Instant Connection for Pixel Streaming
— New Feature Automated Setup
20 Essential Premiere Pro Keyboard Shortcuts
20 Essential Premiere Pro Keyboard Shortcuts
20 Essential Premiere Pro Keyboard Shortcuts
Published on May 8, 2021
Updated on September 12, 2024
Table of Contents
Adobe Premiere Pro is one of the most popular video editing programs on the market today. Everyone from students to Hollywood filmmakers uses the program to create stunning videos. If you're curious about how Premiere Pro compares to other top editors, you can check out our comparison guide between Premiere Pro and Final Cut Pro.
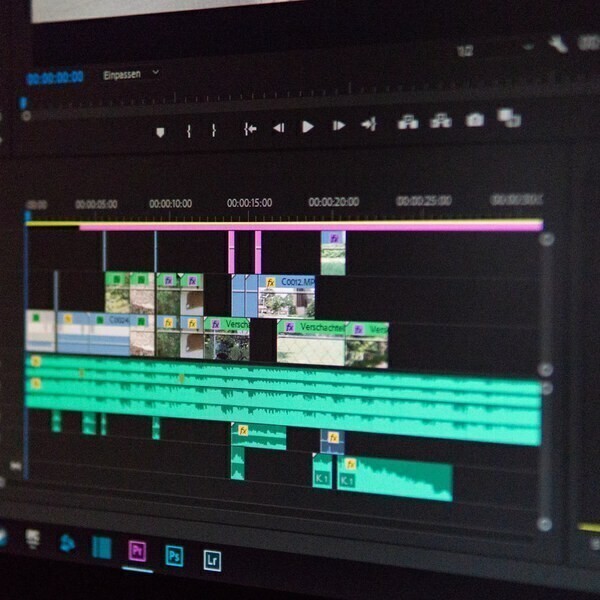
As with any software, it’s always nice to find shortcuts that make your work easier. Shortcuts can speed up your workflow immensely. Even a few quick keyboard shortcuts can shave minutes off your editing time. If you’re looking to improve your Premiere Pro skills further, take a look at these essential Premiere Pro tips that every editor should know.
If you’re looking to speed up your video production, check out these top 20 Premiere Pro keyboard shortcuts:
1. Open Import Menu
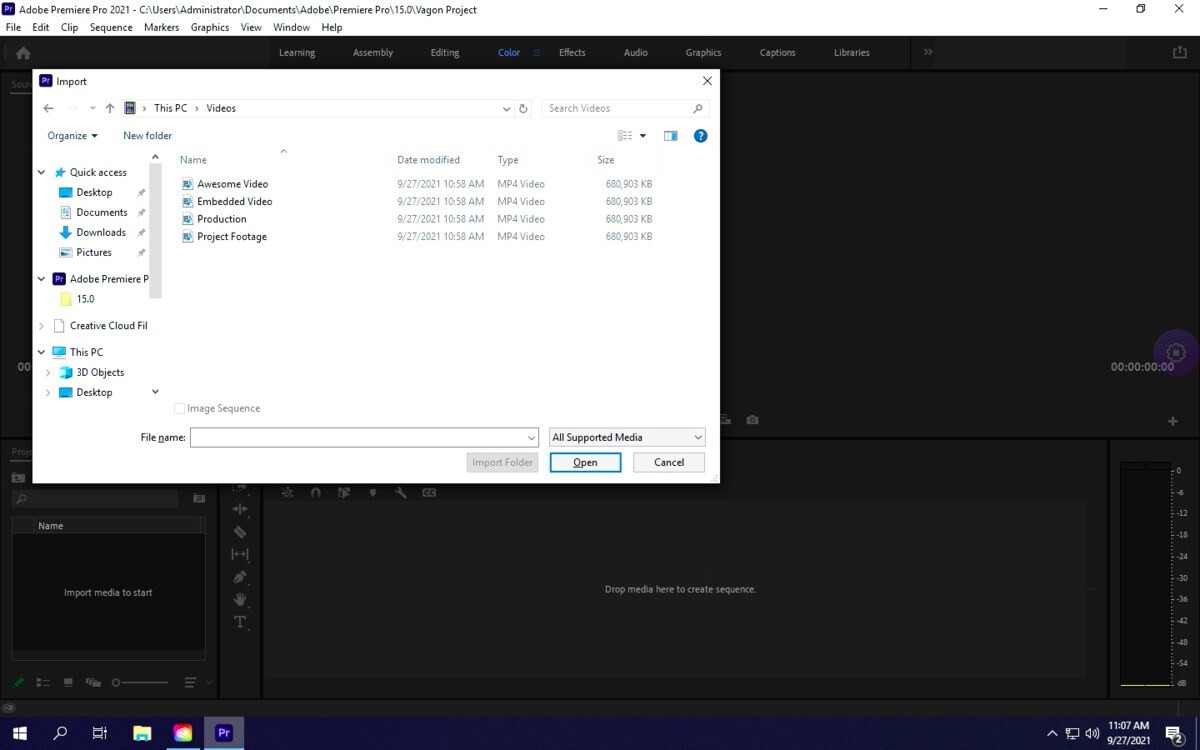
The first of our favorite Premiere Pro keyboard shortcuts makes it easy to import your video footage quickly: use CTRL + I or CMD + I to open the import menu. Mastering these Premiere Pro import shortcuts is just as important as knowing the shortcut for render in Premiere Pro, especially when working on large projects.
2. Video Grouping
Grouping videos is essential when dealing with multiple clips. It can be tough to maneuver pieces of video and audio when they all have to move together. Use CTRL + G or CMD + G to create a new group to ensure it all moves as one.
3. Switching to Adobe Bridge
Managing your workflow is easier with Adobe Bridge, so you may find yourself using both Bridge and Premiere Pro together. If you need to switch over to Adobe Bridge while you’re editing, just click CTRL + ALT + O or OPT + CMD + O.
4. Create New Sequences
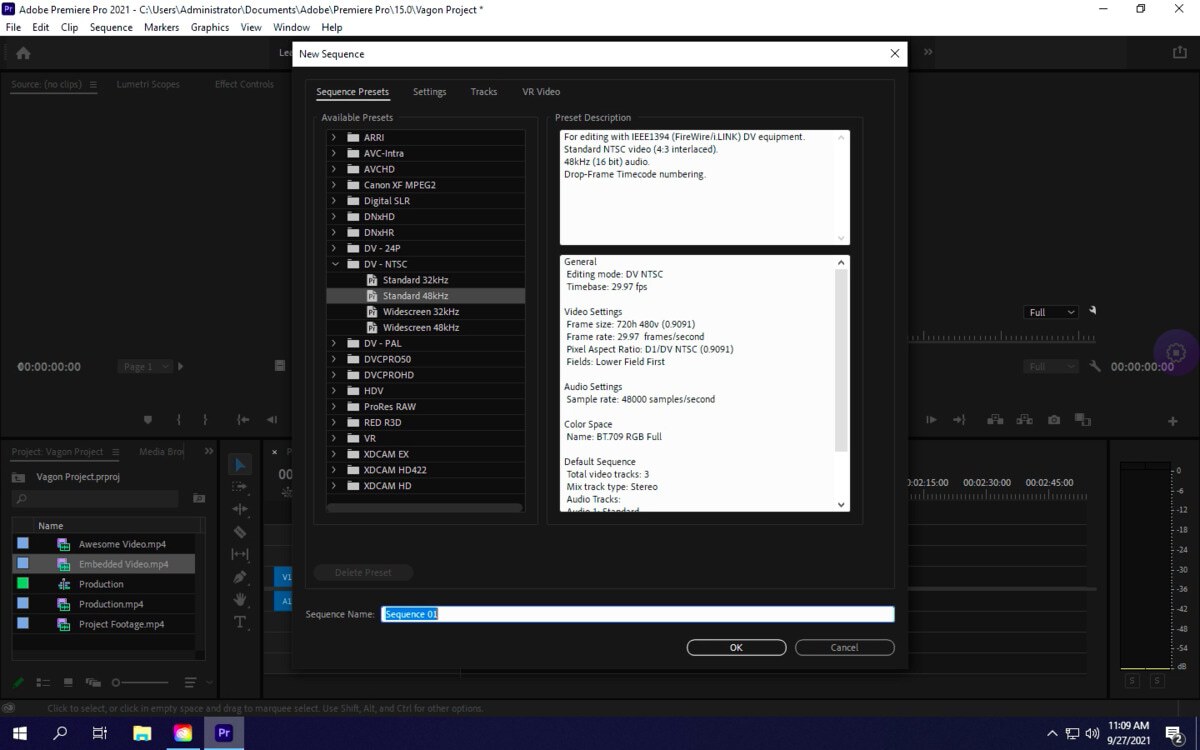
Sequences make it easy to group your scenes together based on what’s happening. When it’s time in your video production to create a new sequence, do it fast with CTRL + N or CMD + N.
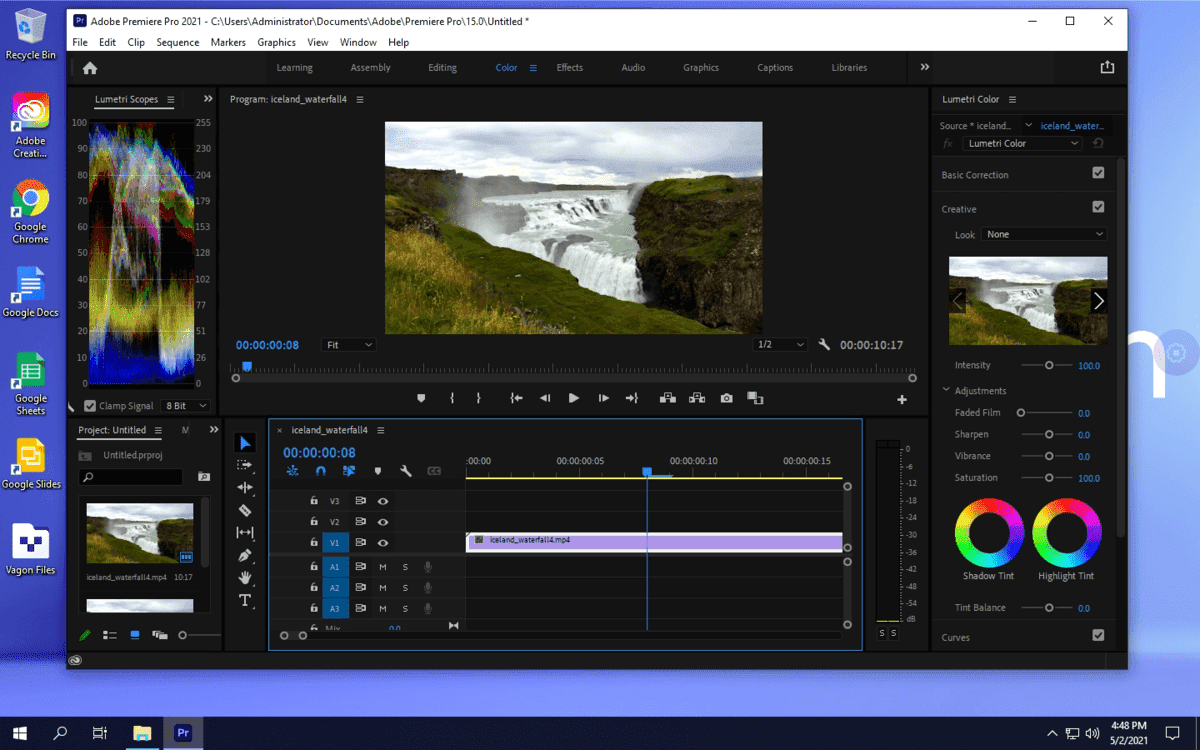
5. Match Video Attributes
No need to match the attributes on a clip to those of another clip, just use CTRL + ALT + V or OPT + CMD + V to paste the attributes of a selected clip. For those looking to optimize their workflow, knowing the shortcut for rendering in Premiere Pro can significantly reduce editing time, especially during intensive projects. For solutions to common Premiere Pro issues, check out our guide on resolving Premiere Pro problems.
6. Cutting Footage
Cutting footage is a very common part of video editing. Premiere Pro makes it easy for a videographer to choose where to cut: just hit C to access the cutter.
7. Play/Pause Footage
Playing and pausing your footage can be a hassle as you edit, especially if you keep using the mouse to hit play or pause. Toggle between playing and pausing your footage with the SPACEBAR instead.
8. Undo Edits
Made a mistake while editing? No worries! Just hit CTRL + Z or CMD + Z to undo it, just like with most other programs.
9. Redo
Want to redo what you just did? Select CTRL + SHIFT + Z or CMD + SHIFT + Z to get back to where you were a moment ago.
10. Duplicate Footage
Need to duplicate part of your video? Hit CTRL + SHIFT or SHIFT + CMD to create an exact copy of any piece of footage. If your project has many heavy files, you can learn how to create video proxies to speed up editing.
11. Batch Capturing
For a videographer, capturing an entire batch of clips at once can save tons of time. Batch capturing is super easy in Premiere Pro: just hit F5.
12. Speed Up/Slow Down Footage
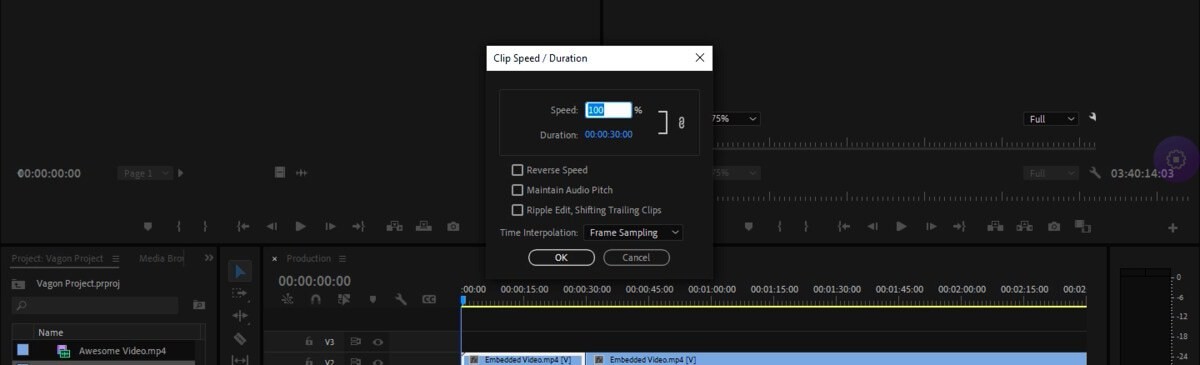
Speeding up or slowing down your footage is a great way to change the feel of a clip. Adjust the speed or duration of your video with CTRL + R or CMD + R.
13. Ripple Delete
A ripple delete allows you to remove a piece of footage and realign the rest instantly. Just hit SHIFT + DELETE or SHIFT + FORWARD + DELETE.
14. Rendering Effects
Rendering effects in the work area is easy with the ENTER or RETURN buttons, making it the perfect Premiere Pro render shortcut to speed up your workflow. Want to reduce rendering times even further? Explore these tips to reduce Premiere Pro rendering times and boost efficiency.Whether you're looking for the render in and out Premiere Pro shortcut or the render video Premiere Pro shortcut, these shortcuts are essential for quick renders.
15. Apply Video Transitions

Every videographer knows the importance of transitions and how they can really up the visual appeal of a movie. Apply a video transition easily by selecting CTRL + D or CMD + D.
16. Apply Audio Transitions
Apply an audio transition in a similar way: just use CTRL + SHIFT + D or CMD + SHIFT + D.
17. Edit Original Files
Sometimes the original video file needs to be changed. If you need to edit an original file, just do CTRL + E or CMD.
18. Create Subclips
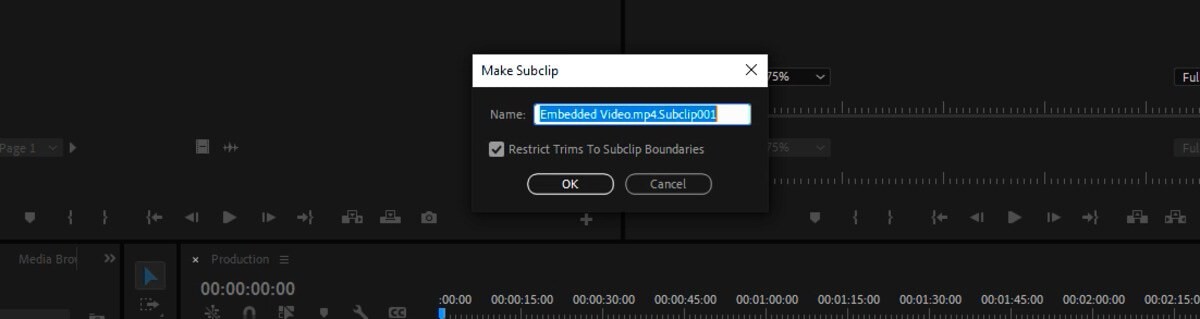
On occasion, you may need to make changes to just a part of the original footage. When you need to edit part of a master clip, create a subclip with CTRL + U or CMD + U.
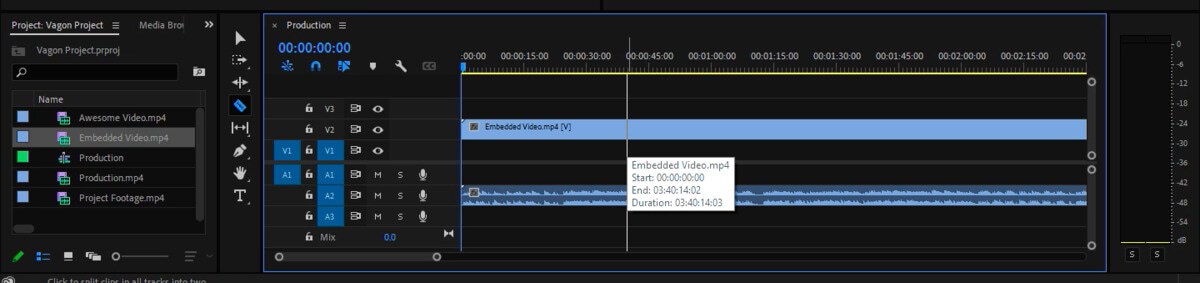
19. Line Video and Audio Automatically
Stop lining up video and audio manually. Snap your clip in place with the S button. Similarly, utilizing the Premiere render shortcut can help when syncing final video and audio after adding effects, ensuring a smooth output. For those working on lower-end devices, learn how to run Premiere Pro smoothly with some helpful tweaks.
20. Quick Video Export
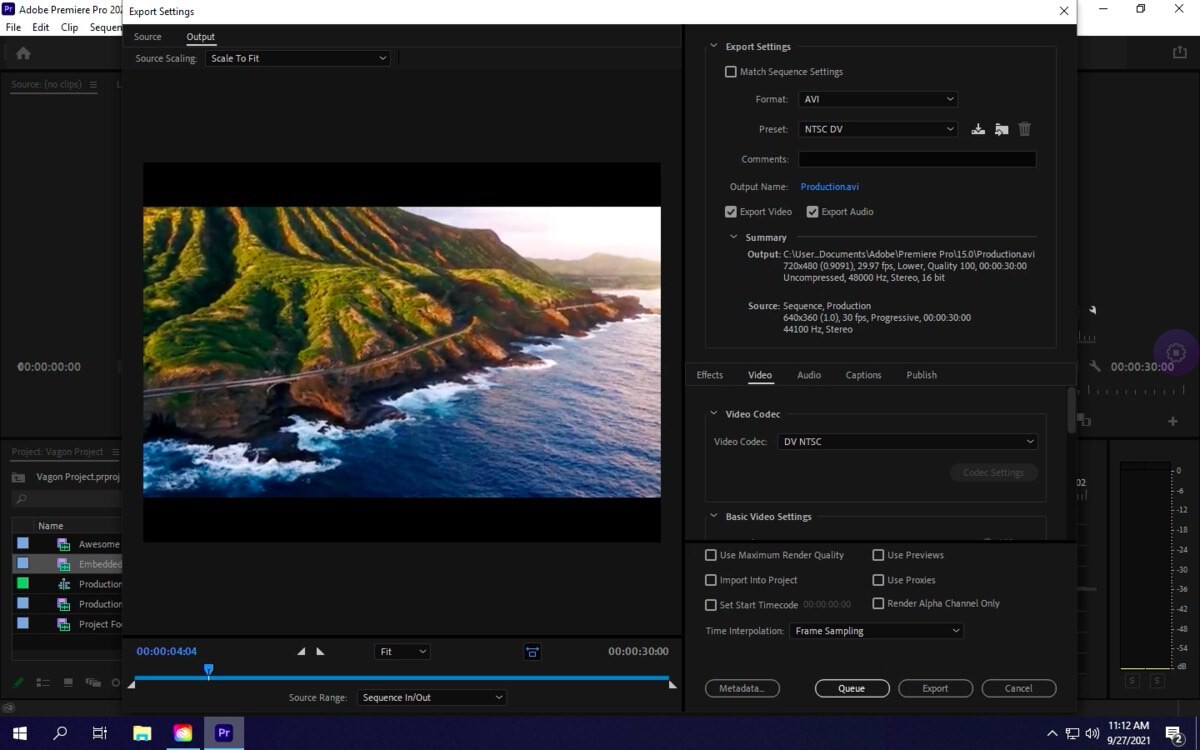
When you’re done with your project, it’s time to quickly render out the video. The export shortcut for Premiere Pro is CTRL + M or CMD + M, which saves you time in the final steps of production. To boost efficiency, remember to master the Premiere Pro render shortcut key and the shortcut to render in Premiere Pro for faster video outputs.
Bonus Shortcut
Here’s a bonus shortcut: You can add your own to the settings! Just go over the Edit menu and select “Keyboard Shortcuts,” or just use CTRL + ALT + K shortcuts to add more shortcuts. Whether you're setting up the shortcut key for rendering in Premiere Pro or looking to adjust the Adobe Premiere Pro render shortcut, customizing these can save valuable time. Additionally, if you're looking for creative inspiration, explore the top Premiere Pro templates to enhance your videos.
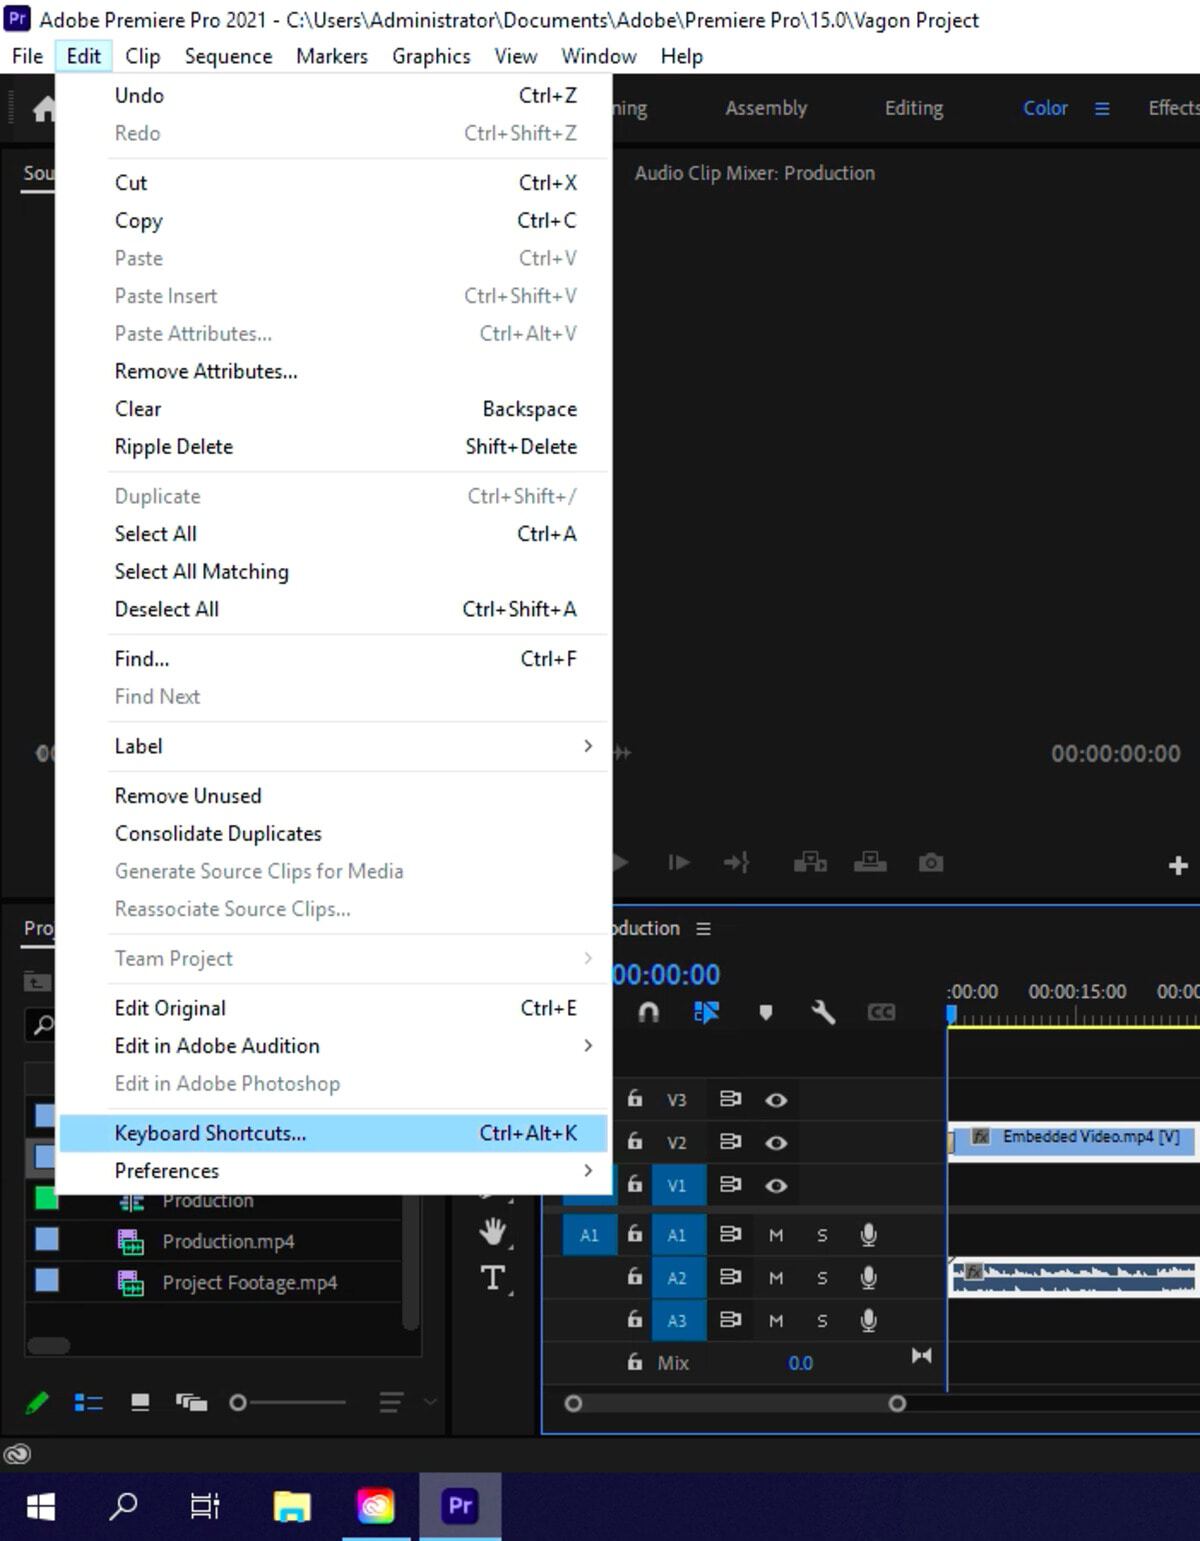
In this menu, you’ll see all the Premiere Pro keyboard shortcuts that are currently set. Just select any you want to change, or any that don’t have a shortcut, and change them as you wish.
Supercharge Your Video Editing with Vagon Cloud PCs
Now that you've mastered Premiere Pro shortcuts, take your editing efficiency to the next level with Vagon’s high-performance cloud PCs. With up to 48 cores and 4 x 24GB RTX GPUs, Vagon gives you the power to render and export videos faster than ever before. Don’t let hardware limitations slow you down—start editing seamlessly in the cloud today with Vagon.
You can also check out our GPU Guide for tips to use GPU, along with speed up and acceleration tips for Adobe Premiere Pro.
Conclusion
Premiere Pro shortcuts can totally change the way you handle your video editing. The more Premiere Pro keyboard shortcuts you know, the faster you’ll be able to do your work. If you're new to Premiere Pro, don’t miss our complete beginner's guide to get you started on the right foot.
FAQs:
What are the most useful Premiere Pro keyboard shortcuts?
Premiere Pro offers a wide range of useful keyboard shortcuts, including shortcuts for importing footage (
CTRL + I/CMD + I), cutting clips (C), and rendering (ENTER/RETURN). Mastering these shortcuts can greatly enhance your workflow.
How do I render a video in Premiere Pro using a shortcut?
To render a video in Premiere Pro, you can use the
ENTERorRETURNkey to render effects in your work area. For exporting a final video, the export shortcut isCTRL + MorCMD + M.
What is the Premiere Pro render shortcut key?
The default Premiere Pro render shortcut key is
ENTERorRETURN. This shortcut will render the effects in your work area without needing to manually access the rendering menu.
How can I customize my keyboard shortcuts in Premiere Pro?
You can customize Premiere Pro keyboard shortcuts by going to the Edit menu and selecting Keyboard Shortcuts. Alternatively, you can press
CTRL + ALT + Kto access the shortcut customization menu directly.
How do I import files into Premiere Pro using a shortcut?
To import media into Premiere Pro, use the keyboard shortcut
CTRL + Ion Windows orCMD + Ion Mac to quickly open the import menu and select your files.
How can I speed up my workflow in Premiere Pro?
You can speed up your workflow in Premiere Pro by learning essential keyboard shortcuts, such as rendering (
ENTER), cutting clips (C), and exporting (CTRL + M). Mastering these shortcuts will allow you to complete your edits more efficiently.
Adobe Premiere Pro is one of the most popular video editing programs on the market today. Everyone from students to Hollywood filmmakers uses the program to create stunning videos. If you're curious about how Premiere Pro compares to other top editors, you can check out our comparison guide between Premiere Pro and Final Cut Pro.
As with any software, it’s always nice to find shortcuts that make your work easier. Shortcuts can speed up your workflow immensely. Even a few quick keyboard shortcuts can shave minutes off your editing time. If you’re looking to improve your Premiere Pro skills further, take a look at these essential Premiere Pro tips that every editor should know.
If you’re looking to speed up your video production, check out these top 20 Premiere Pro keyboard shortcuts:
1. Open Import Menu
The first of our favorite Premiere Pro keyboard shortcuts makes it easy to import your video footage quickly: use CTRL + I or CMD + I to open the import menu. Mastering these Premiere Pro import shortcuts is just as important as knowing the shortcut for render in Premiere Pro, especially when working on large projects.
2. Video Grouping
Grouping videos is essential when dealing with multiple clips. It can be tough to maneuver pieces of video and audio when they all have to move together. Use CTRL + G or CMD + G to create a new group to ensure it all moves as one.
3. Switching to Adobe Bridge
Managing your workflow is easier with Adobe Bridge, so you may find yourself using both Bridge and Premiere Pro together. If you need to switch over to Adobe Bridge while you’re editing, just click CTRL + ALT + O or OPT + CMD + O.
4. Create New Sequences
Sequences make it easy to group your scenes together based on what’s happening. When it’s time in your video production to create a new sequence, do it fast with CTRL + N or CMD + N.
5. Match Video Attributes
No need to match the attributes on a clip to those of another clip, just use CTRL + ALT + V or OPT + CMD + V to paste the attributes of a selected clip. For those looking to optimize their workflow, knowing the shortcut for rendering in Premiere Pro can significantly reduce editing time, especially during intensive projects. For solutions to common Premiere Pro issues, check out our guide on resolving Premiere Pro problems.
6. Cutting Footage
Cutting footage is a very common part of video editing. Premiere Pro makes it easy for a videographer to choose where to cut: just hit C to access the cutter.
7. Play/Pause Footage
Playing and pausing your footage can be a hassle as you edit, especially if you keep using the mouse to hit play or pause. Toggle between playing and pausing your footage with the SPACEBAR instead.
8. Undo Edits
Made a mistake while editing? No worries! Just hit CTRL + Z or CMD + Z to undo it, just like with most other programs.
9. Redo
Want to redo what you just did? Select CTRL + SHIFT + Z or CMD + SHIFT + Z to get back to where you were a moment ago.
10. Duplicate Footage
Need to duplicate part of your video? Hit CTRL + SHIFT or SHIFT + CMD to create an exact copy of any piece of footage. If your project has many heavy files, you can learn how to create video proxies to speed up editing.
11. Batch Capturing
For a videographer, capturing an entire batch of clips at once can save tons of time. Batch capturing is super easy in Premiere Pro: just hit F5.
12. Speed Up/Slow Down Footage
Speeding up or slowing down your footage is a great way to change the feel of a clip. Adjust the speed or duration of your video with CTRL + R or CMD + R.
13. Ripple Delete
A ripple delete allows you to remove a piece of footage and realign the rest instantly. Just hit SHIFT + DELETE or SHIFT + FORWARD + DELETE.
14. Rendering Effects
Rendering effects in the work area is easy with the ENTER or RETURN buttons, making it the perfect Premiere Pro render shortcut to speed up your workflow. Want to reduce rendering times even further? Explore these tips to reduce Premiere Pro rendering times and boost efficiency.Whether you're looking for the render in and out Premiere Pro shortcut or the render video Premiere Pro shortcut, these shortcuts are essential for quick renders.
15. Apply Video Transitions
Every videographer knows the importance of transitions and how they can really up the visual appeal of a movie. Apply a video transition easily by selecting CTRL + D or CMD + D.
16. Apply Audio Transitions
Apply an audio transition in a similar way: just use CTRL + SHIFT + D or CMD + SHIFT + D.
17. Edit Original Files
Sometimes the original video file needs to be changed. If you need to edit an original file, just do CTRL + E or CMD.
18. Create Subclips
On occasion, you may need to make changes to just a part of the original footage. When you need to edit part of a master clip, create a subclip with CTRL + U or CMD + U.
19. Line Video and Audio Automatically
Stop lining up video and audio manually. Snap your clip in place with the S button. Similarly, utilizing the Premiere render shortcut can help when syncing final video and audio after adding effects, ensuring a smooth output. For those working on lower-end devices, learn how to run Premiere Pro smoothly with some helpful tweaks.
20. Quick Video Export
When you’re done with your project, it’s time to quickly render out the video. The export shortcut for Premiere Pro is CTRL + M or CMD + M, which saves you time in the final steps of production. To boost efficiency, remember to master the Premiere Pro render shortcut key and the shortcut to render in Premiere Pro for faster video outputs.
Bonus Shortcut
Here’s a bonus shortcut: You can add your own to the settings! Just go over the Edit menu and select “Keyboard Shortcuts,” or just use CTRL + ALT + K shortcuts to add more shortcuts. Whether you're setting up the shortcut key for rendering in Premiere Pro or looking to adjust the Adobe Premiere Pro render shortcut, customizing these can save valuable time. Additionally, if you're looking for creative inspiration, explore the top Premiere Pro templates to enhance your videos.
In this menu, you’ll see all the Premiere Pro keyboard shortcuts that are currently set. Just select any you want to change, or any that don’t have a shortcut, and change them as you wish.
Supercharge Your Video Editing with Vagon Cloud PCs
Now that you've mastered Premiere Pro shortcuts, take your editing efficiency to the next level with Vagon’s high-performance cloud PCs. With up to 48 cores and 4 x 24GB RTX GPUs, Vagon gives you the power to render and export videos faster than ever before. Don’t let hardware limitations slow you down—start editing seamlessly in the cloud today with Vagon.
You can also check out our GPU Guide for tips to use GPU, along with speed up and acceleration tips for Adobe Premiere Pro.
Conclusion
Premiere Pro shortcuts can totally change the way you handle your video editing. The more Premiere Pro keyboard shortcuts you know, the faster you’ll be able to do your work. If you're new to Premiere Pro, don’t miss our complete beginner's guide to get you started on the right foot.
FAQs:
What are the most useful Premiere Pro keyboard shortcuts?
Premiere Pro offers a wide range of useful keyboard shortcuts, including shortcuts for importing footage (
CTRL + I/CMD + I), cutting clips (C), and rendering (ENTER/RETURN). Mastering these shortcuts can greatly enhance your workflow.
How do I render a video in Premiere Pro using a shortcut?
To render a video in Premiere Pro, you can use the
ENTERorRETURNkey to render effects in your work area. For exporting a final video, the export shortcut isCTRL + MorCMD + M.
What is the Premiere Pro render shortcut key?
The default Premiere Pro render shortcut key is
ENTERorRETURN. This shortcut will render the effects in your work area without needing to manually access the rendering menu.
How can I customize my keyboard shortcuts in Premiere Pro?
You can customize Premiere Pro keyboard shortcuts by going to the Edit menu and selecting Keyboard Shortcuts. Alternatively, you can press
CTRL + ALT + Kto access the shortcut customization menu directly.
How do I import files into Premiere Pro using a shortcut?
To import media into Premiere Pro, use the keyboard shortcut
CTRL + Ion Windows orCMD + Ion Mac to quickly open the import menu and select your files.
How can I speed up my workflow in Premiere Pro?
You can speed up your workflow in Premiere Pro by learning essential keyboard shortcuts, such as rendering (
ENTER), cutting clips (C), and exporting (CTRL + M). Mastering these shortcuts will allow you to complete your edits more efficiently.
Get Beyond Your Computer Performance
Run applications on your cloud computer with the latest generation hardware. No more crashes or lags.
Trial includes 1 hour usage + 7 days of storage.
Get Beyond Your Computer Performance
Run applications on your cloud computer with the latest generation hardware. No more crashes or lags.
Trial includes 1 hour usage + 7 days of storage.
Get Beyond Your Computer Performance
Run applications on your cloud computer with the latest generation hardware. No more crashes or lags.
Trial includes 1 hour usage + 7 days of storage.
Get Beyond Your Computer Performance
Run applications on your cloud computer with the latest generation hardware. No more crashes or lags.
Trial includes 1 hour usage + 7 days of storage.
Get Beyond Your Computer Performance
Run applications on your cloud computer with the latest generation hardware. No more crashes or lags.
Trial includes 1 hour usage + 7 days of storage.

Ready to focus on your creativity?
Vagon gives you the ability to create & render projects, collaborate, and stream applications with the power of the best hardware.

Vagon Blog


Run heavy applications on any device with
your personal computer on the cloud.
San Francisco, California
Solutions
Vagon Teams
Vagon Streams
Use Cases
Resources
Vagon Blog
Arcane Mirage vs Vagon Streams: Best Alternative Pixel Streaming Platform
The Best Unity Shortcuts
How to Render Faster in SketchUp
Running SketchUp on Low-End Devices
How To Run Unreal Engine on a Low-End Device (Even Without GPU)
How To Run Unity 3D On Low-End Laptop (Even Without GPU)
Best Digital Twin Platforms & Software in 2025
How To Run Cinema 4D On Cloud
The Best PC Build For Unity
Vagon Blog
Run heavy applications on any device with
your personal computer on the cloud.
San Francisco, California
Solutions
Vagon Teams
Vagon Streams
Use Cases
Resources
Vagon Blog