Instant Connection for Pixel Streaming
— New Feature Automated Setup

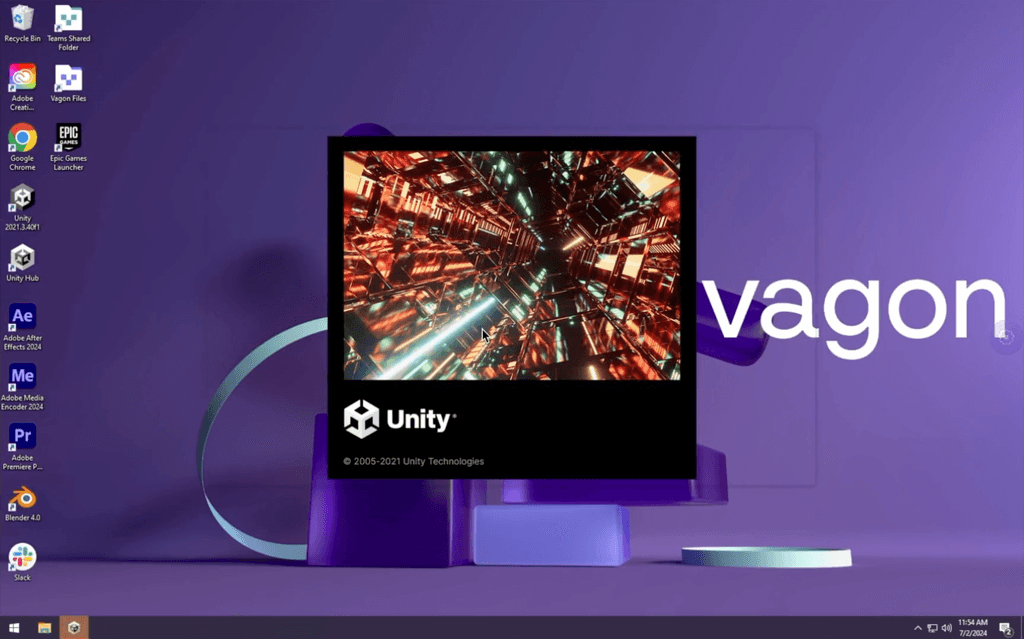
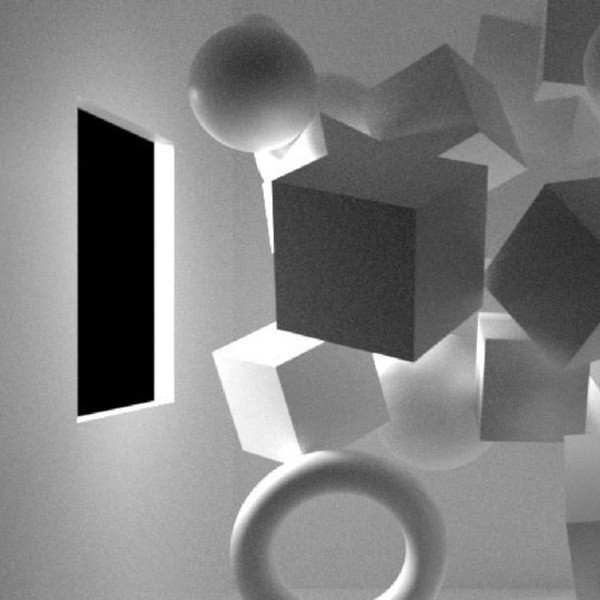
How Do You Optimize Game Art Assets on Blender?
How Do You Optimize Game Art Assets on Blender?
How Do You Optimize Game Art Assets on Blender?
Published on January 13, 2024
Updated on August 20, 2024
Table of Contents
Whether they’re 2D, 3D, or 2.5D, realistic or cartoony, played on a phone or a PC, video games are everywhere. The global video game market scale has been estimated at around $224.9 billion in 2022, and it’s expected to hit $610.6 billion by 2032. Given its potential, the market is expected to grow even further, especially with the rapid emergence of new technologies almost daily.
Game asset optimization has always been linked to reducing render times. At the same time, decreasing the required users’ devices’ computing power increases game sales as the number of devices that can run the game increases.
It’s crucial not to go too far with game optimization as this would eventually lead to a blocky or low-resolution video game, so there always has to be a balance between game optimization and game quality preservation.
We’re going to discuss the general idea of optimization in video games, focusing on Blender game asset creation and how to balance between quality and performance, particularly for Blender 3D games. If you're new to Blender, you might want to start with a complete guide to Blender 3D for beginners before diving into advanced techniques. If you're using Blender on a less powerful setup, you might find this guide helpful.
You can also check out our GPU Guide for tips to use GPU, along with speed up and acceleration tips for Blender 3D.
Techniques for Game Art Optimization in Blender
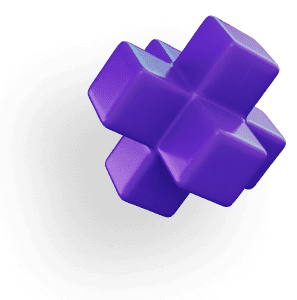
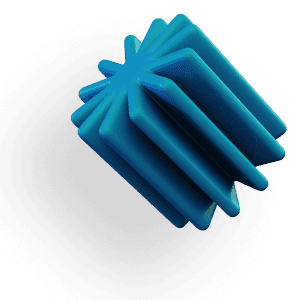
1. Reducing Polygon Count
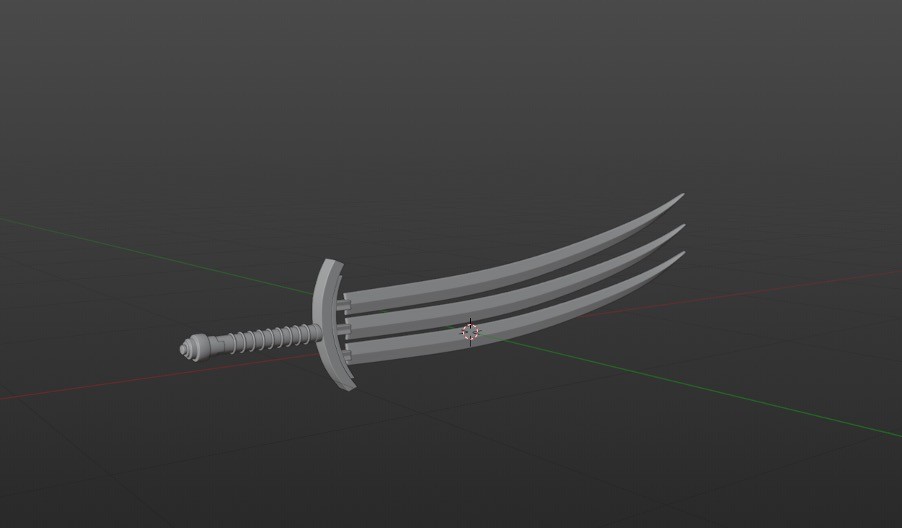
Poly count in Blender is a critical aspect of game asset creation. Blender optimize mesh for game projects often involves reducing the number of polygons without sacrificing too much detail. It’s always been an endless fight as the 3D artist tries to preserve all the details without sacrificing any. Eventually, the game asset has to be optimized to meet the developer and game engine requirements.
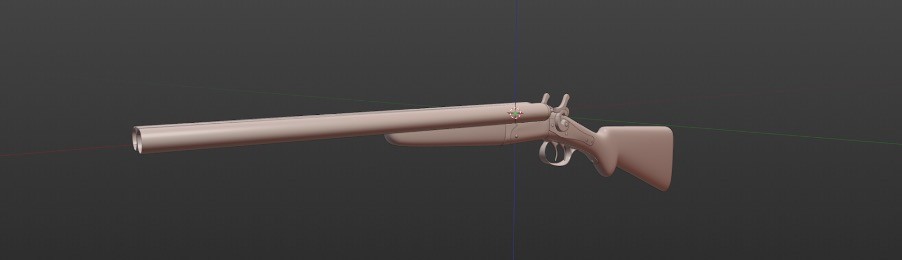
Here’s an example between a high polygon mesh and a low polygon mesh:
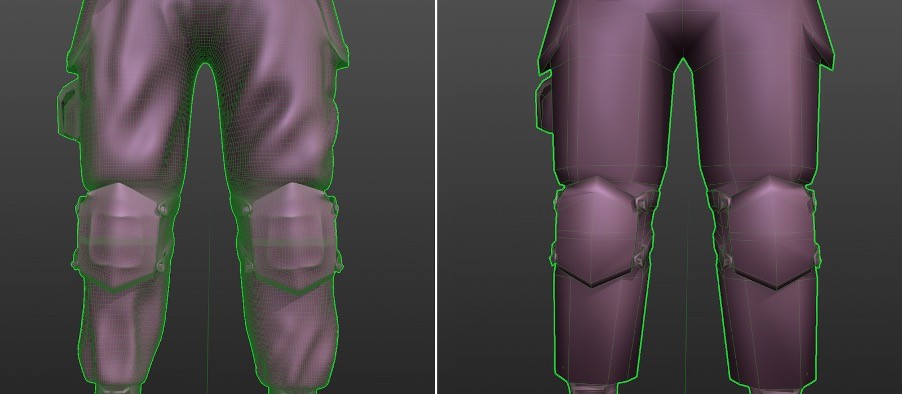
It’s obvious that there’s a huge difference between both of them, and it’s also obvious that the low-poly version has lost most of the features, yet some games’ styles are considered to be low-poly, so it was intended in this example.
Here are some techniques to reduce polygon count and optimize Blender assets:
Using a Multires modifier and after adding all the needed details on the high polygon version of the asset, we’d bake these details on top of the low version of the used asset, which is a technique that has always been used in the industry.
Manually reducing the unneeded edges while maintaining the silhouette of the object as much as possible.
Getting rid of the hidden faces.
Getting rid of duplicate vertices.
If you're exporting assets from Blender to game engines like Unity or Unreal, ensure you're familiar with best practices for export to maintain optimization. Using a mesh optimizer for Unity can help streamline this process.
2. Reducing Texture Resolution
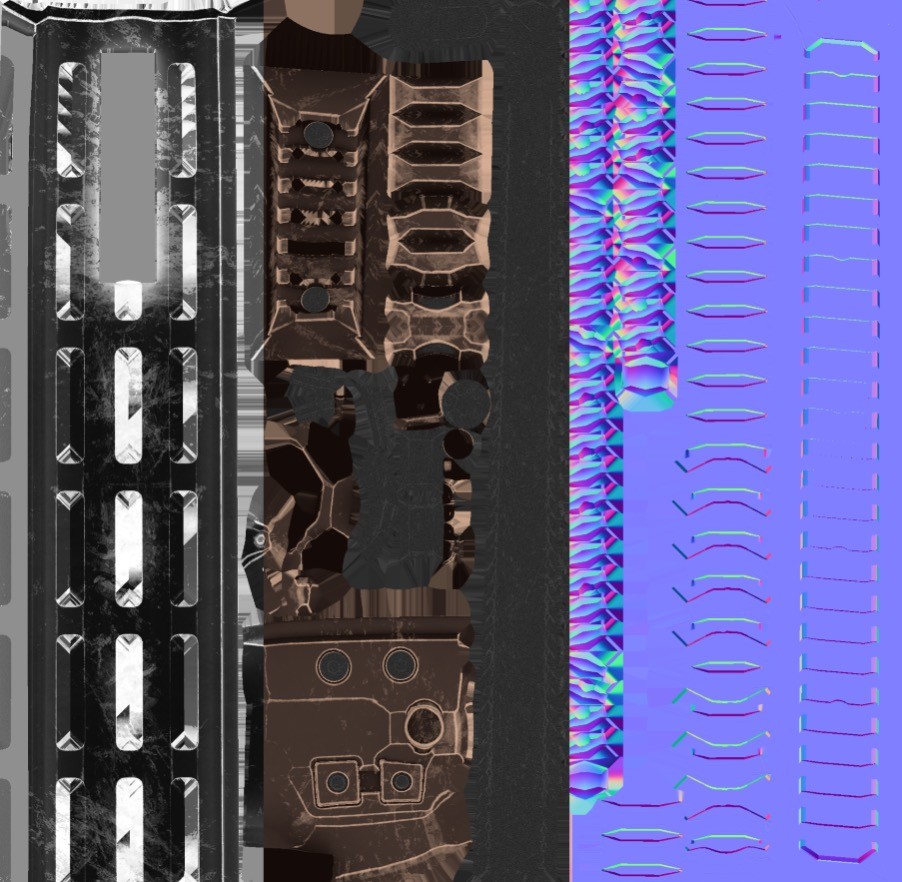
Texture optimization is another vital factor in optimizing game files. This will lead to a decrease in the file size and loading time for the texture, which will eventually lead to a decrease in the needed computing power mentioned before, so it’s always wise to keep the resolution at a reasonable number.
Using different file formats could also lead to decreasing the file size, and getting rid of unneeded channels would also help you out. For example, using an alpha-less image when an alpha channel is not required, or using a BW image when we are using it for the purpose of metallic/roughness/displacement.
For those who want to take optimization a step further, scripting with Python in Blender can automate and refine repetitive tasks, making the process more efficient.
3. Material Simplification
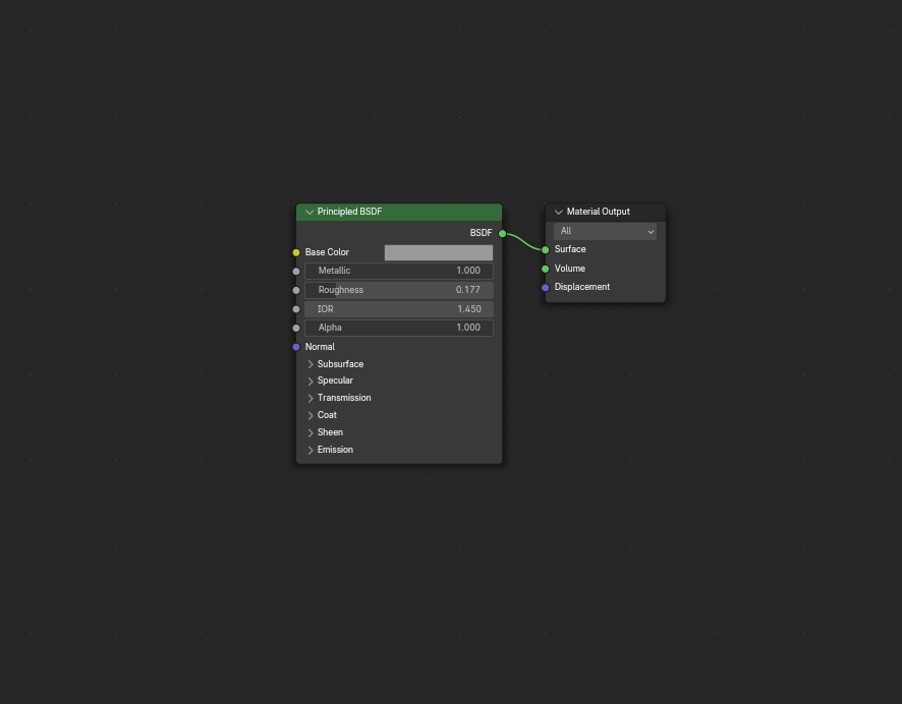
Simplifying materials is crucial in optimizing 3D models for games. Aiming to use a single material for the object also plays a significant role in optimizing the game asset. Complex materials are always a red flag when it comes to game optimization, so it’s always better to use a simple node tree.
Learn Normal Map and all the Blender 3D terms from our Blender 3D Glossary.
4. Using the Same Object
Repeating the usage of the same object decreases the needed time to load it, which is sometimes called instancing. Therefore, the PC has to use less computing power to load the objects in the scene.
If you're still deciding on the ideal setup for Blender, check out how to choose the best PC for Blender to optimize your workflow.
5. Using LODs (Level of Detail)
LODs are an essential part of optimization in video games. They are basically different versions of the same object, swapping between them based on the player’s view. For example, if an object is too close to the player’s view, the highest LOD will be loaded, but if the object is far, a lower LOD will be used, which will lead to less computing power to run the game.
Don't Be Limited by Hardware and Produce Stunning Assets with Vagon!
Optimizing your 3D game assets in Blender is key to creating high-quality games that run smoothly on any device. But why stop at just optimizing your assets? Take your game development to the next level with Vagon’s high-performance cloud PCs. With 48 cores, 4 x 24GB RTX-enabled Nvidia GPUs, and 192GB of RAM, you can render your optimized assets faster and more efficiently, directly from your browser. Whether you're working on a complex Blender project or exploring new game development techniques, Vagon gives you the power and flexibility you need. Try Vagon today and see the difference it can make in your game creation workflow.
Retaining Quality in Optimized Assets
1. Arranging UV Islands on the Texture

Making good use of the texture space is done by arranging UV islands. This could be achieved using a variety of UV unwrapping add-ons like Zen UV vs UVPackMaster, two popular tools for Blender asset optimization.
Learn Normal and all the Blender 3D terms from our Blender 3D Glossary.
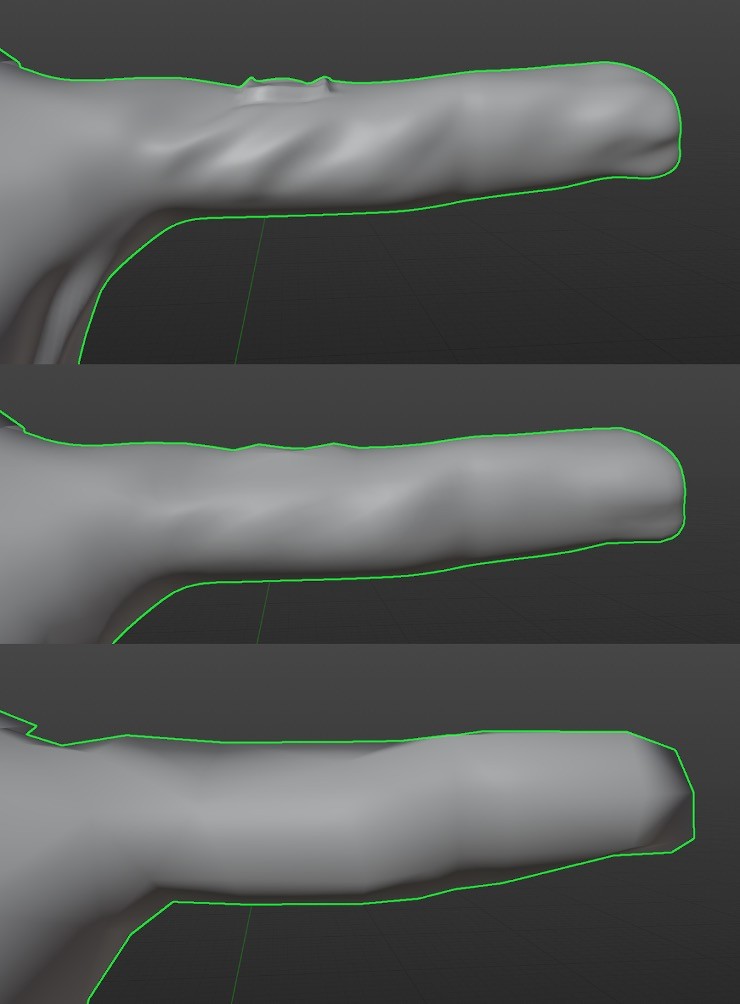
2. Creating High Level Details on Low Polygon Objects
As mentioned before, this could be done by using a Multires modifier or by retopologizing the high polygon count and making a low poly version then baking the details of the high poly one onto the low poly one. Retopology could be done by several plugins like RetopoFlow or by using Blender Quad Remesher.
If you're working with less powerful hardware, consider using Blender on a cloud computer to offload the intensive tasks. This approach can be particularly useful when working on complex Blender game asset creation projects.
3. Using Post-Process Techniques for Textures
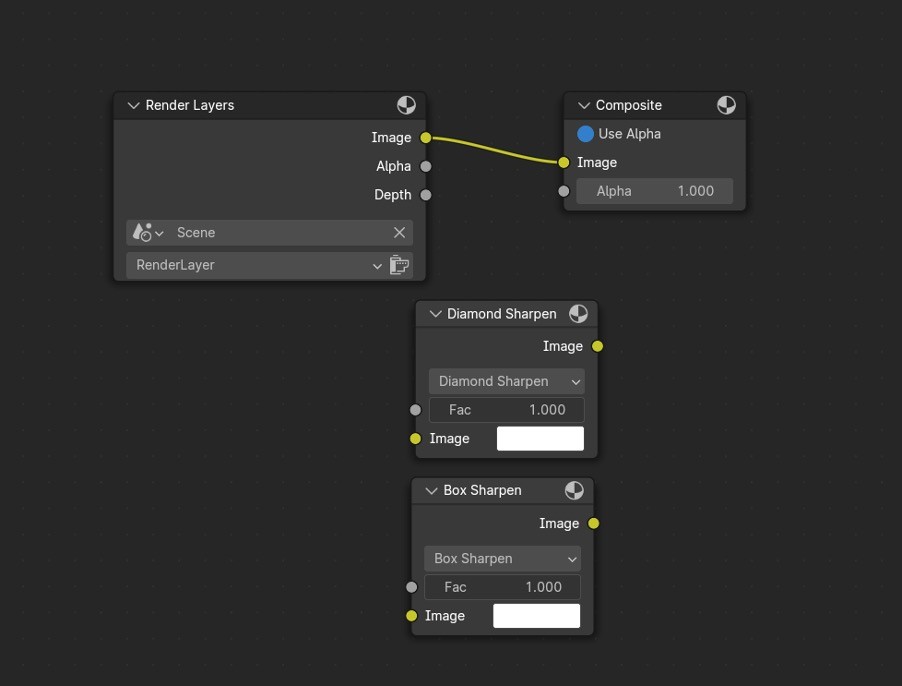
Using post-process techniques like increasing texture sharpness could help you retain the quality in your assets. This could be done through other 2D image-manipulating software like Photoshop/Krita/GIMP, or by using Blender’s Compositor’s Sharpen filter node.
At the end of the day, we always have to aim for that balance between quality and performance, so make sure to decrease the polygon count as much as possible yet maintain the main edge flows of the object and the general silhouette. You can decrease the texture file size as much as possible, yet make sure it is sharp enough and appealing to the players’ eyes.
There isn’t a specific guideline for polygon count or texture resolution, as it largely depends on the game’s level and target audience, whether it’s designed for low-end, mid-end, or high-end PC gamers. New technologies are appearing every day, like Unreal 5’s nanite system, which lets you use very high poly objects without the need for optimization. Whether you’re creating games with Blender or any other tool, understanding what is optimization in games is key to achieving success in the game asset market.
FAQs:
What is game asset optimization in Blender?
Game asset optimization in Blender involves adjusting 3D models and textures to reduce their size and complexity while maintaining visual quality. This process ensures that the assets run efficiently in a game engine without overloading the hardware.
How do I reduce polygon count in Blender for game assets?
You can reduce the polygon count in Blender by using techniques such as the Decimate modifier, manually deleting unnecessary vertices and edges, and using the Multires modifier to bake high-resolution details onto a lower-poly mesh.
Why is texture optimization important in video games?
Texture optimization is crucial because it reduces the file size and memory usage of game assets, leading to faster load times and improved performance. Optimized textures ensure that a game can run smoothly on a wider range of devices.
What are the best practices for optimizing 3D models for games?
Best practices for optimizing 3D models include reducing polygon count, simplifying materials, using LODs (Level of Detail), optimizing UV layouts, and ensuring textures are appropriately compressed and sized for their intended use.
Can I create game assets in Blender for use in Unity or Unreal Engine?
Yes, Blender is widely used for creating game assets that can be exported to game engines like Unity and Unreal Engine. It's important to follow best practices for exporting to ensure the assets remain optimized for the target engine.
What tools can I use to optimize game assets in Blender?
Blender offers various tools and add-ons for asset optimization, including the Decimate modifier, UVPackMaster, Zen UV, and the Quad Remesher for retopology. These tools help streamline the process of preparing assets for efficient use in games.
Whether they’re 2D, 3D, or 2.5D, realistic or cartoony, played on a phone or a PC, video games are everywhere. The global video game market scale has been estimated at around $224.9 billion in 2022, and it’s expected to hit $610.6 billion by 2032. Given its potential, the market is expected to grow even further, especially with the rapid emergence of new technologies almost daily.
Game asset optimization has always been linked to reducing render times. At the same time, decreasing the required users’ devices’ computing power increases game sales as the number of devices that can run the game increases.
It’s crucial not to go too far with game optimization as this would eventually lead to a blocky or low-resolution video game, so there always has to be a balance between game optimization and game quality preservation.
We’re going to discuss the general idea of optimization in video games, focusing on Blender game asset creation and how to balance between quality and performance, particularly for Blender 3D games. If you're new to Blender, you might want to start with a complete guide to Blender 3D for beginners before diving into advanced techniques. If you're using Blender on a less powerful setup, you might find this guide helpful.
You can also check out our GPU Guide for tips to use GPU, along with speed up and acceleration tips for Blender 3D.
Techniques for Game Art Optimization in Blender
1. Reducing Polygon Count
Poly count in Blender is a critical aspect of game asset creation. Blender optimize mesh for game projects often involves reducing the number of polygons without sacrificing too much detail. It’s always been an endless fight as the 3D artist tries to preserve all the details without sacrificing any. Eventually, the game asset has to be optimized to meet the developer and game engine requirements.
Here’s an example between a high polygon mesh and a low polygon mesh:
It’s obvious that there’s a huge difference between both of them, and it’s also obvious that the low-poly version has lost most of the features, yet some games’ styles are considered to be low-poly, so it was intended in this example.
Here are some techniques to reduce polygon count and optimize Blender assets:
Using a Multires modifier and after adding all the needed details on the high polygon version of the asset, we’d bake these details on top of the low version of the used asset, which is a technique that has always been used in the industry.
Manually reducing the unneeded edges while maintaining the silhouette of the object as much as possible.
Getting rid of the hidden faces.
Getting rid of duplicate vertices.
If you're exporting assets from Blender to game engines like Unity or Unreal, ensure you're familiar with best practices for export to maintain optimization. Using a mesh optimizer for Unity can help streamline this process.
2. Reducing Texture Resolution
Texture optimization is another vital factor in optimizing game files. This will lead to a decrease in the file size and loading time for the texture, which will eventually lead to a decrease in the needed computing power mentioned before, so it’s always wise to keep the resolution at a reasonable number.
Using different file formats could also lead to decreasing the file size, and getting rid of unneeded channels would also help you out. For example, using an alpha-less image when an alpha channel is not required, or using a BW image when we are using it for the purpose of metallic/roughness/displacement.
For those who want to take optimization a step further, scripting with Python in Blender can automate and refine repetitive tasks, making the process more efficient.
3. Material Simplification
Simplifying materials is crucial in optimizing 3D models for games. Aiming to use a single material for the object also plays a significant role in optimizing the game asset. Complex materials are always a red flag when it comes to game optimization, so it’s always better to use a simple node tree.
Learn Normal Map and all the Blender 3D terms from our Blender 3D Glossary.
4. Using the Same Object
Repeating the usage of the same object decreases the needed time to load it, which is sometimes called instancing. Therefore, the PC has to use less computing power to load the objects in the scene.
If you're still deciding on the ideal setup for Blender, check out how to choose the best PC for Blender to optimize your workflow.
5. Using LODs (Level of Detail)
LODs are an essential part of optimization in video games. They are basically different versions of the same object, swapping between them based on the player’s view. For example, if an object is too close to the player’s view, the highest LOD will be loaded, but if the object is far, a lower LOD will be used, which will lead to less computing power to run the game.
Don't Be Limited by Hardware and Produce Stunning Assets with Vagon!
Optimizing your 3D game assets in Blender is key to creating high-quality games that run smoothly on any device. But why stop at just optimizing your assets? Take your game development to the next level with Vagon’s high-performance cloud PCs. With 48 cores, 4 x 24GB RTX-enabled Nvidia GPUs, and 192GB of RAM, you can render your optimized assets faster and more efficiently, directly from your browser. Whether you're working on a complex Blender project or exploring new game development techniques, Vagon gives you the power and flexibility you need. Try Vagon today and see the difference it can make in your game creation workflow.
Retaining Quality in Optimized Assets
1. Arranging UV Islands on the Texture
Making good use of the texture space is done by arranging UV islands. This could be achieved using a variety of UV unwrapping add-ons like Zen UV vs UVPackMaster, two popular tools for Blender asset optimization.
Learn Normal and all the Blender 3D terms from our Blender 3D Glossary.
2. Creating High Level Details on Low Polygon Objects
As mentioned before, this could be done by using a Multires modifier or by retopologizing the high polygon count and making a low poly version then baking the details of the high poly one onto the low poly one. Retopology could be done by several plugins like RetopoFlow or by using Blender Quad Remesher.
If you're working with less powerful hardware, consider using Blender on a cloud computer to offload the intensive tasks. This approach can be particularly useful when working on complex Blender game asset creation projects.
3. Using Post-Process Techniques for Textures
Using post-process techniques like increasing texture sharpness could help you retain the quality in your assets. This could be done through other 2D image-manipulating software like Photoshop/Krita/GIMP, or by using Blender’s Compositor’s Sharpen filter node.
At the end of the day, we always have to aim for that balance between quality and performance, so make sure to decrease the polygon count as much as possible yet maintain the main edge flows of the object and the general silhouette. You can decrease the texture file size as much as possible, yet make sure it is sharp enough and appealing to the players’ eyes.
There isn’t a specific guideline for polygon count or texture resolution, as it largely depends on the game’s level and target audience, whether it’s designed for low-end, mid-end, or high-end PC gamers. New technologies are appearing every day, like Unreal 5’s nanite system, which lets you use very high poly objects without the need for optimization. Whether you’re creating games with Blender or any other tool, understanding what is optimization in games is key to achieving success in the game asset market.
FAQs:
What is game asset optimization in Blender?
Game asset optimization in Blender involves adjusting 3D models and textures to reduce their size and complexity while maintaining visual quality. This process ensures that the assets run efficiently in a game engine without overloading the hardware.
How do I reduce polygon count in Blender for game assets?
You can reduce the polygon count in Blender by using techniques such as the Decimate modifier, manually deleting unnecessary vertices and edges, and using the Multires modifier to bake high-resolution details onto a lower-poly mesh.
Why is texture optimization important in video games?
Texture optimization is crucial because it reduces the file size and memory usage of game assets, leading to faster load times and improved performance. Optimized textures ensure that a game can run smoothly on a wider range of devices.
What are the best practices for optimizing 3D models for games?
Best practices for optimizing 3D models include reducing polygon count, simplifying materials, using LODs (Level of Detail), optimizing UV layouts, and ensuring textures are appropriately compressed and sized for their intended use.
Can I create game assets in Blender for use in Unity or Unreal Engine?
Yes, Blender is widely used for creating game assets that can be exported to game engines like Unity and Unreal Engine. It's important to follow best practices for exporting to ensure the assets remain optimized for the target engine.
What tools can I use to optimize game assets in Blender?
Blender offers various tools and add-ons for asset optimization, including the Decimate modifier, UVPackMaster, Zen UV, and the Quad Remesher for retopology. These tools help streamline the process of preparing assets for efficient use in games.
Get Beyond Your Computer Performance
Run applications on your cloud computer with the latest generation hardware. No more crashes or lags.
Trial includes 1 hour usage + 7 days of storage.
Get Beyond Your Computer Performance
Run applications on your cloud computer with the latest generation hardware. No more crashes or lags.
Trial includes 1 hour usage + 7 days of storage.
Get Beyond Your Computer Performance
Run applications on your cloud computer with the latest generation hardware. No more crashes or lags.
Trial includes 1 hour usage + 7 days of storage.
Get Beyond Your Computer Performance
Run applications on your cloud computer with the latest generation hardware. No more crashes or lags.
Trial includes 1 hour usage + 7 days of storage.
Get Beyond Your Computer Performance
Run applications on your cloud computer with the latest generation hardware. No more crashes or lags.
Trial includes 1 hour usage + 7 days of storage.
Ready to focus on your creativity?
Vagon gives you the ability to create & render projects, collaborate, and stream applications with the power of the best hardware.
Vagon Blog

Run heavy applications on any device with
your personal computer on the cloud.
San Francisco, California
Solutions
Vagon Teams
Vagon Streams
Use Cases
Resources
Vagon Blog
The Best Render Settings for Blender 3D
Arcware vs Vagon Streams: Best Pixel Streaming Alternatives
How To Use FL Studio on a Cloud Computer
Reducing Latency in Virtual Desktops: 11 Fixes That Actually Work
PureWeb vs Vagon Streams: Best Alternative Pixel Streaming Platform
How To Use Photoshop On iPad
How To Fix Slow & Laggy Performance on AWS Workspaces VDIs?
Arcane Mirage vs Vagon Streams: Best Alternative Pixel Streaming Platform
The Best Unity Shortcuts
Vagon Blog
Run heavy applications on any device with
your personal computer on the cloud.
San Francisco, California
Solutions
Vagon Teams
Vagon Streams
Use Cases
Resources
Vagon Blog