Instant Connection for Pixel Streaming
— New Feature Automated Setup

A Beginner's Complete Guide to Blender 3D
A Beginner's Complete Guide to Blender 3D
DigitalArt
A Beginner's Complete Guide to Blender 3D
Table of Contents
Welcome to the world of Blender 3D! Blender is a free, open-source 3D creation suite. Whether you're into modeling, animation, or game design, Blender has it all. It's powerful, versatile, and user-friendly.
"Blender is a public project, made by hundreds of people from around the world; by studios and individual artists, professionals and hobbyists, scientists, students, VFX experts, animators, game artists, modders, and more."
– Blender Foundation
What You’ll Learn?
This guide is your A-Z resource on Blender. From basics to advanced techniques, we've got you covered. Whether you’re a beginner or looking to sharpen your skills, this guide will help you master Blender. We'll deep dive into why Blender 3D is a great choice for digital designers and explore its robust capabilities.
You can also check out our GPU Guide for tips to use GPU, along with speed up and acceleration tips for Blender 3D.
Why Blender Matters?
Blender is more than just a tool. It's a gateway to creativity. Used in many fields, its applications are vast and varied.
Film and Animation: Create stunning visuals and animations.
Game Development: Design game assets and environments.
Architecture: Build realistic architectural visualizations.
Product Design: Prototype and visualize products.
Art and Illustration: Craft digital sculptures and art.
Blender’s impact spans across various industries. Its importance in modern design and visualization cannot be overstated. From Hollywood blockbusters to indie game projects, Blender is a go-to tool for many professionals. In this guide, we'll look closely into Blender 3D's capabilities and diverse use cases.
The Power of Blender
Blender is unique in its ability to combine multiple functionalities in one package. This versatility makes it a favorite among creatives.
Modeling: Create intricate 3D models with ease.
Sculpting: Sculpt detailed and complex characters.
Animation: Animate objects and characters with precision.
Rendering: Produce photorealistic images and videos.
Compositing: Integrate 3D elements into live footage.
Simulation: Simulate physics, smoke, and fluids.
Why Choose Blender?
There are several compelling reasons to choose Blender as your 3D tool of choice.
Free and Open Source: No cost barrier. Accessible to everyone.
Community Support: Vast online community for help and tutorials.
Regular Updates: Constantly improving with new features.
By the end of this guide, you’ll understand why Blender is a favorite among 3D artists. Ready to dive in? Let's get started!
Chapter 1: Getting Started with Blender 3D
So, you've decided to dive into the world of digital art and 3D design. Maybe you've seen stunning animations, breathtaking game environments, or hyper-realistic product visualizations and thought, "I want to create that." Welcome to Blender 3D—a powerful and versatile open-source 3D creation suite that makes these dreams possible. From modeling to animation, rendering, and beyond, Blender offers a comprehensive array of tools for digital artists. Its journey from a small in-house tool to a globally recognized software is nothing short of remarkable.
History and Evolution of Blender 3D
Blender's story begins in 1994 with Ton Roosendaal at NeoGeo, a Dutch animation studio. Imagine the challenges of the early days of 3D animation, with clunky software and limited resources. Ton's vision was clear: create a tool that would empower artists to bring their wildest ideas to life. The name "Blender," inspired by a song by the Swiss band Yello, was a testament to this creative spirit.
In 1998, Roosendaal founded Not a Number (NaN) to develop and market Blender as a commercial product. The goal was ambitious—make professional-level 3D tools accessible to everyone. Blender made waves at its first SIGGRAPH conference in 1999, drawing significant attention and investment. But the journey was far from smooth. Financial hurdles and market pressures led NaN to bankruptcy in 2002.
Undeterred, Roosendaal launched the Blender Foundation in May 2002. With a bold "Free Blender" campaign, he aimed to buy back Blender's rights and release it as open-source software. The community rallied, raising €100,000 in just seven weeks. On October 13, 2002, Blender was reborn under the GNU General Public License (GPL), ensuring its freedom and continuous development by a passionate community.
Blender's transformation into open-source software sparked a wave of innovation. The Blender Foundation and the Blender Institute, established in 2007, initiated several open movie projects to push Blender's capabilities. Projects like "Elephants Dream" (2006), "Big Buck Bunny" (2008), and "Sintel" (2010) not only showcased Blender's potential but also helped refine the software with real-world challenges.
The release of Blender 2.5 in 2009 marked a pivotal moment. A major overhaul of the user interface and toolset made Blender more accessible and powerful. Blender 2.8, released in 2019, introduced groundbreaking features like the real-time rendering engine EEVEE, revolutionizing usability and performance. This version catapulted Blender into the 3D mainstream, attracting contributions from major companies and establishing it as a top choice for 3D creation.
Key Features and Capabilities
Blender's extensive feature set is a testament to its evolution and the dedication of its community. Imagine the possibilities with these tools at your fingertips.
With Blender's modeling capabilities, you can create intricate structures and transform basic shapes into detailed 3D models. Sculpting tools allow you to craft characters with fine details, breathing life into your creations.
The animation tools are equally impressive, offering rigging, keyframing, and dynamic scene creation. For rendering, Blender's EEVEE and Cycles engines produce stunning, photorealistic images and videos, ensuring your projects look professional.
Blender's compositing system uses a node-based approach, seamlessly integrating 3D elements into live footage. The simulation features, including physics, fluid, smoke, and particle simulations, add a layer of realism that can make your projects truly stand out. And with the integrated video editor, you have a complete suite for post-production tasks.
Blender's journey from a niche tool to a globally respected software is a testament to the power of community and open-source development. As you embark on your journey with Blender, know that you are part of a vibrant, supportive community dedicated to creativity and innovation.
Why Keeping Up With Blender News Matters?
Staying updated with the latest advancements in Blender is crucial for any digital artist. Blender is an ever-evolving tool with frequent updates and new features that can significantly enhance your workflow. Each update brings new capabilities, performance improvements, and bug fixes, keeping Blender at the cutting edge of 3D software.
Blender’s development is driven by a dynamic community of developers and artists. New updates introduce powerful tools that make complex tasks easier and more efficient. Staying informed allows you to incorporate the latest advancements into your projects, whether it's a new rendering engine, improved modeling tools, or enhanced animation features.
Where to Follow Blender News?
The Blender Official Blog is the best place to start. Here, you’ll find detailed posts about each new release, upcoming features, and insights into the development process. You can also check Vagon Blog for news on the Blender 4.1 Update. Another excellent resource is the Digital Art category of Vagon’s blog, which offers news and articles about digital art and 3D design, including Blender updates, tutorials, tips, and industry news.
Comparisons to Other Software: Find the Best Fit for Your Needs
Choosing the right software can be overwhelming for digital artists, architects, and designers. With numerous alternatives available, deciding where to start can be challenging. Blender 3D stands out for its versatility and open-source nature, but understanding how it compares to other industry-leading tools is crucial. Blender can also complement other applications, enhancing your 3D design workflow for various industries, including game design, architecture, and animation.
Blender vs. Popular 3D Software: Which One Suits You Best?
For many, the first comparison is between Blender and other general-purpose 3D software. Tools like Cinema 4D, Autodesk Maya, and Houdini are often considered direct competitors.
Cinema 4D: Known for its user-friendly interface and powerful motion graphics capabilities. Compare Blender and Cinema 4D to see which fits your needs better.
Autodesk Maya: A staple in the animation industry, Maya offers extensive tools for complex animations. Read the comparison between Blender and Maya to understand their differences.
Houdini: Famous for its procedural generation capabilities, Houdini is a go-to for VFX artists. Learn more in this Blender vs. Houdini comparison.
Industry-Specific Alternatives: Tailored Tools for Your Projects
Blender’s versatility makes it a strong contender across various industries. However, specialized software may offer features tailored to specific needs. Blender 3D can also serve as a supplementary tool in a broader workflow. For instance, you might model and animate in Blender but use another software for rendering or game development. This flexibility makes Blender a valuable asset in any digital artist's toolkit, providing robust capabilities without the cost barrier.
Game Design: Blender vs. Game Engines
While Blender excels in modeling and animating game assets, game engines like Unity and Unreal Engine provide the infrastructure to bring these assets to life. Explore the differences in these comparisons:
Architectural Visualization: Blender vs. KeyShot
For architectural visualization, Blender is powerful, but dedicated tools like KeyShot offer specialized features for rendering and material visualization. See how they compare in the Blender vs. KeyShot comparison.
3D Sculpting: Blender vs. ZBrush
Artists specializing in detailed character modeling often choose between Blender and ZBrush. Discover the strengths of each in the Blender vs. ZBrush comparison.
Video Editing: Blender vs. Premiere Pro
Blender includes a video editor, but professionals often debate between it and Adobe Premiere Pro for post-production. Check out the Blender vs. Premiere Pro comparison.
Installing Blender 3D: Ready to Start
Ensuring Your System is Ready
Before diving into the installation process, it’s essential to ensure your computer meets Blender’s system requirements. While Blender can run on modest hardware, a more powerful setup will enhance your experience and unlock the full potential of this versatile tool.
Minimum Requirements:
Operating System: Windows 8.1, macOS 10.13, or a Linux distribution with glibc 2.17
CPU: Dual-core 2 GHz
RAM: 4 GB
Graphics: OpenGL 2.1-compatible GPU
Disk Space: 2 GB
Recommended Specifications:
Operating System: Windows 10, macOS 10.15, or a recent Linux distribution
CPU: Quad-core Intel/AMD, 3 GHz or faster
RAM: 16 GB
Graphics: OpenGL 3.3-compatible GPU
Disk Space: SSD with 10 GB free
Downloading Blender: The First Step Towards Mastery
Now that you’ve decided to continue with Blender 3D, let’s look at how to download and install it in the most optimized way.
To get Blender, visit the Blender Official Download Page. Choose your operating system and click the “Download Blender” button. Blender is also available on platforms like Steam, Pop Shop, and the Microsoft Store for convenient installation.
Step-by-Step Installation Guide
Installing Blender on Windows
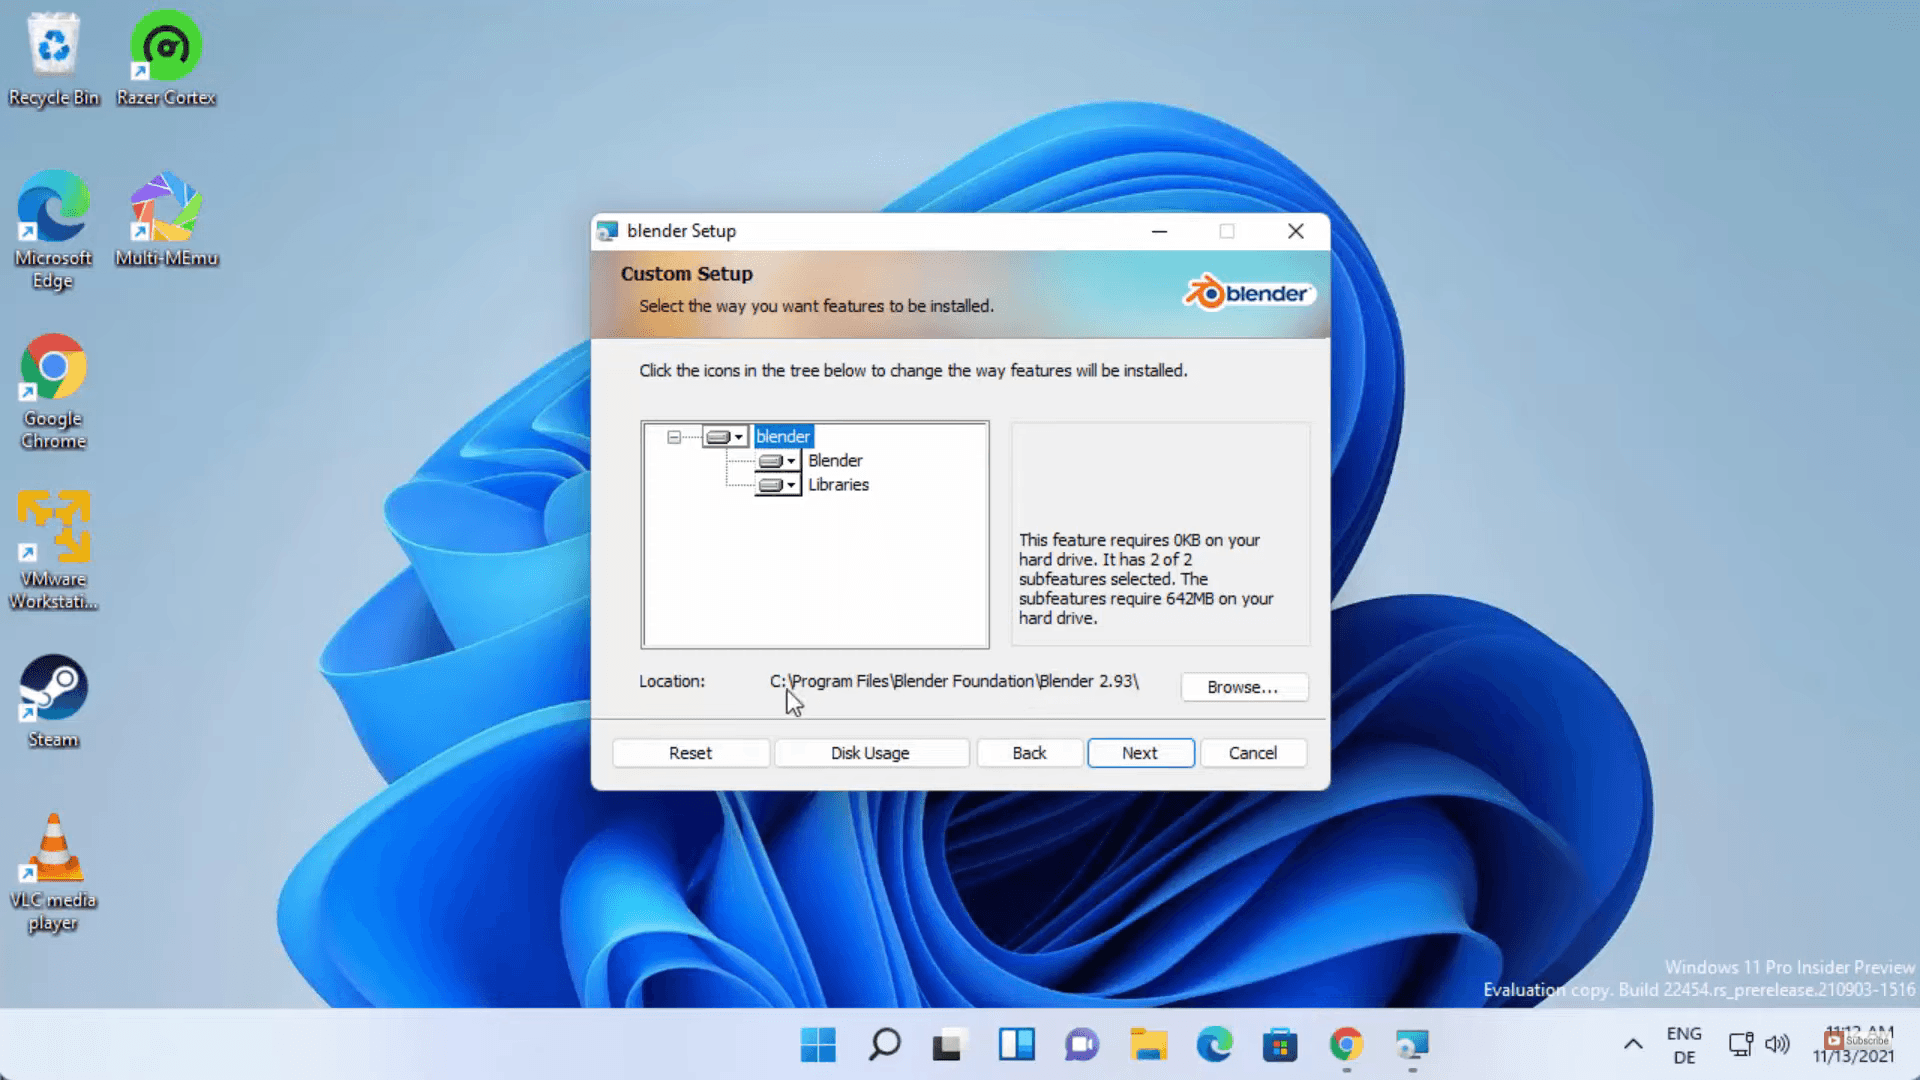
Run the Installer: Locate the downloaded MSI file, usually named “blender-x.xx-windows64.msi” (with “x.xx” representing the version number). Double-click it to start the installation.
Installation Options: Follow the installer prompts. You can choose the installation directory and decide if you want shortcuts on the desktop and in the Start menu.
Installation Progress: The installer will copy Blender files to your selected directory. This may take a few moments.
Completing the Installation: Once the installation is complete, click “Finish.” Blender is now installed and can be launched from the desktop or Start menu.
Installing Blender on macOS
Install Blender: Locate the downloaded DMG file, usually named “blender-x.xx-macOS.dmg.” Double-click it to open.
Drag Blender to Applications: Inside the DMG window, drag the Blender icon into the Applications folder.
Launch Blender: Close and eject the DMG window. Find Blender in your Applications folder and double-click it to launch.
Installing Blender on Linux
Extract Blender Installation File: Navigate to the directory with the downloaded tar.gz file. Right-click and select “Extract” or use the command line to extract the files.
Run Blender: In the extracted folder, find the Blender executable file named “blender” or similar. Double-click this file to run Blender.
Alternative Method: Use Snap to install Blender with the command snap install blender --classic.
Initial Setup and Configuration: Tailor Blender to Your Needs
Upon launching Blender for the first time, you’ll be greeted with the default interface. Here are a few initial setup steps to get you started:
Customize Preferences:
Go to Edit > Preferences to access settings for interface scaling, theme adjustments, and navigation tweaks.
Enable useful built-in add-ons like Node Wrangler, Copy Attributes, and Extra Objects for enhanced functionality.
Set Up Add-ons:
Enable built-in add-ons via Edit > Preferences > Add-ons.
Install third-party add-ons by downloading the ZIP file and using the Install button in the Add-ons tab.
Save Your Preferences:
After adjusting settings, save your preferences to ensure your custom setup is loaded every time you start Blender.
With Blender installed and configured, you're ready to design your 3D dreams.
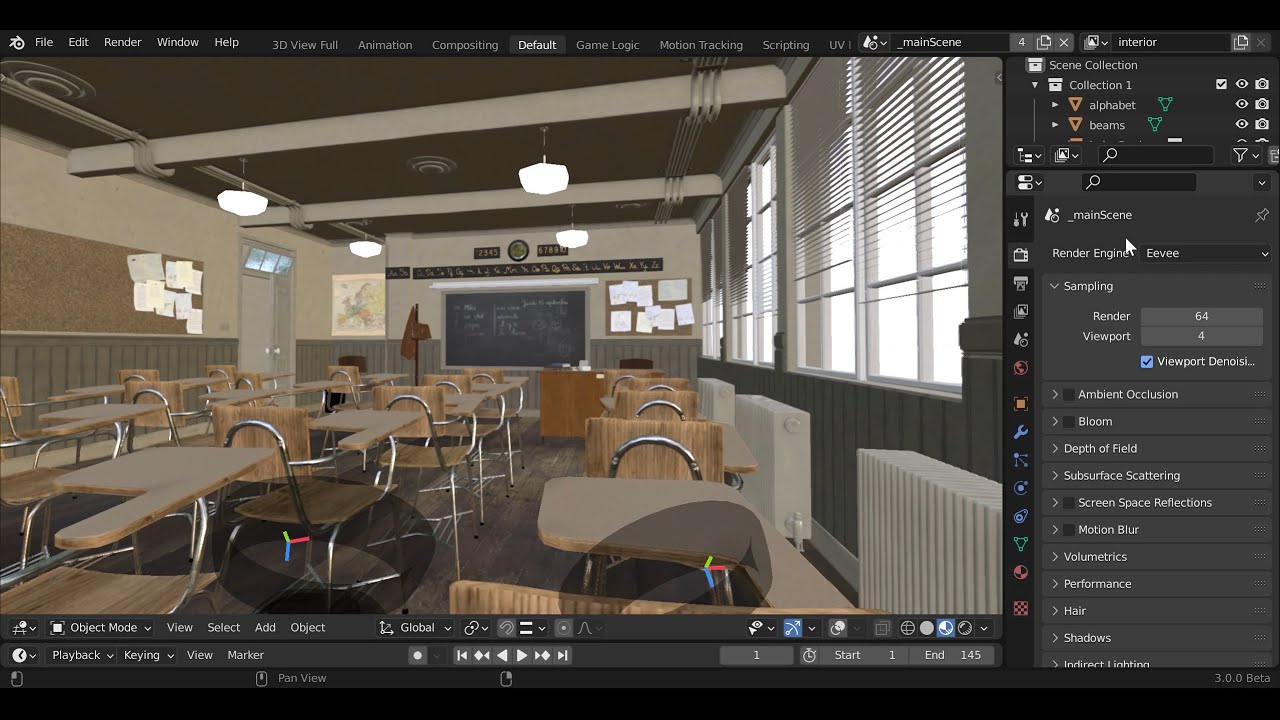
User Interface Overview: Mastering Blender 3D
Navigating the Blender 3D Interface: Your Creative Playground
Blender's interface might seem complex at first, but it’s designed to be intuitive once you understand its layout. Let’s break down the key components of Blender’s workspace.
What is the Blender 3D Interface Layout?
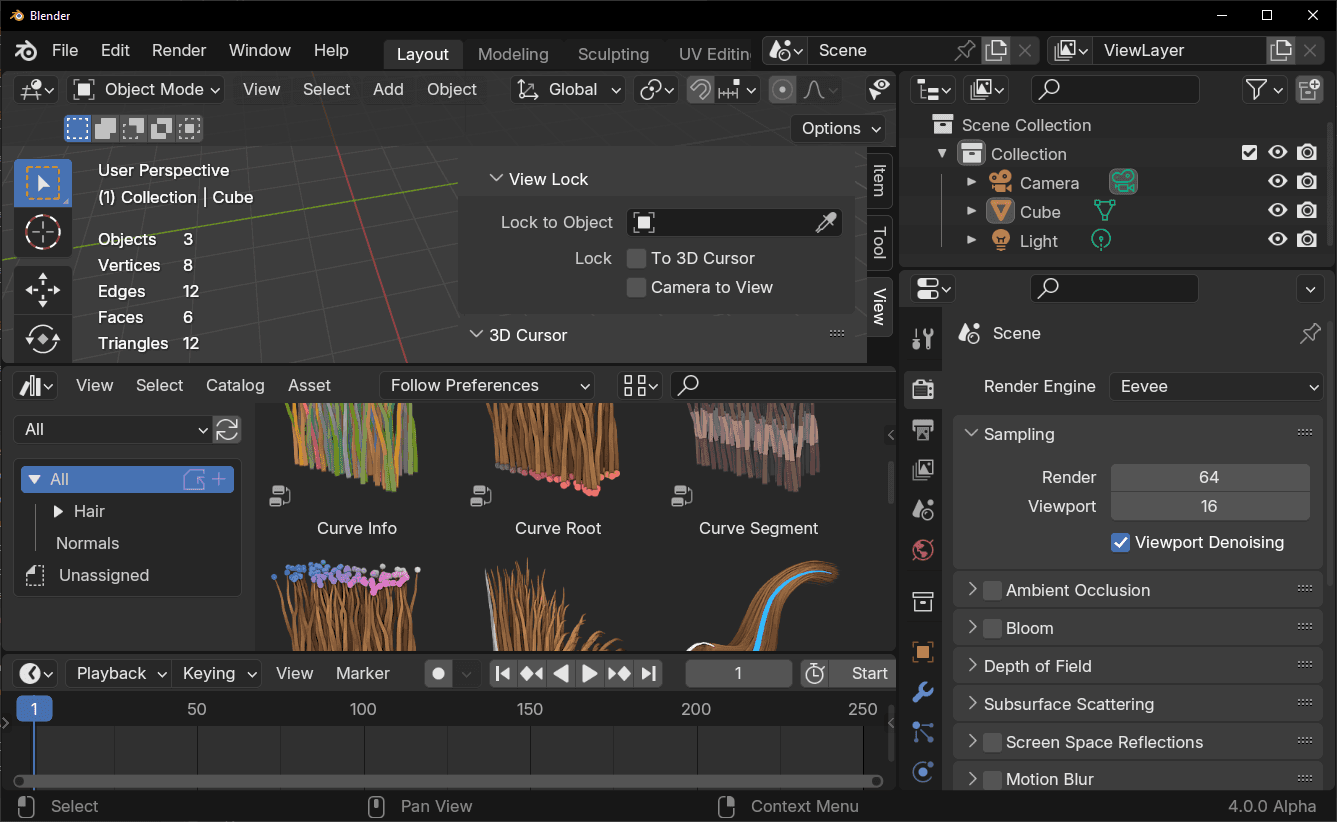
When you first open Blender, you’ll see a variety of panels and menus, each with its own purpose:
Toolbar: Located on the left, it contains tools for transforming objects, adding new elements, and other functions that change depending on the mode (e.g., Object Mode, Edit Mode).
3D Viewport: The central area where you interact with your 3D models and scenes. This is where most of your creative work happens.
Outliner: On the top right, it provides a hierarchical view of all objects in your scene, helping you manage and organize your project.
Properties Panel: Found on the bottom right, it offers detailed settings and options for selected objects, including modifiers, materials, and scene properties.
Timeline: At the bottom, this is essential for animation, allowing you to control keyframes and the sequence of your animations.
Header: At the top, it contains menus for file operations, rendering, and switching between different workspaces.
How to Navigate the 3D Viewport?
Navigating the 3D viewport efficiently is crucial:
Orbit: Middle mouse button (MMB) + drag.
Pan: Shift + MMB + drag.
Zoom: Scroll wheel or Ctrl + MMB + drag up/down.
Select: Right-click to select objects.
Move/Rotate/Scale: Use the 'G' key for grab/move, 'R' for rotate, and 'S' for scale.
Customizing the Workspace: Make Blender Work for You
Why Customize Your Workspace?
Customizing your workspace can significantly enhance your productivity by providing quick access to the tools and views you use most frequently. Blender’s flexibility allows you to create tailored workspaces for modeling, sculpting, texturing, and animating. It is also important to design an efficient 3D asset management methodology in Blender 3D.
How to Customize Your Workspace?
Splitting Areas: Hover over the edge of an area until you see a crosshair. Right-click and select "Split Area" to divide the window into separate panels.
Merging Areas: Hover over the edge of an area, right-click, and select "Join Area" to merge two panels.
Switching Editors: Click on the editor type dropdown in the top-left corner of any panel to change it to a different editor, such as the Shader Editor, UV/Image Editor, or Video Sequencer.
Saving Layouts: After customizing your workspace, go to the top menu bar, select the "+" icon next to the current workspace name, and click "Save Startup File" to keep your changes.
Essential Shortcuts and Commands: Speed Up Your Workflow
What are the Key Shortcuts in Blender?
Blender’s efficiency heavily relies on keyboard shortcuts. Here are some must-know shortcuts:
G: Grab/Move
R: Rotate
S: Scale
E: Extrude
Ctrl + Z: Undo
Shift + D: Duplicate
Tab: Toggle between Object Mode and Edit Mode
Ctrl + R: Loop Cut
B: Box Select
F3: Search for any operator by name
For a more detailed list, check out this Blender Shortcuts and Hotkeys guide.
Basic Blender Glossary: Essential Terms Explained
What is Object Mode?
Object Mode is the default mode in Blender where you can manipulate whole objects. It's used for positioning, scaling, and rotating objects within your scene.
What is Edit Mode?
Edit Mode allows you to edit the individual vertices, edges, and faces of a mesh. This mode is where you do detailed modeling and shaping of your objects.
What is a Modifier?
Modifiers are non-destructive operations that affect an object’s geometry in various ways. For example, the Subdivision Surface modifier smooths a mesh, while the Boolean modifier can cut or join objects.
What is the Outliner?
The Outliner is a hierarchical view of all the objects in your scene. It helps you organize and manage the elements of your project, allowing you to easily hide, select, or parent objects.
What are Nodes?
Nodes are used in Blender’s Shader Editor, Compositor, and Geometry Node Editor. They allow for a visual, node-based approach to creating complex materials, effects, and geometries by connecting different operations.
What is the Timeline?
The Timeline is crucial for animation. It displays a sequence of frames where you can place keyframes to animate properties over time, controlling the flow and timing of your animations.
Troubleshooting in Blender
Blender is a widely supported open-source platform, and it receives many updates to match the industry standards. However, there can be common bugs as with all other software, especially if you are running Blender on a low-end device. Luckily, the strong community can help fix your Blender problems if it isn’t fixed with the next update. You can also check out our Solutions to Common Blender Problems. Vagon’s Cloud Computing solution can always help run Blender and many other applications smoothly.
Chapter 2: Blender 3D Industry Applications
Film and Animation
Blender 3D is a powerful tool in the film and animation industry, offering a comprehensive suite of features that enable filmmakers to create stunning visuals. Notable films and animations created with Blender include "Elephants Dream," "Big Buck Bunny," "Sintel," and "I Lost My Body." These projects highlight Blender’s ability to produce professional-grade animations and visual effects. These are just a few examples of many movies made with Blender.
Techniques and Workflows in the Film Industry
In the filmmaking process, Blender is utilized for various tasks such as modeling, rigging, animation, and rendering. The software’s powerful Cycles and EEVEE render engines allow for photorealistic visual effects and smooth animations.
“With Blender, we knew that most of our scenes would be possible. It also proved that it doesn't have to hide behind its pricey competitors”
— Alexander Heringer, a Filmmaker
Game Development
Blender plays a crucial role in game development by providing robust tools for creating game assets and environments. Its modeling, texturing, and animation capabilities are essential for designing characters, props, and dynamic game worlds.
Blender's Role in Creating Game Assets
Game developers rely on Blender to model and rig characters, build detailed environments, and create realistic textures. The software’s UV mapping and texture painting tools are particularly useful for achieving high-quality game assets. Check out our tips and tricks for UV mapping to master the tool.
Optimizing Game Assets
Finding the right balance of optimizing your game assets is crucial both for the development process and the end product. Everybody wants to achieve the most optimized assets without compromising resolution. Luckily, there are many Techniques to Optimize Game Assets in Blender to help you find your perfect balance of asset optimization.
Integration with Game Engines
Blender integrates seamlessly with popular game engines like Unity and Unreal Engine. This integration enables developers to export their Blender-created assets directly into their game projects, ensuring a smooth and efficient workflow.
"Blender’s approachable and non-destructive modeling tools and modifiers, along with its real-time viewport Eevee, make it a fantastic tool for game development.”
— Daniel Bystedt, a Senior Character Artist at Embark Studios
Architecture and Visualization
Blender is a powerful tool for architectural visualization, enabling architects and designers to create realistic renderings and immersive walkthroughs of their projects. Check out our guide to Architectural Modeling in Blender to see how.
Using Blender for Architectural Visualization
Architects use Blender to model buildings, interiors, and landscapes with precision. The software’s advanced modeling tools allow for accurate representation of architectural designs. Blender’s lighting and shading tools help create photorealistic renders that are essential for client presentations and marketing materials.
Realistic Rendering and Walkthroughs
Blender’s Cycles render engine produces high-quality, photorealistic images, crucial for showcasing the final look of a project before it is built. Virtual walkthroughs created in Blender provide an immersive experience, allowing clients to explore the space as if it were already constructed.
"Blender's tools are a perfect mixture between the freedom to create in Maya with the inherent and very easy-to-use parametricism that can achieve results like Grasshopper while preserving some of the precision that people may be used to from Rhino and Sketchup."
— Dimitar Pouchnikov, an ArchViz designer at UH Studio Academy
Art and Design
Blender is highly regarded among digital artists for sculpting, modeling, and creating visual art and illustrations. Its comprehensive set of tools supports a wide range of artistic endeavors.
Blender for Digital Sculpting and 3D Modeling
Artists use Blender’s sculpting tools to create detailed characters and intricate designs. The software’s dynamic topology and multiresolution sculpting features allow for high levels of detail and flexibility. Blender also supports a range of brushes and sculpting techniques, making it a preferred tool for digital sculptors.
Creating Visual Art and Illustrations
Blender’s robust rendering capabilities enable artists to produce high-quality illustrations and visual art. The Grease Pencil tool is particularly popular for creating 2D animations and storyboards within a 3D environment.
"I’m a donut tutorial survivor and I still get flashbacks from the first several weeks in Blender where I almost punched a hole through my screen. It’s not supposed to be easy at first, no 3D artist had an easy time from day one. It takes time, self-discipline, and patience, but if you keep pushing through I promise you’ll get to the other side where Blender becomes your playground”
— Sarah B. Oemig, a Digital Modelling Artist
Blender’s versatility and powerful feature set make it an indispensable tool across various industries. Whether you are creating films, developing games, visualizing architectural projects, or crafting digital art, Blender provides the tools you need to bring your creative visions to life.
Chapter 3: Essential Equipment for Blender 3D
Understanding Blender 3D's Hardware Needs
Blender 3D is a comprehensive software suite that utilizes a variety of computer hardware resources to perform tasks such as modeling, texturing, rendering, and animation. The performance of Blender is heavily influenced by the specifications of the computer it runs on, particularly the CPU, GPU, RAM, and storage. Optimizing these components can significantly enhance your workflow and reduce rendering times.
Recommended Specifications for Optimal Performance
CPU (Central Processing Unit)
Blender relies heavily on the CPU for various tasks, including modeling, simulations, and some rendering processes. Multi-core CPUs are particularly beneficial as Blender can utilize multiple cores for faster computation.
Recommended CPU: AMD Ryzen 9 5950X or Intel i9-11900K. These CPUs offer excellent multi-threaded performance, which is ideal for handling complex calculations in Blender.
GPU (Graphics Processing Unit)
The GPU is crucial for rendering tasks, especially when using Blender’s Cycles or EEVEE render engines. A powerful GPU can significantly reduce rendering times and improve real-time viewport performance.
Recommended GPU: NVIDIA RTX 3080 or NVIDIA Quadro RTX 4000. These GPUs are known for their high CUDA core counts, which are beneficial for GPU-accelerated rendering in Blender.
RAM (Random Access Memory)
RAM is essential for managing the data Blender uses, especially for large scenes with high-polygon models and detailed textures. More RAM allows Blender to handle larger files more efficiently.
Recommended RAM: 32GB or more. For complex projects and heavy multitasking, 64GB is advisable.
Storage
Fast storage solutions like SSDs (Solid State Drives) are essential for quick data access and reduced loading times. NVMe SSDs offer even faster speeds compared to traditional SATA SSDs.
Recommended Storage: At least 1TB NVMe SSD. This ensures ample space for projects and fast read/write speeds.
Other Hardware Considerations
Display
A high-resolution, color-accurate display is important for detailed work and accurate color representation in your projects.
Recommended Display: 2K or 4K monitor with good color accuracy (e.g., 100% sRGB coverage).
Cooling and Power Supply
Ensure your PC has adequate cooling and a reliable power supply to maintain performance and prevent overheating during intensive tasks.
Suggested Computers for Blender 3D
Based on our blog post, which curates the best computers for Blender 3D, here are some computer suggestions tailored to different budgets:
High-Performance Option
HP Z4 G4 Workstation
CPU: Intel Xeon Quad-Core 3.7GHz
GPU: NVIDIA Quadro RTX 4000
RAM: 32GB
Storage: 512GB NVMe SSD
Display: 2K, color-accurate
Budget-Friendly Option
Custom AMD Build with Ryzen 9 5950X
CPU: AMD Ryzen 9 5950X (16 cores, 32 threads)
GPU: NVIDIA RTX 3080
RAM: 64GB
Storage: 1TB NVMe SSD
Display: 4K, color-accurate
Entry-Level Option
Acer Nitro
CPU: Intel Core i5-9400F
GPU: NVIDIA GeForce GTX 1650
RAM: 8GB
Storage: 512GB SSD
Display: 1080p
Custom-Built vs. Pre-Built: Pros and Cons
Choosing between a custom-built and a pre-built PC depends on your needs, technical expertise, and budget.
Custom-Built PCs
Pros:
Flexibility to choose specific components
Potential cost savings
Cons:
Requires technical expertise
Longer assembly time
Pre-Built PCs
Pros:
Convenience
Warranty covering the entire system
Cons:
Limited customization
Potential higher cost for similar performance
Enhancing Blender Performance
Once you have the ideal PC setup, you can further optimize Blender’s performance by adjusting its settings, even for low-end PCs. By fine-tuning various aspects of Blender, you can achieve smoother workflows and faster rendering times. Here are some effective strategies:
Adjust Viewport Settings: Use the simplify options in Blender to reduce the complexity of the viewport display. This can help in handling high-polygon scenes more efficiently.
Turn Off Shadows in Workbench Viewport: Disabling shadows in the workbench viewport can improve performance by reducing the computational load.
Fine-Tune Render Settings: Balance quality and speed by adjusting render settings. Lowering sample rates for previews and increasing them for final renders can save time.
Utilize Caching Options: For simulations and animations, leverage Blender’s caching options to store data and reduce computation times during playback.
Use Proxy Videos for Complex Scenes: Implement proxy videos to simplify the viewport representation of complex scenes, improving navigation and responsiveness.
Input Devices
Graphics Tablets and Styluses
Graphics tablets and styluses are indispensable tools for digital artists working with Blender 3D. They provide precision and control that a regular mouse cannot match, making tasks like sculpting and detailed modeling much more intuitive.
Wacom Cintiq 22
Display: 15.6-inch Full HD
Pen Pressure Levels: 8192
Pros: Excellent color representation, responsive pen, comfortable to use, no need to charge the stylus.
Cons: Lacks multi-touch capabilities, brightness could be better.
Ideal For: Professionals seeking a reliable and high-quality drawing experience.
Huion Kamvas Pro 16
Display: 15.6-inch IPS, 1920 x 1080 pixels
Pen Pressure Levels: 8192
Pros: Excellent display quality, affordable, responsive.
Cons: Customizable keys are too close to the power button.
Ideal For: Artists on a budget who need a quality drawing tablet.
XP-Pen Artist Pro 16 (Gen 2)
Display: 2560 x 1600
Pen Pressure Levels: 16000
Pros: Affordable, sharp display, adjustable brightness.
Cons: Fixed stand angle.
Ideal For: Artists seeking a balance between cost and features.
3D Mice and Controllers
3D mice and controllers enhance navigation and precision within Blender, making them particularly useful for 3D modeling and sculpting.
3Dconnexion SpaceMouse Pro
Features: Ergonomic design, customizable buttons, 6-degrees-of-freedom sensor.
Pros: Improves navigation efficiency, comfortable to use for long periods.
Cons: Expensive.
Ideal For: Professionals who spend a lot of time navigating 3D environments.
3Dconnexion SpaceMouse Compact
Features: Two-button layout, compact design.
Pros: Affordable, easy to use.
Cons: Limited functionality compared to SpaceMouse Pro.
Ideal For: Beginners and those on a budget.
Regular Peripherals (Mouse, Keyboard)
While specialized devices are essential for certain tasks, having a reliable mouse and keyboard setup is also crucial for an efficient workflow in Blender.
Logitech MX Master 3
Features: Customizable buttons, ergonomic design, high precision.
Pros: Excellent for long hours of use, highly customizable.
Cons: Higher price point.
Ideal For: Professionals who need a reliable and ergonomic mouse.
Razer BlackWidow Elite
Features: Mechanical switches, customizable RGB lighting, programmable keys.
Pros: Durable, responsive, great for shortcut assignments.
Cons: Loud key switches.
Ideal For: Users who prefer mechanical keyboards and need customizable keys.
By choosing the right input devices and peripherals, you can significantly enhance your productivity and comfort while working with Blender 3D.
Chapter 4: Getting to Know Blender’s Tools and Features
Modeling
Basics of 3D Modeling
Blender’s 3D modeling capabilities are foundational to any project. You’ll start by exploring different types of modeling: mesh, curve, surface, and text. Mesh modeling is the most common type, involving the manipulation of vertices, edges, and faces to create 3D shapes. Essential tools like Extrude, Loop Cut, and Knife are crucial. The Modifier stack allows for non-destructive editing, enabling experimentation and refinement of your models. Check out our list of Blender Tips and Tricks to master 3D modeling.
Techniques and Tools for Creating Models
Blender offers advanced modeling techniques and tools to enhance your workflow. Sculpting tools are ideal for organic modeling, perfect for characters and complex shapes. Boolean operations let you add or subtract objects to create intricate details. Blender’s snapping and precision modeling tools, like the 3D cursor and grid snapping, ensure accurate alignment and positioning of objects. Expertise of these tools is crucial for creating high-quality 3D models efficiently. Mastering the 3D Cursor can prove to be invaluable, and we have the right guide for you.
Texturing and Shading
Applying Textures and Materials
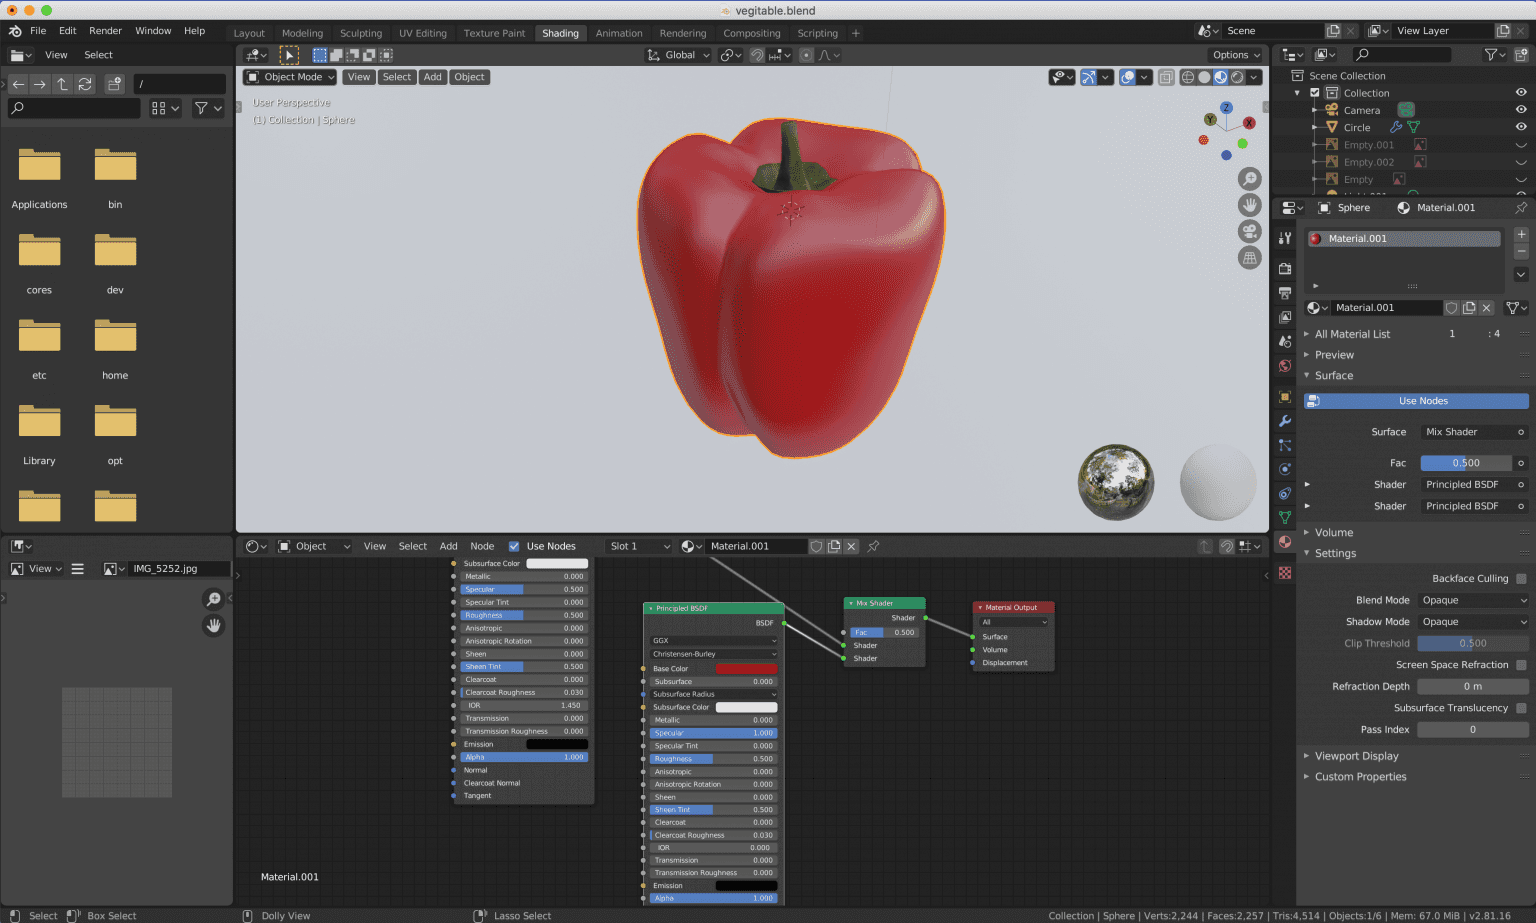
Applying textures and materials is key to bringing your models to life. Blender’s Material Properties panel lets you assign materials, defining surface properties like color, reflectivity, and transparency. UV unwrapping is essential for accurately applying textures to your 3D model. Blender’s node-based shader editor provides immense flexibility, allowing you to combine different texture maps and procedural textures to create complex materials.
Understanding Shaders and Nodes
Blender’s shader system is powerful and versatile, using a node-based approach. Shaders define how light interacts with surfaces. Understanding basic shaders like Diffuse, Glossy, and Emission is crucial. By connecting nodes such as texture coordinates, noise textures, and math operations, you can create a wide range of materials, from realistic metal to abstract procedural textures. Mastering nodes allows for dynamic and intricate material effects.
Animation
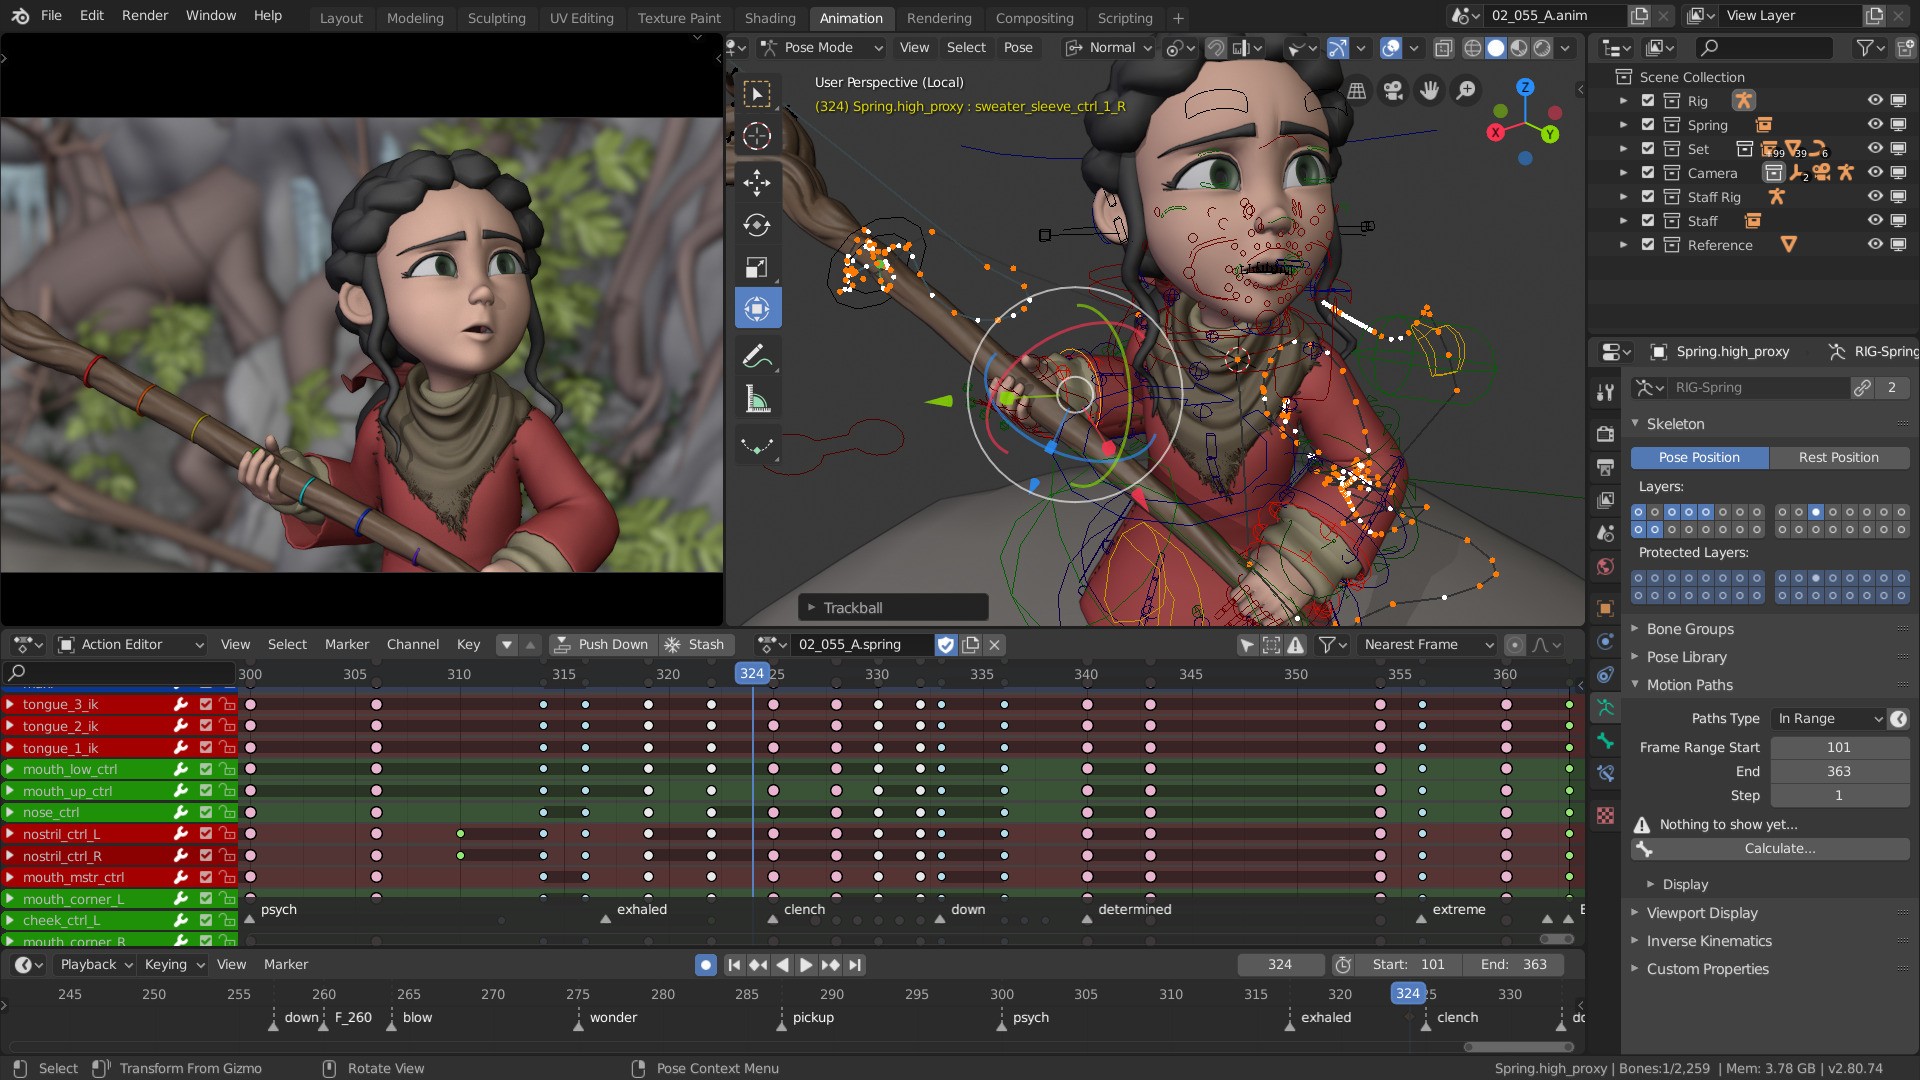
Basics of Animation in Blender
Blender’s animation system is robust, offering tools for keyframe animation, motion paths, and non-linear animation. The Timeline and Graph Editor are fundamental for controlling timing and interpolation. Understanding the Dope Sheet is crucial for managing multiple keyframes and adjusting animation curves for smoother transitions. Learning principles like easing, anticipation, and follow-through help create believable and engaging animations.
Rigging and Character Animation
Rigging involves creating a skeleton for a 3D model so it can be animated. Blender’s Armature system allows for bone creation, which can be parented to the mesh with weight painting. This is vital for character animation. Blender also supports inverse kinematics (IK), simplifying the animation of complex movements. Additionally, Blender’s Pose Library helps manage different character poses, streamlining the animation process.
Creating Realistic Motion and Effects
Blender excels at creating realistic motion and effects, from simple transformations to complex simulations. Using constraints, you can control object movements for more natural animations. Blender’s particle system allows for effects like fire, smoke, and fluid simulations, adding dynamic realism to your scenes. The Animation Nodes add-on provides even more control, enabling procedural animations and effects.
Virtual Reality
Blender 3.0 VR Update
The Blender 3.0 update brought significant improvements to VR capabilities, including better support for VR headsets and enhanced performance. This allows for more immersive and interactive VR content creation, making Blender a powerful tool for virtual reality development. Our how-to guide on creating VR Content with Blender can help you kickstart your VR content creation process with tips and tricks to ensure a smooth workflow.
VR Scenes in Blender
Creating VR scenes in Blender involves setting up your project for VR compatibility, including proper scene scaling and camera settings. The VR Scene Inspection add-on lets you preview and navigate your scenes using VR headsets, providing a true sense of scale and depth. Optimizing VR content, such as reducing polygon count and efficient texture use, is crucial for maintaining performance. Exporting VR content in compatible formats ensures that your scenes can be viewed on various VR platforms.
Rendering
Introduction to Rendering Engines (Cycles, Eevee)
Blender offers two primary rendering engines: Cycles and Eevee. Cycles is known for high-quality, photorealistic renders, leveraging GPU acceleration for faster performance. Eevee is a real-time rendering engine, ideal for interactive previews and less demanding projects. Understanding the strengths and use cases of each engine is vital for choosing the right tool for your project.
Rendering Techniques and Settings
Optimizing render settings is essential for balancing quality and performance. In Cycles, techniques like denoising, adaptive sampling, and light path management can significantly reduce render times while maintaining quality. Eevee offers screen-space reflections, ambient occlusion, and volumetric effects, powerful tools for achieving realistic results in real-time. Using render layers and passes allows for greater control in post-processing. Learning Eevee essentials is crucial for a better Blender experience.
Post-Processing and Compositing
Post-processing enhances your renders. Blender’s Compositor provides a node-based environment to combine render passes, apply color corrections, and add effects like bloom and lens flares. Techniques such as depth of field, motion blur, and filmic color management help achieve a cinematic look. Understanding how to use masks and alpha channels is crucial for integrating rendered elements seamlessly into live-action footage.
Additional Tools and Features
Physics Simulations
Blender includes robust physics simulation tools for creating realistic behaviors such as soft body dynamics, rigid body dynamics, cloth, and fluid simulations. These tools allow you to create complex interactions and animations that mimic real-world physics.
Grease Pencil
The Grease Pencil tool in Blender allows for 2D animation within the 3D environment. This tool is perfect for creating storyboards, 2D animations, and complex hybrid 2D/3D animations, offering a wide range of brushes and tools for drawing and animating.
Motion Tracking and VFX
Blender’s motion tracking and VFX tools are powerful for integrating 3D elements into live-action footage. The motion tracking toolset allows you to track the movement of objects and camera motion within a video clip, enabling seamless integration of 3D elements. The VFX tools include masking, green screen keying, and rotoscoping capabilities.
Scripting and Automation
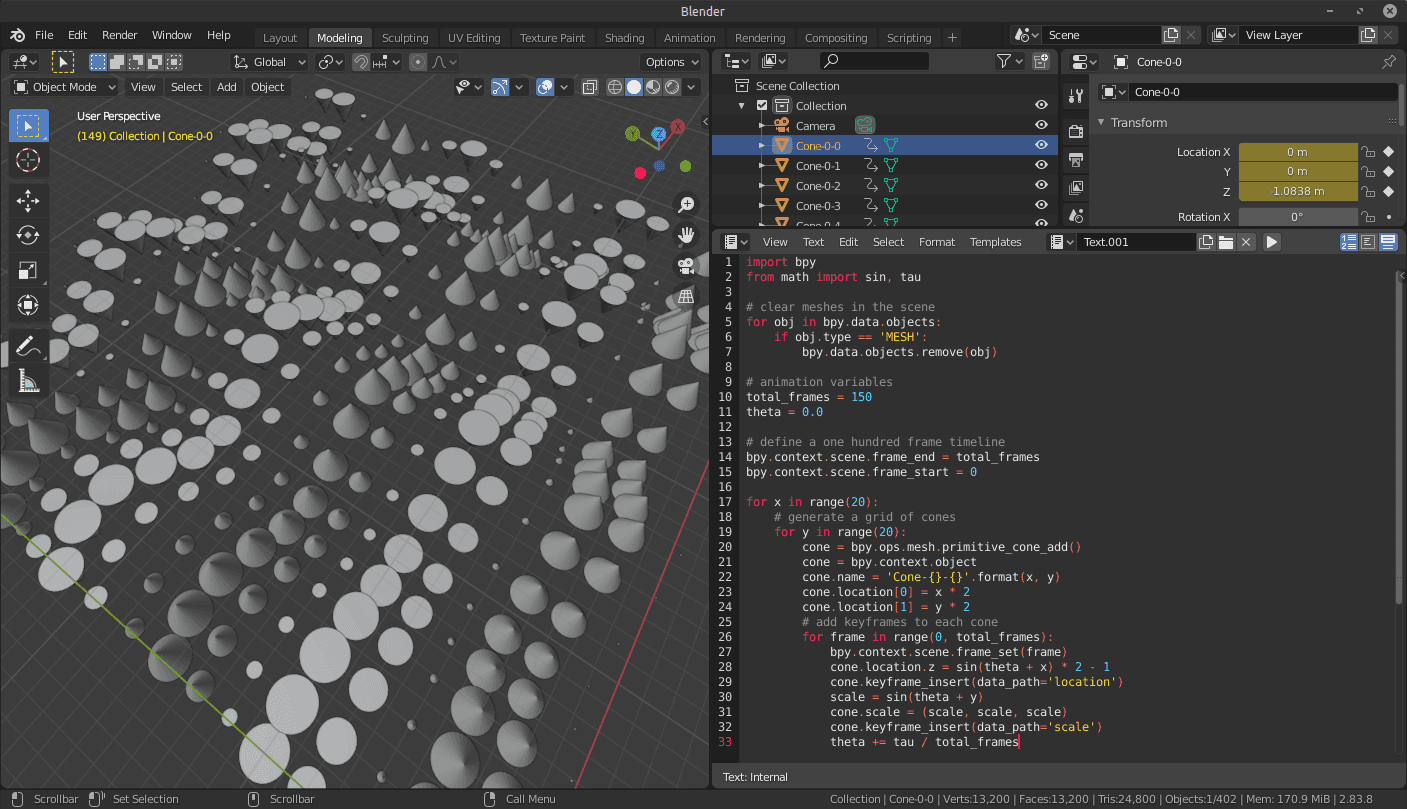
Blender’s Python API allows for scripting and automation of repetitive tasks. This feature is invaluable for creating custom tools, automating workflows, and extending Blender’s capabilities. Whether developing add-ons or automating complex sequences of operations, scripting can significantly enhance productivity. Learn the basics of Python in Blender to supercharge your Blender workflow.
Collaboration and Asset Management
Blender’s asset management tools, including the Asset Browser, help you organize and manage your project’s assets efficiently. This is particularly useful for collaborative projects, allowing multiple artists to work together seamlessly. The ability to link and append assets across different Blender files ensures consistency and efficiency in larger projects.
Templates
The availability of templates for Blender makes it extremely easy to start creating. Check out the Top Blender Templates that best fits your needs. The templates available for Blender are highly customizable, so you can both get a headstart on your project as well as achieving unique results. Whether you’re an architect, game developer, or motion graphics designer, there is a Blender Template for you, so not checking the available templates will be a missed opportunity.
Chapter 5: Learning and Community Resources for Blender 3D
Mastering Blender 3D requires continuous learning and active participation in the community. From online courses and tutorials to books and community events, numerous resources can help you stay updated and enhance your skills. In this section, we'll explore the best resources available for Blender 3D enthusiasts, helping you find the right tools to improve your expertise.
Best Blender 3D Courses
For structured learning, online courses are invaluable. Platforms like Udemy, Coursera, and Blender Cloud offer comprehensive courses that cover all aspects of Blender, from beginner to advanced levels.
Udemy: Known for its extensive catalog, Udemy offers courses like Blender 3D: Your First 3D Character and Blender 3D from hero to zero, which are great for beginners and intermediate users.
Coursera: Provides university-level courses such as Introduction to 3D Modeling with Blender from Michigan State University, perfect for those seeking a more academic approach.
Blender Studio: The official platform offers in-depth courses created by the Blender Foundation, ensuring up-to-date and comprehensive learning material.
These courses provide a structured learning path and are highly recommended for anyone serious about mastering Blender.
Top Blender Tutorials
Blender tutorials are essential for learning specific techniques and workflows. Websites like Blender Guru and YouTube channels by creators like CG Cookie provide high-quality tutorials that cater to various skill levels.
Blender Guru: Known for the popular "Blender Beginner Tutorial Series," which covers everything from basics to advanced techniques, making it a go-to resource for new users.
CG Cookie: Offers tutorials focused on character creation, animation, and more, providing in-depth knowledge and practical skills.
Essential Reading for Blender Users
Books are excellent for deep dives into Blender's functionalities and concepts. Here are some must-read books for Blender users:
"Blender for Dummies" by Jason van Gumster: A comprehensive guide for beginners, covering all the basics and more.
"Blender Master Class" by Ben Simonds: Offers advanced techniques and project-based learning, perfect for users looking to deepen their knowledge.
"The Art of Blender" by David Revoy: Focuses on artistic aspects and professional tips, making it an invaluable resource for digital artists.
Major Blender Community Events and Conferences
Attending Blender events and conferences is a great way to network with professionals and stay updated on the latest developments.
Blender Conference: Held annually in Amsterdam, it's the biggest event for Blender enthusiasts, featuring workshops, talks, and networking opportunities.
Blender Day: Regional events held in various countries, providing local networking opportunities and community engagement.
Attending these events provides numerous benefits, including the opportunity to learn from experts, see the latest updates and features in action, and connect with other Blender users. This networking can lead to collaborations, job opportunities, and enhanced learning. There are many events and conferences for Blender, which we have listed for you in our blog post.
Online Blender 3D Communities and Forums
Participating in online communities and forums is crucial for support and collaboration. Here are some active platforms:
Blender Artists: A forum for sharing work, getting feedback, and troubleshooting.
Reddit (r/blender): A vibrant community for discussions, tips, and showcasing projects.
Blender Stack Exchange: A Q&A site where users can ask specific questions and get detailed answers.
Engage with these communities to inspire from their collective knowledge and experience. Whether you're looking for feedback on a project, troubleshooting a problem, or just wanting to connect with fellow Blender enthusiasts, these forums are invaluable resources.
Chapter 6: Expanding Blender’s Capabilities with Assets, Plugins, Models & Textures
Add-ons and Plugins
Blender add-ons extend the functionality of the software, offering tools and features that streamline workflows and enhance productivity. These plugins can automate repetitive tasks, provide new modeling tools, and integrate external resources seamlessly. Understanding what add-ons are, why they are useful, and how to manage them is crucial for maximizing Blender's potential.
Essential Add-ons for Various Tasks
Blender’s vast community has developed numerous plugins to cater to different aspects of 3D creation. Here are some essential ones:
Node Wrangler: This add-on simplifies the shader creation process by adding shortcuts and tools to manage nodes efficiently. It’s a must-have for anyone working with materials and textures.
Hard Ops and Boxcutter: Perfect for hard surface modeling, these plugins assist in creating complex models and shapes with ease, making them indispensable for advanced modeling tasks.
MeasureIt: Essential for precise modeling, this tool allows you to add measurements to your models, ensuring accuracy in your designs.
BlenderKit: Provides an online database of materials, models, and brushes that can be directly loaded into Blender, making it easy to enhance your scenes with high-quality assets.
Installing and Managing Add-ons
Installing add-ons in Blender is straightforward. Navigate to Edit > Preferences > Add-ons, then click Install and select the add-on file. Once installed, you can enable or disable add-ons as needed. Efficiently managing add-ons ensures that Blender runs smoothly without unnecessary bloat.
Assets, Models, and Textures
Asset Libraries and Marketplaces
Blender’s functionality can be greatly enhanced with the use of high-quality assets, models, and textures. These resources can be sourced from various libraries and marketplaces.
BlenderKit: Offers a wide range of models and materials, easily accessible through a plugin interface, making it a go-to resource for Blender users.
Poly Haven: A free, open-source platform providing high-quality 3D models, materials, and HDRIs, highly regarded for its extensive library and accessibility.
Blender Market: A marketplace where artists can purchase and sell high-quality models, add-ons, and other assets, ideal for those looking for premium resources.
Utilizing a mix of free and premium resources can elevate your projects. Free resources like those from Poly Haven are invaluable for getting started and experimenting. Investing in premium assets from platforms such as Blender Market can provide higher quality and more unique elements for your scenes. For more details on balancing free and premium resources, you can refer to our curation of the Best Blender Assets.
Blender Assets
In addition to textures and materials, having a robust library of assets can greatly speed up your workflow and improve the quality of your projects. Here are some recommended asset resources:
BlenderKit: Besides offering materials, BlenderKit has a vast library of models and brushes, perfect for quickly populating your scenes with high-quality assets.
Quixel Megascans: Provides photorealistic 3D assets and textures, ideal for creating ultra-realistic environments.
Sketchfab: A platform where you can download and share 3D models, offering both free and premium options. It's an excellent resource for finding unique and detailed models.
AmbientCG: Offers a variety of free, high-quality PBR materials and HDRIs, which are essential for realistic rendering.
Best CGI Material Libraries
Having access to high-quality material libraries is essential for creating realistic textures and surfaces. Here are some top picks:
BlenderKit: In addition to models, BlenderKit offers an extensive library of materials and brushes.
Poliigon: Known for its professional-grade textures and materials, ideal for photorealistic rendering.
CC0 Textures: Offers a wide range of free textures that can be used for any project without attribution, making it a versatile choice for various needs.
For even more recommendations on CGI Material Libraries, check our blog post.
Chapter 6: Showcasing Your Work
Exporting Projects
Exporting to Different Applications and Use Cases
Exporting your Blender projects to various applications is crucial for integrating with different workflows and industries. Blender supports a wide range of export formats, each suited to specific applications and industries:
FBX: Commonly used in game development and virtual reality applications, this format ensures models and animations integrate smoothly with game engines like Unity and Unreal Engine.
OBJ: Widely used in 3D printing and various modeling software, OBJ is a versatile format for ensuring compatibility and ease of use.
GLTF: Ideal for web-based applications and AR/VR due to its compact size and real-time capabilities, GLTF is optimized for quick loading and efficient rendering.
Alembic: Used extensively in the film industry for handling complex animations and simulations, Alembic supports large-scale, high-fidelity data transfer.
Understanding which format to use based on your target application ensures compatibility and maintains the integrity of your work. For instance, exporting to FBX or GLTF is optimal for gaming, ensuring seamless integration with game engines. In contrast, the Alembic format is preferred in film and animation for managing large-scale projects with complex simulations. For 3D printing, OBJ and STL formats are commonly used to ensure models are print-ready. Our step-by-step guide on how to export assets from Blender is a great starting point if you need further guidance.
Optimizing your export settings for the intended use case can save time and reduce issues during the integration process. This tailored approach to exporting ensures that your projects are ready for the next stage of development, whether in gaming, film, or 3D printing.
Cloud Computing for Blender 3D
Opting to use Blender 3D on a cloud computer can be the right choice for many different use cases. Whether you are using Blender on a low-end device, or need to render resource-intensive projects, cloud computing has the solution for you. Vagon offers flexible solutions for any creative wanting to elevate and power up their workflow. Optimize your Blender usage with Vagon’s offerings of high-end GPU’s and CPU’s. Our guide on using Blender on a Cloud Computer can help you set up your Blender workspace on your very own cloud computer.
Renderfarms for Blender 3D
For extremely resource-intensive projects, utilizing renderfarms and cloud computing can be beneficial. Renderfarms like RebusFarm and SheepIt offer scalable solutions for rendering and exporting large scenes. These services allow you to leverage powerful cloud-based systems to handle demanding tasks, saving time and freeing up your local resources. Read more about renderfarms in our Top Renderfarms blog post.
Portfolio Development
Creating a Professional Portfolio
A professional portfolio is essential for showcasing your skills and attracting potential clients or employers. Here are some tips for creating an impressive portfolio:
Diverse Projects: Include a variety of projects that demonstrate different skills and techniques.
High-Quality Renders: Ensure all renders are of the highest quality to showcase your attention to detail.
Breakdowns: Include breakdowns of your work to demonstrate your process and problem-solving skills.
Consistency: Maintain a consistent style and presentation across all portfolio items.
Presenting Your Work Effectively
Presenting your work effectively involves more than just showcasing the final product. Consider the following:
Context: Provide context for each project, explaining the brief, your role, and the tools used.
Narrative: Create a narrative around your projects to engage viewers and highlight your creative journey.
Platform: Use platforms like ArtStation, Behance, or a personal website to host your portfolio. Ensure the platform is professional and easy to navigate.
Job Prospects in Blender-Related Fields
Blender is increasingly popular across various industries, creating numerous job opportunities. Key fields where Blender skills are in demand include:
Game Development: Roles like 3D modeler, animator, and environment artist are essential for creating assets and animations in game engines like Unity and Unreal Engine.
Film and Animation: Positions such as character animator, VFX artist, and rigging artist leverage Blender’s robust animation and simulation tools.
Architecture: Jobs like architectural visualization specialist, interior designer, and landscape artist use Blender for creating realistic renderings and walkthroughs of architectural projects.
Freelancing and Client Work
Freelancing with Blender offers flexibility and the opportunity to work on diverse projects. To succeed as a freelancer:
Build a Strong Portfolio: A comprehensive portfolio is crucial for attracting clients. Include a variety of projects that demonstrate different skills and techniques.
Network: Join Blender communities, forums, and attend events to connect with potential clients and collaborators.
Set Competitive Rates: Research industry rates and set competitive pricing for your services.
Manage Time Effectively: Use project management tools to keep track of deadlines and deliverables.
Best Platforms to Find Blender Jobs
There are several platforms where you can find Blender-related jobs and freelance opportunities:
Upwork: A popular platform for freelancers, Upwork offers numerous Blender job listings, from short-term projects to long-term contracts. It allows you to showcase your portfolio and set your rates.
Guru: Another excellent platform for finding freelance work, Guru offers tools to manage projects, communicate with clients, and secure payments through their SafePay system.
Indeed: This job search engine lists a variety of full-time, part-time, and freelance Blender jobs across different industries and locations.
Glassdoor: Known for company reviews, Glassdoor also lists job opportunities where you can find Blender-related positions and get insights into company culture and salary expectations.
Fiverr: A versatile platform for freelancers, Fiverr features a wide range of Blender job listings, from quick gigs to more extensive projects. It enables you to showcase your skills through portfolios and connect directly with clients for seamless transactions.
Frequently Asked Questions About Blender 3D & Vagon
Here is a list of frequently asked questions (FAQs) related to Blender 3D software:
What is Blender 3D?
Blender 3D is an open-source 3D modeling, animation, rendering, and post-production software.Is Blender 3D free to use?
Yes, Blender 3D is completely free and open-source.What operating systems does Blender support?
Blender supports Windows, macOS, and Linux.What are the system requirements for Blender?
Minimum requirements include a dual-core CPU, 4GB RAM, and a graphics card with at least 1GB VRAM.Can Blender be used for professional work?
Yes, Blender is used professionally in various industries, including film, game development, and architecture.What file formats can Blender import/export?
Blender supports multiple formats including FBX, OBJ, STL, and GLTF.What is the Blender Foundation?
The Blender Foundation is a non-profit organization that oversees the development of Blender.How do I install Blender add-ons?
Add-ons can be installed via the Preferences menu under the Add-ons tab.How do I render an image in Blender?
You can render an image using the Render menu and selecting Render Image.What are Blender's main rendering engines?
Blender includes Cycles and Eevee as its main rendering engines.Can Blender be used for 2D animation?
Yes, Blender has a Grease Pencil tool for 2D animation.What is UV unwrapping?
UV unwrapping is the process of projecting a 3D model's surface onto a 2D plane for texturing.How do I learn Blender?
There are many resources including Blender’s own documentation, tutorials, and online courses.What are Blender’s shortcuts?
Blender has numerous keyboard shortcuts for different functions, which can be customized in the Preferences.Can Blender simulate physics?
Yes, Blender can simulate physics including soft bodies, rigid bodies, and fluids.What is Blender’s node system?
The node system in Blender is used for creating materials, textures, and compositing by connecting nodes.Is Blender suitable for game development?
Yes, Blender is widely used for creating game assets and can export to game engines like Unity and Unreal Engine.Can I use Blender for 3D printing?
Yes, Blender can create models for 3D printing, often exported in STL format.What is Blender’s Python API?
Blender’s Python API allows for scripting and automation of tasks within Blender.How do I save my work in Blender?
Blender projects are saved in .blend files, which include all aspects of your scene.Can I customize Blender’s UI?
Yes, Blender’s UI is highly customizable, allowing you to save different layouts and workspace configurations.What is Vagon and how does it enhance Blender 3D usage?
Vagon is a cloud-based platform that provides high-performance virtual computers for digital artists. It enhances Blender 3D usage by offering powerful cloud computing resources, enabling users to handle complex rendering tasks and large projects without the need for expensive local hardware.Can I run Blender 3D on Vagon’s virtual machines?
Yes, Blender 3D can be run on Vagon’s high-performance virtual machines. Vagon's infrastructure is optimized to support Blender, ensuring smooth performance and efficient rendering capabilities for 3D modeling, animation, and simulation tasks.How do I get started with Blender 3D on Vagon?
Getting started with Blender 3D on Vagon is easy, as Blender comes preinstalled on Vagon's virtual machines. Simply sign up for a Vagon account, choose a virtual machine configuration that suits your needs, and start creating and rendering your projects using Vagon’s robust cloud infrastructure.
Welcome to the world of Blender 3D! Blender is a free, open-source 3D creation suite. Whether you're into modeling, animation, or game design, Blender has it all. It's powerful, versatile, and user-friendly.
"Blender is a public project, made by hundreds of people from around the world; by studios and individual artists, professionals and hobbyists, scientists, students, VFX experts, animators, game artists, modders, and more."
– Blender Foundation
What You’ll Learn?
This guide is your A-Z resource on Blender. From basics to advanced techniques, we've got you covered. Whether you’re a beginner or looking to sharpen your skills, this guide will help you master Blender. We'll deep dive into why Blender 3D is a great choice for digital designers and explore its robust capabilities.
You can also check out our GPU Guide for tips to use GPU, along with speed up and acceleration tips for Blender 3D.
Why Blender Matters?
Blender is more than just a tool. It's a gateway to creativity. Used in many fields, its applications are vast and varied.
Film and Animation: Create stunning visuals and animations.
Game Development: Design game assets and environments.
Architecture: Build realistic architectural visualizations.
Product Design: Prototype and visualize products.
Art and Illustration: Craft digital sculptures and art.
Blender’s impact spans across various industries. Its importance in modern design and visualization cannot be overstated. From Hollywood blockbusters to indie game projects, Blender is a go-to tool for many professionals. In this guide, we'll look closely into Blender 3D's capabilities and diverse use cases.
The Power of Blender
Blender is unique in its ability to combine multiple functionalities in one package. This versatility makes it a favorite among creatives.
Modeling: Create intricate 3D models with ease.
Sculpting: Sculpt detailed and complex characters.
Animation: Animate objects and characters with precision.
Rendering: Produce photorealistic images and videos.
Compositing: Integrate 3D elements into live footage.
Simulation: Simulate physics, smoke, and fluids.
Why Choose Blender?
There are several compelling reasons to choose Blender as your 3D tool of choice.
Free and Open Source: No cost barrier. Accessible to everyone.
Community Support: Vast online community for help and tutorials.
Regular Updates: Constantly improving with new features.
By the end of this guide, you’ll understand why Blender is a favorite among 3D artists. Ready to dive in? Let's get started!
Chapter 1: Getting Started with Blender 3D
So, you've decided to dive into the world of digital art and 3D design. Maybe you've seen stunning animations, breathtaking game environments, or hyper-realistic product visualizations and thought, "I want to create that." Welcome to Blender 3D—a powerful and versatile open-source 3D creation suite that makes these dreams possible. From modeling to animation, rendering, and beyond, Blender offers a comprehensive array of tools for digital artists. Its journey from a small in-house tool to a globally recognized software is nothing short of remarkable.
History and Evolution of Blender 3D
Blender's story begins in 1994 with Ton Roosendaal at NeoGeo, a Dutch animation studio. Imagine the challenges of the early days of 3D animation, with clunky software and limited resources. Ton's vision was clear: create a tool that would empower artists to bring their wildest ideas to life. The name "Blender," inspired by a song by the Swiss band Yello, was a testament to this creative spirit.
In 1998, Roosendaal founded Not a Number (NaN) to develop and market Blender as a commercial product. The goal was ambitious—make professional-level 3D tools accessible to everyone. Blender made waves at its first SIGGRAPH conference in 1999, drawing significant attention and investment. But the journey was far from smooth. Financial hurdles and market pressures led NaN to bankruptcy in 2002.
Undeterred, Roosendaal launched the Blender Foundation in May 2002. With a bold "Free Blender" campaign, he aimed to buy back Blender's rights and release it as open-source software. The community rallied, raising €100,000 in just seven weeks. On October 13, 2002, Blender was reborn under the GNU General Public License (GPL), ensuring its freedom and continuous development by a passionate community.
Blender's transformation into open-source software sparked a wave of innovation. The Blender Foundation and the Blender Institute, established in 2007, initiated several open movie projects to push Blender's capabilities. Projects like "Elephants Dream" (2006), "Big Buck Bunny" (2008), and "Sintel" (2010) not only showcased Blender's potential but also helped refine the software with real-world challenges.
The release of Blender 2.5 in 2009 marked a pivotal moment. A major overhaul of the user interface and toolset made Blender more accessible and powerful. Blender 2.8, released in 2019, introduced groundbreaking features like the real-time rendering engine EEVEE, revolutionizing usability and performance. This version catapulted Blender into the 3D mainstream, attracting contributions from major companies and establishing it as a top choice for 3D creation.
Key Features and Capabilities
Blender's extensive feature set is a testament to its evolution and the dedication of its community. Imagine the possibilities with these tools at your fingertips.
With Blender's modeling capabilities, you can create intricate structures and transform basic shapes into detailed 3D models. Sculpting tools allow you to craft characters with fine details, breathing life into your creations.
The animation tools are equally impressive, offering rigging, keyframing, and dynamic scene creation. For rendering, Blender's EEVEE and Cycles engines produce stunning, photorealistic images and videos, ensuring your projects look professional.
Blender's compositing system uses a node-based approach, seamlessly integrating 3D elements into live footage. The simulation features, including physics, fluid, smoke, and particle simulations, add a layer of realism that can make your projects truly stand out. And with the integrated video editor, you have a complete suite for post-production tasks.
Blender's journey from a niche tool to a globally respected software is a testament to the power of community and open-source development. As you embark on your journey with Blender, know that you are part of a vibrant, supportive community dedicated to creativity and innovation.
Why Keeping Up With Blender News Matters?
Staying updated with the latest advancements in Blender is crucial for any digital artist. Blender is an ever-evolving tool with frequent updates and new features that can significantly enhance your workflow. Each update brings new capabilities, performance improvements, and bug fixes, keeping Blender at the cutting edge of 3D software.
Blender’s development is driven by a dynamic community of developers and artists. New updates introduce powerful tools that make complex tasks easier and more efficient. Staying informed allows you to incorporate the latest advancements into your projects, whether it's a new rendering engine, improved modeling tools, or enhanced animation features.
Where to Follow Blender News?
The Blender Official Blog is the best place to start. Here, you’ll find detailed posts about each new release, upcoming features, and insights into the development process. You can also check Vagon Blog for news on the Blender 4.1 Update. Another excellent resource is the Digital Art category of Vagon’s blog, which offers news and articles about digital art and 3D design, including Blender updates, tutorials, tips, and industry news.
Comparisons to Other Software: Find the Best Fit for Your Needs
Choosing the right software can be overwhelming for digital artists, architects, and designers. With numerous alternatives available, deciding where to start can be challenging. Blender 3D stands out for its versatility and open-source nature, but understanding how it compares to other industry-leading tools is crucial. Blender can also complement other applications, enhancing your 3D design workflow for various industries, including game design, architecture, and animation.
Blender vs. Popular 3D Software: Which One Suits You Best?
For many, the first comparison is between Blender and other general-purpose 3D software. Tools like Cinema 4D, Autodesk Maya, and Houdini are often considered direct competitors.
Cinema 4D: Known for its user-friendly interface and powerful motion graphics capabilities. Compare Blender and Cinema 4D to see which fits your needs better.
Autodesk Maya: A staple in the animation industry, Maya offers extensive tools for complex animations. Read the comparison between Blender and Maya to understand their differences.
Houdini: Famous for its procedural generation capabilities, Houdini is a go-to for VFX artists. Learn more in this Blender vs. Houdini comparison.
Industry-Specific Alternatives: Tailored Tools for Your Projects
Blender’s versatility makes it a strong contender across various industries. However, specialized software may offer features tailored to specific needs. Blender 3D can also serve as a supplementary tool in a broader workflow. For instance, you might model and animate in Blender but use another software for rendering or game development. This flexibility makes Blender a valuable asset in any digital artist's toolkit, providing robust capabilities without the cost barrier.
Game Design: Blender vs. Game Engines
While Blender excels in modeling and animating game assets, game engines like Unity and Unreal Engine provide the infrastructure to bring these assets to life. Explore the differences in these comparisons:
Architectural Visualization: Blender vs. KeyShot
For architectural visualization, Blender is powerful, but dedicated tools like KeyShot offer specialized features for rendering and material visualization. See how they compare in the Blender vs. KeyShot comparison.
3D Sculpting: Blender vs. ZBrush
Artists specializing in detailed character modeling often choose between Blender and ZBrush. Discover the strengths of each in the Blender vs. ZBrush comparison.
Video Editing: Blender vs. Premiere Pro
Blender includes a video editor, but professionals often debate between it and Adobe Premiere Pro for post-production. Check out the Blender vs. Premiere Pro comparison.
Installing Blender 3D: Ready to Start
Ensuring Your System is Ready
Before diving into the installation process, it’s essential to ensure your computer meets Blender’s system requirements. While Blender can run on modest hardware, a more powerful setup will enhance your experience and unlock the full potential of this versatile tool.
Minimum Requirements:
Operating System: Windows 8.1, macOS 10.13, or a Linux distribution with glibc 2.17
CPU: Dual-core 2 GHz
RAM: 4 GB
Graphics: OpenGL 2.1-compatible GPU
Disk Space: 2 GB
Recommended Specifications:
Operating System: Windows 10, macOS 10.15, or a recent Linux distribution
CPU: Quad-core Intel/AMD, 3 GHz or faster
RAM: 16 GB
Graphics: OpenGL 3.3-compatible GPU
Disk Space: SSD with 10 GB free
Downloading Blender: The First Step Towards Mastery
Now that you’ve decided to continue with Blender 3D, let’s look at how to download and install it in the most optimized way.
To get Blender, visit the Blender Official Download Page. Choose your operating system and click the “Download Blender” button. Blender is also available on platforms like Steam, Pop Shop, and the Microsoft Store for convenient installation.
Step-by-Step Installation Guide
Installing Blender on Windows
Run the Installer: Locate the downloaded MSI file, usually named “blender-x.xx-windows64.msi” (with “x.xx” representing the version number). Double-click it to start the installation.
Installation Options: Follow the installer prompts. You can choose the installation directory and decide if you want shortcuts on the desktop and in the Start menu.
Installation Progress: The installer will copy Blender files to your selected directory. This may take a few moments.
Completing the Installation: Once the installation is complete, click “Finish.” Blender is now installed and can be launched from the desktop or Start menu.
Installing Blender on macOS
Install Blender: Locate the downloaded DMG file, usually named “blender-x.xx-macOS.dmg.” Double-click it to open.
Drag Blender to Applications: Inside the DMG window, drag the Blender icon into the Applications folder.
Launch Blender: Close and eject the DMG window. Find Blender in your Applications folder and double-click it to launch.
Installing Blender on Linux
Extract Blender Installation File: Navigate to the directory with the downloaded tar.gz file. Right-click and select “Extract” or use the command line to extract the files.
Run Blender: In the extracted folder, find the Blender executable file named “blender” or similar. Double-click this file to run Blender.
Alternative Method: Use Snap to install Blender with the command snap install blender --classic.
Initial Setup and Configuration: Tailor Blender to Your Needs
Upon launching Blender for the first time, you’ll be greeted with the default interface. Here are a few initial setup steps to get you started:
Customize Preferences:
Go to Edit > Preferences to access settings for interface scaling, theme adjustments, and navigation tweaks.
Enable useful built-in add-ons like Node Wrangler, Copy Attributes, and Extra Objects for enhanced functionality.
Set Up Add-ons:
Enable built-in add-ons via Edit > Preferences > Add-ons.
Install third-party add-ons by downloading the ZIP file and using the Install button in the Add-ons tab.
Save Your Preferences:
After adjusting settings, save your preferences to ensure your custom setup is loaded every time you start Blender.
With Blender installed and configured, you're ready to design your 3D dreams.
User Interface Overview: Mastering Blender 3D
Navigating the Blender 3D Interface: Your Creative Playground
Blender's interface might seem complex at first, but it’s designed to be intuitive once you understand its layout. Let’s break down the key components of Blender’s workspace.
What is the Blender 3D Interface Layout?
When you first open Blender, you’ll see a variety of panels and menus, each with its own purpose:
Toolbar: Located on the left, it contains tools for transforming objects, adding new elements, and other functions that change depending on the mode (e.g., Object Mode, Edit Mode).
3D Viewport: The central area where you interact with your 3D models and scenes. This is where most of your creative work happens.
Outliner: On the top right, it provides a hierarchical view of all objects in your scene, helping you manage and organize your project.
Properties Panel: Found on the bottom right, it offers detailed settings and options for selected objects, including modifiers, materials, and scene properties.
Timeline: At the bottom, this is essential for animation, allowing you to control keyframes and the sequence of your animations.
Header: At the top, it contains menus for file operations, rendering, and switching between different workspaces.
How to Navigate the 3D Viewport?
Navigating the 3D viewport efficiently is crucial:
Orbit: Middle mouse button (MMB) + drag.
Pan: Shift + MMB + drag.
Zoom: Scroll wheel or Ctrl + MMB + drag up/down.
Select: Right-click to select objects.
Move/Rotate/Scale: Use the 'G' key for grab/move, 'R' for rotate, and 'S' for scale.
Customizing the Workspace: Make Blender Work for You
Why Customize Your Workspace?
Customizing your workspace can significantly enhance your productivity by providing quick access to the tools and views you use most frequently. Blender’s flexibility allows you to create tailored workspaces for modeling, sculpting, texturing, and animating. It is also important to design an efficient 3D asset management methodology in Blender 3D.
How to Customize Your Workspace?
Splitting Areas: Hover over the edge of an area until you see a crosshair. Right-click and select "Split Area" to divide the window into separate panels.
Merging Areas: Hover over the edge of an area, right-click, and select "Join Area" to merge two panels.
Switching Editors: Click on the editor type dropdown in the top-left corner of any panel to change it to a different editor, such as the Shader Editor, UV/Image Editor, or Video Sequencer.
Saving Layouts: After customizing your workspace, go to the top menu bar, select the "+" icon next to the current workspace name, and click "Save Startup File" to keep your changes.
Essential Shortcuts and Commands: Speed Up Your Workflow
What are the Key Shortcuts in Blender?
Blender’s efficiency heavily relies on keyboard shortcuts. Here are some must-know shortcuts:
G: Grab/Move
R: Rotate
S: Scale
E: Extrude
Ctrl + Z: Undo
Shift + D: Duplicate
Tab: Toggle between Object Mode and Edit Mode
Ctrl + R: Loop Cut
B: Box Select
F3: Search for any operator by name
For a more detailed list, check out this Blender Shortcuts and Hotkeys guide.
Basic Blender Glossary: Essential Terms Explained
What is Object Mode?
Object Mode is the default mode in Blender where you can manipulate whole objects. It's used for positioning, scaling, and rotating objects within your scene.
What is Edit Mode?
Edit Mode allows you to edit the individual vertices, edges, and faces of a mesh. This mode is where you do detailed modeling and shaping of your objects.
What is a Modifier?
Modifiers are non-destructive operations that affect an object’s geometry in various ways. For example, the Subdivision Surface modifier smooths a mesh, while the Boolean modifier can cut or join objects.
What is the Outliner?
The Outliner is a hierarchical view of all the objects in your scene. It helps you organize and manage the elements of your project, allowing you to easily hide, select, or parent objects.
What are Nodes?
Nodes are used in Blender’s Shader Editor, Compositor, and Geometry Node Editor. They allow for a visual, node-based approach to creating complex materials, effects, and geometries by connecting different operations.
What is the Timeline?
The Timeline is crucial for animation. It displays a sequence of frames where you can place keyframes to animate properties over time, controlling the flow and timing of your animations.
Troubleshooting in Blender
Blender is a widely supported open-source platform, and it receives many updates to match the industry standards. However, there can be common bugs as with all other software, especially if you are running Blender on a low-end device. Luckily, the strong community can help fix your Blender problems if it isn’t fixed with the next update. You can also check out our Solutions to Common Blender Problems. Vagon’s Cloud Computing solution can always help run Blender and many other applications smoothly.
Chapter 2: Blender 3D Industry Applications
Film and Animation
Blender 3D is a powerful tool in the film and animation industry, offering a comprehensive suite of features that enable filmmakers to create stunning visuals. Notable films and animations created with Blender include "Elephants Dream," "Big Buck Bunny," "Sintel," and "I Lost My Body." These projects highlight Blender’s ability to produce professional-grade animations and visual effects. These are just a few examples of many movies made with Blender.
Techniques and Workflows in the Film Industry
In the filmmaking process, Blender is utilized for various tasks such as modeling, rigging, animation, and rendering. The software’s powerful Cycles and EEVEE render engines allow for photorealistic visual effects and smooth animations.
“With Blender, we knew that most of our scenes would be possible. It also proved that it doesn't have to hide behind its pricey competitors”
— Alexander Heringer, a Filmmaker
Game Development
Blender plays a crucial role in game development by providing robust tools for creating game assets and environments. Its modeling, texturing, and animation capabilities are essential for designing characters, props, and dynamic game worlds.
Blender's Role in Creating Game Assets
Game developers rely on Blender to model and rig characters, build detailed environments, and create realistic textures. The software’s UV mapping and texture painting tools are particularly useful for achieving high-quality game assets. Check out our tips and tricks for UV mapping to master the tool.
Optimizing Game Assets
Finding the right balance of optimizing your game assets is crucial both for the development process and the end product. Everybody wants to achieve the most optimized assets without compromising resolution. Luckily, there are many Techniques to Optimize Game Assets in Blender to help you find your perfect balance of asset optimization.
Integration with Game Engines
Blender integrates seamlessly with popular game engines like Unity and Unreal Engine. This integration enables developers to export their Blender-created assets directly into their game projects, ensuring a smooth and efficient workflow.
"Blender’s approachable and non-destructive modeling tools and modifiers, along with its real-time viewport Eevee, make it a fantastic tool for game development.”
— Daniel Bystedt, a Senior Character Artist at Embark Studios
Architecture and Visualization
Blender is a powerful tool for architectural visualization, enabling architects and designers to create realistic renderings and immersive walkthroughs of their projects. Check out our guide to Architectural Modeling in Blender to see how.
Using Blender for Architectural Visualization
Architects use Blender to model buildings, interiors, and landscapes with precision. The software’s advanced modeling tools allow for accurate representation of architectural designs. Blender’s lighting and shading tools help create photorealistic renders that are essential for client presentations and marketing materials.
Realistic Rendering and Walkthroughs
Blender’s Cycles render engine produces high-quality, photorealistic images, crucial for showcasing the final look of a project before it is built. Virtual walkthroughs created in Blender provide an immersive experience, allowing clients to explore the space as if it were already constructed.
"Blender's tools are a perfect mixture between the freedom to create in Maya with the inherent and very easy-to-use parametricism that can achieve results like Grasshopper while preserving some of the precision that people may be used to from Rhino and Sketchup."
— Dimitar Pouchnikov, an ArchViz designer at UH Studio Academy
Art and Design
Blender is highly regarded among digital artists for sculpting, modeling, and creating visual art and illustrations. Its comprehensive set of tools supports a wide range of artistic endeavors.
Blender for Digital Sculpting and 3D Modeling
Artists use Blender’s sculpting tools to create detailed characters and intricate designs. The software’s dynamic topology and multiresolution sculpting features allow for high levels of detail and flexibility. Blender also supports a range of brushes and sculpting techniques, making it a preferred tool for digital sculptors.
Creating Visual Art and Illustrations
Blender’s robust rendering capabilities enable artists to produce high-quality illustrations and visual art. The Grease Pencil tool is particularly popular for creating 2D animations and storyboards within a 3D environment.
"I’m a donut tutorial survivor and I still get flashbacks from the first several weeks in Blender where I almost punched a hole through my screen. It’s not supposed to be easy at first, no 3D artist had an easy time from day one. It takes time, self-discipline, and patience, but if you keep pushing through I promise you’ll get to the other side where Blender becomes your playground”
— Sarah B. Oemig, a Digital Modelling Artist
Blender’s versatility and powerful feature set make it an indispensable tool across various industries. Whether you are creating films, developing games, visualizing architectural projects, or crafting digital art, Blender provides the tools you need to bring your creative visions to life.
Chapter 3: Essential Equipment for Blender 3D
Understanding Blender 3D's Hardware Needs
Blender 3D is a comprehensive software suite that utilizes a variety of computer hardware resources to perform tasks such as modeling, texturing, rendering, and animation. The performance of Blender is heavily influenced by the specifications of the computer it runs on, particularly the CPU, GPU, RAM, and storage. Optimizing these components can significantly enhance your workflow and reduce rendering times.
Recommended Specifications for Optimal Performance
CPU (Central Processing Unit)
Blender relies heavily on the CPU for various tasks, including modeling, simulations, and some rendering processes. Multi-core CPUs are particularly beneficial as Blender can utilize multiple cores for faster computation.
Recommended CPU: AMD Ryzen 9 5950X or Intel i9-11900K. These CPUs offer excellent multi-threaded performance, which is ideal for handling complex calculations in Blender.
GPU (Graphics Processing Unit)
The GPU is crucial for rendering tasks, especially when using Blender’s Cycles or EEVEE render engines. A powerful GPU can significantly reduce rendering times and improve real-time viewport performance.
Recommended GPU: NVIDIA RTX 3080 or NVIDIA Quadro RTX 4000. These GPUs are known for their high CUDA core counts, which are beneficial for GPU-accelerated rendering in Blender.
RAM (Random Access Memory)
RAM is essential for managing the data Blender uses, especially for large scenes with high-polygon models and detailed textures. More RAM allows Blender to handle larger files more efficiently.
Recommended RAM: 32GB or more. For complex projects and heavy multitasking, 64GB is advisable.
Storage
Fast storage solutions like SSDs (Solid State Drives) are essential for quick data access and reduced loading times. NVMe SSDs offer even faster speeds compared to traditional SATA SSDs.
Recommended Storage: At least 1TB NVMe SSD. This ensures ample space for projects and fast read/write speeds.
Other Hardware Considerations
Display
A high-resolution, color-accurate display is important for detailed work and accurate color representation in your projects.
Recommended Display: 2K or 4K monitor with good color accuracy (e.g., 100% sRGB coverage).
Cooling and Power Supply
Ensure your PC has adequate cooling and a reliable power supply to maintain performance and prevent overheating during intensive tasks.
Suggested Computers for Blender 3D
Based on our blog post, which curates the best computers for Blender 3D, here are some computer suggestions tailored to different budgets:
High-Performance Option
HP Z4 G4 Workstation
CPU: Intel Xeon Quad-Core 3.7GHz
GPU: NVIDIA Quadro RTX 4000
RAM: 32GB
Storage: 512GB NVMe SSD
Display: 2K, color-accurate
Budget-Friendly Option
Custom AMD Build with Ryzen 9 5950X
CPU: AMD Ryzen 9 5950X (16 cores, 32 threads)
GPU: NVIDIA RTX 3080
RAM: 64GB
Storage: 1TB NVMe SSD
Display: 4K, color-accurate
Entry-Level Option
Acer Nitro
CPU: Intel Core i5-9400F
GPU: NVIDIA GeForce GTX 1650
RAM: 8GB
Storage: 512GB SSD
Display: 1080p
Custom-Built vs. Pre-Built: Pros and Cons
Choosing between a custom-built and a pre-built PC depends on your needs, technical expertise, and budget.
Custom-Built PCs
Pros:
Flexibility to choose specific components
Potential cost savings
Cons:
Requires technical expertise
Longer assembly time
Pre-Built PCs
Pros:
Convenience
Warranty covering the entire system
Cons:
Limited customization
Potential higher cost for similar performance
Enhancing Blender Performance
Once you have the ideal PC setup, you can further optimize Blender’s performance by adjusting its settings, even for low-end PCs. By fine-tuning various aspects of Blender, you can achieve smoother workflows and faster rendering times. Here are some effective strategies:
Adjust Viewport Settings: Use the simplify options in Blender to reduce the complexity of the viewport display. This can help in handling high-polygon scenes more efficiently.
Turn Off Shadows in Workbench Viewport: Disabling shadows in the workbench viewport can improve performance by reducing the computational load.
Fine-Tune Render Settings: Balance quality and speed by adjusting render settings. Lowering sample rates for previews and increasing them for final renders can save time.
Utilize Caching Options: For simulations and animations, leverage Blender’s caching options to store data and reduce computation times during playback.
Use Proxy Videos for Complex Scenes: Implement proxy videos to simplify the viewport representation of complex scenes, improving navigation and responsiveness.
Input Devices
Graphics Tablets and Styluses
Graphics tablets and styluses are indispensable tools for digital artists working with Blender 3D. They provide precision and control that a regular mouse cannot match, making tasks like sculpting and detailed modeling much more intuitive.
Wacom Cintiq 22
Display: 15.6-inch Full HD
Pen Pressure Levels: 8192
Pros: Excellent color representation, responsive pen, comfortable to use, no need to charge the stylus.
Cons: Lacks multi-touch capabilities, brightness could be better.
Ideal For: Professionals seeking a reliable and high-quality drawing experience.
Huion Kamvas Pro 16
Display: 15.6-inch IPS, 1920 x 1080 pixels
Pen Pressure Levels: 8192
Pros: Excellent display quality, affordable, responsive.
Cons: Customizable keys are too close to the power button.
Ideal For: Artists on a budget who need a quality drawing tablet.
XP-Pen Artist Pro 16 (Gen 2)
Display: 2560 x 1600
Pen Pressure Levels: 16000
Pros: Affordable, sharp display, adjustable brightness.
Cons: Fixed stand angle.
Ideal For: Artists seeking a balance between cost and features.
3D Mice and Controllers
3D mice and controllers enhance navigation and precision within Blender, making them particularly useful for 3D modeling and sculpting.
3Dconnexion SpaceMouse Pro
Features: Ergonomic design, customizable buttons, 6-degrees-of-freedom sensor.
Pros: Improves navigation efficiency, comfortable to use for long periods.
Cons: Expensive.
Ideal For: Professionals who spend a lot of time navigating 3D environments.
3Dconnexion SpaceMouse Compact
Features: Two-button layout, compact design.
Pros: Affordable, easy to use.
Cons: Limited functionality compared to SpaceMouse Pro.
Ideal For: Beginners and those on a budget.
Regular Peripherals (Mouse, Keyboard)
While specialized devices are essential for certain tasks, having a reliable mouse and keyboard setup is also crucial for an efficient workflow in Blender.
Logitech MX Master 3
Features: Customizable buttons, ergonomic design, high precision.
Pros: Excellent for long hours of use, highly customizable.
Cons: Higher price point.
Ideal For: Professionals who need a reliable and ergonomic mouse.
Razer BlackWidow Elite
Features: Mechanical switches, customizable RGB lighting, programmable keys.
Pros: Durable, responsive, great for shortcut assignments.
Cons: Loud key switches.
Ideal For: Users who prefer mechanical keyboards and need customizable keys.
By choosing the right input devices and peripherals, you can significantly enhance your productivity and comfort while working with Blender 3D.
Chapter 4: Getting to Know Blender’s Tools and Features
Modeling
Basics of 3D Modeling
Blender’s 3D modeling capabilities are foundational to any project. You’ll start by exploring different types of modeling: mesh, curve, surface, and text. Mesh modeling is the most common type, involving the manipulation of vertices, edges, and faces to create 3D shapes. Essential tools like Extrude, Loop Cut, and Knife are crucial. The Modifier stack allows for non-destructive editing, enabling experimentation and refinement of your models. Check out our list of Blender Tips and Tricks to master 3D modeling.
Techniques and Tools for Creating Models
Blender offers advanced modeling techniques and tools to enhance your workflow. Sculpting tools are ideal for organic modeling, perfect for characters and complex shapes. Boolean operations let you add or subtract objects to create intricate details. Blender’s snapping and precision modeling tools, like the 3D cursor and grid snapping, ensure accurate alignment and positioning of objects. Expertise of these tools is crucial for creating high-quality 3D models efficiently. Mastering the 3D Cursor can prove to be invaluable, and we have the right guide for you.
Texturing and Shading
Applying Textures and Materials
Applying textures and materials is key to bringing your models to life. Blender’s Material Properties panel lets you assign materials, defining surface properties like color, reflectivity, and transparency. UV unwrapping is essential for accurately applying textures to your 3D model. Blender’s node-based shader editor provides immense flexibility, allowing you to combine different texture maps and procedural textures to create complex materials.
Understanding Shaders and Nodes
Blender’s shader system is powerful and versatile, using a node-based approach. Shaders define how light interacts with surfaces. Understanding basic shaders like Diffuse, Glossy, and Emission is crucial. By connecting nodes such as texture coordinates, noise textures, and math operations, you can create a wide range of materials, from realistic metal to abstract procedural textures. Mastering nodes allows for dynamic and intricate material effects.
Animation
Basics of Animation in Blender
Blender’s animation system is robust, offering tools for keyframe animation, motion paths, and non-linear animation. The Timeline and Graph Editor are fundamental for controlling timing and interpolation. Understanding the Dope Sheet is crucial for managing multiple keyframes and adjusting animation curves for smoother transitions. Learning principles like easing, anticipation, and follow-through help create believable and engaging animations.
Rigging and Character Animation
Rigging involves creating a skeleton for a 3D model so it can be animated. Blender’s Armature system allows for bone creation, which can be parented to the mesh with weight painting. This is vital for character animation. Blender also supports inverse kinematics (IK), simplifying the animation of complex movements. Additionally, Blender’s Pose Library helps manage different character poses, streamlining the animation process.
Creating Realistic Motion and Effects
Blender excels at creating realistic motion and effects, from simple transformations to complex simulations. Using constraints, you can control object movements for more natural animations. Blender’s particle system allows for effects like fire, smoke, and fluid simulations, adding dynamic realism to your scenes. The Animation Nodes add-on provides even more control, enabling procedural animations and effects.
Virtual Reality
Blender 3.0 VR Update
The Blender 3.0 update brought significant improvements to VR capabilities, including better support for VR headsets and enhanced performance. This allows for more immersive and interactive VR content creation, making Blender a powerful tool for virtual reality development. Our how-to guide on creating VR Content with Blender can help you kickstart your VR content creation process with tips and tricks to ensure a smooth workflow.
VR Scenes in Blender
Creating VR scenes in Blender involves setting up your project for VR compatibility, including proper scene scaling and camera settings. The VR Scene Inspection add-on lets you preview and navigate your scenes using VR headsets, providing a true sense of scale and depth. Optimizing VR content, such as reducing polygon count and efficient texture use, is crucial for maintaining performance. Exporting VR content in compatible formats ensures that your scenes can be viewed on various VR platforms.
Rendering
Introduction to Rendering Engines (Cycles, Eevee)
Blender offers two primary rendering engines: Cycles and Eevee. Cycles is known for high-quality, photorealistic renders, leveraging GPU acceleration for faster performance. Eevee is a real-time rendering engine, ideal for interactive previews and less demanding projects. Understanding the strengths and use cases of each engine is vital for choosing the right tool for your project.
Rendering Techniques and Settings
Optimizing render settings is essential for balancing quality and performance. In Cycles, techniques like denoising, adaptive sampling, and light path management can significantly reduce render times while maintaining quality. Eevee offers screen-space reflections, ambient occlusion, and volumetric effects, powerful tools for achieving realistic results in real-time. Using render layers and passes allows for greater control in post-processing. Learning Eevee essentials is crucial for a better Blender experience.
Post-Processing and Compositing
Post-processing enhances your renders. Blender’s Compositor provides a node-based environment to combine render passes, apply color corrections, and add effects like bloom and lens flares. Techniques such as depth of field, motion blur, and filmic color management help achieve a cinematic look. Understanding how to use masks and alpha channels is crucial for integrating rendered elements seamlessly into live-action footage.
Additional Tools and Features
Physics Simulations
Blender includes robust physics simulation tools for creating realistic behaviors such as soft body dynamics, rigid body dynamics, cloth, and fluid simulations. These tools allow you to create complex interactions and animations that mimic real-world physics.
Grease Pencil
The Grease Pencil tool in Blender allows for 2D animation within the 3D environment. This tool is perfect for creating storyboards, 2D animations, and complex hybrid 2D/3D animations, offering a wide range of brushes and tools for drawing and animating.
Motion Tracking and VFX
Blender’s motion tracking and VFX tools are powerful for integrating 3D elements into live-action footage. The motion tracking toolset allows you to track the movement of objects and camera motion within a video clip, enabling seamless integration of 3D elements. The VFX tools include masking, green screen keying, and rotoscoping capabilities.
Scripting and Automation
Blender’s Python API allows for scripting and automation of repetitive tasks. This feature is invaluable for creating custom tools, automating workflows, and extending Blender’s capabilities. Whether developing add-ons or automating complex sequences of operations, scripting can significantly enhance productivity. Learn the basics of Python in Blender to supercharge your Blender workflow.
Collaboration and Asset Management
Blender’s asset management tools, including the Asset Browser, help you organize and manage your project’s assets efficiently. This is particularly useful for collaborative projects, allowing multiple artists to work together seamlessly. The ability to link and append assets across different Blender files ensures consistency and efficiency in larger projects.
Templates
The availability of templates for Blender makes it extremely easy to start creating. Check out the Top Blender Templates that best fits your needs. The templates available for Blender are highly customizable, so you can both get a headstart on your project as well as achieving unique results. Whether you’re an architect, game developer, or motion graphics designer, there is a Blender Template for you, so not checking the available templates will be a missed opportunity.
Chapter 5: Learning and Community Resources for Blender 3D
Mastering Blender 3D requires continuous learning and active participation in the community. From online courses and tutorials to books and community events, numerous resources can help you stay updated and enhance your skills. In this section, we'll explore the best resources available for Blender 3D enthusiasts, helping you find the right tools to improve your expertise.
Best Blender 3D Courses
For structured learning, online courses are invaluable. Platforms like Udemy, Coursera, and Blender Cloud offer comprehensive courses that cover all aspects of Blender, from beginner to advanced levels.
Udemy: Known for its extensive catalog, Udemy offers courses like Blender 3D: Your First 3D Character and Blender 3D from hero to zero, which are great for beginners and intermediate users.
Coursera: Provides university-level courses such as Introduction to 3D Modeling with Blender from Michigan State University, perfect for those seeking a more academic approach.
Blender Studio: The official platform offers in-depth courses created by the Blender Foundation, ensuring up-to-date and comprehensive learning material.
These courses provide a structured learning path and are highly recommended for anyone serious about mastering Blender.
Top Blender Tutorials
Blender tutorials are essential for learning specific techniques and workflows. Websites like Blender Guru and YouTube channels by creators like CG Cookie provide high-quality tutorials that cater to various skill levels.
Blender Guru: Known for the popular "Blender Beginner Tutorial Series," which covers everything from basics to advanced techniques, making it a go-to resource for new users.
CG Cookie: Offers tutorials focused on character creation, animation, and more, providing in-depth knowledge and practical skills.
Essential Reading for Blender Users
Books are excellent for deep dives into Blender's functionalities and concepts. Here are some must-read books for Blender users:
"Blender for Dummies" by Jason van Gumster: A comprehensive guide for beginners, covering all the basics and more.
"Blender Master Class" by Ben Simonds: Offers advanced techniques and project-based learning, perfect for users looking to deepen their knowledge.
"The Art of Blender" by David Revoy: Focuses on artistic aspects and professional tips, making it an invaluable resource for digital artists.
Major Blender Community Events and Conferences
Attending Blender events and conferences is a great way to network with professionals and stay updated on the latest developments.
Blender Conference: Held annually in Amsterdam, it's the biggest event for Blender enthusiasts, featuring workshops, talks, and networking opportunities.
Blender Day: Regional events held in various countries, providing local networking opportunities and community engagement.
Attending these events provides numerous benefits, including the opportunity to learn from experts, see the latest updates and features in action, and connect with other Blender users. This networking can lead to collaborations, job opportunities, and enhanced learning. There are many events and conferences for Blender, which we have listed for you in our blog post.
Online Blender 3D Communities and Forums
Participating in online communities and forums is crucial for support and collaboration. Here are some active platforms:
Blender Artists: A forum for sharing work, getting feedback, and troubleshooting.
Reddit (r/blender): A vibrant community for discussions, tips, and showcasing projects.
Blender Stack Exchange: A Q&A site where users can ask specific questions and get detailed answers.
Engage with these communities to inspire from their collective knowledge and experience. Whether you're looking for feedback on a project, troubleshooting a problem, or just wanting to connect with fellow Blender enthusiasts, these forums are invaluable resources.
Chapter 6: Expanding Blender’s Capabilities with Assets, Plugins, Models & Textures
Add-ons and Plugins
Blender add-ons extend the functionality of the software, offering tools and features that streamline workflows and enhance productivity. These plugins can automate repetitive tasks, provide new modeling tools, and integrate external resources seamlessly. Understanding what add-ons are, why they are useful, and how to manage them is crucial for maximizing Blender's potential.
Essential Add-ons for Various Tasks
Blender’s vast community has developed numerous plugins to cater to different aspects of 3D creation. Here are some essential ones:
Node Wrangler: This add-on simplifies the shader creation process by adding shortcuts and tools to manage nodes efficiently. It’s a must-have for anyone working with materials and textures.
Hard Ops and Boxcutter: Perfect for hard surface modeling, these plugins assist in creating complex models and shapes with ease, making them indispensable for advanced modeling tasks.
MeasureIt: Essential for precise modeling, this tool allows you to add measurements to your models, ensuring accuracy in your designs.
BlenderKit: Provides an online database of materials, models, and brushes that can be directly loaded into Blender, making it easy to enhance your scenes with high-quality assets.
Installing and Managing Add-ons
Installing add-ons in Blender is straightforward. Navigate to Edit > Preferences > Add-ons, then click Install and select the add-on file. Once installed, you can enable or disable add-ons as needed. Efficiently managing add-ons ensures that Blender runs smoothly without unnecessary bloat.
Assets, Models, and Textures
Asset Libraries and Marketplaces
Blender’s functionality can be greatly enhanced with the use of high-quality assets, models, and textures. These resources can be sourced from various libraries and marketplaces.
BlenderKit: Offers a wide range of models and materials, easily accessible through a plugin interface, making it a go-to resource for Blender users.
Poly Haven: A free, open-source platform providing high-quality 3D models, materials, and HDRIs, highly regarded for its extensive library and accessibility.
Blender Market: A marketplace where artists can purchase and sell high-quality models, add-ons, and other assets, ideal for those looking for premium resources.
Utilizing a mix of free and premium resources can elevate your projects. Free resources like those from Poly Haven are invaluable for getting started and experimenting. Investing in premium assets from platforms such as Blender Market can provide higher quality and more unique elements for your scenes. For more details on balancing free and premium resources, you can refer to our curation of the Best Blender Assets.
Blender Assets
In addition to textures and materials, having a robust library of assets can greatly speed up your workflow and improve the quality of your projects. Here are some recommended asset resources:
BlenderKit: Besides offering materials, BlenderKit has a vast library of models and brushes, perfect for quickly populating your scenes with high-quality assets.
Quixel Megascans: Provides photorealistic 3D assets and textures, ideal for creating ultra-realistic environments.
Sketchfab: A platform where you can download and share 3D models, offering both free and premium options. It's an excellent resource for finding unique and detailed models.
AmbientCG: Offers a variety of free, high-quality PBR materials and HDRIs, which are essential for realistic rendering.
Best CGI Material Libraries
Having access to high-quality material libraries is essential for creating realistic textures and surfaces. Here are some top picks:
BlenderKit: In addition to models, BlenderKit offers an extensive library of materials and brushes.
Poliigon: Known for its professional-grade textures and materials, ideal for photorealistic rendering.
CC0 Textures: Offers a wide range of free textures that can be used for any project without attribution, making it a versatile choice for various needs.
For even more recommendations on CGI Material Libraries, check our blog post.
Chapter 6: Showcasing Your Work
Exporting Projects
Exporting to Different Applications and Use Cases
Exporting your Blender projects to various applications is crucial for integrating with different workflows and industries. Blender supports a wide range of export formats, each suited to specific applications and industries:
FBX: Commonly used in game development and virtual reality applications, this format ensures models and animations integrate smoothly with game engines like Unity and Unreal Engine.
OBJ: Widely used in 3D printing and various modeling software, OBJ is a versatile format for ensuring compatibility and ease of use.
GLTF: Ideal for web-based applications and AR/VR due to its compact size and real-time capabilities, GLTF is optimized for quick loading and efficient rendering.
Alembic: Used extensively in the film industry for handling complex animations and simulations, Alembic supports large-scale, high-fidelity data transfer.
Understanding which format to use based on your target application ensures compatibility and maintains the integrity of your work. For instance, exporting to FBX or GLTF is optimal for gaming, ensuring seamless integration with game engines. In contrast, the Alembic format is preferred in film and animation for managing large-scale projects with complex simulations. For 3D printing, OBJ and STL formats are commonly used to ensure models are print-ready. Our step-by-step guide on how to export assets from Blender is a great starting point if you need further guidance.
Optimizing your export settings for the intended use case can save time and reduce issues during the integration process. This tailored approach to exporting ensures that your projects are ready for the next stage of development, whether in gaming, film, or 3D printing.
Cloud Computing for Blender 3D
Opting to use Blender 3D on a cloud computer can be the right choice for many different use cases. Whether you are using Blender on a low-end device, or need to render resource-intensive projects, cloud computing has the solution for you. Vagon offers flexible solutions for any creative wanting to elevate and power up their workflow. Optimize your Blender usage with Vagon’s offerings of high-end GPU’s and CPU’s. Our guide on using Blender on a Cloud Computer can help you set up your Blender workspace on your very own cloud computer.
Renderfarms for Blender 3D
For extremely resource-intensive projects, utilizing renderfarms and cloud computing can be beneficial. Renderfarms like RebusFarm and SheepIt offer scalable solutions for rendering and exporting large scenes. These services allow you to leverage powerful cloud-based systems to handle demanding tasks, saving time and freeing up your local resources. Read more about renderfarms in our Top Renderfarms blog post.
Portfolio Development
Creating a Professional Portfolio
A professional portfolio is essential for showcasing your skills and attracting potential clients or employers. Here are some tips for creating an impressive portfolio:
Diverse Projects: Include a variety of projects that demonstrate different skills and techniques.
High-Quality Renders: Ensure all renders are of the highest quality to showcase your attention to detail.
Breakdowns: Include breakdowns of your work to demonstrate your process and problem-solving skills.
Consistency: Maintain a consistent style and presentation across all portfolio items.
Presenting Your Work Effectively
Presenting your work effectively involves more than just showcasing the final product. Consider the following:
Context: Provide context for each project, explaining the brief, your role, and the tools used.
Narrative: Create a narrative around your projects to engage viewers and highlight your creative journey.
Platform: Use platforms like ArtStation, Behance, or a personal website to host your portfolio. Ensure the platform is professional and easy to navigate.
Job Prospects in Blender-Related Fields
Blender is increasingly popular across various industries, creating numerous job opportunities. Key fields where Blender skills are in demand include:
Game Development: Roles like 3D modeler, animator, and environment artist are essential for creating assets and animations in game engines like Unity and Unreal Engine.
Film and Animation: Positions such as character animator, VFX artist, and rigging artist leverage Blender’s robust animation and simulation tools.
Architecture: Jobs like architectural visualization specialist, interior designer, and landscape artist use Blender for creating realistic renderings and walkthroughs of architectural projects.
Freelancing and Client Work
Freelancing with Blender offers flexibility and the opportunity to work on diverse projects. To succeed as a freelancer:
Build a Strong Portfolio: A comprehensive portfolio is crucial for attracting clients. Include a variety of projects that demonstrate different skills and techniques.
Network: Join Blender communities, forums, and attend events to connect with potential clients and collaborators.
Set Competitive Rates: Research industry rates and set competitive pricing for your services.
Manage Time Effectively: Use project management tools to keep track of deadlines and deliverables.
Best Platforms to Find Blender Jobs
There are several platforms where you can find Blender-related jobs and freelance opportunities:
Upwork: A popular platform for freelancers, Upwork offers numerous Blender job listings, from short-term projects to long-term contracts. It allows you to showcase your portfolio and set your rates.
Guru: Another excellent platform for finding freelance work, Guru offers tools to manage projects, communicate with clients, and secure payments through their SafePay system.
Indeed: This job search engine lists a variety of full-time, part-time, and freelance Blender jobs across different industries and locations.
Glassdoor: Known for company reviews, Glassdoor also lists job opportunities where you can find Blender-related positions and get insights into company culture and salary expectations.
Fiverr: A versatile platform for freelancers, Fiverr features a wide range of Blender job listings, from quick gigs to more extensive projects. It enables you to showcase your skills through portfolios and connect directly with clients for seamless transactions.
Frequently Asked Questions About Blender 3D & Vagon
Here is a list of frequently asked questions (FAQs) related to Blender 3D software:
What is Blender 3D?
Blender 3D is an open-source 3D modeling, animation, rendering, and post-production software.Is Blender 3D free to use?
Yes, Blender 3D is completely free and open-source.What operating systems does Blender support?
Blender supports Windows, macOS, and Linux.What are the system requirements for Blender?
Minimum requirements include a dual-core CPU, 4GB RAM, and a graphics card with at least 1GB VRAM.Can Blender be used for professional work?
Yes, Blender is used professionally in various industries, including film, game development, and architecture.What file formats can Blender import/export?
Blender supports multiple formats including FBX, OBJ, STL, and GLTF.What is the Blender Foundation?
The Blender Foundation is a non-profit organization that oversees the development of Blender.How do I install Blender add-ons?
Add-ons can be installed via the Preferences menu under the Add-ons tab.How do I render an image in Blender?
You can render an image using the Render menu and selecting Render Image.What are Blender's main rendering engines?
Blender includes Cycles and Eevee as its main rendering engines.Can Blender be used for 2D animation?
Yes, Blender has a Grease Pencil tool for 2D animation.What is UV unwrapping?
UV unwrapping is the process of projecting a 3D model's surface onto a 2D plane for texturing.How do I learn Blender?
There are many resources including Blender’s own documentation, tutorials, and online courses.What are Blender’s shortcuts?
Blender has numerous keyboard shortcuts for different functions, which can be customized in the Preferences.Can Blender simulate physics?
Yes, Blender can simulate physics including soft bodies, rigid bodies, and fluids.What is Blender’s node system?
The node system in Blender is used for creating materials, textures, and compositing by connecting nodes.Is Blender suitable for game development?
Yes, Blender is widely used for creating game assets and can export to game engines like Unity and Unreal Engine.Can I use Blender for 3D printing?
Yes, Blender can create models for 3D printing, often exported in STL format.What is Blender’s Python API?
Blender’s Python API allows for scripting and automation of tasks within Blender.How do I save my work in Blender?
Blender projects are saved in .blend files, which include all aspects of your scene.Can I customize Blender’s UI?
Yes, Blender’s UI is highly customizable, allowing you to save different layouts and workspace configurations.What is Vagon and how does it enhance Blender 3D usage?
Vagon is a cloud-based platform that provides high-performance virtual computers for digital artists. It enhances Blender 3D usage by offering powerful cloud computing resources, enabling users to handle complex rendering tasks and large projects without the need for expensive local hardware.Can I run Blender 3D on Vagon’s virtual machines?
Yes, Blender 3D can be run on Vagon’s high-performance virtual machines. Vagon's infrastructure is optimized to support Blender, ensuring smooth performance and efficient rendering capabilities for 3D modeling, animation, and simulation tasks.How do I get started with Blender 3D on Vagon?
Getting started with Blender 3D on Vagon is easy, as Blender comes preinstalled on Vagon's virtual machines. Simply sign up for a Vagon account, choose a virtual machine configuration that suits your needs, and start creating and rendering your projects using Vagon’s robust cloud infrastructure.
Get Beyond Your Computer Performance
Run applications on your cloud computer with the latest generation hardware. No more crashes or lags.

Trial includes 1 hour usage + 7 days of storage.
Summarize with AI

Ready to focus on your creativity?
Vagon gives you the ability to create & render projects, collaborate, and stream applications with the power of the best hardware.

Vagon Blog


Run heavy applications on any device with
your personal computer on the cloud.
San Francisco, California
Solutions
Vagon Teams
Vagon Streams
Use Cases
Resources
Vagon Blog
How to Run Ollama in the Cloud on a GPU Ubuntu Desktop (2026 Guide)
How to Run Ubuntu on an iPad (That Actually Works in 2026)
How to Get an Ubuntu Desktop in the Cloud (GPU Optional): The Complete 2026 Guide
What Slows Down After Effects Projects?
The First 30 Minutes in Blender 3D: A Practical Workflow Guide
What’s New in Godot 4.7? Key Features, Upgrades, and Workflow Improvements
What Slows Down Blender 3D Projects?
What Slows Down Adobe Photoshop Projects?
The First 30 Minutes in Adobe Photoshop: A Practical Workflow Guide
Vagon Blog
Run heavy applications on any device with
your personal computer on the cloud.
San Francisco, California
Solutions
Vagon Teams
Vagon Streams
Use Cases
Resources
Vagon Blog