Instant Connection for Pixel Streaming
— New Feature Automated Setup

Blender for Virtual Reality: How to Create VR Content with Blender
Blender for Virtual Reality: How to Create VR Content with Blender
DigitalArt
Blender for Virtual Reality: How to Create VR Content with Blender
Table of Contents
Ever built a scene in Blender VR, slipped on the headset, and thought, “Why does this feel… off?”
I have. More times than I’d like to admit.
Here’s the thing, Blender is a beast when it comes to 3D creation, but VR changes the game. Suddenly, scale matters. Camera angles hit different. And every tiny modeling mistake becomes a skyscraper-sized problem when you’re standing inside your scene.
The good news? With the right setup and a few workflow tweaks, creating immersive VR content in Blender isn’t just doable, it’s fun. Whether you’re building a virtual art gallery, designing environments for a VR game, or just testing out what’s possible, Blender gives you everything you need to bring your ideas to life.
In this guide, I’ll walk you through how to use Blender in VR, from setting up your workspace and perfecting your Blender VR camera, to exporting your scene and testing it in real time. Along the way, I’ll share the pitfalls I’ve hit (so you can avoid them), the tools I actually rely on, and a few tips that make the process faster and less frustrating.
Ready? Let’s step into Blender, literally.
Why Blender Works for VR
Here’s what I love about Blender for VR, it just makes sense.
For one, it’s free. No licensing hoops, no fine print. Whether you’re a student learning the ropes or a studio experimenting with immersive content, the barrier to entry is basically zero.
Then there’s the flexibility. Blender runs on Windows, macOS, and Linux, which means you can take your project anywhere. And with the VR Scene Inspection add-on built right in, you don’t need a stack of extra plugins to start testing your environments in 3D space. Just enable it, put on your headset, and you’re in.

I remember the first time I enabled VR in Blender. I’d been modeling a small city block for a client, feeling pretty confident about the layout. Then I loaded it in VR, and realized my sidewalks were practically highways. That moment changed the way I work. Seeing your scene at full scale in real time doesn’t just help with accuracy; it changes how you design from the ground up.
And that’s the magic here. VR in Blender gives you instant feedback. It lets you catch scale issues before they become costly fixes, fine-tune camera positions, and get a feel for the environment you’re building long before rendering a single frame.
Blender may not have the flashiest interface or the biggest marketing budget, but for creators who actually want to create, it delivers.
Setting Up Your Blender VR Workspace
Before you start building mind-bending VR worlds, you need your workspace dialed in. Trust me, skipping this step is how you end up frustrated before you’ve even started.
#1. Enable the VR Scene Inspection Add-on
Blender has native VR support, you just have to turn it on.
Open Edit → Preferences → Add-ons.
Search for “VR Scene Inspection.”
Check the box, and you’ll see a VR tab in your 3D viewport.
That’s it. No complicated installs, no third-party software. The beauty of this is you can jump straight from your regular modeling workflow into VR, headset on, seeing your project in real-time.

#2. Check Your Scale
Here’s where most beginners mess up, scale is everything in VR. What looks fine on your screen can feel completely wrong once you’re standing inside the scene.
A few quick rules to keep your scale in check:
Use real-world measurements whenever possible. If you’re modeling a chair, make it 0.8 meters tall, not “whatever looks good.”
Add a reference cube or human mesh in your scene for context.
Walk through your environment in VR early and often.
I’ve been burned by this before. I once modeled an entire apartment interior, only to realize the ceiling was so low it felt like a bunker. A five-minute VR check would’ve saved me a full day of revisions.
#3. Optimize Your Viewport
VR can be demanding. To keep performance smooth, tweak these settings:
Lower the viewport shading to Solid while you’re modeling.
Enable Simplify in your scene settings to reduce polycount previews.
Keep heavy modifiers hidden until you need them.
Smooth performance in the viewport means you’ll actually want to iterate in VR, instead of getting motion sick from choppy frame rates. Speed matters, so knowing your Blender hotkeys can seriously cut down modeling and testing time, especially when switching between VR preview modes.
Modeling and Animation for VR
This is where the magic happens, but it’s also where Blender can eat up your time if you’re not careful.
#1. Keep It Clean and Optimized
In Blender VR modeling, efficiency is everything. VR scenes have to run smoothly, whether you’re testing in your headset or sharing builds with a client. That means:
Start low-poly. Block out your environment with basic geometry first.
Use modifiers smartly. Subdivision and mirror modifiers are great, but don’t apply them until you need to.
Think modular. Build reusable assets for repeated elements like windows, chairs, or props.
I learned this the hard way when I built a high-poly interior for a Quest 2 demo. Looked gorgeous, until the headset froze halfway through. Don’t be me. Optimize early.
#2. Animation Tips That Actually Work
When you move into Blender VR animation, the rules shift a little:
Keep movements slow and smooth. Fast, snappy animations can cause discomfort in VR.
Anchor your environment. Static reference points in the scene help keep users grounded.
Plan for 360° interaction. Users aren’t looking in one direction, build animations that make sense from multiple angles.
If you’re just starting, try animating simple environmental elements first: flickering lights, moving clouds, or a rotating object. Once you’re comfortable, step up to character animation or physics-based interactions. Little tools matter too — like the 3D cursor in Blender, which is surprisingly useful for snapping, positioning, and iterating layout pieces quickly in VR workflows.

Want to explore a different side of Blender? This guide to 2D animation breaks down how you can use the Grease Pencil tool for hand-drawn and hybrid animations.
#3. Use Geometry Nodes to Your Advantage
Geometry nodes are a game-changer for VR content. They let you:
Populate scenes with procedural details (like grass, rocks, or furniture) without heavy manual modeling.
Adjust complexity in real time without tanking performance.
Think of geometry nodes as your efficiency multiplier, one node setup can save you hours of repetitive modeling.
In Blender 4.5, geometry nodes got a big upgrade. You can now import external files like PLY, OBJ, or VDB directly into your node tree. It’s a huge time-saver for VR, especially when populating environments with photogrammetry assets or prefabs.

#4. Test in VR Often
Don’t wait until the end to see your progress in VR. Every time you make a major change, a scale tweak, a new asset, a lighting adjustment, throw on your headset and test it. I’ve caught so many tiny issues this way that I would’ve missed staring at a flat viewport.
Lighting and Rendering with EEVEE Next
Lighting can make or break your VR experience. It’s what turns a flat, lifeless scene into something immersive, and with Blender 4.2’s EEVEE Next, you’ve got more power than ever.
#1. Real-Time Global Illumination
EEVEE Next introduced real-time global illumination (GI), and honestly, it’s a game-changer.
You can preview realistic lighting while you’re building.
No more guessing how your light bounces will look after a render.
It’s perfect for iterating quickly on VR environments without long wait times.
If you’re designing for VR, being able to step into your scene and instantly see how sunlight interacts with your materials saves hours of trial and error.

#2. Better Volumetrics and Shadows
Fog, mist, smoke, subtle atmospheric effects can make VR worlds feel alive. EEVEE Next handles volumetrics with far more depth and accuracy than older versions, and its virtual shadow maps add a realism boost without killing performance.
#3. When to Switch to Cycles
EEVEE Next is amazing for real-time workflows, but sometimes you’ll want the photorealism that only Cycles can deliver, especially for high-res VR renders or animations.
My rule of thumb:
EEVEE Next for modeling, look-dev, and iterative design.
Cycles for final renders, especially if your scene will be viewed on high-end headsets like the Quest Pro or Valve Index.

#4. Performance Tweaks for VR
Rendering for VR is demanding. To keep things smooth:
Keep textures optimized (2K is often enough for VR).
Bake lighting when possible to reduce render times.
Use render regions to test sections instead of the full scene.
For more deep-dive rendering tips, this guide to reducing rendering times is packed with practical advice for Blender artists — VR or not.
Perfecting Your Blender VR Camera
If you’ve ever stepped into your scene and felt… dizzy, your Blender VR camera is probably to blame. Camera setup is one of the most overlooked parts of VR creation, and one of the easiest ways to make your content instantly better.
#1. Set Up a Stereo Camera
VR needs stereo vision to feel natural. Here’s how to get it right:
Add a stereo camera rig from the VR tab or manually duplicate and offset your camera.
Use a standard interocular distance of around 6.3 cm, that’s the average distance between human eyes.
Keep convergence subtle; overdoing it makes the scene feel warped and uncomfortable.
#2. Dial in Your Resolution
Rendering in VR isn’t like a flat animation. Low resolutions will feel blurry and break immersion.
For high-end headsets (like Valve Index or Quest Pro), aim for 4K per eye if your hardware allows it.
For mid-range devices, 2K per eye is usually enough for testing without lag.
Always stick to power-of-two resolutions (like 2048 or 4096 pixels) for compatibility with most engines and viewers.

#3. Adjust Depth and Focal Points
One of the biggest mistakes I see in Blender VR projects? Cameras with unnatural depth of field.
Keep the focus point at a natural distance, usually 1.5–2 meters for interactive scenes.
Avoid extreme depth-of-field effects unless you’re going for a very specific cinematic style.
#4. Test Early, Test Often
The only way to truly dial in your camera is to test it in your headset. Every scene feels different in VR compared to your 3D viewport.
I can’t count how many times I thought my framing was perfect, until I stepped into the scene and realized my character was standing half out of frame.
Exporting Your Scene for VR
Once your scene is ready, it’s time to get it out of Blender and into the VR platform of your choice. This is where the blender to vr workflow really comes into play.
#1. Choose the Right Format
Different platforms prefer different file types, so start by matching your export to your destination:
.glb/.gltf→ Best for WebXR or lightweight VR applications..fbx→ Widely supported for Unity and Unreal workflows..usdz→ Apple’s preferred format for AR and VR apps.
Keep it clean: apply transformations, pack your textures, and double-check naming conventions before export.

#2. Optimize Before Export
VR performance lives or dies by optimization.
Reduce poly counts on complex meshes.
Bake high-res textures into lower-res maps.
Remove hidden or unused objects, no one wants to render geometry they’ll never see.
A little cleanup goes a long way toward smoother playback in VR.
#3. Platform Testing
After export, always test your scene in the target environment.
In Unity or Unreal, check lighting, materials, and scale.
For WebXR, preview directly in your browser with a headset to spot compatibility issues.
On standalone devices like the Quest 3, keep an eye on performance to avoid lag or overheating.

#4. Automate Your Workflow
If you’re exporting frequently, set up batch export scripts in Blender. It saves time and keeps your exports consistent, especially when managing multiple versions of the same project. And if you’re comfortable with code, using Python in Blender lets you automate batch exports and other repetitive VR prep steps.
Latest Trends & Tools in 2025
Blender’s VR ecosystem is moving fast, and if you haven’t kept up, you’re missing out on tools that make your workflow faster, smoother, and honestly, more fun. You can also explore top VR technologies and trends to see how the broader immersive world is evolving in 2025.
#1. EEVEE Next Is Changing the Game
The upgrade to EEVEE Next in Blender 4.2 isn’t just about prettier renders, it’s about speed. Real-time global illumination, virtual shadow maps, and smarter volumetrics mean you can iterate on your VR environments without constantly hitting render and waiting.
I’ve noticed more studios using EEVEE Next for live client previews. It’s that reliable now.
Pro Tip: With Blender 4.5’s switch to the Vulkan graphics backend, VR previews and viewport performance are noticeably smoother. If you’ve struggled with lag in earlier versions, you’ll feel the difference right away.

#2. AI-Driven Tools
AI has finally found its footing in 3D workflows:
AI texturing plugins like TextureLab and Substance AI help generate hyper-realistic materials with just a few prompts.
AI-assisted rigging tools are speeding up animation pipelines, especially for VR avatars.
That doesn’t mean AI will do the work for you, but it can shave hours off repetitive tasks. These AI tools for model generation can help you build smarter and faster.
#3. Better Photogrammetry Pipelines
Photogrammetry is becoming a staple in VR. Tools like RealityCapture or Polycam now integrate seamlessly with Blender, letting you scan real-world objects and drop them directly into your scene.
Want a hyper-realistic tree or piece of furniture in your VR environment? Scan it. Clean it up in Blender. Done.
#4. Headset Integrations
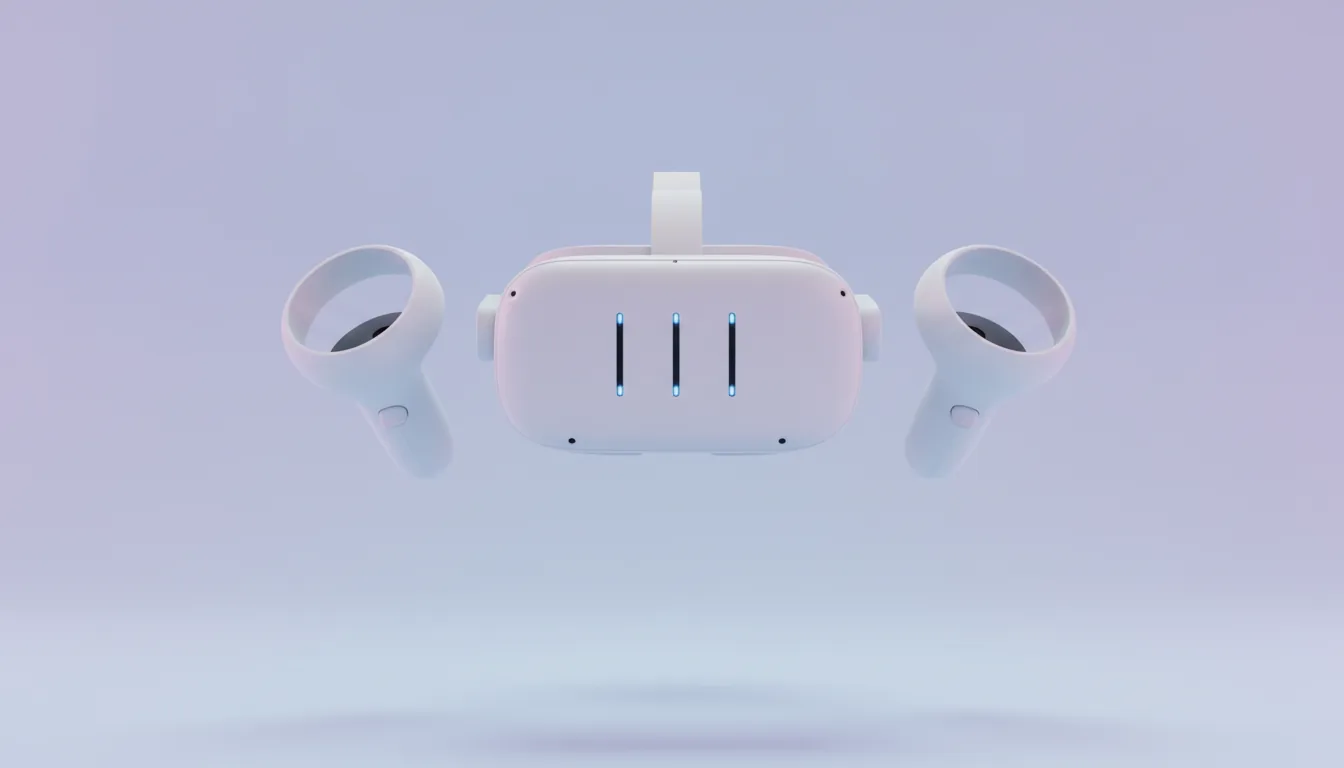
With devices like the Meta Quest 3, Apple Vision Pro, and Valve Index maturing, testing your Blender VR projects is easier than ever. The VR Scene Inspection add-on now plays nicer with a wider range of hardware, less time fiddling with drivers, more time building.
#5. Vulkan and Viewport Upgrades
Blender 4.5’s full transition to Vulkan brings faster viewport navigation and more stable performance in heavy VR scenes. Pair that with geometry node updates for smarter scene management, and iteration feels faster than ever.
Common Mistakes & Fixes
Everyone hits snags when they first start building VR content in Blender. The trick is knowing where things usually go wrong, and how to fix them before they ruin your project.
#1. Ignoring Scale
This is the number one killer of immersion. A chair that’s just a bit too big on your monitor turns into a comically oversized throne in VR.
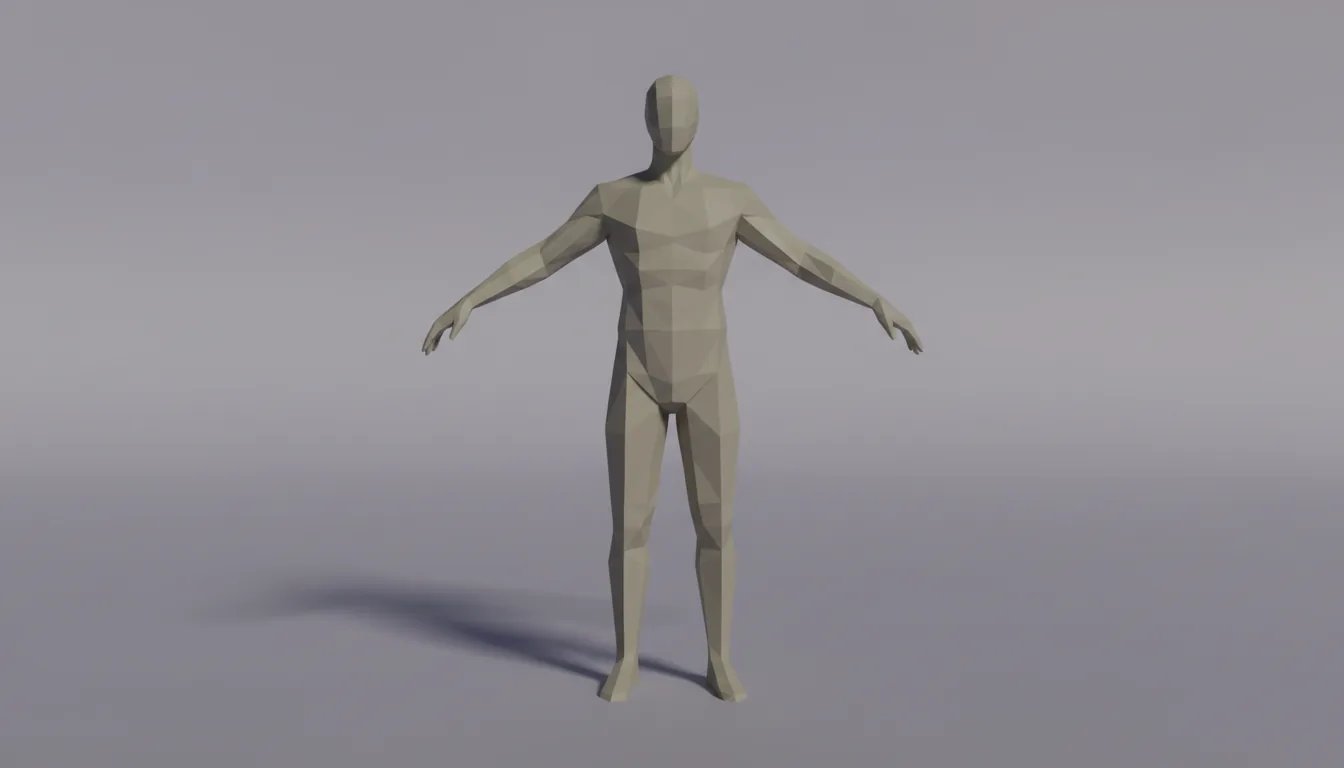
Fix it: Always work with real-world measurements. Drop in a human reference model or default cube (2 meters) to sanity check your proportions.

#2. Overloading the Scene
I’ve been guilty of this, piling in high-poly assets, 4K textures, and volumetric lights until Blender wheezes. In VR, this means low frame rates and motion sickness for anyone wearing a headset.
Fix it:
Use LOD (Level of Detail) models for assets far from the camera.
Bake textures where possible.
Keep your polycount lean, detail where it matters, simplicity where it doesn’t.

#3. Camera Misalignment
A poorly configured Blender VR camera can ruin even the most beautiful scene.
Fix it:
Stick with a natural interocular distance (~6.3 cm).
Test depth and framing in VR early.
Avoid exaggerated depth-of-field unless you’re going for a very specific look.
#4. Not Testing Often Enough
The worst feeling? Spending weeks on a scene only to find glaring issues the first time you load it into a headset.
Fix it: Make testing a habit. Every major change, new assets, lighting tweaks, animation adjustments, deserves a quick VR check.
Scaling and Sharing with Vagon Cloud
Here’s the reality: even a perfectly optimized scene can hit the limits of your hardware. VR demands power, and not everyone has a high-end workstation sitting under their desk.
That’s where Vagon Cloud Computer steps in.
#1. Power Without the Hardware
With Vagon, you can spin up a remote machine with serious specs, think RTX 6000 GPUs, 192 GB of RAM, straight from your browser. No setup headaches, no compatibility drama. Just log in, open Blender, and keep building.
I can’t count how many times I’ve offloaded heavy Blender VR rendering jobs to Vagon while still working smoothly on my laptop. It’s the closest thing to having a portable render farm.
Curious about mobile workflows? Here's how you can use Blender on an iPad through Vagon and take your VR projects on the go.
#2. Test on Any Headset
Whether you’re developing for a Quest 3, Apple Vision Pro, or Valve Index, Vagon’s cloud-based setup makes testing seamless. Launch your Blender project remotely and preview your scene exactly as your users will experience it, without worrying about local performance bottlenecks.
#3. Share Your Work Easily
Collaboration gets easier too. Instead of sending massive project files back and forth, you can share access to your high-performance session. Perfect for client presentations or remote team reviews where everyone needs to see the same VR environment in real time.

Final Thoughts
Creating VR content in Blender can feel intimidating at first, the settings, the performance tweaks, the constant testing. But once you get the hang of it, it’s like unlocking a new layer of creativity.
Start small. Enable VR Scene Inspection, check your scale, and just walk through your scene. Every time you step inside your project, you’ll notice details you would’ve missed staring at a flat viewport.
And if your hardware starts to groan under the weight of high-res renders or complex animations? That’s your sign to take it to the cloud. Tools like Vagon Cloud Computer make it easy to scale your workflow without draining your local machine.
So, whether you’re designing a virtual world, pre-visualizing an animation, or just experimenting with new ideas, Blender gives you the tools to make VR creation not just possible, but genuinely fun.
Put on the headset. Step inside. And start building.
FAQs
1. Can you use Blender in VR?
Absolutely. Blender has a built-in feature called VR Scene Inspection. Once you enable it in the Add-ons panel, you can explore your 3D scenes in real-time using most modern VR headsets like the Quest 3, Valve Index, or HTC Vive. It’s great for checking scale, framing, and spatial design early in your workflow.
2. How do I set up Blender for VR?
Here’s the quick setup:
Go to Edit → Preferences → Add-ons.
Search for VR Scene Inspection and enable it.
Connect your headset and access the VR tab in the 3D viewport.
Adjust your scene’s scale and camera before entering VR to avoid distortion.
3. What’s the best VR headset for Blender?
It depends on your needs:
Meta Quest 3 → Affordable, wireless, and great for general testing.
Valve Index → High fidelity and great tracking for complex projects.
Apple Vision Pro → Premium option for advanced testing and AR/VR workflows. If you’re just starting, the Quest 3 gives the best balance of performance and cost.
4. What is the best workflow for Blender VR modeling?
Start simple. Block out your scene with low-poly geometry, test often in VR, and only add detail once you’re confident in the scale and layout. Use geometry nodes to populate scenes efficiently and keep assets modular for easier optimization.
5. How do I optimize performance for VR?
Performance is everything in VR.
Use LOD models for distant assets.
Bake textures to reduce material load.
Limit texture sizes to 2K unless you need ultra-high fidelity.
Test often on your target headset to catch frame rate drops early.
6. How do I set up the Blender VR camera correctly?
Use a stereo camera rig with an interocular distance of ~6.3 cm to match human vision. Keep depth of field subtle and resolution high, 2K per eye for testing and 4K per eye for final renders when hardware allows. Always test camera settings in your headset to catch framing or perspective issues.
7. Can I export Blender scenes to VR platforms?
Yes, exporting from Blender to VR is straightforward if you pick the right format:
.glbor.gltffor WebXR or lightweight applications..fbxfor Unity or Unreal pipelines..usdzfor Apple devices.Apply transformations, pack textures, and clean up your scene before exporting for the smoothest workflow.
8. How do I make animations work in VR?
Smooth and subtle animations work best in VR. Avoid rapid movements that can make users uncomfortable. Anchor users with static reference points, and test animations directly in the headset to fine-tune pacing and camera angles.
9. Do I need a powerful PC for Blender VR?
Not necessarily, but more power helps. If you’re running complex scenes or rendering high-resolution VR animations, you’ll need a strong GPU and plenty of RAM. If your hardware is struggling, Vagon Cloud Computer lets you run Blender on a high-spec remote machine without the cost of upgrading your PC. You can also check out this list of top graphics cards for VR if you’re considering a local hardware upgrade.
10. Can I collaborate with others in Blender VR?
Blender itself isn’t multi-user in VR, but you can share files and have multiple people review the same VR environment. With cloud setups like Vagon, you can even let collaborators connect to a shared high-performance session for real-time feedback.
Ever built a scene in Blender VR, slipped on the headset, and thought, “Why does this feel… off?”
I have. More times than I’d like to admit.
Here’s the thing, Blender is a beast when it comes to 3D creation, but VR changes the game. Suddenly, scale matters. Camera angles hit different. And every tiny modeling mistake becomes a skyscraper-sized problem when you’re standing inside your scene.
The good news? With the right setup and a few workflow tweaks, creating immersive VR content in Blender isn’t just doable, it’s fun. Whether you’re building a virtual art gallery, designing environments for a VR game, or just testing out what’s possible, Blender gives you everything you need to bring your ideas to life.
In this guide, I’ll walk you through how to use Blender in VR, from setting up your workspace and perfecting your Blender VR camera, to exporting your scene and testing it in real time. Along the way, I’ll share the pitfalls I’ve hit (so you can avoid them), the tools I actually rely on, and a few tips that make the process faster and less frustrating.
Ready? Let’s step into Blender, literally.
Why Blender Works for VR
Here’s what I love about Blender for VR, it just makes sense.
For one, it’s free. No licensing hoops, no fine print. Whether you’re a student learning the ropes or a studio experimenting with immersive content, the barrier to entry is basically zero.
Then there’s the flexibility. Blender runs on Windows, macOS, and Linux, which means you can take your project anywhere. And with the VR Scene Inspection add-on built right in, you don’t need a stack of extra plugins to start testing your environments in 3D space. Just enable it, put on your headset, and you’re in.
I remember the first time I enabled VR in Blender. I’d been modeling a small city block for a client, feeling pretty confident about the layout. Then I loaded it in VR, and realized my sidewalks were practically highways. That moment changed the way I work. Seeing your scene at full scale in real time doesn’t just help with accuracy; it changes how you design from the ground up.
And that’s the magic here. VR in Blender gives you instant feedback. It lets you catch scale issues before they become costly fixes, fine-tune camera positions, and get a feel for the environment you’re building long before rendering a single frame.
Blender may not have the flashiest interface or the biggest marketing budget, but for creators who actually want to create, it delivers.
Setting Up Your Blender VR Workspace
Before you start building mind-bending VR worlds, you need your workspace dialed in. Trust me, skipping this step is how you end up frustrated before you’ve even started.
#1. Enable the VR Scene Inspection Add-on
Blender has native VR support, you just have to turn it on.
Open Edit → Preferences → Add-ons.
Search for “VR Scene Inspection.”
Check the box, and you’ll see a VR tab in your 3D viewport.
That’s it. No complicated installs, no third-party software. The beauty of this is you can jump straight from your regular modeling workflow into VR, headset on, seeing your project in real-time.
#2. Check Your Scale
Here’s where most beginners mess up, scale is everything in VR. What looks fine on your screen can feel completely wrong once you’re standing inside the scene.
A few quick rules to keep your scale in check:
Use real-world measurements whenever possible. If you’re modeling a chair, make it 0.8 meters tall, not “whatever looks good.”
Add a reference cube or human mesh in your scene for context.
Walk through your environment in VR early and often.
I’ve been burned by this before. I once modeled an entire apartment interior, only to realize the ceiling was so low it felt like a bunker. A five-minute VR check would’ve saved me a full day of revisions.
#3. Optimize Your Viewport
VR can be demanding. To keep performance smooth, tweak these settings:
Lower the viewport shading to Solid while you’re modeling.
Enable Simplify in your scene settings to reduce polycount previews.
Keep heavy modifiers hidden until you need them.
Smooth performance in the viewport means you’ll actually want to iterate in VR, instead of getting motion sick from choppy frame rates. Speed matters, so knowing your Blender hotkeys can seriously cut down modeling and testing time, especially when switching between VR preview modes.
Modeling and Animation for VR
This is where the magic happens, but it’s also where Blender can eat up your time if you’re not careful.
#1. Keep It Clean and Optimized
In Blender VR modeling, efficiency is everything. VR scenes have to run smoothly, whether you’re testing in your headset or sharing builds with a client. That means:
Start low-poly. Block out your environment with basic geometry first.
Use modifiers smartly. Subdivision and mirror modifiers are great, but don’t apply them until you need to.
Think modular. Build reusable assets for repeated elements like windows, chairs, or props.
I learned this the hard way when I built a high-poly interior for a Quest 2 demo. Looked gorgeous, until the headset froze halfway through. Don’t be me. Optimize early.
#2. Animation Tips That Actually Work
When you move into Blender VR animation, the rules shift a little:
Keep movements slow and smooth. Fast, snappy animations can cause discomfort in VR.
Anchor your environment. Static reference points in the scene help keep users grounded.
Plan for 360° interaction. Users aren’t looking in one direction, build animations that make sense from multiple angles.
If you’re just starting, try animating simple environmental elements first: flickering lights, moving clouds, or a rotating object. Once you’re comfortable, step up to character animation or physics-based interactions. Little tools matter too — like the 3D cursor in Blender, which is surprisingly useful for snapping, positioning, and iterating layout pieces quickly in VR workflows.
Want to explore a different side of Blender? This guide to 2D animation breaks down how you can use the Grease Pencil tool for hand-drawn and hybrid animations.
#3. Use Geometry Nodes to Your Advantage
Geometry nodes are a game-changer for VR content. They let you:
Populate scenes with procedural details (like grass, rocks, or furniture) without heavy manual modeling.
Adjust complexity in real time without tanking performance.
Think of geometry nodes as your efficiency multiplier, one node setup can save you hours of repetitive modeling.
In Blender 4.5, geometry nodes got a big upgrade. You can now import external files like PLY, OBJ, or VDB directly into your node tree. It’s a huge time-saver for VR, especially when populating environments with photogrammetry assets or prefabs.
#4. Test in VR Often
Don’t wait until the end to see your progress in VR. Every time you make a major change, a scale tweak, a new asset, a lighting adjustment, throw on your headset and test it. I’ve caught so many tiny issues this way that I would’ve missed staring at a flat viewport.
Lighting and Rendering with EEVEE Next
Lighting can make or break your VR experience. It’s what turns a flat, lifeless scene into something immersive, and with Blender 4.2’s EEVEE Next, you’ve got more power than ever.
#1. Real-Time Global Illumination
EEVEE Next introduced real-time global illumination (GI), and honestly, it’s a game-changer.
You can preview realistic lighting while you’re building.
No more guessing how your light bounces will look after a render.
It’s perfect for iterating quickly on VR environments without long wait times.
If you’re designing for VR, being able to step into your scene and instantly see how sunlight interacts with your materials saves hours of trial and error.
#2. Better Volumetrics and Shadows
Fog, mist, smoke, subtle atmospheric effects can make VR worlds feel alive. EEVEE Next handles volumetrics with far more depth and accuracy than older versions, and its virtual shadow maps add a realism boost without killing performance.
#3. When to Switch to Cycles
EEVEE Next is amazing for real-time workflows, but sometimes you’ll want the photorealism that only Cycles can deliver, especially for high-res VR renders or animations.
My rule of thumb:
EEVEE Next for modeling, look-dev, and iterative design.
Cycles for final renders, especially if your scene will be viewed on high-end headsets like the Quest Pro or Valve Index.
#4. Performance Tweaks for VR
Rendering for VR is demanding. To keep things smooth:
Keep textures optimized (2K is often enough for VR).
Bake lighting when possible to reduce render times.
Use render regions to test sections instead of the full scene.
For more deep-dive rendering tips, this guide to reducing rendering times is packed with practical advice for Blender artists — VR or not.
Perfecting Your Blender VR Camera
If you’ve ever stepped into your scene and felt… dizzy, your Blender VR camera is probably to blame. Camera setup is one of the most overlooked parts of VR creation, and one of the easiest ways to make your content instantly better.
#1. Set Up a Stereo Camera
VR needs stereo vision to feel natural. Here’s how to get it right:
Add a stereo camera rig from the VR tab or manually duplicate and offset your camera.
Use a standard interocular distance of around 6.3 cm, that’s the average distance between human eyes.
Keep convergence subtle; overdoing it makes the scene feel warped and uncomfortable.
#2. Dial in Your Resolution
Rendering in VR isn’t like a flat animation. Low resolutions will feel blurry and break immersion.
For high-end headsets (like Valve Index or Quest Pro), aim for 4K per eye if your hardware allows it.
For mid-range devices, 2K per eye is usually enough for testing without lag.
Always stick to power-of-two resolutions (like 2048 or 4096 pixels) for compatibility with most engines and viewers.
#3. Adjust Depth and Focal Points
One of the biggest mistakes I see in Blender VR projects? Cameras with unnatural depth of field.
Keep the focus point at a natural distance, usually 1.5–2 meters for interactive scenes.
Avoid extreme depth-of-field effects unless you’re going for a very specific cinematic style.
#4. Test Early, Test Often
The only way to truly dial in your camera is to test it in your headset. Every scene feels different in VR compared to your 3D viewport.
I can’t count how many times I thought my framing was perfect, until I stepped into the scene and realized my character was standing half out of frame.
Exporting Your Scene for VR
Once your scene is ready, it’s time to get it out of Blender and into the VR platform of your choice. This is where the blender to vr workflow really comes into play.
#1. Choose the Right Format
Different platforms prefer different file types, so start by matching your export to your destination:
.glb/.gltf→ Best for WebXR or lightweight VR applications..fbx→ Widely supported for Unity and Unreal workflows..usdz→ Apple’s preferred format for AR and VR apps.
Keep it clean: apply transformations, pack your textures, and double-check naming conventions before export.
#2. Optimize Before Export
VR performance lives or dies by optimization.
Reduce poly counts on complex meshes.
Bake high-res textures into lower-res maps.
Remove hidden or unused objects, no one wants to render geometry they’ll never see.
A little cleanup goes a long way toward smoother playback in VR.
#3. Platform Testing
After export, always test your scene in the target environment.
In Unity or Unreal, check lighting, materials, and scale.
For WebXR, preview directly in your browser with a headset to spot compatibility issues.
On standalone devices like the Quest 3, keep an eye on performance to avoid lag or overheating.
#4. Automate Your Workflow
If you’re exporting frequently, set up batch export scripts in Blender. It saves time and keeps your exports consistent, especially when managing multiple versions of the same project. And if you’re comfortable with code, using Python in Blender lets you automate batch exports and other repetitive VR prep steps.
Latest Trends & Tools in 2025
Blender’s VR ecosystem is moving fast, and if you haven’t kept up, you’re missing out on tools that make your workflow faster, smoother, and honestly, more fun. You can also explore top VR technologies and trends to see how the broader immersive world is evolving in 2025.
#1. EEVEE Next Is Changing the Game
The upgrade to EEVEE Next in Blender 4.2 isn’t just about prettier renders, it’s about speed. Real-time global illumination, virtual shadow maps, and smarter volumetrics mean you can iterate on your VR environments without constantly hitting render and waiting.
I’ve noticed more studios using EEVEE Next for live client previews. It’s that reliable now.
Pro Tip: With Blender 4.5’s switch to the Vulkan graphics backend, VR previews and viewport performance are noticeably smoother. If you’ve struggled with lag in earlier versions, you’ll feel the difference right away.
#2. AI-Driven Tools
AI has finally found its footing in 3D workflows:
AI texturing plugins like TextureLab and Substance AI help generate hyper-realistic materials with just a few prompts.
AI-assisted rigging tools are speeding up animation pipelines, especially for VR avatars.
That doesn’t mean AI will do the work for you, but it can shave hours off repetitive tasks. These AI tools for model generation can help you build smarter and faster.
#3. Better Photogrammetry Pipelines
Photogrammetry is becoming a staple in VR. Tools like RealityCapture or Polycam now integrate seamlessly with Blender, letting you scan real-world objects and drop them directly into your scene.
Want a hyper-realistic tree or piece of furniture in your VR environment? Scan it. Clean it up in Blender. Done.
#4. Headset Integrations
With devices like the Meta Quest 3, Apple Vision Pro, and Valve Index maturing, testing your Blender VR projects is easier than ever. The VR Scene Inspection add-on now plays nicer with a wider range of hardware, less time fiddling with drivers, more time building.
#5. Vulkan and Viewport Upgrades
Blender 4.5’s full transition to Vulkan brings faster viewport navigation and more stable performance in heavy VR scenes. Pair that with geometry node updates for smarter scene management, and iteration feels faster than ever.
Common Mistakes & Fixes
Everyone hits snags when they first start building VR content in Blender. The trick is knowing where things usually go wrong, and how to fix them before they ruin your project.
#1. Ignoring Scale
This is the number one killer of immersion. A chair that’s just a bit too big on your monitor turns into a comically oversized throne in VR.
Fix it: Always work with real-world measurements. Drop in a human reference model or default cube (2 meters) to sanity check your proportions.
#2. Overloading the Scene
I’ve been guilty of this, piling in high-poly assets, 4K textures, and volumetric lights until Blender wheezes. In VR, this means low frame rates and motion sickness for anyone wearing a headset.
Fix it:
Use LOD (Level of Detail) models for assets far from the camera.
Bake textures where possible.
Keep your polycount lean, detail where it matters, simplicity where it doesn’t.
#3. Camera Misalignment
A poorly configured Blender VR camera can ruin even the most beautiful scene.
Fix it:
Stick with a natural interocular distance (~6.3 cm).
Test depth and framing in VR early.
Avoid exaggerated depth-of-field unless you’re going for a very specific look.
#4. Not Testing Often Enough
The worst feeling? Spending weeks on a scene only to find glaring issues the first time you load it into a headset.
Fix it: Make testing a habit. Every major change, new assets, lighting tweaks, animation adjustments, deserves a quick VR check.
Scaling and Sharing with Vagon Cloud
Here’s the reality: even a perfectly optimized scene can hit the limits of your hardware. VR demands power, and not everyone has a high-end workstation sitting under their desk.
That’s where Vagon Cloud Computer steps in.
#1. Power Without the Hardware
With Vagon, you can spin up a remote machine with serious specs, think RTX 6000 GPUs, 192 GB of RAM, straight from your browser. No setup headaches, no compatibility drama. Just log in, open Blender, and keep building.
I can’t count how many times I’ve offloaded heavy Blender VR rendering jobs to Vagon while still working smoothly on my laptop. It’s the closest thing to having a portable render farm.
Curious about mobile workflows? Here's how you can use Blender on an iPad through Vagon and take your VR projects on the go.
#2. Test on Any Headset
Whether you’re developing for a Quest 3, Apple Vision Pro, or Valve Index, Vagon’s cloud-based setup makes testing seamless. Launch your Blender project remotely and preview your scene exactly as your users will experience it, without worrying about local performance bottlenecks.
#3. Share Your Work Easily
Collaboration gets easier too. Instead of sending massive project files back and forth, you can share access to your high-performance session. Perfect for client presentations or remote team reviews where everyone needs to see the same VR environment in real time.
Final Thoughts
Creating VR content in Blender can feel intimidating at first, the settings, the performance tweaks, the constant testing. But once you get the hang of it, it’s like unlocking a new layer of creativity.
Start small. Enable VR Scene Inspection, check your scale, and just walk through your scene. Every time you step inside your project, you’ll notice details you would’ve missed staring at a flat viewport.
And if your hardware starts to groan under the weight of high-res renders or complex animations? That’s your sign to take it to the cloud. Tools like Vagon Cloud Computer make it easy to scale your workflow without draining your local machine.
So, whether you’re designing a virtual world, pre-visualizing an animation, or just experimenting with new ideas, Blender gives you the tools to make VR creation not just possible, but genuinely fun.
Put on the headset. Step inside. And start building.
FAQs
1. Can you use Blender in VR?
Absolutely. Blender has a built-in feature called VR Scene Inspection. Once you enable it in the Add-ons panel, you can explore your 3D scenes in real-time using most modern VR headsets like the Quest 3, Valve Index, or HTC Vive. It’s great for checking scale, framing, and spatial design early in your workflow.
2. How do I set up Blender for VR?
Here’s the quick setup:
Go to Edit → Preferences → Add-ons.
Search for VR Scene Inspection and enable it.
Connect your headset and access the VR tab in the 3D viewport.
Adjust your scene’s scale and camera before entering VR to avoid distortion.
3. What’s the best VR headset for Blender?
It depends on your needs:
Meta Quest 3 → Affordable, wireless, and great for general testing.
Valve Index → High fidelity and great tracking for complex projects.
Apple Vision Pro → Premium option for advanced testing and AR/VR workflows. If you’re just starting, the Quest 3 gives the best balance of performance and cost.
4. What is the best workflow for Blender VR modeling?
Start simple. Block out your scene with low-poly geometry, test often in VR, and only add detail once you’re confident in the scale and layout. Use geometry nodes to populate scenes efficiently and keep assets modular for easier optimization.
5. How do I optimize performance for VR?
Performance is everything in VR.
Use LOD models for distant assets.
Bake textures to reduce material load.
Limit texture sizes to 2K unless you need ultra-high fidelity.
Test often on your target headset to catch frame rate drops early.
6. How do I set up the Blender VR camera correctly?
Use a stereo camera rig with an interocular distance of ~6.3 cm to match human vision. Keep depth of field subtle and resolution high, 2K per eye for testing and 4K per eye for final renders when hardware allows. Always test camera settings in your headset to catch framing or perspective issues.
7. Can I export Blender scenes to VR platforms?
Yes, exporting from Blender to VR is straightforward if you pick the right format:
.glbor.gltffor WebXR or lightweight applications..fbxfor Unity or Unreal pipelines..usdzfor Apple devices.Apply transformations, pack textures, and clean up your scene before exporting for the smoothest workflow.
8. How do I make animations work in VR?
Smooth and subtle animations work best in VR. Avoid rapid movements that can make users uncomfortable. Anchor users with static reference points, and test animations directly in the headset to fine-tune pacing and camera angles.
9. Do I need a powerful PC for Blender VR?
Not necessarily, but more power helps. If you’re running complex scenes or rendering high-resolution VR animations, you’ll need a strong GPU and plenty of RAM. If your hardware is struggling, Vagon Cloud Computer lets you run Blender on a high-spec remote machine without the cost of upgrading your PC. You can also check out this list of top graphics cards for VR if you’re considering a local hardware upgrade.
10. Can I collaborate with others in Blender VR?
Blender itself isn’t multi-user in VR, but you can share files and have multiple people review the same VR environment. With cloud setups like Vagon, you can even let collaborators connect to a shared high-performance session for real-time feedback.
Get Beyond Your Computer Performance
Run applications on your cloud computer with the latest generation hardware. No more crashes or lags.

Trial includes 1 hour usage + 7 days of storage.
Summarize with AI

Ready to focus on your creativity?
Vagon gives you the ability to create & render projects, collaborate, and stream applications with the power of the best hardware.

Vagon Blog


Run heavy applications on any device with
your personal computer on the cloud.
San Francisco, California
Solutions
Vagon Teams
Vagon Streams
Use Cases
Resources
Vagon Blog
How to Run Audacity on a Cloud Ubuntu Desktop (2026 Guide)
How to Run Darktable on a Cloud Ubuntu Desktop for RAW Photo Editing (2026 Guide)
How to Run Kdenlive on a Cloud Ubuntu Desktop (2026 Guide)
How to Run DaVinci Resolve on Linux in the Cloud (2026 Guide)
How to Run Inkscape on a Cloud Ubuntu Desktop (2026 Guide)
How to Run Krita on a Cloud Ubuntu Desktop for Digital Painting (2026 Guide)
How to Run GIMP on a Cloud Ubuntu Desktop (2026 Guide)
How to Run Jupyter on a Cloud GPU Linux Desktop (2026 Guide)
Vagon vs GitHub Codespaces: Cloud Dev Environments Compared (2026)
Vagon Blog
Run heavy applications on any device with
your personal computer on the cloud.
San Francisco, California
Solutions
Vagon Teams
Vagon Streams
Use Cases
Resources
Vagon Blog