Instant Connection for Pixel Streaming
— New Feature Automated Setup

Common Problems of Premiere Pro and How to Solve Them
Common Problems of Premiere Pro and How to Solve Them
Common Problems of Premiere Pro and How to Solve Them
Published on September 30, 2023
Updated on February 3, 2025
Table of Contents
Adobe Premiere Pro CC is one of the leading computer programs for video editing. Premiere Pro has a sleek, modern interface that is continually being updated to fix bugs, but like all computer programs, certain problems can arise. In today’s blog post, we share tips from video editing experts on how to optimize Premiere Pro’s performance and fix common problems.

Photo by NordWood Themes on Unsplash
Most Common Premiere Pro Problems 2023
If you want to learn about the common problems of Premiere Pro and how to solve them, you have come to the right place! This quick guide to troubleshooting Premiere Pro problems shares suggestions from video producers for how to fix common issues such as:
Slow rendering
Can’t apply warp stabilizer
Frequent crashing
Failed exports
Trouble importing
Can’t unnest video clips
Media is offline
Video clips wrong size in the timeline
Audio Not Syncing Properly
Premiere Pro Not Detecting GPU (No Hardware Acceleration)
Playback Lag and Choppy Performance
Lumetri Color Panel Not Working or Crashing
Premiere Pro Stuck on “Initializing Media” or “Loading Importer QuickTime”
Essential Graphics Panel Not Loading
Before we get started with our tips for how to optimize Premiere Pro, we want to mention that Adobe announced in February 2023 that both Premiere and After Effects may crash on computers with NVIDIA graphics drivers due to a problem with NVIDIA game-ready drivers 531.18 and 531.26. This issue may also cause Apple ProRes RAW playback in Adobe applications to display black frames. To workaround, roll back to the previous studio driver version 528.49.
You can also check out our GPU Guide for tips to use GPU, along with speed up and acceleration tips for Adobe Premiere Pro.
1. Problems with Warp Stabilizer
Warp stabilizer is one of the most popular features of Premiere Pro. It is used to correct shaky footage and usually has pretty amazing results. The downside is that using the warp stabilizer too much can cause slow playback and rendering due to the processing power it requires.
One of the common problems of Premiere Pro that editors run into is not being able to apply warp stabilizer. The error message reads:
“Warp Stabilizer requires clip to match sequence (fix by nesting)”
If you're wondering how to use Warp Stabilizer and speed on the same clip in Premiere Pro, it’s important to note that they can’t be used together without nesting the clips first. The warp stabilizer cannot work properly if the clips in the sequence are not roughly the same size. If you have a 4k clip in a 1080 sequence or vice versa, you will not be able to apply the stabilizer. You also cannot apply a warp stabilizer to clips that have been modified, such as with a speed effect.
Luckily there is an easy fix; all you need to do is nest the clips together. When you right-click on the video clips to create a nest in the sequence, you can count on the nest to automatically adjust to the ideal sequence resolution. If you're experiencing Warp Stabilizer not working in Premiere Pro, the most likely cause is mismatched clip sizes. Premiere Pro often displays an error when Warp Stabilizer isn’t working properly due to this.
2. Importing Footage with Drag & Drop
Premiere Pro makes it easy to import footage with a convenient drag & drop feature. A common problem that editors run into is that when they try to drag & drop a file into the timeline, it does not work.
The latest versions of Premiere Pro use a “patching” system. You can find the patch selection buttons on the left side of the clips in the timeline. Make sure that both the A1 and V1 buttons are turned on and highlighted in blue, otherwise you may only be able to import either audio or video.
If you want to further enhance your workflow, you can also explore the best plugins for Premiere Pro to unlock additional tools and features that can save time and improve your editing experience.
3. Media Offline
If you ever get an error screen in Premiere Pro that says “media offline”, do not panic! This is a common editing problem in Premiere that is easy to fix. The reason why this happens is usually that files have been moved from one location to another, and Premiere is unable to locate them. When one project is being worked on by multiple editors, this can happen a lot.
To fix the media offline screen in Premiere, you need to help the program locate the lost files. To re-link the lost media, you have two options. The first is to close the program and use the media location window from the start screen to link the footage. The second way to fix it is to press CMD/CTRL+A and then right-click to find the “link media” feature.
If you’re working with a less powerful computer, check out our guide on how to run Premiere Pro on low-end devices to optimize your setup before considering an upgrade.
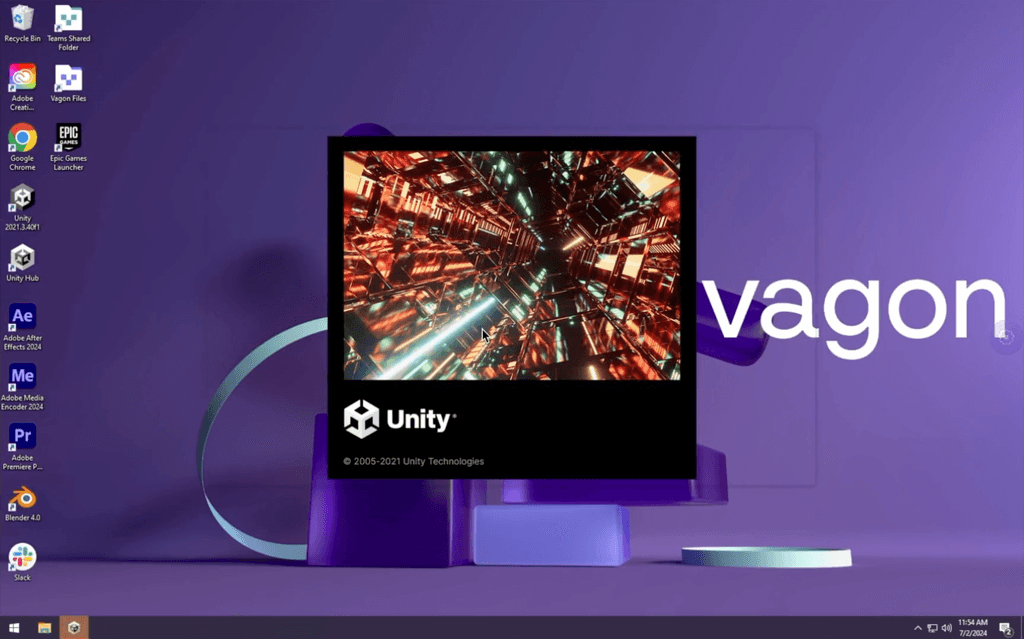
4. Utilize Cloud Computing with Vagon
One of the most effective solutions for tackling common problems in Premiere Pro is to use cloud PCs. In recent years, cloud computing has evolved from a storage system to a platform capable of handling GPU-intensive tasks.
Supercharge Your Premiere Pro Workflow with Vagon
If you're tired of dealing with crashes or slow rendering times in Premiere Pro, Vagon’s high-performance cloud PCs can revolutionize your editing experience. Equipped with powerful GPUs and optimized for resource-intensive tasks, Vagon ensures smooth, crash-free sessions. No matter your device, you can access a supercomputer in your browser and edit projects without limitations. Boost your productivity and say goodbye to hardware struggles. Try Vagon today and experience the difference.
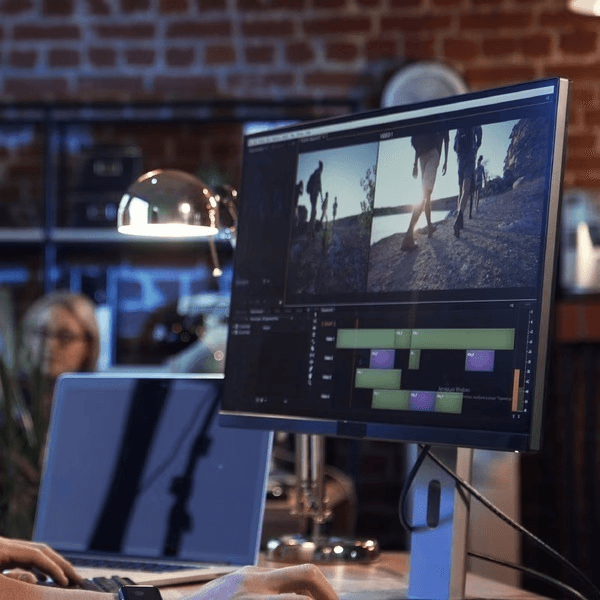
5. Unnesting Video Footage
Editors may get frustrated when they right-click on a nest and do not see an option to unnest the clips. If you have just made the nest, hit CTRL+Z to undo it. If unnesting the clips would undo a large amount of work, the best thing to do is to click into the nest and then copy and paste the original clips. You can then paste them back into the timeline in their unnested format.
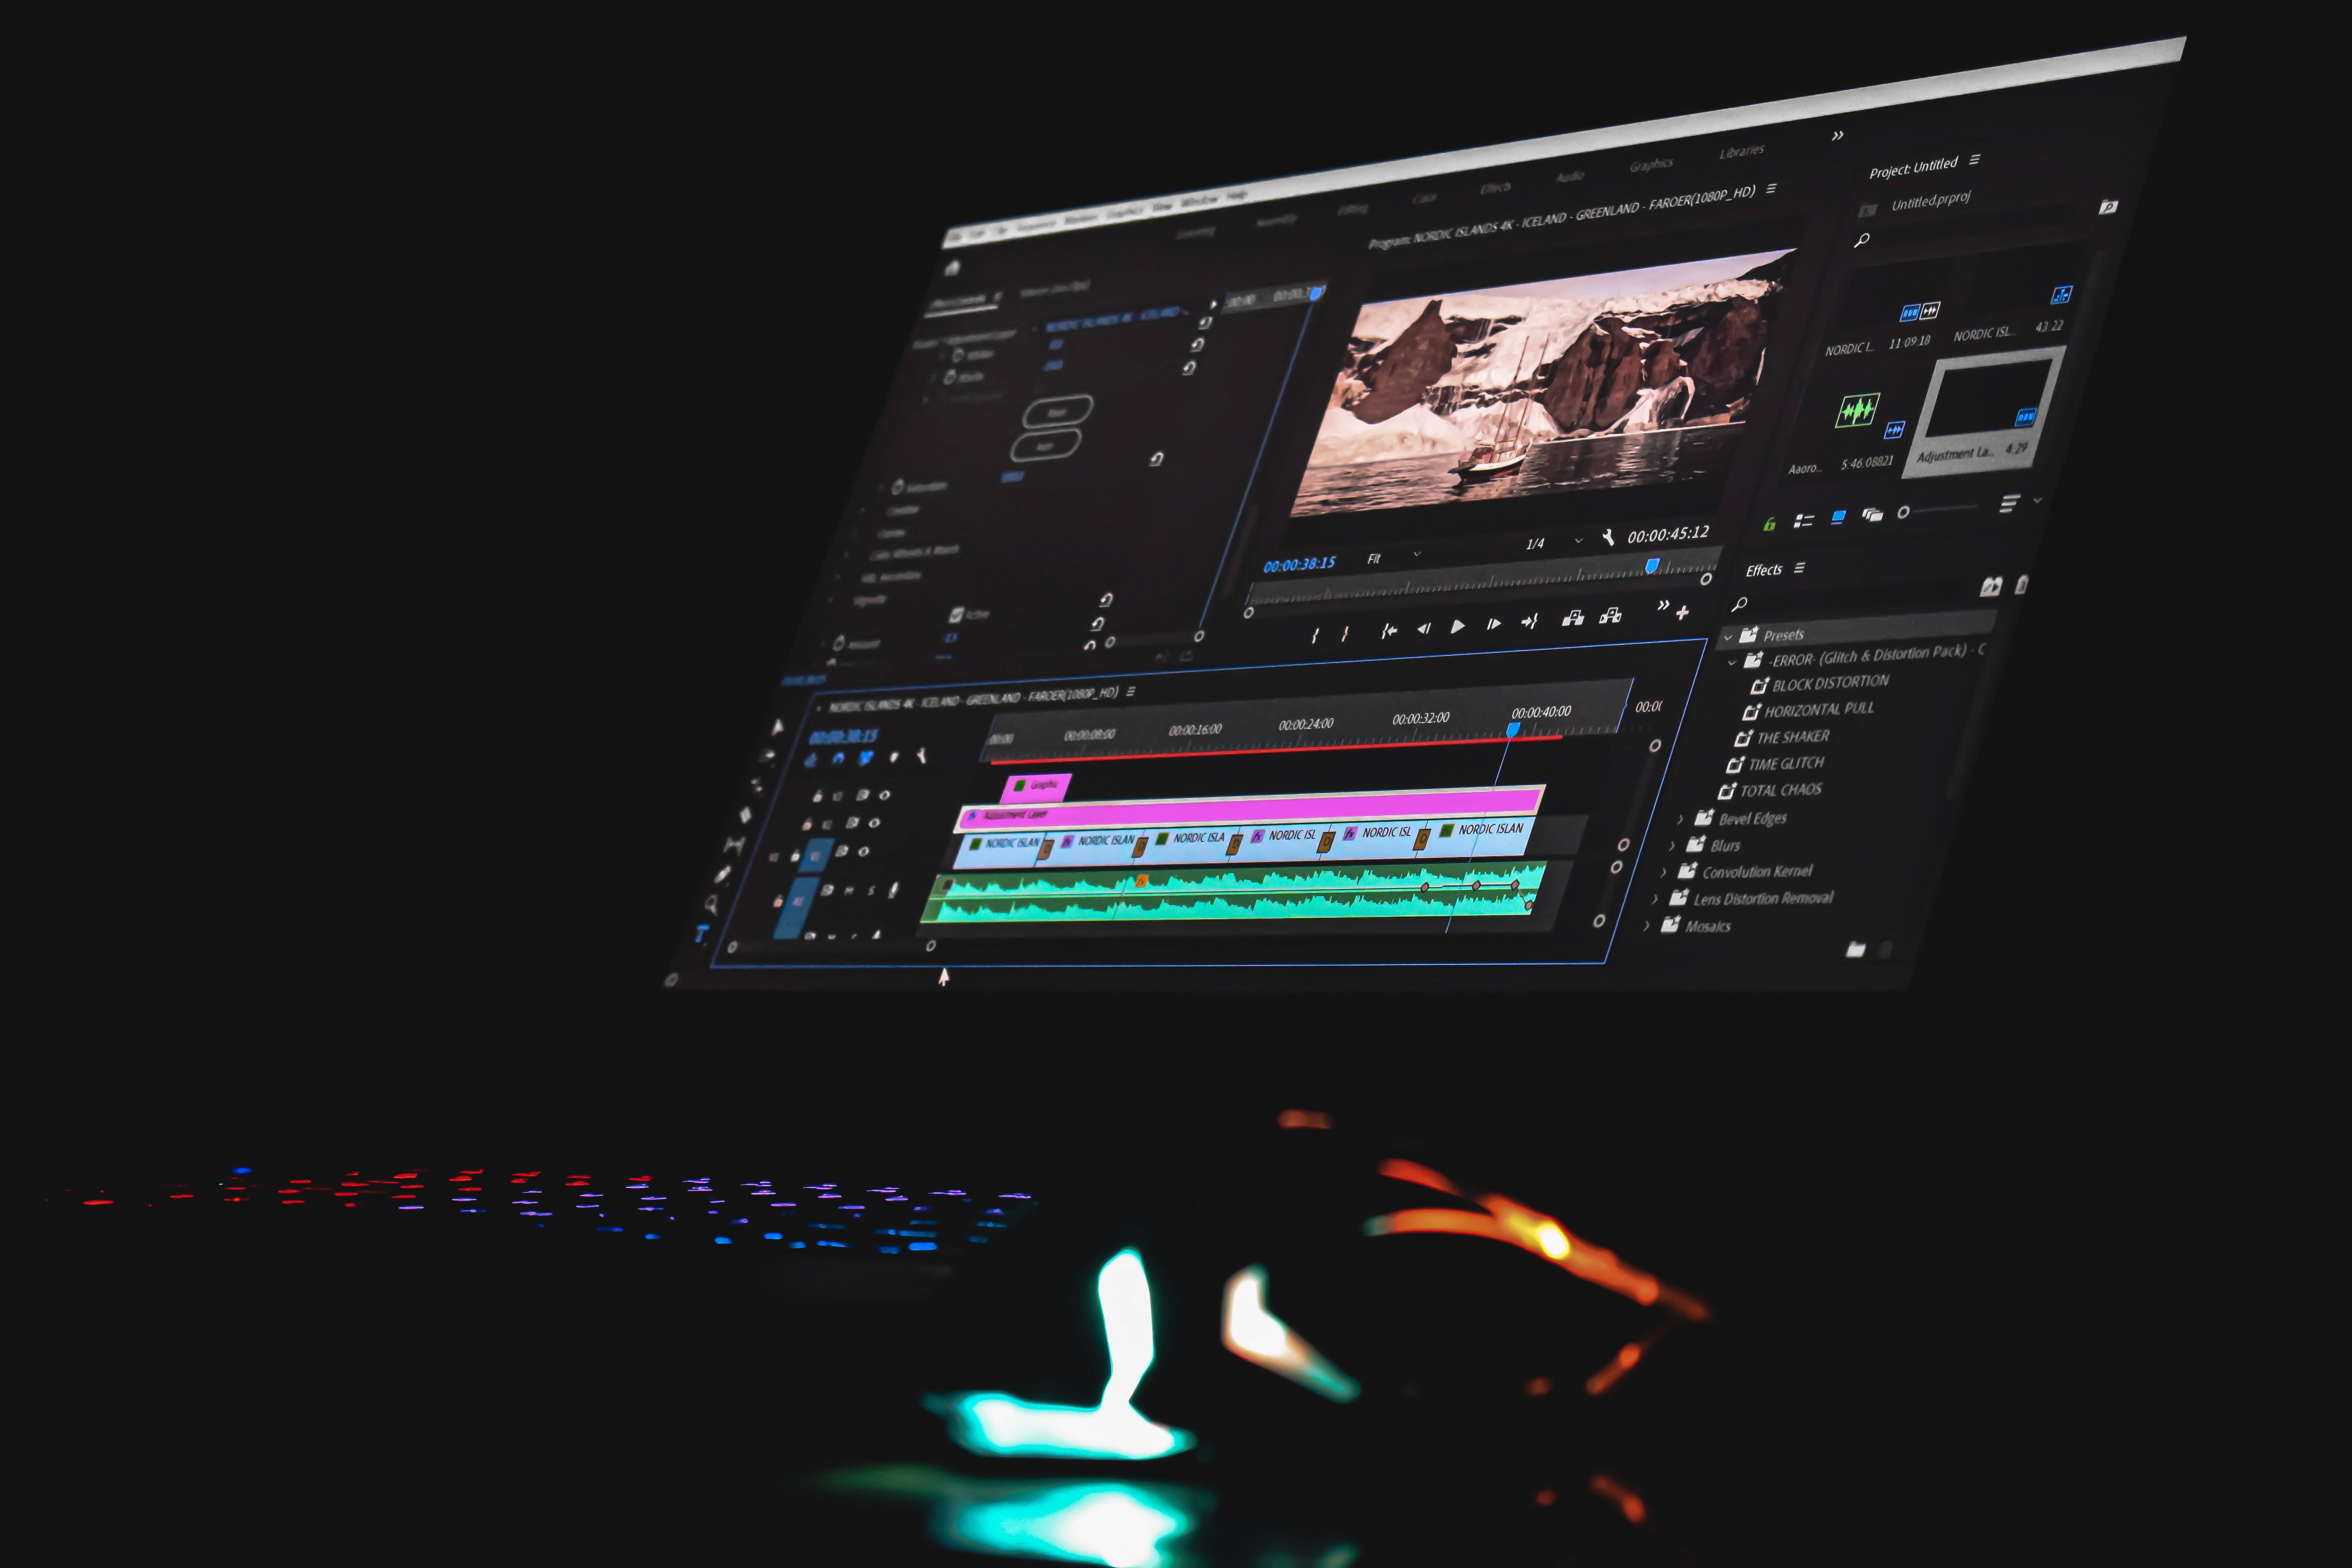
Photo by Sanjeev Nagaraj on Unsplash
6. Mis-Matched Clip Sizes
Sometimes you need to edit footage that is recorded in multiple resolutions in the same project. The rule of thumb for working with multiple clip sizes is to create the sequence in the resolution that the majority of the files are in. You want to try to preserve high-resolution files as much as possible, so it is better to scale down than to scale up the footage.
If Premiere Pro Warp Stabilizer is slow to render or analyze, it may be due to your system’s limitations or the clip's size. Optimizing your workflow with proxy files can help. If you need a refresher, here's how to create video proxies in Premiere Pro.
7. Program Crashes or Slow Rendering
Adobe Premiere Pro is a graphics-intensive software that allows cross-platform integration. To optimize Premiere Pro for the best performance, you need to make it easier on your computer to run the program. You can do this in a few different ways:
Delete media cache files
Preferences > Media Cache > DeleteTurn off GPU acceleration
File > Project Settings > General > Video Rendering and PlaybackReset Premiere Pro preferences
Press ALT (PC) or Option (Mac) while launching the applicationCheck for software updates
Export with Adobe Media Encoder
Edit using proxy files
Close and reopen the program
If Premiere Pro continues to crash, here are additional troubleshooting tips to help you stop Premiere Pro from crashing and maintain smoother workflows.
To further speed up your workflow, explore strategies to reduce your rendering times in Premiere Pro and complete projects faster without sacrificing quality.
8. Audio Not Syncing Properly
One of the most frustrating issues Premiere Pro users encounter is audio drifting out of sync with the video, especially when working with variable frame rate (VFR) recordings from smartphones, screen recordings, or webcams. Unlike fixed frame rate (CFR) videos, which maintain a consistent frame rate throughout the recording, VFR files adjust frame rates dynamically based on motion and scene complexity. This fluctuation can cause Premiere Pro to misinterpret the timing of audio, leading to gradual desynchronization. The problem becomes more noticeable in longer clips, where the audio starts off in sync but drifts over time. Manually syncing these files by adjusting their speed or cutting and realigning sections can be extremely time-consuming.
To prevent this issue, converting VFR footage to CFR before importing it into Premiere Pro is highly recommended. This can be done using tools like HandBrake or Shutter Encoder, which allow users to transcode their footage into a constant frame rate format, ensuring that Premiere Pro maintains accurate audio synchronization. Additionally, Premiere Pro’s “Interpret Footage” option (found in the Project Panel > Modify > Interpret Footage) allows users to manually adjust the frame rate to better align audio and video. For screen recordings, setting up the recording software to capture at a fixed frame rate (e.g., 30fps or 60fps) rather than using a dynamic frame rate can prevent sync issues before they occur.
9. Premiere Pro Not Detecting GPU (No Hardware Acceleration)
Despite having a powerful NVIDIA, AMD, or Apple GPU, some users find that Premiere Pro fails to recognize their graphics card and defaults to Software Encoding instead of GPU Acceleration. This results in slower playback, laggy previews, and significantly longer export times since the CPU has to handle all rendering processes instead of offloading tasks to the GPU. The most common causes of this issue include outdated GPU drivers, incorrect project settings, or incompatible hardware.
To resolve this issue, first, ensure that GPU acceleration is enabled by navigating to File > Project Settings > Generaland selecting Mercury Playback Engine GPU Acceleration (CUDA, Metal, or OpenCL, depending on your GPU). If this option is unavailable, it may be due to outdated or incompatible GPU drivers. Visit NVIDIA’s GeForce Experience, AMD’s Radeon Software, or Apple’s official support page to download the latest drivers and install them. Additionally, clearing Premiere Pro’s media cache and ensuring that the graphics card is properly assigned in the Windows or macOS GPU settings can help resolve detection issues. If the GPU is still not recognized, checking for conflicts with third-party plugins or background applications that might interfere with Premiere Pro’s hardware acceleration is recommended.
10. Playback Lag and Choppy Performance
Choppy playback and lag are common issues, even for users with high-end computers, especially when editing 4K, 8K, or high-frame-rate footage with multiple effects applied. This lag occurs because Premiere Pro struggles to process complex files in real-time, leading to stuttering, frame drops, and delayed response times in the timeline. Some users experience severe lag when using effects like Warp Stabilizer, Lumetri Color, or motion tracking, as these require significant processing power.
To improve playback performance, users should lower the playback resolution from Full to Half or Quarter in the Program Monitor, allowing Premiere Pro to process lower-resolution previews while maintaining full quality in the final export. Additionally, enabling Proxies (File > Ingest Settings > Create Proxies) can significantly enhance performance by replacing high-resolution files with low-resolution versions during editing. Disabling background applications, increasing RAM allocation in Preferences > Memory, and storing media files on fast SSDs or NVMe drives can further optimize performance. If issues persist, using Render In to Out (Sequence > Rend
In to Out) allows Premiere Pro to pre-render complex effects, reducing lag during playback.
11. Lumetri Color Panel Not Working or Crashing
Premiere Pro’s Lumetri Color panel is an essential tool for color grading, but users sometimes encounter issues where adjustments don’t apply, sliders become unresponsive, or Premiere Pro crashes when using color corrections. This problem is often linked to corrupt LUTs (Look-Up Tables), GPU acceleration conflicts, or project glitches. If Lumetri Color is unresponsive, try resetting it by clicking the Reset Effect button or disabling GPU acceleration in Project Settings to see if the issue persists.
Another common cause is corrupt or incompatible LUTs, which can crash Premiere Pro when applied. To fix this, navigate to C:\Program Files\Adobe\Common\LUTs (Windows) or Macintosh HD/Library/Application Support/Adobe/Common/LUTs (Mac), remove any third-party LUTs, and restart Premiere Pro. If Premiere Pro crashes after applying Lumetri Color, try resetting preferences (Alt/Option + Shift while launching Premiere Pro) or clearing the media cache (Preferences > Media Cache > Delete). If the problem continues, updating your graphics drivers and Adobe Premiere Pro may resolve compatibility issues.
12. Premiere Pro Stuck on “Initializing Media” or “Loading Importer QuickTime”
Sometimes, Premiere Pro gets stuck during startup, showing “Initializing Media,” “Loading Importer QuickTime,” or “Checking Media Files.” This often happens when the media cache is overloaded, plugins are corrupted, or the software encounters a conflict with certain video formats.
To resolve this, start by clearing the media cache in Preferences > Media Cache > Delete and restarting Premiere Pro. If the issue persists, disable third-party plugins (by renaming the Plugins folder in Premiere Pro’s installation directory) and check if the software starts normally. If specific video files are causing the hang, try converting them into a more Premiere-friendly codec like ProRes or DNxHD using a tool like HandBrake. Running Premiere Pro as an Administrator (Windows) or resetting preferences can also resolve startup-related issues.
13. Essential Graphics Panel Not Loading
The Essential Graphics panel allows users to work with Motion Graphics Templates (MOGRTs), but sometimes it fails to load, crashes Premiere Pro, or doesn’t display templates properly. This issue is often caused by incompatible MOGRT files, missing fonts, or software bugs.
To fix this, ensure all Motion Graphics Templates are stored in the correct directory (Essential Graphics Panel > Browse > Install Motion Graphics Template). If a MOGRT file is unresponsive, try reloading the template or reinstalling missing fonts. Resetting workspace settings (Window > Workspaces > Reset to Saved Layout) or updating Premiere Pro can also resolve compatibility issues with Essential Graphics.
We hope that our list of the common problems of Premiere Pro and how to solve them has been helpful to you! Graphics-intensive professional editing software like Premiere Pro usually needs a powerful computer to run smoothly. If you continue to have problems with Premiere Pro, you might consider editing using Vagon’s in-browser supercomputer. Vagon empowers video editors to use any software without system limitations.
Optimize Your Premiere Pro Workflow Today!
Struggling with slow rendering, crashing, or media errors in Adobe Premiere Pro? Don’t let these common issues slow down your productivity! By applying the right troubleshooting steps—such as clearing cache files, updating GPU drivers, using proxy files, and optimizing sequence settings—you can significantly improve performance and enjoy a smoother editing experience.
If your hardware is holding you back, consider taking your editing to the next level with Vagon’s high-performance cloud PCs. With powerful GPUs, unlimited scalability, and seamless access from any device, you’ll never have to worry about system limitations again. Say goodbye to frustrating crashes and slow exports—edit faster, render quicker, and focus on what really matters: creating amazing content.
Start optimizing your workflow today! Try Vagon’s cloud-based supercomputer for lag-free editing and unlock the full potential of Premiere Pro. Click here to get started! 🚀
For even more flexibility in your editing workflow, consider using Premiere Pro on-the-go with your iPad! Check out this guide to learn how you can set up Premiere Pro on an iPad, optimize its performance, and keep your editing mobile without compromising on quality.
FAQs:
Why is Warp Stabilizer not working in Adobe Premiere Pro?
Warp Stabilizer may not work if your clip sizes don’t match the sequence settings or if you’ve applied speed adjustments. Nesting the clip typically resolves this issue.
How do I fix slow rendering times in Premiere Pro?
You can speed up rendering by clearing media cache files, disabling GPU acceleration, using proxy files, or exporting through Adobe Media Encoder.
What should I do if Premiere Pro keeps crashing?
Premiere Pro may crash due to outdated drivers or software conflicts. Consider updating your drivers, lowering your playback resolution, or using cloud-based solutions like Vagon for improved performance.
Can I use speed adjustments and Warp Stabilizer on the same clip?
No, Warp Stabilizer and speed adjustments can’t be applied to the same clip without nesting. Nesting the clip allows both effects to function together.
How do I fix the “media offline” error in Premiere Pro?
The “media offline” error happens when files are moved or renamed. You can re-link media by selecting the missing files manually or using the media location window to relink footage.
What are some common issues in Premiere Pro, and how can I solve them?
Common Premiere Pro issues include slow rendering, failed exports, media offline errors, and crashes. Solutions include clearing cache, checking updates, and using proxy files or cloud PCs.
Adobe Premiere Pro CC is one of the leading computer programs for video editing. Premiere Pro has a sleek, modern interface that is continually being updated to fix bugs, but like all computer programs, certain problems can arise. In today’s blog post, we share tips from video editing experts on how to optimize Premiere Pro’s performance and fix common problems.
Photo by NordWood Themes on Unsplash
Most Common Premiere Pro Problems 2023
If you want to learn about the common problems of Premiere Pro and how to solve them, you have come to the right place! This quick guide to troubleshooting Premiere Pro problems shares suggestions from video producers for how to fix common issues such as:
Slow rendering
Can’t apply warp stabilizer
Frequent crashing
Failed exports
Trouble importing
Can’t unnest video clips
Media is offline
Video clips wrong size in the timeline
Audio Not Syncing Properly
Premiere Pro Not Detecting GPU (No Hardware Acceleration)
Playback Lag and Choppy Performance
Lumetri Color Panel Not Working or Crashing
Premiere Pro Stuck on “Initializing Media” or “Loading Importer QuickTime”
Essential Graphics Panel Not Loading
Before we get started with our tips for how to optimize Premiere Pro, we want to mention that Adobe announced in February 2023 that both Premiere and After Effects may crash on computers with NVIDIA graphics drivers due to a problem with NVIDIA game-ready drivers 531.18 and 531.26. This issue may also cause Apple ProRes RAW playback in Adobe applications to display black frames. To workaround, roll back to the previous studio driver version 528.49.
You can also check out our GPU Guide for tips to use GPU, along with speed up and acceleration tips for Adobe Premiere Pro.
1. Problems with Warp Stabilizer
Warp stabilizer is one of the most popular features of Premiere Pro. It is used to correct shaky footage and usually has pretty amazing results. The downside is that using the warp stabilizer too much can cause slow playback and rendering due to the processing power it requires.
One of the common problems of Premiere Pro that editors run into is not being able to apply warp stabilizer. The error message reads:
“Warp Stabilizer requires clip to match sequence (fix by nesting)”
If you're wondering how to use Warp Stabilizer and speed on the same clip in Premiere Pro, it’s important to note that they can’t be used together without nesting the clips first. The warp stabilizer cannot work properly if the clips in the sequence are not roughly the same size. If you have a 4k clip in a 1080 sequence or vice versa, you will not be able to apply the stabilizer. You also cannot apply a warp stabilizer to clips that have been modified, such as with a speed effect.
Luckily there is an easy fix; all you need to do is nest the clips together. When you right-click on the video clips to create a nest in the sequence, you can count on the nest to automatically adjust to the ideal sequence resolution. If you're experiencing Warp Stabilizer not working in Premiere Pro, the most likely cause is mismatched clip sizes. Premiere Pro often displays an error when Warp Stabilizer isn’t working properly due to this.
2. Importing Footage with Drag & Drop
Premiere Pro makes it easy to import footage with a convenient drag & drop feature. A common problem that editors run into is that when they try to drag & drop a file into the timeline, it does not work.
The latest versions of Premiere Pro use a “patching” system. You can find the patch selection buttons on the left side of the clips in the timeline. Make sure that both the A1 and V1 buttons are turned on and highlighted in blue, otherwise you may only be able to import either audio or video.
If you want to further enhance your workflow, you can also explore the best plugins for Premiere Pro to unlock additional tools and features that can save time and improve your editing experience.
3. Media Offline
If you ever get an error screen in Premiere Pro that says “media offline”, do not panic! This is a common editing problem in Premiere that is easy to fix. The reason why this happens is usually that files have been moved from one location to another, and Premiere is unable to locate them. When one project is being worked on by multiple editors, this can happen a lot.
To fix the media offline screen in Premiere, you need to help the program locate the lost files. To re-link the lost media, you have two options. The first is to close the program and use the media location window from the start screen to link the footage. The second way to fix it is to press CMD/CTRL+A and then right-click to find the “link media” feature.
If you’re working with a less powerful computer, check out our guide on how to run Premiere Pro on low-end devices to optimize your setup before considering an upgrade.
4. Utilize Cloud Computing with Vagon
One of the most effective solutions for tackling common problems in Premiere Pro is to use cloud PCs. In recent years, cloud computing has evolved from a storage system to a platform capable of handling GPU-intensive tasks.
Supercharge Your Premiere Pro Workflow with Vagon
If you're tired of dealing with crashes or slow rendering times in Premiere Pro, Vagon’s high-performance cloud PCs can revolutionize your editing experience. Equipped with powerful GPUs and optimized for resource-intensive tasks, Vagon ensures smooth, crash-free sessions. No matter your device, you can access a supercomputer in your browser and edit projects without limitations. Boost your productivity and say goodbye to hardware struggles. Try Vagon today and experience the difference.
5. Unnesting Video Footage
Editors may get frustrated when they right-click on a nest and do not see an option to unnest the clips. If you have just made the nest, hit CTRL+Z to undo it. If unnesting the clips would undo a large amount of work, the best thing to do is to click into the nest and then copy and paste the original clips. You can then paste them back into the timeline in their unnested format.
Photo by Sanjeev Nagaraj on Unsplash
6. Mis-Matched Clip Sizes
Sometimes you need to edit footage that is recorded in multiple resolutions in the same project. The rule of thumb for working with multiple clip sizes is to create the sequence in the resolution that the majority of the files are in. You want to try to preserve high-resolution files as much as possible, so it is better to scale down than to scale up the footage.
If Premiere Pro Warp Stabilizer is slow to render or analyze, it may be due to your system’s limitations or the clip's size. Optimizing your workflow with proxy files can help. If you need a refresher, here's how to create video proxies in Premiere Pro.
7. Program Crashes or Slow Rendering
Adobe Premiere Pro is a graphics-intensive software that allows cross-platform integration. To optimize Premiere Pro for the best performance, you need to make it easier on your computer to run the program. You can do this in a few different ways:
Delete media cache files
Preferences > Media Cache > DeleteTurn off GPU acceleration
File > Project Settings > General > Video Rendering and PlaybackReset Premiere Pro preferences
Press ALT (PC) or Option (Mac) while launching the applicationCheck for software updates
Export with Adobe Media Encoder
Edit using proxy files
Close and reopen the program
If Premiere Pro continues to crash, here are additional troubleshooting tips to help you stop Premiere Pro from crashing and maintain smoother workflows.
To further speed up your workflow, explore strategies to reduce your rendering times in Premiere Pro and complete projects faster without sacrificing quality.
8. Audio Not Syncing Properly
One of the most frustrating issues Premiere Pro users encounter is audio drifting out of sync with the video, especially when working with variable frame rate (VFR) recordings from smartphones, screen recordings, or webcams. Unlike fixed frame rate (CFR) videos, which maintain a consistent frame rate throughout the recording, VFR files adjust frame rates dynamically based on motion and scene complexity. This fluctuation can cause Premiere Pro to misinterpret the timing of audio, leading to gradual desynchronization. The problem becomes more noticeable in longer clips, where the audio starts off in sync but drifts over time. Manually syncing these files by adjusting their speed or cutting and realigning sections can be extremely time-consuming.
To prevent this issue, converting VFR footage to CFR before importing it into Premiere Pro is highly recommended. This can be done using tools like HandBrake or Shutter Encoder, which allow users to transcode their footage into a constant frame rate format, ensuring that Premiere Pro maintains accurate audio synchronization. Additionally, Premiere Pro’s “Interpret Footage” option (found in the Project Panel > Modify > Interpret Footage) allows users to manually adjust the frame rate to better align audio and video. For screen recordings, setting up the recording software to capture at a fixed frame rate (e.g., 30fps or 60fps) rather than using a dynamic frame rate can prevent sync issues before they occur.
9. Premiere Pro Not Detecting GPU (No Hardware Acceleration)
Despite having a powerful NVIDIA, AMD, or Apple GPU, some users find that Premiere Pro fails to recognize their graphics card and defaults to Software Encoding instead of GPU Acceleration. This results in slower playback, laggy previews, and significantly longer export times since the CPU has to handle all rendering processes instead of offloading tasks to the GPU. The most common causes of this issue include outdated GPU drivers, incorrect project settings, or incompatible hardware.
To resolve this issue, first, ensure that GPU acceleration is enabled by navigating to File > Project Settings > Generaland selecting Mercury Playback Engine GPU Acceleration (CUDA, Metal, or OpenCL, depending on your GPU). If this option is unavailable, it may be due to outdated or incompatible GPU drivers. Visit NVIDIA’s GeForce Experience, AMD’s Radeon Software, or Apple’s official support page to download the latest drivers and install them. Additionally, clearing Premiere Pro’s media cache and ensuring that the graphics card is properly assigned in the Windows or macOS GPU settings can help resolve detection issues. If the GPU is still not recognized, checking for conflicts with third-party plugins or background applications that might interfere with Premiere Pro’s hardware acceleration is recommended.
10. Playback Lag and Choppy Performance
Choppy playback and lag are common issues, even for users with high-end computers, especially when editing 4K, 8K, or high-frame-rate footage with multiple effects applied. This lag occurs because Premiere Pro struggles to process complex files in real-time, leading to stuttering, frame drops, and delayed response times in the timeline. Some users experience severe lag when using effects like Warp Stabilizer, Lumetri Color, or motion tracking, as these require significant processing power.
To improve playback performance, users should lower the playback resolution from Full to Half or Quarter in the Program Monitor, allowing Premiere Pro to process lower-resolution previews while maintaining full quality in the final export. Additionally, enabling Proxies (File > Ingest Settings > Create Proxies) can significantly enhance performance by replacing high-resolution files with low-resolution versions during editing. Disabling background applications, increasing RAM allocation in Preferences > Memory, and storing media files on fast SSDs or NVMe drives can further optimize performance. If issues persist, using Render In to Out (Sequence > Rend
In to Out) allows Premiere Pro to pre-render complex effects, reducing lag during playback.
11. Lumetri Color Panel Not Working or Crashing
Premiere Pro’s Lumetri Color panel is an essential tool for color grading, but users sometimes encounter issues where adjustments don’t apply, sliders become unresponsive, or Premiere Pro crashes when using color corrections. This problem is often linked to corrupt LUTs (Look-Up Tables), GPU acceleration conflicts, or project glitches. If Lumetri Color is unresponsive, try resetting it by clicking the Reset Effect button or disabling GPU acceleration in Project Settings to see if the issue persists.
Another common cause is corrupt or incompatible LUTs, which can crash Premiere Pro when applied. To fix this, navigate to C:\Program Files\Adobe\Common\LUTs (Windows) or Macintosh HD/Library/Application Support/Adobe/Common/LUTs (Mac), remove any third-party LUTs, and restart Premiere Pro. If Premiere Pro crashes after applying Lumetri Color, try resetting preferences (Alt/Option + Shift while launching Premiere Pro) or clearing the media cache (Preferences > Media Cache > Delete). If the problem continues, updating your graphics drivers and Adobe Premiere Pro may resolve compatibility issues.
12. Premiere Pro Stuck on “Initializing Media” or “Loading Importer QuickTime”
Sometimes, Premiere Pro gets stuck during startup, showing “Initializing Media,” “Loading Importer QuickTime,” or “Checking Media Files.” This often happens when the media cache is overloaded, plugins are corrupted, or the software encounters a conflict with certain video formats.
To resolve this, start by clearing the media cache in Preferences > Media Cache > Delete and restarting Premiere Pro. If the issue persists, disable third-party plugins (by renaming the Plugins folder in Premiere Pro’s installation directory) and check if the software starts normally. If specific video files are causing the hang, try converting them into a more Premiere-friendly codec like ProRes or DNxHD using a tool like HandBrake. Running Premiere Pro as an Administrator (Windows) or resetting preferences can also resolve startup-related issues.
13. Essential Graphics Panel Not Loading
The Essential Graphics panel allows users to work with Motion Graphics Templates (MOGRTs), but sometimes it fails to load, crashes Premiere Pro, or doesn’t display templates properly. This issue is often caused by incompatible MOGRT files, missing fonts, or software bugs.
To fix this, ensure all Motion Graphics Templates are stored in the correct directory (Essential Graphics Panel > Browse > Install Motion Graphics Template). If a MOGRT file is unresponsive, try reloading the template or reinstalling missing fonts. Resetting workspace settings (Window > Workspaces > Reset to Saved Layout) or updating Premiere Pro can also resolve compatibility issues with Essential Graphics.
We hope that our list of the common problems of Premiere Pro and how to solve them has been helpful to you! Graphics-intensive professional editing software like Premiere Pro usually needs a powerful computer to run smoothly. If you continue to have problems with Premiere Pro, you might consider editing using Vagon’s in-browser supercomputer. Vagon empowers video editors to use any software without system limitations.
Optimize Your Premiere Pro Workflow Today!
Struggling with slow rendering, crashing, or media errors in Adobe Premiere Pro? Don’t let these common issues slow down your productivity! By applying the right troubleshooting steps—such as clearing cache files, updating GPU drivers, using proxy files, and optimizing sequence settings—you can significantly improve performance and enjoy a smoother editing experience.
If your hardware is holding you back, consider taking your editing to the next level with Vagon’s high-performance cloud PCs. With powerful GPUs, unlimited scalability, and seamless access from any device, you’ll never have to worry about system limitations again. Say goodbye to frustrating crashes and slow exports—edit faster, render quicker, and focus on what really matters: creating amazing content.
Start optimizing your workflow today! Try Vagon’s cloud-based supercomputer for lag-free editing and unlock the full potential of Premiere Pro. Click here to get started! 🚀
For even more flexibility in your editing workflow, consider using Premiere Pro on-the-go with your iPad! Check out this guide to learn how you can set up Premiere Pro on an iPad, optimize its performance, and keep your editing mobile without compromising on quality.
FAQs:
Why is Warp Stabilizer not working in Adobe Premiere Pro?
Warp Stabilizer may not work if your clip sizes don’t match the sequence settings or if you’ve applied speed adjustments. Nesting the clip typically resolves this issue.
How do I fix slow rendering times in Premiere Pro?
You can speed up rendering by clearing media cache files, disabling GPU acceleration, using proxy files, or exporting through Adobe Media Encoder.
What should I do if Premiere Pro keeps crashing?
Premiere Pro may crash due to outdated drivers or software conflicts. Consider updating your drivers, lowering your playback resolution, or using cloud-based solutions like Vagon for improved performance.
Can I use speed adjustments and Warp Stabilizer on the same clip?
No, Warp Stabilizer and speed adjustments can’t be applied to the same clip without nesting. Nesting the clip allows both effects to function together.
How do I fix the “media offline” error in Premiere Pro?
The “media offline” error happens when files are moved or renamed. You can re-link media by selecting the missing files manually or using the media location window to relink footage.
What are some common issues in Premiere Pro, and how can I solve them?
Common Premiere Pro issues include slow rendering, failed exports, media offline errors, and crashes. Solutions include clearing cache, checking updates, and using proxy files or cloud PCs.
Get Beyond Your Computer Performance
Run applications on your cloud computer with the latest generation hardware. No more crashes or lags.
Trial includes 1 hour usage + 7 days of storage.
Get Beyond Your Computer Performance
Run applications on your cloud computer with the latest generation hardware. No more crashes or lags.
Trial includes 1 hour usage + 7 days of storage.
Get Beyond Your Computer Performance
Run applications on your cloud computer with the latest generation hardware. No more crashes or lags.
Trial includes 1 hour usage + 7 days of storage.
Get Beyond Your Computer Performance
Run applications on your cloud computer with the latest generation hardware. No more crashes or lags.
Trial includes 1 hour usage + 7 days of storage.
Get Beyond Your Computer Performance
Run applications on your cloud computer with the latest generation hardware. No more crashes or lags.
Trial includes 1 hour usage + 7 days of storage.
Ready to focus on your creativity?
Vagon gives you the ability to create & render projects, collaborate, and stream applications with the power of the best hardware.

Vagon Blog


Run heavy applications on any device with
your personal computer on the cloud.
San Francisco, California
Solutions
Vagon Teams
Vagon Streams
Use Cases
Resources
Vagon Blog
The Best Render Settings for Blender 3D
Arcware vs Vagon Streams: Best Pixel Streaming Alternatives
How To Use FL Studio on a Cloud Computer
Reducing Latency in Virtual Desktops: 11 Fixes That Actually Work
PureWeb vs Vagon Streams: Best Alternative Pixel Streaming Platform
How To Use Photoshop On iPad
How To Fix Slow & Laggy Performance on AWS Workspaces VDIs?
Arcane Mirage vs Vagon Streams: Best Alternative Pixel Streaming Platform
The Best Unity Shortcuts
Vagon Blog
Run heavy applications on any device with
your personal computer on the cloud.
San Francisco, California
Solutions
Vagon Teams
Vagon Streams
Use Cases
Resources
Vagon Blog