Instant Connection for Pixel Streaming
— New Feature Automated Setup

Autodesk Maya Keyboard Shortcuts & Hotkeys
Autodesk Maya Keyboard Shortcuts & Hotkeys
DigitalArt
Autodesk Maya Keyboard Shortcuts & Hotkeys
Table of Contents
Regarding applications you can use for 3D modeling and animation, I think most people might agree that Autodesk Maya is the industry standard, and for good reason. This program is extremely powerful and running it on a capable system will open you up to a wide world of creativity.
Suppose you’re going to drop over a thousand dollars for an Autodesk Maya license each year. In that case, it is important that you know how to use the program like a pro (which tutorials can help with) and shortcuts can be one of the best ways to achieve an efficient Maya workflow.
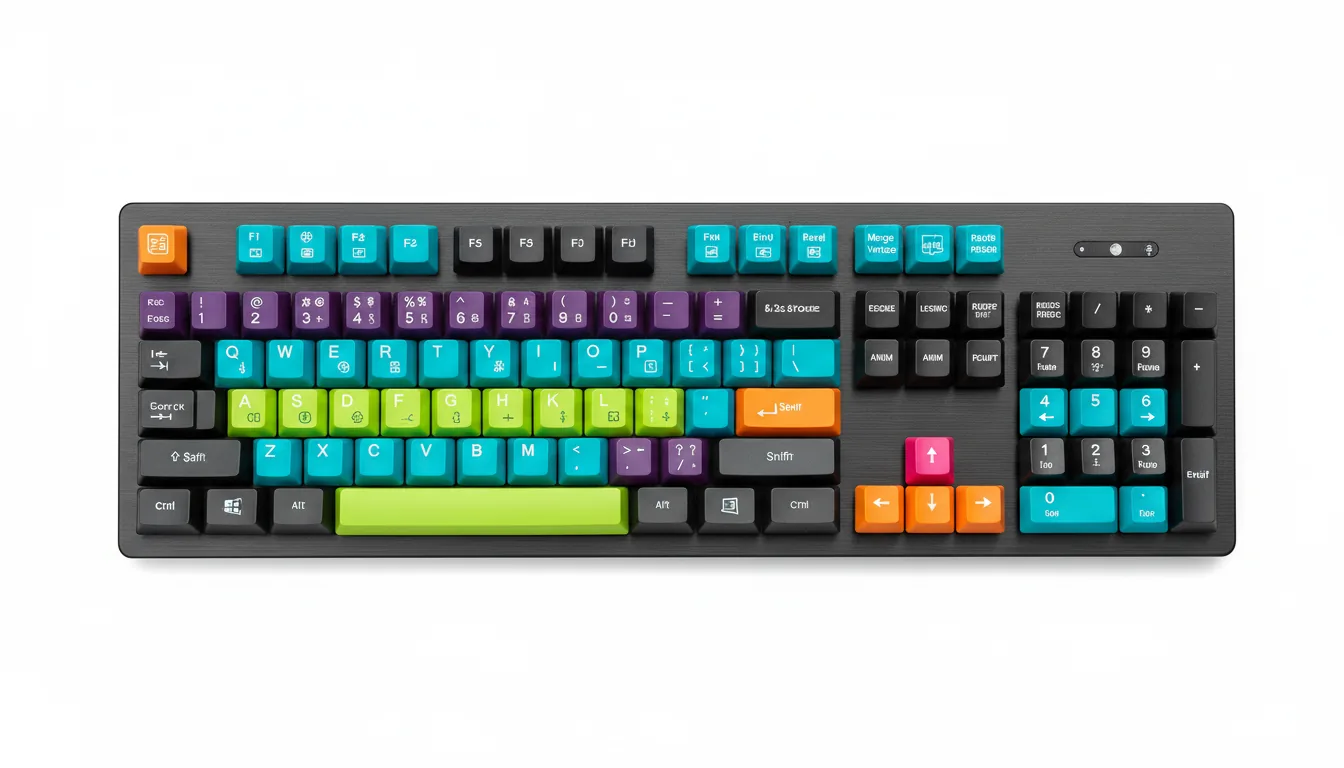
Logic Keyboard Designed for Autodesk Maya
Getting Started with Maya Keyboard Shortcuts
There are some shortcuts that every basic Maya user needs to know, whether for navigating around your model, switching to basic tools, or jumping to different parts of the interface.
Basic Shortcuts for Everyday Tasks
Even if you’ve only been using Autodesk Maya for a week, some very basic Maya keyboard shortcuts are almost a must to know, so let’s talk about a few of them:
Move Tool: W
Rotate Tool: E
Scale Tool: R
View Entire Scene: A
View Selected Object(s): F
Delete Selected Object: X
Select All Objects: Ctrl + A
Undo: Ctrl + Z
Redo: Shift + Ctrl + Z
Repeat The Last Action: G
Move Around The Scene: Arrow Keys
Navigating the Maya Interface with Shortcuts
Even someone who might have been using Maya for over a decade might have yet to learn all the ins and outs of the program. That’s how many different menus and interfaces you’ll find in the program. However, it’s about mastering the things you use the most, and not everything. Let’s talk about some shortcuts to help you warp through the interface at Lightspeed.
Switch to Animation Menu Set: F2
Switch to Polygons Menu Set: F3
Switch to Modeling Menu Set: F4
Switch to Dynamics Menu Set: F5
Switch to Rendering Menu Set: F6
Toggle Between Pan and Zoom Modes: \
Shortcuts for Modeling and Sculpting
Not everyone does animation in Maya. Some people just model and sculpt. However, even if you do animate, you’ve got to make the models first, so let’s talk about shortcuts that can make modeling and sculpting in Maya easier. You can also check out plugins that can enhance the experience.
You can also check out our GPU Guide for tips to use GPU, along with speed up and acceleration tips for Autodesk Maya.
Essential Shortcuts for Speeding Up Modeling Workflow
If you’re modeling in Maya, you’ve got to mess around with faces, edges, vertices, and the like. Here are some 3D modeling shortcuts to make things faster for you when doing so.
Toggle Between Object Selection and Component Selection: F8
Vertex Selection Mode: F9
Edge Selection Mode: F10
Face Selection Mode: F11
Extrude Selected Faces: Ctrl + E
Inset Selected Faces: Ctrl + Shift + E
Create A New Polygon: Ctrl + T
Duplicate Object: D
Duplicate Special (More Precise Duplication Option): Shift + Ctrl + D
Cut The Selected Object(s): C
Paste The Cut Object(s): V
Toggle Between Viewport Angles: Spacebar
Advanced Shortcuts for Sculpting and Detailing
When you want more precise control over what you’re creating, like someone making a work of art from marble, you turn to sculpting. Here are shortcuts related to sculpting in Autodesk Maya:
Switch to Sculpt Tool: Ctrl + 1
Switch to Smooth Tool: Ctrl + 2
Switch to Relax Tool: Ctrl + 3
Show Sculpting Tools Marking Menu: Ctrl/Shift + Right Click
Increase Brush Size: B + Drag Mouse Right
Decrease Brush Size: B + Drag Mouse Left
Increase Brush Strength: M + Drag Mouse Up
Decrease Brush Strength: M + Drag Mouse Down
Sculpt Along Surface Normals: Alt + Click and Drag
Invert Sculpting Tool Effect: Ctrl + Shift + Drag
Animation and Rigging Shortcuts
The animation and rigging potential of Maya is what makes it so important in the animation industry. Gorgeous models are one thing, but getting them to move beautifully is another, and these animation keyboard shortcuts will help in that regard.
Keyframe Manipulation and Timeline Shortcuts
The timeline and the keyframes you set are the heart of whatever animation you’ve imagined, and animation can be a relatively long process. This is exactly why you should have certain Maya shortcut keys in your back pocket.
Set a Keyframe for Selected Object: S
Select One Keyframe: Shift + Click
Select Multiple Keyframes: Click and Drag on the Timeline
Select All Keyframes: Ctrl + A
Move A Keyframe: Hold a Keyframe and Drag
Delete the Selected Keyframe: Delete
Toggle Through Interpolation Types for a Selected Keyframe: F
Play/Pause Animation: Spacebar
Stop Animation: Esc
Skip to the Beginning of Animation: Home
Skip to the End of Animation: End
Skip to the Next Keyframe: Period (.)
Skip to the Previous Keyframe: Comma (,)
Rigging and Character Animation Hotkeys
If you’re going to be doing a lot of animation for characters with arms and legs and complex bodies, then rigging will make your life a whole lot easier because you can basically create a skeleton that will be used for animation purposes.
Create a Joint: J
Create a Child Joint Under Selected Joint: Shift + J
Create a New Joint to Be Parented to the Selected Joint: Ctrl + J
Delete Selected Joint: X
Move Selected Joint: W
Move Selected Joint Without Connected Joints: W, then Hold D
Rotate Selected Joint: E
Scale Selected Joint: R
Create IK Handle Solver: Shift + I
Create IK Handle Chain: Ctrl + I
Create Parent Constraint: Shift + C
Create Point Constraint: Ctrl + Shift + C
Create Orientation Constraint: Alt + Shift + C
Add Current Pose to Pose Library: Shift + Ctrl + C
Paste From Pose Library to Character: Shift + Ctrl + V
Lighting and Rendering Shortcuts
You can make the most detailed model of a Tyrannosaurus Rex and animate it with a team of 10 people, but if you want it to look properly production-ready, you can never neglect the quality of your lighting and your rendering.
Shortcuts for Efficient Lighting Setups
Here are some hotkeys you can rely on to make lighting your scene a bit easier.
Show the Create Lighting Effects menu: Shift + A
Show the Create Lighting Effects menu: Shift + A
Use the Target Locator to Link Light Direction to the Object: T
Look Through Selected Object (for Accurate Light Placement): Shift + T
Insert New Light Between Two Selected Lights: I
Toggle All Lights in the Scene: 7
View Objects Accurately Shaded and Textured: 6
View Objects Shaded: 5
Quick Rendering Hotkeys
A scene in Autodesk Maya is not complete until it has been rendered, and for many, that’s the most power-hungry and time-consuming part of the process. As a result, why not cut off some seconds in the few ways that you can?
Start a Full Render: F9
Open Render View Window: Shift + F9
Render Current Frame: Ctrl + A
Open Render Settings: Alt + R
Play/Pause Current Render: Spacebar
Customizing Your Own Shortcuts in Maya
Ultimately, while it is great to have all of these Maya hotkeys and shortcuts set by default for your convenience, it is understandable that you might not like some of them (or you might feel some of them could be done better).
The good thing is that Autodesk Maya has a Hotkey Editor that you can use to make your own set of shortcuts. All you need to do is click Windows in the top bar, then Setting/Preferences, and Hotkey Editor.
Here, you’ll see the different shortcuts arranged by menu. You can duplicate the default set and make your own edits to it, or create one from scratch (though that’s a lot of work). However, as you learn more about using Maya, you’ll begin to know which shortcuts you’d like to change and which work best for you.
Conclusion
You can’t truly look or feel like an advanced user of any program until you get the hang of the shortcuts and hotkeys related to your workflow. They push your efficiency to another level, and it is worth grabbing onto them.
Maya needs a lot of power to work right though. Instead of compromising by using your potentially underpowered system, just hop onto a Vagon remote desktop, where you can get the power of several high-end Nvidia GPUs to do your bidding in your next 3D creation journey.
Regarding applications you can use for 3D modeling and animation, I think most people might agree that Autodesk Maya is the industry standard, and for good reason. This program is extremely powerful and running it on a capable system will open you up to a wide world of creativity.
Suppose you’re going to drop over a thousand dollars for an Autodesk Maya license each year. In that case, it is important that you know how to use the program like a pro (which tutorials can help with) and shortcuts can be one of the best ways to achieve an efficient Maya workflow.
Logic Keyboard Designed for Autodesk Maya
Getting Started with Maya Keyboard Shortcuts
There are some shortcuts that every basic Maya user needs to know, whether for navigating around your model, switching to basic tools, or jumping to different parts of the interface.
Basic Shortcuts for Everyday Tasks
Even if you’ve only been using Autodesk Maya for a week, some very basic Maya keyboard shortcuts are almost a must to know, so let’s talk about a few of them:
Move Tool: W
Rotate Tool: E
Scale Tool: R
View Entire Scene: A
View Selected Object(s): F
Delete Selected Object: X
Select All Objects: Ctrl + A
Undo: Ctrl + Z
Redo: Shift + Ctrl + Z
Repeat The Last Action: G
Move Around The Scene: Arrow Keys
Navigating the Maya Interface with Shortcuts
Even someone who might have been using Maya for over a decade might have yet to learn all the ins and outs of the program. That’s how many different menus and interfaces you’ll find in the program. However, it’s about mastering the things you use the most, and not everything. Let’s talk about some shortcuts to help you warp through the interface at Lightspeed.
Switch to Animation Menu Set: F2
Switch to Polygons Menu Set: F3
Switch to Modeling Menu Set: F4
Switch to Dynamics Menu Set: F5
Switch to Rendering Menu Set: F6
Toggle Between Pan and Zoom Modes: \
Shortcuts for Modeling and Sculpting
Not everyone does animation in Maya. Some people just model and sculpt. However, even if you do animate, you’ve got to make the models first, so let’s talk about shortcuts that can make modeling and sculpting in Maya easier. You can also check out plugins that can enhance the experience.
You can also check out our GPU Guide for tips to use GPU, along with speed up and acceleration tips for Autodesk Maya.
Essential Shortcuts for Speeding Up Modeling Workflow
If you’re modeling in Maya, you’ve got to mess around with faces, edges, vertices, and the like. Here are some 3D modeling shortcuts to make things faster for you when doing so.
Toggle Between Object Selection and Component Selection: F8
Vertex Selection Mode: F9
Edge Selection Mode: F10
Face Selection Mode: F11
Extrude Selected Faces: Ctrl + E
Inset Selected Faces: Ctrl + Shift + E
Create A New Polygon: Ctrl + T
Duplicate Object: D
Duplicate Special (More Precise Duplication Option): Shift + Ctrl + D
Cut The Selected Object(s): C
Paste The Cut Object(s): V
Toggle Between Viewport Angles: Spacebar
Advanced Shortcuts for Sculpting and Detailing
When you want more precise control over what you’re creating, like someone making a work of art from marble, you turn to sculpting. Here are shortcuts related to sculpting in Autodesk Maya:
Switch to Sculpt Tool: Ctrl + 1
Switch to Smooth Tool: Ctrl + 2
Switch to Relax Tool: Ctrl + 3
Show Sculpting Tools Marking Menu: Ctrl/Shift + Right Click
Increase Brush Size: B + Drag Mouse Right
Decrease Brush Size: B + Drag Mouse Left
Increase Brush Strength: M + Drag Mouse Up
Decrease Brush Strength: M + Drag Mouse Down
Sculpt Along Surface Normals: Alt + Click and Drag
Invert Sculpting Tool Effect: Ctrl + Shift + Drag
Animation and Rigging Shortcuts
The animation and rigging potential of Maya is what makes it so important in the animation industry. Gorgeous models are one thing, but getting them to move beautifully is another, and these animation keyboard shortcuts will help in that regard.
Keyframe Manipulation and Timeline Shortcuts
The timeline and the keyframes you set are the heart of whatever animation you’ve imagined, and animation can be a relatively long process. This is exactly why you should have certain Maya shortcut keys in your back pocket.
Set a Keyframe for Selected Object: S
Select One Keyframe: Shift + Click
Select Multiple Keyframes: Click and Drag on the Timeline
Select All Keyframes: Ctrl + A
Move A Keyframe: Hold a Keyframe and Drag
Delete the Selected Keyframe: Delete
Toggle Through Interpolation Types for a Selected Keyframe: F
Play/Pause Animation: Spacebar
Stop Animation: Esc
Skip to the Beginning of Animation: Home
Skip to the End of Animation: End
Skip to the Next Keyframe: Period (.)
Skip to the Previous Keyframe: Comma (,)
Rigging and Character Animation Hotkeys
If you’re going to be doing a lot of animation for characters with arms and legs and complex bodies, then rigging will make your life a whole lot easier because you can basically create a skeleton that will be used for animation purposes.
Create a Joint: J
Create a Child Joint Under Selected Joint: Shift + J
Create a New Joint to Be Parented to the Selected Joint: Ctrl + J
Delete Selected Joint: X
Move Selected Joint: W
Move Selected Joint Without Connected Joints: W, then Hold D
Rotate Selected Joint: E
Scale Selected Joint: R
Create IK Handle Solver: Shift + I
Create IK Handle Chain: Ctrl + I
Create Parent Constraint: Shift + C
Create Point Constraint: Ctrl + Shift + C
Create Orientation Constraint: Alt + Shift + C
Add Current Pose to Pose Library: Shift + Ctrl + C
Paste From Pose Library to Character: Shift + Ctrl + V
Lighting and Rendering Shortcuts
You can make the most detailed model of a Tyrannosaurus Rex and animate it with a team of 10 people, but if you want it to look properly production-ready, you can never neglect the quality of your lighting and your rendering.
Shortcuts for Efficient Lighting Setups
Here are some hotkeys you can rely on to make lighting your scene a bit easier.
Show the Create Lighting Effects menu: Shift + A
Show the Create Lighting Effects menu: Shift + A
Use the Target Locator to Link Light Direction to the Object: T
Look Through Selected Object (for Accurate Light Placement): Shift + T
Insert New Light Between Two Selected Lights: I
Toggle All Lights in the Scene: 7
View Objects Accurately Shaded and Textured: 6
View Objects Shaded: 5
Quick Rendering Hotkeys
A scene in Autodesk Maya is not complete until it has been rendered, and for many, that’s the most power-hungry and time-consuming part of the process. As a result, why not cut off some seconds in the few ways that you can?
Start a Full Render: F9
Open Render View Window: Shift + F9
Render Current Frame: Ctrl + A
Open Render Settings: Alt + R
Play/Pause Current Render: Spacebar
Customizing Your Own Shortcuts in Maya
Ultimately, while it is great to have all of these Maya hotkeys and shortcuts set by default for your convenience, it is understandable that you might not like some of them (or you might feel some of them could be done better).
The good thing is that Autodesk Maya has a Hotkey Editor that you can use to make your own set of shortcuts. All you need to do is click Windows in the top bar, then Setting/Preferences, and Hotkey Editor.
Here, you’ll see the different shortcuts arranged by menu. You can duplicate the default set and make your own edits to it, or create one from scratch (though that’s a lot of work). However, as you learn more about using Maya, you’ll begin to know which shortcuts you’d like to change and which work best for you.
Conclusion
You can’t truly look or feel like an advanced user of any program until you get the hang of the shortcuts and hotkeys related to your workflow. They push your efficiency to another level, and it is worth grabbing onto them.
Maya needs a lot of power to work right though. Instead of compromising by using your potentially underpowered system, just hop onto a Vagon remote desktop, where you can get the power of several high-end Nvidia GPUs to do your bidding in your next 3D creation journey.
Get Beyond Your Computer Performance
Run applications on your cloud computer with the latest generation hardware. No more crashes or lags.

Trial includes 1 hour usage + 7 days of storage.
Summarize with AI

Ready to focus on your creativity?
Vagon gives you the ability to create & render projects, collaborate, and stream applications with the power of the best hardware.

Vagon Blog


Run heavy applications on any device with
your personal computer on the cloud.
San Francisco, California
Solutions
Vagon Teams
Vagon Streams
Use Cases
Resources
Vagon Blog
How to Run Inkscape on a Cloud Ubuntu Desktop (2026 Guide)
How to Run Krita on a Cloud Ubuntu Desktop for Digital Painting (2026 Guide)
How to Run GIMP on a Cloud Ubuntu Desktop (2026 Guide)
How to Run Jupyter on a Cloud GPU Linux Desktop (2026 Guide)
Vagon vs GitHub Codespaces: Cloud Dev Environments Compared (2026)
Vagon vs RunPod: Which Cloud GPU Is Right for You? (2026 Comparison)
How to Watch Your AI Agent Work on a Cloud Ubuntu Desktop (2026 Guide)
How to Run a Local LLM on Ubuntu in the Cloud (2026 Guide)
How to Run Blender on a Cloud GPU (Ubuntu): The Complete 2026 Guide
Vagon Blog
Run heavy applications on any device with
your personal computer on the cloud.
San Francisco, California
Solutions
Vagon Teams
Vagon Streams
Use Cases
Resources
Vagon Blog