Instant Connection for Pixel Streaming
— New Feature Automated Setup
The Best Plugins for DaVinci Resolve
The Best Plugins for DaVinci Resolve
VideoProduction
The Best Plugins for DaVinci Resolve
Table of Contents
I’ll be honest, I didn’t think I needed plugins.
DaVinci Resolve already felt like a beast out of the box. Color grading? Check. Editing? Smooth. Fusion? Confusing, but it’s there. But then I started getting more client work. More rush jobs. And suddenly, all the built-in tools that felt “good enough” weren’t cutting it anymore.
I had noise in low-light footage I couldn’t clean up without trashing the details. Skin retouching that looked fake. Footage from two cameras that didn’t match no matter what LUT I used. That’s when I finally gave in and started trying some third-party plugins.
Let me tell you: the difference is night and day.
Some of these tools are expensive. Some are free. A few will make you wonder why Resolve doesn’t just have this built-in already. But once you’ve used them, it’s hard to go back.
So, here they are, the best DaVinci Resolve plugins in 2025 that have actually made a difference in my work.
Start Here: Plugins That Fix Footage Problems
You know that feeling when something in your footage just looks... off? Maybe it’s a subtle flicker. Maybe it’s noise you didn’t notice until color grading. Or your exposure is technically fine, but it still feels wrong.
That’s where these plugins come in. They don’t just enhance, they fix the things that quietly ruin your final product if you’re not paying attention.
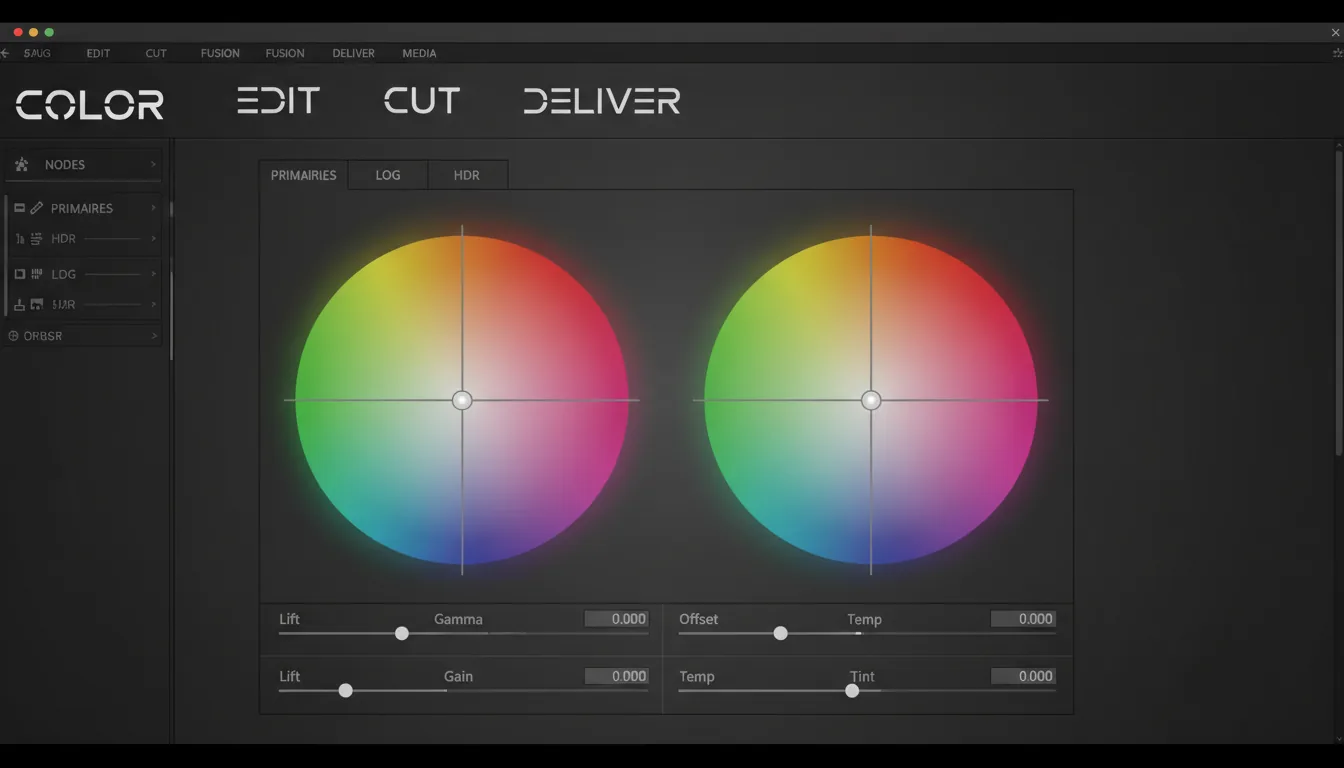
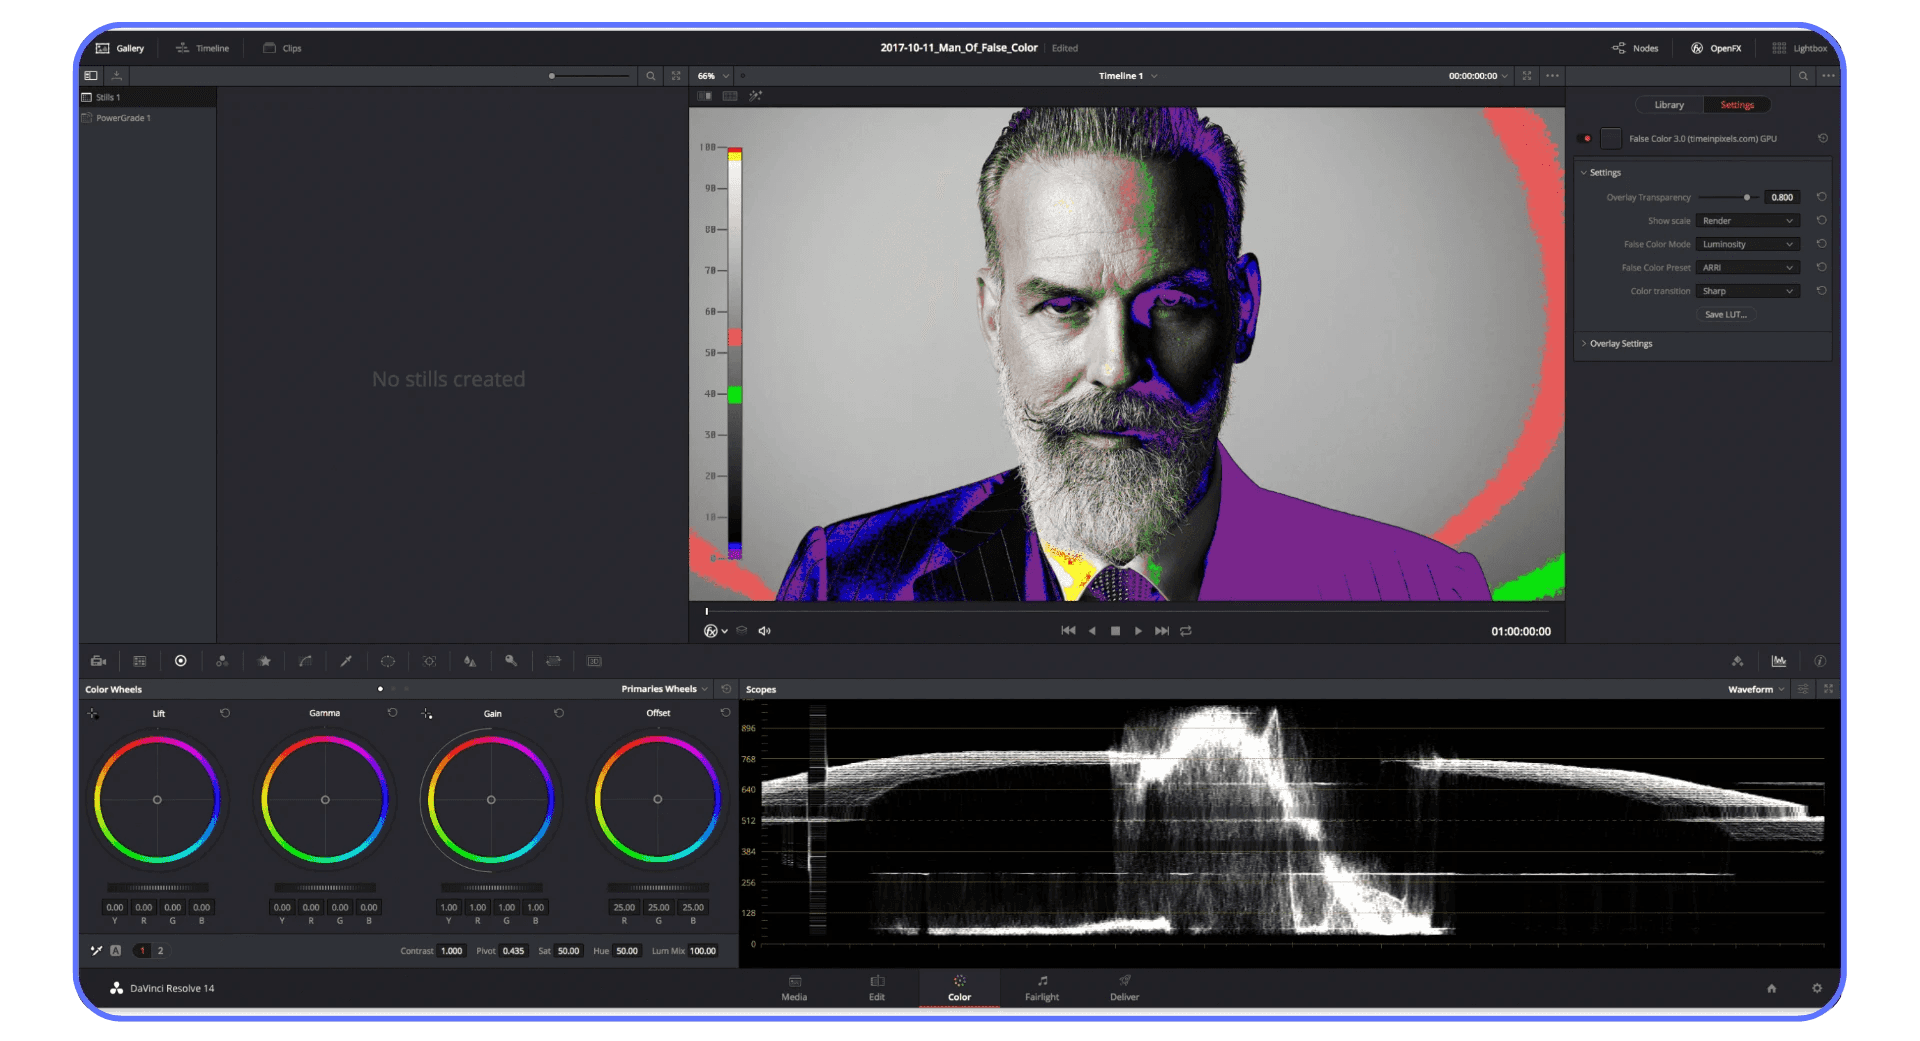
#1. False Color
Free / Windows & macOS
You don’t need to be a cinematographer to understand exposure, but you do need to see it clearly. This plugin maps your image into color-coded zones, showing exactly where you’re blowing out highlights or losing detail in the shadows.
It’s the kind of tool that teaches you how to see. Once you get used to it, scopes feel like background noise.
“I started using False Color during grading, and now I can’t believe I ever trusted just the histogram.”
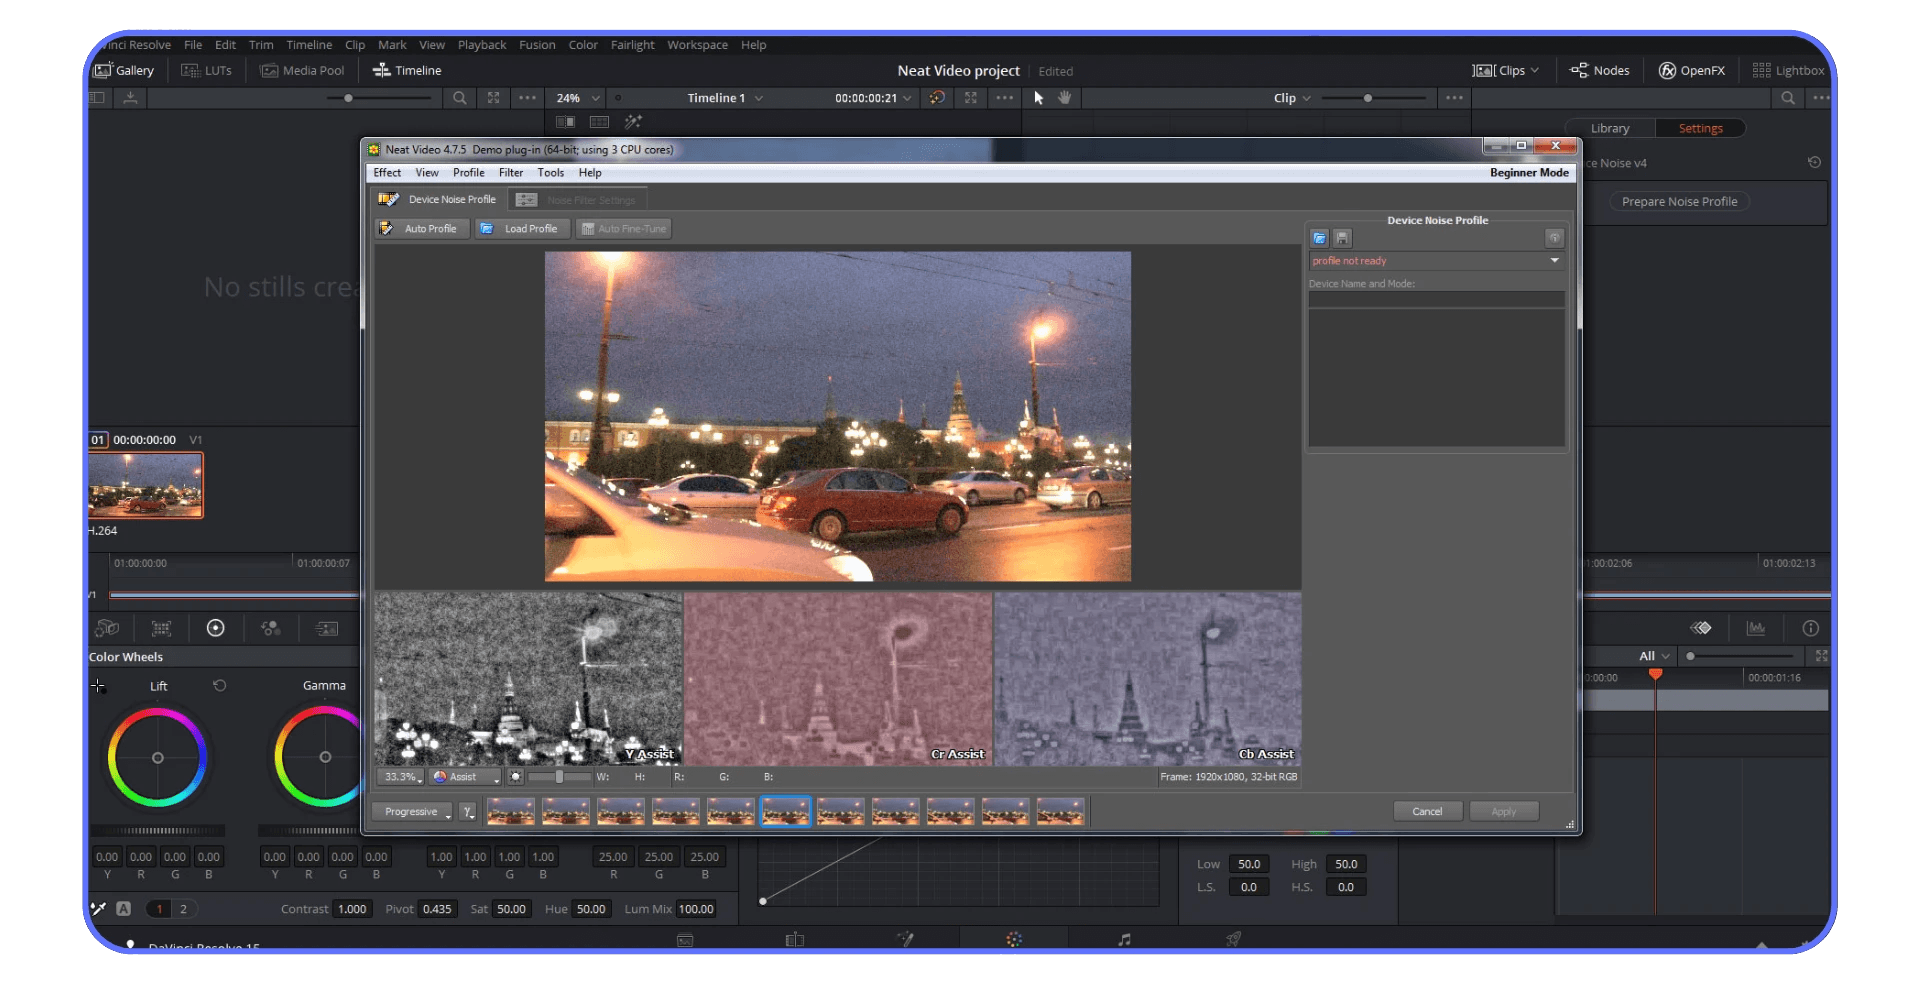
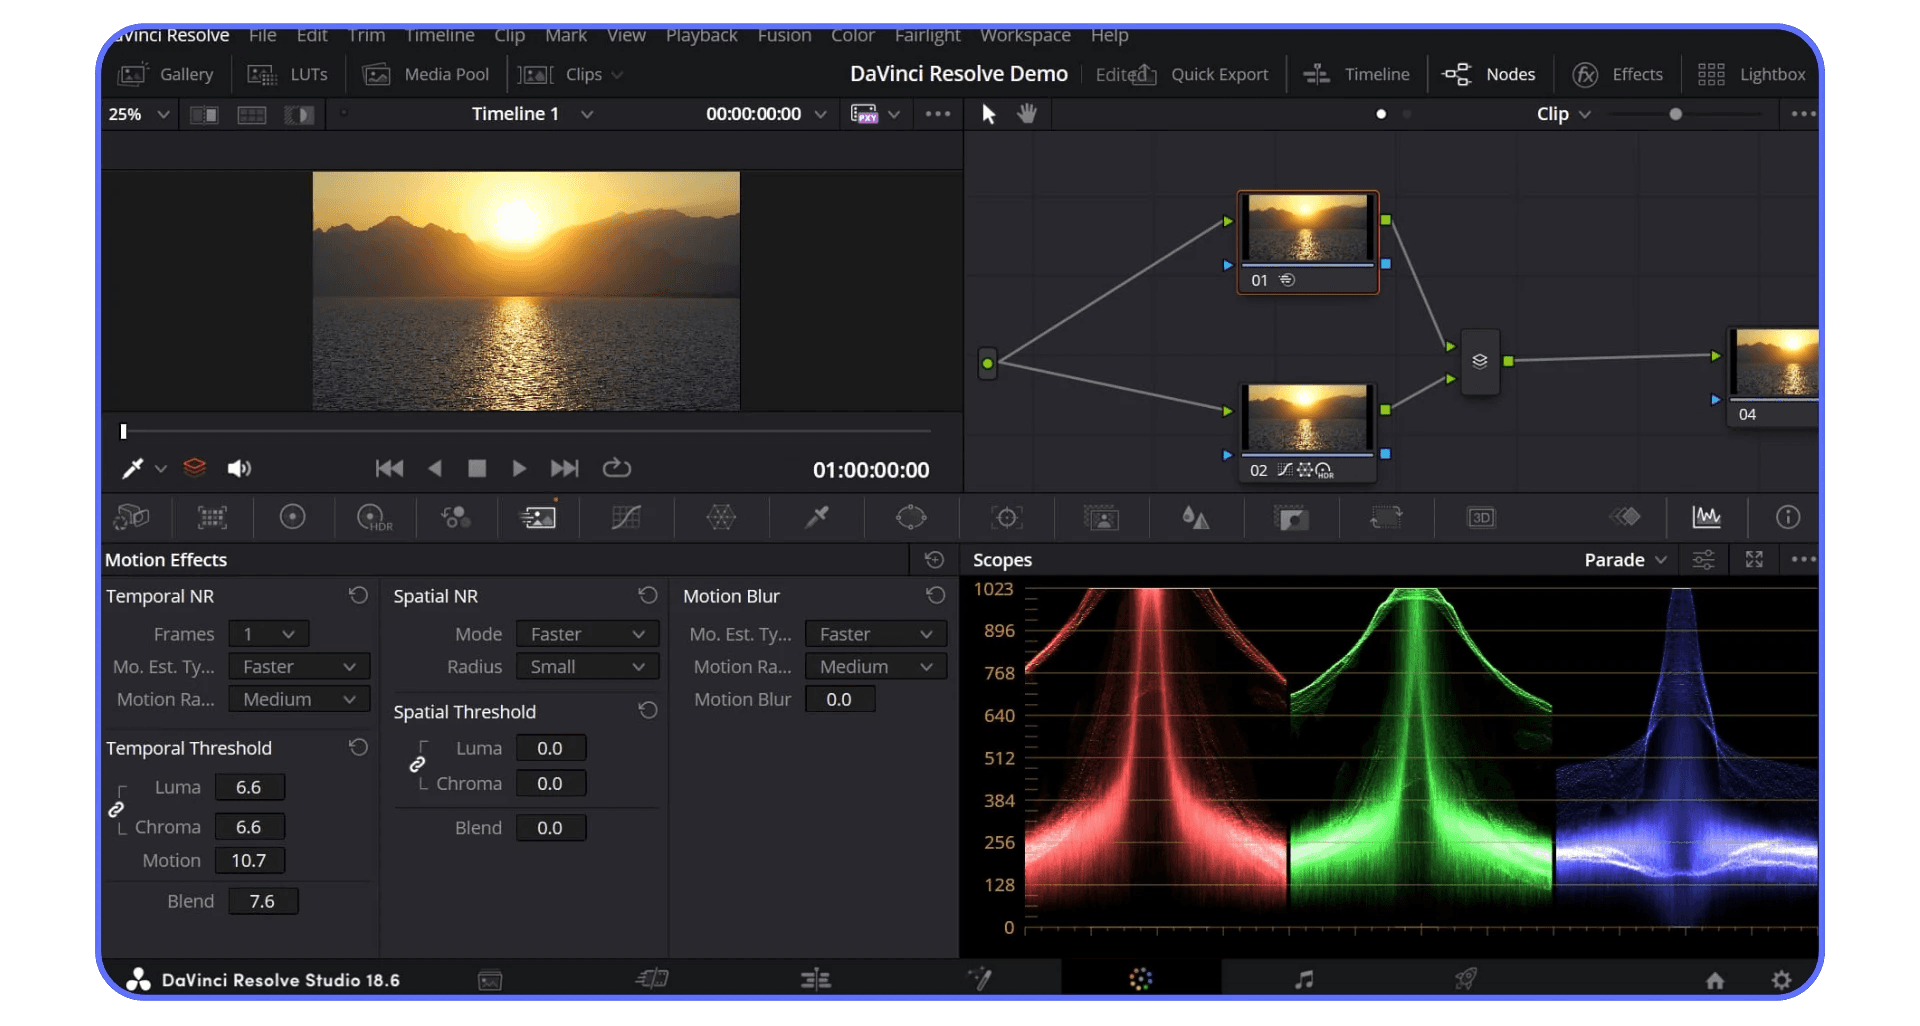
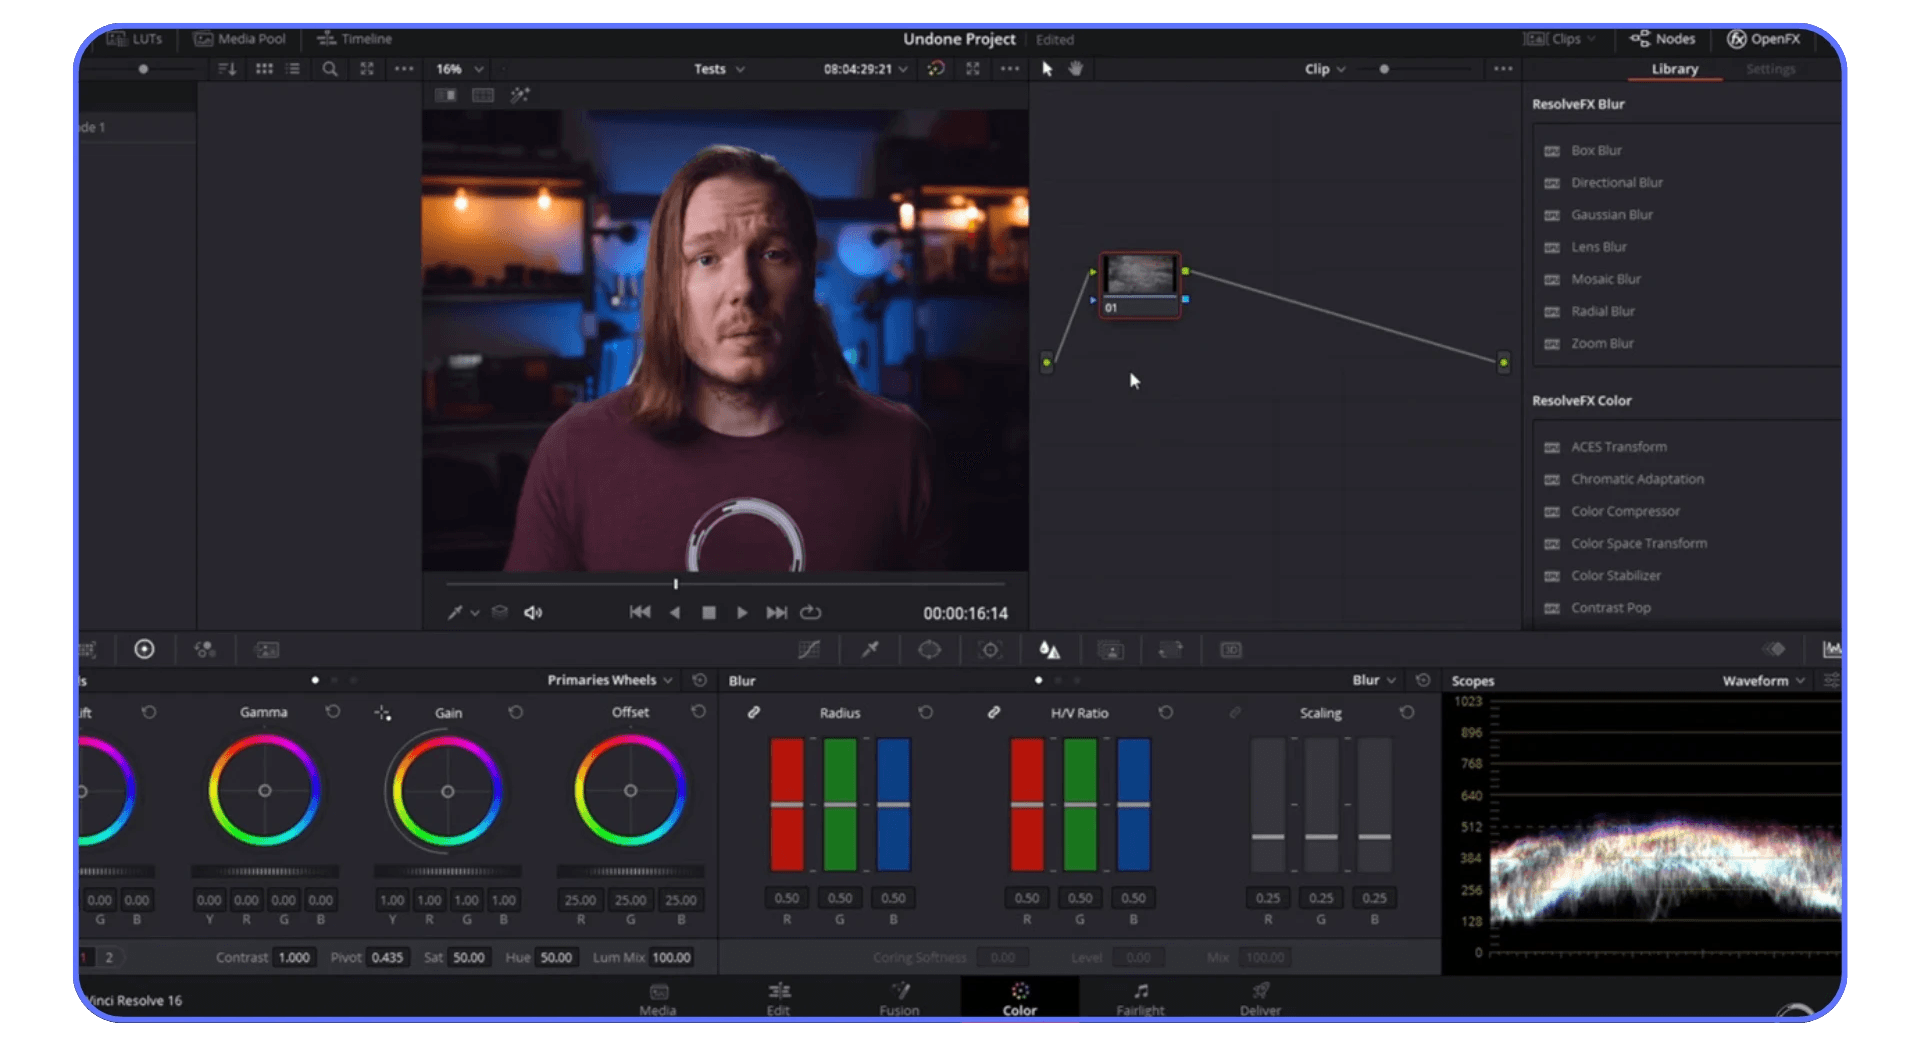
#2. Neat Video
~$75 / Windows & macOS
Resolve’s built-in noise reduction isn’t bad. But Neat Video? It’s surgical. You can push ISO in your camera knowing this thing will clean up the mess later, without turning faces into wax or smudging texture into mush.
Just be warned: it’s CPU/GPU-hungry. You’ll want to run this one on your strongest machine (or, let’s be honest, someone else’s, more on that later).
And if you’re wondering whether Resolve is even using your GPU properly, here’s a quick guide on how to use GPU on DaVinci Resolve 17 to make sure you’re getting every ounce of power.
#3. DE:Noise
$149.95 / Windows & macOS
If Neat Video is the scalpel, DE:Noise is the Swiss Army knife.
It handles all kinds of visual junk: motion blur, dust, smudges, jitter, low-light grain, weird artifacts. It’s especially good at fixing fast-moving scenes where everything seems to go sideways.
It also lets you filter spatial and temporal data, which basically means: you can tell it to calm down both still frames and how they interact with each other over time. No idea why Resolve hasn’t just bought this company already.
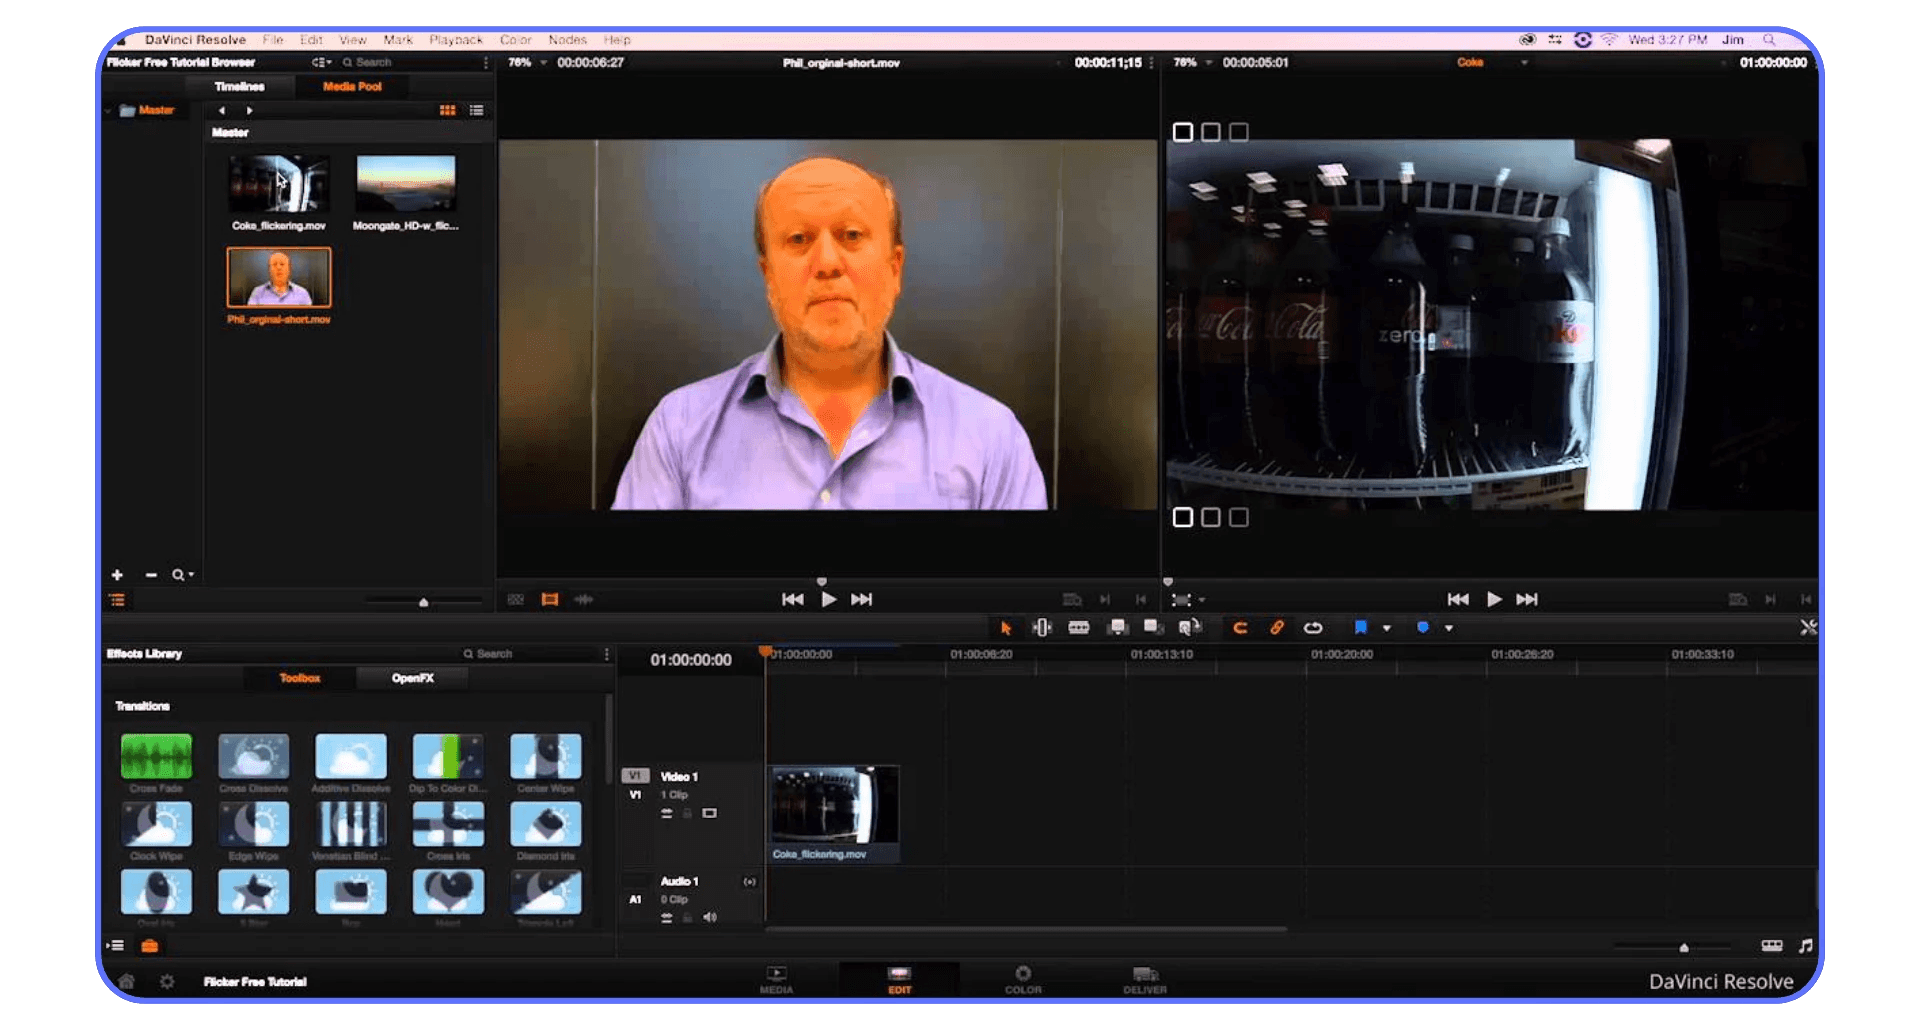
#4. Flicker Free
$149 / Windows & macOS
Ever shot under LED lights and got that cursed banding flicker? Or used old GoPro time-lapses that just pulse for no reason? Flicker Free was made for that.
It has presets for slow motion, drone footage, timelapse, stage lighting, and it works faster than trying to keyframe it out manually like a lunatic.
“Saved a client project where we had zero time for a reshoot. Worth every penny.”
This batch of plugins isn’t flashy. They won’t give you sexy transitions or 3D text. But they’ll save your footage from the trash bin.
Make It Look Cinematic: Color & Grading Plugins
Color grading is where editors either fall in love or lose their minds. Sometimes both. It’s one of those things that seems simple, until you realize your “cinematic teal and orange” is starting to look like a popsicle ad.
These plugins don’t just throw LUTs on your footage. They’re built to help you create a real look. The kind that makes people ask what camera you shot on (even when it was just your mirrorless running on fumes).
#5. FilmConvert Nitrate
$149 / Windows & macOS
There’s a reason FilmConvert is still on everyone’s list after all these years, because it actually works. The updated Nitrate version lets you dial in precise grain, color response, and film stock simulation based on your actual camera model.
Want your Sony footage to feel like it came off a Kodak Vision3 500T? Done.
Need grain that doesn’t look like a filter from 2012? Also done.
The best part? It’s subtle. You don’t need to go full Wes Anderson unless you want to.
“It’s like adding soul to digital footage.”
#6. mFilmLook
$89 / macOS & Windows via OFX
Think of this as the Hollywood filter for DaVinci. You get dozens of pre-built cinematic looks, lens flares, tints, halation, and contrast adjustments, all adjustable.
And unlike random LUT packs, these looks actually respond to your footage properly. You can tweak each parameter or just throw one on and call it done.
Is it cheating? Maybe.
Does it work? Absolutely.
#7. CineMatch
$139 / macOS & Windows
Have you ever mixed a Blackmagic and a Canon or Sony and spent hours trying to get them to match? CineMatch was made to end that pain.
It uses actual sensor data from your camera to convert footage between brands, matching color science behind the scenes. Pair it with FilmConvert (same company), and suddenly your multi-cam edit doesn’t look like it was shot across three decades.
“My A-cam and B-cam finally look like they belong in the same universe.”

#8. Red Giant Universe
Starts at $199/year / macOS & Windows
You know those videos with dreamy glows, grainy transitions, retro CRT effects, and animated titles that don’t look like PowerPoint? Most of them are probably using Red Giant Universe.
This is a collection of 80+ plugins, some useful, some overkill, but when you need to add just the right glitch, fade, or stylized accent, it delivers. Think music videos, YouTube intros, and “I want it to feel 90s but cool” kind of vibes.
Not subtle. Not boring. Just really fun to play with.
These are the plugins that turn average footage into something you'd actually want to show people. The right one can save you hours in the color page, or inspire a whole new visual style.
Pro-Level Polish: VFX, Retouching & Tracking
There’s a point in every editor’s journey where someone asks, “Can we just blur the background and track it to the subject?” And if you’re like me, your first instinct is panic.
That’s when you learn to appreciate the power of good VFX and tracking plugins, especially ones that don’t make you spend six hours inside Fusion trying to figure out why your mask exploded.
These plugins don’t just save time. They make you look way more skilled than you probably are. And that’s a superpower.
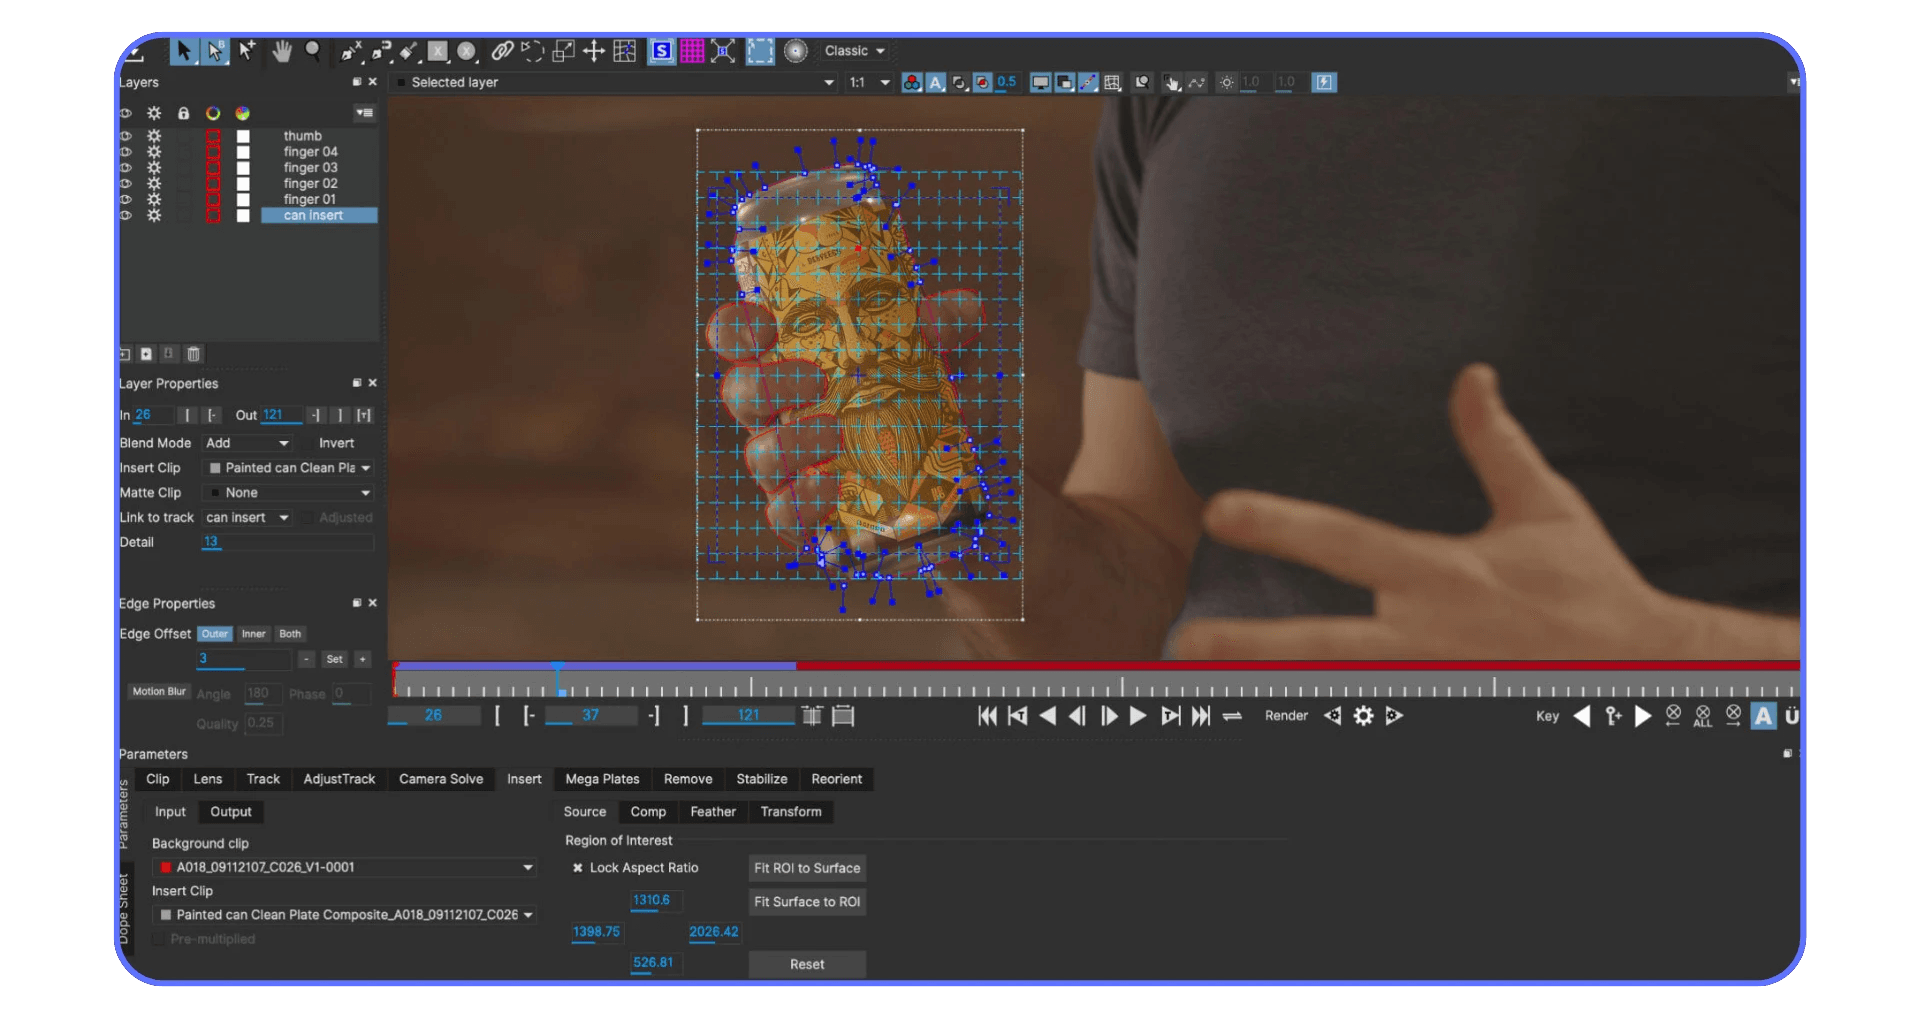
#9. Boris FX Continuum + Mocha
$695 / macOS & Windows
Yeah, it’s pricey. But this isn’t just one plugin, it’s a full post-production Swiss Army knife.
Beauty Studio smooths skin without turning people into wax.
Title Studio gives you actual motion graphics, not clunky 2003 lower thirds.
Primatte Studio makes green screen keying bearable.
Mocha masking? Next-level. It’s built-in planar tracking that works when Resolve’s own tracker says “nah.”
“I once used Mocha to isolate a person’s face in a moving car reflection. It was black magic.”
#10. Sapphire VFX
$1699 / macOS & Windows
Okay, deep breath. This one’s expensive. Like, rent-money expensive.
But for studios, commercial editors, or anyone who needs flawless transitions, stylized lighting, glow, edge rays, or true motion blur, Sapphire is the gold standard.
You get 270+ effects, all GPU-accelerated, all silky smooth. And once you use Sapphire Glow, you’ll never go back to the stock one.
“It’s like going from IKEA to artisan-built furniture. Both are fine, but one has soul.”

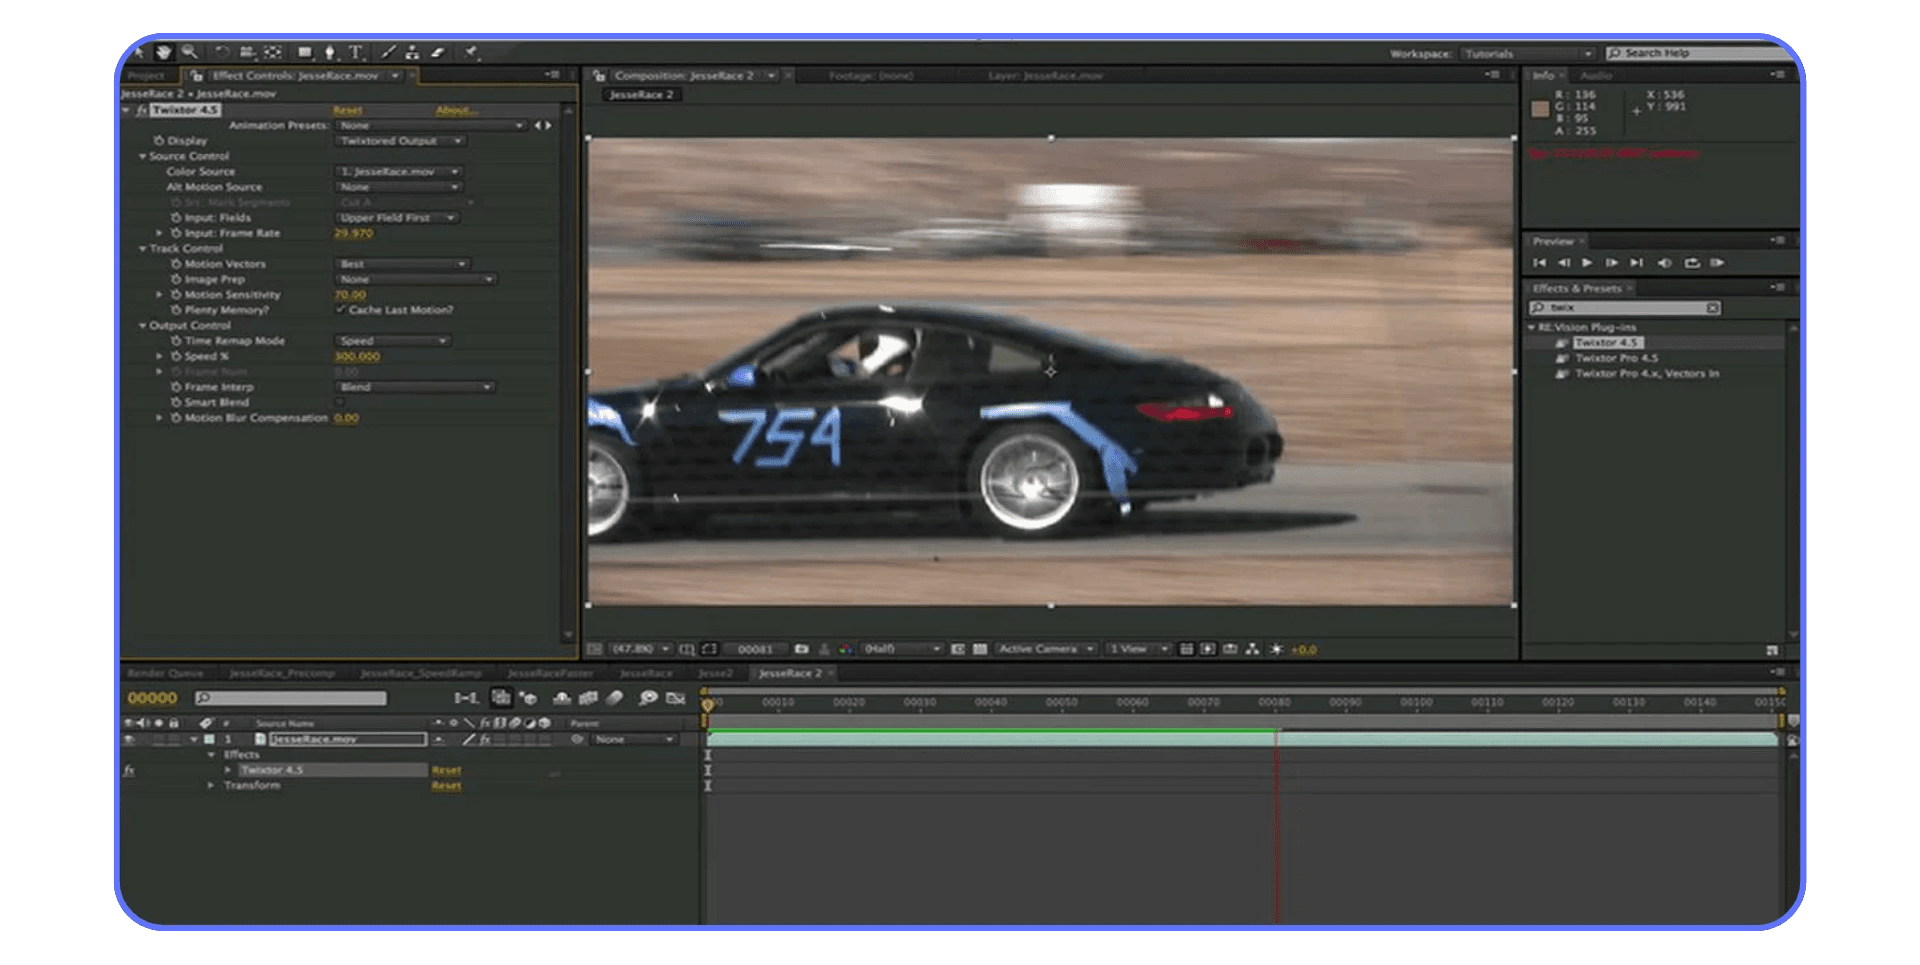
#11. Twixtor
$329.95 / macOS & Windows
Slow motion is great, when it works. But if you didn’t shoot in high frame rate, your options are usually a blurry mess.
Twixtor fixes that. It creates extra frames with motion estimation and interpolation that doesn’t feel like jelly. You still need to be smart about your footage, fast pans will always be tricky, but for most clips, it’s a lifesaver.
“Made a 30fps handheld clip look like 120. Client was convinced I used a RED.”
#12. Beauty Box Video
$199 / macOS & Windows
A lot of “beauty” plugins go full porcelain doll. This one doesn’t.
Beauty Box analyzes skin tones, smooths out blemishes, and evens lighting, but still keeps pores, texture, and realism. You can push it further if you want, but it’s really best for subtle polish.
It’s also fast. Perfect for corporate videos, interviews, or commercial beauty work where talent expects to look their best without looking AI-generated.

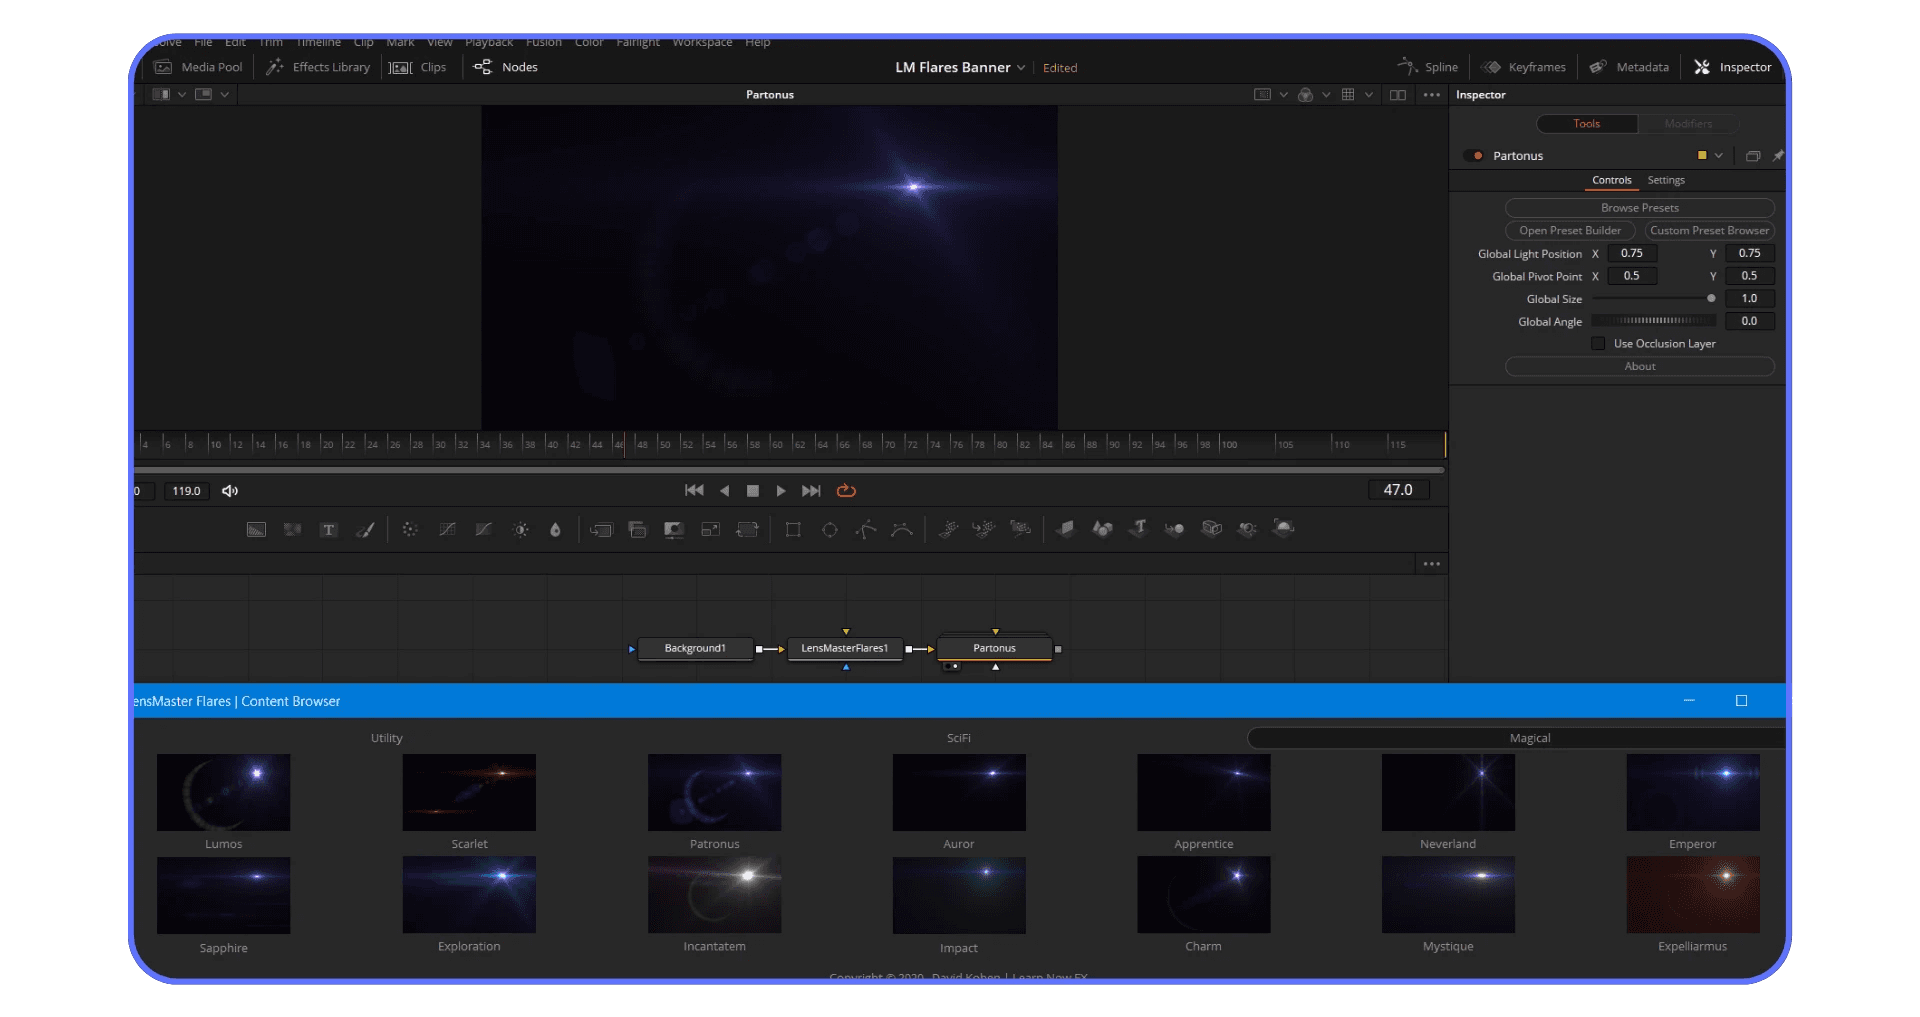
#13. LensMaster Flares
~$69 / macOS & Windows
There are two kinds of lens flares: the good kind that adds subtle cinematic depth, and the kind that screams “I just discovered plugins.”
LensMaster Flares falls into the first category. It’s easy to use, comes with solid presets, and lets you build your own without getting stuck in a spaghetti-node nightmare. Unlike Sapphire, it’s affordable, and honestly, enough for most use cases.
“Added a little bloom and suddenly my corporate video looked like it belonged on HBO.”
These plugins don’t just add flair, they give you pro-level control over your image and make the hardest jobs feel manageable. And once you learn how to use Mocha masking or Twixtor interpolation correctly? You’ll feel like a VFX demigod.
Work Smarter: Productivity & Workflow Plugins
Not every plugin is flashy. Some don’t touch your image at all. But they’ll save you from smashing your keyboard at 1AM when Resolve starts acting like it’s powered by coal.
These are the plugins that keep you sane. They help you move faster, stay organized, and automate the parts of editing you dread.
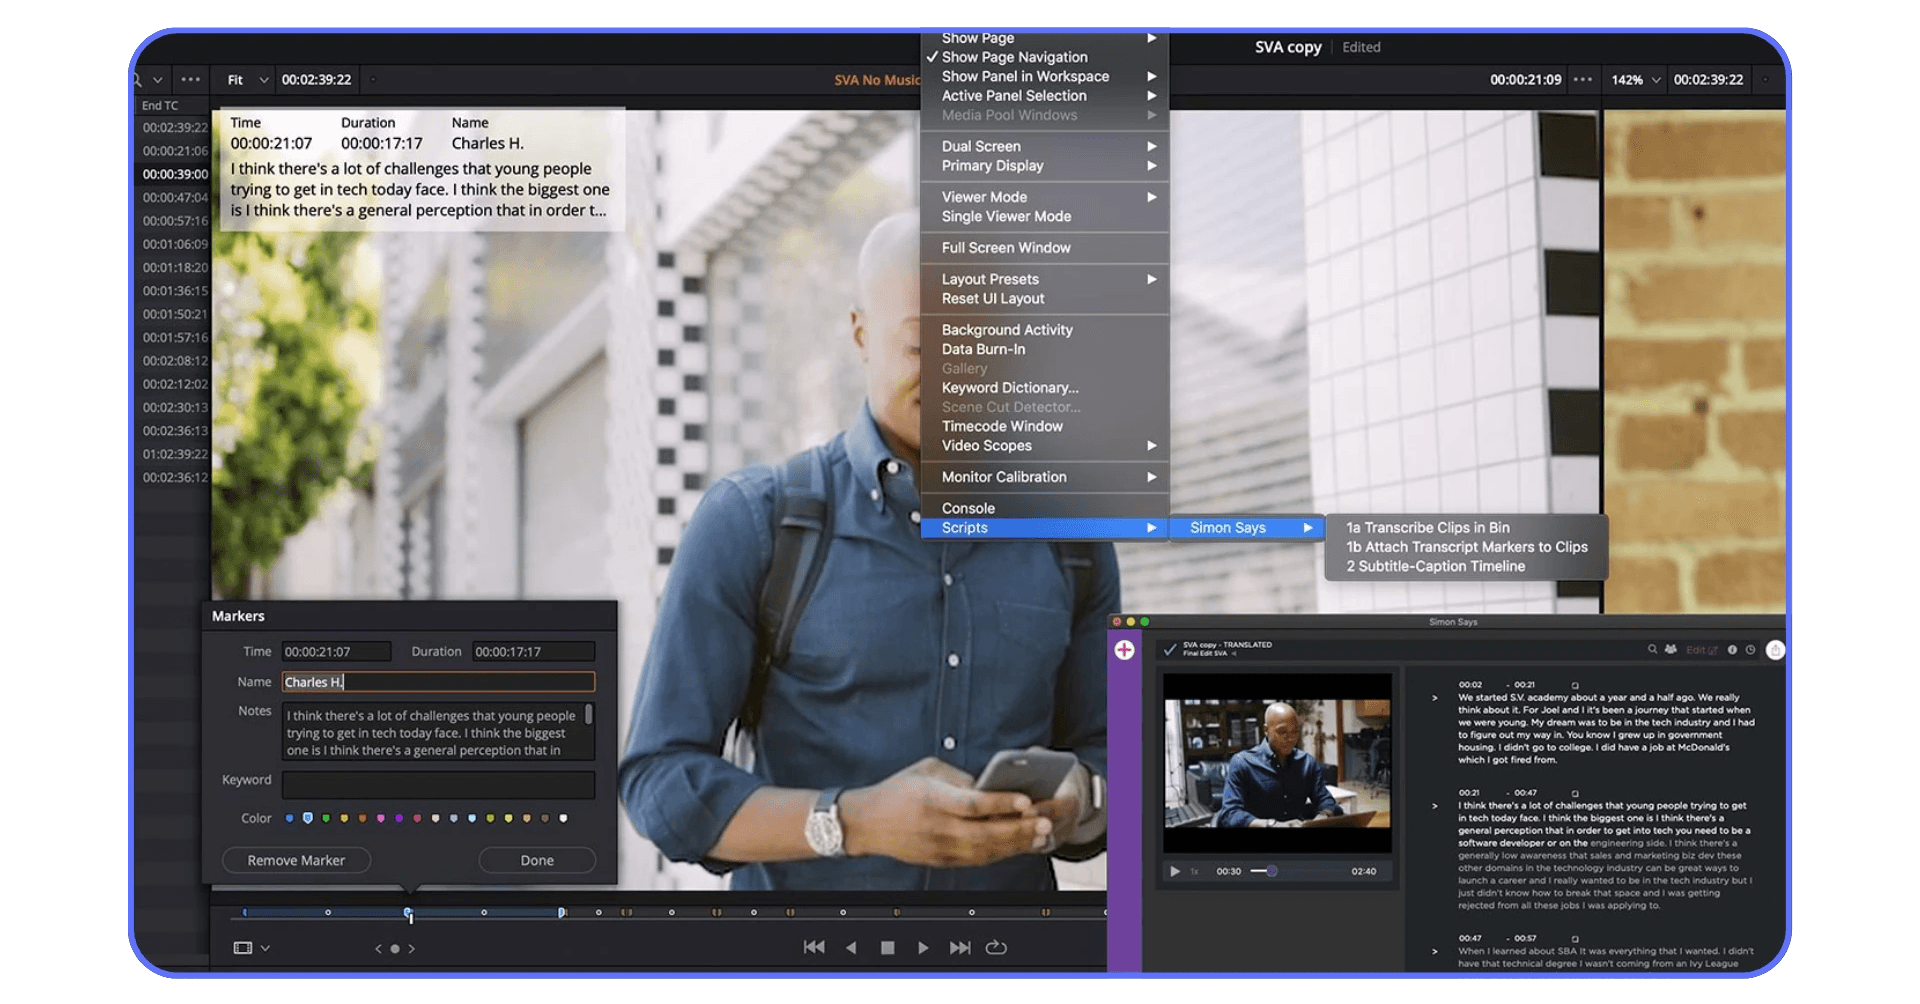
#14. Simon Says
$15/hour or $25/month subscription / macOS & Windows
Need subtitles? Translations? A full transcript of a 40-minute interview you forgot to label?
Simon Says runs inside Resolve and handles it. You can transcribe, translate, and generate captions in dozens of languages, right in your timeline. And it doesn’t just dump a wall of text; it lets you edit and time everything cleanly.
It’s AI, yes, but it actually works. And if you’ve ever tried to manually caption a video in Resolve... yeah. This is worth it.
“Turned a nightmare 30-minute roundtable into clean captions in 8 minutes. Not joking.”
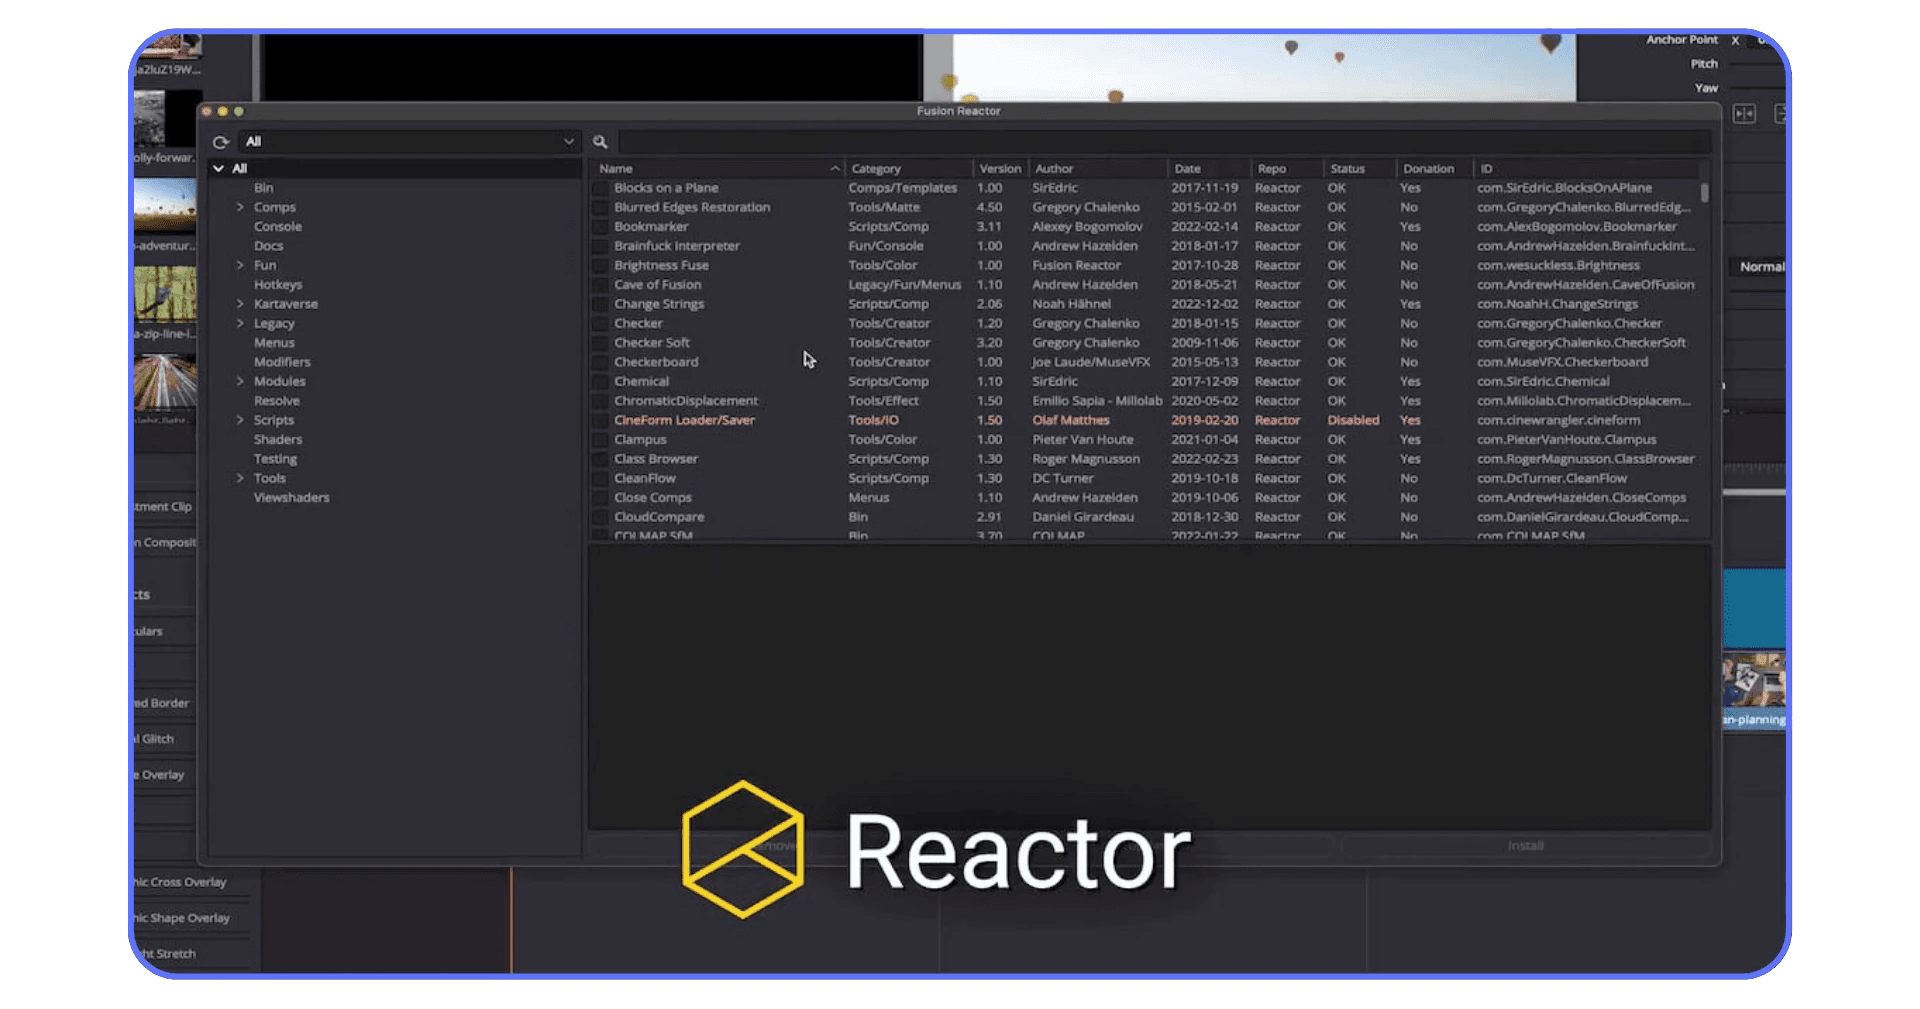
#15. Reactor
Free / Community Supported / macOS & Windows
Reactor is like the underground plugin market, but safe and nerd-approved.
It’s a free plugin manager built by the Fusion community that gives you access to tools, scripts, macros, templates, and small utilities that make Resolve smarter.
Need a node that auto-blinks an object?
Want a better LUT loader?
Looking for a customizable fusion text animation preset?
It’s all in there.
“I treat Reactor like a secret stash, when I hit a wall, I open it and something useful always pops out.”
Wait — Why Is Resolve Slowing Down?
Here’s the thing nobody tells you when you start stacking plugins in DaVinci Resolve:
Your machine will beg for mercy.
That buttery-smooth playback you had with just a few nodes? Gone. Hit render and you’re watching frames crawl by while your fans sound like a mini jet engine. Throw in Neat Video, FilmConvert, and a couple Sapphire effects, and you might as well go make coffee. Or a full lasagna. Before upgrading hardware, you might get surprising results just by following a few common and advanced tips to speed up rendering in DaVinci Resolve.
And sure, if you’ve got a $5,000 editing rig with a beefy GPU, maybe you’re fine. But most of us are pushing our laptops to the edge. Or worse, editing on whatever desktop the agency gave us in 2018. If you're working on a budget rig, check out how creators are running Resolve on low-end devices — and still getting great results.
That’s where I started testing cloud machines, specifically Vagon Cloud Computer.
Here’s what surprised me:
I opened Resolve on a browser. It launched faster than it does on my local machine.
I added a heavy noise reduction node, a few plugins, 4K footage. No stuttering.
I rendered out a project with multiple VFX and color grades, and it was done before my coffee cooled.
No installs. No driver updates. No hardware upgrades.
Just full-speed Resolve, on actual high-performance hardware, in the cloud.
“Once I ran DE:Noise + FilmConvert + Sapphire on Vagon with zero lag, I realized I didn’t need a new computer. I just needed a better one, temporarily.” Also, don’t miss this complete optimization guide to faster rendering — it’s packed with Resolve-specific tweaks for smoother workflows.
So if you’re reading this list and thinking “these plugins sound great, but my machine will explode,” you’re not wrong. But you’re also not stuck.
If you're still editing on aging gear, this list of the best laptops to smoothly run DaVinci Resolve might be your next upgrade — or at least help you spot where your current setup is falling short.
So Which One Should You Actually Get?
The truth is, most people only use a few plugins consistently. The rest? Nice to have. Fun to test. Maybe useful on that one weird project where you had to make a video look like VHS recorded through a fish tank. And if you're starting to feel like Resolve might not be your forever editor, these top alternatives to DaVinci Resolve are worth exploring.
So don’t stress about buying them all. Instead, ask yourself:
Are you losing time fixing the same noise issues on every project?
Do your colors feel a little too “YouTube” and not enough “feature film”?
Is your machine locking up every time you try to grade a music video?
Pick the plugin that solves your actual pain. Just one. Watch how much better your edit feels, and how much faster you work.
And if Resolve still stutters, you know where to go. Vagon’s sitting in the cloud, waiting to carry the heavy load for you.
Plugins won’t make you a better editor. But they’ll absolutely help you look like one.
Frequently Asked Questions
1. What are the best free plugins for DaVinci Resolve?
Some of the most useful free plugins include the False Color plugin by Time in Pixels (free version), which helps you nail exposure quickly, and Reactor, a community-built plugin manager packed with useful tools and scripts. If you're looking for free transcription, Simon Says offers a limited free tier. And don’t forget, DaVinci Resolve already comes with some powerful native OpenFX tools built in.
2. How do I install plugins in DaVinci Resolve?
Most DaVinci Resolve plugins are OpenFX-based and come with an installer. Just make sure Resolve is closed when you run it. Once installed, the plugin will usually appear in your OpenFX panel inside the Edit, Color, or Fusion tabs. Drag it onto a clip or node, then tweak the settings from the inspector or control panel. It’s straightforward, but each plugin may have slightly different instructions.
3. Are DaVinci Resolve plugins worth the money?
They are, if they solve a real problem for you. A plugin like Neat Video or FilmConvert can pay for itself in one or two jobs, especially if you’re working with noisy footage or trying to create a professional-grade color grade fast. The key is not to buy everything. Just start with the plugin that actually fixes your current headache.
4. Do plugins slow down DaVinci Resolve?
Yes, some definitely do. Especially the heavy hitters, noise reduction, motion blur, advanced color grading, or VFX tools, they can tax your system quickly. If your machine starts choking, you can render in place, use optimized media, or just shift the workload to something more powerful like Vagon Cloud Computer.
5. Can I use After Effects plugins in DaVinci Resolve?
Not directly. After Effects and Resolve use different plugin formats. Resolve supports OpenFX plugins, while After Effects uses its own system. That said, some plugin developers, like Boris FX or Red Giant, create OFX versions of their tools, so you can still use many of the same effects in both programs if you get the right version. If you’re curious about how these two tools compare beyond plugins, here’s a breakdown of After Effects vs. DaVinci Resolve from a workflow perspective.
6. Will these plugins work in the free version of Resolve?
Most third-party plugins will run in the free version of DaVinci Resolve, but a few advanced features may require Resolve Studio. Things like GPU acceleration, motion blur, and advanced noise reduction are Studio-only, so check the plugin’s requirements before buying if you’re on the free version.
I’ll be honest, I didn’t think I needed plugins.
DaVinci Resolve already felt like a beast out of the box. Color grading? Check. Editing? Smooth. Fusion? Confusing, but it’s there. But then I started getting more client work. More rush jobs. And suddenly, all the built-in tools that felt “good enough” weren’t cutting it anymore.
I had noise in low-light footage I couldn’t clean up without trashing the details. Skin retouching that looked fake. Footage from two cameras that didn’t match no matter what LUT I used. That’s when I finally gave in and started trying some third-party plugins.
Let me tell you: the difference is night and day.
Some of these tools are expensive. Some are free. A few will make you wonder why Resolve doesn’t just have this built-in already. But once you’ve used them, it’s hard to go back.
So, here they are, the best DaVinci Resolve plugins in 2025 that have actually made a difference in my work.
Start Here: Plugins That Fix Footage Problems
You know that feeling when something in your footage just looks... off? Maybe it’s a subtle flicker. Maybe it’s noise you didn’t notice until color grading. Or your exposure is technically fine, but it still feels wrong.
That’s where these plugins come in. They don’t just enhance, they fix the things that quietly ruin your final product if you’re not paying attention.
#1. False Color
Free / Windows & macOS
You don’t need to be a cinematographer to understand exposure, but you do need to see it clearly. This plugin maps your image into color-coded zones, showing exactly where you’re blowing out highlights or losing detail in the shadows.
It’s the kind of tool that teaches you how to see. Once you get used to it, scopes feel like background noise.
“I started using False Color during grading, and now I can’t believe I ever trusted just the histogram.”
#2. Neat Video
~$75 / Windows & macOS
Resolve’s built-in noise reduction isn’t bad. But Neat Video? It’s surgical. You can push ISO in your camera knowing this thing will clean up the mess later, without turning faces into wax or smudging texture into mush.
Just be warned: it’s CPU/GPU-hungry. You’ll want to run this one on your strongest machine (or, let’s be honest, someone else’s, more on that later).
And if you’re wondering whether Resolve is even using your GPU properly, here’s a quick guide on how to use GPU on DaVinci Resolve 17 to make sure you’re getting every ounce of power.
#3. DE:Noise
$149.95 / Windows & macOS
If Neat Video is the scalpel, DE:Noise is the Swiss Army knife.
It handles all kinds of visual junk: motion blur, dust, smudges, jitter, low-light grain, weird artifacts. It’s especially good at fixing fast-moving scenes where everything seems to go sideways.
It also lets you filter spatial and temporal data, which basically means: you can tell it to calm down both still frames and how they interact with each other over time. No idea why Resolve hasn’t just bought this company already.
#4. Flicker Free
$149 / Windows & macOS
Ever shot under LED lights and got that cursed banding flicker? Or used old GoPro time-lapses that just pulse for no reason? Flicker Free was made for that.
It has presets for slow motion, drone footage, timelapse, stage lighting, and it works faster than trying to keyframe it out manually like a lunatic.
“Saved a client project where we had zero time for a reshoot. Worth every penny.”
This batch of plugins isn’t flashy. They won’t give you sexy transitions or 3D text. But they’ll save your footage from the trash bin.
Make It Look Cinematic: Color & Grading Plugins
Color grading is where editors either fall in love or lose their minds. Sometimes both. It’s one of those things that seems simple, until you realize your “cinematic teal and orange” is starting to look like a popsicle ad.
These plugins don’t just throw LUTs on your footage. They’re built to help you create a real look. The kind that makes people ask what camera you shot on (even when it was just your mirrorless running on fumes).
#5. FilmConvert Nitrate
$149 / Windows & macOS
There’s a reason FilmConvert is still on everyone’s list after all these years, because it actually works. The updated Nitrate version lets you dial in precise grain, color response, and film stock simulation based on your actual camera model.
Want your Sony footage to feel like it came off a Kodak Vision3 500T? Done.
Need grain that doesn’t look like a filter from 2012? Also done.
The best part? It’s subtle. You don’t need to go full Wes Anderson unless you want to.
“It’s like adding soul to digital footage.”
#6. mFilmLook
$89 / macOS & Windows via OFX
Think of this as the Hollywood filter for DaVinci. You get dozens of pre-built cinematic looks, lens flares, tints, halation, and contrast adjustments, all adjustable.
And unlike random LUT packs, these looks actually respond to your footage properly. You can tweak each parameter or just throw one on and call it done.
Is it cheating? Maybe.
Does it work? Absolutely.
#7. CineMatch
$139 / macOS & Windows
Have you ever mixed a Blackmagic and a Canon or Sony and spent hours trying to get them to match? CineMatch was made to end that pain.
It uses actual sensor data from your camera to convert footage between brands, matching color science behind the scenes. Pair it with FilmConvert (same company), and suddenly your multi-cam edit doesn’t look like it was shot across three decades.
“My A-cam and B-cam finally look like they belong in the same universe.”
#8. Red Giant Universe
Starts at $199/year / macOS & Windows
You know those videos with dreamy glows, grainy transitions, retro CRT effects, and animated titles that don’t look like PowerPoint? Most of them are probably using Red Giant Universe.
This is a collection of 80+ plugins, some useful, some overkill, but when you need to add just the right glitch, fade, or stylized accent, it delivers. Think music videos, YouTube intros, and “I want it to feel 90s but cool” kind of vibes.
Not subtle. Not boring. Just really fun to play with.
These are the plugins that turn average footage into something you'd actually want to show people. The right one can save you hours in the color page, or inspire a whole new visual style.
Pro-Level Polish: VFX, Retouching & Tracking
There’s a point in every editor’s journey where someone asks, “Can we just blur the background and track it to the subject?” And if you’re like me, your first instinct is panic.
That’s when you learn to appreciate the power of good VFX and tracking plugins, especially ones that don’t make you spend six hours inside Fusion trying to figure out why your mask exploded.
These plugins don’t just save time. They make you look way more skilled than you probably are. And that’s a superpower.
#9. Boris FX Continuum + Mocha
$695 / macOS & Windows
Yeah, it’s pricey. But this isn’t just one plugin, it’s a full post-production Swiss Army knife.
Beauty Studio smooths skin without turning people into wax.
Title Studio gives you actual motion graphics, not clunky 2003 lower thirds.
Primatte Studio makes green screen keying bearable.
Mocha masking? Next-level. It’s built-in planar tracking that works when Resolve’s own tracker says “nah.”
“I once used Mocha to isolate a person’s face in a moving car reflection. It was black magic.”
#10. Sapphire VFX
$1699 / macOS & Windows
Okay, deep breath. This one’s expensive. Like, rent-money expensive.
But for studios, commercial editors, or anyone who needs flawless transitions, stylized lighting, glow, edge rays, or true motion blur, Sapphire is the gold standard.
You get 270+ effects, all GPU-accelerated, all silky smooth. And once you use Sapphire Glow, you’ll never go back to the stock one.
“It’s like going from IKEA to artisan-built furniture. Both are fine, but one has soul.”
#11. Twixtor
$329.95 / macOS & Windows
Slow motion is great, when it works. But if you didn’t shoot in high frame rate, your options are usually a blurry mess.
Twixtor fixes that. It creates extra frames with motion estimation and interpolation that doesn’t feel like jelly. You still need to be smart about your footage, fast pans will always be tricky, but for most clips, it’s a lifesaver.
“Made a 30fps handheld clip look like 120. Client was convinced I used a RED.”
#12. Beauty Box Video
$199 / macOS & Windows
A lot of “beauty” plugins go full porcelain doll. This one doesn’t.
Beauty Box analyzes skin tones, smooths out blemishes, and evens lighting, but still keeps pores, texture, and realism. You can push it further if you want, but it’s really best for subtle polish.
It’s also fast. Perfect for corporate videos, interviews, or commercial beauty work where talent expects to look their best without looking AI-generated.
#13. LensMaster Flares
~$69 / macOS & Windows
There are two kinds of lens flares: the good kind that adds subtle cinematic depth, and the kind that screams “I just discovered plugins.”
LensMaster Flares falls into the first category. It’s easy to use, comes with solid presets, and lets you build your own without getting stuck in a spaghetti-node nightmare. Unlike Sapphire, it’s affordable, and honestly, enough for most use cases.
“Added a little bloom and suddenly my corporate video looked like it belonged on HBO.”
These plugins don’t just add flair, they give you pro-level control over your image and make the hardest jobs feel manageable. And once you learn how to use Mocha masking or Twixtor interpolation correctly? You’ll feel like a VFX demigod.
Work Smarter: Productivity & Workflow Plugins
Not every plugin is flashy. Some don’t touch your image at all. But they’ll save you from smashing your keyboard at 1AM when Resolve starts acting like it’s powered by coal.
These are the plugins that keep you sane. They help you move faster, stay organized, and automate the parts of editing you dread.
#14. Simon Says
$15/hour or $25/month subscription / macOS & Windows
Need subtitles? Translations? A full transcript of a 40-minute interview you forgot to label?
Simon Says runs inside Resolve and handles it. You can transcribe, translate, and generate captions in dozens of languages, right in your timeline. And it doesn’t just dump a wall of text; it lets you edit and time everything cleanly.
It’s AI, yes, but it actually works. And if you’ve ever tried to manually caption a video in Resolve... yeah. This is worth it.
“Turned a nightmare 30-minute roundtable into clean captions in 8 minutes. Not joking.”
#15. Reactor
Free / Community Supported / macOS & Windows
Reactor is like the underground plugin market, but safe and nerd-approved.
It’s a free plugin manager built by the Fusion community that gives you access to tools, scripts, macros, templates, and small utilities that make Resolve smarter.
Need a node that auto-blinks an object?
Want a better LUT loader?
Looking for a customizable fusion text animation preset?
It’s all in there.
“I treat Reactor like a secret stash, when I hit a wall, I open it and something useful always pops out.”
Wait — Why Is Resolve Slowing Down?
Here’s the thing nobody tells you when you start stacking plugins in DaVinci Resolve:
Your machine will beg for mercy.
That buttery-smooth playback you had with just a few nodes? Gone. Hit render and you’re watching frames crawl by while your fans sound like a mini jet engine. Throw in Neat Video, FilmConvert, and a couple Sapphire effects, and you might as well go make coffee. Or a full lasagna. Before upgrading hardware, you might get surprising results just by following a few common and advanced tips to speed up rendering in DaVinci Resolve.
And sure, if you’ve got a $5,000 editing rig with a beefy GPU, maybe you’re fine. But most of us are pushing our laptops to the edge. Or worse, editing on whatever desktop the agency gave us in 2018. If you're working on a budget rig, check out how creators are running Resolve on low-end devices — and still getting great results.
That’s where I started testing cloud machines, specifically Vagon Cloud Computer.
Here’s what surprised me:
I opened Resolve on a browser. It launched faster than it does on my local machine.
I added a heavy noise reduction node, a few plugins, 4K footage. No stuttering.
I rendered out a project with multiple VFX and color grades, and it was done before my coffee cooled.
No installs. No driver updates. No hardware upgrades.
Just full-speed Resolve, on actual high-performance hardware, in the cloud.
“Once I ran DE:Noise + FilmConvert + Sapphire on Vagon with zero lag, I realized I didn’t need a new computer. I just needed a better one, temporarily.” Also, don’t miss this complete optimization guide to faster rendering — it’s packed with Resolve-specific tweaks for smoother workflows.
So if you’re reading this list and thinking “these plugins sound great, but my machine will explode,” you’re not wrong. But you’re also not stuck.
If you're still editing on aging gear, this list of the best laptops to smoothly run DaVinci Resolve might be your next upgrade — or at least help you spot where your current setup is falling short.
So Which One Should You Actually Get?
The truth is, most people only use a few plugins consistently. The rest? Nice to have. Fun to test. Maybe useful on that one weird project where you had to make a video look like VHS recorded through a fish tank. And if you're starting to feel like Resolve might not be your forever editor, these top alternatives to DaVinci Resolve are worth exploring.
So don’t stress about buying them all. Instead, ask yourself:
Are you losing time fixing the same noise issues on every project?
Do your colors feel a little too “YouTube” and not enough “feature film”?
Is your machine locking up every time you try to grade a music video?
Pick the plugin that solves your actual pain. Just one. Watch how much better your edit feels, and how much faster you work.
And if Resolve still stutters, you know where to go. Vagon’s sitting in the cloud, waiting to carry the heavy load for you.
Plugins won’t make you a better editor. But they’ll absolutely help you look like one.
Frequently Asked Questions
1. What are the best free plugins for DaVinci Resolve?
Some of the most useful free plugins include the False Color plugin by Time in Pixels (free version), which helps you nail exposure quickly, and Reactor, a community-built plugin manager packed with useful tools and scripts. If you're looking for free transcription, Simon Says offers a limited free tier. And don’t forget, DaVinci Resolve already comes with some powerful native OpenFX tools built in.
2. How do I install plugins in DaVinci Resolve?
Most DaVinci Resolve plugins are OpenFX-based and come with an installer. Just make sure Resolve is closed when you run it. Once installed, the plugin will usually appear in your OpenFX panel inside the Edit, Color, or Fusion tabs. Drag it onto a clip or node, then tweak the settings from the inspector or control panel. It’s straightforward, but each plugin may have slightly different instructions.
3. Are DaVinci Resolve plugins worth the money?
They are, if they solve a real problem for you. A plugin like Neat Video or FilmConvert can pay for itself in one or two jobs, especially if you’re working with noisy footage or trying to create a professional-grade color grade fast. The key is not to buy everything. Just start with the plugin that actually fixes your current headache.
4. Do plugins slow down DaVinci Resolve?
Yes, some definitely do. Especially the heavy hitters, noise reduction, motion blur, advanced color grading, or VFX tools, they can tax your system quickly. If your machine starts choking, you can render in place, use optimized media, or just shift the workload to something more powerful like Vagon Cloud Computer.
5. Can I use After Effects plugins in DaVinci Resolve?
Not directly. After Effects and Resolve use different plugin formats. Resolve supports OpenFX plugins, while After Effects uses its own system. That said, some plugin developers, like Boris FX or Red Giant, create OFX versions of their tools, so you can still use many of the same effects in both programs if you get the right version. If you’re curious about how these two tools compare beyond plugins, here’s a breakdown of After Effects vs. DaVinci Resolve from a workflow perspective.
6. Will these plugins work in the free version of Resolve?
Most third-party plugins will run in the free version of DaVinci Resolve, but a few advanced features may require Resolve Studio. Things like GPU acceleration, motion blur, and advanced noise reduction are Studio-only, so check the plugin’s requirements before buying if you’re on the free version.
Get Beyond Your Computer Performance
Run applications on your cloud computer with the latest generation hardware. No more crashes or lags.

Trial includes 1 hour usage + 7 days of storage.
Summarize with AI

Ready to focus on your creativity?
Vagon gives you the ability to create & render projects, collaborate, and stream applications with the power of the best hardware.

Vagon Blog


Run heavy applications on any device with
your personal computer on the cloud.
San Francisco, California
Solutions
Vagon Teams
Vagon Streams
Use Cases
Resources
Vagon Blog
How to Run Inkscape on a Cloud Ubuntu Desktop (2026 Guide)
How to Run Krita on a Cloud Ubuntu Desktop for Digital Painting (2026 Guide)
How to Run GIMP on a Cloud Ubuntu Desktop (2026 Guide)
How to Run Jupyter on a Cloud GPU Linux Desktop (2026 Guide)
Vagon vs GitHub Codespaces: Cloud Dev Environments Compared (2026)
Vagon vs RunPod: Which Cloud GPU Is Right for You? (2026 Comparison)
How to Watch Your AI Agent Work on a Cloud Ubuntu Desktop (2026 Guide)
How to Run a Local LLM on Ubuntu in the Cloud (2026 Guide)
How to Run Blender on a Cloud GPU (Ubuntu): The Complete 2026 Guide
Vagon Blog
Run heavy applications on any device with
your personal computer on the cloud.
San Francisco, California
Solutions
Vagon Teams
Vagon Streams
Use Cases
Resources
Vagon Blog