Instant Connection for Pixel Streaming
— New Feature Automated Setup
How to Create Effective Storyboards for Animation Projects
How to Create Effective Storyboards for Animation Projects
DigitalArt
How to Create Effective Storyboards for Animation Projects
Table of Contents
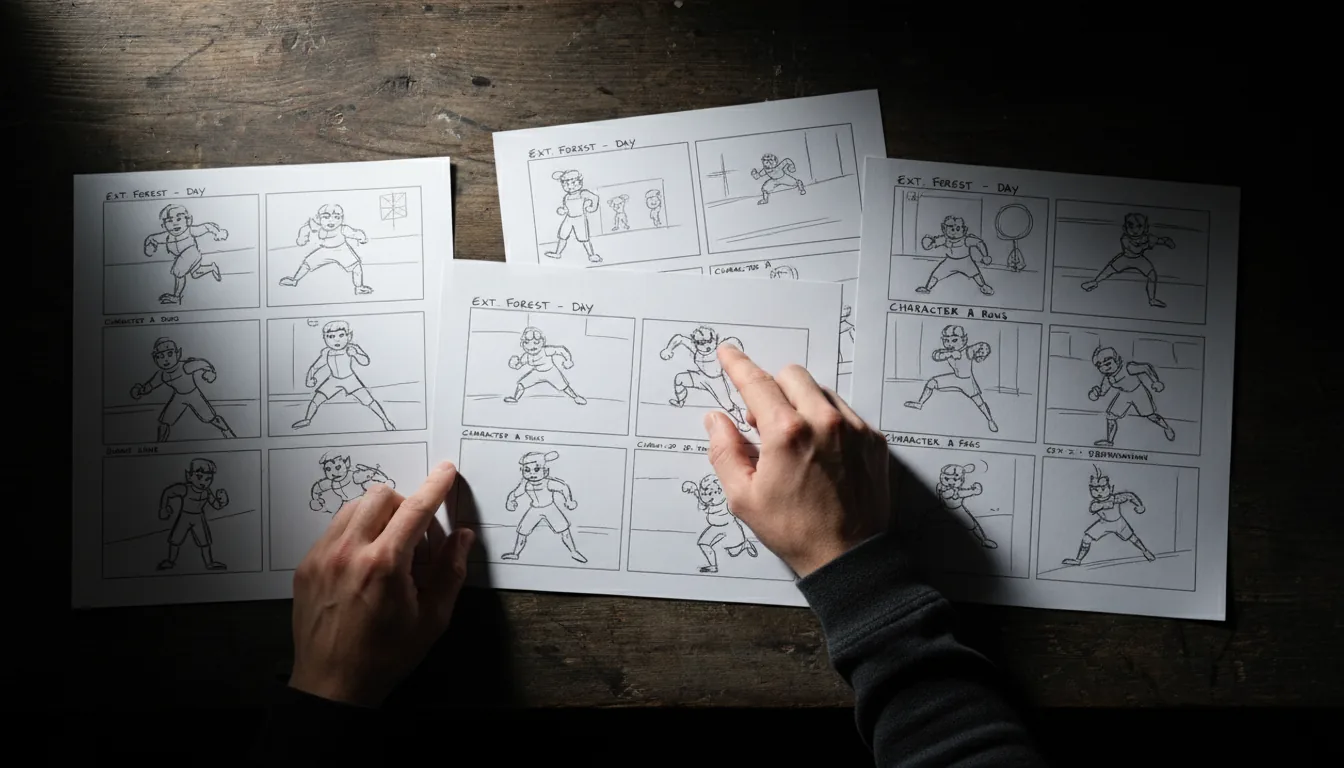
Storyboarding is one of the most important parts of animation and is very much like a visual outline that puts together everything that is needed to tell a story. It shows the animators and exactly what they will do in each scene while sticking to the story and vision of the project.
This guide will help you to completely master a storyboard so that you may bring your stories to life in the most magnificent way possible.
Understanding the Basics of Storyboarding
Storyboarding is working out plans for your animation, scene by scene. Storyboarding involves the making of drawings or frames telling you exactly what happens from scene to scene in your story. The frames see your narrative; it is visualized for easy comprehension and implementation of the final animation.
Here’s how storyboarding helps:
Visualizing the Story: It allows you to see the flow of your story visually, helping you spot any gaps or issues that might come up along the way.
Planning Camera Angles and Movements: You can decide where the camera should be placed and how it should move to best capture the moment and tell your story.
Highlighting Key Scenes and Transitions: It helps you take note of the most important parts of your story and how to smoothly change between them.
Communicating Ideas: It makes it easier to share your vision with your team, making sure that everyone is on the same page.
To better understand this, storyboarding is like making a comic strip of your animation. Each frame is seen as a key moment in the story, helping you and your team visualize and plan the animation before you start creating it.
Tools and Materials for Storyboarding
Having the right tools on hand makes storyboarding easier and more effective. Whether you like drawing by hand or using digital tools, here are some essentials:
Traditional Tools
Pencils: For sketching your frames.
Erasers: To correct mistakes easily.
Paper: Any kind of paper works, but thicker paper can handle more erasing.
Markers: For adding bold lines and details.
Storyboard Templates: Pre-made templates help keep your frames organized and consistent.
Digital Tools
Tablets: Devices like iPads or Wacom tablets make drawing digital frames easy.
Stylus Pens: These work like pencils but for more of the digital space, ie screens.
Software: Programs like Adobe Photoshop, Toon Boom Storyboard Pro, and Storyboarder offer tools specifically for creating storyboards.
Templates
Pre-made Storyboard Templates: These can save you time and ensure all your frames are the same size and style. You can find these online or create your own.
So if you are someone who prefers the more traditional ways of doing things, stick to paper and pencils. If you feel like digital tools are more your thing, a tablet, and the right software will make the job a lot easier. Templates, whether digital or paper, will help keep everything neat and organized as well as give some inspiration where needed.
Developing Your Story and Script
Before you start the process of storyboarding, you need a solid story and script. This will be the foundation of what you will build on your storyboard. Here’s a simple step-by-step guide to help you translate your story or script into visual frames and key scenes:
Outline Your Story
Break down your story into key scenes and important plot points.
Identify the beginning, middle, and end of your story.
Write the Script
Detail the dialogue, actions, and key events for each scene.
Make sure the script is clear and easy to follow.
Identify Key Moments
Highlight the pivotal scenes that need to be visualized in your storyboard.
Focus on moments that are crucial for the story’s flow and impact.
Break Down Scenes into Frames
Divide each scene into smaller frames, showing the sequence of actions and events.
Think about what happens first, next, and last in each scene.
Visualize Each Frame
Sketch rough images for each frame, focusing on the main action or emotion.
Include basic details like character positions, important objects, and background elements.
Add Annotations
Write notes for each frame, describing what’s happening, any dialogue, and special instructions.
Include camera angles, movements, and transitions between frames.
Review and Adjust
Look over your storyboard to ensure it represents your story.
Make adjustments to improve the flow and clarity.
The best thing to do is to start by breaking your story into key parts, write a detailed script, and then point out the most important moments. Break down these moments into individual frames, sketch them out, and add notes to explain what’s happening. Last but not least, review your storyboard to make sure it effectively tells your story.
Sketching and Layout Techniques
Creating clear storyboards goes hand in hand with good sketching and layout. Here are some simple tips and techniques to help you:
Thumbnail Sketches
Start with small, rough sketches.
Quickly explore different ideas and compositions.
These sketches don’t need to be detailed—focus on the basic shapes and flow of each scene.
Panel Layout
Arrange your frames in a logical order.
Make sure each frame follows the previous one smoothly, like a comic strip.
Think about the sequence of actions and how they flow from one frame to the next.
Focus on Clarity
Keep your sketches simple and easy to understand.
Focus on the essential elements of each scene, like characters, key actions, and important objects.
Avoid adding too many details that can clutter the frame and distract from the main action.
Use Consistent Framing
Keep the size and shape of your frames consistent.
This helps maintain a uniform look and makes it easier to follow the story.
Highlight Key Actions
Emphasize the most important actions or moments in each frame.
Use larger drawings or bolder lines to make these actions stand out.
Show Camera Movements
Indicate camera angles and movements with arrows and notes.
Show how the camera will move within the scene, like panning, zooming, or tilting.
Include Backgrounds Sparingly
Only add background details that are necessary for understanding the scene.
Keep backgrounds simple to avoid distracting from the main action.
Use Annotations
Add notes to explain what’s happening in each frame.
Include dialogue, sound effects, and any special instructions for the scene.
If you follow these steps, you can create clear and effective storyboards that convey your story accurately. Start with rough thumbnail sketches to come up with some ideas, arrange your frames logically, focus on clarity, and use consistent framing. Highlight key actions, show camera movements, try and include some background details that might be needed, and use annotations to give any other information.
Adding Details and Annotations
Adding details and annotations to your storyboards is super important for providing context and guidance to the animation team. Here’s how to easily include important details, annotations, and directional cues:
Character Poses
Key Poses: Show the main poses and expressions for each character in the scene.
Emotion Indicators: Draw facial expressions and body language to convey emotions.
Camera Movements
Angles: Indicate the camera angles, like close-ups, wide shots, or over-the-shoulder views.
Movements: Use arrows and notes to show camera movements such as zooms, pans, tilts, and tracking shots.
Action Arrows
Movement Directions: Use arrows to indicate the direction of movement for characters and objects.
Flow of Action: Ensure the arrows clearly show the flow of action from one frame to the next.
Notes and Annotations
Dialogue: Write down the dialogue for each frame, making it clear who is speaking.
Sound Effects: Include notes for sound effects, like footsteps, explosions, or background music.
Special Instructions: Add specific instructions for the scene, such as lighting changes or timing cues.
Background Details
Essential Elements: Include only the background elements that are necessary for understanding the scene.
Context: Ensure that the background supports the action and context of the scene without overwhelming it.
Visual Effects
Indications: Show where and how visual effects should be used, such as smoke, fire, or magical elements.
Consistency: Keep the style of visual effects consistent throughout the storyboard.
Example of Annotating a Storyboard Frame
Character Pose: A character is shown running with a surprised expression.
Camera Movement: An arrow indicates a zoom-in on the character’s face.
Action Arrows: Arrows show the direction of the character’s movement from left to right.
Notes:
Dialogue: “Watch out!”
Sound Effect: “Footsteps running”
Special Instruction: “Character jumps over a log”
Creating a Flow and Sequence
Maintaining continuity and flow in your storyboard is crucial for a well-linked and compelling story. Here’s how to do it:
Consistent Style
Uniform Look: Keep your drawing style the same throughout.
Character Consistency: Ensure characters look consistent in each frame.
Backgrounds: Use similar styles for backgrounds and elements.
Logical Sequence
Story Progression: Each frame should logically follow the one before.
Cause and Effect: Show how actions lead to reactions.
Chronological Order: Arrange scenes in the order they happen.
Smooth Transitions
Visual Transitions: Plan fades, cuts, or dissolves to move smoothly between scenes.
Action Continuity: Ensure actions started in one frame are completed in the next.
Consistent Direction: Keep movement direction the same across frames.
Why Continuity and Flow Matter
Keeping the continuity and flow in your storyboard is so important because it keeps viewers engaged and helps them follow the story a lot easier. Logical sequences and smooth transitions make sure the story is clear and understandable, demonstrating professionalism and attention to detail. Additionally, a cohesive storyboard saves time and reduces the need for revisions during the animation process.
Collaboration and Feedback in Storyboarding
Collaboration and feedback are crucial for ironing out the storyboards. Get together with your team and encourage open communication and idea sharing, regularly reviewing and going through storyboards based on feedback, and using collaborative tools like Google Drive or project management software to share and edit storyboards efficiently. Be open to suggestions and be willing to try some out to see if it better enhances the storyboard. Nothing ventured, nothing gained. Even a small change can have a big impact.
Digitizing and Presenting Your Storyboards
Digitizing your storyboards makes them much easier to share and show the world. Start by scanning or photographing your hand-drawn storyboards to create digital versions. Use digital storyboarding software, like Adobe Photoshop or Toon Boom Storyboard Pro, for easy editing and refinement.
This software also allows you to add some of those finer details, make adjustments, and enhance the overall quality of your storyboards. Then you are ready to prepare your storyboards in presentation formats like PDFs or slide decks, which are the best option for professional sharing and pitching to clients or team members.
Conclusion
A well-prepared storyboard is so valuable in the animation process. It saves time, helps communication, and ensures that the final animation aligns with your creative vision. By becoming a master of storyboarding, you can bring your stories to life more effectively and efficiently. Start practicing your storyboarding skills today. Experiment with different techniques, look for some solid feedback, and always refine your approach. Remember, a great storyboard is the first step toward a successful animation project.
Get Beyond Your Computer Performance
Run applications on your cloud computer with the latest generation hardware. No more crashes or lags.

Trial includes 1 hour usage + 7 days of storage.
Summarize with AI

Ready to focus on your creativity?
Vagon gives you the ability to create & render projects, collaborate, and stream applications with the power of the best hardware.

Vagon Blog


Run heavy applications on any device with
your personal computer on the cloud.
San Francisco, California
Solutions
Vagon Teams
Vagon Streams
Use Cases
Resources
Vagon Blog
How to Run Audacity on a Cloud Ubuntu Desktop (2026 Guide)
How to Run Darktable on a Cloud Ubuntu Desktop for RAW Photo Editing (2026 Guide)
How to Run Kdenlive on a Cloud Ubuntu Desktop (2026 Guide)
How to Run DaVinci Resolve on Linux in the Cloud (2026 Guide)
How to Run Inkscape on a Cloud Ubuntu Desktop (2026 Guide)
How to Run Krita on a Cloud Ubuntu Desktop for Digital Painting (2026 Guide)
How to Run GIMP on a Cloud Ubuntu Desktop (2026 Guide)
How to Run Jupyter on a Cloud GPU Linux Desktop (2026 Guide)
Vagon vs GitHub Codespaces: Cloud Dev Environments Compared (2026)
Vagon Blog
Run heavy applications on any device with
your personal computer on the cloud.
San Francisco, California
Solutions
Vagon Teams
Vagon Streams
Use Cases
Resources
Vagon Blog