Instant Connection for Pixel Streaming
— New Feature Automated Setup

How to Optimize Your Unreal Engine Experience Before Implementing Pixel Streaming? (14 Tips Included)
How to Optimize Your Unreal Engine Experience Before Implementing Pixel Streaming? (14 Tips Included)
GameDev
How to Optimize Your Unreal Engine Experience Before Implementing Pixel Streaming? (14 Tips Included)
Table of Contents
Pixel streaming is a powerful way to bring Unreal Engine projects to users on any device. It works by running your application on a strong cloud server and sending the visuals to a user’s browser, like a video stream. This means people can enjoy high-quality 3D experiences without needing expensive computers or phones. However, to make this work well, you need to prepare your project carefully before streaming begins.
This optimization guide explains how to optimize your Unreal Engine project for pixel streaming. The steps here will help you avoid problems like slow loading, choppy visuals, or crashes that frustrate users. Whether you are new to streaming or have some experience, these tips will make your project run smoothly on different devices and networks. The goal is to save you time and effort by setting up everything correctly from the start.
You can use these steps with Unreal Engine’s built-in pixel streaming tools or with a service like Vagon Streams. Both options let you stream your project, but preparation is key to success. Good optimization ensures your application looks great and performs well, no matter how users access it. In the sections ahead, we will cover how to adjust your assets, configure your build, test properly, and more. Each part is designed to be clear and practical, so you can follow along and get your project ready to stream without confusion. Let’s begin by understanding why this preparation matters and how it improves your streaming results.
Why Optimization Matters Before Streaming
Optimization is an essential step before you start pixel streaming your Unreal Engine project. Without it, your application might not work as expected. For example, if your project has large files or complex settings, it can overload the cloud server. This leads to slow performance, such as low frame rates or delays, which make the experience unpleasant for users. Preparing your project properly helps avoid these issues and ensures everything runs smoothly.
When you stream, the cloud server does the hard work of rendering your 3D content. However, it still depends on how well your project is built. If your assets—like models or textures—are too heavy, they use up too much processing power and network bandwidth. This can cause long loading times or even disconnects, especially for users with slower internet. Optimization reduces these demands, so your project loads faster and plays without interruptions, even on weaker devices like mobile phones.
Another reason to optimize is to reach more people. Pixel streaming lets anyone with a browser access your work, but not everyone has fast internet or powerful hardware. By making your project efficient, you ensure it works well for all users, not just those with the best setups. This improves user satisfaction and keeps them engaged with your content. Plus, a well-optimized project is easier to manage when you scale up to more users later.
In short, optimization saves resources and improves quality. It’s about making smart choices early—like reducing file sizes or testing on different devices—so you don’t face bigger problems during streaming. The steps in this guide will show you how to do this effectively, whether you use Unreal Engine’s tools or a platform like Vagon Streams. With the right preparation, your project will deliver a professional and reliable experience every time.
Vagon Streams: Next Level 3D Interactive Streaming Experience
Before we explore the technical steps, let’s look at Vagon Streams, a tool that simplifies streaming your Unreal Engine projects. Vagon Streams is a platform designed to help you share your work quickly and reliably, without needing advanced coding skills. And with the recent launch of Vagon Streams’ Instant Connection, you can streamline your setup even further, enabling one-click deployment for seamless streaming of your Unreal Engine projects. It runs on powerful cloud servers with NVIDIA GPUs, so your project gets the performance it needs to stream smoothly to users anywhere in the world.
One key feature of Vagon Streams is its support for Unreal Engine’s pixel streaming. This means you can use the standard Unreal tools and settings we’ll discuss later, and Vagon Streams will handle the delivery to users’ browsers. However, it also offers its own streaming technology, which is built to perform better than the default pixel streaming method. This protocol reduces delays and improves video quality, even on challenging networks. You can choose between the two options based on what works best for your project—flexibility is a big advantage here.
The tips in this guide are valuable no matter which streaming method you pick. Optimizing your project ensures it runs well with Unreal’s pixel streaming or Vagon Streams’ enhanced protocol. For example, making your assets smaller or testing on slow connections helps both systems deliver a good experience. Vagon Streams takes care of the complicated setup, like managing servers or scaling to more users, so you can focus on preparing your application. This no-code approach saves time and makes streaming accessible, even if you’re not a network expert.
With Vagon Streams, you also get practical features like global data centers to reduce lag for users in different regions. It’s built to be fast and dependable, but your project still needs to be optimized to take full advantage of these benefits. The steps ahead—like adjusting your build or checking device compatibility—work hand-in-hand with Vagon Streams to ensure your users enjoy a seamless experience. Let’s move on to the first step: optimizing your Unreal Engine project for streaming success.
Step 1: Optimize Your Unreal Engine Project
To stream your Unreal Engine project successfully, the first step is to optimize it. This means making your application lighter and more efficient, so it runs well on a cloud server and reaches users without problems. Streaming puts a lot of work on the server, and if your project is too heavy, it can slow down or crash. By adjusting your assets—like models, textures, and lighting—you can reduce this load and improve performance. Here are three key ways to do this.
#1: Reduce Asset Complexity
Your 3D models are a big part of your project, but they can also make streaming harder if they’re too detailed. High-polygon models take more processing power, which can slow down the server and cause lag for users. To fix this, lower the polygon count in your models using Unreal Engine’s built-in tools. Open your mesh in the editor, go to the “LOD” settings, and create Levels of Detail (LODs). LODs automatically use simpler versions of your model when it’s far away, saving resources without changing how it looks up close. For example, a tree might have 10,000 polygons when near but only 1,000 when distant—this keeps your stream smooth.
You should also check for unnecessary details, like tiny parts users won’t notice during streaming. Remove these with the mesh simplification tool, which reduces polygons while keeping the shape intact. Test your changes in the editor to ensure the quality stays good. This step makes your project easier to render and send over the internet, especially for users on slower devices or connections. A lighter model means faster loading and less strain on the cloud, setting a strong base for streaming.
#2: Compress Textures Efficiently
Textures add color and detail to your project, but large texture files can slow down streaming by using too much memory and bandwidth. To avoid this, compress your textures to a smaller size without losing too much quality. In Unreal Engine, open your texture in the editor and check its resolution. If it’s 4K (4096x4096 pixels) but only covers a small object, reduce it to 2K (2048x2048) or even 1K (1024x1024). This cuts the file size in half or more, making it faster to load and stream.
Next, use a compression format like BC7, which Unreal supports. BC7 keeps images sharp while shrinking their size, perfect for streaming where every byte counts. In the texture settings, set “Compression” to BC7 and save. For less important textures—like backgrounds—try lower settings like BC1 to save even more space. After compressing, preview your project to ensure the visuals still look clear on different screens. Smaller textures mean the server can send data quicker, and users with limited internet won’t struggle to connect. This step balances quality and performance, ensuring your project streams well without delays.
#3: Bake Lighting for Performance

Lighting makes your project look real, but calculating it live during streaming uses a lot of server power. To save resources, bake your lighting instead. Baking means precomputing how light hits objects and saving it as a static map, so the server doesn’t need to work it out every frame. In Unreal Engine, set your lights to “Static” in the details panel, then build your lighting from the “Build” menu. This creates lightmaps that store the results, reducing the GPU’s job during streaming.
Focus on static objects like walls or floors that don’t move, as dynamic lighting suits moving items better but costs more power. Adjust lightmap resolution in the mesh settings—higher for detailed areas, lower for simple ones—to keep file sizes small. After baking, test your scene to confirm it looks good and runs faster. Baked lighting cuts down rendering time, which helps maintain a steady frame rate when streaming. It’s a simple way to boost performance, letting your project shine without overloading the cloud server.
Step 2: Configure Your Build for Streaming
After optimizing your Unreal Engine project, the next step is to configure your build correctly for streaming. This means preparing your application so it runs well on a cloud server and streams smoothly to users’ devices. A good build setup reduces errors, improves speed, and ensures your project works as expected when it reaches browsers. Here are three important tasks to focus on: setting up the streaming plugin, packaging a shipping build, and controlling frame rate and resolution.
#4: Set Up the Plugin Properly
To stream your project, you need to enable Unreal Engine’s pixel streaming plugin. This tool connects your application to the cloud and sends video and audio to users. In the Unreal Editor, go to the “Edit” menu, select “Plugins,” and find “Pixel Streaming” under the “Built-In” section. Check the box to enable it, then restart the editor to make sure it loads correctly. Once it’s active, your project can stream, but you need to configure it a little more.
Open your project settings and look for the “Pixel Streaming” section. Here, you can add startup commands like -AudioMixer to ensure sound works properly during streaming. You might also need to set -PixelStreamingIP=localhost and -PixelStreamingPort=8888 if you’re testing locally—these tell the plugin where to connect. After saving, run your project in the editor and check the output log for any errors. If it says “Pixel Streaming is active,” you’re on the right track. This setup makes sure your application is ready to send data to the cloud, so users hear and see everything clearly when they connect through their browsers.
#5: Package a Shipping Build
For streaming, you need to package your project into a final build that’s stable and efficient. Unreal Engine offers different build types, but a “Shipping” build is best for this. It removes extra debug information and optimizes performance, making it perfect for cloud servers. In the editor, go to “File,” then “Package Project,” and choose “Windows (64-bit)” since most streaming platforms use this format. Select a folder to save your build, then click “Package.”
Before you start, open “Project Settings” and set the “Build Configuration” to “Shipping” under the “Packaging” section. This ensures your build is lean—no unnecessary files that slow things down. You can also include only the levels you need by adding them to the “List of Maps to Include” in the same settings. Once packaging finishes, you’ll get a folder with an .exe file and other data. Test this build on your computer first by running the .exe—if it works well, it’s ready for the cloud. A shipping build cuts out extra weight, so your project starts fast and runs reliably when streamed to users, avoiding crashes or delays.
#6: Control Frame Rate and Resolution
Streaming works best when your project has a steady frame rate and resolution that suits most devices. In Unreal Engine, you can set these limits to keep performance cons
istent. Open “Project Settings,” go to “Engine” then “General Settings,” and find “Frame Rate.” Set the “Max FPS” to 30 frames per second (FPS). This is a good balance—smooth enough for users but not too hard on the server or network. If your project needs faster motion, like a game, you can try 60 FPS later, but test it first.
For resolution, aim for 1080p (1920x1080 pixels) as a starting point. In the same settings, under “Rendering,” set the “Default Resolution” to 1920x1080. This size looks clear on most screens and doesn’t use too much bandwidth. When streaming, the cloud can adjust this based on the user’s device, but setting a base helps. Test your project at this setting to ensure it looks good and runs without stuttering. Controlling these factors keeps your stream stable, so users get a steady experience even on slower internet connections.
Step 3: Design for User Interaction
Once your Unreal Engine project is optimized and built, the next step is to design how users will interact with it during streaming. Pixel streaming lets people access your application through browsers on different devices, like phones, tablets, or computers. If the controls or interface don’t work well, users might get confused or stop using it. This step focuses on making inputs easy to use and the interface clear, so everyone has a good experience. Here are three key areas to work on.
#7: Enable Multi-Device Inputs
Your project needs to handle inputs from many devices, like touchscreens, mice, keyboards, or gamepads, since streaming reaches users on all kinds of hardware. In Unreal Engine, start by making sure touch controls work for phones and tablets. Open “Project Settings,” go to “Input,” and check the box for “Always Show Touch Interface.” This adds a virtual joystick or buttons for mobile users, so they can move or interact without a physical controller. Test this by running your project and using the editor’s mobile preview to see if it feels natural.
Next, set up bindings for other inputs in the same “Input” settings. Add actions like “Move Forward” or “Jump” and map them to keys (e.g., W for keyboard) and mouse clicks. If your project supports gamepads, include those too—Unreal recognizes most standard controllers automatically. Then, launch your packaged build and test each input type: click with a mouse, tap on a phone, press keys on a laptop. Streaming adds a small delay, so keep inputs simple to avoid frustration. Good multi-device support means every user can control your project easily, no matter how they connect, making it ready for a wide audience.
#8: Build a Scalable UI
The user interface (UI) must look good and be easy to read on all screen sizes, from small phones to big monitors. In Unreal Engine, use the UMG (Unreal Motion Graphics) system to create your UI. Open the “Widget Blueprint” from the content browser, and design with vector-based elements like text or shapes instead of fixed images. Vectors scale without getting blurry, so your buttons and menus stay sharp. Set the “Anchors” for each element to adjust automatically—tie them to the screen edges or center—so they move properly when the window changes size.
Set your UI resolution to 1920x1080 as a base, then test it at smaller sizes like 1280x720 or 800x480 in the editor’s “Viewport” settings. Check that text is readable and buttons are big enough to tap on a phone. Avoid tiny details that disappear on small screens. A scalable UI ensures users see everything clearly when streaming, whether they’re on a tablet or a desktop, keeping your project professional and user-friendly across devices.
#9: Minimize Latency Perception
Streaming has a slight delay because data travels over the internet, but you can make it feel faster. For touch controls, lower the sensitivity in “Project Settings” under “Input.” Find the “Touch Input” section and reduce the “Sensitivity” value (e.g., from 1.0 to 0.5). This stops small, shaky movements from registering, so users feel like their taps work right away, even with a delay. Test this on a phone to find a setting that feels smooth.
You can also add short animations or loading bars to keep users busy during waits. In UMG, create a “Progress Bar” widget and tie it to your level’s loading state. Show it when the stream starts or a new area loads—this distracts from any lag and shows something is happening. Keep animations simple, like a sliding bar, so they don’t slow down the project. These tricks hide the network delay, making your streamed application feel quick and responsive, which keeps users happy and engaged.
Step 4: Test Across Real-World Conditions
After setting up your Unreal Engine project for streaming, you need to test it under conditions that match how users will experience it. Pixel streaming sends your application to browsers on all kinds of devices and networks, so it must work well everywhere—not just on your powerful computer. Testing helps you find and fix problems like slow performance or errors before users see them. This step covers three main areas: checking different devices, simulating network issues, and speeding up load times.
#10: Check Diverse Devices
Your project will reach users on devices with different power, like old phones, new tablets, or laptops. To make sure it runs well, test it on a range of hardware. Start with a low-end device, like a budget Android phone with 2GB of RAM. Package your build, upload it to a streaming service or test locally, and open it in a browser like Chrome or Firefox. Play through your project—move around, use controls, and watch for slow frame rates or crashes. If it works here, it’s likely fine on stronger devices too.
Next, try a tablet and a computer. On the tablet, check touch controls and screen scaling in the browser. On the computer, test with a mouse and keyboard. Use Unreal Engine’s “Device Profiles” in “Project Settings” to mimic weaker hardware—set lower memory or CPU limits and run the editor to see how it holds up. Fix any issues, like blurry textures or unresponsive buttons, by adjusting assets or UI. Testing across devices ensures your streamed project feels smooth and looks good for everyone, no matter what they use to connect.
#11: Simulate Network Variability
Not all users have fast internet, so you need to test how your project handles weaker networks. Unreal Engine has a tool called “Network Emulation” to copy real-world conditions. In the editor, go to “Play” settings, enable “Network Emulation,” and pick a profile like “Average” (simulating 4G) or “Bad” (simulating slow 3G). Set “Packet Loss” to 5% and “Latency” to 100ms, then play your project. Watch for stuttering video or delayed controls—these show where your stream struggles.
If problems appear, reduce the amount of data your project sends. In “Project Settings,” under “Replication,” limit how often objects update over the network—focus on key items like the player, not background props. Test again to see if it improves. This step makes sure your project stays playable even on unstable or slow connections, like rural Wi-Fi or mobile data, so users don’t get frustrated and leave.
#12: Optimize Load Times
Users won’t wait long for your project to start, so aim to keep loading under 20 seconds. In Unreal Engine, open the “Content Browser” and find your main level. Right-click it, choose “Asset Actions,” and set it to “Preload” in the details panel. This tells the engine to load critical files first, like the map and player, before less important ones. Package your build and test it—time how long it takes to show the first screen.
If it’s too slow, remove unused assets. In “Project Settings,” under “Packaging,” check “List of Maps to Include” and add only what you need. Then, use the “Size Map” tool (Window > Developer Tools) to find big files—cut or compress them if they’re not essential. Test again in a browser to confirm it’s faster. Quick load times keep users engaged when they start your streamed project, making a strong first impression wherever they are.
Step 5: Fine-Tune Encoding and Network Settings
When your Unreal Engine project is ready to stream, the final step is to adjust how it sends data to users. This involves encoding—the process of turning your visuals into a video stream—and managing network settings. These choices affect how clear your project looks and how fast it reaches users. If they’re not set up well, users might see blurry images or delays. This step explains how to pick the right codec, set a good bitrate, and monitor network health, so your stream runs smoothly.
#13: Choose the Right Codec
A codec compresses your project’s video so it can travel over the internet quickly. Unreal Engine’s pixel streaming supports different codecs, and picking the right one matters. The most common choice is H.264, which works on almost all devices, like phones, tablets, and computers. To use it, open your packaged build’s folder, find the “Engine” directory, and edit the “PixelStreaming” settings file (or add a command line option). Set -PixelStreamingEncoderCodec=H264 when launching your .exe file. Test it by streaming locally—H.264 keeps file sizes small and plays reliably, even on older hardware.
If your cloud server has newer GPUs, you can try AV1 instead. AV1 gives better picture quality at lower data rates, which is great for slow networks. Change the command to -PixelStreamingEncoderCodec=AV1 and test again. It needs more server power, so check if your streaming platform supports it. Run your project in a browser and compare—AV1 should look sharper with less buffering if it works. Choosing the right codec balances quality and compatibility, ensuring your stream looks good without overloading users’ connections.
#14: Set a Smart Bitrate
Bitrate controls how much data your stream sends per second, affecting both quality and speed. Too low, and the video gets blurry; too high, and it lags on slow internet. For 1080p streaming, aim for 10 to 20 megabits per second (Mbps). In Unreal Engine, add a command like -PixelStreamingEncoderTargetBitrate=10000000 (10 Mbps) to your build’s launch settings. Package your project, stream it, and watch on a browser—check if the visuals are clear without stuttering.
Test with different values—try 15 Mbps or 20 Mbps—to find what works best. Open your browser’s developer tools (F12), go to the “Network” tab, and look at the data rate while streaming. If it drops or buffers, lower the bitrate. For weaker networks, 5 Mbps might be enough for 720p. A smart bitrate keeps your project smooth and sharp, matching the user’s internet speed so they don’t wait or see pixelated screens.
#15: Monitor Network Health
To keep your stream steady, you need to check how the network handles data. Unreal Engine has a tool for this. When running your build, add -PixelStreamingWebRTCStats to the command line. Stream it, then press the tilde key (~) in the browser to open the console. Type “stat PixelStreaming” and press enter—this shows details like packet loss and latency. Packet loss above 5% means data is missing, causing stutters; latency over 100ms feels slow.
If packet loss is high, go to “Project Settings” under “Replication” and lower the update frequency for objects—focus on essentials like the player. Retest and check the stats again. For latency, keep your assets light, as big files slow things down. This monitoring helps you fix problems before users notice, ensuring your stream stays fast and reliable, even on tricky networks.
Common Pitfalls to Avoid
When preparing your Unreal Engine project for pixel streaming, it’s easy to make mistakes that hurt performance or frustrate users. These problems can turn a great idea into a bad experience if you don’t catch them early. By knowing what to watch out for, you can save time and keep your stream running well. Here are three common pitfalls to avoid and how to steer clear of them.
One big mistake is using heavy assets that aren’t optimized. For example, if your 3D models have too many polygons or your textures are 4K for tiny objects, the cloud server struggles to render and send them. This causes slow frame rates or long loading times, especially on weaker devices. To fix this, always simplify models and compress textures before streaming—keep your project light so it flows smoothly.
Another issue is forgetting about bandwidth limits. Some developers set their stream to high quality, like 4K at 60 FPS, without thinking about users’ internet speeds. If someone has a slow connection, like 2 Mbps, the stream buffers or fails. Avoid this by testing at a lower resolution, like 1080p, and a reasonable bitrate, like 10 Mbps. Adjust settings to match real-world networks, not just your fast office Wi-Fi.
Finally, skipping early tests can lead to trouble. If you don’t check your project on different devices or networks before streaming, you might miss bugs—like controls not working on phones or crashes on low-end hardware. These show up when users try it, making your work look unprofessional. Test everything locally first, using tools like Unreal’s device profiles or network emulation, to find and fix issues ahead of time.
Avoiding these pitfalls keeps your project strong. A light, well-tested setup that respects bandwidth limits ensures your stream works for everyone. Take these extra steps, and your users will enjoy a steady, polished experience without surprises.
Final Checklist Before You Stream
Before you start streaming your Unreal Engine project, take a moment to check everything is ready. This quick list ensures your work is optimized and set up for success, whether you use Unreal’s pixel streaming or a platform like Vagon Streams. Going through these points helps you avoid last-minute problems and gives users a smooth experience.
First, confirm your assets are lean. Have you reduced polygon counts in models and compressed textures to 2K or lower? Baked lighting should be done for static objects to save server power. Next, check your build. Is the pixel streaming plugin enabled with the right commands, like -AudioMixer, and packaged as a Windows 64-bit shipping build? Make sure the frame rate is capped at 30 FPS and resolution set to 1080p for a good balance.
Then, verify your inputs work across devices—test touch, mouse, and keyboard controls—and ensure the UI scales well on different screens. Have you tested on low-end devices and slow networks, like 3G, to catch any lag or crashes? Load times should be under 20 seconds, with key assets preloaded. Finally, review your encoding: is the codec set to H.264 (or AV1 if supported), and the bitrate between 10-20 Mbps? Check network stats for low packet loss and latency.
If all these are done, your project is ready. Upload it to your streaming platform, launch it, and watch it run smoothly. This checklist ties everything together for a reliable, professional stream.
Conclusion
Preparing your Unreal Engine project for pixel streaming takes effort, but it’s worth it. By optimizing your assets, configuring your build, designing for user interaction, testing under real conditions, and fine-tuning encoding, you create a strong foundation. These steps ensure your project runs well on a cloud server and reaches users on any device—phones, tablets, or computers—without lag or errors. A well-prepared application loads quickly, looks clear, and feels smooth, keeping users happy and engaged.
This process solves common streaming challenges. Heavy assets slow things down, but reducing polygons and compressing textures keeps the server light. Poor controls confuse users, so testing inputs and scaling the UI makes everything easy to use. Weak networks cause delays, but smart bitrates and network checks keep the stream steady. Each step builds on the last, turning your project into a reliable experience that works for everyone, no matter their setup.
If you’re using a platform like Vagon Streams, these tips fit perfectly. Vagon Streams offers a no-code way to share your work, with native support for Unreal’s pixel streaming and its own protocol that cuts delays even more. You can pick what suits your project, and these optimization steps ensure it performs at its best either way. With powerful cloud GPUs and global reach, Vagon Streams handles the hard parts, while your preparation makes the difference.
Now, your project is ready to go live. Upload it, start streaming, and let users enjoy your work anywhere. Good optimization means fewer fixes later and a professional result from the start. Take these steps, and your audience will see the quality you’ve built—on their terms, on any screen.
Frequently Asked Questions (FAQs)
1. What happens if I don’t optimize my assets before streaming?
If you skip optimizing your assets, your project might run into problems. Large models with too many polygons or uncompressed textures take more server power to render, slowing down the stream. This can cause low frame rates, long loading times, or even crashes, especially on weaker devices like phones. Users might see choppy visuals or get disconnected, which ruins their experience. Optimizing—like reducing polygons and baking lighting—keeps your project light and fast, so it streams smoothly to everyone.
2. How do I know if my build is ready for pixel streaming?
Your build is ready if it meets a few key checks. First, enable the pixel streaming plugin in Unreal Engine and package it as a Windows 64-bit shipping build—this ensures it’s stable and efficient. Test it locally by running the .exe file with commands like -AudioMixer and -PixelStreamingPort=8888. If it starts without errors and streams to a browser, it’s a good sign. Also, check that the frame rate stays steady (e.g., 30 FPS) and inputs work. A solid build runs well before it hits the cloud.
3. Why does my stream lag on some devices but not others?
Lag often comes from differences in device power or internet speed. A strong computer with fast Wi-Fi handles high settings fine, but a weak phone on slow data struggles. To fix this, test on low-end devices and networks—use Unreal’s network emulation to mimic 3G or 4G. Lower your bitrate (e.g., 10 Mbps) and resolution (e.g., 1080p) to match slower connections. Also, simplify assets and limit network updates. This balances performance, so all users get a steady stream.
4. Can I stream at 4K resolution, or is 1080p better?
You can stream at 4K if your cloud server and users’ internet support it, but 1080p is usually better to start with. 4K needs a high bitrate—like 30 Mbps or more—which can lag on slower networks. Most devices and browsers handle 1080p well at 10-20 Mbps, giving clear visuals without buffering. Test 4K with a tool like Vagon Streams, which supports high resolutions, but check it on weaker connections first. Stick to 1080p unless your audience demands more and has the bandwidth.
5. How does Vagon Streams make streaming easier compared to Unreal’s tools?
Vagon Streams simplifies streaming by removing complex setup steps. It supports Unreal’s pixel streaming natively, so your optimized build works right away, but it also has its own protocol that reduces lag and improves quality—better than Unreal’s default in many cases. You don’t need to manage servers or code anything; just upload your build and stream. It uses powerful GPUs and global data centers to reach users fast. Optimizing your project still matters, but Vagon Streams handles the rest, saving you time and effort.
Pixel streaming is a powerful way to bring Unreal Engine projects to users on any device. It works by running your application on a strong cloud server and sending the visuals to a user’s browser, like a video stream. This means people can enjoy high-quality 3D experiences without needing expensive computers or phones. However, to make this work well, you need to prepare your project carefully before streaming begins.
This optimization guide explains how to optimize your Unreal Engine project for pixel streaming. The steps here will help you avoid problems like slow loading, choppy visuals, or crashes that frustrate users. Whether you are new to streaming or have some experience, these tips will make your project run smoothly on different devices and networks. The goal is to save you time and effort by setting up everything correctly from the start.
You can use these steps with Unreal Engine’s built-in pixel streaming tools or with a service like Vagon Streams. Both options let you stream your project, but preparation is key to success. Good optimization ensures your application looks great and performs well, no matter how users access it. In the sections ahead, we will cover how to adjust your assets, configure your build, test properly, and more. Each part is designed to be clear and practical, so you can follow along and get your project ready to stream without confusion. Let’s begin by understanding why this preparation matters and how it improves your streaming results.
Why Optimization Matters Before Streaming
Optimization is an essential step before you start pixel streaming your Unreal Engine project. Without it, your application might not work as expected. For example, if your project has large files or complex settings, it can overload the cloud server. This leads to slow performance, such as low frame rates or delays, which make the experience unpleasant for users. Preparing your project properly helps avoid these issues and ensures everything runs smoothly.
When you stream, the cloud server does the hard work of rendering your 3D content. However, it still depends on how well your project is built. If your assets—like models or textures—are too heavy, they use up too much processing power and network bandwidth. This can cause long loading times or even disconnects, especially for users with slower internet. Optimization reduces these demands, so your project loads faster and plays without interruptions, even on weaker devices like mobile phones.
Another reason to optimize is to reach more people. Pixel streaming lets anyone with a browser access your work, but not everyone has fast internet or powerful hardware. By making your project efficient, you ensure it works well for all users, not just those with the best setups. This improves user satisfaction and keeps them engaged with your content. Plus, a well-optimized project is easier to manage when you scale up to more users later.
In short, optimization saves resources and improves quality. It’s about making smart choices early—like reducing file sizes or testing on different devices—so you don’t face bigger problems during streaming. The steps in this guide will show you how to do this effectively, whether you use Unreal Engine’s tools or a platform like Vagon Streams. With the right preparation, your project will deliver a professional and reliable experience every time.
Vagon Streams: Next Level 3D Interactive Streaming Experience
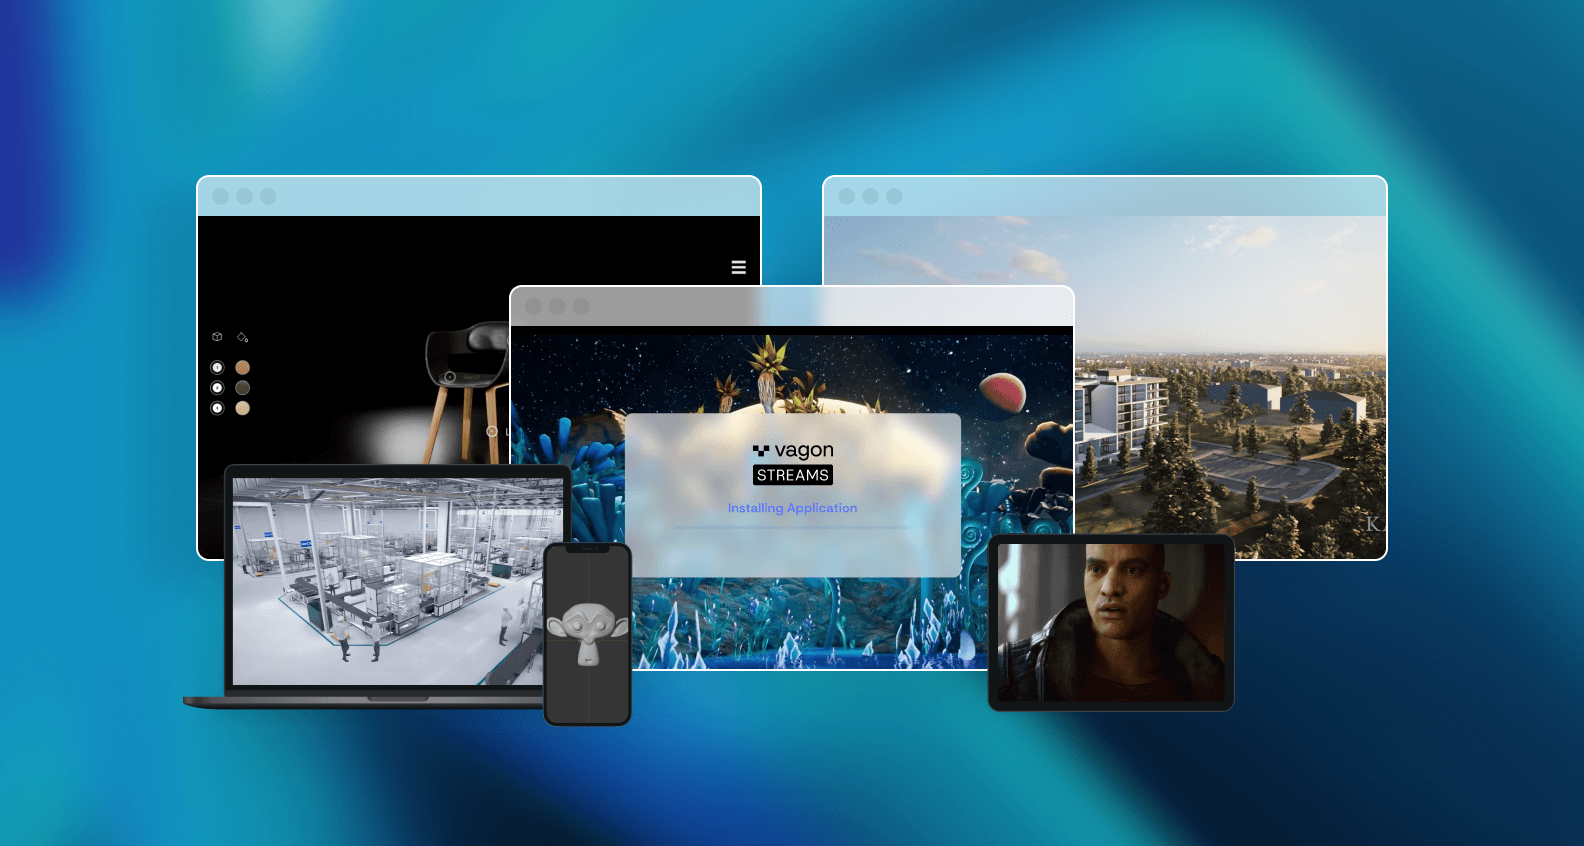
Before we explore the technical steps, let’s look at Vagon Streams, a tool that simplifies streaming your Unreal Engine projects. Vagon Streams is a platform designed to help you share your work quickly and reliably, without needing advanced coding skills. And with the recent launch of Vagon Streams’ Instant Connection, you can streamline your setup even further, enabling one-click deployment for seamless streaming of your Unreal Engine projects. It runs on powerful cloud servers with NVIDIA GPUs, so your project gets the performance it needs to stream smoothly to users anywhere in the world.
One key feature of Vagon Streams is its support for Unreal Engine’s pixel streaming. This means you can use the standard Unreal tools and settings we’ll discuss later, and Vagon Streams will handle the delivery to users’ browsers. However, it also offers its own streaming technology, which is built to perform better than the default pixel streaming method. This protocol reduces delays and improves video quality, even on challenging networks. You can choose between the two options based on what works best for your project—flexibility is a big advantage here.
The tips in this guide are valuable no matter which streaming method you pick. Optimizing your project ensures it runs well with Unreal’s pixel streaming or Vagon Streams’ enhanced protocol. For example, making your assets smaller or testing on slow connections helps both systems deliver a good experience. Vagon Streams takes care of the complicated setup, like managing servers or scaling to more users, so you can focus on preparing your application. This no-code approach saves time and makes streaming accessible, even if you’re not a network expert.
With Vagon Streams, you also get practical features like global data centers to reduce lag for users in different regions. It’s built to be fast and dependable, but your project still needs to be optimized to take full advantage of these benefits. The steps ahead—like adjusting your build or checking device compatibility—work hand-in-hand with Vagon Streams to ensure your users enjoy a seamless experience. Let’s move on to the first step: optimizing your Unreal Engine project for streaming success.
Step 1: Optimize Your Unreal Engine Project
To stream your Unreal Engine project successfully, the first step is to optimize it. This means making your application lighter and more efficient, so it runs well on a cloud server and reaches users without problems. Streaming puts a lot of work on the server, and if your project is too heavy, it can slow down or crash. By adjusting your assets—like models, textures, and lighting—you can reduce this load and improve performance. Here are three key ways to do this.
#1: Reduce Asset Complexity
Your 3D models are a big part of your project, but they can also make streaming harder if they’re too detailed. High-polygon models take more processing power, which can slow down the server and cause lag for users. To fix this, lower the polygon count in your models using Unreal Engine’s built-in tools. Open your mesh in the editor, go to the “LOD” settings, and create Levels of Detail (LODs). LODs automatically use simpler versions of your model when it’s far away, saving resources without changing how it looks up close. For example, a tree might have 10,000 polygons when near but only 1,000 when distant—this keeps your stream smooth.
You should also check for unnecessary details, like tiny parts users won’t notice during streaming. Remove these with the mesh simplification tool, which reduces polygons while keeping the shape intact. Test your changes in the editor to ensure the quality stays good. This step makes your project easier to render and send over the internet, especially for users on slower devices or connections. A lighter model means faster loading and less strain on the cloud, setting a strong base for streaming.
#2: Compress Textures Efficiently
Textures add color and detail to your project, but large texture files can slow down streaming by using too much memory and bandwidth. To avoid this, compress your textures to a smaller size without losing too much quality. In Unreal Engine, open your texture in the editor and check its resolution. If it’s 4K (4096x4096 pixels) but only covers a small object, reduce it to 2K (2048x2048) or even 1K (1024x1024). This cuts the file size in half or more, making it faster to load and stream.
Next, use a compression format like BC7, which Unreal supports. BC7 keeps images sharp while shrinking their size, perfect for streaming where every byte counts. In the texture settings, set “Compression” to BC7 and save. For less important textures—like backgrounds—try lower settings like BC1 to save even more space. After compressing, preview your project to ensure the visuals still look clear on different screens. Smaller textures mean the server can send data quicker, and users with limited internet won’t struggle to connect. This step balances quality and performance, ensuring your project streams well without delays.
#3: Bake Lighting for Performance
Lighting makes your project look real, but calculating it live during streaming uses a lot of server power. To save resources, bake your lighting instead. Baking means precomputing how light hits objects and saving it as a static map, so the server doesn’t need to work it out every frame. In Unreal Engine, set your lights to “Static” in the details panel, then build your lighting from the “Build” menu. This creates lightmaps that store the results, reducing the GPU’s job during streaming.
Focus on static objects like walls or floors that don’t move, as dynamic lighting suits moving items better but costs more power. Adjust lightmap resolution in the mesh settings—higher for detailed areas, lower for simple ones—to keep file sizes small. After baking, test your scene to confirm it looks good and runs faster. Baked lighting cuts down rendering time, which helps maintain a steady frame rate when streaming. It’s a simple way to boost performance, letting your project shine without overloading the cloud server.
Step 2: Configure Your Build for Streaming
After optimizing your Unreal Engine project, the next step is to configure your build correctly for streaming. This means preparing your application so it runs well on a cloud server and streams smoothly to users’ devices. A good build setup reduces errors, improves speed, and ensures your project works as expected when it reaches browsers. Here are three important tasks to focus on: setting up the streaming plugin, packaging a shipping build, and controlling frame rate and resolution.
#4: Set Up the Plugin Properly
To stream your project, you need to enable Unreal Engine’s pixel streaming plugin. This tool connects your application to the cloud and sends video and audio to users. In the Unreal Editor, go to the “Edit” menu, select “Plugins,” and find “Pixel Streaming” under the “Built-In” section. Check the box to enable it, then restart the editor to make sure it loads correctly. Once it’s active, your project can stream, but you need to configure it a little more.
Open your project settings and look for the “Pixel Streaming” section. Here, you can add startup commands like -AudioMixer to ensure sound works properly during streaming. You might also need to set -PixelStreamingIP=localhost and -PixelStreamingPort=8888 if you’re testing locally—these tell the plugin where to connect. After saving, run your project in the editor and check the output log for any errors. If it says “Pixel Streaming is active,” you’re on the right track. This setup makes sure your application is ready to send data to the cloud, so users hear and see everything clearly when they connect through their browsers.
#5: Package a Shipping Build
For streaming, you need to package your project into a final build that’s stable and efficient. Unreal Engine offers different build types, but a “Shipping” build is best for this. It removes extra debug information and optimizes performance, making it perfect for cloud servers. In the editor, go to “File,” then “Package Project,” and choose “Windows (64-bit)” since most streaming platforms use this format. Select a folder to save your build, then click “Package.”
Before you start, open “Project Settings” and set the “Build Configuration” to “Shipping” under the “Packaging” section. This ensures your build is lean—no unnecessary files that slow things down. You can also include only the levels you need by adding them to the “List of Maps to Include” in the same settings. Once packaging finishes, you’ll get a folder with an .exe file and other data. Test this build on your computer first by running the .exe—if it works well, it’s ready for the cloud. A shipping build cuts out extra weight, so your project starts fast and runs reliably when streamed to users, avoiding crashes or delays.
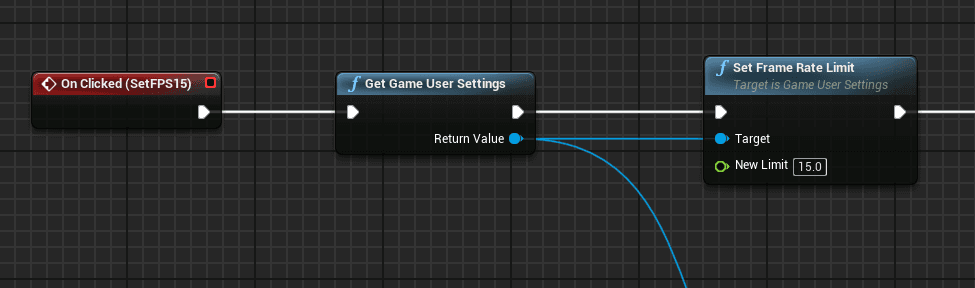
#6: Control Frame Rate and Resolution
Streaming works best when your project has a steady frame rate and resolution that suits most devices. In Unreal Engine, you can set these limits to keep performance cons
istent. Open “Project Settings,” go to “Engine” then “General Settings,” and find “Frame Rate.” Set the “Max FPS” to 30 frames per second (FPS). This is a good balance—smooth enough for users but not too hard on the server or network. If your project needs faster motion, like a game, you can try 60 FPS later, but test it first.
For resolution, aim for 1080p (1920x1080 pixels) as a starting point. In the same settings, under “Rendering,” set the “Default Resolution” to 1920x1080. This size looks clear on most screens and doesn’t use too much bandwidth. When streaming, the cloud can adjust this based on the user’s device, but setting a base helps. Test your project at this setting to ensure it looks good and runs without stuttering. Controlling these factors keeps your stream stable, so users get a steady experience even on slower internet connections.
Step 3: Design for User Interaction
Once your Unreal Engine project is optimized and built, the next step is to design how users will interact with it during streaming. Pixel streaming lets people access your application through browsers on different devices, like phones, tablets, or computers. If the controls or interface don’t work well, users might get confused or stop using it. This step focuses on making inputs easy to use and the interface clear, so everyone has a good experience. Here are three key areas to work on.
#7: Enable Multi-Device Inputs
Your project needs to handle inputs from many devices, like touchscreens, mice, keyboards, or gamepads, since streaming reaches users on all kinds of hardware. In Unreal Engine, start by making sure touch controls work for phones and tablets. Open “Project Settings,” go to “Input,” and check the box for “Always Show Touch Interface.” This adds a virtual joystick or buttons for mobile users, so they can move or interact without a physical controller. Test this by running your project and using the editor’s mobile preview to see if it feels natural.
Next, set up bindings for other inputs in the same “Input” settings. Add actions like “Move Forward” or “Jump” and map them to keys (e.g., W for keyboard) and mouse clicks. If your project supports gamepads, include those too—Unreal recognizes most standard controllers automatically. Then, launch your packaged build and test each input type: click with a mouse, tap on a phone, press keys on a laptop. Streaming adds a small delay, so keep inputs simple to avoid frustration. Good multi-device support means every user can control your project easily, no matter how they connect, making it ready for a wide audience.
#8: Build a Scalable UI
The user interface (UI) must look good and be easy to read on all screen sizes, from small phones to big monitors. In Unreal Engine, use the UMG (Unreal Motion Graphics) system to create your UI. Open the “Widget Blueprint” from the content browser, and design with vector-based elements like text or shapes instead of fixed images. Vectors scale without getting blurry, so your buttons and menus stay sharp. Set the “Anchors” for each element to adjust automatically—tie them to the screen edges or center—so they move properly when the window changes size.
Set your UI resolution to 1920x1080 as a base, then test it at smaller sizes like 1280x720 or 800x480 in the editor’s “Viewport” settings. Check that text is readable and buttons are big enough to tap on a phone. Avoid tiny details that disappear on small screens. A scalable UI ensures users see everything clearly when streaming, whether they’re on a tablet or a desktop, keeping your project professional and user-friendly across devices.
#9: Minimize Latency Perception
Streaming has a slight delay because data travels over the internet, but you can make it feel faster. For touch controls, lower the sensitivity in “Project Settings” under “Input.” Find the “Touch Input” section and reduce the “Sensitivity” value (e.g., from 1.0 to 0.5). This stops small, shaky movements from registering, so users feel like their taps work right away, even with a delay. Test this on a phone to find a setting that feels smooth.
You can also add short animations or loading bars to keep users busy during waits. In UMG, create a “Progress Bar” widget and tie it to your level’s loading state. Show it when the stream starts or a new area loads—this distracts from any lag and shows something is happening. Keep animations simple, like a sliding bar, so they don’t slow down the project. These tricks hide the network delay, making your streamed application feel quick and responsive, which keeps users happy and engaged.
Step 4: Test Across Real-World Conditions
After setting up your Unreal Engine project for streaming, you need to test it under conditions that match how users will experience it. Pixel streaming sends your application to browsers on all kinds of devices and networks, so it must work well everywhere—not just on your powerful computer. Testing helps you find and fix problems like slow performance or errors before users see them. This step covers three main areas: checking different devices, simulating network issues, and speeding up load times.
#10: Check Diverse Devices
Your project will reach users on devices with different power, like old phones, new tablets, or laptops. To make sure it runs well, test it on a range of hardware. Start with a low-end device, like a budget Android phone with 2GB of RAM. Package your build, upload it to a streaming service or test locally, and open it in a browser like Chrome or Firefox. Play through your project—move around, use controls, and watch for slow frame rates or crashes. If it works here, it’s likely fine on stronger devices too.
Next, try a tablet and a computer. On the tablet, check touch controls and screen scaling in the browser. On the computer, test with a mouse and keyboard. Use Unreal Engine’s “Device Profiles” in “Project Settings” to mimic weaker hardware—set lower memory or CPU limits and run the editor to see how it holds up. Fix any issues, like blurry textures or unresponsive buttons, by adjusting assets or UI. Testing across devices ensures your streamed project feels smooth and looks good for everyone, no matter what they use to connect.
#11: Simulate Network Variability
Not all users have fast internet, so you need to test how your project handles weaker networks. Unreal Engine has a tool called “Network Emulation” to copy real-world conditions. In the editor, go to “Play” settings, enable “Network Emulation,” and pick a profile like “Average” (simulating 4G) or “Bad” (simulating slow 3G). Set “Packet Loss” to 5% and “Latency” to 100ms, then play your project. Watch for stuttering video or delayed controls—these show where your stream struggles.
If problems appear, reduce the amount of data your project sends. In “Project Settings,” under “Replication,” limit how often objects update over the network—focus on key items like the player, not background props. Test again to see if it improves. This step makes sure your project stays playable even on unstable or slow connections, like rural Wi-Fi or mobile data, so users don’t get frustrated and leave.
#12: Optimize Load Times
Users won’t wait long for your project to start, so aim to keep loading under 20 seconds. In Unreal Engine, open the “Content Browser” and find your main level. Right-click it, choose “Asset Actions,” and set it to “Preload” in the details panel. This tells the engine to load critical files first, like the map and player, before less important ones. Package your build and test it—time how long it takes to show the first screen.
If it’s too slow, remove unused assets. In “Project Settings,” under “Packaging,” check “List of Maps to Include” and add only what you need. Then, use the “Size Map” tool (Window > Developer Tools) to find big files—cut or compress them if they’re not essential. Test again in a browser to confirm it’s faster. Quick load times keep users engaged when they start your streamed project, making a strong first impression wherever they are.
Step 5: Fine-Tune Encoding and Network Settings
When your Unreal Engine project is ready to stream, the final step is to adjust how it sends data to users. This involves encoding—the process of turning your visuals into a video stream—and managing network settings. These choices affect how clear your project looks and how fast it reaches users. If they’re not set up well, users might see blurry images or delays. This step explains how to pick the right codec, set a good bitrate, and monitor network health, so your stream runs smoothly.
#13: Choose the Right Codec
A codec compresses your project’s video so it can travel over the internet quickly. Unreal Engine’s pixel streaming supports different codecs, and picking the right one matters. The most common choice is H.264, which works on almost all devices, like phones, tablets, and computers. To use it, open your packaged build’s folder, find the “Engine” directory, and edit the “PixelStreaming” settings file (or add a command line option). Set -PixelStreamingEncoderCodec=H264 when launching your .exe file. Test it by streaming locally—H.264 keeps file sizes small and plays reliably, even on older hardware.
If your cloud server has newer GPUs, you can try AV1 instead. AV1 gives better picture quality at lower data rates, which is great for slow networks. Change the command to -PixelStreamingEncoderCodec=AV1 and test again. It needs more server power, so check if your streaming platform supports it. Run your project in a browser and compare—AV1 should look sharper with less buffering if it works. Choosing the right codec balances quality and compatibility, ensuring your stream looks good without overloading users’ connections.
#14: Set a Smart Bitrate
Bitrate controls how much data your stream sends per second, affecting both quality and speed. Too low, and the video gets blurry; too high, and it lags on slow internet. For 1080p streaming, aim for 10 to 20 megabits per second (Mbps). In Unreal Engine, add a command like -PixelStreamingEncoderTargetBitrate=10000000 (10 Mbps) to your build’s launch settings. Package your project, stream it, and watch on a browser—check if the visuals are clear without stuttering.
Test with different values—try 15 Mbps or 20 Mbps—to find what works best. Open your browser’s developer tools (F12), go to the “Network” tab, and look at the data rate while streaming. If it drops or buffers, lower the bitrate. For weaker networks, 5 Mbps might be enough for 720p. A smart bitrate keeps your project smooth and sharp, matching the user’s internet speed so they don’t wait or see pixelated screens.
#15: Monitor Network Health
To keep your stream steady, you need to check how the network handles data. Unreal Engine has a tool for this. When running your build, add -PixelStreamingWebRTCStats to the command line. Stream it, then press the tilde key (~) in the browser to open the console. Type “stat PixelStreaming” and press enter—this shows details like packet loss and latency. Packet loss above 5% means data is missing, causing stutters; latency over 100ms feels slow.
If packet loss is high, go to “Project Settings” under “Replication” and lower the update frequency for objects—focus on essentials like the player. Retest and check the stats again. For latency, keep your assets light, as big files slow things down. This monitoring helps you fix problems before users notice, ensuring your stream stays fast and reliable, even on tricky networks.
Common Pitfalls to Avoid
When preparing your Unreal Engine project for pixel streaming, it’s easy to make mistakes that hurt performance or frustrate users. These problems can turn a great idea into a bad experience if you don’t catch them early. By knowing what to watch out for, you can save time and keep your stream running well. Here are three common pitfalls to avoid and how to steer clear of them.
One big mistake is using heavy assets that aren’t optimized. For example, if your 3D models have too many polygons or your textures are 4K for tiny objects, the cloud server struggles to render and send them. This causes slow frame rates or long loading times, especially on weaker devices. To fix this, always simplify models and compress textures before streaming—keep your project light so it flows smoothly.
Another issue is forgetting about bandwidth limits. Some developers set their stream to high quality, like 4K at 60 FPS, without thinking about users’ internet speeds. If someone has a slow connection, like 2 Mbps, the stream buffers or fails. Avoid this by testing at a lower resolution, like 1080p, and a reasonable bitrate, like 10 Mbps. Adjust settings to match real-world networks, not just your fast office Wi-Fi.
Finally, skipping early tests can lead to trouble. If you don’t check your project on different devices or networks before streaming, you might miss bugs—like controls not working on phones or crashes on low-end hardware. These show up when users try it, making your work look unprofessional. Test everything locally first, using tools like Unreal’s device profiles or network emulation, to find and fix issues ahead of time.
Avoiding these pitfalls keeps your project strong. A light, well-tested setup that respects bandwidth limits ensures your stream works for everyone. Take these extra steps, and your users will enjoy a steady, polished experience without surprises.
Final Checklist Before You Stream
Before you start streaming your Unreal Engine project, take a moment to check everything is ready. This quick list ensures your work is optimized and set up for success, whether you use Unreal’s pixel streaming or a platform like Vagon Streams. Going through these points helps you avoid last-minute problems and gives users a smooth experience.
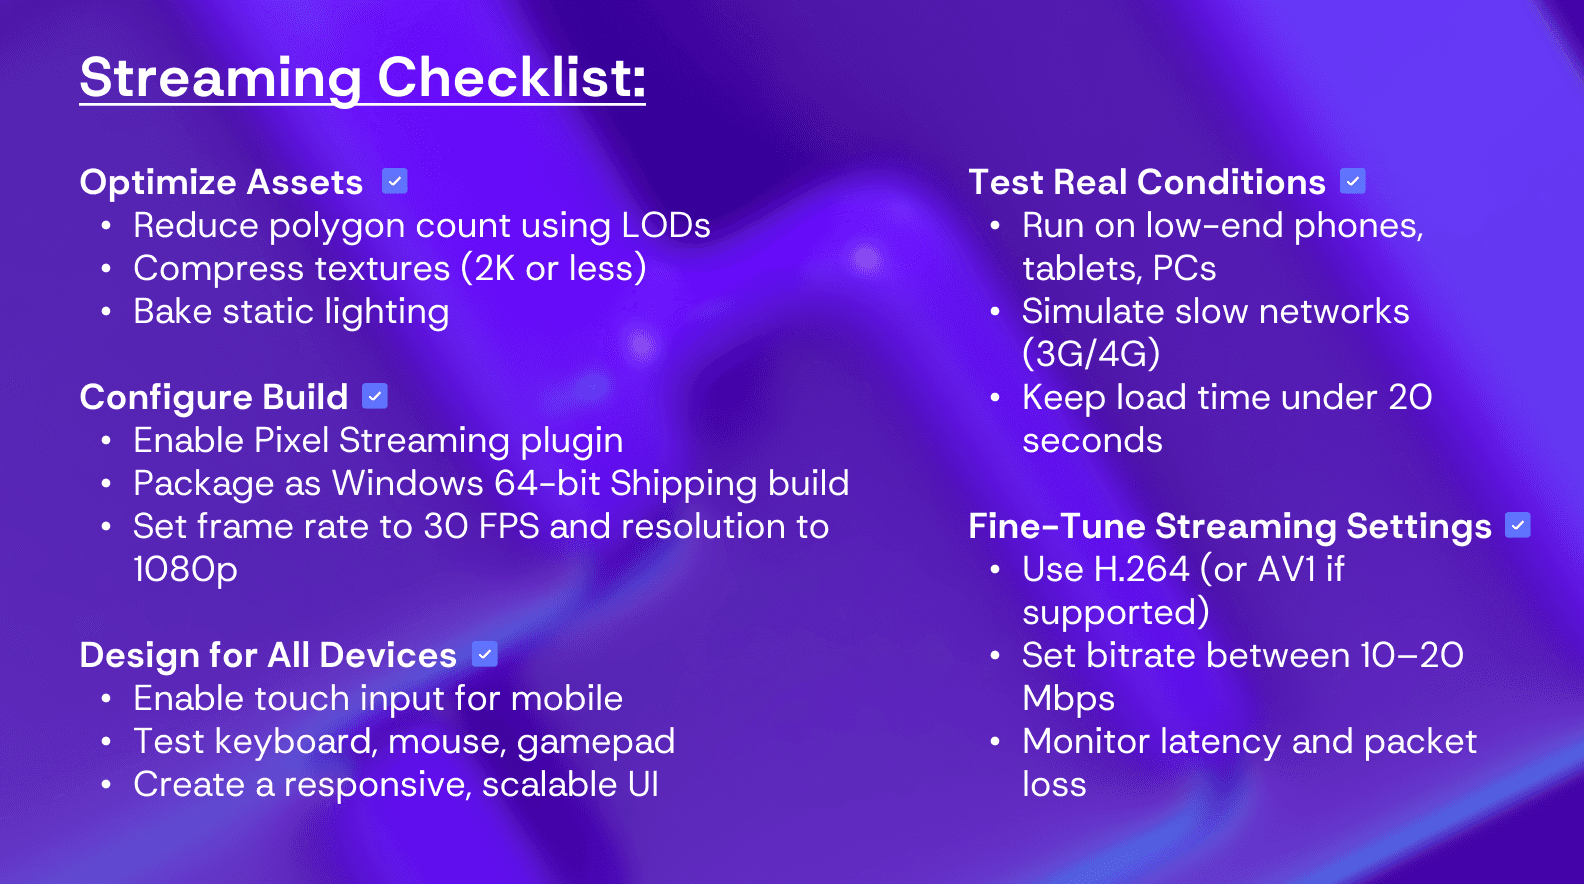
First, confirm your assets are lean. Have you reduced polygon counts in models and compressed textures to 2K or lower? Baked lighting should be done for static objects to save server power. Next, check your build. Is the pixel streaming plugin enabled with the right commands, like -AudioMixer, and packaged as a Windows 64-bit shipping build? Make sure the frame rate is capped at 30 FPS and resolution set to 1080p for a good balance.
Then, verify your inputs work across devices—test touch, mouse, and keyboard controls—and ensure the UI scales well on different screens. Have you tested on low-end devices and slow networks, like 3G, to catch any lag or crashes? Load times should be under 20 seconds, with key assets preloaded. Finally, review your encoding: is the codec set to H.264 (or AV1 if supported), and the bitrate between 10-20 Mbps? Check network stats for low packet loss and latency.
If all these are done, your project is ready. Upload it to your streaming platform, launch it, and watch it run smoothly. This checklist ties everything together for a reliable, professional stream.
Conclusion
Preparing your Unreal Engine project for pixel streaming takes effort, but it’s worth it. By optimizing your assets, configuring your build, designing for user interaction, testing under real conditions, and fine-tuning encoding, you create a strong foundation. These steps ensure your project runs well on a cloud server and reaches users on any device—phones, tablets, or computers—without lag or errors. A well-prepared application loads quickly, looks clear, and feels smooth, keeping users happy and engaged.
This process solves common streaming challenges. Heavy assets slow things down, but reducing polygons and compressing textures keeps the server light. Poor controls confuse users, so testing inputs and scaling the UI makes everything easy to use. Weak networks cause delays, but smart bitrates and network checks keep the stream steady. Each step builds on the last, turning your project into a reliable experience that works for everyone, no matter their setup.
If you’re using a platform like Vagon Streams, these tips fit perfectly. Vagon Streams offers a no-code way to share your work, with native support for Unreal’s pixel streaming and its own protocol that cuts delays even more. You can pick what suits your project, and these optimization steps ensure it performs at its best either way. With powerful cloud GPUs and global reach, Vagon Streams handles the hard parts, while your preparation makes the difference.
Now, your project is ready to go live. Upload it, start streaming, and let users enjoy your work anywhere. Good optimization means fewer fixes later and a professional result from the start. Take these steps, and your audience will see the quality you’ve built—on their terms, on any screen.
Frequently Asked Questions (FAQs)
1. What happens if I don’t optimize my assets before streaming?
If you skip optimizing your assets, your project might run into problems. Large models with too many polygons or uncompressed textures take more server power to render, slowing down the stream. This can cause low frame rates, long loading times, or even crashes, especially on weaker devices like phones. Users might see choppy visuals or get disconnected, which ruins their experience. Optimizing—like reducing polygons and baking lighting—keeps your project light and fast, so it streams smoothly to everyone.
2. How do I know if my build is ready for pixel streaming?
Your build is ready if it meets a few key checks. First, enable the pixel streaming plugin in Unreal Engine and package it as a Windows 64-bit shipping build—this ensures it’s stable and efficient. Test it locally by running the .exe file with commands like -AudioMixer and -PixelStreamingPort=8888. If it starts without errors and streams to a browser, it’s a good sign. Also, check that the frame rate stays steady (e.g., 30 FPS) and inputs work. A solid build runs well before it hits the cloud.
3. Why does my stream lag on some devices but not others?
Lag often comes from differences in device power or internet speed. A strong computer with fast Wi-Fi handles high settings fine, but a weak phone on slow data struggles. To fix this, test on low-end devices and networks—use Unreal’s network emulation to mimic 3G or 4G. Lower your bitrate (e.g., 10 Mbps) and resolution (e.g., 1080p) to match slower connections. Also, simplify assets and limit network updates. This balances performance, so all users get a steady stream.
4. Can I stream at 4K resolution, or is 1080p better?
You can stream at 4K if your cloud server and users’ internet support it, but 1080p is usually better to start with. 4K needs a high bitrate—like 30 Mbps or more—which can lag on slower networks. Most devices and browsers handle 1080p well at 10-20 Mbps, giving clear visuals without buffering. Test 4K with a tool like Vagon Streams, which supports high resolutions, but check it on weaker connections first. Stick to 1080p unless your audience demands more and has the bandwidth.
5. How does Vagon Streams make streaming easier compared to Unreal’s tools?
Vagon Streams simplifies streaming by removing complex setup steps. It supports Unreal’s pixel streaming natively, so your optimized build works right away, but it also has its own protocol that reduces lag and improves quality—better than Unreal’s default in many cases. You don’t need to manage servers or code anything; just upload your build and stream. It uses powerful GPUs and global data centers to reach users fast. Optimizing your project still matters, but Vagon Streams handles the rest, saving you time and effort.
Scalable Pixel and Application Streaming
Run your Unity or Unreal Engine application on any device, share with your clients in minutes, with no coding.

Summarize with AI

Ready to focus on your creativity?
Vagon gives you the ability to create & render projects, collaborate, and stream applications with the power of the best hardware.

Vagon Blog


Run heavy applications on any device with
your personal computer on the cloud.
San Francisco, California
Solutions
Vagon Teams
Vagon Streams
Use Cases
Resources
Vagon Blog
What Slows Down After Effects Projects?
The First 30 Minutes in Blender 3D: A Practical Workflow Guide
What’s New in Godot 4.7? Key Features, Upgrades, and Workflow Improvements
What Slows Down Blender 3D Projects?
What Slows Down Adobe Photoshop Projects?
The First 30 Minutes in Adobe Photoshop: A Practical Workflow Guide
Before You Start in Adobe Photoshop: A Practical Setup Checklist
What’s New in Unreal Engine 5.8? Key Features and Upgrade Advice
How to Run Windows on an iPad: 4 Best Ways (2026)
Vagon Blog
Run heavy applications on any device with
your personal computer on the cloud.
San Francisco, California
Solutions
Vagon Teams
Vagon Streams
Use Cases
Resources
Vagon Blog