Instant Connection for Pixel Streaming
— New Feature Automated Setup

How To Run Rhino 3D On Low-End Devices For Better Performance Without GPU?
How To Run Rhino 3D On Low-End Devices For Better Performance Without GPU?
DigitalArt
How To Run Rhino 3D On Low-End Devices For Better Performance Without GPU?
Table of Contents
Rhino 3D is a powerful and versatile tool used across industries like architecture, product design, jewelry, and industrial engineering. Known for its precision and flexibility, it enables users to work with complex geometries and detailed models, making it a favorite for professionals and creatives alike.
But with that power comes a cost. Running Rhino 3D can be demanding, especially when working with large files or using real-time rendering plugins. On low-end devices or machines without a dedicated GPU, users often experience laggy viewports, system slowdowns, or even crashes. These limitations make it difficult to stay productive and creative, particularly for students, remote professionals, or those without access to high-performance computers.
This guide is here to help. Whether you're working on an older laptop or a device without a graphics card, we’ll walk you through how to get the most out of Rhino 3D with limited hardware. You’ll learn how to optimize local performance, manage resources effectively, and discover how cloud-based solutions like Vagon can unlock the full potential of Rhino 3D, even from a basic machine.
Our goal is to help you keep designing, modeling, and creating without being held back by your hardware.
Understanding Rhino 3D’s Hardware Requirements
Before we dive into optimization strategies, it’s important to understand what Rhino 3D expects from your system. Like most professional-grade modeling tools, Rhino relies on a balance of CPU performance, RAM, and GPU power to run smoothly, especially when handling complex models, real-time shading, or rendering tasks.
According to Rhino’s developer, McNeel, the minimum system requirements are relatively modest:
A 64-bit operating system
8 GB of RAM (16 GB or more recommended)
A modern CPU with multiple cores
A graphics card that supports OpenGL 4.1
However, these are just baseline specs for running the software. In practice, users working on real-world projects quickly hit bottlenecks when working on low-end hardware. Viewport navigation becomes choppy, certain plugins become unusable, and rendering slows to a crawl or fails entirely.
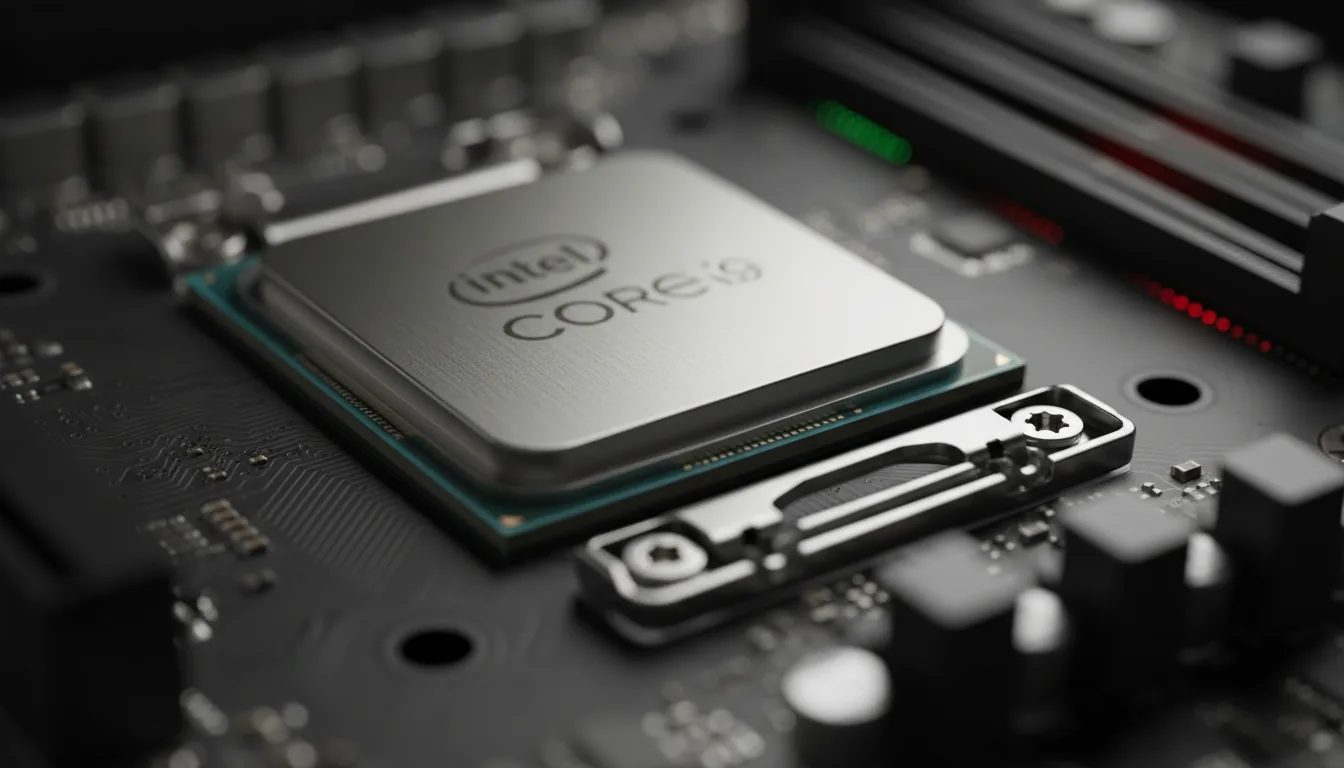
CPU vs. GPU: What's Doing the Work?
Rhino’s performance depends heavily on both the CPU and GPU, but in different ways.
CPU: Rhino’s modeling operations and calculations are primarily CPU-driven. A fast processor with high single-core performance helps keep modeling snappy and responsive.
GPU: The GPU is responsible for viewport display, real-time shading, and rendering previews. Without a dedicated GPU, tasks like orbiting around complex models or using plugins like Enscape or V-Ray can slow down drastically.
Integrated graphics chips (like Intel UHD or AMD Vega) can technically run Rhino, but they struggle with anything beyond basic modeling. This is where many users start to feel the performance gap.
Why This Matters for Low-End Devices
If you're using a device without a dedicated GPU, Rhino will rely entirely on integrated graphics. This can cause issues with:
Viewport lag and visual artifacts
Limited support for real-time rendering modes
Crashes when handling larger or more detailed files
Inability to use GPU-accelerated rendering plugins
Understanding these constraints helps set realistic expectations. The good news is that with a few smart adjustments and the right setup, you can still make Rhino work on modest hardware. In the next section, we’ll look at how to optimize your workflow to get the best possible performance without upgrading your machine.
Best Tips to Use & Optimize Rhino 3D on Low-End Hardware
Using Rhino 3D on a low-end machine, especially one without a dedicated GPU, can feel limiting at first. Viewports can lag, renderings may fail, and navigating complex scenes becomes frustrating. However, Rhino is a flexible and relatively lightweight modeling tool when properly configured. With the right system tweaks and workflow adjustments, you can significantly improve stability and responsiveness. Below is a detailed breakdown of the most effective strategies to get the best performance from limited hardware.
If you want to take a deeper dive into optimizing your hardware for Rhino 3D, you might find our best computers for Rhino 3D blog post helpful, where we cover the best machines suited for running Rhino smoothly.
#1: Adjusting Display Settings to Improve Viewport Responsiveness
The viewport is where you will notice most performance issues. Rhino’s display pipeline is rendered using OpenGL, which depends heavily on GPU acceleration. On systems without a dedicated GPU, the integrated graphics will be responsible for everything, which often results in lag, screen tearing, or visual glitches.
The most effective change you can make is to work in Wireframe mode by default. This display mode eliminates shading and surface evaluation, focusing entirely on edges and outlines. Because it requires the least rendering power, Wireframe is ideal for early-stage modeling or editing detailed geometry.
For more advanced adjustments, go to Tools > Options > View > OpenGL. Here, you can fine-tune how Rhino communicates with your system's graphics hardware. Disable GPU Tessellation to reduce the complexity of how curved surfaces are drawn. Set Anti-aliasing to the lowest setting or turn it off entirely, as it can be resource-intensive on integrated graphics. Also, disable Advanced GPU lighting and real-time reflection effects to cut down unnecessary visual load. These settings are not critical for modeling and can significantly slow down the viewport when left enabled.
If you are using a high-resolution monitor, consider reducing your screen resolution while working in Rhino. This lowers the number of pixels being rendered and processed, which improves viewport performance without requiring any changes to your models.
#2: Simplifying Geometry and Structuring Your Model for Efficiency
Complex geometry can be just as demanding as poor display settings. Even with optimized visuals, a model with excessive detail or poorly managed structure will still tax the system’s CPU and RAM.
Start by using Rhino’s layer system to organize your model. Assign different parts of your project to layers and keep only the relevant layers visible during editing. For example, if you're working on a window detail, turn off the structural and landscaping layers. This reduces the number of objects being processed and redrawn in each frame.

Whenever possible, use blocks for repeating geometry. Blocks are especially useful for elements like furniture, windows, or façade modules. Instead of duplicating objects, convert them into a block instance. Blocks are lighter in memory and make file sizes more manageable, especially in large scenes.
If you are not actively editing certain parts of your model, consider hiding or locking them. Hidden objects are excluded from rendering in the viewport, which improves overall performance. Locked objects are visible but unselectable, reducing interaction overhead and making navigation more fluid.
Use the Purge command regularly to clean up unused materials, blocks, and geometry that are no longer needed. Over time, files become bloated with assets from imports, deleted elements, or test render setups. Keeping your file clean helps Rhino open faster and operate more reliably.
#3: Disabling Plugins and Avoiding Heavy Add-ons
Plugins can dramatically expand Rhino’s capabilities, but they also consume memory and processing power. Some, especially those used for rendering or real-time visual feedback, are built with high-end hardware in mind and will not run well on basic systems.
Begin by reviewing your active plugins. Navigate to Tools > Options > Plugins and look through what is installed. Disable anything that you do not actively use. Pay attention to plugins set to load at startup, as these impact memory usage even before you open a project.
Rendering plugins such as Enscape, V-Ray RT, or Twinmotion require dedicated GPUs to function properly. On systems without one, these plugins either refuse to launch or cause crashes. Stick to Rhino’s native rendering engine for previews and consider exporting your model to external render farms when needed.
Even lightweight modeling plugins may introduce background processes or startup overhead. By limiting the number of active plugins, you create a more stable and responsive Rhino environment.
#4: Monitoring and Managing System Resources
Rhino does not operate in isolation. Background applications, operating system tasks, and idle processes all compete for the same limited resources. Monitoring and managing these elements can give Rhino more breathing room.
Use Task Manager on Windows or Activity Monitor on macOS to review your current CPU, memory, and disk usage. Shut down unnecessary applications such as web browsers, messaging tools, or cloud sync apps like Dropbox and Google Drive. These applications may not seem demanding individually, but together they can significantly impact system performance.
Consider increasing your system’s virtual memory allocation. On Windows, this is known as the paging file. Go to System Properties > Advanced > Performance Settings > Virtual Memory and set a custom value. A minimum of 4096 MB and a maximum of 8192 MB is a good range for most low-end setups. This acts as an overflow buffer when physical RAM runs out, preventing crashes and freezing.
Disable unneeded startup applications to improve boot times and reduce system strain. Many programs automatically start when your computer turns on, consuming RAM even if you are not using them. Disabling these apps from your startup list ensures that more system resources are available for Rhino.
Always keep your graphics drivers updated. Even integrated GPUs from Intel or AMD receive performance and compatibility updates through drivers. Visit the manufacturer’s website to download and install the latest version. Updated drivers can resolve viewport rendering issues and improve overall software stability.
#5: Adopting Smarter Modeling and Saving Practices
Your modeling habits play a significant role in overall performance, especially on a resource-constrained machine. Even with system and software optimization, a poor workflow can cause Rhino to slow down or crash during heavy use.
Use IncrementalSave instead of overwriting your file with Save. This command creates a versioned history of your project each time you save, which protects you from data loss due to crashes or file corruption. If something goes wrong, you can revert to a previous working version.
Large projects should be divided into smaller components using Rhino’s Worksessions feature. Instead of placing every part of your model into a single file, break the project into logical sections. Each section can be worked on independently, reducing the size and complexity of the file you are actively using. When needed, all files can be loaded into a single session for coordination.
Restart Rhino every few hours during long sessions. Memory usage builds up over time, especially when importing geometry, switching display modes, or undoing operations. Closing and reopening Rhino clears temporary caches and resets memory usage, restoring performance.
Finally, limit how many undo steps Rhino keeps in memory. By default, Rhino stores a large number of past actions to support deep undo functionality. This is useful but memory-intensive. After completing a large import or batch edit that you no longer need to undo, use the ClearUndo command to release that memory.
These adjustments create a more stable and responsive Rhino 3D experience, even on machines without powerful hardware. By combining smarter system configurations with thoughtful modeling practices, you can make the most of your device’s capabilities. In the next section, we will explore how you can go beyond your device's physical limits by running Rhino 3D on powerful cloud infrastructure through Vagon.
Run Rhino 3D Smoothly on Any Device with Vagon
Even with the best optimizations, low-end devices can struggle with complex Rhino 3D models, real-time rendering, and GPU-heavy plugins. If you're facing lag, crashes, or limited functionality, it's time to look beyond your hardware.
Cloud solutions like Vagon offer a great way to run Rhino seamlessly. If you're curious about how cloud computing can help with Rhino, you can read more about how to run Rhino 3D on a cloud computer in our dedicated guide.
With Vagon, you can run Rhino 3D on a high-performance cloud computer from any device—no local GPU needed. Access powerful CPUs and GPUs through your browser or desktop app, and handle heavy geometry, rendering, and plugins like V-Ray or Enscape with ease.
Getting started is simple: sign up, launch your Vagon computer, install Rhino, and upload your files. Whether you're on a basic laptop or tablet, you’ll get the smooth, responsive experience of a top-tier workstation.
Upgrade your workflow with Vagon. Start your 7-day trial for just $0.99 and see how fast Rhino 3D can really run.
Enhancing Rendering Performance Without a Dedicated GPU
Rendering is one of the most demanding parts of working with Rhino 3D. Without a dedicated GPU, it can be very slow or even impossible to complete high-quality renders on a low-end device. However, with the right approach and tools, you can still get good results. This section explains how to make rendering more efficient and achievable without powerful hardware.
If you’re struggling with Rhino's rendering performance, you can check out our article on how to render faster on Rhinoceros for additional tips to improve your workflow.
#1: Adjust Rhino’s Built-in Render Settings
Rhino includes a basic rendering engine that runs using your computer's CPU. This is helpful if your device does not have a GPU, but the render times can still be long. To make things faster, lower the image resolution during tests. For example, render at 1280x720 instead of 1920x1080 or higher.
Also, reduce the number of lights in your scene, avoid complex reflections, and skip heavy textures during early design stages. Turn off extra effects like shadows or ambient occlusion unless you are preparing a final render. Using "Draft" or "Preview" quality settings helps speed up test renders and prevents the system from freezing.
Rhino’s built-in renderer does not produce the most advanced visuals, but it works reliably for many basic needs and simple presentations.
#2: Use CPU-Based Render Engines Like V-Ray
Some plugins, such as V-Ray, let you choose between GPU and CPU rendering. If you are working without a GPU, switch to CPU mode in the V-Ray settings. While CPU rendering is slower than GPU rendering, it can still create high-quality results with enough time and memory.
To make this process smoother, close other programs to give Rhino and V-Ray more system resources. Also, use simple models and smaller textures when possible. You can also reduce the number of rendering threads if your system becomes slow or unresponsive during the render process.
This method is slower, but it works well for final images, especially when you are not in a hurry.
#3: Try External Render Farms
If your project is too heavy for your computer, you can use an external render farm. These are online services where you upload your Rhino files and let powerful servers handle the rendering for you.
They support Rhino and popular plugins like V-Ray or Maxwell, and usually charge by the minute or per frame. While they can deliver high-quality results, render farms are not always user friendly.
The setup process often requires extra steps, such as installing custom tools, preparing scenes in a specific format, and waiting in a render queue. For many users, especially beginners or those on a tight deadline, the workflow can feel slow and complicated.
#4: Use Vagon for Faster Renders
If you are using Vagon, you already have access to powerful cloud computers with GPUs and high-end CPUs. This allows you to use GPU-based rendering engines like V-Ray GPU or Enscape directly inside Rhino, even from a basic laptop or tablet.
Since Vagon supports both modeling and rendering, you do not need to switch between different tools. You can complete the entire workflow in one place and get faster results without putting stress on your own device.
Even without a dedicated graphics card, you can still render professional images in Rhino. By adjusting render settings, using CPU rendering, trying external render farms, or moving to a cloud platform like Vagon, you can continue working without delay and keep your creative process smooth.
Conclusion and Final Thoughts
Rhino 3D is a powerful tool, but running it on a low-end device or without a dedicated GPU can be challenging. Viewport lag, long render times, and plugin limitations can slow down your creative process and impact your productivity. However, as we've covered throughout this guide, there are practical solutions that can help you get the most out of your setup.
By adjusting Rhino's display settings, simplifying your models, managing plugins, and adopting smarter modeling habits, you can make Rhino run more smoothly—even on modest hardware. For rendering, using CPU-based engines or external render farms offers a way to get professional results without a GPU, though not always in the most user-friendly way.
If you want to remove those limitations completely, using a cloud platform like Vagon is a game-changer. With Vagon, you can run Rhino 3D on a high-performance cloud PC from any device, giving you access to full GPU acceleration, fast rendering, and a stable modeling environment whenever you need it.
Whether you stick with local optimizations or take your workflow to the cloud, the key is finding a setup that supports your creativity without holding you back.
For more detailed troubleshooting tips, we also recommend checking out our guide on common Rhino 3D crashes and how to fix them.
Frequently Asked Questions (FAQs)
Can I run Rhino 3D on a low-end device without a dedicated GPU?
Yes, it is possible to run Rhino 3D on a low-end device without a dedicated GPU. However, performance will be limited, especially when working with complex models or using features that rely on real-time rendering. You may experience lag, slower viewport navigation, and difficulty with rendering detailed scenes. To improve performance, you can optimize the software by using wireframe or shaded display modes, simplifying geometry, and reducing the number of active plugins.What are the minimum system requirements for Rhino 3D?
According to Rhino's official system requirements, the minimum specifications for running Rhino include a 64-bit Intel or AMD processor, at least 8 GB of RAM, and a graphics card that supports OpenGL 4.5 with at least 4 GB of video memory. While these are the baseline requirements, for optimal performance, more powerful hardware is recommended, particularly for handling complex models or real-time rendering tasks.How can I improve Rhino's performance on a low-spec machine?
To improve Rhino's performance on a low-spec machine, consider several steps. First, use wireframe or shaded display modes, which require fewer system resources than other modes like rendered or Arctic. Simplifying the geometry of your models, turning off unnecessary layers, and hiding or locking parts of your design can reduce the workload on your system. Additionally, disabling unused plugins will free up valuable memory and processing power. Closing unnecessary background applications will also help allocate more system resources to Rhino, further improving performance.Does Rhino utilize the GPU for rendering?
Rhino's built-in rendering engine primarily uses the CPU rather than the GPU. This makes it more accessible for systems without a dedicated GPU. However, third-party rendering plugins like V-Ray or Enscape can take advantage of GPU acceleration if available. Without a dedicated GPU, rendering times can be significantly longer, and real-time visualization features may not work as smoothly. Switching to CPU-based rendering in these cases can help you continue working, though it may take more time for each rendering pass.Are there cloud-based solutions to run Rhino 3D?
Yes, cloud-based solutions like Vagon provide a way to run Rhino 3D on powerful cloud computers from any device, bypassing the limitations of your local hardware. These services give users access to high-performance CPUs and GPUs, allowing them to work on complex models and render high-quality images without worrying about their device's specs. With Vagon, you can run Rhino smoothly, even if your local device is underpowered, and handle demanding tasks such as real-time rendering and large-scale modeling.What are the benefits of using cloud rendering services with Rhino?
Cloud rendering services offer several advantages, especially for users with limited hardware. By offloading rendering tasks to powerful cloud servers, users can significantly reduce rendering times and improve overall performance. This also frees up local resources, allowing you to continue working on your project without being slowed down by rendering processes. For professionals or students who need high-quality results quickly, cloud rendering provides a cost-effective and efficient solution to handle complex scenes that would otherwise be difficult or impossible to manage on local machines.How can I optimize Rhino's performance on a low-end device?
To optimize Rhino's performance on a low-end device, start by using simpler display settings like wireframe or shaded modes, which reduce the strain on your GPU. Another helpful tip is to simplify your models, breaking them into smaller sections or layers that can be turned on and off as needed. This approach minimizes the number of active objects being processed in real time. Also, regularly purging unused data from your file and closing other applications that consume memory can further improve Rhino’s performance.What are some common performance issues when using Rhino without a dedicated GPU?
When using Rhino without a dedicated GPU, common performance issues include slow viewport navigation, long rendering times, and the inability to use real-time rendering features like those offered by Enscape or V-Ray GPU. The absence of a dedicated GPU means that Rhino will rely entirely on the CPU and integrated graphics, which are often not powerful enough to handle large models or complex visualizations efficiently. As a result, you may also experience crashes or system freezes when working with heavy geometry or large textures.Can I use Rhino's built-in renderer without a GPU?
Yes, Rhino's built-in renderer can be used without a GPU. Since it relies on the CPU, it is a viable option for systems that do not have a dedicated GPU. However, rendering times will be longer, especially for more detailed images or complex scenes. To make rendering more manageable without a GPU, you can lower the resolution, use simpler lighting setups, and limit the number of rendering passes during the testing phase. This approach will help you work more efficiently while still achieving acceptable results.How can I monitor Rhino's performance on my system?
To monitor Rhino's performance on your system, you can use tools like Task Manager on Windows or Activity Monitor on macOS to keep track of CPU, memory, and disk usage. Rhino also has a built-in command called SystemInfo that provides detailed information about your computer’s hardware and software configuration. This can help you understand which components are underperforming and whether any system upgrades or optimizations might be necessary.
Rhino 3D is a powerful and versatile tool used across industries like architecture, product design, jewelry, and industrial engineering. Known for its precision and flexibility, it enables users to work with complex geometries and detailed models, making it a favorite for professionals and creatives alike.
But with that power comes a cost. Running Rhino 3D can be demanding, especially when working with large files or using real-time rendering plugins. On low-end devices or machines without a dedicated GPU, users often experience laggy viewports, system slowdowns, or even crashes. These limitations make it difficult to stay productive and creative, particularly for students, remote professionals, or those without access to high-performance computers.
This guide is here to help. Whether you're working on an older laptop or a device without a graphics card, we’ll walk you through how to get the most out of Rhino 3D with limited hardware. You’ll learn how to optimize local performance, manage resources effectively, and discover how cloud-based solutions like Vagon can unlock the full potential of Rhino 3D, even from a basic machine.
Our goal is to help you keep designing, modeling, and creating without being held back by your hardware.
Understanding Rhino 3D’s Hardware Requirements
Before we dive into optimization strategies, it’s important to understand what Rhino 3D expects from your system. Like most professional-grade modeling tools, Rhino relies on a balance of CPU performance, RAM, and GPU power to run smoothly, especially when handling complex models, real-time shading, or rendering tasks.
According to Rhino’s developer, McNeel, the minimum system requirements are relatively modest:
A 64-bit operating system
8 GB of RAM (16 GB or more recommended)
A modern CPU with multiple cores
A graphics card that supports OpenGL 4.1
However, these are just baseline specs for running the software. In practice, users working on real-world projects quickly hit bottlenecks when working on low-end hardware. Viewport navigation becomes choppy, certain plugins become unusable, and rendering slows to a crawl or fails entirely.
CPU vs. GPU: What's Doing the Work?
Rhino’s performance depends heavily on both the CPU and GPU, but in different ways.
CPU: Rhino’s modeling operations and calculations are primarily CPU-driven. A fast processor with high single-core performance helps keep modeling snappy and responsive.
GPU: The GPU is responsible for viewport display, real-time shading, and rendering previews. Without a dedicated GPU, tasks like orbiting around complex models or using plugins like Enscape or V-Ray can slow down drastically.
Integrated graphics chips (like Intel UHD or AMD Vega) can technically run Rhino, but they struggle with anything beyond basic modeling. This is where many users start to feel the performance gap.
Why This Matters for Low-End Devices
If you're using a device without a dedicated GPU, Rhino will rely entirely on integrated graphics. This can cause issues with:
Viewport lag and visual artifacts
Limited support for real-time rendering modes
Crashes when handling larger or more detailed files
Inability to use GPU-accelerated rendering plugins
Understanding these constraints helps set realistic expectations. The good news is that with a few smart adjustments and the right setup, you can still make Rhino work on modest hardware. In the next section, we’ll look at how to optimize your workflow to get the best possible performance without upgrading your machine.
Best Tips to Use & Optimize Rhino 3D on Low-End Hardware
Using Rhino 3D on a low-end machine, especially one without a dedicated GPU, can feel limiting at first. Viewports can lag, renderings may fail, and navigating complex scenes becomes frustrating. However, Rhino is a flexible and relatively lightweight modeling tool when properly configured. With the right system tweaks and workflow adjustments, you can significantly improve stability and responsiveness. Below is a detailed breakdown of the most effective strategies to get the best performance from limited hardware.
If you want to take a deeper dive into optimizing your hardware for Rhino 3D, you might find our best computers for Rhino 3D blog post helpful, where we cover the best machines suited for running Rhino smoothly.
#1: Adjusting Display Settings to Improve Viewport Responsiveness
The viewport is where you will notice most performance issues. Rhino’s display pipeline is rendered using OpenGL, which depends heavily on GPU acceleration. On systems without a dedicated GPU, the integrated graphics will be responsible for everything, which often results in lag, screen tearing, or visual glitches.
The most effective change you can make is to work in Wireframe mode by default. This display mode eliminates shading and surface evaluation, focusing entirely on edges and outlines. Because it requires the least rendering power, Wireframe is ideal for early-stage modeling or editing detailed geometry.
For more advanced adjustments, go to Tools > Options > View > OpenGL. Here, you can fine-tune how Rhino communicates with your system's graphics hardware. Disable GPU Tessellation to reduce the complexity of how curved surfaces are drawn. Set Anti-aliasing to the lowest setting or turn it off entirely, as it can be resource-intensive on integrated graphics. Also, disable Advanced GPU lighting and real-time reflection effects to cut down unnecessary visual load. These settings are not critical for modeling and can significantly slow down the viewport when left enabled.
If you are using a high-resolution monitor, consider reducing your screen resolution while working in Rhino. This lowers the number of pixels being rendered and processed, which improves viewport performance without requiring any changes to your models.
#2: Simplifying Geometry and Structuring Your Model for Efficiency
Complex geometry can be just as demanding as poor display settings. Even with optimized visuals, a model with excessive detail or poorly managed structure will still tax the system’s CPU and RAM.
Start by using Rhino’s layer system to organize your model. Assign different parts of your project to layers and keep only the relevant layers visible during editing. For example, if you're working on a window detail, turn off the structural and landscaping layers. This reduces the number of objects being processed and redrawn in each frame.
Whenever possible, use blocks for repeating geometry. Blocks are especially useful for elements like furniture, windows, or façade modules. Instead of duplicating objects, convert them into a block instance. Blocks are lighter in memory and make file sizes more manageable, especially in large scenes.
If you are not actively editing certain parts of your model, consider hiding or locking them. Hidden objects are excluded from rendering in the viewport, which improves overall performance. Locked objects are visible but unselectable, reducing interaction overhead and making navigation more fluid.
Use the Purge command regularly to clean up unused materials, blocks, and geometry that are no longer needed. Over time, files become bloated with assets from imports, deleted elements, or test render setups. Keeping your file clean helps Rhino open faster and operate more reliably.
#3: Disabling Plugins and Avoiding Heavy Add-ons
Plugins can dramatically expand Rhino’s capabilities, but they also consume memory and processing power. Some, especially those used for rendering or real-time visual feedback, are built with high-end hardware in mind and will not run well on basic systems.
Begin by reviewing your active plugins. Navigate to Tools > Options > Plugins and look through what is installed. Disable anything that you do not actively use. Pay attention to plugins set to load at startup, as these impact memory usage even before you open a project.
Rendering plugins such as Enscape, V-Ray RT, or Twinmotion require dedicated GPUs to function properly. On systems without one, these plugins either refuse to launch or cause crashes. Stick to Rhino’s native rendering engine for previews and consider exporting your model to external render farms when needed.
Even lightweight modeling plugins may introduce background processes or startup overhead. By limiting the number of active plugins, you create a more stable and responsive Rhino environment.
#4: Monitoring and Managing System Resources
Rhino does not operate in isolation. Background applications, operating system tasks, and idle processes all compete for the same limited resources. Monitoring and managing these elements can give Rhino more breathing room.
Use Task Manager on Windows or Activity Monitor on macOS to review your current CPU, memory, and disk usage. Shut down unnecessary applications such as web browsers, messaging tools, or cloud sync apps like Dropbox and Google Drive. These applications may not seem demanding individually, but together they can significantly impact system performance.
Consider increasing your system’s virtual memory allocation. On Windows, this is known as the paging file. Go to System Properties > Advanced > Performance Settings > Virtual Memory and set a custom value. A minimum of 4096 MB and a maximum of 8192 MB is a good range for most low-end setups. This acts as an overflow buffer when physical RAM runs out, preventing crashes and freezing.
Disable unneeded startup applications to improve boot times and reduce system strain. Many programs automatically start when your computer turns on, consuming RAM even if you are not using them. Disabling these apps from your startup list ensures that more system resources are available for Rhino.
Always keep your graphics drivers updated. Even integrated GPUs from Intel or AMD receive performance and compatibility updates through drivers. Visit the manufacturer’s website to download and install the latest version. Updated drivers can resolve viewport rendering issues and improve overall software stability.
#5: Adopting Smarter Modeling and Saving Practices
Your modeling habits play a significant role in overall performance, especially on a resource-constrained machine. Even with system and software optimization, a poor workflow can cause Rhino to slow down or crash during heavy use.
Use IncrementalSave instead of overwriting your file with Save. This command creates a versioned history of your project each time you save, which protects you from data loss due to crashes or file corruption. If something goes wrong, you can revert to a previous working version.
Large projects should be divided into smaller components using Rhino’s Worksessions feature. Instead of placing every part of your model into a single file, break the project into logical sections. Each section can be worked on independently, reducing the size and complexity of the file you are actively using. When needed, all files can be loaded into a single session for coordination.
Restart Rhino every few hours during long sessions. Memory usage builds up over time, especially when importing geometry, switching display modes, or undoing operations. Closing and reopening Rhino clears temporary caches and resets memory usage, restoring performance.
Finally, limit how many undo steps Rhino keeps in memory. By default, Rhino stores a large number of past actions to support deep undo functionality. This is useful but memory-intensive. After completing a large import or batch edit that you no longer need to undo, use the ClearUndo command to release that memory.
These adjustments create a more stable and responsive Rhino 3D experience, even on machines without powerful hardware. By combining smarter system configurations with thoughtful modeling practices, you can make the most of your device’s capabilities. In the next section, we will explore how you can go beyond your device's physical limits by running Rhino 3D on powerful cloud infrastructure through Vagon.
Run Rhino 3D Smoothly on Any Device with Vagon
Even with the best optimizations, low-end devices can struggle with complex Rhino 3D models, real-time rendering, and GPU-heavy plugins. If you're facing lag, crashes, or limited functionality, it's time to look beyond your hardware.
Cloud solutions like Vagon offer a great way to run Rhino seamlessly. If you're curious about how cloud computing can help with Rhino, you can read more about how to run Rhino 3D on a cloud computer in our dedicated guide.
With Vagon, you can run Rhino 3D on a high-performance cloud computer from any device—no local GPU needed. Access powerful CPUs and GPUs through your browser or desktop app, and handle heavy geometry, rendering, and plugins like V-Ray or Enscape with ease.
Getting started is simple: sign up, launch your Vagon computer, install Rhino, and upload your files. Whether you're on a basic laptop or tablet, you’ll get the smooth, responsive experience of a top-tier workstation.
Upgrade your workflow with Vagon. Start your 7-day trial for just $0.99 and see how fast Rhino 3D can really run.
Enhancing Rendering Performance Without a Dedicated GPU
Rendering is one of the most demanding parts of working with Rhino 3D. Without a dedicated GPU, it can be very slow or even impossible to complete high-quality renders on a low-end device. However, with the right approach and tools, you can still get good results. This section explains how to make rendering more efficient and achievable without powerful hardware.
If you’re struggling with Rhino's rendering performance, you can check out our article on how to render faster on Rhinoceros for additional tips to improve your workflow.
#1: Adjust Rhino’s Built-in Render Settings
Rhino includes a basic rendering engine that runs using your computer's CPU. This is helpful if your device does not have a GPU, but the render times can still be long. To make things faster, lower the image resolution during tests. For example, render at 1280x720 instead of 1920x1080 or higher.
Also, reduce the number of lights in your scene, avoid complex reflections, and skip heavy textures during early design stages. Turn off extra effects like shadows or ambient occlusion unless you are preparing a final render. Using "Draft" or "Preview" quality settings helps speed up test renders and prevents the system from freezing.
Rhino’s built-in renderer does not produce the most advanced visuals, but it works reliably for many basic needs and simple presentations.
#2: Use CPU-Based Render Engines Like V-Ray
Some plugins, such as V-Ray, let you choose between GPU and CPU rendering. If you are working without a GPU, switch to CPU mode in the V-Ray settings. While CPU rendering is slower than GPU rendering, it can still create high-quality results with enough time and memory.
To make this process smoother, close other programs to give Rhino and V-Ray more system resources. Also, use simple models and smaller textures when possible. You can also reduce the number of rendering threads if your system becomes slow or unresponsive during the render process.
This method is slower, but it works well for final images, especially when you are not in a hurry.
#3: Try External Render Farms
If your project is too heavy for your computer, you can use an external render farm. These are online services where you upload your Rhino files and let powerful servers handle the rendering for you.
They support Rhino and popular plugins like V-Ray or Maxwell, and usually charge by the minute or per frame. While they can deliver high-quality results, render farms are not always user friendly.
The setup process often requires extra steps, such as installing custom tools, preparing scenes in a specific format, and waiting in a render queue. For many users, especially beginners or those on a tight deadline, the workflow can feel slow and complicated.
#4: Use Vagon for Faster Renders
If you are using Vagon, you already have access to powerful cloud computers with GPUs and high-end CPUs. This allows you to use GPU-based rendering engines like V-Ray GPU or Enscape directly inside Rhino, even from a basic laptop or tablet.
Since Vagon supports both modeling and rendering, you do not need to switch between different tools. You can complete the entire workflow in one place and get faster results without putting stress on your own device.
Even without a dedicated graphics card, you can still render professional images in Rhino. By adjusting render settings, using CPU rendering, trying external render farms, or moving to a cloud platform like Vagon, you can continue working without delay and keep your creative process smooth.
Conclusion and Final Thoughts
Rhino 3D is a powerful tool, but running it on a low-end device or without a dedicated GPU can be challenging. Viewport lag, long render times, and plugin limitations can slow down your creative process and impact your productivity. However, as we've covered throughout this guide, there are practical solutions that can help you get the most out of your setup.
By adjusting Rhino's display settings, simplifying your models, managing plugins, and adopting smarter modeling habits, you can make Rhino run more smoothly—even on modest hardware. For rendering, using CPU-based engines or external render farms offers a way to get professional results without a GPU, though not always in the most user-friendly way.
If you want to remove those limitations completely, using a cloud platform like Vagon is a game-changer. With Vagon, you can run Rhino 3D on a high-performance cloud PC from any device, giving you access to full GPU acceleration, fast rendering, and a stable modeling environment whenever you need it.
Whether you stick with local optimizations or take your workflow to the cloud, the key is finding a setup that supports your creativity without holding you back.
For more detailed troubleshooting tips, we also recommend checking out our guide on common Rhino 3D crashes and how to fix them.
Frequently Asked Questions (FAQs)
Can I run Rhino 3D on a low-end device without a dedicated GPU?
Yes, it is possible to run Rhino 3D on a low-end device without a dedicated GPU. However, performance will be limited, especially when working with complex models or using features that rely on real-time rendering. You may experience lag, slower viewport navigation, and difficulty with rendering detailed scenes. To improve performance, you can optimize the software by using wireframe or shaded display modes, simplifying geometry, and reducing the number of active plugins.What are the minimum system requirements for Rhino 3D?
According to Rhino's official system requirements, the minimum specifications for running Rhino include a 64-bit Intel or AMD processor, at least 8 GB of RAM, and a graphics card that supports OpenGL 4.5 with at least 4 GB of video memory. While these are the baseline requirements, for optimal performance, more powerful hardware is recommended, particularly for handling complex models or real-time rendering tasks.How can I improve Rhino's performance on a low-spec machine?
To improve Rhino's performance on a low-spec machine, consider several steps. First, use wireframe or shaded display modes, which require fewer system resources than other modes like rendered or Arctic. Simplifying the geometry of your models, turning off unnecessary layers, and hiding or locking parts of your design can reduce the workload on your system. Additionally, disabling unused plugins will free up valuable memory and processing power. Closing unnecessary background applications will also help allocate more system resources to Rhino, further improving performance.Does Rhino utilize the GPU for rendering?
Rhino's built-in rendering engine primarily uses the CPU rather than the GPU. This makes it more accessible for systems without a dedicated GPU. However, third-party rendering plugins like V-Ray or Enscape can take advantage of GPU acceleration if available. Without a dedicated GPU, rendering times can be significantly longer, and real-time visualization features may not work as smoothly. Switching to CPU-based rendering in these cases can help you continue working, though it may take more time for each rendering pass.Are there cloud-based solutions to run Rhino 3D?
Yes, cloud-based solutions like Vagon provide a way to run Rhino 3D on powerful cloud computers from any device, bypassing the limitations of your local hardware. These services give users access to high-performance CPUs and GPUs, allowing them to work on complex models and render high-quality images without worrying about their device's specs. With Vagon, you can run Rhino smoothly, even if your local device is underpowered, and handle demanding tasks such as real-time rendering and large-scale modeling.What are the benefits of using cloud rendering services with Rhino?
Cloud rendering services offer several advantages, especially for users with limited hardware. By offloading rendering tasks to powerful cloud servers, users can significantly reduce rendering times and improve overall performance. This also frees up local resources, allowing you to continue working on your project without being slowed down by rendering processes. For professionals or students who need high-quality results quickly, cloud rendering provides a cost-effective and efficient solution to handle complex scenes that would otherwise be difficult or impossible to manage on local machines.How can I optimize Rhino's performance on a low-end device?
To optimize Rhino's performance on a low-end device, start by using simpler display settings like wireframe or shaded modes, which reduce the strain on your GPU. Another helpful tip is to simplify your models, breaking them into smaller sections or layers that can be turned on and off as needed. This approach minimizes the number of active objects being processed in real time. Also, regularly purging unused data from your file and closing other applications that consume memory can further improve Rhino’s performance.What are some common performance issues when using Rhino without a dedicated GPU?
When using Rhino without a dedicated GPU, common performance issues include slow viewport navigation, long rendering times, and the inability to use real-time rendering features like those offered by Enscape or V-Ray GPU. The absence of a dedicated GPU means that Rhino will rely entirely on the CPU and integrated graphics, which are often not powerful enough to handle large models or complex visualizations efficiently. As a result, you may also experience crashes or system freezes when working with heavy geometry or large textures.Can I use Rhino's built-in renderer without a GPU?
Yes, Rhino's built-in renderer can be used without a GPU. Since it relies on the CPU, it is a viable option for systems that do not have a dedicated GPU. However, rendering times will be longer, especially for more detailed images or complex scenes. To make rendering more manageable without a GPU, you can lower the resolution, use simpler lighting setups, and limit the number of rendering passes during the testing phase. This approach will help you work more efficiently while still achieving acceptable results.How can I monitor Rhino's performance on my system?
To monitor Rhino's performance on your system, you can use tools like Task Manager on Windows or Activity Monitor on macOS to keep track of CPU, memory, and disk usage. Rhino also has a built-in command called SystemInfo that provides detailed information about your computer’s hardware and software configuration. This can help you understand which components are underperforming and whether any system upgrades or optimizations might be necessary.
Get Beyond Your Computer Performance
Run applications on your cloud computer with the latest generation hardware. No more crashes or lags.

Trial includes 1 hour usage + 7 days of storage.
Summarize with AI

Ready to focus on your creativity?
Vagon gives you the ability to create & render projects, collaborate, and stream applications with the power of the best hardware.

Vagon Blog


Run heavy applications on any device with
your personal computer on the cloud.
San Francisco, California
Solutions
Vagon Teams
Vagon Streams
Use Cases
Resources
Vagon Blog
How to Run Audacity on a Cloud Ubuntu Desktop (2026 Guide)
How to Run Darktable on a Cloud Ubuntu Desktop for RAW Photo Editing (2026 Guide)
How to Run Kdenlive on a Cloud Ubuntu Desktop (2026 Guide)
How to Run DaVinci Resolve on Linux in the Cloud (2026 Guide)
How to Run Inkscape on a Cloud Ubuntu Desktop (2026 Guide)
How to Run Krita on a Cloud Ubuntu Desktop for Digital Painting (2026 Guide)
How to Run GIMP on a Cloud Ubuntu Desktop (2026 Guide)
How to Run Jupyter on a Cloud GPU Linux Desktop (2026 Guide)
Vagon vs GitHub Codespaces: Cloud Dev Environments Compared (2026)
Vagon Blog
Run heavy applications on any device with
your personal computer on the cloud.
San Francisco, California
Solutions
Vagon Teams
Vagon Streams
Use Cases
Resources
Vagon Blog