Instant Connection for Pixel Streaming
— New Feature Automated Setup

Blender MCP Guide: Setup, Claude Integration and Real Workflows
Blender MCP Guide: Setup, Claude Integration and Real Workflows
DigitalArt
Blender MCP Guide: Setup, Claude Integration and Real Workflows
Table of Contents
Blender MCP Is Useful, But Not Magic
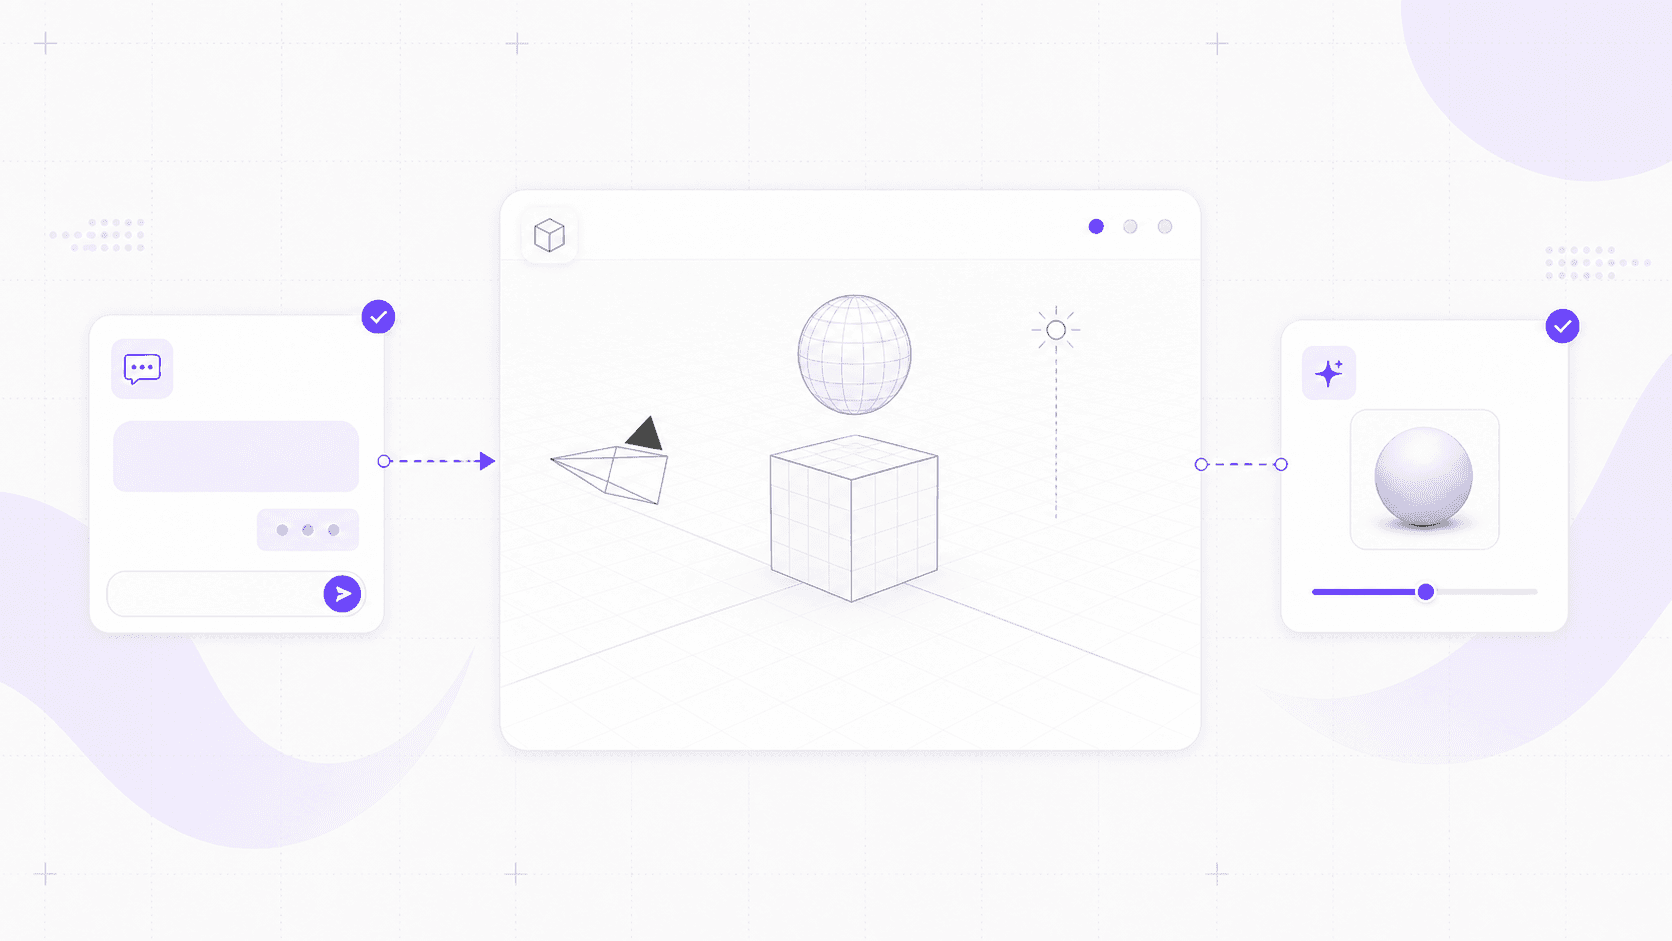
Blender MCP is exciting because it turns Claude from a Blender tutor into something closer to a Blender operator.
You type a prompt, Claude calls a tool, and Blender changes. A sphere appears. A material gets assigned. A camera moves into place. For the first few minutes, it feels like the future has quietly walked into your viewport.
Then the rough edges show up.
A vague prompt creates a messy scene. A “cinematic” camera angle looks awkward. A material named “premium metal” turns into shiny gray plastic. The tool is powerful, but it does not replace your eye, your taste, or your understanding of Blender.
I think that’s the right way to frame Blender MCP: not as an AI artist, but as a fast technical assistant. It’s useful for scene blocking, quick material tests, lighting setup, repetitive cleanup, simple automation, and Blender Python tasks you don’t want to write by hand.
That may sound less flashy than “AI creates 3D worlds from text,” but it’s much more practical.

If you already use Blender, the value is not that MCP lets you stop thinking. It’s that it shortens the distance between intention and action. Instead of hunting through menus, rewriting a small script, or manually setting up the same scene structure again, you can ask Claude to do the first pass and then refine it yourself.
This guide covers what Blender MCP is, how it works, how to set it up with Claude Desktop, which commands are actually worth trying, where it tends to break, and when running the workflow on a cloud workstation like Vagon Cloud Computer makes more sense than pushing your local machine.
What Is Blender MCP and How Does It Work?
Blender MCP is a bridge between Blender and AI assistants that support the Model Context Protocol, most commonly Claude Desktop.
MCP, short for Model Context Protocol, is an open standard that lets AI applications connect to external tools and systems. In this case, the external system is Blender. Instead of Claude only explaining how to create a scene, Blender MCP gives Claude a controlled way to inspect and modify the scene directly.
The usual setup has two main parts:
The Blender addon, installed inside Blender.
The MCP server, usually launched through
uvx blender-mcp.
The addon runs in Blender and listens for commands. The MCP server talks to Claude Desktop and exposes Blender-related tools. Together, they create a local connection between the chat interface and the active Blender session.
A simple mental model looks like this:
Claude Desktop -> MCP Server -> Blender Addon -> Blender Python API
So when you ask Claude to create a red metallic sphere above the default cube, Claude is not just writing advice. It calls a Blender MCP tool. The MCP server passes the request to the Blender addon. The addon uses Blender’s Python API to create the object, assign the material, and place it in the scene.
The default connection usually runs locally on localhost:9876. That means Claude Desktop, the MCP server, and Blender are typically running on the same machine. You can configure remote setups, but for a first installation, keeping everything local is much easier.

The useful part is that the connection can work both ways. Claude can make changes, but it can also read scene information. It can list objects, inspect materials, check object locations, and use that context before acting. This is what separates Blender MCP from simply asking an AI model to write a Blender Python script in a chat window.
That feedback loop matters.
For example, you can ask:
Inspect the current scene and tell me which objects have default names.
Then follow with:
Rename those objects based on their role in the scene, but do not move or delete anything.
That kind of workflow is where Blender MCP starts to make sense. It’s not just text-to-3D. It’s conversational scene control.
The current Blender MCP ecosystem also supports more than basic object creation, depending on the version and configuration you use. The open-source project includes features like scene inspection, object manipulation, material editing, Blender Python execution, viewport screenshots, and optional integrations for external assets such as Poly Haven, Sketchfab, and AI-generated 3D models through services like Hyper3D Rodin.
Still, I would start with the basics before touching asset downloads or generated models. Get Claude reading the default cube first. Then create a sphere. Then try materials, lights, and camera setup. Boring tests save time.
One more point: Blender MCP is often discussed as “Claude for Blender,” but it is not theoretically limited to Claude. Claude Desktop is simply the most common entry point because it supports MCP well and most setup guides use it. Any AI client that supports MCP-style tool calling could potentially work with a compatible Blender MCP server.
For this guide, though, we’ll focus on Claude Desktop. That’s where most Blender users are starting, and it’s the cleanest path for getting the workflow running.
Blender MCP Setup: Requirements and Installation
Blender MCP setup has a few moving parts, but the flow is simple once you see the whole chain.
You need:
Blender 3.0 or newer
Python 3.10 or newer
Claude Desktop
uv, which provides theuvxcommandThe Blender MCP addon file, usually
addon.pyAccess to Claude Desktop’s config file
For a first setup, run everything on the same machine. Claude Desktop, Blender, the MCP server, and the Blender addon should all live in the same environment. Remote setups are possible, but they add networking and port questions you don’t need on day one.

1. Install uv
Blender MCP commonly runs through uvx blender-mcp, so install uv first.
On macOS:
brew install uv
On Windows, use the official PowerShell installer:
powershell -c "irm https://astral.sh/uv/install.ps1 | iex"
On Linux:
curl -LsSf https://astral.sh/uv/install.sh | sh
After installation, open a new terminal and check:
uvx --version
I’d avoid pip install uv for this workflow. It can work, but it can also place uvx somewhere Claude Desktop can’t see. The official installer is less likely to create that problem.
2. Add Blender MCP to Claude Desktop
Open Claude Desktop and go to:
Claude > Settings > Developer > Edit Config
Add this to claude_desktop_config.json:
{
"mcpServers": {
"blender": {
"command": "uvx",
"args": ["blender-mcp"]
}
}
}
Save the file and fully restart Claude Desktop. Fully means quit the app, not just close the window.
If Claude can’t find uvx, use the full path.
On macOS or Linux:
which uvx
On Windows:
where uvx
Then replace "command": "uvx" with the full path. For example:
{
"mcpServers": {
"blender": {
"command": "/opt/homebrew/bin/uvx",
"args": ["blender-mcp"]
}
}
}
On Windows, this pattern can also help:
{
"mcpServers": {
"blender": {
"command": "cmd",
"args": ["/c", "uvx", "blender-mcp"]
}
}
}
If you use conda, pyenv, asdf, or multiple Python versions, pinning Python can make the setup more predictable:
{
"mcpServers": {
"blender": {
"command": "uvx",
"args": ["--python", "3.11", "blender-mcp"],
"env": {
"UV_PYTHON_PREFERENCE": "only-managed"
}
}
}
}
That tells uv to use Python 3.11 and avoid grabbing a random interpreter from your machine.

3. Install the Blender Addon
Now install the Blender side.
Download addon.py from the Blender MCP GitHub repository. Open Blender, then go to:
Edit > Preferences > Add-ons > Install
Select addon.py, install it, and enable the addon named:
Interface: Blender MCP
After that, open the 3D Viewport sidebar by pressing N. Find the Blender MCP tab and start the connection. Depending on the version, the button may say Connect to Claude or Start MCP Server.
The key point is simple: the addon server needs to be running inside Blender.
4. Test the Connection
Go back to Claude Desktop and check whether the Blender tools appear. Depending on your Claude version, you may see them near the chat box under tools/connectors, or in Developer settings.
Start with a read-only prompt:
Using Blender MCP, inspect the current Blender scene and list all objects.
If Claude lists the default cube, camera, and light, the connection is working.
Then try a small edit:
Create a red metallic sphere above the default cube, name it MCP_Test_Sphere, and point the camera at both objects.
If the sphere appears in Blender, you’re ready.
If it doesn’t, check the boring things first: Blender is open, the addon is enabled, the server is started from the Blender sidebar, Claude Desktop was fully restarted, and no other MCP client is trying to run the same server.
Most setup issues live there. Not glamorous, but fixable.
If you are working from ChromeOS, our guide to using Blender on a Chromebook explains the realistic options for running Blender when a traditional local installation is not ideal.
First Commands and Better Prompt Patterns
Once Blender MCP is connected, start small.
The worst first prompt is usually the most tempting one:
Create a huge cinematic cyberpunk city with rain, neon signs, flying cars, detailed alleys, realistic materials, volumetric lighting, and a camera animation.
Claude may try. Blender may fill with objects. But the result will probably be hard to edit, strangely named, visually generic, or all three.
A better first prompt checks whether Claude can read the scene:
Using Blender MCP, inspect the current scene and list every object with its name, type, location, and material.
Reading the scene matters. If Claude can’t understand what’s already in Blender, it won’t reliably change it.
Next, test a small object edit:
Create a UV sphere at location (0, 0, 2), name it Test_Sphere, assign a red metallic material, and leave the default cube unchanged.
That prompt gives Claude a clear object type, location, name, material, and boundary. Boundaries are important. “Leave the default cube unchanged” prevents Claude from treating the whole scene as disposable.
Then try a lighting or camera task:
Create a simple studio lighting setup with one large area light above the scene, a soft fill light from the left, and a camera pointed at the cube and sphere.
This is where Blender MCP starts to feel useful. Not because lighting setup is impossible by hand, but because these small setup tasks interrupt flow. Getting a first pass quickly gives you something to judge.
The general rule is: ask for one clear operation at a time.
Bad:
Make this scene look professional.
Better:
Adjust the scene for a clean product render. Use a 70mm camera, one large softbox reflection from the front-left, a subtle rim light from the back-right, and a neutral gray background plane.
Bad:
Clean up everything.
Better:
Inspect the scene and list objects with default Blender names. Do not rename, move, delete, or modify anything yet.
Bad:
Make the table nicer.
Better:
Add a bevel modifier to Table_Top with width 0.03 meters and 2 segments, then shade smooth. Do not apply the modifier.
Names help a lot. If you call an object Desk_Lamp, future prompts become easier and safer:
Move Desk_Lamp 0.5 meters closer to Desk_Surface along the X axis.
Compare that with “move the lamp thing a bit closer.” Claude can guess, but guessing is where messy scenes begin.
For bigger edits, ask for a plan before action:
Inspect the current scene and propose a short plan for improving the lighting. Do not make changes yet.
Then approve the part you want:
Apply option 2 from your lighting plan. Keep the existing camera angle.
This slows the process down slightly, but it keeps you in control. And with Blender MCP, control is the difference between “fast assistant” and “why did it rename all my objects?”
Real Blender MCP Workflows
Blender MCP works best when you use it in passes, not as a one-shot scene generator.
That matches how Blender work usually happens anyway. You block out the scene, test scale, try materials, set up lights, move the camera, clean the file, render, adjust, and repeat. Blender MCP can speed up those middle steps without taking over the creative decision-making.
Scene Blocking
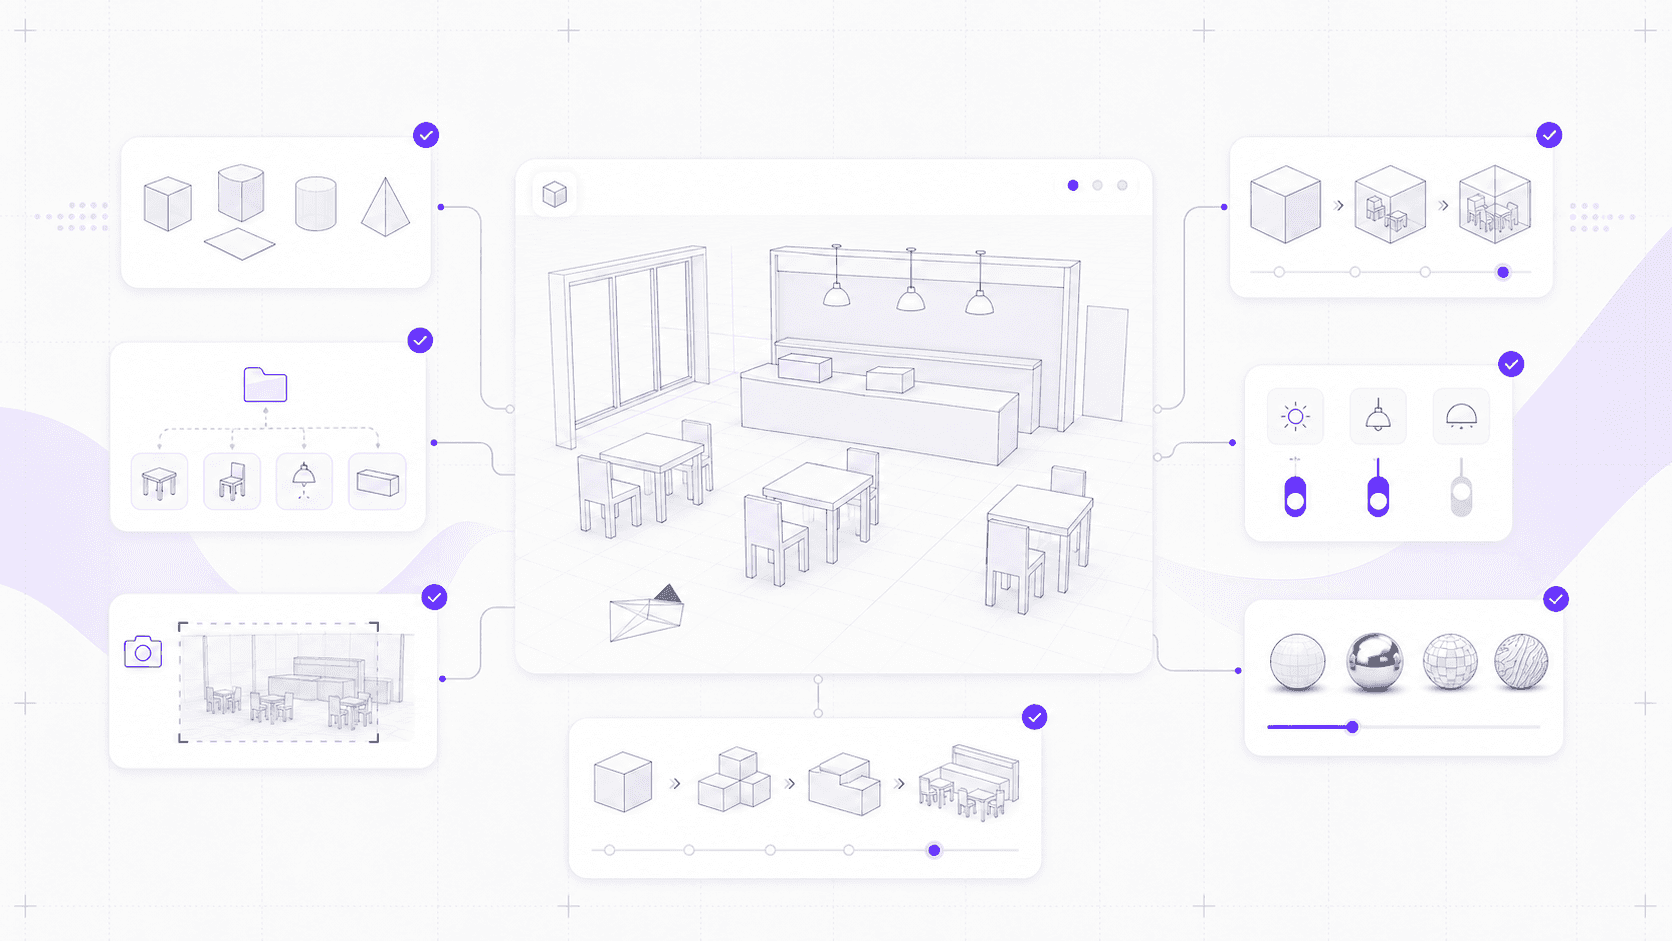
Scene blocking is one of the safest and most useful Blender MCP workflows.
Try:
Create a simple blockout for a small coffee shop interior using named primitive objects only. Include a counter, three tables, six chairs, a back wall, a front window, ceiling lights, and a camera looking from the entrance toward the counter.
The goal is not a finished cafe. The goal is structure. Named objects, rough scale, a starting camera, and something in the viewport besides the default cube. From there, you can replace primitives, adjust proportions, and make actual design decisions.
If you are building models with physical output in mind, our practical guide to using Blender for 3D printing covers the workflow from preparing geometry to getting a model ready for print.
Material Iteration
Blender MCP is helpful for testing material directions quickly.
Create four material options for Product_Body: matte white ceramic, brushed dark aluminum, glossy red plastic, and warm translucent resin. Apply each material to a duplicate so I can compare them side by side.
This works because the prompt is specific. “Make it premium” is vague. Ceramic, brushed aluminum, glossy plastic, and translucent resin are usable targets.
The materials probably won’t be final. That’s fine. You’re looking for direction, not perfection.
Lighting and Camera Setup
Lighting setup is full of small decisions. Blender MCP can create organized options faster than most people want to build them manually.
Create three lighting collections: Studio_Softbox, Evening_Window_Light, and Dramatic_Top_Light. Keep only Studio_Softbox visible at first. Add a camera marker for each setup.
For product renders, you can be more precise:
Set up a clean product render for Product_Body with a 70mm camera, a large softbox reflection from the front-left, a subtle rim light from the back-right, and a neutral background plane.
This is a good use of MCP because it gives you a first pass quickly. You still judge the frame, reflections, and mood.
If you are still deciding how to render the final scene, our comparison of the best Blender render engines can help you choose between options based on speed, realism, and workflow.
Cleanup and Organization
This is less flashy than prompt-generated scenes, but often more useful.
Inspect the scene and list objects with default names like Cube, Sphere, or Cylinder. Do not rename anything yet.
Then:
Rename only those default-named objects based on their apparent role in the scene. Do not change geometry, materials, transforms, or collections.
You can also ask Blender MCP to organize collections:
Create collections named Architecture, Furniture, Lighting, Cameras, Props, and Tests. Move each object into the best matching collection, but do not delete anything.
For messy working files, this can save real time. Just ask for a proposed plan before making broad changes.
Blender Python Automation
This may be the most underrated use case.
Instead of writing a small Blender Python utility yourself, describe the operation:
Run a Blender Python script that finds all mesh objects with more than 100,000 vertices, adds them to a collection named Heavy_Meshes, and prints their object names and vertex counts.
Or:
Add a bevel modifier named Soft_Edge_Bevel to every mesh object in the Furniture collection. Set width to 0.03 meters and segments to 2. Do not apply the modifiers.
That kind of work is perfect for Blender MCP: structured, repetitive, and easy to verify.
Asset-Assisted Experiments
Depending on your Blender MCP version and configuration, you may be able to use integrations like Poly Haven, Sketchfab, or AI-generated 3D model services such as Hyper3D Rodin.
Useful, yes. But keep it contained.
Find a simple wooden chair asset that fits a low-poly cafe interior. Import it into a separate collection named Imported_Chair_Test and do not replace the existing blockout chairs.
Imported assets can have weird scale, messy materials, heavy geometry, or licensing limits. Treat them like candidates, not final scene decisions.
That’s the bigger pattern with Blender MCP: let it create options, then use your Blender judgment to decide what survives.
If your work goes beyond 3D scenes, our guide to 2D animation in Blender covers how Grease Pencil and Blender’s animation tools can fit into a different kind of creative workflow.
Limitations, Errors, and Security
Blender MCP is useful, but it has limits. Knowing them early makes the tool much less frustrating.
The first limitation is creative judgment. Claude can create objects, assign materials, move cameras, and write Blender Python, but it does not know what looks good in your specific project. A “cinematic” shot can be awkward. A “premium” material can look generic. A “realistic” room can feel empty.
That is not a reason to avoid Blender MCP. It is a reason to give better direction.
Instead of:
Make this scene look professional.
Try:
Adjust this scene for a clean product render with a 70mm camera, soft front-left key light, subtle rim light, matte warm gray background, and realistic object scale.
The second limitation is complexity. Big one-shot prompts usually create messy results. If you ask for a full fantasy village, complete with terrain, houses, props, lights, materials, and camera animation, Blender MCP may technically create something, but you probably won’t enjoy cleaning it.
Use passes instead: blockout first, materials second, lighting third, details last.
Blender MCP also is not a replacement for modeling skill. It can help with geometry, but it does not magically produce clean topology, deformation-friendly character rigs, optimized game assets, or production-ready hero models. For concept blocking and automation, it’s useful. For final topology and rigging, your Blender skills still matter.
Setup issues are usually more boring than mysterious.
If Claude Desktop shows an error like:
spawn uvx ENOENT
it usually means Claude can’t find uvx. Run which uvx on macOS or Linux, or where uvx on Windows, then use the full path in your Claude config. After that, fully restart Claude Desktop.
If Blender MCP tools do not appear in Claude, check the config file. Make sure the JSON is valid, the file was saved, and Claude Desktop was fully restarted. A missing comma is enough to break the server entry.
If Claude sees the tools but Blender does not change, check the Blender side. Blender needs to be open, the addon must be enabled, and the Blender MCP server must be started from the sidebar. The default port is usually 9876, so another process using that port can also cause problems.
For early testing, run only one MCP client. Don’t have Claude Desktop, Cursor, VS Code, and a manual terminal process all trying to control the same Blender connection. Keep the first setup simple.
Security deserves a real mention because Blender MCP can execute Python inside Blender.
That is powerful. It is also risky.

A bad instruction can delete objects, apply modifiers, overwrite materials, change file paths, or modify a whole scene when you meant to touch one asset. Most mistakes are not dramatic. They’re ordinary workflow accidents. Still painful.
Use a copy of important files when testing. Ask for a plan before broad edits:
Inspect the scene and propose a cleanup plan. Do not make changes yet.
Then approve only the parts you want:
Apply steps 1 and 3 from the plan. Do not delete any objects or apply modifiers.
Use non-destructive language often:
Create duplicates first.
Do not apply modifiers.
Put all new objects in a collection named MCP_Test.
Do not overwrite existing materials.
If you use external asset integrations, check licenses and file sources before using imported assets commercially. Also be careful with API keys. Store credentials through addon preferences or environment variables when possible, not in casual chat prompts.
The simple rule: treat Blender MCP like a helpful script-running assistant. Let it work, but don’t hand it the keys to your production file without supervision.
If you are getting ready to render those iterations, our guide to the best render settings for Blender can help you balance image quality, render time, and hardware limits.
Using Blender MCP on Vagon Cloud Computer
Blender MCP does not require a cloud workstation, but it can benefit from one quickly.
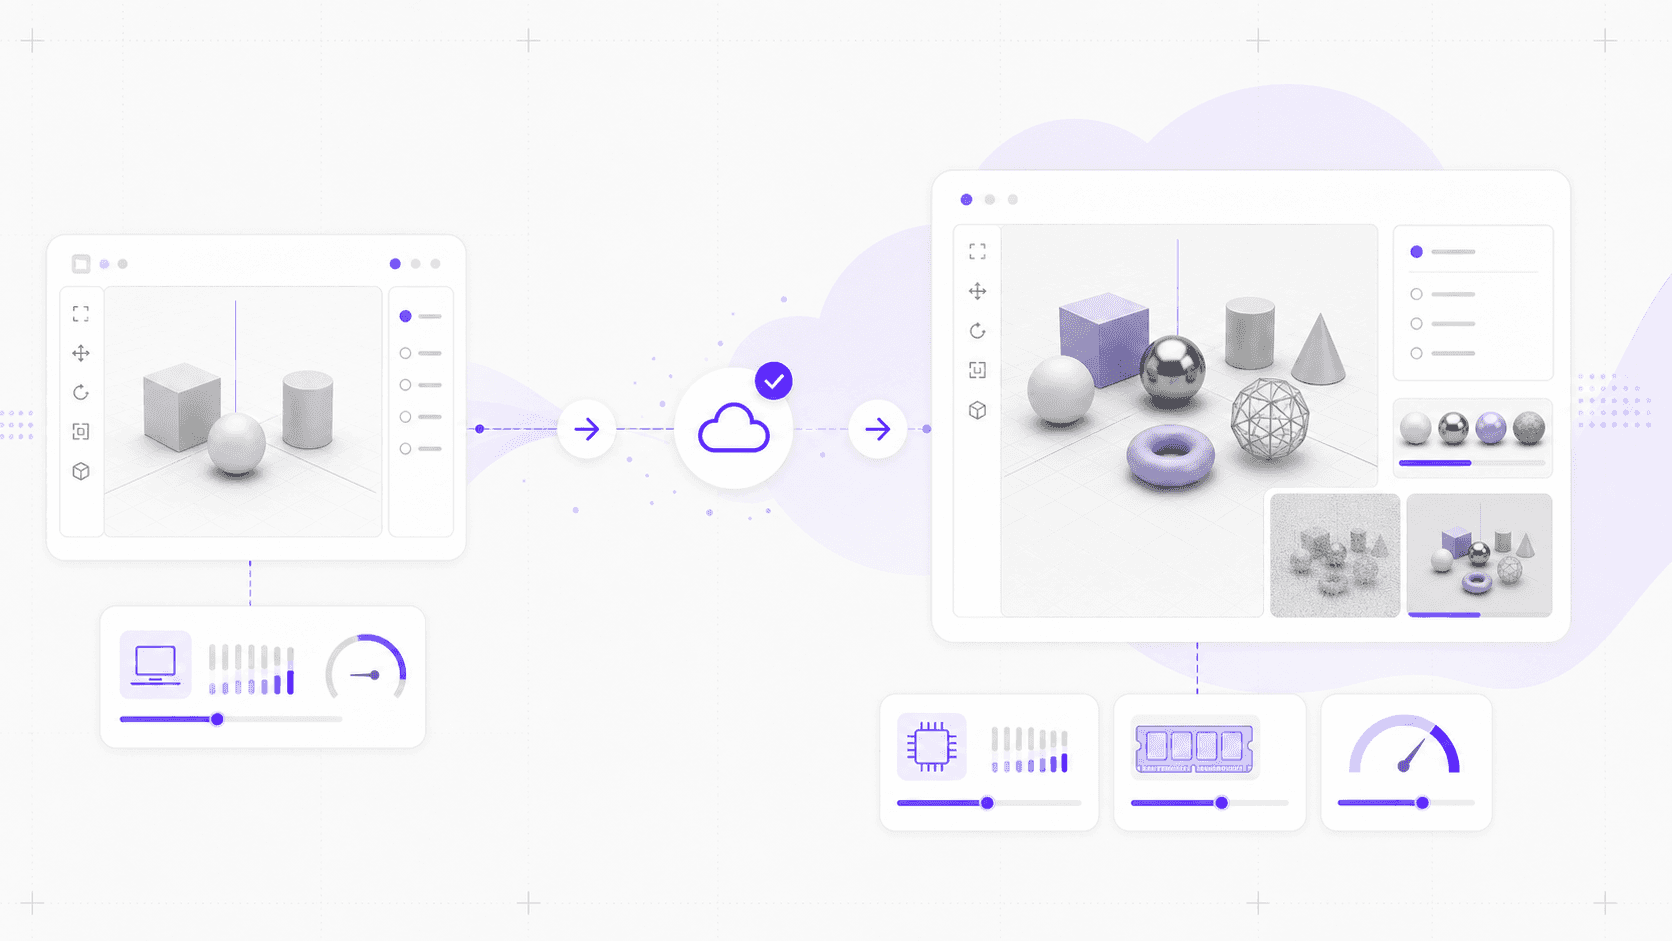
The MCP connection itself is light. The real workload still comes from Blender: high-poly assets, HDRIs, large texture sets, geometry-heavy experiments, viewport rendering, simulations, and Cycles previews. Once Claude starts helping you iterate faster, you naturally create more variations, import more test assets, and render more previews.
That’s where a local laptop can become the bottleneck.
With Vagon Cloud Computer, you can run Blender, Claude Desktop, the Blender MCP server, and the Blender addon on the same cloud machine. Your local device becomes the screen and controls, while the heavier Blender work runs on Vagon’s cloud hardware.
The setup stays familiar:
Claude Desktop -> MCP Server -> Blender Addon -> Blender Python API
The difference is that all of this runs inside your Vagon Cloud Computer. Since Claude Desktop and Blender are on the same machine, the usual localhost:9876 connection can still make sense. You get the benefit of a stronger workstation without turning the first setup into a remote networking project.
A practical workflow looks like this:
Launch a Vagon Cloud Computer with enough GPU and RAM for your Blender project.
Install or open Blender on the cloud machine.
Install Claude Desktop in the same environment.
Install
uvand confirmuvxworks.Add Blender MCP to Claude Desktop’s config.
Install and enable the Blender MCP addon inside Blender.
Start the Blender MCP connection from Blender’s sidebar.
Test with a simple prompt before opening a serious project.
This is especially useful if your local computer struggles with heavier Blender scenes, or if you want the same configured workspace available from different devices. You can set up Blender MCP once on Vagon and return to that environment without rebuilding your tools every time you switch machines.
It also fits the way Blender MCP is actually used. The value is not one perfect prompt. It’s the loop: ask for a scene blockout, inspect it, adjust materials, try a new camera, add lighting options, render a preview, revise again. That loop feels much better when the viewport and render previews keep up.
Vagon does not make Claude better at art direction. It will not fix vague prompts, messy topology, or weak composition.
What it can do is reduce hardware friction. Blender MCP helps you move from idea to action faster. Vagon Cloud Computer helps Blender respond faster when the scene gets heavier.
If you are trying to work from a tablet, our guide to using Blender on an iPad breaks down which approaches are actually practical and where the limitations show up.
Alternatives and Final Take
Blender MCP is useful, but it’s not the only way to bring AI into a Blender workflow.
If your main goal is scripting, you can ask Claude Code, Cursor, ChatGPT, or another coding assistant to write Blender Python, then run the script yourself inside Blender. That workflow is slower, but it gives you a review step before anything touches your scene. For production utilities, exporters, batch cleanup scripts, or studio tools, that can be the better choice.
Blender’s built-in Python tools are still excellent too. The Text Editor, Python console, custom operators, and add-ons give you direct control without Claude Desktop, uvx, MCP config files, or local socket connections. Less conversational, more predictable.
For procedural work, Geometry Nodes may be the smarter tool. If you need repeatable systems, parametric assets, scattering setups, or reusable environment generators, build the system properly instead of prompting one-off results.
Dedicated Blender add-ons also still matter. Hard-surface modeling tools, UV packing tools, scattering systems, asset managers, and render pipeline utilities exist for a reason. Blender MCP is flexible, but specialized tools are often better at specialized work.
And sometimes the fastest option is just doing the thing yourself. If you already know the shortcut or the modeling operation, don’t turn it into a prompt for the sake of using AI.
That’s the real point: Blender MCP earns its place when a task has several steps, needs scene inspection, requires a small script, or would interrupt your flow. It is strongest as an iteration assistant.
Use it to block scenes faster. Use it to create material options. Use it to set up lights and cameras. Use it to organize messy files. Use it to write and run small Blender Python tasks with supervision.
Don’t use it as autopilot.
The best Blender MCP workflow still has a human at the center: you define the direction, Claude helps execute the small steps, Blender shows the result, and you decide what survives.
If your scenes stay light, local setup is enough. If the workflow grows into heavier assets, larger files, more previews, and more frequent rendering, Vagon Cloud Computer gives that loop more breathing room.
Blender MCP shortens the path from idea to action. Vagon helps keep the action responsive when Blender starts doing real work.
If you want to explore another way of making Blender-based 3D content accessible remotely, take a look at our Blender 3D experience with Vagon Streams.
FAQs
1. Is Blender MCP free?
The main Blender MCP project is open source and free to use. You still need Blender, which is free, and an AI client that supports MCP, such as Claude Desktop. If you use paid Claude plans, external asset services, or 3D generation APIs, those costs are separate.
2. Does Blender MCP only work with Claude?
No, not in theory. Blender MCP is built around the Model Context Protocol, so any client that supports MCP-style tool calling could potentially work with it. Claude Desktop is the most common setup right now because it supports MCP well and most tutorials are written around it.
3. Do I need to know Blender Python?
No, but it helps. You can use Blender MCP with plain English prompts for simple tasks like creating objects, assigning materials, or setting up lights. But if you understand Blender terms, modifiers, collections, transforms, and basic Python concepts, you’ll get much better results.
4. Can Blender MCP create finished 3D models?
Sometimes it can create useful rough models or blockouts, but I wouldn’t treat it as a finished asset generator. It’s better for scene setup, iteration, automation, and first-pass ideas. Clean topology, rigging, UVs, optimization, and final art direction still need human work.
5. Why isn’t Claude connecting to Blender?
The usual causes are simple: Claude Desktop can’t find uvx, the Blender addon is not running, the config file has an error, or another process is using port 9876. Start by checking whether Blender is open, the addon is enabled, Claude was fully restarted, and the MCP tools appear in Claude.
6. Is Blender MCP safe to use on production files?
Use caution. Blender MCP can execute Python inside Blender, which means it can make broad changes quickly. Work on a copy first, ask Claude to propose a plan before major edits, and use constraints like “do not delete objects” or “do not apply modifiers.”
7. Can I run Blender MCP on Vagon Cloud Computer?
Yes. You can run Blender, Claude Desktop, the MCP server, and the Blender addon on the same Vagon Cloud Computer. That keeps the usual local connection pattern simple while giving Blender more GPU and RAM headroom for heavier scenes, previews, and rendering.
Blender MCP Is Useful, But Not Magic
Blender MCP is exciting because it turns Claude from a Blender tutor into something closer to a Blender operator.
You type a prompt, Claude calls a tool, and Blender changes. A sphere appears. A material gets assigned. A camera moves into place. For the first few minutes, it feels like the future has quietly walked into your viewport.
Then the rough edges show up.
A vague prompt creates a messy scene. A “cinematic” camera angle looks awkward. A material named “premium metal” turns into shiny gray plastic. The tool is powerful, but it does not replace your eye, your taste, or your understanding of Blender.
I think that’s the right way to frame Blender MCP: not as an AI artist, but as a fast technical assistant. It’s useful for scene blocking, quick material tests, lighting setup, repetitive cleanup, simple automation, and Blender Python tasks you don’t want to write by hand.
That may sound less flashy than “AI creates 3D worlds from text,” but it’s much more practical.
If you already use Blender, the value is not that MCP lets you stop thinking. It’s that it shortens the distance between intention and action. Instead of hunting through menus, rewriting a small script, or manually setting up the same scene structure again, you can ask Claude to do the first pass and then refine it yourself.
This guide covers what Blender MCP is, how it works, how to set it up with Claude Desktop, which commands are actually worth trying, where it tends to break, and when running the workflow on a cloud workstation like Vagon Cloud Computer makes more sense than pushing your local machine.
What Is Blender MCP and How Does It Work?
Blender MCP is a bridge between Blender and AI assistants that support the Model Context Protocol, most commonly Claude Desktop.
MCP, short for Model Context Protocol, is an open standard that lets AI applications connect to external tools and systems. In this case, the external system is Blender. Instead of Claude only explaining how to create a scene, Blender MCP gives Claude a controlled way to inspect and modify the scene directly.
The usual setup has two main parts:
The Blender addon, installed inside Blender.
The MCP server, usually launched through
uvx blender-mcp.
The addon runs in Blender and listens for commands. The MCP server talks to Claude Desktop and exposes Blender-related tools. Together, they create a local connection between the chat interface and the active Blender session.
A simple mental model looks like this:
Claude Desktop -> MCP Server -> Blender Addon -> Blender Python API
So when you ask Claude to create a red metallic sphere above the default cube, Claude is not just writing advice. It calls a Blender MCP tool. The MCP server passes the request to the Blender addon. The addon uses Blender’s Python API to create the object, assign the material, and place it in the scene.
The default connection usually runs locally on localhost:9876. That means Claude Desktop, the MCP server, and Blender are typically running on the same machine. You can configure remote setups, but for a first installation, keeping everything local is much easier.
The useful part is that the connection can work both ways. Claude can make changes, but it can also read scene information. It can list objects, inspect materials, check object locations, and use that context before acting. This is what separates Blender MCP from simply asking an AI model to write a Blender Python script in a chat window.
That feedback loop matters.
For example, you can ask:
Inspect the current scene and tell me which objects have default names.
Then follow with:
Rename those objects based on their role in the scene, but do not move or delete anything.
That kind of workflow is where Blender MCP starts to make sense. It’s not just text-to-3D. It’s conversational scene control.
The current Blender MCP ecosystem also supports more than basic object creation, depending on the version and configuration you use. The open-source project includes features like scene inspection, object manipulation, material editing, Blender Python execution, viewport screenshots, and optional integrations for external assets such as Poly Haven, Sketchfab, and AI-generated 3D models through services like Hyper3D Rodin.
Still, I would start with the basics before touching asset downloads or generated models. Get Claude reading the default cube first. Then create a sphere. Then try materials, lights, and camera setup. Boring tests save time.
One more point: Blender MCP is often discussed as “Claude for Blender,” but it is not theoretically limited to Claude. Claude Desktop is simply the most common entry point because it supports MCP well and most setup guides use it. Any AI client that supports MCP-style tool calling could potentially work with a compatible Blender MCP server.
For this guide, though, we’ll focus on Claude Desktop. That’s where most Blender users are starting, and it’s the cleanest path for getting the workflow running.
Blender MCP Setup: Requirements and Installation
Blender MCP setup has a few moving parts, but the flow is simple once you see the whole chain.
You need:
Blender 3.0 or newer
Python 3.10 or newer
Claude Desktop
uv, which provides theuvxcommandThe Blender MCP addon file, usually
addon.pyAccess to Claude Desktop’s config file
For a first setup, run everything on the same machine. Claude Desktop, Blender, the MCP server, and the Blender addon should all live in the same environment. Remote setups are possible, but they add networking and port questions you don’t need on day one.
1. Install uv
Blender MCP commonly runs through uvx blender-mcp, so install uv first.
On macOS:
brew install uv
On Windows, use the official PowerShell installer:
powershell -c "irm https://astral.sh/uv/install.ps1 | iex"
On Linux:
curl -LsSf https://astral.sh/uv/install.sh | sh
After installation, open a new terminal and check:
uvx --version
I’d avoid pip install uv for this workflow. It can work, but it can also place uvx somewhere Claude Desktop can’t see. The official installer is less likely to create that problem.
2. Add Blender MCP to Claude Desktop
Open Claude Desktop and go to:
Claude > Settings > Developer > Edit Config
Add this to claude_desktop_config.json:
{
"mcpServers": {
"blender": {
"command": "uvx",
"args": ["blender-mcp"]
}
}
}
Save the file and fully restart Claude Desktop. Fully means quit the app, not just close the window.
If Claude can’t find uvx, use the full path.
On macOS or Linux:
which uvx
On Windows:
where uvx
Then replace "command": "uvx" with the full path. For example:
{
"mcpServers": {
"blender": {
"command": "/opt/homebrew/bin/uvx",
"args": ["blender-mcp"]
}
}
}
On Windows, this pattern can also help:
{
"mcpServers": {
"blender": {
"command": "cmd",
"args": ["/c", "uvx", "blender-mcp"]
}
}
}
If you use conda, pyenv, asdf, or multiple Python versions, pinning Python can make the setup more predictable:
{
"mcpServers": {
"blender": {
"command": "uvx",
"args": ["--python", "3.11", "blender-mcp"],
"env": {
"UV_PYTHON_PREFERENCE": "only-managed"
}
}
}
}
That tells uv to use Python 3.11 and avoid grabbing a random interpreter from your machine.
3. Install the Blender Addon
Now install the Blender side.
Download addon.py from the Blender MCP GitHub repository. Open Blender, then go to:
Edit > Preferences > Add-ons > Install
Select addon.py, install it, and enable the addon named:
Interface: Blender MCP
After that, open the 3D Viewport sidebar by pressing N. Find the Blender MCP tab and start the connection. Depending on the version, the button may say Connect to Claude or Start MCP Server.
The key point is simple: the addon server needs to be running inside Blender.
4. Test the Connection
Go back to Claude Desktop and check whether the Blender tools appear. Depending on your Claude version, you may see them near the chat box under tools/connectors, or in Developer settings.
Start with a read-only prompt:
Using Blender MCP, inspect the current Blender scene and list all objects.
If Claude lists the default cube, camera, and light, the connection is working.
Then try a small edit:
Create a red metallic sphere above the default cube, name it MCP_Test_Sphere, and point the camera at both objects.
If the sphere appears in Blender, you’re ready.
If it doesn’t, check the boring things first: Blender is open, the addon is enabled, the server is started from the Blender sidebar, Claude Desktop was fully restarted, and no other MCP client is trying to run the same server.
Most setup issues live there. Not glamorous, but fixable.
If you are working from ChromeOS, our guide to using Blender on a Chromebook explains the realistic options for running Blender when a traditional local installation is not ideal.
First Commands and Better Prompt Patterns
Once Blender MCP is connected, start small.
The worst first prompt is usually the most tempting one:
Create a huge cinematic cyberpunk city with rain, neon signs, flying cars, detailed alleys, realistic materials, volumetric lighting, and a camera animation.
Claude may try. Blender may fill with objects. But the result will probably be hard to edit, strangely named, visually generic, or all three.
A better first prompt checks whether Claude can read the scene:
Using Blender MCP, inspect the current scene and list every object with its name, type, location, and material.
Reading the scene matters. If Claude can’t understand what’s already in Blender, it won’t reliably change it.
Next, test a small object edit:
Create a UV sphere at location (0, 0, 2), name it Test_Sphere, assign a red metallic material, and leave the default cube unchanged.
That prompt gives Claude a clear object type, location, name, material, and boundary. Boundaries are important. “Leave the default cube unchanged” prevents Claude from treating the whole scene as disposable.
Then try a lighting or camera task:
Create a simple studio lighting setup with one large area light above the scene, a soft fill light from the left, and a camera pointed at the cube and sphere.
This is where Blender MCP starts to feel useful. Not because lighting setup is impossible by hand, but because these small setup tasks interrupt flow. Getting a first pass quickly gives you something to judge.
The general rule is: ask for one clear operation at a time.
Bad:
Make this scene look professional.
Better:
Adjust the scene for a clean product render. Use a 70mm camera, one large softbox reflection from the front-left, a subtle rim light from the back-right, and a neutral gray background plane.
Bad:
Clean up everything.
Better:
Inspect the scene and list objects with default Blender names. Do not rename, move, delete, or modify anything yet.
Bad:
Make the table nicer.
Better:
Add a bevel modifier to Table_Top with width 0.03 meters and 2 segments, then shade smooth. Do not apply the modifier.
Names help a lot. If you call an object Desk_Lamp, future prompts become easier and safer:
Move Desk_Lamp 0.5 meters closer to Desk_Surface along the X axis.
Compare that with “move the lamp thing a bit closer.” Claude can guess, but guessing is where messy scenes begin.
For bigger edits, ask for a plan before action:
Inspect the current scene and propose a short plan for improving the lighting. Do not make changes yet.
Then approve the part you want:
Apply option 2 from your lighting plan. Keep the existing camera angle.
This slows the process down slightly, but it keeps you in control. And with Blender MCP, control is the difference between “fast assistant” and “why did it rename all my objects?”
Real Blender MCP Workflows
Blender MCP works best when you use it in passes, not as a one-shot scene generator.
That matches how Blender work usually happens anyway. You block out the scene, test scale, try materials, set up lights, move the camera, clean the file, render, adjust, and repeat. Blender MCP can speed up those middle steps without taking over the creative decision-making.
Scene Blocking
Scene blocking is one of the safest and most useful Blender MCP workflows.
Try:
Create a simple blockout for a small coffee shop interior using named primitive objects only. Include a counter, three tables, six chairs, a back wall, a front window, ceiling lights, and a camera looking from the entrance toward the counter.
The goal is not a finished cafe. The goal is structure. Named objects, rough scale, a starting camera, and something in the viewport besides the default cube. From there, you can replace primitives, adjust proportions, and make actual design decisions.
If you are building models with physical output in mind, our practical guide to using Blender for 3D printing covers the workflow from preparing geometry to getting a model ready for print.
Material Iteration
Blender MCP is helpful for testing material directions quickly.
Create four material options for Product_Body: matte white ceramic, brushed dark aluminum, glossy red plastic, and warm translucent resin. Apply each material to a duplicate so I can compare them side by side.
This works because the prompt is specific. “Make it premium” is vague. Ceramic, brushed aluminum, glossy plastic, and translucent resin are usable targets.
The materials probably won’t be final. That’s fine. You’re looking for direction, not perfection.
Lighting and Camera Setup
Lighting setup is full of small decisions. Blender MCP can create organized options faster than most people want to build them manually.
Create three lighting collections: Studio_Softbox, Evening_Window_Light, and Dramatic_Top_Light. Keep only Studio_Softbox visible at first. Add a camera marker for each setup.
For product renders, you can be more precise:
Set up a clean product render for Product_Body with a 70mm camera, a large softbox reflection from the front-left, a subtle rim light from the back-right, and a neutral background plane.
This is a good use of MCP because it gives you a first pass quickly. You still judge the frame, reflections, and mood.
If you are still deciding how to render the final scene, our comparison of the best Blender render engines can help you choose between options based on speed, realism, and workflow.
Cleanup and Organization
This is less flashy than prompt-generated scenes, but often more useful.
Inspect the scene and list objects with default names like Cube, Sphere, or Cylinder. Do not rename anything yet.
Then:
Rename only those default-named objects based on their apparent role in the scene. Do not change geometry, materials, transforms, or collections.
You can also ask Blender MCP to organize collections:
Create collections named Architecture, Furniture, Lighting, Cameras, Props, and Tests. Move each object into the best matching collection, but do not delete anything.
For messy working files, this can save real time. Just ask for a proposed plan before making broad changes.
Blender Python Automation
This may be the most underrated use case.
Instead of writing a small Blender Python utility yourself, describe the operation:
Run a Blender Python script that finds all mesh objects with more than 100,000 vertices, adds them to a collection named Heavy_Meshes, and prints their object names and vertex counts.
Or:
Add a bevel modifier named Soft_Edge_Bevel to every mesh object in the Furniture collection. Set width to 0.03 meters and segments to 2. Do not apply the modifiers.
That kind of work is perfect for Blender MCP: structured, repetitive, and easy to verify.
Asset-Assisted Experiments
Depending on your Blender MCP version and configuration, you may be able to use integrations like Poly Haven, Sketchfab, or AI-generated 3D model services such as Hyper3D Rodin.
Useful, yes. But keep it contained.
Find a simple wooden chair asset that fits a low-poly cafe interior. Import it into a separate collection named Imported_Chair_Test and do not replace the existing blockout chairs.
Imported assets can have weird scale, messy materials, heavy geometry, or licensing limits. Treat them like candidates, not final scene decisions.
That’s the bigger pattern with Blender MCP: let it create options, then use your Blender judgment to decide what survives.
If your work goes beyond 3D scenes, our guide to 2D animation in Blender covers how Grease Pencil and Blender’s animation tools can fit into a different kind of creative workflow.
Limitations, Errors, and Security
Blender MCP is useful, but it has limits. Knowing them early makes the tool much less frustrating.
The first limitation is creative judgment. Claude can create objects, assign materials, move cameras, and write Blender Python, but it does not know what looks good in your specific project. A “cinematic” shot can be awkward. A “premium” material can look generic. A “realistic” room can feel empty.
That is not a reason to avoid Blender MCP. It is a reason to give better direction.
Instead of:
Make this scene look professional.
Try:
Adjust this scene for a clean product render with a 70mm camera, soft front-left key light, subtle rim light, matte warm gray background, and realistic object scale.
The second limitation is complexity. Big one-shot prompts usually create messy results. If you ask for a full fantasy village, complete with terrain, houses, props, lights, materials, and camera animation, Blender MCP may technically create something, but you probably won’t enjoy cleaning it.
Use passes instead: blockout first, materials second, lighting third, details last.
Blender MCP also is not a replacement for modeling skill. It can help with geometry, but it does not magically produce clean topology, deformation-friendly character rigs, optimized game assets, or production-ready hero models. For concept blocking and automation, it’s useful. For final topology and rigging, your Blender skills still matter.
Setup issues are usually more boring than mysterious.
If Claude Desktop shows an error like:
spawn uvx ENOENT
it usually means Claude can’t find uvx. Run which uvx on macOS or Linux, or where uvx on Windows, then use the full path in your Claude config. After that, fully restart Claude Desktop.
If Blender MCP tools do not appear in Claude, check the config file. Make sure the JSON is valid, the file was saved, and Claude Desktop was fully restarted. A missing comma is enough to break the server entry.
If Claude sees the tools but Blender does not change, check the Blender side. Blender needs to be open, the addon must be enabled, and the Blender MCP server must be started from the sidebar. The default port is usually 9876, so another process using that port can also cause problems.
For early testing, run only one MCP client. Don’t have Claude Desktop, Cursor, VS Code, and a manual terminal process all trying to control the same Blender connection. Keep the first setup simple.
Security deserves a real mention because Blender MCP can execute Python inside Blender.
That is powerful. It is also risky.
A bad instruction can delete objects, apply modifiers, overwrite materials, change file paths, or modify a whole scene when you meant to touch one asset. Most mistakes are not dramatic. They’re ordinary workflow accidents. Still painful.
Use a copy of important files when testing. Ask for a plan before broad edits:
Inspect the scene and propose a cleanup plan. Do not make changes yet.
Then approve only the parts you want:
Apply steps 1 and 3 from the plan. Do not delete any objects or apply modifiers.
Use non-destructive language often:
Create duplicates first.
Do not apply modifiers.
Put all new objects in a collection named MCP_Test.
Do not overwrite existing materials.
If you use external asset integrations, check licenses and file sources before using imported assets commercially. Also be careful with API keys. Store credentials through addon preferences or environment variables when possible, not in casual chat prompts.
The simple rule: treat Blender MCP like a helpful script-running assistant. Let it work, but don’t hand it the keys to your production file without supervision.
If you are getting ready to render those iterations, our guide to the best render settings for Blender can help you balance image quality, render time, and hardware limits.
Using Blender MCP on Vagon Cloud Computer
Blender MCP does not require a cloud workstation, but it can benefit from one quickly.
The MCP connection itself is light. The real workload still comes from Blender: high-poly assets, HDRIs, large texture sets, geometry-heavy experiments, viewport rendering, simulations, and Cycles previews. Once Claude starts helping you iterate faster, you naturally create more variations, import more test assets, and render more previews.
That’s where a local laptop can become the bottleneck.
With Vagon Cloud Computer, you can run Blender, Claude Desktop, the Blender MCP server, and the Blender addon on the same cloud machine. Your local device becomes the screen and controls, while the heavier Blender work runs on Vagon’s cloud hardware.
The setup stays familiar:
Claude Desktop -> MCP Server -> Blender Addon -> Blender Python API
The difference is that all of this runs inside your Vagon Cloud Computer. Since Claude Desktop and Blender are on the same machine, the usual localhost:9876 connection can still make sense. You get the benefit of a stronger workstation without turning the first setup into a remote networking project.
A practical workflow looks like this:
Launch a Vagon Cloud Computer with enough GPU and RAM for your Blender project.
Install or open Blender on the cloud machine.
Install Claude Desktop in the same environment.
Install
uvand confirmuvxworks.Add Blender MCP to Claude Desktop’s config.
Install and enable the Blender MCP addon inside Blender.
Start the Blender MCP connection from Blender’s sidebar.
Test with a simple prompt before opening a serious project.
This is especially useful if your local computer struggles with heavier Blender scenes, or if you want the same configured workspace available from different devices. You can set up Blender MCP once on Vagon and return to that environment without rebuilding your tools every time you switch machines.
It also fits the way Blender MCP is actually used. The value is not one perfect prompt. It’s the loop: ask for a scene blockout, inspect it, adjust materials, try a new camera, add lighting options, render a preview, revise again. That loop feels much better when the viewport and render previews keep up.
Vagon does not make Claude better at art direction. It will not fix vague prompts, messy topology, or weak composition.
What it can do is reduce hardware friction. Blender MCP helps you move from idea to action faster. Vagon Cloud Computer helps Blender respond faster when the scene gets heavier.
If you are trying to work from a tablet, our guide to using Blender on an iPad breaks down which approaches are actually practical and where the limitations show up.
Alternatives and Final Take
Blender MCP is useful, but it’s not the only way to bring AI into a Blender workflow.
If your main goal is scripting, you can ask Claude Code, Cursor, ChatGPT, or another coding assistant to write Blender Python, then run the script yourself inside Blender. That workflow is slower, but it gives you a review step before anything touches your scene. For production utilities, exporters, batch cleanup scripts, or studio tools, that can be the better choice.
Blender’s built-in Python tools are still excellent too. The Text Editor, Python console, custom operators, and add-ons give you direct control without Claude Desktop, uvx, MCP config files, or local socket connections. Less conversational, more predictable.
For procedural work, Geometry Nodes may be the smarter tool. If you need repeatable systems, parametric assets, scattering setups, or reusable environment generators, build the system properly instead of prompting one-off results.
Dedicated Blender add-ons also still matter. Hard-surface modeling tools, UV packing tools, scattering systems, asset managers, and render pipeline utilities exist for a reason. Blender MCP is flexible, but specialized tools are often better at specialized work.
And sometimes the fastest option is just doing the thing yourself. If you already know the shortcut or the modeling operation, don’t turn it into a prompt for the sake of using AI.
That’s the real point: Blender MCP earns its place when a task has several steps, needs scene inspection, requires a small script, or would interrupt your flow. It is strongest as an iteration assistant.
Use it to block scenes faster. Use it to create material options. Use it to set up lights and cameras. Use it to organize messy files. Use it to write and run small Blender Python tasks with supervision.
Don’t use it as autopilot.
The best Blender MCP workflow still has a human at the center: you define the direction, Claude helps execute the small steps, Blender shows the result, and you decide what survives.
If your scenes stay light, local setup is enough. If the workflow grows into heavier assets, larger files, more previews, and more frequent rendering, Vagon Cloud Computer gives that loop more breathing room.
Blender MCP shortens the path from idea to action. Vagon helps keep the action responsive when Blender starts doing real work.
If you want to explore another way of making Blender-based 3D content accessible remotely, take a look at our Blender 3D experience with Vagon Streams.
FAQs
1. Is Blender MCP free?
The main Blender MCP project is open source and free to use. You still need Blender, which is free, and an AI client that supports MCP, such as Claude Desktop. If you use paid Claude plans, external asset services, or 3D generation APIs, those costs are separate.
2. Does Blender MCP only work with Claude?
No, not in theory. Blender MCP is built around the Model Context Protocol, so any client that supports MCP-style tool calling could potentially work with it. Claude Desktop is the most common setup right now because it supports MCP well and most tutorials are written around it.
3. Do I need to know Blender Python?
No, but it helps. You can use Blender MCP with plain English prompts for simple tasks like creating objects, assigning materials, or setting up lights. But if you understand Blender terms, modifiers, collections, transforms, and basic Python concepts, you’ll get much better results.
4. Can Blender MCP create finished 3D models?
Sometimes it can create useful rough models or blockouts, but I wouldn’t treat it as a finished asset generator. It’s better for scene setup, iteration, automation, and first-pass ideas. Clean topology, rigging, UVs, optimization, and final art direction still need human work.
5. Why isn’t Claude connecting to Blender?
The usual causes are simple: Claude Desktop can’t find uvx, the Blender addon is not running, the config file has an error, or another process is using port 9876. Start by checking whether Blender is open, the addon is enabled, Claude was fully restarted, and the MCP tools appear in Claude.
6. Is Blender MCP safe to use on production files?
Use caution. Blender MCP can execute Python inside Blender, which means it can make broad changes quickly. Work on a copy first, ask Claude to propose a plan before major edits, and use constraints like “do not delete objects” or “do not apply modifiers.”
7. Can I run Blender MCP on Vagon Cloud Computer?
Yes. You can run Blender, Claude Desktop, the MCP server, and the Blender addon on the same Vagon Cloud Computer. That keeps the usual local connection pattern simple while giving Blender more GPU and RAM headroom for heavier scenes, previews, and rendering.
Get Beyond Your Computer Performance
Run applications on your cloud computer with the latest generation hardware. No more crashes or lags.

Trial includes 1 hour usage + 7 days of storage.
Summarize with AI

Ready to focus on your creativity?
Vagon gives you the ability to create & render projects, collaborate, and stream applications with the power of the best hardware.

Vagon Blog


Run heavy applications on any device with
your personal computer on the cloud.
San Francisco, California
Solutions
Vagon Teams
Vagon Streams
Use Cases
Resources
Vagon Blog
How to Run Inkscape on a Cloud Ubuntu Desktop (2026 Guide)
How to Run Krita on a Cloud Ubuntu Desktop for Digital Painting (2026 Guide)
How to Run GIMP on a Cloud Ubuntu Desktop (2026 Guide)
How to Run Jupyter on a Cloud GPU Linux Desktop (2026 Guide)
Vagon vs GitHub Codespaces: Cloud Dev Environments Compared (2026)
Vagon vs RunPod: Which Cloud GPU Is Right for You? (2026 Comparison)
How to Watch Your AI Agent Work on a Cloud Ubuntu Desktop (2026 Guide)
How to Run a Local LLM on Ubuntu in the Cloud (2026 Guide)
How to Run Blender on a Cloud GPU (Ubuntu): The Complete 2026 Guide
Vagon Blog
Run heavy applications on any device with
your personal computer on the cloud.
San Francisco, California
Solutions
Vagon Teams
Vagon Streams
Use Cases
Resources
Vagon Blog