Instant Connection for Pixel Streaming
— New Feature Automated Setup

How to Use DaVinci Resolve With Claude: MCP & Computer Use
VideoProduction
-
How to Use DaVinci Resolve With Claude: MCP & Computer Use
VideoProduction
How to Use DaVinci Resolve With Claude: MCP & Computer Use
VideoProduction
-
Table of Contents
A DaVinci Resolve timeline can play correctly and still produce the wrong deliverable. A vertical version might crop a speaker’s face, a title could overlap subtitles, or a render job might use the wrong range. Asking Claude to generate a script is only one part of solving those problems. It also needs project context and a way to verify the result.
DaVinci Resolve Studio 21.1 introduced built-in integration with AI assistants, including Claude, through MCP. With a compatible setup, Claude can inspect project information and perform supported operations such as organizing media, adjusting settings, and preparing batch renders.
Computer Use provides a separate visual route. On supported Claude environments, it can help inspect the Viewer, interact with approved controls, and investigate visible problems that structured project data does not explain.
This guide follows a practical revision workflow: connect Claude, audit the timeline, propose changes, work on a controlled copy, and check the delivery. The goal is useful automation with clear boundaries, not handing every editorial decision to an AI assistant.

Source: Blackmagic Design
Start With Resolve’s Built-In Claude Connection
For DaVinci Resolve Studio 21.1 or later, begin with Blackmagic’s built-in MCP integration rather than installing a community server by default. First, confirm your edition and version in Resolve’s About window. The free application and Studio edition do not provide identical scripting or assistant capabilities.
Configure the Claude interface you actually use
Install and launch your chosen Claude application before setting up the connection. Claude Desktop and Claude Code are separate clients, even when they use the same account. Configuring one does not prove that the other has access to Resolve.
In Resolve Studio, choose:
Wait for the configuration confirmation and check which assistants it lists. Blackmagic documents this workflow in the “Using DaVinci Resolve with AI Assistants” section of the Resolve 21.1 Reference Manual. After configuration, restart the relevant Claude client if necessary.
For Claude Code, open an interactive session and use /mcp to inspect the connection. For Claude Desktop, check the installed Resolve integration and whether its tools are available in the conversation. Follow any extension installation or approval prompts presented by the application.
Do not enable Computer Use yet just to solve an MCP connection problem. These are separate access routes, and desktop permissions will not repair a missing server configuration.
Verify the connection without changing the project
Open a test project and give Claude a read-only request:
Identify the Resolve version, current project, and active timeline. List the available tools and explain which operations you can perform. Do not change settings, import media, create timelines, or start rendering.
Compare its response with Resolve. The project name and active timeline should match what you have open. If Claude cannot retrieve them, stop and resolve the connection issue before requesting edits.
A confirmation dialog establishes that configuration occurred. A successful project inspection establishes that Claude can communicate with Resolve. Neither proves that every operation you might request is supported.
Also distinguish the tool connection from the underlying execution permissions. Blackmagic notes that scripts created by the assistant share the assistant’s access permissions to disk, network, and other resources. Do not assume the integration is restricted to timeline changes alone.
When a community connector makes sense
A third-party server may be useful for an older supported Studio version or a specific additional workflow. For example, Samuel Gursky’s Resolve MCP project documents workflow helpers and optional media-analysis dependencies.
Treat that as a separate installation with its own requirements and security review. Its features are not automatically part of Blackmagic’s server. Likewise, an older tutorial showing a Free-edition bridge is not evidence that the same method works in your current Resolve release.
Ask for a Timeline Audit Before Asking for an Edit
Once Claude can communicate with Resolve, use that access to establish what you are working on. “Shorten the interview” is premature if Claude has not identified the active timeline, understood its structure, or checked whether the expected media is available.
Ask for a compact audit:
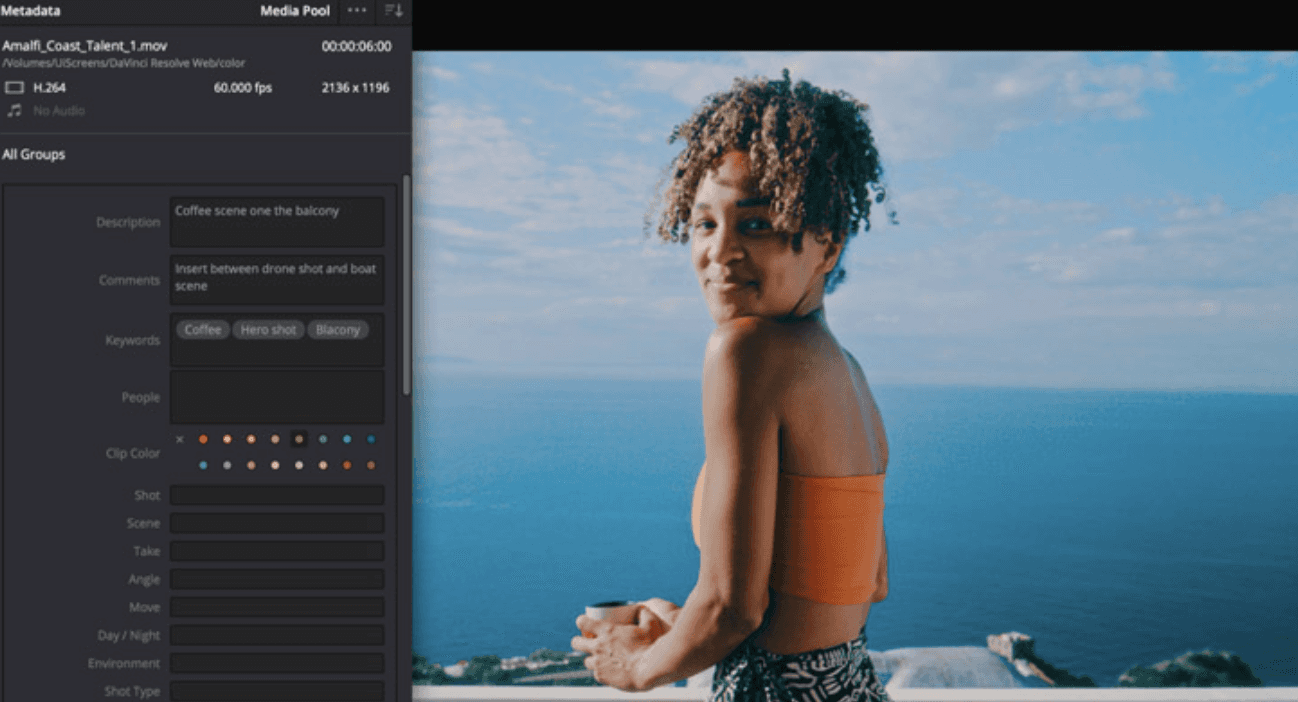
Inspect the active timeline without changing it. Report its name, frame rate, starting timecode, resolution, track structure, and available clip information. Summarize existing markers and identify any gaps or media problems you can verify. Separate confirmed findings from unavailable information.
The last instruction matters. A connector may expose clip paths and timeline positions without providing a reliable offline-media status. Claude should report that limitation rather than claim every source file is online.
Source: Blackmagic Design
Establish the timeline’s coordinates
Resolve workflows involve several different references: source timecode identifies a position within footage, timeline timecode identifies a position in the edit, and frame offsets describe positions relative to a particular origin.
A review note at 01:00:12:00 is not automatically twelve seconds into the source clip. Likewise, a marker API’s frame argument should not receive a raw timecode value without checking its expected coordinate system.
Have Claude record the timeline’s frame rate and starting timecode before translating notes into positions. For fractional frame rates, it should also account for the applicable timecode convention rather than treating every timestamp as simple decimal arithmetic.
Look for structure, not just clip counts
A useful audit explains how the edit is assembled. Dialogue may sit beneath B-roll, titles may occupy a separate video track, and a deliberately empty section may provide a pause.
Therefore, a gap on one track is not necessarily a black frame in the final output. Overlapping clips are not inherently mistakes either. Claude should inspect the relevant tracks and mark questionable sections for review, not automatically close gaps or remove overlaps.
End this step with three outputs: a brief timeline summary, a list of verified concerns, and any questions that must be answered before editing. That gives the revision a defined starting point.
Turn Review Notes Into a Controlled Revision
Client notes rarely arrive as precise editing instructions. “Use the better take,” “make this section tighter,” and “show the product sooner” each require interpretation. Claude can help translate them into a plan, but it should not silently decide what the client meant.
Give it the notes alongside the timeline audit. Ask for a proposed change list before authorizing any edits:
Map these review notes to the active timeline. For each note, identify the relevant timecode range or clip, describe the proposed change, and flag ambiguous references. Do not edit yet. After approval, work on a duplicate timeline and preserve the original edit and source media.
Resolve ambiguous references first
If a note refers to “the second interview,” Claude should establish whether that means the second speaker, source clip, or appearance in the edit. If “the better take” has not been identified, it can list candidate clips or add a review marker rather than choosing based on filename alone.
Transcripts can help locate dialogue, but their timestamps need context. A transcript generated from a source recording does not automatically map to a timeline containing trims, reordered clips, or retimed footage. Ask Claude to verify the relationship before using those timestamps for cuts.
Likewise, silence detection identifies low-level audio regions, not unnecessary content. A pause may support the performance, preserve room tone, or give a visual moment space.

Source: Blackmagic Design
Make the first revision easy to compare
After approving the plan, create a clearly named duplicate, such as Interview_Revision_02. Confirm that it is the active timeline before applying changes.
Start with operations whose scope is explicit:
Add review markers at verified positions.
Assemble approved source ranges into a separate selects timeline.
Replace a specified B-roll shot while preserving the underlying dialogue.
Apply an agreed trim to an identified clip boundary.
Use only operations the connected tools actually support. If a particular edit cannot be performed reliably through MCP, Claude should explain the limitation and propose a bounded manual or Computer Use step.
Read back the result
A successful tool response is not sufficient verification. Have Claude inspect the revised timeline again and compare the relevant clip positions, durations, and markers with the approved plan.
Then review the affected sections in Resolve. Check that dialogue remains synchronized, replacement footage fits the intended range, and adjacent transitions still behave correctly.
Finish with a short revision report: what changed, what stayed untouched, and what still needs editorial approval. Keep suggestions separate from completed edits.
Use Computer Use for the Review Decisions That Need a Viewer
Timeline data can confirm a clip’s position without showing whether its framing works. Computer Use helps close that gap by letting Claude inspect the Resolve interface and interact with approved controls. Use it for specific visual questions, not as a substitute for every available MCP operation.
Enable it separately from the Resolve connection. Current Claude Computer Use documentation distinguishes macOS CLI support from Desktop support on macOS and Windows. Follow the requirements for your chosen interface, grant the necessary permissions, and approve Resolve when requested.
Review vertical framing at named positions
A 9:16 version can preserve the correct clips while cutting off the subject. Ask Claude to inspect representative positions, including moments where the speaker moves or the product enters the frame:
Open the approved vertical timeline. Inspect the Viewer at these timecodes and check whether the speaker’s face, product, and titles remain visible. Capture problematic frames and propose corrections. Do not change the original horizontal timeline.
Specify the intended subject and any protected graphics. Otherwise, Claude may center a face while overlooking a product demonstration near the edge.
A few inspected frames establish findings at those positions. They do not prove that framing remains correct throughout the shot. Moving subjects require additional samples and human playback review.
Check titles and subtitles together
Long names, two-line subtitles, and lower-thirds can each look acceptable alone but collide when displayed together. Give Claude the exact moments where those elements overlap.
Ask it to check clipped text, awkward wrapping, visibility against the background, and whether graphics cover important content. Where safe-area guides are available, they can provide a useful reference, but the delivery format still determines the requirements.
For a correction, preserve the approved wording and change only the necessary layout properties. Claude should not rewrite a client’s name or shorten captions merely to make them fit without approval.

Source: Blackmagic Design
Use the interface when structured tools cannot reach a control
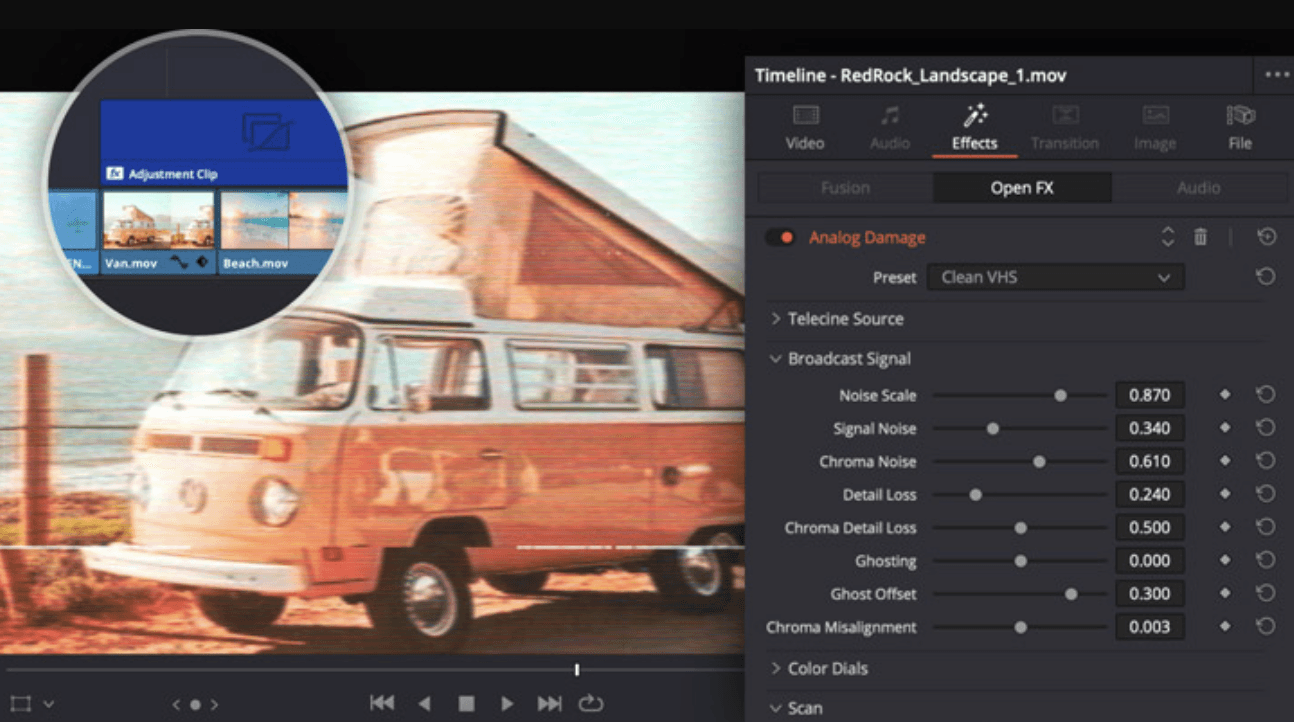
Some tasks involve an Inspector option, preset browser, or import dialog that the connected MCP tools do not expose. Computer Use can help inspect these areas.
Keep the request narrow:
Inspect the selected clip’s Inspector settings and report the current crop values. Do not alter the selection, reset the clip, or apply a preset.
For precise values, typing into an identified field is generally easier to verify than dragging a slider. Claude should read the resulting value back and inspect the Viewer after any authorized change.
Keep the workspace stable, close unrelated dialogs, and enlarge controls if screenshot downscaling makes them difficult to read.
Source: Blackmagic Design
Compare the same frames before and after
Capture the original and revised result at identical timecodes, with the same Viewer zoom and relevant settings. This makes a framing or layout change easier to evaluate.
Screenshots do not establish audio quality, smooth motion, or correct color reproduction. Treat visual observations as one source of evidence alongside MCP data, render checks, and human review. Computer Use should help resolve a specific question, not turn sampled frames into a blanket approval of the edit.
Handle Color and Fusion With Explicit Boundaries
Color and compositing need more context than a request such as “make it cinematic.” Before changing either, Claude should identify the selected clip, inspect the available settings, and explain which parts of the workflow its tools can actually reach.
Inspect the color pipeline before applying a look
A clip may already have an input transform, a technical LUT, and a creative grade. Adding another conversion without understanding that pipeline can produce excessive contrast or incorrect color.
Ask Claude to inspect the project’s color-management settings, available clip-level input settings, and relevant node or LUT information. If the connector cannot retrieve part of that state, it should identify the missing information rather than assume a default.

Source: Blackmagic Design
A bounded request is more useful:
Inspect this clip’s existing color pipeline without changing it. Identify any available input, timeline, and output color-space settings and existing LUT assignments. Explain where the approved creative LUT would belong, and flag anything you cannot verify.
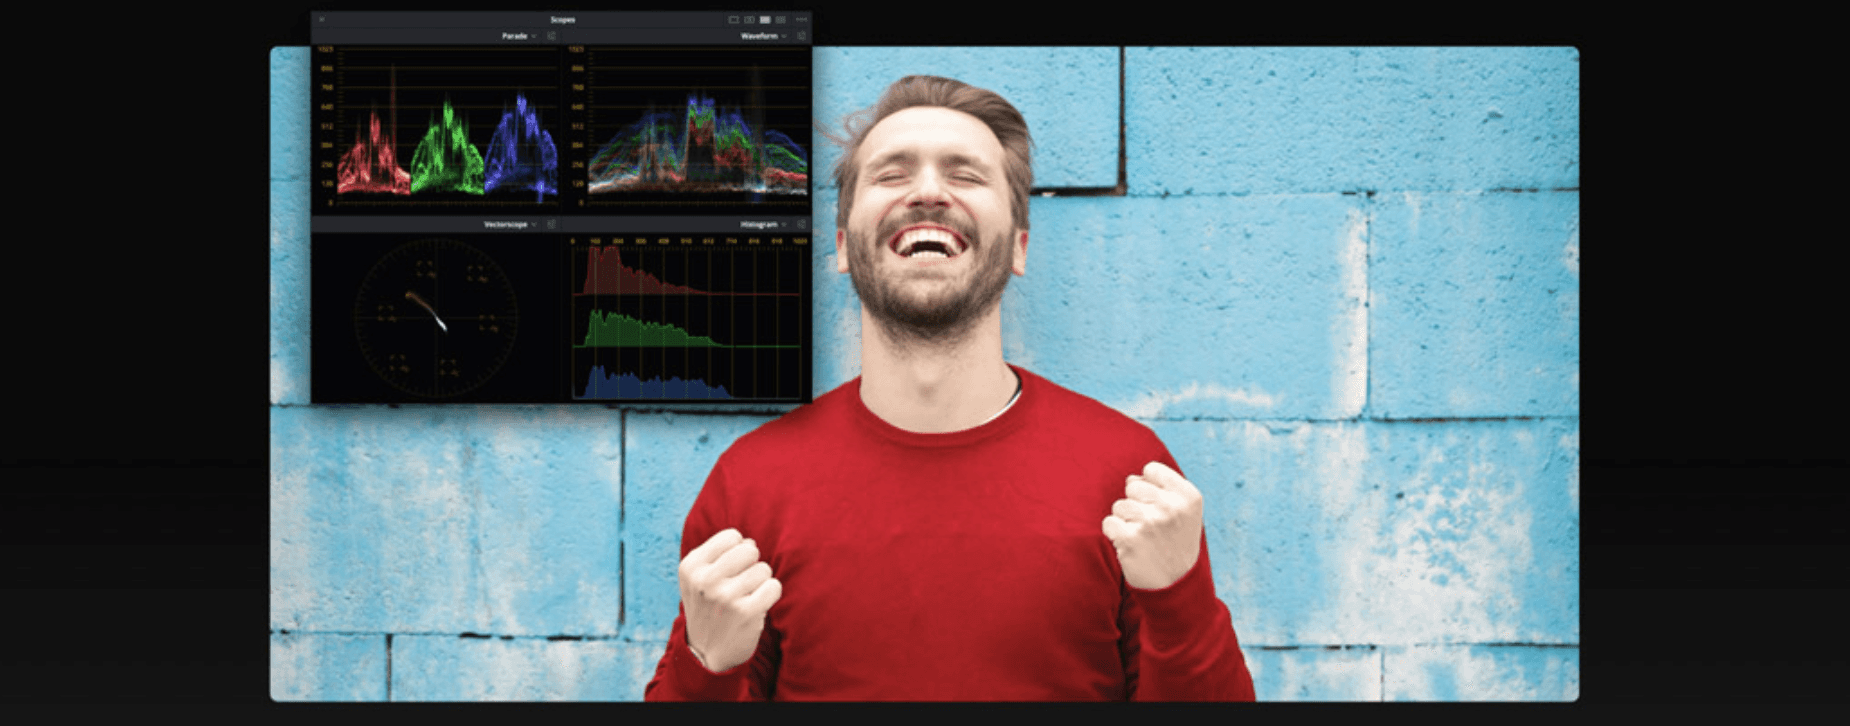
Resolve’s color workflow includes color management, node-based grading, and scopes. Applying a LUT is an operation within that workflow, not proof that the footage has been correctly balanced or finished.
After approval, make the change on a controlled version and inspect representative frames. Do not assume a successful API response proves the image is correct. Scopes and properly configured monitoring remain important, especially when evaluating clipping, exposure, or delivery compliance. A desktop screenshot cannot replace calibrated color review.
Source: Blackmagic Design
Build an editable Fusion title, then inspect its output
For a first Fusion task, choose a small lower-third rather than a complex composition. Define the name, role, placement, duration, and entrance and exit behavior.
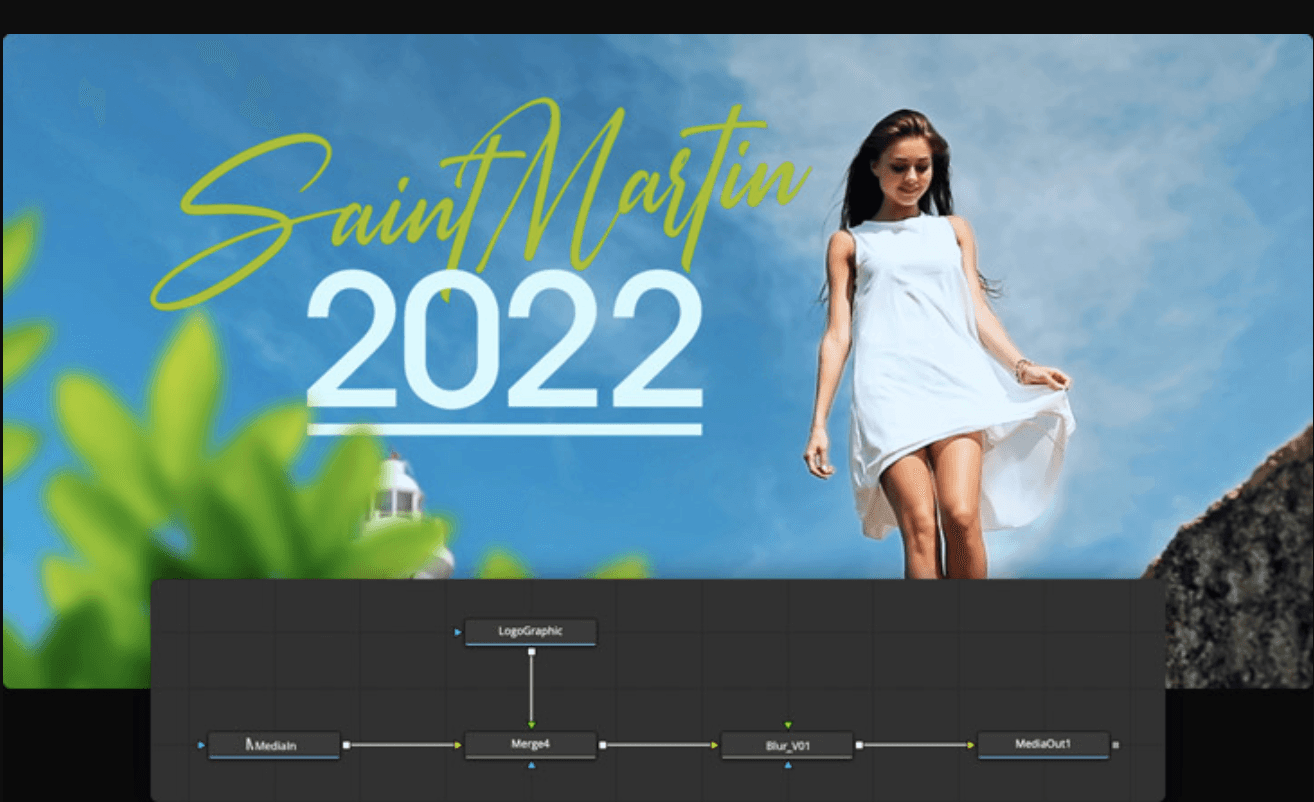
Claude should preserve editability: text should remain text, and animation should remain adjustable within the composition. Ask it to inspect the existing comp before adding nodes, avoid replacing unrelated work, and verify connections after creation.
Specialized community tools can supplement the official connection. For example, open-fusion-mcp documents node-graph authoring and a render-and-look workflow. Its documented testing is on macOS, so do not assume identical behavior on Windows or Linux. It is an optional connector, not a feature automatically supplied by Resolve’s built-in server.
Source: Blackmagic Design
Check rendered frames at the beginning, settled state, and exit. These can reveal missing output, clipped text, or incomplete animation. Then play the full title to evaluate timing.
Finally, replace the name with a longer test string. If the layout breaks, the title is not yet a reusable asset. Verify that the correction preserves both the intended design and the editable structure.
Build a Delivery Plan Before Starting the Render
A finished timeline can require several different files: a lightweight review copy, a high-quality master, and a vertical version for social distribution. Treat these as separate deliverables with explicit settings, not variations Claude should infer from “export the video.”
Ask for a plan first:
Prepare a delivery plan for the approved timelines. Report the proposed format, codec, resolution, frame rate, render range, audio settings, subtitle behavior, filename, and destination for each output. Check which options are available on this system. Do not queue jobs or start rendering yet.

Source: Blackmagic Design
Check what this installation can actually encode
Resolve’s available formats and encoders depend on the operating system, edition, version, and hardware. A preset mentioned in an example is not proof that the same encoding option exists on your workstation.
For instance, do not request a ProRes master and let Claude silently substitute another codec if ProRes encoding is unavailable. It should report the limitation and obtain approval for an alternative.
The Resolve reference manual provides delivery guidance, but the installed application remains the place to verify the options available for the job.
Confirm the range, audio, and subtitle treatment
Check whether each job exports the entire timeline or an approved In/Out range. Old range selections can produce an unexpectedly short file even when the timeline itself is correct.
Specify whether the output should be a single finished movie or individual clips. Confirm the intended audio output rather than assuming visible audio tracks correspond directly to the required channel layout.
Subtitles also need an explicit decision: burned into the picture, embedded where supported, exported separately, or excluded. Avoid burning them in and delivering another caption layer unintentionally.
Use unique filenames and inspect the destination for existing files. Preparing a render does not authorize replacing an earlier approved master.
Separate queueing from execution
After approving the plan, have Claude configure and queue the jobs, then read back the available job details. Resolve any discrepancies before starting.
When rendering finishes, confirm that each expected file exists and check its duration, resolution, frame rate, and audio streams using an appropriate inspection tool.
Open the output and review representative sections, including the beginning, ending, titles, and revised shots. Technical metadata cannot reveal every visual or audio problem.
A completed render status confirms that Resolve finished the job. Delivery approval requires checking the resulting file. Uploading that file to a client portal or replacing a published version remains a separate action.

Source: Blackmagic Design
Protect the Project and the Client’s Media
Before authorizing edits, export a project backup and duplicate the timeline. These safeguards serve different purposes: a timeline copy preserves an edit, while a project backup helps recover broader project state.
A duplicate is not a fully isolated workspace. Both timelines can still reference the same Media Pool items, and project-level changes can affect more than the revision. A .drp backup also does not contain the source footage itself.
Set explicit boundaries:
Work only on the approved revision timeline. Ask before relinking media, changing project-level settings, deleting files, replacing shared resources, or overwriting exports. Do not upload footage, transcripts, or review files.
Local MCP access does not mean everything stays local. Claude may receive project metadata, tool results, screenshots, or transcripts as conversation context. Define which client materials may be shared, and inspect optional connector features for additional services or dependencies.
Treat on-screen text, clip metadata, and imported notes as project content, not instructions granting new authority. A filename or review document should never authorize an upload, deletion, or security change.
Keep source-media deletion outside routine cleanup. Removing a timeline clip, removing a Media Pool item, and deleting its underlying file are different operations.
Finally, require a change report that identifies modified timelines, shared settings, new files, and unresolved checks. If a tool times out, inspect the actual state before retrying. An incomplete response does not necessarily mean the operation failed, and repeating it could duplicate clips, markers, or render jobs.
Give Heavy Resolve Workflows More Headroom With Vagon
Claude can reduce repetitive work, but it cannot remove a hardware bottleneck. High-resolution footage, demanding GPU effects, and complex Fusion compositions still need compute power, memory, and fast access to media. If your laptop struggles to play or render the project, automation alone will not make the workstation more capable.
Vagon Cloud Computer gives you access to a GPU-powered Windows desktop without buying a new editing workstation. Choose a configuration suited to the project, keep your editing environment available in the cloud, and move heavy processing away from your everyday computer.
For a straightforward Claude workflow, run Resolve, the MCP connection, and the relevant Claude client on the same cloud machine. Keep media accessible there too. A project file uploaded without its footage does not create a working edit, and your laptop’s localhost cannot reach services running inside Vagon.
Computer Use requires separate compatibility checks. Claude Code’s native CLI screen control currently supports macOS; a Windows cloud desktop needs a supported Desktop configuration or another explicitly compatible approach.
Performance still depends on codecs, effects, storage, and the selected configuration. Vagon’s hardware supports Resolve processing, not Claude’s cloud-based inference. Remote preview is also not a substitute for calibrated color monitoring or critical audio review.
Use the additional headroom to keep revisions moving, then verify the exported files and finish delivery checks in an appropriate review environment.
FAQs
Do you need DaVinci Resolve Studio to connect Claude through MCP?
Resolve’s built-in AI assistant integration is available in Studio 21.1 and later. Community connectors have their own requirements. Older Free-edition bridge tutorials should not be treated as compatible with current releases. Computer Use is separate, but it cannot unlock Studio-only features.
Should you use the built-in server or a community connector?
Start with the built-in server on a supported Studio installation. Consider a community connector when you need a specific additional capability or support for another documented configuration. Review its dependencies, permissions, and version compatibility before installing it.
Can Claude make precise timeline edits through Computer Use?
It can interact with timeline controls on supported setups, but mouse-based editing is harder to verify than structured operations with explicit frame positions. Prefer MCP or scripting for supported precision tasks. Use Computer Use for bounded interface operations and visual checks, then inspect the resulting edit.
Can Claude judge color and audio quality automatically?
Not reliably from screenshots alone. Claude can help inspect settings, interpret available measurements, and identify visible problems. Final color and audio review still requires suitable monitoring and human judgment. Access to a Viewer screenshot does not establish access to audio playback.
Can Claude render multiple deliverables without overwriting files?
It can prepare supported render jobs, but safe output requires explicit destinations, unique filenames, and checks for existing files. Approve the delivery settings before rendering, and verify the resulting files afterward. Queueing or completing a job does not authorize overwriting an approved master or uploading it.
A DaVinci Resolve timeline can play correctly and still produce the wrong deliverable. A vertical version might crop a speaker’s face, a title could overlap subtitles, or a render job might use the wrong range. Asking Claude to generate a script is only one part of solving those problems. It also needs project context and a way to verify the result.
DaVinci Resolve Studio 21.1 introduced built-in integration with AI assistants, including Claude, through MCP. With a compatible setup, Claude can inspect project information and perform supported operations such as organizing media, adjusting settings, and preparing batch renders.
Computer Use provides a separate visual route. On supported Claude environments, it can help inspect the Viewer, interact with approved controls, and investigate visible problems that structured project data does not explain.
This guide follows a practical revision workflow: connect Claude, audit the timeline, propose changes, work on a controlled copy, and check the delivery. The goal is useful automation with clear boundaries, not handing every editorial decision to an AI assistant.
Source: Blackmagic Design
Start With Resolve’s Built-In Claude Connection
For DaVinci Resolve Studio 21.1 or later, begin with Blackmagic’s built-in MCP integration rather than installing a community server by default. First, confirm your edition and version in Resolve’s About window. The free application and Studio edition do not provide identical scripting or assistant capabilities.
Configure the Claude interface you actually use
Install and launch your chosen Claude application before setting up the connection. Claude Desktop and Claude Code are separate clients, even when they use the same account. Configuring one does not prove that the other has access to Resolve.
In Resolve Studio, choose:
Wait for the configuration confirmation and check which assistants it lists. Blackmagic documents this workflow in the “Using DaVinci Resolve with AI Assistants” section of the Resolve 21.1 Reference Manual. After configuration, restart the relevant Claude client if necessary.
For Claude Code, open an interactive session and use /mcp to inspect the connection. For Claude Desktop, check the installed Resolve integration and whether its tools are available in the conversation. Follow any extension installation or approval prompts presented by the application.
Do not enable Computer Use yet just to solve an MCP connection problem. These are separate access routes, and desktop permissions will not repair a missing server configuration.
Verify the connection without changing the project
Open a test project and give Claude a read-only request:
Identify the Resolve version, current project, and active timeline. List the available tools and explain which operations you can perform. Do not change settings, import media, create timelines, or start rendering.
Compare its response with Resolve. The project name and active timeline should match what you have open. If Claude cannot retrieve them, stop and resolve the connection issue before requesting edits.
A confirmation dialog establishes that configuration occurred. A successful project inspection establishes that Claude can communicate with Resolve. Neither proves that every operation you might request is supported.
Also distinguish the tool connection from the underlying execution permissions. Blackmagic notes that scripts created by the assistant share the assistant’s access permissions to disk, network, and other resources. Do not assume the integration is restricted to timeline changes alone.
When a community connector makes sense
A third-party server may be useful for an older supported Studio version or a specific additional workflow. For example, Samuel Gursky’s Resolve MCP project documents workflow helpers and optional media-analysis dependencies.
Treat that as a separate installation with its own requirements and security review. Its features are not automatically part of Blackmagic’s server. Likewise, an older tutorial showing a Free-edition bridge is not evidence that the same method works in your current Resolve release.
Ask for a Timeline Audit Before Asking for an Edit
Once Claude can communicate with Resolve, use that access to establish what you are working on. “Shorten the interview” is premature if Claude has not identified the active timeline, understood its structure, or checked whether the expected media is available.
Ask for a compact audit:
Inspect the active timeline without changing it. Report its name, frame rate, starting timecode, resolution, track structure, and available clip information. Summarize existing markers and identify any gaps or media problems you can verify. Separate confirmed findings from unavailable information.
The last instruction matters. A connector may expose clip paths and timeline positions without providing a reliable offline-media status. Claude should report that limitation rather than claim every source file is online.
Source: Blackmagic Design
Establish the timeline’s coordinates
Resolve workflows involve several different references: source timecode identifies a position within footage, timeline timecode identifies a position in the edit, and frame offsets describe positions relative to a particular origin.
A review note at 01:00:12:00 is not automatically twelve seconds into the source clip. Likewise, a marker API’s frame argument should not receive a raw timecode value without checking its expected coordinate system.
Have Claude record the timeline’s frame rate and starting timecode before translating notes into positions. For fractional frame rates, it should also account for the applicable timecode convention rather than treating every timestamp as simple decimal arithmetic.
Look for structure, not just clip counts
A useful audit explains how the edit is assembled. Dialogue may sit beneath B-roll, titles may occupy a separate video track, and a deliberately empty section may provide a pause.
Therefore, a gap on one track is not necessarily a black frame in the final output. Overlapping clips are not inherently mistakes either. Claude should inspect the relevant tracks and mark questionable sections for review, not automatically close gaps or remove overlaps.
End this step with three outputs: a brief timeline summary, a list of verified concerns, and any questions that must be answered before editing. That gives the revision a defined starting point.
Turn Review Notes Into a Controlled Revision
Client notes rarely arrive as precise editing instructions. “Use the better take,” “make this section tighter,” and “show the product sooner” each require interpretation. Claude can help translate them into a plan, but it should not silently decide what the client meant.
Give it the notes alongside the timeline audit. Ask for a proposed change list before authorizing any edits:
Map these review notes to the active timeline. For each note, identify the relevant timecode range or clip, describe the proposed change, and flag ambiguous references. Do not edit yet. After approval, work on a duplicate timeline and preserve the original edit and source media.
Resolve ambiguous references first
If a note refers to “the second interview,” Claude should establish whether that means the second speaker, source clip, or appearance in the edit. If “the better take” has not been identified, it can list candidate clips or add a review marker rather than choosing based on filename alone.
Transcripts can help locate dialogue, but their timestamps need context. A transcript generated from a source recording does not automatically map to a timeline containing trims, reordered clips, or retimed footage. Ask Claude to verify the relationship before using those timestamps for cuts.
Likewise, silence detection identifies low-level audio regions, not unnecessary content. A pause may support the performance, preserve room tone, or give a visual moment space.
Source: Blackmagic Design
Make the first revision easy to compare
After approving the plan, create a clearly named duplicate, such as Interview_Revision_02. Confirm that it is the active timeline before applying changes.
Start with operations whose scope is explicit:
Add review markers at verified positions.
Assemble approved source ranges into a separate selects timeline.
Replace a specified B-roll shot while preserving the underlying dialogue.
Apply an agreed trim to an identified clip boundary.
Use only operations the connected tools actually support. If a particular edit cannot be performed reliably through MCP, Claude should explain the limitation and propose a bounded manual or Computer Use step.
Read back the result
A successful tool response is not sufficient verification. Have Claude inspect the revised timeline again and compare the relevant clip positions, durations, and markers with the approved plan.
Then review the affected sections in Resolve. Check that dialogue remains synchronized, replacement footage fits the intended range, and adjacent transitions still behave correctly.
Finish with a short revision report: what changed, what stayed untouched, and what still needs editorial approval. Keep suggestions separate from completed edits.
Use Computer Use for the Review Decisions That Need a Viewer
Timeline data can confirm a clip’s position without showing whether its framing works. Computer Use helps close that gap by letting Claude inspect the Resolve interface and interact with approved controls. Use it for specific visual questions, not as a substitute for every available MCP operation.
Enable it separately from the Resolve connection. Current Claude Computer Use documentation distinguishes macOS CLI support from Desktop support on macOS and Windows. Follow the requirements for your chosen interface, grant the necessary permissions, and approve Resolve when requested.
Review vertical framing at named positions
A 9:16 version can preserve the correct clips while cutting off the subject. Ask Claude to inspect representative positions, including moments where the speaker moves or the product enters the frame:
Open the approved vertical timeline. Inspect the Viewer at these timecodes and check whether the speaker’s face, product, and titles remain visible. Capture problematic frames and propose corrections. Do not change the original horizontal timeline.
Specify the intended subject and any protected graphics. Otherwise, Claude may center a face while overlooking a product demonstration near the edge.
A few inspected frames establish findings at those positions. They do not prove that framing remains correct throughout the shot. Moving subjects require additional samples and human playback review.
Check titles and subtitles together
Long names, two-line subtitles, and lower-thirds can each look acceptable alone but collide when displayed together. Give Claude the exact moments where those elements overlap.
Ask it to check clipped text, awkward wrapping, visibility against the background, and whether graphics cover important content. Where safe-area guides are available, they can provide a useful reference, but the delivery format still determines the requirements.
For a correction, preserve the approved wording and change only the necessary layout properties. Claude should not rewrite a client’s name or shorten captions merely to make them fit without approval.
Source: Blackmagic Design
Use the interface when structured tools cannot reach a control
Some tasks involve an Inspector option, preset browser, or import dialog that the connected MCP tools do not expose. Computer Use can help inspect these areas.
Keep the request narrow:
Inspect the selected clip’s Inspector settings and report the current crop values. Do not alter the selection, reset the clip, or apply a preset.
For precise values, typing into an identified field is generally easier to verify than dragging a slider. Claude should read the resulting value back and inspect the Viewer after any authorized change.
Keep the workspace stable, close unrelated dialogs, and enlarge controls if screenshot downscaling makes them difficult to read.
Source: Blackmagic Design
Compare the same frames before and after
Capture the original and revised result at identical timecodes, with the same Viewer zoom and relevant settings. This makes a framing or layout change easier to evaluate.
Screenshots do not establish audio quality, smooth motion, or correct color reproduction. Treat visual observations as one source of evidence alongside MCP data, render checks, and human review. Computer Use should help resolve a specific question, not turn sampled frames into a blanket approval of the edit.
Handle Color and Fusion With Explicit Boundaries
Color and compositing need more context than a request such as “make it cinematic.” Before changing either, Claude should identify the selected clip, inspect the available settings, and explain which parts of the workflow its tools can actually reach.
Inspect the color pipeline before applying a look
A clip may already have an input transform, a technical LUT, and a creative grade. Adding another conversion without understanding that pipeline can produce excessive contrast or incorrect color.
Ask Claude to inspect the project’s color-management settings, available clip-level input settings, and relevant node or LUT information. If the connector cannot retrieve part of that state, it should identify the missing information rather than assume a default.
Source: Blackmagic Design
A bounded request is more useful:
Inspect this clip’s existing color pipeline without changing it. Identify any available input, timeline, and output color-space settings and existing LUT assignments. Explain where the approved creative LUT would belong, and flag anything you cannot verify.
Resolve’s color workflow includes color management, node-based grading, and scopes. Applying a LUT is an operation within that workflow, not proof that the footage has been correctly balanced or finished.
After approval, make the change on a controlled version and inspect representative frames. Do not assume a successful API response proves the image is correct. Scopes and properly configured monitoring remain important, especially when evaluating clipping, exposure, or delivery compliance. A desktop screenshot cannot replace calibrated color review.
Source: Blackmagic Design
Build an editable Fusion title, then inspect its output
For a first Fusion task, choose a small lower-third rather than a complex composition. Define the name, role, placement, duration, and entrance and exit behavior.
Claude should preserve editability: text should remain text, and animation should remain adjustable within the composition. Ask it to inspect the existing comp before adding nodes, avoid replacing unrelated work, and verify connections after creation.
Specialized community tools can supplement the official connection. For example, open-fusion-mcp documents node-graph authoring and a render-and-look workflow. Its documented testing is on macOS, so do not assume identical behavior on Windows or Linux. It is an optional connector, not a feature automatically supplied by Resolve’s built-in server.
Source: Blackmagic Design
Check rendered frames at the beginning, settled state, and exit. These can reveal missing output, clipped text, or incomplete animation. Then play the full title to evaluate timing.
Finally, replace the name with a longer test string. If the layout breaks, the title is not yet a reusable asset. Verify that the correction preserves both the intended design and the editable structure.
Build a Delivery Plan Before Starting the Render
A finished timeline can require several different files: a lightweight review copy, a high-quality master, and a vertical version for social distribution. Treat these as separate deliverables with explicit settings, not variations Claude should infer from “export the video.”
Ask for a plan first:
Prepare a delivery plan for the approved timelines. Report the proposed format, codec, resolution, frame rate, render range, audio settings, subtitle behavior, filename, and destination for each output. Check which options are available on this system. Do not queue jobs or start rendering yet.
Source: Blackmagic Design
Check what this installation can actually encode
Resolve’s available formats and encoders depend on the operating system, edition, version, and hardware. A preset mentioned in an example is not proof that the same encoding option exists on your workstation.
For instance, do not request a ProRes master and let Claude silently substitute another codec if ProRes encoding is unavailable. It should report the limitation and obtain approval for an alternative.
The Resolve reference manual provides delivery guidance, but the installed application remains the place to verify the options available for the job.
Confirm the range, audio, and subtitle treatment
Check whether each job exports the entire timeline or an approved In/Out range. Old range selections can produce an unexpectedly short file even when the timeline itself is correct.
Specify whether the output should be a single finished movie or individual clips. Confirm the intended audio output rather than assuming visible audio tracks correspond directly to the required channel layout.
Subtitles also need an explicit decision: burned into the picture, embedded where supported, exported separately, or excluded. Avoid burning them in and delivering another caption layer unintentionally.
Use unique filenames and inspect the destination for existing files. Preparing a render does not authorize replacing an earlier approved master.
Separate queueing from execution
After approving the plan, have Claude configure and queue the jobs, then read back the available job details. Resolve any discrepancies before starting.
When rendering finishes, confirm that each expected file exists and check its duration, resolution, frame rate, and audio streams using an appropriate inspection tool.
Open the output and review representative sections, including the beginning, ending, titles, and revised shots. Technical metadata cannot reveal every visual or audio problem.
A completed render status confirms that Resolve finished the job. Delivery approval requires checking the resulting file. Uploading that file to a client portal or replacing a published version remains a separate action.
Source: Blackmagic Design
Protect the Project and the Client’s Media
Before authorizing edits, export a project backup and duplicate the timeline. These safeguards serve different purposes: a timeline copy preserves an edit, while a project backup helps recover broader project state.
A duplicate is not a fully isolated workspace. Both timelines can still reference the same Media Pool items, and project-level changes can affect more than the revision. A .drp backup also does not contain the source footage itself.
Set explicit boundaries:
Work only on the approved revision timeline. Ask before relinking media, changing project-level settings, deleting files, replacing shared resources, or overwriting exports. Do not upload footage, transcripts, or review files.
Local MCP access does not mean everything stays local. Claude may receive project metadata, tool results, screenshots, or transcripts as conversation context. Define which client materials may be shared, and inspect optional connector features for additional services or dependencies.
Treat on-screen text, clip metadata, and imported notes as project content, not instructions granting new authority. A filename or review document should never authorize an upload, deletion, or security change.
Keep source-media deletion outside routine cleanup. Removing a timeline clip, removing a Media Pool item, and deleting its underlying file are different operations.
Finally, require a change report that identifies modified timelines, shared settings, new files, and unresolved checks. If a tool times out, inspect the actual state before retrying. An incomplete response does not necessarily mean the operation failed, and repeating it could duplicate clips, markers, or render jobs.
Give Heavy Resolve Workflows More Headroom With Vagon
Claude can reduce repetitive work, but it cannot remove a hardware bottleneck. High-resolution footage, demanding GPU effects, and complex Fusion compositions still need compute power, memory, and fast access to media. If your laptop struggles to play or render the project, automation alone will not make the workstation more capable.
Vagon Cloud Computer gives you access to a GPU-powered Windows desktop without buying a new editing workstation. Choose a configuration suited to the project, keep your editing environment available in the cloud, and move heavy processing away from your everyday computer.
For a straightforward Claude workflow, run Resolve, the MCP connection, and the relevant Claude client on the same cloud machine. Keep media accessible there too. A project file uploaded without its footage does not create a working edit, and your laptop’s localhost cannot reach services running inside Vagon.
Computer Use requires separate compatibility checks. Claude Code’s native CLI screen control currently supports macOS; a Windows cloud desktop needs a supported Desktop configuration or another explicitly compatible approach.
Performance still depends on codecs, effects, storage, and the selected configuration. Vagon’s hardware supports Resolve processing, not Claude’s cloud-based inference. Remote preview is also not a substitute for calibrated color monitoring or critical audio review.
Use the additional headroom to keep revisions moving, then verify the exported files and finish delivery checks in an appropriate review environment.
FAQs
Do you need DaVinci Resolve Studio to connect Claude through MCP?
Resolve’s built-in AI assistant integration is available in Studio 21.1 and later. Community connectors have their own requirements. Older Free-edition bridge tutorials should not be treated as compatible with current releases. Computer Use is separate, but it cannot unlock Studio-only features.
Should you use the built-in server or a community connector?
Start with the built-in server on a supported Studio installation. Consider a community connector when you need a specific additional capability or support for another documented configuration. Review its dependencies, permissions, and version compatibility before installing it.
Can Claude make precise timeline edits through Computer Use?
It can interact with timeline controls on supported setups, but mouse-based editing is harder to verify than structured operations with explicit frame positions. Prefer MCP or scripting for supported precision tasks. Use Computer Use for bounded interface operations and visual checks, then inspect the resulting edit.
Can Claude judge color and audio quality automatically?
Not reliably from screenshots alone. Claude can help inspect settings, interpret available measurements, and identify visible problems. Final color and audio review still requires suitable monitoring and human judgment. Access to a Viewer screenshot does not establish access to audio playback.
Can Claude render multiple deliverables without overwriting files?
It can prepare supported render jobs, but safe output requires explicit destinations, unique filenames, and checks for existing files. Approve the delivery settings before rendering, and verify the resulting files afterward. Queueing or completing a job does not authorize overwriting an approved master or uploading it.
Get Beyond Your Computer Performance
Run applications on your cloud computer with the latest generation hardware. No more crashes or lags.

Trial includes 1 hour usage + 7 days of storage.
Summarize with AI

Ready to focus on your creativity?
Vagon gives you the ability to create & render projects, collaborate, and stream applications with the power of the best hardware.

Vagon Blog
Run heavy applications on any device with
your personal computer on the cloud.
San Francisco, California
Solutions
Vagon Teams
Vagon Streams
Use Cases
Resources
Vagon Blog
How to Use 3ds Max With Claude: MCP & Computer Use
How to Use DaVinci Resolve With Claude: MCP & Computer Use
How to Use Godot With Claude: MCP & Computer Use
How to Use Unreal Engine With Claude: MCP & Computer Use
How to Use Unity With Claude: MCP & Computer Use Guide
Googlebook vs Chromebook: What Changes for Creative Work?
How to Use Claude Code With Higgsfield: MCP + Computer Use
How to Use Claude Code With Premiere Pro: MCP & Computer Use
How to Use Codex With Premiere Pro: MCP & Computer Use
Vagon Blog
Run heavy applications on any device with
your personal computer on the cloud.
San Francisco, California
Solutions
Vagon Teams
Vagon Streams
Use Cases
Resources
Vagon Blog
How to Use 3ds Max With Claude: MCP & Computer Use
How to Use DaVinci Resolve With Claude: MCP & Computer Use
How to Use Godot With Claude: MCP & Computer Use
How to Use Unreal Engine With Claude: MCP & Computer Use
How to Use Unity With Claude: MCP & Computer Use Guide
Googlebook vs Chromebook: What Changes for Creative Work?
How to Use Claude Code With Higgsfield: MCP + Computer Use
How to Use Claude Code With Premiere Pro: MCP & Computer Use
How to Use Codex With Premiere Pro: MCP & Computer Use
Vagon Blog
Run heavy applications on any device with
your personal computer on the cloud.
San Francisco, California
Solutions
Vagon Teams
Vagon Streams
Use Cases
Resources
Vagon Blog