Instant Connection for Pixel Streaming
— New Feature Automated Setup

Mastering Product Lighting in Blender: Techniques for Stunning 3D Renders
Mastering Product Lighting in Blender: Techniques for Stunning 3D Renders
DigitalArt
Mastering Product Lighting in Blender: Techniques for Stunning 3D Renders
Table of Contents
You’ve probably seen those perfectly lit product renders—the kind where every detail looks sharp, the reflections are just right, and the lighting makes the product look straight out of a commercial. Then you try setting up your own lighting in Blender, and no matter what you do, it just doesn’t look quite as professional. Maybe the shadows are too harsh, the reflections are blown out, or the product just feels flat. If this sounds familiar, don’t worry—product lighting is one of the most important yet most challenging aspects of 3D rendering.
Great lighting isn’t just about making something visible; it’s about creating depth, enhancing materials, and making a product stand out. Whether it’s a glossy perfume bottle, a sleek mechanical keyboard, or a high-end watch, the right lighting setup can bring it to life. But it’s not just about throwing a few area lights into the scene and hoping for the best. You need to understand how light interacts with different surfaces, how reflections shape the final look, and how small adjustments can completely change the mood of your render.
In this guide, we’ll break down the fundamentals of product lighting in Blender, covering both beginner-friendly setups and advanced techniques like custom reflections and light linking. We’ll also explore how Blender plugins (check out the best Blender plugins here) can enhance your workflow and how cloud-based rendering with Vagon can help optimize your workflow. Whether you’re working on personal projects or professional product visualizations, mastering lighting will take your Blender renders to the next level.
Setting Up Your Scene for Product Lighting in Blender
Before diving into complex lighting techniques, it's important to set up your scene properly to get the best results. Every product render benefits from a structured lighting approach, and understanding the fundamental lighting principles will make a significant difference in how your final render looks.
A strong lighting setup typically involves a key light, fill light, and rim light. The key light is the primary source of illumination, defining the shape and form of the product. The fill light softens harsh shadows and ensures details remain visible. The rim light (or backlight) helps separate the product from the background, adding depth and making the render feel more dynamic. Three-point lighting is the most commonly used setup in product visualization, as it provides balanced illumination, but softbox lighting is also a great alternative when working with softer shadows and diffused highlights, often seen in commercial product photography. If you're unsure about which setup to use, this Blender asset guide can help you find useful lighting presets to speed up your workflow.
For those aiming for a more natural look, HDRI lighting is an excellent choice. HDR images provide realistic environmental reflections, making them ideal for metallic, glass, or highly reflective products. However, manual lighting setups allow for more control, letting you precisely shape shadows and highlights to suit the scene. If you’re struggling with noise, shadow flickering, or overexposed reflections, this troubleshooting guide covers common Blender lighting issues and how to fix them.
Once your lighting is in place, rendering becomes the next challenge. High-quality renders demand powerful processing, and if your local hardware is struggling, cloud-based solutions like Vagon offer a major advantage. Instead of waiting hours for test renders, Vagon provides high-performance virtual machines that allow you to work on demanding lighting setups without slowing down. Remote rendering also makes quick iteration easier, letting you refine your lights, reflections, and shadows in real time. For artists working on large-scale product visualizations, Vagon eliminates hardware bottlenecks, allowing for efficient lighting adjustments and faster turnaround times. Whether you're refining small product details or rendering entire product catalogs, a strong lighting setup combined with cloud-powered rendering ensures you get high-quality, professional results every time.
Product-Specific Lighting Techniques in Blender
Lighting a product isn’t as simple as just throwing a few lights into the scene and hoping for the best. A mechanical keyboard with textured keycaps needs a completely different approach than a glass perfume bottle with delicate reflections. If you’ve ever tried lighting a product and ended up with something that looked flat, overly harsh, or just plain off, you’re not alone. The key to getting it right is understanding how light interacts with different surfaces and making small adjustments that bring out the best in each material. Let’s break it down with two very different examples.
Lighting a Keyboard for Sharp Details
Ever noticed how some keycaps on a keyboard catch the light beautifully while others seem to fade into the background? That’s because the depth and angles of the keys create natural variations in lighting. To bring out the details, you need to position your key light at an angle, rather than directly overhead. This keeps the keys from looking washed out and helps define their individual shapes. A soft fill light reduces harsh shadows without making the image look flat, and adding a rim light can subtly separate the keyboard from the background, making it look more three-dimensional.
Reflections play a big role in the final look. A matte keyboard benefits from soft, diffused lighting to enhance the texture without adding too much shine. If you’re working with a glossy mechanical keyboard, sharper reflections create that polished, high-end feel. HDRI environments can add natural reflections, but sometimes they overpower the scene. A better approach is to use custom reflection maps or manually placed area lights for controlled highlights.
Shadows are just as important. If they’re too sharp, they look artificial. If they’re too soft, they make the keyboard look weightless. The trick is using area lights with slight diffusion to maintain depth without making the shadows feel too harsh. For keyboards with RGB lighting, subtle colored rim lights mimic the glow realistically, preventing it from looking dull or overly saturated.
If you want to experiment with pre-made lighting setups, this Blender asset guide has useful resources to help speed up the process.
Lighting a Perfume Bottle for Maximum Realism
Glass objects are some of the hardest things to light. Unlike solid materials, glass doesn’t just reflect light—it bends and distorts it, making it tricky to control highlights, shadows, and transparency. If you’ve ever tried to light a perfume bottle and ended up with a noisy, blown-out mess, don’t worry—it happens to everyone at first.
The first thing to get right is your key light. A harsh light source will create strong, distracting reflections, while a too-soft one won’t bring out enough definition. A large, diffused light source, like an HDRI or a soft area light, helps keep the reflections smooth. If the highlights still look too strong, you can lower the light’s intensity and adjust the material’s reflection roughness to create a more balanced look.
One of the biggest headaches with glass is render noise, especially those tiny bright spots known as fireflies. Blender’s caustics settings can help, but another trick is using light blockers—simple planes placed outside the camera view to control how reflections and shadows behave.
Reflections can make or break a glass render. If they’re too crisp, the bottle looks fake. If they’re too blurry, the details get lost. A mix of sharp and slightly diffused reflections helps create a realistic look, while a rim light around the edges of the bottle gives it that high-end, luxury feel.
One of the best tricks for lighting transparent objects is light linking. Normally, adjusting one light affects everything in the scene, but with light linking, you can brighten just the label, enhance the reflections on the cap, or highlight the liquid inside the bottle without changing the rest of the lighting setup. This small adjustment gives you complete control over the final look and helps avoid weird lighting inconsistencies.
If you’re struggling with weird reflections, grainy shadows, or flickering highlights, this Blender troubleshooting guide walks you through solutions to the most common rendering problems.
At the end of the day, lighting is all about understanding the materials you’re working with and adjusting accordingly. A keyboard needs well-defined shadows and reflections to highlight its depth, while a perfume bottle needs soft, controlled lighting to showcase transparency and shine. The key is to experiment, refine, and trust your instincts—small tweaks can make a huge difference in achieving a professional, polished render.
Refining Your Lighting: Light Linking & Custom Reflections
Once you’ve set up your main lighting, you might notice that some parts of your product look great while others are completely off. Maybe the reflections on a glossy surface are too intense, or the shadows on a matte object are too deep. This is where light linking and custom reflections come in—they give you precise control over how light interacts with different parts of your scene, so you’re not stuck with a one-size-fits-all setup.
What is Light Linking and Why Does It Matter?
By default, when you add a light in Blender, it affects everything in your scene. Sometimes that works fine, but for product rendering, it can lead to overexposed highlights, unwanted shadows, or strange reflections. Light Linking allows you to assign a light source to specific objects, meaning you can brighten one part of a product without affecting the entire scene.
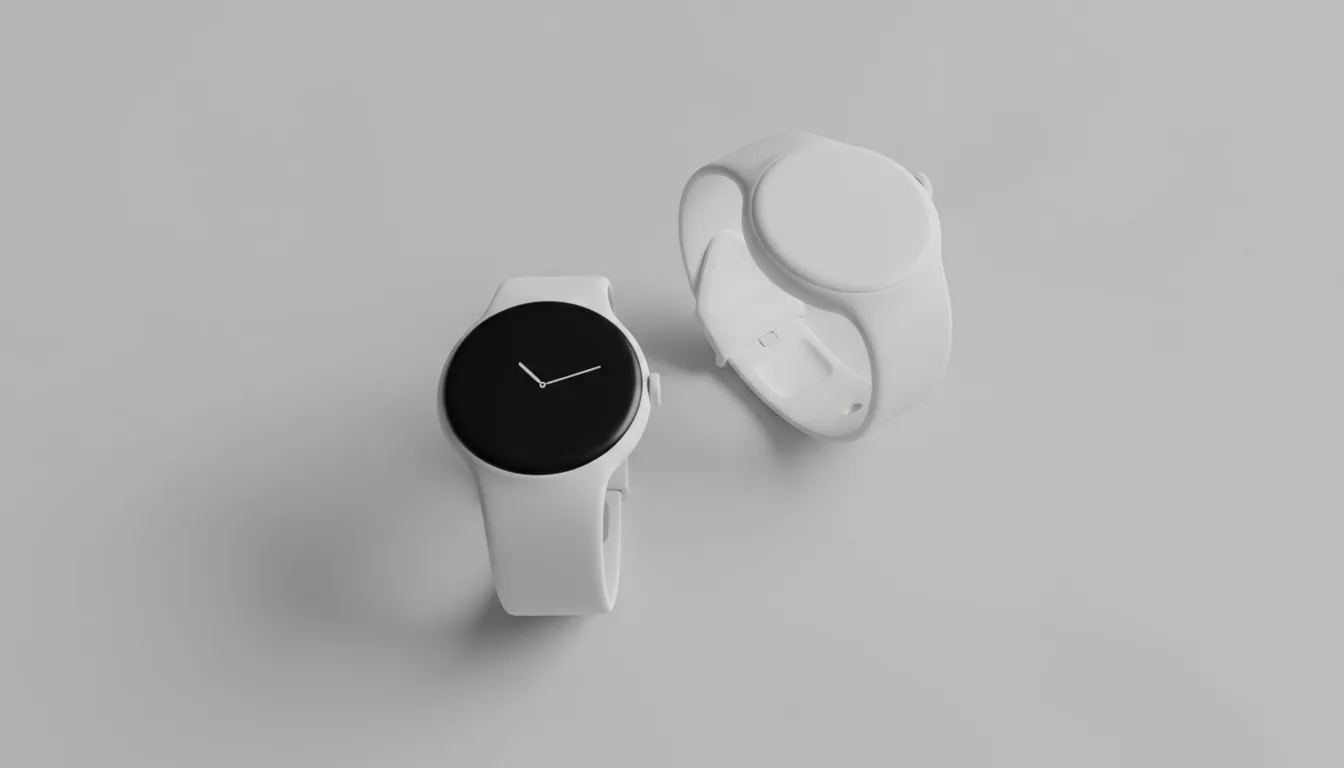
For example, if you’re rendering a metallic watch, you might want a bright reflection on the watch face but not on the strap. Instead of adjusting the entire scene’s lighting, you can use Light Linking to ensure that only the watch face receives that highlight. This level of control helps create realistic and balanced lighting without making everything look blown out or unnatural.
For a hands-on demonstration of how Light Linking works in Blender, check out the video below. It walks through the process step by step, showing you how to precisely control which objects are affected by light sources, ensuring your renders look polished and professional.
By incorporating Light Linking into your workflow, you can achieve precise, professional-looking lighting setups that enhance the realism of your product renders.
Fine-Tuning Reflections for Different Materials
Reflections are essential for making materials look believable, but too much reflection can make an object look fake, while too little can make it look dull. A high-gloss object like polished metal or glass needs sharp, well-placed reflections, while a matte object like plastic or rubber benefits from softer, more subtle highlights.
A great trick to fine-tune reflections is adjusting the roughness value in the material settings. Higher roughness = softer reflections, lower roughness = sharper reflections. If your reflections still don’t look right, you can also use custom reflection maps to control exactly where reflections appear. If you're looking for pre-made lighting setups to help manage reflections better, this Blender asset guide has useful tools to improve your workflow.
Global Illumination vs. Direct Lighting – Which One Should You Use?
Lighting in Blender can be approached in two main ways: global illumination (GI) and direct lighting.
Global Illumination (GI) simulates how light naturally bounces around a scene, creating soft, natural-looking lighting. It’s great for realism but can slow down renders and introduce noise if not optimized.
Direct Lighting comes from specific, controlled light sources and is much faster to render. It’s commonly used in product photography where you want crisp shadows and well-defined reflections without unnecessary light spill.
For studio-style product renders, a direct lighting setup with area lights is usually the best option, as it gives you total control over highlights, shadows, and reflections. But if you’re going for a natural, environment-based look, global illumination combined with an HDRI setup might be the better choice.
If you’re running into issues like noise, flickering shadows, or inconsistent reflections, this troubleshooting guide can help fix common rendering problems.
By refining your lighting with light linking, custom reflections, and the right lighting approach, you can create more professional, realistic product renders that highlight the details you want—without the distractions you don’t.
Rendering and Post-Processing for a Professional Look
Even with perfect lighting, your render isn’t truly finished until you fine-tune render settings and post-processing. Rendering at high quality can be time-consuming, so finding the right balance between speed and realism is key. A well-optimized render setup not only saves time but also prevents common issues like noise, flickering reflections, or overexposed highlights.
Optimizing Blender’s Render Settings
If you’ve ever waited hours for a render only to realize the final image still looks grainy or lacks detail, it might be time to optimize your render settings. Blender’s Cycles engine delivers stunning results, but without proper adjustments, it can take forever to render complex product shots.
Start by increasing sample rates just enough to remove noise while avoiding excessive render times. Using adaptive sampling can help Blender automatically reduce unnecessary calculations, improving efficiency. Denoising tools, like OptiX for NVIDIA GPUs, also speed up rendering without sacrificing detail. If you’re dealing with transparent materials like glass or plastic, adjusting caustics and reflection bounces prevents unwanted artifacts.
If local rendering is slowing you down, cloud-based solutions like Vagon offer high-performance virtual workstations that make heavy rendering much faster and more efficient.
Post-Processing for Final Touches
Even with a great render, post-processing helps bring out contrast, highlights, and reflections for that final, polished look. Using Blender’s compositor or an external program like Photoshop, you can tweak brightness, fine-tune color balance, and sharpen details without re-rendering everything.
A simple but effective trick is adjusting the exposure and contrast to make the product stand out. Adding subtle glow effects on reflections enhances realism, while fine-tuning hue and saturation helps control color accuracy.
Using Free Light Textures for Extra Realism
One of the easiest ways to enhance realism without long render times is by using pre-made light textures. These textures simulate studio lighting setups and help create realistic reflections and highlights. If your product looks too “CGI” or lacks depth, adding light textures can instantly improve material realism.
For a collection of high-quality lighting textures, this guide on Blender assets has great resources to experiment with. With the right rendering and post-processing techniques, you can transform a basic product render into a professional-grade image that looks as good as real-world photography.
Render Faster and Work Smarter with Vagon
Blender’s complex lighting and high-resolution rendering can overwhelm even powerful PCs, causing frustrating slowdowns. Vagon gives you instant access to high-performance cloud workstations, so you can render faster, work on heavy scenes smoothly, and access your projects from anywhere—without expensive upgrades..
Don’t let hardware limits hold you back. Start using Vagon today and experience seamless, high-speed rendering.
Conclusion
Mastering product lighting in Blender is more than just placing a few lights in your scene—it’s about understanding how light interacts with different materials, fine-tuning reflections, and optimizing your workflow to achieve professional results. Whether you’re lighting a keyboard with sharp details or a glass perfume bottle with delicate reflections, small adjustments in key light positioning, shadow control, and custom reflections can make a huge difference in realism.
Beyond lighting, rendering and post-processing are essential for achieving that final polished look. Fine-tuning Blender’s render settings, adjusting contrast and highlights, and using light textures can elevate a basic render into something visually compelling. If performance is slowing you down, cloud-based rendering with Vagon ensures you can work on high-resolution scenes smoothly and complete renders faster, no matter your hardware limitations.
Lighting in Blender is both an art and a technical skill, and the best way to improve is through experimentation and refinement. Every product has unique lighting needs, and with the right techniques, tools, and optimizations, you can create stunning, realistic renders that stand out.
Frequently Asked Questions (FAQs)
1. Why is product lighting so important in Blender?
Product lighting affects how materials, textures, and reflections appear in a render. Proper lighting enhances realism, highlights key details, and creates the right mood for product presentations. Without a well-planned lighting setup, even the best 3D models can look flat or artificial.
2. What’s the best lighting setup for product rendering?
It depends on the product. Three-point lighting is a great all-purpose setup for balanced illumination, while softbox lighting is ideal for smooth, commercial-style product shots. HDRI lighting works well for natural reflections, but manual lights offer more control over highlights and shadows.
3. How do I avoid harsh shadows in my product renders?
To soften shadows, use larger area lights instead of small point lights. Adjust the shadow softness setting in Blender’s light properties, and make sure your fill light is properly balanced to reduce overly dark areas.
4. What’s the best way to handle reflections in product lighting?
Reflections can be controlled by adjusting the roughness value of materials. For high-gloss surfaces like polished metal or glass, sharp reflections work best. For matte objects, softer reflections create a more natural look. If reflections appear too strong or distracting, using custom reflection maps or adjusting the light angle can help.
5. How do I reduce noise in my renders?
Noise often comes from low sample rates or caustics in transparent materials. Increase render samples, enable denoising in Blender’s Cycles settings, and adjust caustics settings for glass and liquid materials. If rendering takes too long, using Vagon’s cloud-based rendering can help speed up the process without overloading your local hardware.
6. Should I use Global Illumination (GI) or Direct Lighting for product renders?
For photorealistic renders, Global Illumination (GI) creates natural light bounces and soft shadows but can increase render times. Direct Lighting is better for studio-style product shots where you need sharp shadows and controlled highlights.
You’ve probably seen those perfectly lit product renders—the kind where every detail looks sharp, the reflections are just right, and the lighting makes the product look straight out of a commercial. Then you try setting up your own lighting in Blender, and no matter what you do, it just doesn’t look quite as professional. Maybe the shadows are too harsh, the reflections are blown out, or the product just feels flat. If this sounds familiar, don’t worry—product lighting is one of the most important yet most challenging aspects of 3D rendering.
Great lighting isn’t just about making something visible; it’s about creating depth, enhancing materials, and making a product stand out. Whether it’s a glossy perfume bottle, a sleek mechanical keyboard, or a high-end watch, the right lighting setup can bring it to life. But it’s not just about throwing a few area lights into the scene and hoping for the best. You need to understand how light interacts with different surfaces, how reflections shape the final look, and how small adjustments can completely change the mood of your render.
In this guide, we’ll break down the fundamentals of product lighting in Blender, covering both beginner-friendly setups and advanced techniques like custom reflections and light linking. We’ll also explore how Blender plugins (check out the best Blender plugins here) can enhance your workflow and how cloud-based rendering with Vagon can help optimize your workflow. Whether you’re working on personal projects or professional product visualizations, mastering lighting will take your Blender renders to the next level.
Setting Up Your Scene for Product Lighting in Blender
Before diving into complex lighting techniques, it's important to set up your scene properly to get the best results. Every product render benefits from a structured lighting approach, and understanding the fundamental lighting principles will make a significant difference in how your final render looks.
A strong lighting setup typically involves a key light, fill light, and rim light. The key light is the primary source of illumination, defining the shape and form of the product. The fill light softens harsh shadows and ensures details remain visible. The rim light (or backlight) helps separate the product from the background, adding depth and making the render feel more dynamic. Three-point lighting is the most commonly used setup in product visualization, as it provides balanced illumination, but softbox lighting is also a great alternative when working with softer shadows and diffused highlights, often seen in commercial product photography. If you're unsure about which setup to use, this Blender asset guide can help you find useful lighting presets to speed up your workflow.
For those aiming for a more natural look, HDRI lighting is an excellent choice. HDR images provide realistic environmental reflections, making them ideal for metallic, glass, or highly reflective products. However, manual lighting setups allow for more control, letting you precisely shape shadows and highlights to suit the scene. If you’re struggling with noise, shadow flickering, or overexposed reflections, this troubleshooting guide covers common Blender lighting issues and how to fix them.
Once your lighting is in place, rendering becomes the next challenge. High-quality renders demand powerful processing, and if your local hardware is struggling, cloud-based solutions like Vagon offer a major advantage. Instead of waiting hours for test renders, Vagon provides high-performance virtual machines that allow you to work on demanding lighting setups without slowing down. Remote rendering also makes quick iteration easier, letting you refine your lights, reflections, and shadows in real time. For artists working on large-scale product visualizations, Vagon eliminates hardware bottlenecks, allowing for efficient lighting adjustments and faster turnaround times. Whether you're refining small product details or rendering entire product catalogs, a strong lighting setup combined with cloud-powered rendering ensures you get high-quality, professional results every time.
Product-Specific Lighting Techniques in Blender
Lighting a product isn’t as simple as just throwing a few lights into the scene and hoping for the best. A mechanical keyboard with textured keycaps needs a completely different approach than a glass perfume bottle with delicate reflections. If you’ve ever tried lighting a product and ended up with something that looked flat, overly harsh, or just plain off, you’re not alone. The key to getting it right is understanding how light interacts with different surfaces and making small adjustments that bring out the best in each material. Let’s break it down with two very different examples.
Lighting a Keyboard for Sharp Details
Ever noticed how some keycaps on a keyboard catch the light beautifully while others seem to fade into the background? That’s because the depth and angles of the keys create natural variations in lighting. To bring out the details, you need to position your key light at an angle, rather than directly overhead. This keeps the keys from looking washed out and helps define their individual shapes. A soft fill light reduces harsh shadows without making the image look flat, and adding a rim light can subtly separate the keyboard from the background, making it look more three-dimensional.
Reflections play a big role in the final look. A matte keyboard benefits from soft, diffused lighting to enhance the texture without adding too much shine. If you’re working with a glossy mechanical keyboard, sharper reflections create that polished, high-end feel. HDRI environments can add natural reflections, but sometimes they overpower the scene. A better approach is to use custom reflection maps or manually placed area lights for controlled highlights.
Shadows are just as important. If they’re too sharp, they look artificial. If they’re too soft, they make the keyboard look weightless. The trick is using area lights with slight diffusion to maintain depth without making the shadows feel too harsh. For keyboards with RGB lighting, subtle colored rim lights mimic the glow realistically, preventing it from looking dull or overly saturated.
If you want to experiment with pre-made lighting setups, this Blender asset guide has useful resources to help speed up the process.
Lighting a Perfume Bottle for Maximum Realism
Glass objects are some of the hardest things to light. Unlike solid materials, glass doesn’t just reflect light—it bends and distorts it, making it tricky to control highlights, shadows, and transparency. If you’ve ever tried to light a perfume bottle and ended up with a noisy, blown-out mess, don’t worry—it happens to everyone at first.
The first thing to get right is your key light. A harsh light source will create strong, distracting reflections, while a too-soft one won’t bring out enough definition. A large, diffused light source, like an HDRI or a soft area light, helps keep the reflections smooth. If the highlights still look too strong, you can lower the light’s intensity and adjust the material’s reflection roughness to create a more balanced look.
One of the biggest headaches with glass is render noise, especially those tiny bright spots known as fireflies. Blender’s caustics settings can help, but another trick is using light blockers—simple planes placed outside the camera view to control how reflections and shadows behave.
Reflections can make or break a glass render. If they’re too crisp, the bottle looks fake. If they’re too blurry, the details get lost. A mix of sharp and slightly diffused reflections helps create a realistic look, while a rim light around the edges of the bottle gives it that high-end, luxury feel.
One of the best tricks for lighting transparent objects is light linking. Normally, adjusting one light affects everything in the scene, but with light linking, you can brighten just the label, enhance the reflections on the cap, or highlight the liquid inside the bottle without changing the rest of the lighting setup. This small adjustment gives you complete control over the final look and helps avoid weird lighting inconsistencies.
If you’re struggling with weird reflections, grainy shadows, or flickering highlights, this Blender troubleshooting guide walks you through solutions to the most common rendering problems.
At the end of the day, lighting is all about understanding the materials you’re working with and adjusting accordingly. A keyboard needs well-defined shadows and reflections to highlight its depth, while a perfume bottle needs soft, controlled lighting to showcase transparency and shine. The key is to experiment, refine, and trust your instincts—small tweaks can make a huge difference in achieving a professional, polished render.
Refining Your Lighting: Light Linking & Custom Reflections
Once you’ve set up your main lighting, you might notice that some parts of your product look great while others are completely off. Maybe the reflections on a glossy surface are too intense, or the shadows on a matte object are too deep. This is where light linking and custom reflections come in—they give you precise control over how light interacts with different parts of your scene, so you’re not stuck with a one-size-fits-all setup.
What is Light Linking and Why Does It Matter?
By default, when you add a light in Blender, it affects everything in your scene. Sometimes that works fine, but for product rendering, it can lead to overexposed highlights, unwanted shadows, or strange reflections. Light Linking allows you to assign a light source to specific objects, meaning you can brighten one part of a product without affecting the entire scene.
For example, if you’re rendering a metallic watch, you might want a bright reflection on the watch face but not on the strap. Instead of adjusting the entire scene’s lighting, you can use Light Linking to ensure that only the watch face receives that highlight. This level of control helps create realistic and balanced lighting without making everything look blown out or unnatural.
For a hands-on demonstration of how Light Linking works in Blender, check out the video below. It walks through the process step by step, showing you how to precisely control which objects are affected by light sources, ensuring your renders look polished and professional.
By incorporating Light Linking into your workflow, you can achieve precise, professional-looking lighting setups that enhance the realism of your product renders.
Fine-Tuning Reflections for Different Materials
Reflections are essential for making materials look believable, but too much reflection can make an object look fake, while too little can make it look dull. A high-gloss object like polished metal or glass needs sharp, well-placed reflections, while a matte object like plastic or rubber benefits from softer, more subtle highlights.
A great trick to fine-tune reflections is adjusting the roughness value in the material settings. Higher roughness = softer reflections, lower roughness = sharper reflections. If your reflections still don’t look right, you can also use custom reflection maps to control exactly where reflections appear. If you're looking for pre-made lighting setups to help manage reflections better, this Blender asset guide has useful tools to improve your workflow.
Global Illumination vs. Direct Lighting – Which One Should You Use?
Lighting in Blender can be approached in two main ways: global illumination (GI) and direct lighting.
Global Illumination (GI) simulates how light naturally bounces around a scene, creating soft, natural-looking lighting. It’s great for realism but can slow down renders and introduce noise if not optimized.
Direct Lighting comes from specific, controlled light sources and is much faster to render. It’s commonly used in product photography where you want crisp shadows and well-defined reflections without unnecessary light spill.
For studio-style product renders, a direct lighting setup with area lights is usually the best option, as it gives you total control over highlights, shadows, and reflections. But if you’re going for a natural, environment-based look, global illumination combined with an HDRI setup might be the better choice.
If you’re running into issues like noise, flickering shadows, or inconsistent reflections, this troubleshooting guide can help fix common rendering problems.
By refining your lighting with light linking, custom reflections, and the right lighting approach, you can create more professional, realistic product renders that highlight the details you want—without the distractions you don’t.
Rendering and Post-Processing for a Professional Look
Even with perfect lighting, your render isn’t truly finished until you fine-tune render settings and post-processing. Rendering at high quality can be time-consuming, so finding the right balance between speed and realism is key. A well-optimized render setup not only saves time but also prevents common issues like noise, flickering reflections, or overexposed highlights.
Optimizing Blender’s Render Settings
If you’ve ever waited hours for a render only to realize the final image still looks grainy or lacks detail, it might be time to optimize your render settings. Blender’s Cycles engine delivers stunning results, but without proper adjustments, it can take forever to render complex product shots.
Start by increasing sample rates just enough to remove noise while avoiding excessive render times. Using adaptive sampling can help Blender automatically reduce unnecessary calculations, improving efficiency. Denoising tools, like OptiX for NVIDIA GPUs, also speed up rendering without sacrificing detail. If you’re dealing with transparent materials like glass or plastic, adjusting caustics and reflection bounces prevents unwanted artifacts.
If local rendering is slowing you down, cloud-based solutions like Vagon offer high-performance virtual workstations that make heavy rendering much faster and more efficient.
Post-Processing for Final Touches
Even with a great render, post-processing helps bring out contrast, highlights, and reflections for that final, polished look. Using Blender’s compositor or an external program like Photoshop, you can tweak brightness, fine-tune color balance, and sharpen details without re-rendering everything.
A simple but effective trick is adjusting the exposure and contrast to make the product stand out. Adding subtle glow effects on reflections enhances realism, while fine-tuning hue and saturation helps control color accuracy.
Using Free Light Textures for Extra Realism
One of the easiest ways to enhance realism without long render times is by using pre-made light textures. These textures simulate studio lighting setups and help create realistic reflections and highlights. If your product looks too “CGI” or lacks depth, adding light textures can instantly improve material realism.
For a collection of high-quality lighting textures, this guide on Blender assets has great resources to experiment with. With the right rendering and post-processing techniques, you can transform a basic product render into a professional-grade image that looks as good as real-world photography.
Render Faster and Work Smarter with Vagon
Blender’s complex lighting and high-resolution rendering can overwhelm even powerful PCs, causing frustrating slowdowns. Vagon gives you instant access to high-performance cloud workstations, so you can render faster, work on heavy scenes smoothly, and access your projects from anywhere—without expensive upgrades..
Don’t let hardware limits hold you back. Start using Vagon today and experience seamless, high-speed rendering.
Conclusion
Mastering product lighting in Blender is more than just placing a few lights in your scene—it’s about understanding how light interacts with different materials, fine-tuning reflections, and optimizing your workflow to achieve professional results. Whether you’re lighting a keyboard with sharp details or a glass perfume bottle with delicate reflections, small adjustments in key light positioning, shadow control, and custom reflections can make a huge difference in realism.
Beyond lighting, rendering and post-processing are essential for achieving that final polished look. Fine-tuning Blender’s render settings, adjusting contrast and highlights, and using light textures can elevate a basic render into something visually compelling. If performance is slowing you down, cloud-based rendering with Vagon ensures you can work on high-resolution scenes smoothly and complete renders faster, no matter your hardware limitations.
Lighting in Blender is both an art and a technical skill, and the best way to improve is through experimentation and refinement. Every product has unique lighting needs, and with the right techniques, tools, and optimizations, you can create stunning, realistic renders that stand out.
Frequently Asked Questions (FAQs)
1. Why is product lighting so important in Blender?
Product lighting affects how materials, textures, and reflections appear in a render. Proper lighting enhances realism, highlights key details, and creates the right mood for product presentations. Without a well-planned lighting setup, even the best 3D models can look flat or artificial.
2. What’s the best lighting setup for product rendering?
It depends on the product. Three-point lighting is a great all-purpose setup for balanced illumination, while softbox lighting is ideal for smooth, commercial-style product shots. HDRI lighting works well for natural reflections, but manual lights offer more control over highlights and shadows.
3. How do I avoid harsh shadows in my product renders?
To soften shadows, use larger area lights instead of small point lights. Adjust the shadow softness setting in Blender’s light properties, and make sure your fill light is properly balanced to reduce overly dark areas.
4. What’s the best way to handle reflections in product lighting?
Reflections can be controlled by adjusting the roughness value of materials. For high-gloss surfaces like polished metal or glass, sharp reflections work best. For matte objects, softer reflections create a more natural look. If reflections appear too strong or distracting, using custom reflection maps or adjusting the light angle can help.
5. How do I reduce noise in my renders?
Noise often comes from low sample rates or caustics in transparent materials. Increase render samples, enable denoising in Blender’s Cycles settings, and adjust caustics settings for glass and liquid materials. If rendering takes too long, using Vagon’s cloud-based rendering can help speed up the process without overloading your local hardware.
6. Should I use Global Illumination (GI) or Direct Lighting for product renders?
For photorealistic renders, Global Illumination (GI) creates natural light bounces and soft shadows but can increase render times. Direct Lighting is better for studio-style product shots where you need sharp shadows and controlled highlights.
Get Beyond Your Computer Performance
Run applications on your cloud computer with the latest generation hardware. No more crashes or lags.

Trial includes 1 hour usage + 7 days of storage.
Summarize with AI

Ready to focus on your creativity?
Vagon gives you the ability to create & render projects, collaborate, and stream applications with the power of the best hardware.

Vagon Blog


Run heavy applications on any device with
your personal computer on the cloud.
San Francisco, California
Solutions
Vagon Teams
Vagon Streams
Use Cases
Resources
Vagon Blog
What Slows Down After Effects Projects?
The First 30 Minutes in Blender 3D: A Practical Workflow Guide
What’s New in Godot 4.7? Key Features, Upgrades, and Workflow Improvements
What Slows Down Blender 3D Projects?
What Slows Down Adobe Photoshop Projects?
The First 30 Minutes in Adobe Photoshop: A Practical Workflow Guide
Before You Start in Adobe Photoshop: A Practical Setup Checklist
What’s New in Unreal Engine 5.8? Key Features and Upgrade Advice
How to Run Windows on an iPad: 4 Best Ways (2026)
Vagon Blog
Run heavy applications on any device with
your personal computer on the cloud.
San Francisco, California
Solutions
Vagon Teams
Vagon Streams
Use Cases
Resources
Vagon Blog