Instant Connection for Pixel Streaming
— New Feature Automated Setup
After Effects Keyboard Shortcuts That Actually Save You Hours
After Effects Keyboard Shortcuts That Actually Save You Hours
VideoProduction
After Effects Keyboard Shortcuts That Actually Save You Hours
Table of Contents
Ever spent 20 minutes hunting for a panel you know is in After Effects… only to realize it was hiding behind another panel the whole time? I’ve done that more times than I care to admit. And every single time, the same thought pops up: there has to be a faster way.
There is. It’s shortcuts.
Most After Effects users don’t lose time on the “big stuff.” It’s the tiny moments. Clicking instead of tapping a key. Digging through menus. Dragging the playhead when a single key would’ve done the job. Stack enough of those moments together and suddenly a five hour project quietly turns into seven.
Shortcut guides all say the same thing for a reason: consistent keyboard use can save literal hours over the life of a project. Not in a motivational-poster way. In a very real “why am I still here at 2 a.m.” way.
If you’ve ever watched someone else animate in After Effects and thought, “How are they moving that fast?” chances are you weren’t watching talent. You were watching muscle memory.
Let’s talk about that.
Why Shortcuts Matter More Than People Admit
Everyone says shortcuts are about speed. That’s true, but it’s also a bit shallow.
In my experience, shortcuts change how you think inside After Effects. When you stop reaching for menus, your brain stays focused on motion, timing, and rhythm instead of interface management. You’re not breaking your flow every 10 seconds to go hunting. You’re staying in it.
There’s also a quiet confidence that creeps in once a few shortcuts live in your fingers. You stop second-guessing simple actions. You try things faster. You undo faster. You experiment more because the cost of trying something drops way down.
Here’s the part most tutorials don’t say out loud: you don’t need to know all of them. After Effects has a ton of shortcuts. No one actually uses all of them. Pros don’t either. What they do have is a tight loop of maybe 15 to 25 shortcuts they hit constantly. Every project. Every day.
And once those are locked in, the rest of the app feels smaller. Less intimidating. Less sticky.
If shortcuts have ever felt overwhelming to you, that’s normal. The mistake is trying to learn them like vocabulary words. The better move is learning them as tools for problems you already have.
Let’s start with the ones that solve the most annoying problems first.
Navigation Shortcuts That Save You From Losing Your Mind
Before layers. Before keyframes. Before fancy animation tricks. You need to be able to move around without friction. Navigation is where shortcuts start paying rent almost immediately.
If you only learn a handful of shortcuts from this entire post, I’d argue these should be near the top of the list.
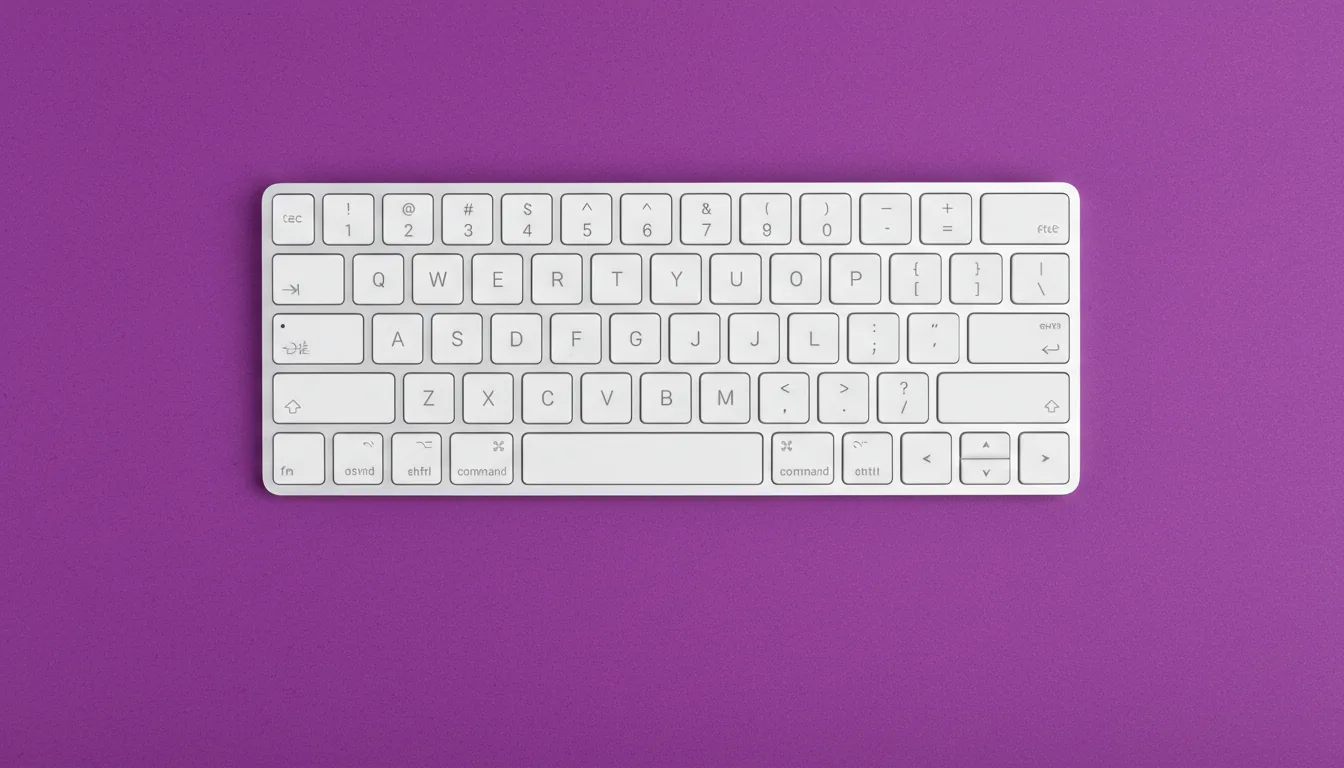
Spacebar
This one’s obvious, but a lot of people still click the play button. Don’t. Spacebar to preview. Spacebar to stop. It keeps your eyes on the comp instead of the UI.
Page Up / Page Down
These move the playhead one frame at a time. If you’re adjusting timing, checking alignment, or fine-tuning animation beats, this matters more than dragging the playhead with your mouse. Dragging is imprecise. Keys are honest.
Shift + Page Up / Page Down
Same idea, but jumps 10 frames at a time. Great for scanning motion without scrubbing like a maniac.
Home / End
Instant jump to the start or end of the composition. Once you get used to this, scrolling feels painfully slow.
Shift + /
Fits the composition to your viewer. This is one of those shortcuts people accidentally discover and then wonder how they lived without it. If your comp view is constantly zoomed wrong, this fixes it in one move.
Here’s the pattern you’ll notice with all of these: none of them are flashy. They don’t feel impressive. But they remove tiny bits of friction that add up fast.
If your hand keeps bouncing between mouse and keyboard just to move around, you’re burning energy you could be using to actually animate.
Next up: layers. This is where shortcuts stop being nice-to-have and start feeling mandatory.
Layer Shortcuts You’ll Use On Every Single Project
Layers are where most people waste time without realizing it. Click. Right-click. Menu. Submenu. Repeat. It works, but it’s slow in a way that sneaks up on you.
Once you start using layer shortcuts, something clicks. You stop “managing” layers and start shaping them.
Ctrl / Cmd + D
Duplicate layer. You’ll use this constantly. Variations, offsets, safety copies, quick experiments. If you’re still right-clicking to duplicate, this one change alone will shave minutes off your day.
Ctrl / Cmd + Shift + C
Pre-compose. This shortcut feels boring until the day you use it fifty times. Any time a timeline starts getting messy, pre-comps are your cleanup tool. Faster access means you’ll actually use them instead of postponing the mess.
Ctrl / Cmd + Shift + D
Split layer at the playhead. Perfect for timing changes, cutting animations into sections, or killing a layer cleanly without trimming handles manually. Once this is muscle memory, trimming feels prehistoric.
[ and ]
Trim layer in and out points to the playhead. These are sneaky powerful. They encourage you to work in time instead of eyeballing things. Set the playhead. Tap a key. Done.
Ctrl / Cmd + Shift + Y
Solid settings. Not glamorous, but when you need to adjust a solid mid-project, this saves a menu dive.
Here’s something I’ve noticed over the years: people who avoid shortcuts tend to avoid restructuring timelines too. They leave things messy because cleaning up feels like work. Shortcuts flip that. Cleanup becomes cheap. So you do it more often.
And cleaner timelines make everything else easier. Debugging. Revising. Handing projects off to someone else without shame.
Next, we get into the single-key shortcuts that quietly do the most work in After Effects. These are small. They’re fast. And they add up fast.
The Single-Key Shortcuts That Quietly Do The Heavy Lifting
This is where After Effects starts to feel responsive instead of stubborn. Single-key property shortcuts don’t look impressive on a cheat sheet, but they save an absurd amount of clicking over time.
If you only memorize one group of shortcuts, make it this one.
P, S, R, T
Position. Scale. Rotation. Opacity.
Hit the key, the property appears. Hit it again, it hides. No twirling triangles. No scrolling through stacks of stuff you don’t care about right now.
I think this is the moment when After Effects stops feeling bloated for most people. You realize you don’t need to see everything. You just need to see what you’re working on right now.
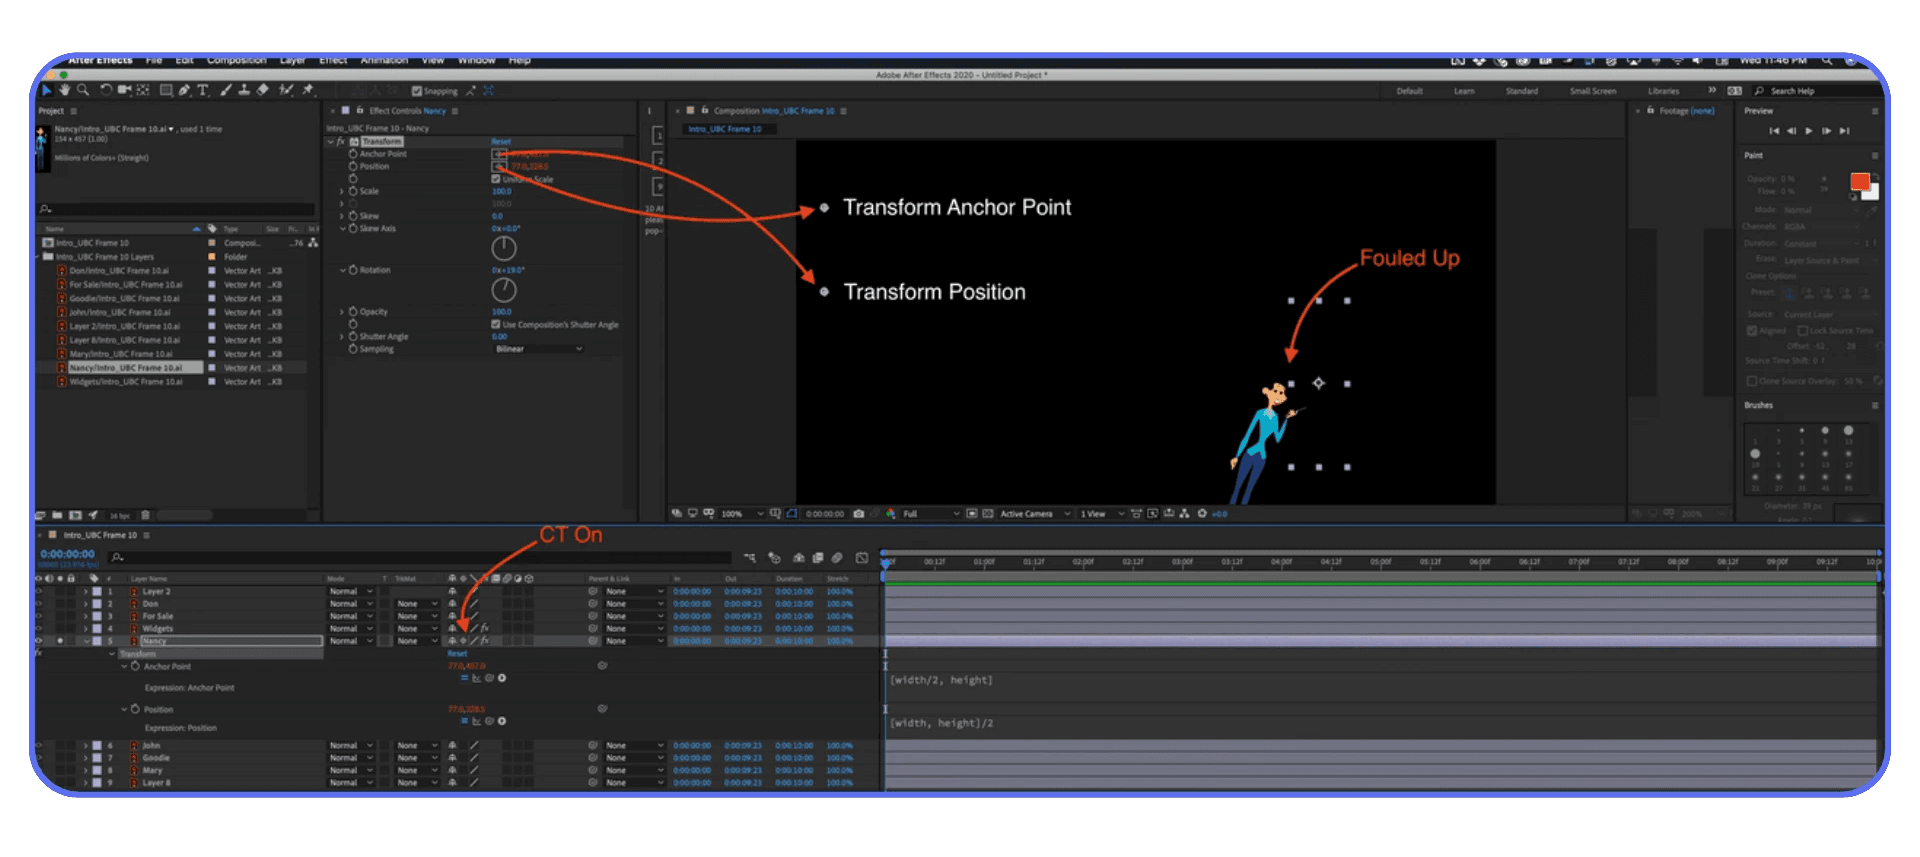
A
Anchor Point. Easy to forget, constantly useful. Especially if you’re doing character work, text animation, or anything rotational. If you find yourself digging for the Anchor Point property more than twice a day, this key pays for itself instantly.
U
Show only properties with keyframes. This one is huge. It turns a messy timeline into something readable in one tap. If you’ve ever opened a layer and thought, “Why is there so much stuff here,” this is the fix.
UU
Tap U twice quickly. This shows every property you’ve modified, whether it has keyframes or not. Expressions, changed values, anything. When you inherit someone else’s project, this shortcut feels like a flashlight in a dark room.
There’s a mental shift that happens here. Instead of scrolling to find properties, you call them up. It’s subtle, but it keeps you in control of the timeline instead of reacting to it.
And yes, it takes a few days for this to stick. You’ll forget. You’ll click anyway. That’s normal. But once these keys live in your fingers, you’ll notice something funny.
Your mouse starts getting bored.
Next up, keyframes. This is where shortcuts stop being about speed and start being about rhythm.
Keyframe Shortcuts That Make Animation Feel Intentional
Keyframes are where After Effects either feels fun or feels like work. A lot of that comes down to how much friction you tolerate between an idea and the timeline.
Shortcuts don’t make your animation better on their own. But they do make it easier to feel timing. And timing is most of the job.
F9
Easy Ease. Probably the most abused shortcut in After Effects. People slap it on everything and wonder why motion feels mushy. Still, used intentionally, it’s essential. I treat it like salt. Necessary, but not on everything.
If you’re easing everything by default, pause and ask why. Sometimes linear is exactly what you want.
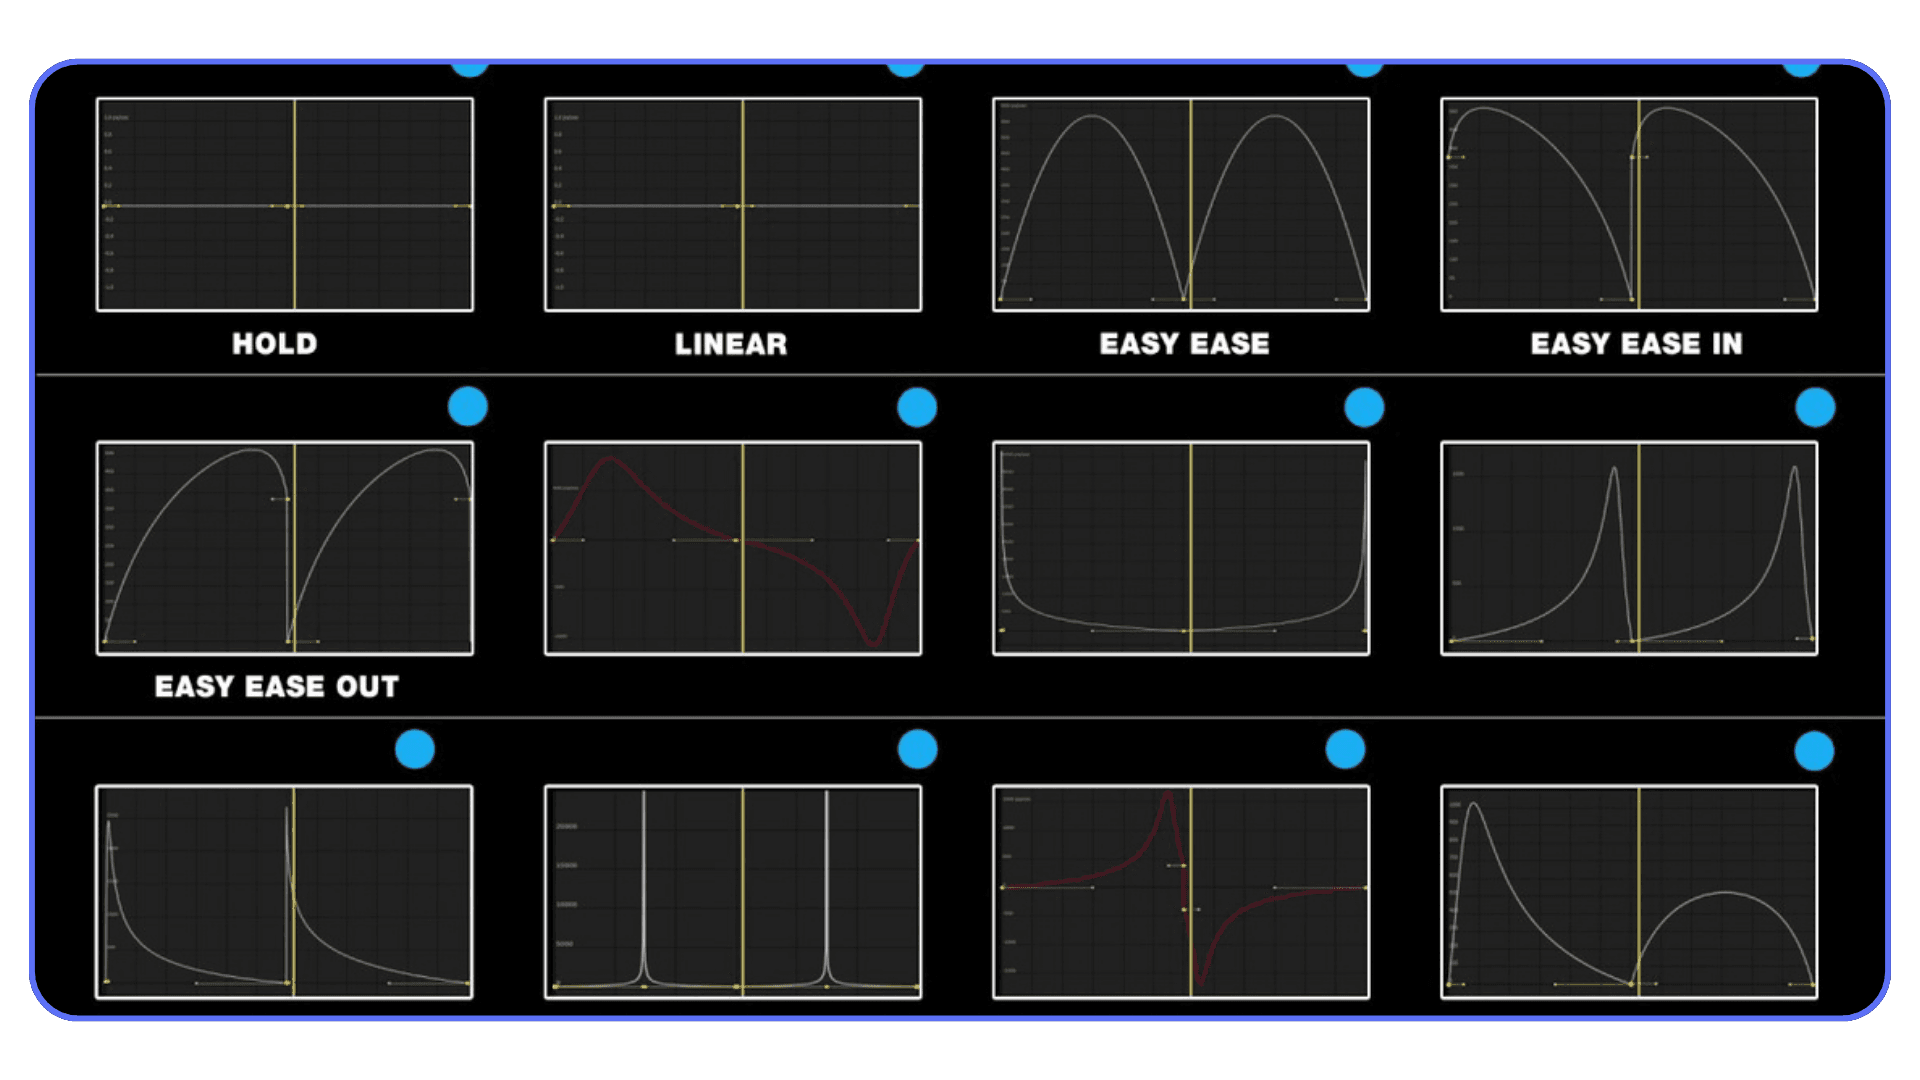
Shift + F9 / Ctrl + Shift + F9 (Cmd on Mac)
Ease In and Ease Out. These give you more control than F9 without opening the Graph Editor. If you’re adjusting motion directionally, these feel more deliberate.
J / K
Jump to previous or next keyframe. Once you use these, scrubbing feels clumsy. They’re perfect for tightening timing, checking arcs, or nudging values without losing your place.
This is one of those shortcuts that changes how you review animation. You stop watching the whole thing over and over and start inspecting specific moments.
Alt / Option + drag keyframe
Duplicate keyframes by dragging. Great for repeating motion patterns or creating offsets without copy-pasting. It’s fast, but more importantly, it keeps your spacing consistent.
Delete
Sounds obvious, but a lot of people still click tiny diamonds. You don’t need that kind of stress in your life.
Here’s a small truth I learned the hard way: the faster you can move between keyframes, the more willing you are to refine them. When navigation is slow, you settle. When it’s fast, you polish.
That’s usually the difference between “good enough” animation and animation that actually feels considered.
Next, a few shortcuts that don’t fit neatly into categories but somehow end up being used constantly anyway.
The Weird Little Shortcuts You End Up Using All The Time
These don’t look important on paper. They don’t belong to one clean category. And yet, once you know them, they sneak into your workflow and refuse to leave.
~ (tilde)
Maximize the panel your cursor is hovering over. Timeline too cramped? Hit it. Comp viewer getting lost in panel chaos? Hit it again. This shortcut alone can make After Effects feel less claustrophobic, especially on smaller screens.
I use this constantly when animating. Full timeline. Full comp. Back and forth. No dragging panels around like it’s 2009.
Ctrl / Cmd + R
Toggle rulers. If you’re aligning text, UI elements, or motion guides, this saves a trip to the View menu. Simple, reliable, out of the way.
Ctrl / Cmd + Shift + H
Show or hide layer controls. Bounding boxes, masks, guides. When things start blocking your view, this clears the noise instantly.
Ctrl / Cmd + Z
Undo. Obviously. But here’s the real tip: trust it. After Effects undo is deeper than people think. If you’re hesitant to experiment because you’re afraid of breaking something, you’re probably underusing undo.
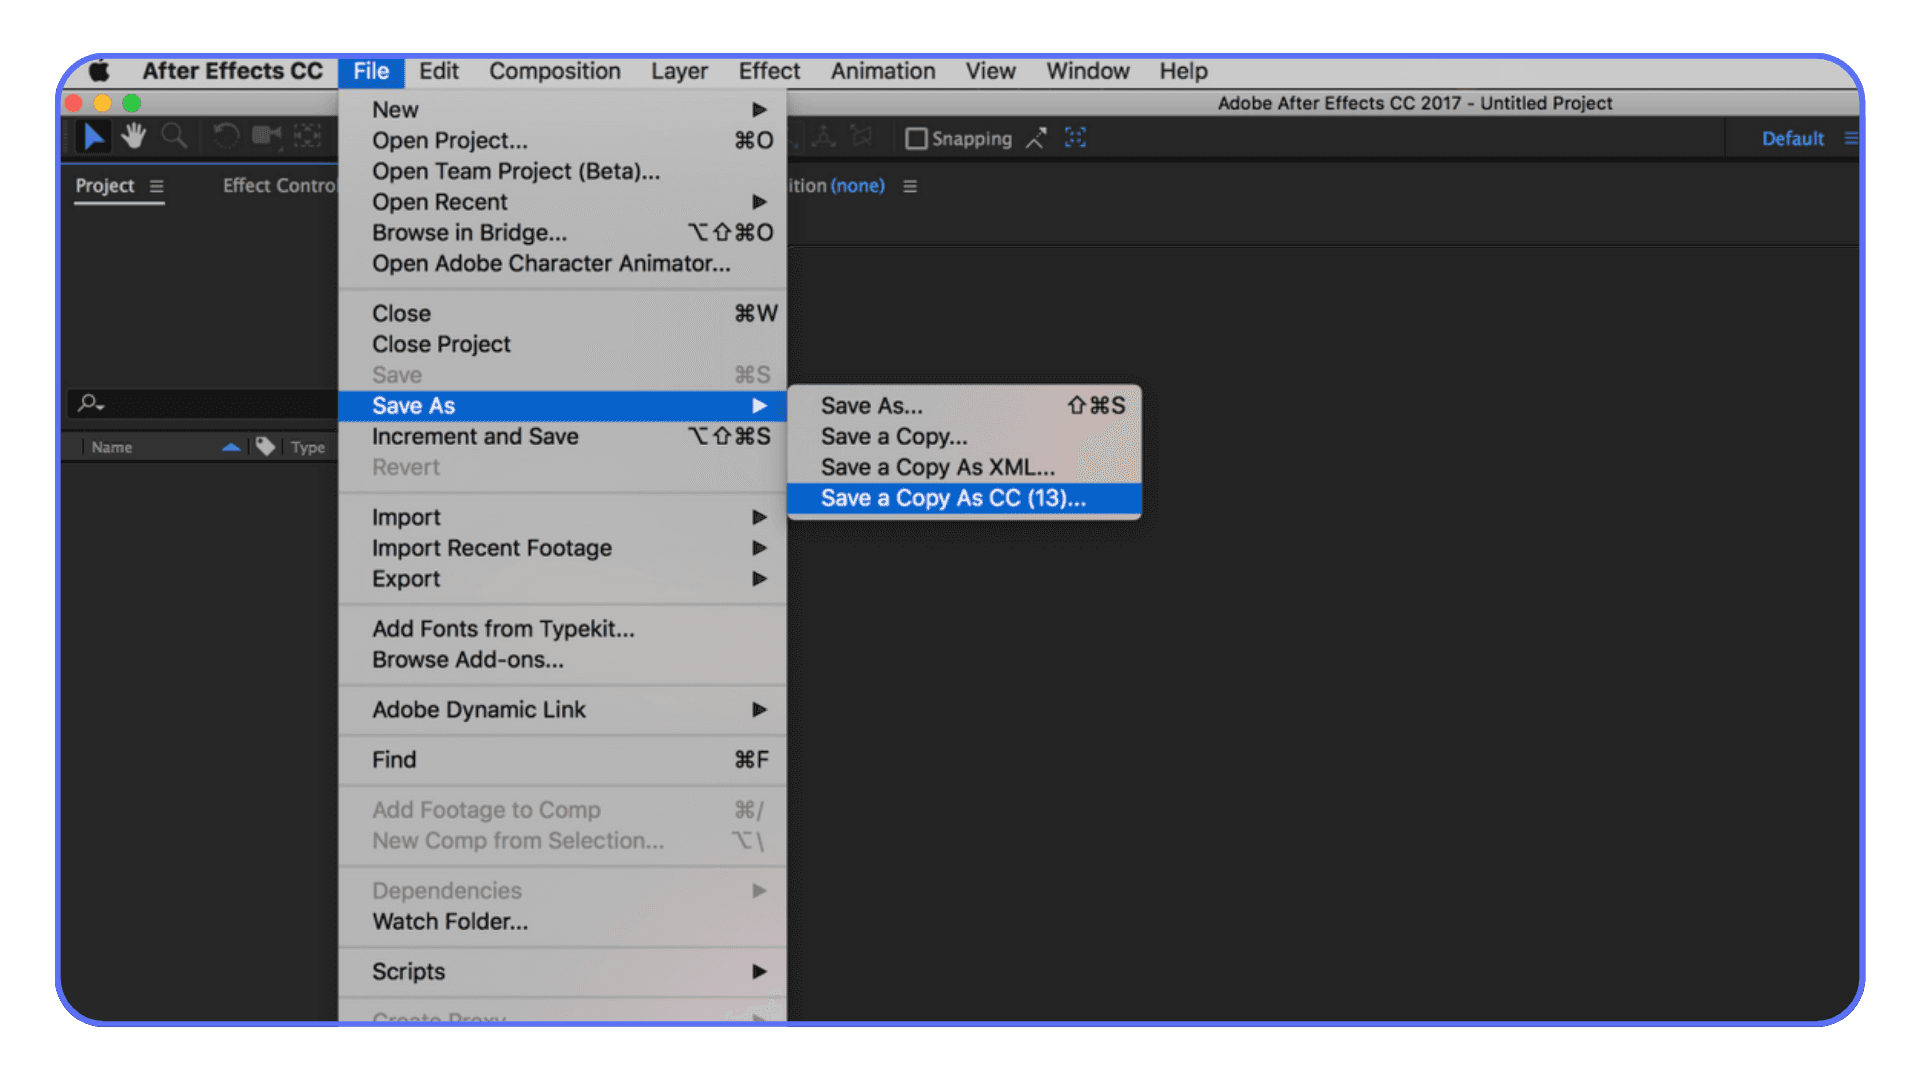
Ctrl / Cmd + Shift + S
Save As. Not glamorous, but essential. Versioning manually still matters, especially when you’re pushing animation ideas that might not work.
These shortcuts don’t make headlines. But they smooth out the rough edges of daily work. They reduce the little annoyances that drain energy over long sessions.
At some point, you realize something. It’s not about knowing more shortcuts. It’s about removing friction wherever it shows up.
Which leads to an uncomfortable truth.
Sometimes, even perfect shortcuts aren’t enough.
When Shortcuts Stop Helping And The Machine Becomes The Problem
There’s a point where you’ve done everything right.
You know the shortcuts. Your timeline is clean. You’re navigating like a pro. And After Effects still feels… heavy. Previews stutter. RAM fills up. Simple tweaks take a second longer than they should.
That’s not you. That’s the machine pushing back.
This usually shows up once projects get real. High-resolution comps. Lots of shape layers. Blur, grain, motion tile, expressions talking to each other. Add a few AI-assisted tools into the mix and suddenly even good hardware starts breathing hard.
I’ve noticed this is where people misdiagnose the problem. They think they’re “bad at After Effects” or not fast enough yet. But the truth is, shortcuts can only optimize input. They can’t fix limited compute.
You feel it most during iteration. That back-and-forth moment where you want to tweak timing, preview, tweak again. When previews lag, you animate less. You settle sooner. Not because the idea is done, but because waiting gets exhausting.
This is also where collaboration gets messy. Sending project files back and forth. Explaining why something renders differently on another machine. Freezing layers just to survive.
Shortcuts still matter here. They always do. But they’re no longer the bottleneck.
The bottleneck is where the work actually runs.
And that’s where cloud machines quietly start making a lot of sense.
Solving After Effects Performance Limits With Vagon Cloud Computer
I want to be clear about something first. Vagon doesn’t replace shortcuts. If anything, it makes them more valuable.
Here’s why.
Once you’ve trained your fingers to work fast, lag becomes way more noticeable. Every dropped frame feels personal. Every slow preview breaks the rhythm you worked to build. That’s the moment when a stronger machine stops being a luxury and starts being a workflow decision.
Vagon Cloud Computer gives you access to high-performance machines that don’t care how heavy your After Effects project gets. Big comps. Dense timelines. AI-assisted tools running in the background. It just keeps up.
What surprised me wasn’t just raw speed. It was consistency. Preview, tweak, preview again. No mental recalibration. No waiting for the machine to catch its breath. The shortcuts you already know suddenly feel sharper because the response is immediate.
There’s also a sharing angle that doesn’t get talked about enough. When your project lives on a cloud machine, collaborators see the same performance you do. Same previews. Same renders. No more “it runs fine on my computer” conversations.
And this matters if you’re working with AI tools alongside After Effects. Those workflows are getting heavier, not lighter. The gap between what the software can do and what local machines can comfortably handle is only getting wider.
Vagon doesn’t need to be part of every project. But when shortcuts have done all they can, it’s one of the cleanest ways to remove the last major source of friction.
Which brings us back to where this all started.
Speed isn’t about rushing. It’s about staying in flow.
Final Thoughts
Here’s the thing I wish someone had told me earlier.
Keyboard shortcuts don’t magically make you better at After Effects. They make it easier to stay present while you’re working. Less friction. Fewer interruptions. More time actually thinking about motion instead of wrestling the interface.
If you’re early in your After Effects journey, don’t try to memorize everything. Pick a few shortcuts that solve problems you hit every day. Navigation. Layer control. Showing the right properties at the right time. Let those settle in first. The rest will come naturally, almost by accident.
If you’re further along, shortcuts probably aren’t your issue anymore. You already move fast. What slows you down is waiting. Waiting for previews. Waiting for renders. Waiting for your machine to catch up with ideas that are already formed in your head.
That’s where tools like Vagon Cloud Computer start to feel less like an upgrade and more like relief. Not because they replace skill, but because they stop getting in the way of it.
The goal isn’t to work faster for the sake of speed. It’s to protect momentum. When the software responds instantly and your hands know where to go, you stop fighting the process.
And that’s usually when the best work happens.
FAQs
1. Do I really need to learn a lot of shortcuts to be good at After Effects?
No. And anyone telling you otherwise is being dramatic. You need a small set of shortcuts that match how you work. Most experienced users rely on the same core keys every day. The rest are situational. Learn the ones that remove your biggest annoyances first.
2. How long does it take for shortcuts to feel natural?
Usually a week or two of consistent use. The trick is forcing yourself to use them even when clicking feels faster. There’s an awkward phase where your brain hesitates. Push through that. Muscle memory kicks in sooner than you expect.
3. Should I customize my keyboard shortcuts right away?
I wouldn’t. Defaults exist for a reason. Tutorials, team workflows, and shared projects all assume them. Customize later, once you know what actually slows you down. Otherwise you just create friction you didn’t need.
4. Why do shortcuts feel fast on some machines and sluggish on others?
Because shortcuts only control input. If previews lag or the timeline stutters, that’s performance, not skill. Faster hardware or cloud-based machines make shortcuts feel instant instead of delayed, which changes the whole experience.
5. Are keyboard shortcuts still useful if I use AI tools in After Effects?
Honestly, even more so. AI-assisted workflows tend to be heavier. More layers, more effects, more processing. Shortcuts help you move quickly, but you’ll feel performance limits sooner. That’s where pairing good habits with a strong machine really matters.
Ever spent 20 minutes hunting for a panel you know is in After Effects… only to realize it was hiding behind another panel the whole time? I’ve done that more times than I care to admit. And every single time, the same thought pops up: there has to be a faster way.
There is. It’s shortcuts.
Most After Effects users don’t lose time on the “big stuff.” It’s the tiny moments. Clicking instead of tapping a key. Digging through menus. Dragging the playhead when a single key would’ve done the job. Stack enough of those moments together and suddenly a five hour project quietly turns into seven.
Shortcut guides all say the same thing for a reason: consistent keyboard use can save literal hours over the life of a project. Not in a motivational-poster way. In a very real “why am I still here at 2 a.m.” way.
If you’ve ever watched someone else animate in After Effects and thought, “How are they moving that fast?” chances are you weren’t watching talent. You were watching muscle memory.
Let’s talk about that.
Why Shortcuts Matter More Than People Admit
Everyone says shortcuts are about speed. That’s true, but it’s also a bit shallow.
In my experience, shortcuts change how you think inside After Effects. When you stop reaching for menus, your brain stays focused on motion, timing, and rhythm instead of interface management. You’re not breaking your flow every 10 seconds to go hunting. You’re staying in it.
There’s also a quiet confidence that creeps in once a few shortcuts live in your fingers. You stop second-guessing simple actions. You try things faster. You undo faster. You experiment more because the cost of trying something drops way down.
Here’s the part most tutorials don’t say out loud: you don’t need to know all of them. After Effects has a ton of shortcuts. No one actually uses all of them. Pros don’t either. What they do have is a tight loop of maybe 15 to 25 shortcuts they hit constantly. Every project. Every day.
And once those are locked in, the rest of the app feels smaller. Less intimidating. Less sticky.
If shortcuts have ever felt overwhelming to you, that’s normal. The mistake is trying to learn them like vocabulary words. The better move is learning them as tools for problems you already have.
Let’s start with the ones that solve the most annoying problems first.
Navigation Shortcuts That Save You From Losing Your Mind
Before layers. Before keyframes. Before fancy animation tricks. You need to be able to move around without friction. Navigation is where shortcuts start paying rent almost immediately.
If you only learn a handful of shortcuts from this entire post, I’d argue these should be near the top of the list.
Spacebar
This one’s obvious, but a lot of people still click the play button. Don’t. Spacebar to preview. Spacebar to stop. It keeps your eyes on the comp instead of the UI.
Page Up / Page Down
These move the playhead one frame at a time. If you’re adjusting timing, checking alignment, or fine-tuning animation beats, this matters more than dragging the playhead with your mouse. Dragging is imprecise. Keys are honest.
Shift + Page Up / Page Down
Same idea, but jumps 10 frames at a time. Great for scanning motion without scrubbing like a maniac.
Home / End
Instant jump to the start or end of the composition. Once you get used to this, scrolling feels painfully slow.
Shift + /
Fits the composition to your viewer. This is one of those shortcuts people accidentally discover and then wonder how they lived without it. If your comp view is constantly zoomed wrong, this fixes it in one move.
Here’s the pattern you’ll notice with all of these: none of them are flashy. They don’t feel impressive. But they remove tiny bits of friction that add up fast.
If your hand keeps bouncing between mouse and keyboard just to move around, you’re burning energy you could be using to actually animate.
Next up: layers. This is where shortcuts stop being nice-to-have and start feeling mandatory.
Layer Shortcuts You’ll Use On Every Single Project
Layers are where most people waste time without realizing it. Click. Right-click. Menu. Submenu. Repeat. It works, but it’s slow in a way that sneaks up on you.
Once you start using layer shortcuts, something clicks. You stop “managing” layers and start shaping them.
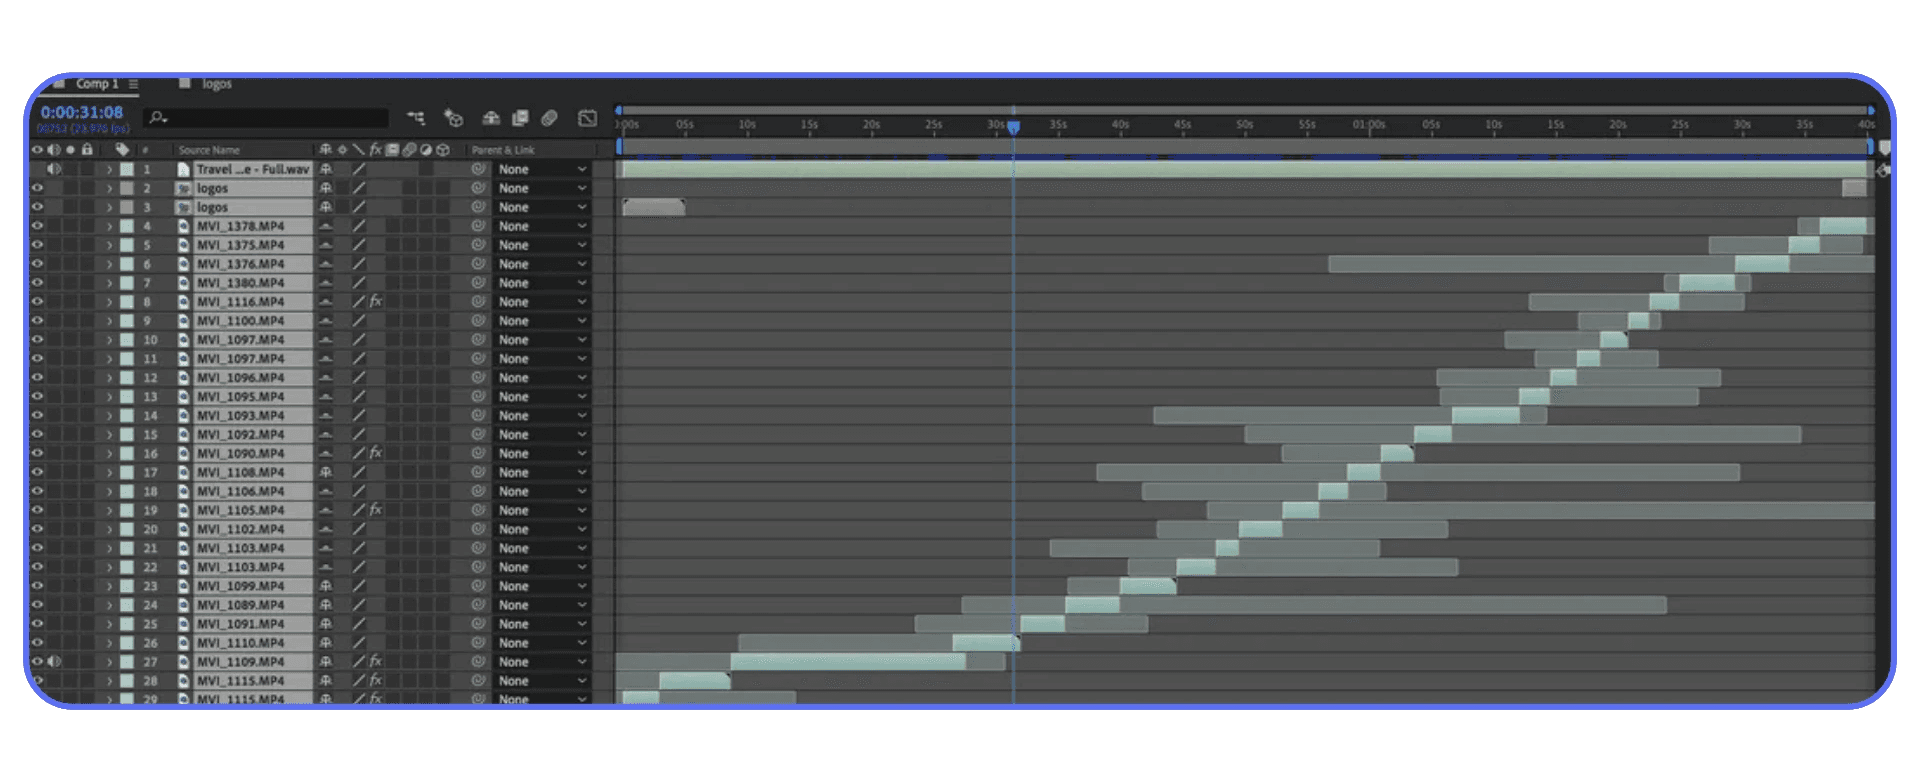
Ctrl / Cmd + D
Duplicate layer. You’ll use this constantly. Variations, offsets, safety copies, quick experiments. If you’re still right-clicking to duplicate, this one change alone will shave minutes off your day.
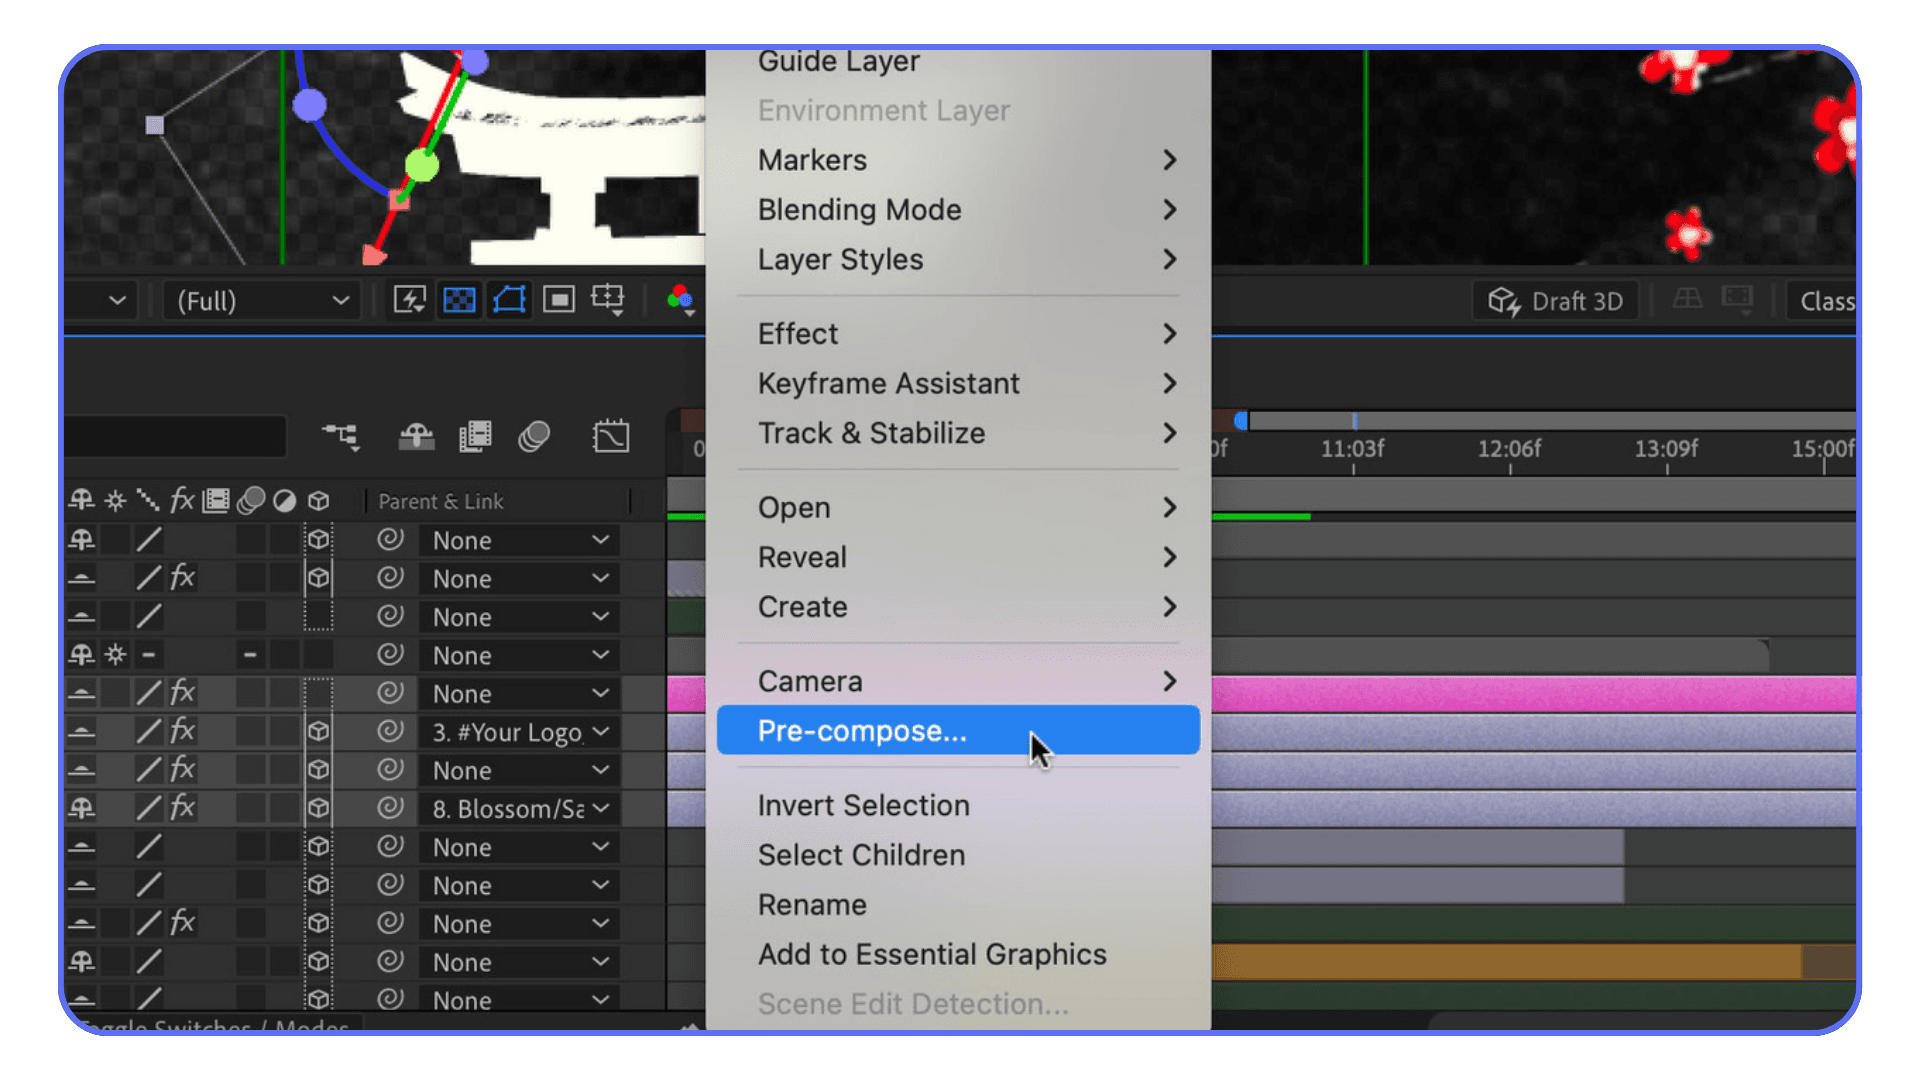
Ctrl / Cmd + Shift + C
Pre-compose. This shortcut feels boring until the day you use it fifty times. Any time a timeline starts getting messy, pre-comps are your cleanup tool. Faster access means you’ll actually use them instead of postponing the mess.
Ctrl / Cmd + Shift + D
Split layer at the playhead. Perfect for timing changes, cutting animations into sections, or killing a layer cleanly without trimming handles manually. Once this is muscle memory, trimming feels prehistoric.
[ and ]
Trim layer in and out points to the playhead. These are sneaky powerful. They encourage you to work in time instead of eyeballing things. Set the playhead. Tap a key. Done.
Ctrl / Cmd + Shift + Y
Solid settings. Not glamorous, but when you need to adjust a solid mid-project, this saves a menu dive.
Here’s something I’ve noticed over the years: people who avoid shortcuts tend to avoid restructuring timelines too. They leave things messy because cleaning up feels like work. Shortcuts flip that. Cleanup becomes cheap. So you do it more often.
And cleaner timelines make everything else easier. Debugging. Revising. Handing projects off to someone else without shame.
Next, we get into the single-key shortcuts that quietly do the most work in After Effects. These are small. They’re fast. And they add up fast.
The Single-Key Shortcuts That Quietly Do The Heavy Lifting
This is where After Effects starts to feel responsive instead of stubborn. Single-key property shortcuts don’t look impressive on a cheat sheet, but they save an absurd amount of clicking over time.
If you only memorize one group of shortcuts, make it this one.
P, S, R, T
Position. Scale. Rotation. Opacity.
Hit the key, the property appears. Hit it again, it hides. No twirling triangles. No scrolling through stacks of stuff you don’t care about right now.
I think this is the moment when After Effects stops feeling bloated for most people. You realize you don’t need to see everything. You just need to see what you’re working on right now.
A
Anchor Point. Easy to forget, constantly useful. Especially if you’re doing character work, text animation, or anything rotational. If you find yourself digging for the Anchor Point property more than twice a day, this key pays for itself instantly.
U
Show only properties with keyframes. This one is huge. It turns a messy timeline into something readable in one tap. If you’ve ever opened a layer and thought, “Why is there so much stuff here,” this is the fix.
UU
Tap U twice quickly. This shows every property you’ve modified, whether it has keyframes or not. Expressions, changed values, anything. When you inherit someone else’s project, this shortcut feels like a flashlight in a dark room.
There’s a mental shift that happens here. Instead of scrolling to find properties, you call them up. It’s subtle, but it keeps you in control of the timeline instead of reacting to it.
And yes, it takes a few days for this to stick. You’ll forget. You’ll click anyway. That’s normal. But once these keys live in your fingers, you’ll notice something funny.
Your mouse starts getting bored.
Next up, keyframes. This is where shortcuts stop being about speed and start being about rhythm.
Keyframe Shortcuts That Make Animation Feel Intentional
Keyframes are where After Effects either feels fun or feels like work. A lot of that comes down to how much friction you tolerate between an idea and the timeline.
Shortcuts don’t make your animation better on their own. But they do make it easier to feel timing. And timing is most of the job.
F9
Easy Ease. Probably the most abused shortcut in After Effects. People slap it on everything and wonder why motion feels mushy. Still, used intentionally, it’s essential. I treat it like salt. Necessary, but not on everything.
If you’re easing everything by default, pause and ask why. Sometimes linear is exactly what you want.
Shift + F9 / Ctrl + Shift + F9 (Cmd on Mac)
Ease In and Ease Out. These give you more control than F9 without opening the Graph Editor. If you’re adjusting motion directionally, these feel more deliberate.
J / K
Jump to previous or next keyframe. Once you use these, scrubbing feels clumsy. They’re perfect for tightening timing, checking arcs, or nudging values without losing your place.
This is one of those shortcuts that changes how you review animation. You stop watching the whole thing over and over and start inspecting specific moments.
Alt / Option + drag keyframe
Duplicate keyframes by dragging. Great for repeating motion patterns or creating offsets without copy-pasting. It’s fast, but more importantly, it keeps your spacing consistent.
Delete
Sounds obvious, but a lot of people still click tiny diamonds. You don’t need that kind of stress in your life.
Here’s a small truth I learned the hard way: the faster you can move between keyframes, the more willing you are to refine them. When navigation is slow, you settle. When it’s fast, you polish.
That’s usually the difference between “good enough” animation and animation that actually feels considered.
Next, a few shortcuts that don’t fit neatly into categories but somehow end up being used constantly anyway.
The Weird Little Shortcuts You End Up Using All The Time
These don’t look important on paper. They don’t belong to one clean category. And yet, once you know them, they sneak into your workflow and refuse to leave.
~ (tilde)
Maximize the panel your cursor is hovering over. Timeline too cramped? Hit it. Comp viewer getting lost in panel chaos? Hit it again. This shortcut alone can make After Effects feel less claustrophobic, especially on smaller screens.
I use this constantly when animating. Full timeline. Full comp. Back and forth. No dragging panels around like it’s 2009.
Ctrl / Cmd + R
Toggle rulers. If you’re aligning text, UI elements, or motion guides, this saves a trip to the View menu. Simple, reliable, out of the way.
Ctrl / Cmd + Shift + H
Show or hide layer controls. Bounding boxes, masks, guides. When things start blocking your view, this clears the noise instantly.
Ctrl / Cmd + Z
Undo. Obviously. But here’s the real tip: trust it. After Effects undo is deeper than people think. If you’re hesitant to experiment because you’re afraid of breaking something, you’re probably underusing undo.
Ctrl / Cmd + Shift + S
Save As. Not glamorous, but essential. Versioning manually still matters, especially when you’re pushing animation ideas that might not work.
These shortcuts don’t make headlines. But they smooth out the rough edges of daily work. They reduce the little annoyances that drain energy over long sessions.
At some point, you realize something. It’s not about knowing more shortcuts. It’s about removing friction wherever it shows up.
Which leads to an uncomfortable truth.
Sometimes, even perfect shortcuts aren’t enough.
When Shortcuts Stop Helping And The Machine Becomes The Problem
There’s a point where you’ve done everything right.
You know the shortcuts. Your timeline is clean. You’re navigating like a pro. And After Effects still feels… heavy. Previews stutter. RAM fills up. Simple tweaks take a second longer than they should.
That’s not you. That’s the machine pushing back.
This usually shows up once projects get real. High-resolution comps. Lots of shape layers. Blur, grain, motion tile, expressions talking to each other. Add a few AI-assisted tools into the mix and suddenly even good hardware starts breathing hard.
I’ve noticed this is where people misdiagnose the problem. They think they’re “bad at After Effects” or not fast enough yet. But the truth is, shortcuts can only optimize input. They can’t fix limited compute.
You feel it most during iteration. That back-and-forth moment where you want to tweak timing, preview, tweak again. When previews lag, you animate less. You settle sooner. Not because the idea is done, but because waiting gets exhausting.
This is also where collaboration gets messy. Sending project files back and forth. Explaining why something renders differently on another machine. Freezing layers just to survive.
Shortcuts still matter here. They always do. But they’re no longer the bottleneck.
The bottleneck is where the work actually runs.
And that’s where cloud machines quietly start making a lot of sense.
Solving After Effects Performance Limits With Vagon Cloud Computer
I want to be clear about something first. Vagon doesn’t replace shortcuts. If anything, it makes them more valuable.
Here’s why.
Once you’ve trained your fingers to work fast, lag becomes way more noticeable. Every dropped frame feels personal. Every slow preview breaks the rhythm you worked to build. That’s the moment when a stronger machine stops being a luxury and starts being a workflow decision.
Vagon Cloud Computer gives you access to high-performance machines that don’t care how heavy your After Effects project gets. Big comps. Dense timelines. AI-assisted tools running in the background. It just keeps up.
What surprised me wasn’t just raw speed. It was consistency. Preview, tweak, preview again. No mental recalibration. No waiting for the machine to catch its breath. The shortcuts you already know suddenly feel sharper because the response is immediate.
There’s also a sharing angle that doesn’t get talked about enough. When your project lives on a cloud machine, collaborators see the same performance you do. Same previews. Same renders. No more “it runs fine on my computer” conversations.
And this matters if you’re working with AI tools alongside After Effects. Those workflows are getting heavier, not lighter. The gap between what the software can do and what local machines can comfortably handle is only getting wider.
Vagon doesn’t need to be part of every project. But when shortcuts have done all they can, it’s one of the cleanest ways to remove the last major source of friction.
Which brings us back to where this all started.
Speed isn’t about rushing. It’s about staying in flow.
Final Thoughts
Here’s the thing I wish someone had told me earlier.
Keyboard shortcuts don’t magically make you better at After Effects. They make it easier to stay present while you’re working. Less friction. Fewer interruptions. More time actually thinking about motion instead of wrestling the interface.
If you’re early in your After Effects journey, don’t try to memorize everything. Pick a few shortcuts that solve problems you hit every day. Navigation. Layer control. Showing the right properties at the right time. Let those settle in first. The rest will come naturally, almost by accident.
If you’re further along, shortcuts probably aren’t your issue anymore. You already move fast. What slows you down is waiting. Waiting for previews. Waiting for renders. Waiting for your machine to catch up with ideas that are already formed in your head.
That’s where tools like Vagon Cloud Computer start to feel less like an upgrade and more like relief. Not because they replace skill, but because they stop getting in the way of it.
The goal isn’t to work faster for the sake of speed. It’s to protect momentum. When the software responds instantly and your hands know where to go, you stop fighting the process.
And that’s usually when the best work happens.
FAQs
1. Do I really need to learn a lot of shortcuts to be good at After Effects?
No. And anyone telling you otherwise is being dramatic. You need a small set of shortcuts that match how you work. Most experienced users rely on the same core keys every day. The rest are situational. Learn the ones that remove your biggest annoyances first.
2. How long does it take for shortcuts to feel natural?
Usually a week or two of consistent use. The trick is forcing yourself to use them even when clicking feels faster. There’s an awkward phase where your brain hesitates. Push through that. Muscle memory kicks in sooner than you expect.
3. Should I customize my keyboard shortcuts right away?
I wouldn’t. Defaults exist for a reason. Tutorials, team workflows, and shared projects all assume them. Customize later, once you know what actually slows you down. Otherwise you just create friction you didn’t need.
4. Why do shortcuts feel fast on some machines and sluggish on others?
Because shortcuts only control input. If previews lag or the timeline stutters, that’s performance, not skill. Faster hardware or cloud-based machines make shortcuts feel instant instead of delayed, which changes the whole experience.
5. Are keyboard shortcuts still useful if I use AI tools in After Effects?
Honestly, even more so. AI-assisted workflows tend to be heavier. More layers, more effects, more processing. Shortcuts help you move quickly, but you’ll feel performance limits sooner. That’s where pairing good habits with a strong machine really matters.
Get Beyond Your Computer Performance
Run applications on your cloud computer with the latest generation hardware. No more crashes or lags.

Trial includes 1 hour usage + 7 days of storage.
Summarize with AI

Ready to focus on your creativity?
Vagon gives you the ability to create & render projects, collaborate, and stream applications with the power of the best hardware.

Vagon Blog


Run heavy applications on any device with
your personal computer on the cloud.
San Francisco, California
Solutions
Vagon Teams
Vagon Streams
Use Cases
Resources
Vagon Blog
How to Run Audacity on a Cloud Ubuntu Desktop (2026 Guide)
How to Run Darktable on a Cloud Ubuntu Desktop for RAW Photo Editing (2026 Guide)
How to Run Kdenlive on a Cloud Ubuntu Desktop (2026 Guide)
How to Run DaVinci Resolve on Linux in the Cloud (2026 Guide)
How to Run Inkscape on a Cloud Ubuntu Desktop (2026 Guide)
How to Run Krita on a Cloud Ubuntu Desktop for Digital Painting (2026 Guide)
How to Run GIMP on a Cloud Ubuntu Desktop (2026 Guide)
How to Run Jupyter on a Cloud GPU Linux Desktop (2026 Guide)
Vagon vs GitHub Codespaces: Cloud Dev Environments Compared (2026)
Vagon Blog
Run heavy applications on any device with
your personal computer on the cloud.
San Francisco, California
Solutions
Vagon Teams
Vagon Streams
Use Cases
Resources
Vagon Blog