Instant Connection for Pixel Streaming
— New Feature Automated Setup

Best Animation Tutorials for Blender 3D
Best Animation Tutorials for Blender 3D
DigitalArt
Best Animation Tutorials for Blender 3D
Table of Contents
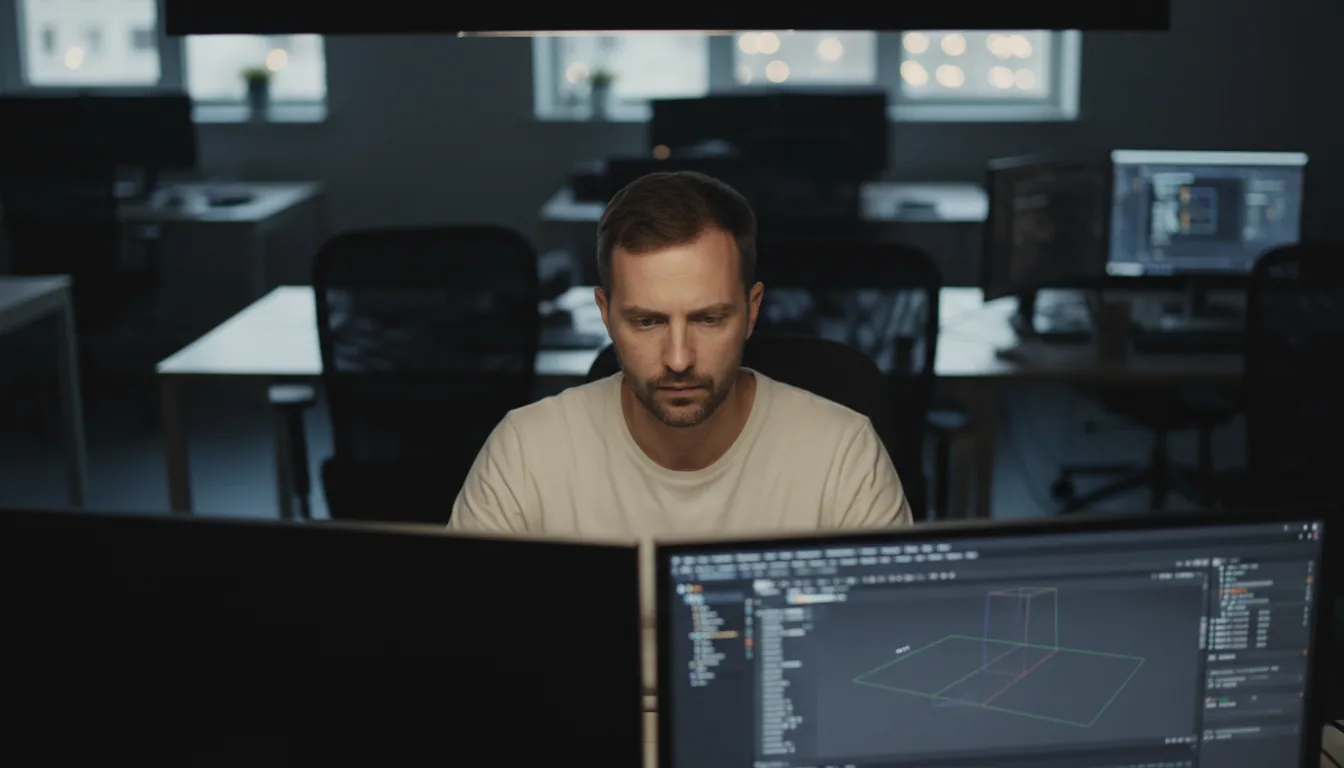
I still remember my first attempt at animating in Blender. A lonely cube. One keyframe. And a bounce that looked like it was defying gravity, in the worst way possible.
Fast forward a few years and things look very different. Blender has leveled up, tutorials have gotten sharper, and animation isn’t just some intimidating skill locked away for “pros.” It’s accessible. Fun. And honestly, kind of addictive once you get past the initial overwhelm.
The trick? Knowing which tutorials actually teach you something, and which ones just make you follow along, click by click, without understanding why.
Why Animation Tutorials Still Matter in 2025
Blender changes fast. Like, “you blink and the interface updates” fast. With the jump to Blender 4.x, we’ve got:
EEVEE Next — faster, more realistic previews without cooking your GPU.
Geometry Nodes as a standard — procedural animation is everywhere now, and if you’re not playing with nodes yet, you’re falling behind.
Action editor upgrades in Blender 4.4 — making animation mixing smoother than ever.
And that’s why tutorials are still your best friend in 2025. They help you cut through the noise and focus on workflows that actually work today, not the stuff that went out of date two versions ago.
But here’s the thing: not all tutorials are created equal. The best ones don’t just show you which buttons to click; they explain why you’re clicking them. That difference? It’s what takes you from blindly copying a YouTube video to building animations you actually understand, and can tweak, troubleshoot, and make your own.
Best Tutorials for Beginners: Start Here
If you’re just getting started with Blender animation, the hardest part isn’t learning the tools.
It’s figuring out which tutorials won’t waste your time.
I’ve been down that rabbit hole, five tabs open, three hours gone, and nothing but a slightly rotated cube to show for it. These are the ones I wish I’d found first.
#1. Robot Animation Tutorial (2025)
This one’s new and ridiculously fun. In just a few hours, you go from a blank scene to a robot zipping across a track. It’s project-based, which means you’re not just learning buttons, you’re building something you can actually show off.
Why it works:
The pacing is perfect. Slow enough for beginners, but never boring.
You get hands-on experience with modeling, rigging, and animation in one go.
It uses the latest Blender 4.4 updates, so nothing feels outdated.
#2. Blender Fundamentals (2025)
If you want something clean, focused, and free of the “Hey guys, smash that like button!” energy, this is it. It covers the essentials in under an hour, and yes, you’ll animate something by the end.
Why it works:
No rambling, no tangents.
Perfect for those of us with zero patience for fluff.
Sets you up to understand more advanced tutorials without scratching your head.
#3. Ryan King Art’s “Animation for Beginners”
Ryan’s series has been around for a bit, but it still holds up in 2025. He has a knack for breaking down concepts like keyframes, interpolation, and motion paths without making you feel dumb.
Why it works:
Great pacing for true beginners.
Lots of real-world examples to help concepts click.
Feels like learning from a friend who actually knows what they’re doing.
#4. The Blender Guru Donut (Still a Classic)
Yes, it’s a meme. Yes, it’s still worth your time. Andrew Price’s Donut tutorial won’t make you an animation pro, but it will teach you the interface, basic modeling, and some simple animation tricks that form the backbone of everything else you’ll do.
Pro tip: Skip straight to the animation sections if you already know your way around the viewport.
Intermediate Tutorials: Level Up Your Skills
Once you’ve got the basics down, moving objects, setting keyframes, and maybe even making a cube dance, it’s time to push a little further. These tutorials will help you step out of “beginner” territory and start building animations that actually look polished.
#1. Geometry Nodes Animation (Louis du Mont, 2025)
If you’ve been ignoring Geometry Nodes, this is your sign to stop. Louis du Mont’s series is a masterclass in using nodes for motion, from looping animations to procedural effects you can tweak endlessly.
Why it’s great:
Focuses on Blender 4.4+ updates, so you’re learning workflows that will stay relevant.
Shows practical use cases instead of abstract node spaghetti.
Perfect for anyone who wants to create animations that feel modern and flexible.
#2. Character Animation Basics (Grant Abbitt)
Grant Abbitt makes intermediate tutorials feel approachable. His character animation lessons are fantastic for learning rigging, walk cycles, and posing without the headache of overly technical jargon.
Why it’s great:
Simple explanations that actually stick.
Helps you understand how animation rigs work so you can troubleshoot your own projects later.
Great foundation for anyone interested in character work.
#3. Scene Animation Workflows (CG Geek)
CG Geek’s tutorials are perfect for stepping up your scene-building game. Think cinematic camera moves, smooth environmental animations, and tips on making your renders look way more professional than you thought possible.
Why it’s great:
Detailed breakdowns of scene composition and lighting.
Great for animators interested in storytelling.
Teaches you to think like a filmmaker, not just an animator.
#4. Stylized Animation with Lightning Boy Studio
If your goal is to make stylized, almost hand-drawn animations in Blender, Lightning Boy Studio’s tutorials are a must. They’re niche, but they’ll open your eyes to what’s possible when you combine Blender’s tools with creative shading techniques.
Why it’s great:
Unique artistic workflows you won’t see elsewhere.
Practical advice for achieving that “animation studio” look.
Perfect for animators looking to stand out with a distinct style.
If you’re leaning toward stylized or hand-drawn vibes, check out this 2D animation guide, it pairs perfectly with the Lightning Boy workflow.
Advanced Tutorials: Master the Details
If you’ve made it this far, you’re probably past basic keyframes and camera pans. At this level, it’s all about refining your skills, learning advanced workflows, and pushing Blender to its limits without crashing your system (too often).
#1. Mixing Animations in Blender 4.4
Blender’s new action editor updates in 4.4 are a game-changer. This tutorial teaches you how to blend multiple animations seamlessly, a must for character animators or anyone working on complex scenes.
Why it’s great:
Explains not just the how, but the why of blending actions.
Perfect for character animation, crowd simulations, or any scenario where you need layers of movement.
Saves hours of manual tweaking with smarter workflows.
#2. Procedural Rigs and Animation Nodes
Once you’re comfortable with Geometry Nodes, it’s time to step into procedural rigging. Tutorials from creators like Erindale and CG Matter show how to build rigs that adapt dynamically, perfect for animations that need flexibility without constant re-rigging.
Why it’s great:
Gives you pro-level control without endless manual keyframes.
Ideal for motion graphics or looping animations.
Future-proof, this procedural approach is only getting bigger.
Once you’re deep into procedural setups, dipping your toes into Python scripting in Blender can unlock a whole new level of animation control. And if you’re experimenting with procedural setups, AI-assisted tools can speed up base modeling before animation, these AI tools for Blender are a solid place to start.
#3. Blender Studio Training

If you’re serious about professional animation, nothing beats learning straight from the source. Blender Studio offers deep-dive training on cinematic pipelines, character animation, and production-ready workflows.
Why it’s great:
Industry-level techniques explained clearly.
Real-world project files to dissect and study.
Perfect for bridging the gap between hobbyist and professional animator.
#4. Advanced Stylized Workflows
For artists aiming for a signature look, newer tutorials from creators like Lightning Boy Studio and SouthernShotty explore advanced NPR (non-photorealistic rendering) techniques, perfect for animations that need that “hand-painted” or “anime-inspired” finish.
Why it’s great:
Combines complex shader techniques with solid animation fundamentals.
Helps your work stand out in a sea of hyper-realistic renders.
Excellent for portfolio pieces or professional reels.
Community-Driven Tips & Wisdom
Spend five minutes on r/blender or BlenderArtists and you’ll see a pattern: the people who actually get good don’t just watch tutorials, they work through them, twice. The first run teaches you the buttons. The second? That’s when you start to understand the workflow. And by the time you remix the project into your own version, you’re not just copying anymore, you’re creating.
The key is to make every tutorial your own. That robot racing tutorial? Swap the robot for a spaceship. Change the track. Try a new camera angle. The moment you stop copying frame for frame, your creativity kicks in. And here’s another thing the community is loud about: find teachers, not just recorders. Tutorials from creators like Ryan King Art, Grant Abbitt, or Louis du Mont stand out because they explain why they’re making each choice, not just what button to click next.
And don’t fear failure. Every animator has a folder full of half-finished projects. Perfection is overrated. You’ll learn more from finishing an imperfect piece than you will from endlessly planning the “perfect” one. Finally, remember that Blender changes fast. With updates in Blender 4.4 and 4.5 shaking up animation nodes, rendering, and the action editor, make sure the tutorials you’re following are current, or you’ll end up fighting outdated workflows.

Pitfalls to Avoid
Animation in Blender can be rewarding, and frustrating. One of the easiest traps to fall into is binge-watching tutorials without ever opening Blender. It feels productive, but it’s not. The real progress happens when you start doing, even if your first attempt looks rough.
Another pitfall? Skipping the basics. Timing, spacing, and understanding the graph editor aren’t optional, they’re the foundation of every good animation. And don’t forget to check how recent a tutorial is. Blender changes fast, and workflows from a couple of years ago often don’t match what you see in Blender 4.4 or 4.5.
Performance is another hidden roadblock. Heavy scenes on a low-end machine can kill your momentum fast. Optimize your files early, or try running Blender on a cloud computer when projects start getting demanding. And maybe the biggest thing: don’t give up too quickly. Every artist has a folder of abandoned projects, but the ones who keep coming back, even after a frustrating day, are the ones who improve the fastest.
Workflow Boosters
Animation eats time. The good news? A few smart tweaks to your workflow can save hours, and keep you sane when your timeline starts looking like spaghetti.
#1. Stay Organized from Frame One
Name. Your. Stuff.
Objects, materials, actions, everything. “Cube.001” and “Action.003” will come back to haunt you when you’re knee-deep in keyframes. Spend an extra five minutes organizing your outliner and you’ll thank yourself later.
Even something as simple as mastering the 3D cursor in Blender can make a big difference when positioning objects or animating efficiently.
#2. Use the Graph Editor
The difference between stiff animation and smooth motion often comes down to one thing: the Graph Editor. Learning how to tweak curves, adjust easing, and fine-tune motion transforms your work instantly.
Think of it as the secret sauce behind every animation that feels “right.”
#3. Learn Shortcuts Like Your Life Depends On It
By the time you’re animating in Blender 4.5, the time saved from knowing shortcuts will stack up. Some to master early:
G, R, S for grab, rotate, scale.
Shift+D for duplicating.
I for inserting keyframes.
Ctrl+Tab for quick mode switching.
Speed equals flow, and flow equals better animation. If you’re ready to level up your speed, check out this Blender shortcut cheat sheet, it’s a huge time-saver once animation gets complex.
#4. Keep Your Viewport Light
Use simplified shaders, low-quality previews, or proxy objects while animating. Save the fancy materials and high-res textures for renders. Smooth playback means faster iteration and fewer mistakes.
#5. Cloud Power for Heavy Projects
Here’s where Vagon Cloud Computer earns its mention. If your laptop wheezes when you scrub the timeline, spinning up a cloud machine with a GPU tier that matches your scene’s needs keeps your workflow fluid. No more waiting 30 seconds for every preview, just animate and keep your momentum.
If you’re working on the go, don’t sleep on the iPad setups, it’s surprisingly smooth to run Blender on an iPad when paired with a cloud computer.
Final Thoughts
Blender animation isn’t about finding the perfect tutorial. It’s about finding one that makes you want to open Blender and actually create something.
Start small. Maybe it’s a bouncing ball. Maybe it’s that robot racing scene that everyone’s trying right now. The point is to start, and keep going.
You’ll mess up. You’ll curse at your timeline. You’ll wonder why your render came out looking like a melted plastic toy. That’s part of the process. And every failed attempt is one step closer to the animations you’ve been picturing in your head.
When you’re ready to push your projects further, heavier simulations, longer timelines, higher-poly characters, that’s when it makes sense to lean on tools like Vagon Cloud Computer. It keeps your workflow smooth without draining your local machine.
So, pick a tutorial today. Hit play. And by the time you’re done, you’ll be one step closer to making Blender animation your own.
And when you're ready to explore more creative workflows, these Blender tips and tricks might help push your next animation even further.
FAQs
1. I’m brand new to Blender. Which tutorial should I start with?
Start with something simple and fun, like the Robot Animation Tutorial (2025) or Ryan King Art’s beginner series. They’re easy to follow, up-to-date with Blender 4.4/4.5, and you’ll end up with a finished project you can actually show off.
2. How long does it take to get good at Blender animation?
It depends on how much time you put in. If you practice a few hours a week, you’ll start feeling confident in 3–6 months. Daily practice will speed that up, but the real secret is finishing projects instead of just watching tutorials.
3. Do I really need to learn the fundamentals?
Yes. Timing, spacing, and the graph editor are what separate stiff animations from smooth, professional ones. Even advanced animators go back to the basics when polishing their work.
4. How do I know if a tutorial is outdated?
Check the upload date and scan the comments. If the video is older than a year, make sure it’s compatible with Blender 4.4 or 4.5. Features like the updated Action Editor and Geometry Nodes have changed workflows a lot.
5. My computer is struggling with heavy animations. What can I do?
First, simplify your scene, lower preview quality, hide unnecessary objects, and use proxy meshes. If that’s not enough, try running Blender on a cloud computer like Vagon. It’ll give you the GPU power you need without the noise and lag.
6. What’s the fastest way to improve my animation skills?
Practice with purpose. Pick a tutorial, follow it carefully, then redo it from memory. After that, make it your own, change the objects, tweak the scene, try new camera moves. That’s where real progress happens.
7. Can I use Geometry Nodes for animation as a beginner?
Absolutely. Geometry Nodes can seem intimidating at first, but tutorials like Louis du Mont’s 2025 series break it down in a way that’s beginner-friendly. Start small, even basic node setups will make your animations look more dynamic.
I still remember my first attempt at animating in Blender. A lonely cube. One keyframe. And a bounce that looked like it was defying gravity, in the worst way possible.
Fast forward a few years and things look very different. Blender has leveled up, tutorials have gotten sharper, and animation isn’t just some intimidating skill locked away for “pros.” It’s accessible. Fun. And honestly, kind of addictive once you get past the initial overwhelm.
The trick? Knowing which tutorials actually teach you something, and which ones just make you follow along, click by click, without understanding why.
Why Animation Tutorials Still Matter in 2025
Blender changes fast. Like, “you blink and the interface updates” fast. With the jump to Blender 4.x, we’ve got:
EEVEE Next — faster, more realistic previews without cooking your GPU.
Geometry Nodes as a standard — procedural animation is everywhere now, and if you’re not playing with nodes yet, you’re falling behind.
Action editor upgrades in Blender 4.4 — making animation mixing smoother than ever.
And that’s why tutorials are still your best friend in 2025. They help you cut through the noise and focus on workflows that actually work today, not the stuff that went out of date two versions ago.
But here’s the thing: not all tutorials are created equal. The best ones don’t just show you which buttons to click; they explain why you’re clicking them. That difference? It’s what takes you from blindly copying a YouTube video to building animations you actually understand, and can tweak, troubleshoot, and make your own.
Best Tutorials for Beginners: Start Here
If you’re just getting started with Blender animation, the hardest part isn’t learning the tools.
It’s figuring out which tutorials won’t waste your time.
I’ve been down that rabbit hole, five tabs open, three hours gone, and nothing but a slightly rotated cube to show for it. These are the ones I wish I’d found first.
#1. Robot Animation Tutorial (2025)
This one’s new and ridiculously fun. In just a few hours, you go from a blank scene to a robot zipping across a track. It’s project-based, which means you’re not just learning buttons, you’re building something you can actually show off.
Why it works:
The pacing is perfect. Slow enough for beginners, but never boring.
You get hands-on experience with modeling, rigging, and animation in one go.
It uses the latest Blender 4.4 updates, so nothing feels outdated.
#2. Blender Fundamentals (2025)
If you want something clean, focused, and free of the “Hey guys, smash that like button!” energy, this is it. It covers the essentials in under an hour, and yes, you’ll animate something by the end.
Why it works:
No rambling, no tangents.
Perfect for those of us with zero patience for fluff.
Sets you up to understand more advanced tutorials without scratching your head.
#3. Ryan King Art’s “Animation for Beginners”
Ryan’s series has been around for a bit, but it still holds up in 2025. He has a knack for breaking down concepts like keyframes, interpolation, and motion paths without making you feel dumb.
Why it works:
Great pacing for true beginners.
Lots of real-world examples to help concepts click.
Feels like learning from a friend who actually knows what they’re doing.
#4. The Blender Guru Donut (Still a Classic)
Yes, it’s a meme. Yes, it’s still worth your time. Andrew Price’s Donut tutorial won’t make you an animation pro, but it will teach you the interface, basic modeling, and some simple animation tricks that form the backbone of everything else you’ll do.
Pro tip: Skip straight to the animation sections if you already know your way around the viewport.
Intermediate Tutorials: Level Up Your Skills
Once you’ve got the basics down, moving objects, setting keyframes, and maybe even making a cube dance, it’s time to push a little further. These tutorials will help you step out of “beginner” territory and start building animations that actually look polished.
#1. Geometry Nodes Animation (Louis du Mont, 2025)
If you’ve been ignoring Geometry Nodes, this is your sign to stop. Louis du Mont’s series is a masterclass in using nodes for motion, from looping animations to procedural effects you can tweak endlessly.
Why it’s great:
Focuses on Blender 4.4+ updates, so you’re learning workflows that will stay relevant.
Shows practical use cases instead of abstract node spaghetti.
Perfect for anyone who wants to create animations that feel modern and flexible.
#2. Character Animation Basics (Grant Abbitt)
Grant Abbitt makes intermediate tutorials feel approachable. His character animation lessons are fantastic for learning rigging, walk cycles, and posing without the headache of overly technical jargon.
Why it’s great:
Simple explanations that actually stick.
Helps you understand how animation rigs work so you can troubleshoot your own projects later.
Great foundation for anyone interested in character work.
#3. Scene Animation Workflows (CG Geek)
CG Geek’s tutorials are perfect for stepping up your scene-building game. Think cinematic camera moves, smooth environmental animations, and tips on making your renders look way more professional than you thought possible.
Why it’s great:
Detailed breakdowns of scene composition and lighting.
Great for animators interested in storytelling.
Teaches you to think like a filmmaker, not just an animator.
#4. Stylized Animation with Lightning Boy Studio
If your goal is to make stylized, almost hand-drawn animations in Blender, Lightning Boy Studio’s tutorials are a must. They’re niche, but they’ll open your eyes to what’s possible when you combine Blender’s tools with creative shading techniques.
Why it’s great:
Unique artistic workflows you won’t see elsewhere.
Practical advice for achieving that “animation studio” look.
Perfect for animators looking to stand out with a distinct style.
If you’re leaning toward stylized or hand-drawn vibes, check out this 2D animation guide, it pairs perfectly with the Lightning Boy workflow.
Advanced Tutorials: Master the Details
If you’ve made it this far, you’re probably past basic keyframes and camera pans. At this level, it’s all about refining your skills, learning advanced workflows, and pushing Blender to its limits without crashing your system (too often).
#1. Mixing Animations in Blender 4.4
Blender’s new action editor updates in 4.4 are a game-changer. This tutorial teaches you how to blend multiple animations seamlessly, a must for character animators or anyone working on complex scenes.
Why it’s great:
Explains not just the how, but the why of blending actions.
Perfect for character animation, crowd simulations, or any scenario where you need layers of movement.
Saves hours of manual tweaking with smarter workflows.
#2. Procedural Rigs and Animation Nodes
Once you’re comfortable with Geometry Nodes, it’s time to step into procedural rigging. Tutorials from creators like Erindale and CG Matter show how to build rigs that adapt dynamically, perfect for animations that need flexibility without constant re-rigging.
Why it’s great:
Gives you pro-level control without endless manual keyframes.
Ideal for motion graphics or looping animations.
Future-proof, this procedural approach is only getting bigger.
Once you’re deep into procedural setups, dipping your toes into Python scripting in Blender can unlock a whole new level of animation control. And if you’re experimenting with procedural setups, AI-assisted tools can speed up base modeling before animation, these AI tools for Blender are a solid place to start.
#3. Blender Studio Training
If you’re serious about professional animation, nothing beats learning straight from the source. Blender Studio offers deep-dive training on cinematic pipelines, character animation, and production-ready workflows.
Why it’s great:
Industry-level techniques explained clearly.
Real-world project files to dissect and study.
Perfect for bridging the gap between hobbyist and professional animator.
#4. Advanced Stylized Workflows
For artists aiming for a signature look, newer tutorials from creators like Lightning Boy Studio and SouthernShotty explore advanced NPR (non-photorealistic rendering) techniques, perfect for animations that need that “hand-painted” or “anime-inspired” finish.
Why it’s great:
Combines complex shader techniques with solid animation fundamentals.
Helps your work stand out in a sea of hyper-realistic renders.
Excellent for portfolio pieces or professional reels.
Community-Driven Tips & Wisdom
Spend five minutes on r/blender or BlenderArtists and you’ll see a pattern: the people who actually get good don’t just watch tutorials, they work through them, twice. The first run teaches you the buttons. The second? That’s when you start to understand the workflow. And by the time you remix the project into your own version, you’re not just copying anymore, you’re creating.
The key is to make every tutorial your own. That robot racing tutorial? Swap the robot for a spaceship. Change the track. Try a new camera angle. The moment you stop copying frame for frame, your creativity kicks in. And here’s another thing the community is loud about: find teachers, not just recorders. Tutorials from creators like Ryan King Art, Grant Abbitt, or Louis du Mont stand out because they explain why they’re making each choice, not just what button to click next.
And don’t fear failure. Every animator has a folder full of half-finished projects. Perfection is overrated. You’ll learn more from finishing an imperfect piece than you will from endlessly planning the “perfect” one. Finally, remember that Blender changes fast. With updates in Blender 4.4 and 4.5 shaking up animation nodes, rendering, and the action editor, make sure the tutorials you’re following are current, or you’ll end up fighting outdated workflows.
Pitfalls to Avoid
Animation in Blender can be rewarding, and frustrating. One of the easiest traps to fall into is binge-watching tutorials without ever opening Blender. It feels productive, but it’s not. The real progress happens when you start doing, even if your first attempt looks rough.
Another pitfall? Skipping the basics. Timing, spacing, and understanding the graph editor aren’t optional, they’re the foundation of every good animation. And don’t forget to check how recent a tutorial is. Blender changes fast, and workflows from a couple of years ago often don’t match what you see in Blender 4.4 or 4.5.
Performance is another hidden roadblock. Heavy scenes on a low-end machine can kill your momentum fast. Optimize your files early, or try running Blender on a cloud computer when projects start getting demanding. And maybe the biggest thing: don’t give up too quickly. Every artist has a folder of abandoned projects, but the ones who keep coming back, even after a frustrating day, are the ones who improve the fastest.
Workflow Boosters
Animation eats time. The good news? A few smart tweaks to your workflow can save hours, and keep you sane when your timeline starts looking like spaghetti.
#1. Stay Organized from Frame One
Name. Your. Stuff.
Objects, materials, actions, everything. “Cube.001” and “Action.003” will come back to haunt you when you’re knee-deep in keyframes. Spend an extra five minutes organizing your outliner and you’ll thank yourself later.
Even something as simple as mastering the 3D cursor in Blender can make a big difference when positioning objects or animating efficiently.
#2. Use the Graph Editor
The difference between stiff animation and smooth motion often comes down to one thing: the Graph Editor. Learning how to tweak curves, adjust easing, and fine-tune motion transforms your work instantly.
Think of it as the secret sauce behind every animation that feels “right.”
#3. Learn Shortcuts Like Your Life Depends On It
By the time you’re animating in Blender 4.5, the time saved from knowing shortcuts will stack up. Some to master early:
G, R, S for grab, rotate, scale.
Shift+D for duplicating.
I for inserting keyframes.
Ctrl+Tab for quick mode switching.
Speed equals flow, and flow equals better animation. If you’re ready to level up your speed, check out this Blender shortcut cheat sheet, it’s a huge time-saver once animation gets complex.
#4. Keep Your Viewport Light
Use simplified shaders, low-quality previews, or proxy objects while animating. Save the fancy materials and high-res textures for renders. Smooth playback means faster iteration and fewer mistakes.
#5. Cloud Power for Heavy Projects
Here’s where Vagon Cloud Computer earns its mention. If your laptop wheezes when you scrub the timeline, spinning up a cloud machine with a GPU tier that matches your scene’s needs keeps your workflow fluid. No more waiting 30 seconds for every preview, just animate and keep your momentum.
If you’re working on the go, don’t sleep on the iPad setups, it’s surprisingly smooth to run Blender on an iPad when paired with a cloud computer.
Final Thoughts
Blender animation isn’t about finding the perfect tutorial. It’s about finding one that makes you want to open Blender and actually create something.
Start small. Maybe it’s a bouncing ball. Maybe it’s that robot racing scene that everyone’s trying right now. The point is to start, and keep going.
You’ll mess up. You’ll curse at your timeline. You’ll wonder why your render came out looking like a melted plastic toy. That’s part of the process. And every failed attempt is one step closer to the animations you’ve been picturing in your head.
When you’re ready to push your projects further, heavier simulations, longer timelines, higher-poly characters, that’s when it makes sense to lean on tools like Vagon Cloud Computer. It keeps your workflow smooth without draining your local machine.
So, pick a tutorial today. Hit play. And by the time you’re done, you’ll be one step closer to making Blender animation your own.
And when you're ready to explore more creative workflows, these Blender tips and tricks might help push your next animation even further.
FAQs
1. I’m brand new to Blender. Which tutorial should I start with?
Start with something simple and fun, like the Robot Animation Tutorial (2025) or Ryan King Art’s beginner series. They’re easy to follow, up-to-date with Blender 4.4/4.5, and you’ll end up with a finished project you can actually show off.
2. How long does it take to get good at Blender animation?
It depends on how much time you put in. If you practice a few hours a week, you’ll start feeling confident in 3–6 months. Daily practice will speed that up, but the real secret is finishing projects instead of just watching tutorials.
3. Do I really need to learn the fundamentals?
Yes. Timing, spacing, and the graph editor are what separate stiff animations from smooth, professional ones. Even advanced animators go back to the basics when polishing their work.
4. How do I know if a tutorial is outdated?
Check the upload date and scan the comments. If the video is older than a year, make sure it’s compatible with Blender 4.4 or 4.5. Features like the updated Action Editor and Geometry Nodes have changed workflows a lot.
5. My computer is struggling with heavy animations. What can I do?
First, simplify your scene, lower preview quality, hide unnecessary objects, and use proxy meshes. If that’s not enough, try running Blender on a cloud computer like Vagon. It’ll give you the GPU power you need without the noise and lag.
6. What’s the fastest way to improve my animation skills?
Practice with purpose. Pick a tutorial, follow it carefully, then redo it from memory. After that, make it your own, change the objects, tweak the scene, try new camera moves. That’s where real progress happens.
7. Can I use Geometry Nodes for animation as a beginner?
Absolutely. Geometry Nodes can seem intimidating at first, but tutorials like Louis du Mont’s 2025 series break it down in a way that’s beginner-friendly. Start small, even basic node setups will make your animations look more dynamic.
Get Beyond Your Computer Performance
Run applications on your cloud computer with the latest generation hardware. No more crashes or lags.

Trial includes 1 hour usage + 7 days of storage.
Summarize with AI

Ready to focus on your creativity?
Vagon gives you the ability to create & render projects, collaborate, and stream applications with the power of the best hardware.

Vagon Blog


Run heavy applications on any device with
your personal computer on the cloud.
San Francisco, California
Solutions
Vagon Teams
Vagon Streams
Use Cases
Resources
Vagon Blog
How to Run Audacity on a Cloud Ubuntu Desktop (2026 Guide)
How to Run Darktable on a Cloud Ubuntu Desktop for RAW Photo Editing (2026 Guide)
How to Run Kdenlive on a Cloud Ubuntu Desktop (2026 Guide)
How to Run DaVinci Resolve on Linux in the Cloud (2026 Guide)
How to Run Inkscape on a Cloud Ubuntu Desktop (2026 Guide)
How to Run Krita on a Cloud Ubuntu Desktop for Digital Painting (2026 Guide)
How to Run GIMP on a Cloud Ubuntu Desktop (2026 Guide)
How to Run Jupyter on a Cloud GPU Linux Desktop (2026 Guide)
Vagon vs GitHub Codespaces: Cloud Dev Environments Compared (2026)
Vagon Blog
Run heavy applications on any device with
your personal computer on the cloud.
San Francisco, California
Solutions
Vagon Teams
Vagon Streams
Use Cases
Resources
Vagon Blog