Instant Connection for Pixel Streaming
— New Feature Automated Setup

DaVinci Resolve Tutorials to Master Every Editing Technique
DaVinci Resolve Tutorials to Master Every Editing Technique
VideoProduction
DaVinci Resolve Tutorials to Master Every Editing Technique
Table of Contents
DaVinci Resolve Tutorials to Master Every Editing Technique
DaVinci Resolve was termed “Hollywood’s #1 Post Solution,” as it is the tool of choice for superior color grading. As a leading video editing software, it combines advanced color grading with visual effects and audio post-production for crisp video editing projects. It is useful for beginners crafting simple edits and experts working on high-budget film projects. Learn how to use DaVinci Resolve as you read along.
Importance of Learning Through Tutorials
DaVinci comes with many video editing features. To enjoy these features, it is important to take some tutorials to maximize their full potential. Tutorials offer step-by-step guidance to master the numerous capabilities of DaVinci Resolve. So, whether you need DaVinci for basic video splits or advanced color grading, tutorials help you complete your projects with the best practices.
Getting Started: Tutorials for Beginners
We will start with the basics for beginners who do not know their way around the software. If you are getting on DaVinci Resolve for the first time, it may seem strange and overwhelming. It has many features that require a tutorial to understand. Essential Tutorials for Beginners include navigating the workspace, importing, and organizing media. As you master the basics, you will find it easy to move on to exploring advanced features.
How To Create New Project?
Jason Roberts Video’s tutorial, "How to Create a Project in DaVinci Resolve," is perfect for beginners and editors looking to refine their workflow. In this step-by-step video, Jason explains how to set up a new project, navigate the interface, and configure settings with ease. He also shares valuable resources, like his book The 52 Laws of Video and a free tips newsletter, to help you take your editing skills further. Whether you're new to DaVinci Resolve or need a refresher, this tutorial is a must-watch!
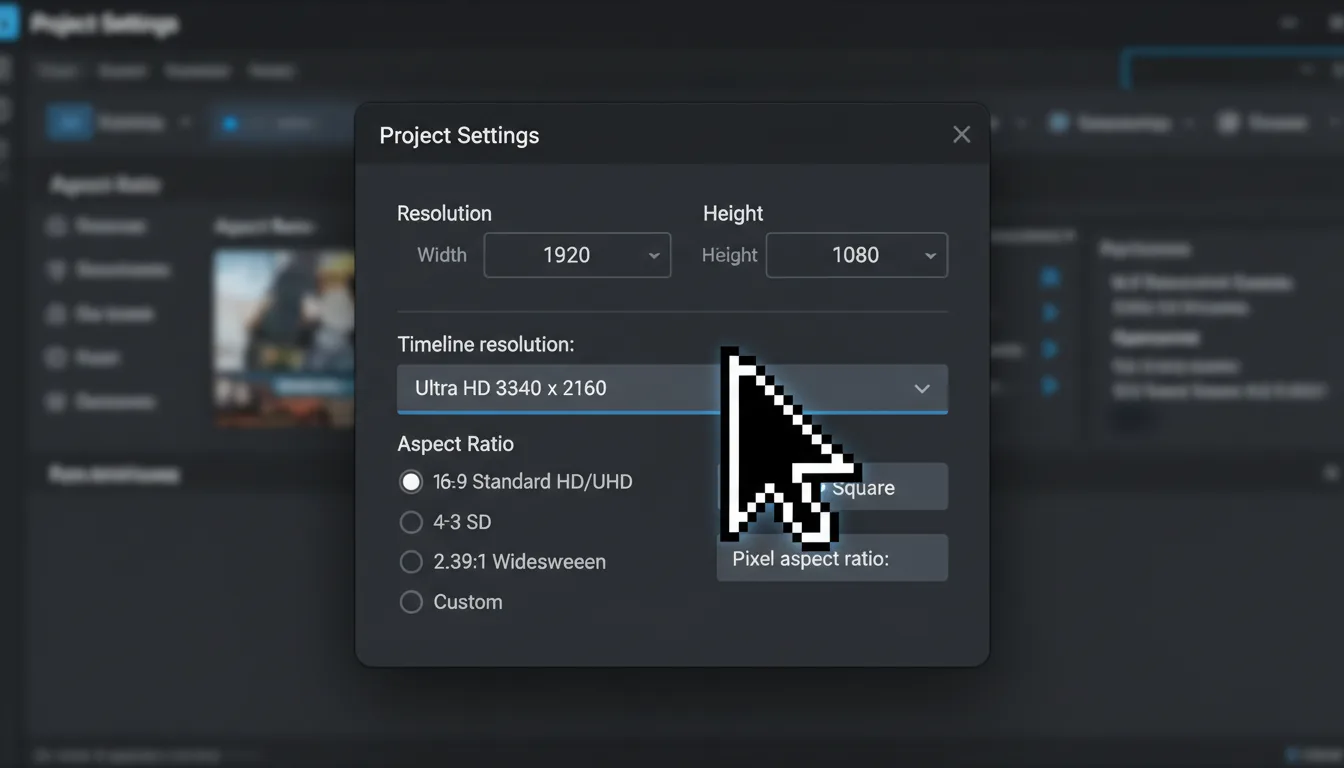
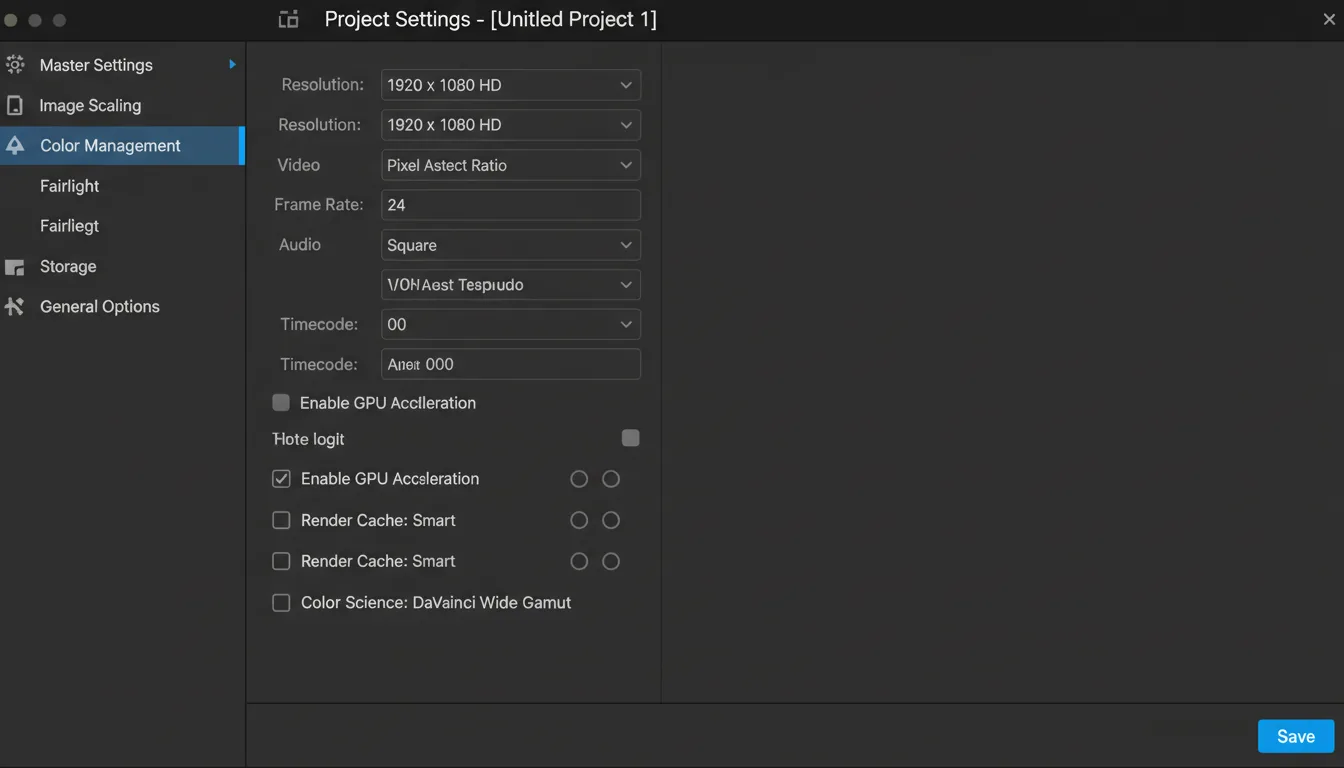
After creating a new project, the next step is to import videos. You should ensure that the Timeline frame rate resolution matches the video files that you will import. Go to File, click Project Settings, and adjust the settings.
How to Import Media Files?
You can import media when you move on to the media page. The media page comprises a media storage icon on the top left side, leading to your files. You can select your files and move to the next step. DaVinci Resolve supports several video and audio formats, which makes importing media to your project simple.
Next, drag and drop your selected media into the media pool. The Media pool displays important media and it is located at the central bottom.
Then, preview your selected media on the source viewer before importing.
How to Cut Videos
Trimming and cutting occur on the cut page. The Cut page has straightforward tools that help you split your videos. Some of these tools include;
Trim Edit: You can trim a video by adjusting the start or the end.
Split Tool: Helps to cut a video precisely
Ripple Delete: Delete a cut clip from the timeline and shift the remaining clips to close the gap.
Transition and Title Tools: The cut page also has tools for transitioning from one clip to another.
After cutting and editing, move on to the deliver page. Use preset export options (YouTube, Vimeo, etc.), or select a custom size and export your video. Your videos can now move to your high or low end device.
Leveling Up: Intermediate Editing Tutorials
Beginners can practice the essential tutorials for a few days before moving on to intermediate edits. Once you’re comfortable with the basics, you can use advanced tools like multicam editing, masking, and tracking. These tutorials sharpen your editing skills, adding a professional polish to your projects.
Masking and Tracking
Masking in DaVinci Resolve allows you to isolate a portion of your video using your preferred shape. Editors use mask tools to replace a background or for extra effects. On the other hand, the tracking tool follows a moving object in your video, ensuring that masks stay aligned with it.
The video Track ANY MASK in DaVinci Resolve - Pro Techniques for Color & Fusion is a great starting point and provides an excellent guide to getting better at masking.
After creating your mask, you can track your masks via the Tracker Panel on the Color Page. Choose to either follow the mask forward or backward. Note, that keyframes allow you to fine-tune the mask’s position manually.
Advanced Techniques: Tutorials for Pros
Professionals have mastered the basics and intermediate training, they utilize all of DaVinci’s tools seamlessly. DaVinci Resolve offers tools and plugins ranging from color grading to collaborative editing for video editors and audio engineers alike. Let’s take a look at how to achieve a cinematic film.
How to Achieve a Cinematic Look
To add a cinematic feel to your videos, start by applying a Color Space Transform effect to your clip. This allows you to utilize a Film Print Emulation LUT (Look-Up Table), which mimics the aesthetic qualities of traditional film stock. Once applied, create a new color grading node, navigate to the LUTs tab in your editing software, and explore the available cinematic film looks. Select and apply your preferred LUT to this node, which will instantly give your footage the rich, film-like colors associated with cinematic visuals.
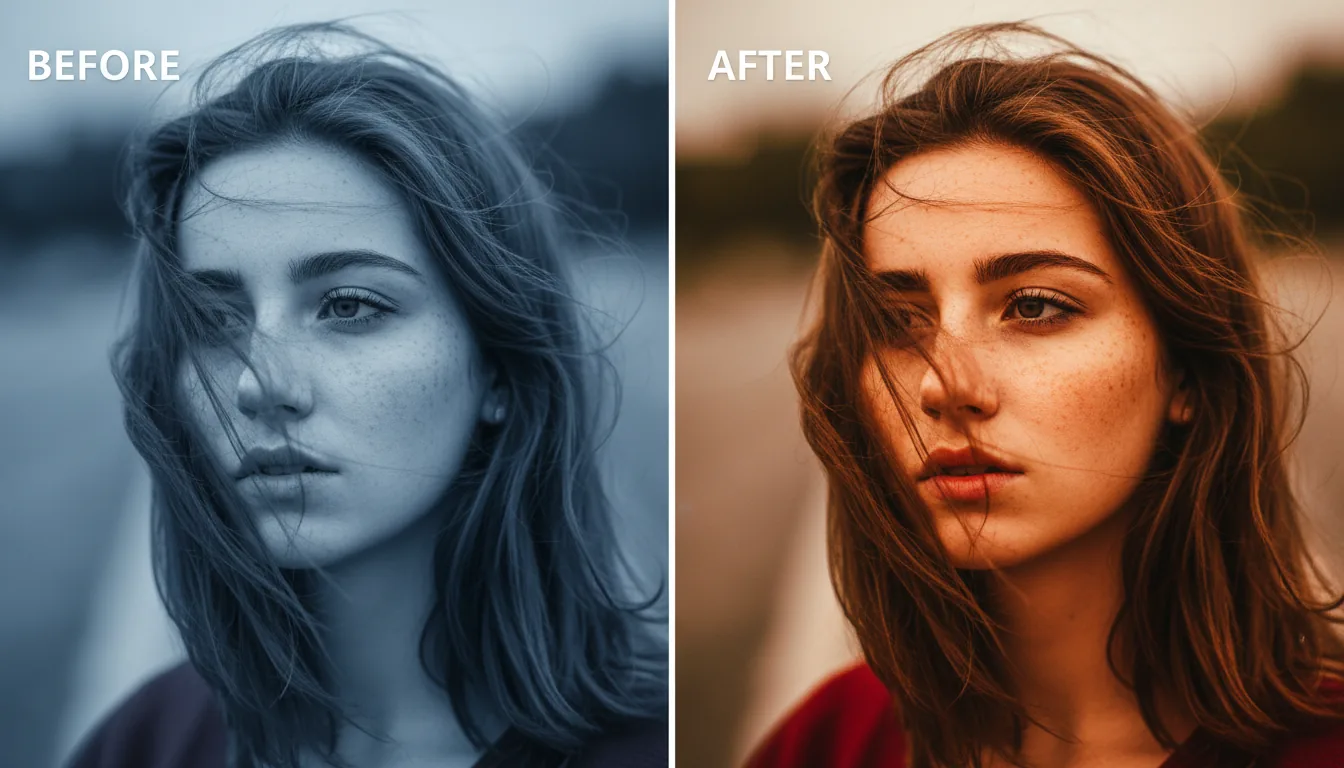
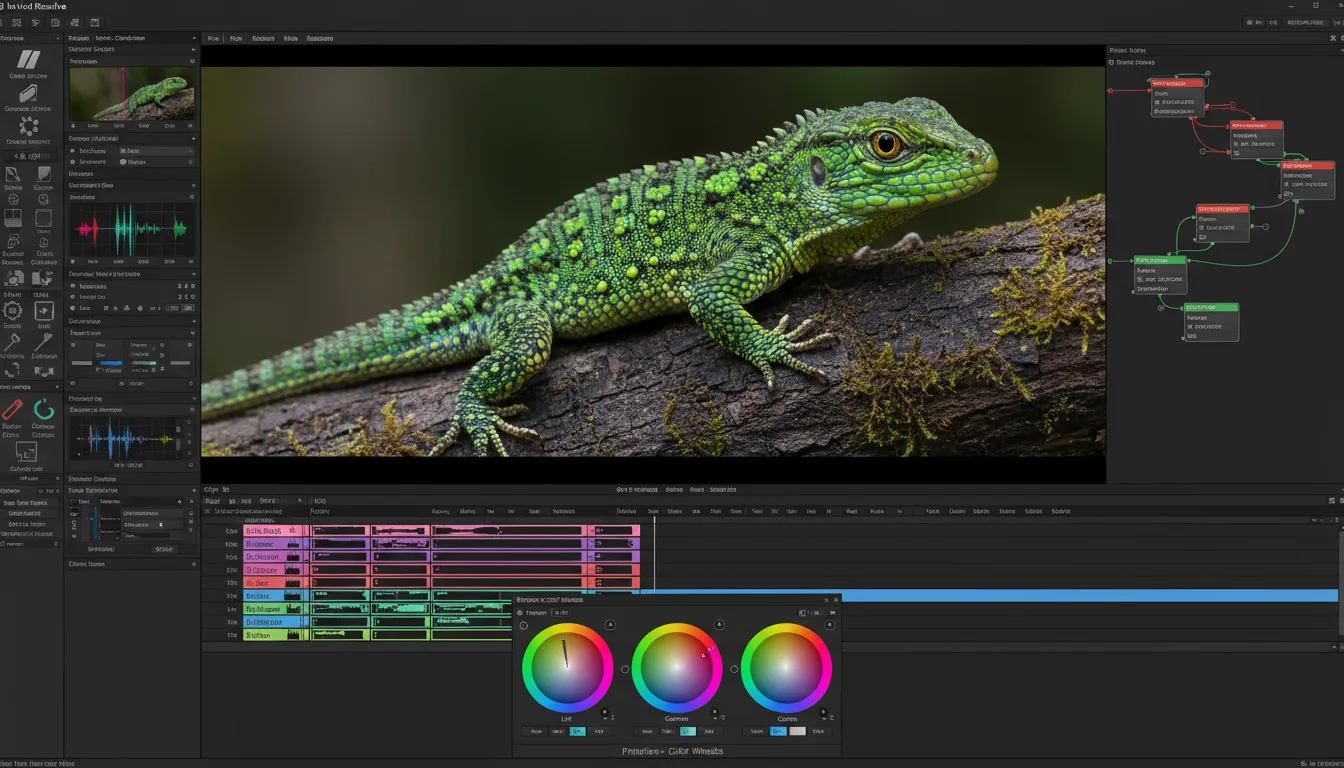
After applying the LUT, shift your focus to balancing the colors in your footage. Go back to the first node and begin adjusting the Offset Wheel, which controls the overall tone and color balance of your image. This step ensures that the colors harmonize well with the applied LUT and maintain the desired cinematic look. Fine-tuning the offset wheel helps achieve a polished, professional finish, bringing your video closer to a true filmic appearance.
You can adjust colors, sharpness, saturation, and contrast to mimic the characteristics of your chosen film stock. These pro edits on DaVinci Resolve are similar and easy to use like on other software like Premiere Pro.
Use Case-Specific Tutorials
You can learn the top Davinci resolve courses and classes. However, you can follow custom tutorials for similar projects, as different projects have unique requirements. For example, you can learn specific tutorials for social media edits, movie-like trailers, or documentaries.
Social Media projects for example require short videos with a strong hook within the first 5 seconds. They require friendly captions in the aspect ratio and a square or vertical (9:16) aspect ratio for better engagement on Instagram and TikTok.
An important part of the documentary is the ambient sound that adds a natural feel. Audio engineers should use this, together with a slow-paced video to keep viewers engaged.
On the contrary, music trailers need to be faster, with high-energy music. The cuts and edits should be just enough to spark the viewer's interest.
Here is a few tutorials that can help you get a better understanding of DaVinci Resolve and help you use it more effectively:
#1: How To Cut Video?
This video, How to Cut Videos in DaVinci Resolve 17 – Basic Video Editing Tips, walks you through essential tools like the Razor, Split Tool, and Transition & Title features. Whether you're new to editing or looking to refine your skills, this tutorial is perfect for mastering the foundation of professional video editing.
#2 How To Import Media?
In How to Import Media – DaVinci Resolve 17 Tutorial, you'll learn the step-by-step process for importing video files and explore the supported formats to ensure compatibility. Perfect for beginners and pros alike, this guide simplifies the first steps of your editing journey.
#3 How To Get A Cinematic Look In Davinci Resolve?
This video, How to Add Text in DaVinci Resolve 17, demonstrates how to create and customize text for your projects. Learn step-by-step how to add titles, adjust fonts, and apply effects, making your videos more engaging and professional. Perfect for enhancing your storytelling!
#4 DaVinci Resolve Beginners Tutorial
The tutorial How to Export Video in DaVinci Resolve 17 offers a detailed guide on rendering videos in various formats, ensuring high-quality results suitable for any platform. It provides valuable insights for both beginners and experienced editors aiming to streamline their export workflow and achieve professional-quality output.
#5 Introduction to DaVinci Resolve - [Full Course] for Beginners
In this tutorial, you'll learn how to harness its full potential with step-by-step guidance tailored for both beginners and experienced users. From mastering the basics to exploring advanced features, this guide is designed to help you create professional-grade videos efficiently and effectivel
#6 How to Edit A YouTube Video in DaVinci Resolve! (Start to Finish)
From applying Film Print Emulation LUTs to fine-tuning colors for a polished look, this guide walks you through the essential steps to achieve stunning, film-like visuals. Perfect for creators looking to elevate their video projects with professional-grade color grading techniques!
Tips for Getting the Most Out of Tutorials
These tutorials, along with others you will find on DaVinci Resolve will help your editing journey as a beginner or an expert. To get the most out of these tutorials,
Spend some time practicing the steps in real-time.
Practice new techniques with simple videos before moving on to larger projects.
Implement what you learn in different video formats
Review your sample projects, and compare them to the tutorial guide.
Participate in online forums related to DaVinci Resolve like the Blackmagic forum and others on Reddit.
Editors share their work and seek feedback from other editors on forums. These help to master the tools and improve your creativity.
Vagon Cloud Computer: A Solution for Complex Projects
When your local machine starts giving up on you, Vagon Cloud Computer steps in as the superhero you didn’t know you needed.
What is Vagon Cloud Computer?
It’s a cloud-based computing solution that provides high-performance resources for handling asset-heavy After Effects projects. Access it from any device and let it power through complex renders easier than you could have imagined.
Why Use Vagon?
Handles resource-intensive assets without the dreadful lag that we all hate so much.
Scalable performance for those high-end effects that you think you cannot achieve on your average machine.
Accessible from any device, no matter what kind of specs your machine has.
Conclusion
Once again, DaVinci Resolve tutorials are resourceful in your mastery of the wealth of tools. As a beginner or an advanced user, they guide your little and large projects. To help you unlock your creative potential and bring your projects to life. Audio and video editors can use a tool like film emulation to infuse a cinematic feel into corporate videos. As you explore and practice these tutorials, you add to your portfolio and increase your skills as an editor.
DaVinci Resolve Tutorials to Master Every Editing Technique
DaVinci Resolve was termed “Hollywood’s #1 Post Solution,” as it is the tool of choice for superior color grading. As a leading video editing software, it combines advanced color grading with visual effects and audio post-production for crisp video editing projects. It is useful for beginners crafting simple edits and experts working on high-budget film projects. Learn how to use DaVinci Resolve as you read along.
Importance of Learning Through Tutorials
DaVinci comes with many video editing features. To enjoy these features, it is important to take some tutorials to maximize their full potential. Tutorials offer step-by-step guidance to master the numerous capabilities of DaVinci Resolve. So, whether you need DaVinci for basic video splits or advanced color grading, tutorials help you complete your projects with the best practices.
Getting Started: Tutorials for Beginners
We will start with the basics for beginners who do not know their way around the software. If you are getting on DaVinci Resolve for the first time, it may seem strange and overwhelming. It has many features that require a tutorial to understand. Essential Tutorials for Beginners include navigating the workspace, importing, and organizing media. As you master the basics, you will find it easy to move on to exploring advanced features.
How To Create New Project?
Jason Roberts Video’s tutorial, "How to Create a Project in DaVinci Resolve," is perfect for beginners and editors looking to refine their workflow. In this step-by-step video, Jason explains how to set up a new project, navigate the interface, and configure settings with ease. He also shares valuable resources, like his book The 52 Laws of Video and a free tips newsletter, to help you take your editing skills further. Whether you're new to DaVinci Resolve or need a refresher, this tutorial is a must-watch!
After creating a new project, the next step is to import videos. You should ensure that the Timeline frame rate resolution matches the video files that you will import. Go to File, click Project Settings, and adjust the settings.
How to Import Media Files?
You can import media when you move on to the media page. The media page comprises a media storage icon on the top left side, leading to your files. You can select your files and move to the next step. DaVinci Resolve supports several video and audio formats, which makes importing media to your project simple.
Next, drag and drop your selected media into the media pool. The Media pool displays important media and it is located at the central bottom.
Then, preview your selected media on the source viewer before importing.
How to Cut Videos
Trimming and cutting occur on the cut page. The Cut page has straightforward tools that help you split your videos. Some of these tools include;
Trim Edit: You can trim a video by adjusting the start or the end.
Split Tool: Helps to cut a video precisely
Ripple Delete: Delete a cut clip from the timeline and shift the remaining clips to close the gap.
Transition and Title Tools: The cut page also has tools for transitioning from one clip to another.
After cutting and editing, move on to the deliver page. Use preset export options (YouTube, Vimeo, etc.), or select a custom size and export your video. Your videos can now move to your high or low end device.
Leveling Up: Intermediate Editing Tutorials
Beginners can practice the essential tutorials for a few days before moving on to intermediate edits. Once you’re comfortable with the basics, you can use advanced tools like multicam editing, masking, and tracking. These tutorials sharpen your editing skills, adding a professional polish to your projects.
Masking and Tracking
Masking in DaVinci Resolve allows you to isolate a portion of your video using your preferred shape. Editors use mask tools to replace a background or for extra effects. On the other hand, the tracking tool follows a moving object in your video, ensuring that masks stay aligned with it.
The video Track ANY MASK in DaVinci Resolve - Pro Techniques for Color & Fusion is a great starting point and provides an excellent guide to getting better at masking.
After creating your mask, you can track your masks via the Tracker Panel on the Color Page. Choose to either follow the mask forward or backward. Note, that keyframes allow you to fine-tune the mask’s position manually.
Advanced Techniques: Tutorials for Pros
Professionals have mastered the basics and intermediate training, they utilize all of DaVinci’s tools seamlessly. DaVinci Resolve offers tools and plugins ranging from color grading to collaborative editing for video editors and audio engineers alike. Let’s take a look at how to achieve a cinematic film.
How to Achieve a Cinematic Look
To add a cinematic feel to your videos, start by applying a Color Space Transform effect to your clip. This allows you to utilize a Film Print Emulation LUT (Look-Up Table), which mimics the aesthetic qualities of traditional film stock. Once applied, create a new color grading node, navigate to the LUTs tab in your editing software, and explore the available cinematic film looks. Select and apply your preferred LUT to this node, which will instantly give your footage the rich, film-like colors associated with cinematic visuals.
After applying the LUT, shift your focus to balancing the colors in your footage. Go back to the first node and begin adjusting the Offset Wheel, which controls the overall tone and color balance of your image. This step ensures that the colors harmonize well with the applied LUT and maintain the desired cinematic look. Fine-tuning the offset wheel helps achieve a polished, professional finish, bringing your video closer to a true filmic appearance.
You can adjust colors, sharpness, saturation, and contrast to mimic the characteristics of your chosen film stock. These pro edits on DaVinci Resolve are similar and easy to use like on other software like Premiere Pro.
Use Case-Specific Tutorials
You can learn the top Davinci resolve courses and classes. However, you can follow custom tutorials for similar projects, as different projects have unique requirements. For example, you can learn specific tutorials for social media edits, movie-like trailers, or documentaries.
Social Media projects for example require short videos with a strong hook within the first 5 seconds. They require friendly captions in the aspect ratio and a square or vertical (9:16) aspect ratio for better engagement on Instagram and TikTok.
An important part of the documentary is the ambient sound that adds a natural feel. Audio engineers should use this, together with a slow-paced video to keep viewers engaged.
On the contrary, music trailers need to be faster, with high-energy music. The cuts and edits should be just enough to spark the viewer's interest.
Here is a few tutorials that can help you get a better understanding of DaVinci Resolve and help you use it more effectively:
#1: How To Cut Video?
This video, How to Cut Videos in DaVinci Resolve 17 – Basic Video Editing Tips, walks you through essential tools like the Razor, Split Tool, and Transition & Title features. Whether you're new to editing or looking to refine your skills, this tutorial is perfect for mastering the foundation of professional video editing.
#2 How To Import Media?
In How to Import Media – DaVinci Resolve 17 Tutorial, you'll learn the step-by-step process for importing video files and explore the supported formats to ensure compatibility. Perfect for beginners and pros alike, this guide simplifies the first steps of your editing journey.
#3 How To Get A Cinematic Look In Davinci Resolve?
This video, How to Add Text in DaVinci Resolve 17, demonstrates how to create and customize text for your projects. Learn step-by-step how to add titles, adjust fonts, and apply effects, making your videos more engaging and professional. Perfect for enhancing your storytelling!
#4 DaVinci Resolve Beginners Tutorial
The tutorial How to Export Video in DaVinci Resolve 17 offers a detailed guide on rendering videos in various formats, ensuring high-quality results suitable for any platform. It provides valuable insights for both beginners and experienced editors aiming to streamline their export workflow and achieve professional-quality output.
#5 Introduction to DaVinci Resolve - [Full Course] for Beginners
In this tutorial, you'll learn how to harness its full potential with step-by-step guidance tailored for both beginners and experienced users. From mastering the basics to exploring advanced features, this guide is designed to help you create professional-grade videos efficiently and effectivel
#6 How to Edit A YouTube Video in DaVinci Resolve! (Start to Finish)
From applying Film Print Emulation LUTs to fine-tuning colors for a polished look, this guide walks you through the essential steps to achieve stunning, film-like visuals. Perfect for creators looking to elevate their video projects with professional-grade color grading techniques!
Tips for Getting the Most Out of Tutorials
These tutorials, along with others you will find on DaVinci Resolve will help your editing journey as a beginner or an expert. To get the most out of these tutorials,
Spend some time practicing the steps in real-time.
Practice new techniques with simple videos before moving on to larger projects.
Implement what you learn in different video formats
Review your sample projects, and compare them to the tutorial guide.
Participate in online forums related to DaVinci Resolve like the Blackmagic forum and others on Reddit.
Editors share their work and seek feedback from other editors on forums. These help to master the tools and improve your creativity.
Vagon Cloud Computer: A Solution for Complex Projects
When your local machine starts giving up on you, Vagon Cloud Computer steps in as the superhero you didn’t know you needed.
What is Vagon Cloud Computer?
It’s a cloud-based computing solution that provides high-performance resources for handling asset-heavy After Effects projects. Access it from any device and let it power through complex renders easier than you could have imagined.
Why Use Vagon?
Handles resource-intensive assets without the dreadful lag that we all hate so much.
Scalable performance for those high-end effects that you think you cannot achieve on your average machine.
Accessible from any device, no matter what kind of specs your machine has.
Conclusion
Once again, DaVinci Resolve tutorials are resourceful in your mastery of the wealth of tools. As a beginner or an advanced user, they guide your little and large projects. To help you unlock your creative potential and bring your projects to life. Audio and video editors can use a tool like film emulation to infuse a cinematic feel into corporate videos. As you explore and practice these tutorials, you add to your portfolio and increase your skills as an editor.
Get Beyond Your Computer Performance
Run applications on your cloud computer with the latest generation hardware. No more crashes or lags.

Trial includes 1 hour usage + 7 days of storage.
Summarize with AI

Ready to focus on your creativity?
Vagon gives you the ability to create & render projects, collaborate, and stream applications with the power of the best hardware.

Vagon Blog


Run heavy applications on any device with
your personal computer on the cloud.
San Francisco, California
Solutions
Vagon Teams
Vagon Streams
Use Cases
Resources
Vagon Blog
How to Run Audacity on a Cloud Ubuntu Desktop (2026 Guide)
How to Run Darktable on a Cloud Ubuntu Desktop for RAW Photo Editing (2026 Guide)
How to Run Kdenlive on a Cloud Ubuntu Desktop (2026 Guide)
How to Run DaVinci Resolve on Linux in the Cloud (2026 Guide)
How to Run Inkscape on a Cloud Ubuntu Desktop (2026 Guide)
How to Run Krita on a Cloud Ubuntu Desktop for Digital Painting (2026 Guide)
How to Run GIMP on a Cloud Ubuntu Desktop (2026 Guide)
How to Run Jupyter on a Cloud GPU Linux Desktop (2026 Guide)
Vagon vs GitHub Codespaces: Cloud Dev Environments Compared (2026)
Vagon Blog
Run heavy applications on any device with
your personal computer on the cloud.
San Francisco, California
Solutions
Vagon Teams
Vagon Streams
Use Cases
Resources
Vagon Blog