Instant Connection for Pixel Streaming
— New Feature Automated Setup

How to Use Codex With Figma: Step-by-Step Guide
DigitalArt
-
How to Use Codex With Figma: Step-by-Step Guide
DigitalArt
How to Use Codex With Figma: Step-by-Step Guide
DigitalArt
-
Table of Contents
The simplest way to use Codex with Figma is to install the official Figma plugin in the Codex app, authorize your Figma account, open your repository in Codex, and provide a link to one specific Figma frame or layer. Then ask Codex to inspect both the design and the existing codebase before it edits anything.
That last part matters. Connecting the two tools gives Codex access to structured design context. It does not turn a frame into production-ready code with one click. The useful workflow is inspect, implement, and verify: understand the selected design, map it to the project's components and tokens, make a limited change, and compare the result with the source design.
This approach works well for frontend developers, design engineers, and product teams with an existing repository.
What Can Codex Actually Do With Figma?
Figma's Model Context Protocol server gives Codex tools for reading design information and, with the right workflow and permissions, writing information back. For a design-to-code task, Codex can receive the selected node's hierarchy, dimensions, layout, component instances, variables, screenshots, and assets. It combines that material with repository routes, UI components, tokens, tests, and project instructions. The current capabilities are documented in the Figma MCP introduction and Figma MCP tool reference.
The official Figma plugin for Codex adds more than the server connection. Its current package includes skills for implementing designs, creating Code Connect templates, generating project-specific design-system rules, and creating or updating content in Figma. A manually configured MCP server exposes Figma's tools, but it doesn't install that complete set of workflow instructions. You can see the current package in the official Figma plugin repository.
Separate four related workflows:
Figma to code: Codex reads a frame or layer and implements it in your repository.
Code to canvas: Codex captures a live web interface and sends it to Figma as editable layers.
Write to canvas: Codex creates or changes native Figma objects such as frames, components, variables, and Auto Layout structures.
Code Connect: Figma components are mapped to their real code implementations so an agent can reuse the correct imports and component APIs.
This article focuses on the first. The others have different tools and permissions. Reading a design does not let Codex modify the original file.
Which Setup Should You Choose?
Figma recommends its remote MCP server for most users because it has the widest feature set and does not require the Figma desktop app to remain open. For Codex users, the preferred path is installing the official Figma plugin in the Codex app. Manual remote MCP and desktop MCP are useful alternatives for narrower cases.
Setup | Best fit | Figma desktop required? | Plugin workflow skills included? | How you identify the design |
|---|---|---|---|---|
Codex app with the Figma plugin | The default choice for most users | No | Yes | Paste a frame or layer link |
Codex CLI with remote MCP | Terminal-first work or a raw server connection | No | No | Paste a frame or layer link |
Codex app with desktop MCP | Same-machine work that benefits from the active Figma selection | Yes | No, unless you separately install the plugin | Use the active selection or a link |
Before connecting, confirm that Codex can open and run the target repository, sign in to a Figma account with access to the file, and copy a link to the exact frame or layer. Check that your organization permits the Figma plugin. Desktop MCP also requires the current Figma desktop app and an open Design file.
Figma access and read limits depend on plan and seat type. Code Connect requires a Dev or Full seat on Organization or Enterprise; native write to canvas requires a Full seat and edit permission. Neither is required for basic read-to-code work. Check the current MCP access table.
The Codex app supports the packaged plugin; CLI connects directly to MCP servers. The IDE extension can use MCP configuration on the same host but does not support plugins. See OpenAI's MCP and plugin guides.
How Do You Install the Figma Plugin in the Codex App?
The preferred setup takes only a few steps:
Open the Codex app.
Select Plugins in the upper-left area.
Find Figma and click the + button next to it.
Select Install Figma.
Complete the Figma authentication flow and select Allow access after reviewing the request.
Return to Codex and open the repository you want to change.
These are the current steps in Figma's Codex setup guide. If the skills aren't visible, start a new task; they load with a new chat or CLI session.
Your first prompt should test the connection without changing code. Copy a link to a specific Figma frame or layer, then ask Codex to inspect it:
Use the Figma plugin to inspect this pricing section:
[FIGMA NODE URL]

Do not edit the repository yet. Summarize the component hierarchy,
layout, responsive clues, typography, colors, spacing, reusable assets,
and any Code Connect mappings. List uncertain details separately
Use the Figma plugin to inspect this pricing section:
[FIGMA NODE URL]

Do not edit the repository yet. Summarize the component hierarchy,
layout, responsive clues, typography, colors, spacing, reusable assets,
and any Code Connect mappings. List uncertain details separately
With remote MCP, the link is the locator. Codex doesn't need to navigate the page like a browser. The Figma server extracts the node ID from the URL and returns the relevant context. A link to the exact frame is better than a link to a large file because it gives the task a clear boundary.
A healthy result identifies the selected node, describes its structure, and calls out missing information. If Codex invents a full page without discussing the frame, narrow the request.
If the plugin or its tools don't appear, check whether a workspace administrator has disabled third-party plugins or requires new tools to be approved. Also confirm that OAuth used the intended Figma identity and that this account can open the linked file.
How Do Manual Remote MCP and Desktop MCP Work?
You don't have to install the plugin to connect Codex to Figma. The manual route is useful if you work mainly in Codex CLI or want only the server tools.
Install the remote Figma MCP server with the verified command:
codex mcp add figma --urlcodex mcp add figma --urlAuthenticate with Figma, then use codex mcp list or /mcp in the Codex terminal interface to inspect the connection. Figma maintains the command and URL in its remote installation instructions.
This uses the same hosted endpoint as the plugin, so Figma desktop is not required. Supply a target node link. Raw MCP provides tools and data; the plugin also provides Figma-specific workflow skills.
When desktop MCP makes sense
The desktop server is a secondary option for same-machine work. It can read the current selection in an active Figma desktop file. Figma still recommends remote MCP for most users.
To configure it:
Open the current Figma desktop app and a Figma Design file.
Switch to Dev Mode.
Enable the desktop MCP server in the inspect panel.
In Codex, open Settings, then MCP servers, and choose Add server.
Change the server type to Streamable HTTP.
Enter
figma-desktopas the name.Enter the following URL and save:
http://127.0.0.1:3845/mcp
http://127.0.0.1:3845/mcp
Keep Figma desktop open, the file active, and the server enabled. Select a frame and ask Codex to inspect it, or provide a node link. Figma documents both modes in its desktop server guide.
The loopback address is important. 127.0.0.1 means the machine where Codex is running. If Codex runs on one computer and Figma desktop runs on another, this address does not connect the two systems.
The Codex app, CLI, and IDE extension can share MCP settings when they use the same Codex host. Separate hosts keep separate configuration. Windows-native Codex and a CLI inside WSL do not share settings automatically; see the Codex Windows guide.
How Do You Implement a Figma Design in an Existing Repository?
Use three stages: inspect, implement, and verify. Codex should reconcile the design with the codebase, not treat the frame as an isolated picture.
Imagine that you're adding a three-card pricing section to an existing React and TypeScript application. The repository already contains Button, Heading, Card, and icon components, plus theme tokens and established breakpoints.
Stage 1: Inspect both sources of truth
Start with the Figma inspection prompt from the setup section. Then ask Codex to inspect the repository separately:
Inspect this repository without editing it yet.

Find:
- the route that owns the pricing page;
- existing Button, Heading, Card, and icon components;
- theme, token, and breakpoint definitions;
- styling conventions used by nearby sections;
- project instructions and asset rules;
- the relevant lint, type-check, test, and build commands.

Explain which existing primitives map to the selected Figma section.
List any conflict between the design and repository conventions
Inspect this repository without editing it yet.

Find:
- the route that owns the pricing page;
- existing Button, Heading, Card, and icon components;
- theme, token, and breakpoint definitions;
- styling conventions used by nearby sections;
- project instructions and asset rules;
- the relevant lint, type-check, test, and build commands.

Explain which existing primitives map to the selected Figma section.
List any conflict between the design and repository conventions
This prevents Codex from creating a second button, card, or spacing system because it was never asked to find the first one. It also reveals code decisions the design cannot communicate, such as file placement, state management, and test patterns.
If the Figma frame is large, ask Codex to inspect its structure first and retrieve detailed context only for the needed subframes. Figma's get_metadata tool returns a lighter hierarchy that an agent can use before requesting richer design context. A smaller target reduces noise and makes each review easier.
Stage 2: Implement a bounded change
Once Codex has described the mapping, give it a concrete implementation request:
Implement only the selected pricing section in [TARGET ROUTE OR FILE].

Use [FIGMA NODE URL] as the design reference. Reuse the repository's
existing components and semantic tokens where possible. Follow the nearby
file and styling conventions. Preserve unrelated behavior and do not change
shared component APIs unless the current design cannot be implemented without it.

Requirements:
- support the documented desktop and mobile layouts;
- preserve meaningful HTML structure and keyboard behavior;
- include hover, focus, disabled, and selected states where the design or
  existing component API defines them;
- use approved local assets and add useful alternative text where needed;
- do not depend on temporary Figma asset URLs;
- run [LINT COMMAND], [TYPECHECK COMMAND], [TEST COMMAND], and [BUILD COMMAND].

Before editing, summarize the files you plan to change. After editing,
report changed files, verification results, and unresolved design questions
Implement only the selected pricing section in [TARGET ROUTE OR FILE].

Use [FIGMA NODE URL] as the design reference. Reuse the repository's
existing components and semantic tokens where possible. Follow the nearby
file and styling conventions. Preserve unrelated behavior and do not change
shared component APIs unless the current design cannot be implemented without it.

Requirements:
- support the documented desktop and mobile layouts;
- preserve meaningful HTML structure and keyboard behavior;
- include hover, focus, disabled, and selected states where the design or
  existing component API defines them;
- use approved local assets and add useful alternative text where needed;
- do not depend on temporary Figma asset URLs;
- run [LINT COMMAND], [TYPECHECK COMMAND], [TEST COMMAND], and [BUILD COMMAND].

Before editing, summarize the files you plan to change. After editing,
report changed files, verification results, and unresolved design questions
The prompt does not ask for "pixel-perfect code," which provides no acceptance criteria. Viewports, components, states, checks, and change boundaries are measurable.
Store approved assets in the repository because temporary Figma URLs can expire. See Figma's asset troubleshooting guide.
Stage 3: Verify, compare, and correct
The first implementation is a draft. Ask Codex to run the application and compare it at the agreed viewport sizes:
Run the app at [LOCAL URL] and compare the implemented pricing section
with the Figma reference at [DESKTOP WIDTH] and [MOBILE WIDTH].

Check layout, typography, spacing, color, borders, assets, responsive
behavior, interactive states, and component reuse. Fix the largest verified
differences first. Do not replace a shared component only to match one
screenshot. Run the repository checks again and report remaining differences
Run the app at [LOCAL URL] and compare the implemented pricing section
with the Figma reference at [DESKTOP WIDTH] and [MOBILE WIDTH].

Check layout, typography, spacing, color, borders, assets, responsive
behavior, interactive states, and component reuse. Fix the largest verified
differences first. Do not replace a shared component only to match one
screenshot. Run the repository checks again and report remaining differences
Finish with a human review of the page and Git diff; visual similarity does not prove behavior or accessibility.
How Do Components, Tokens, and Code Connect Improve the Result?
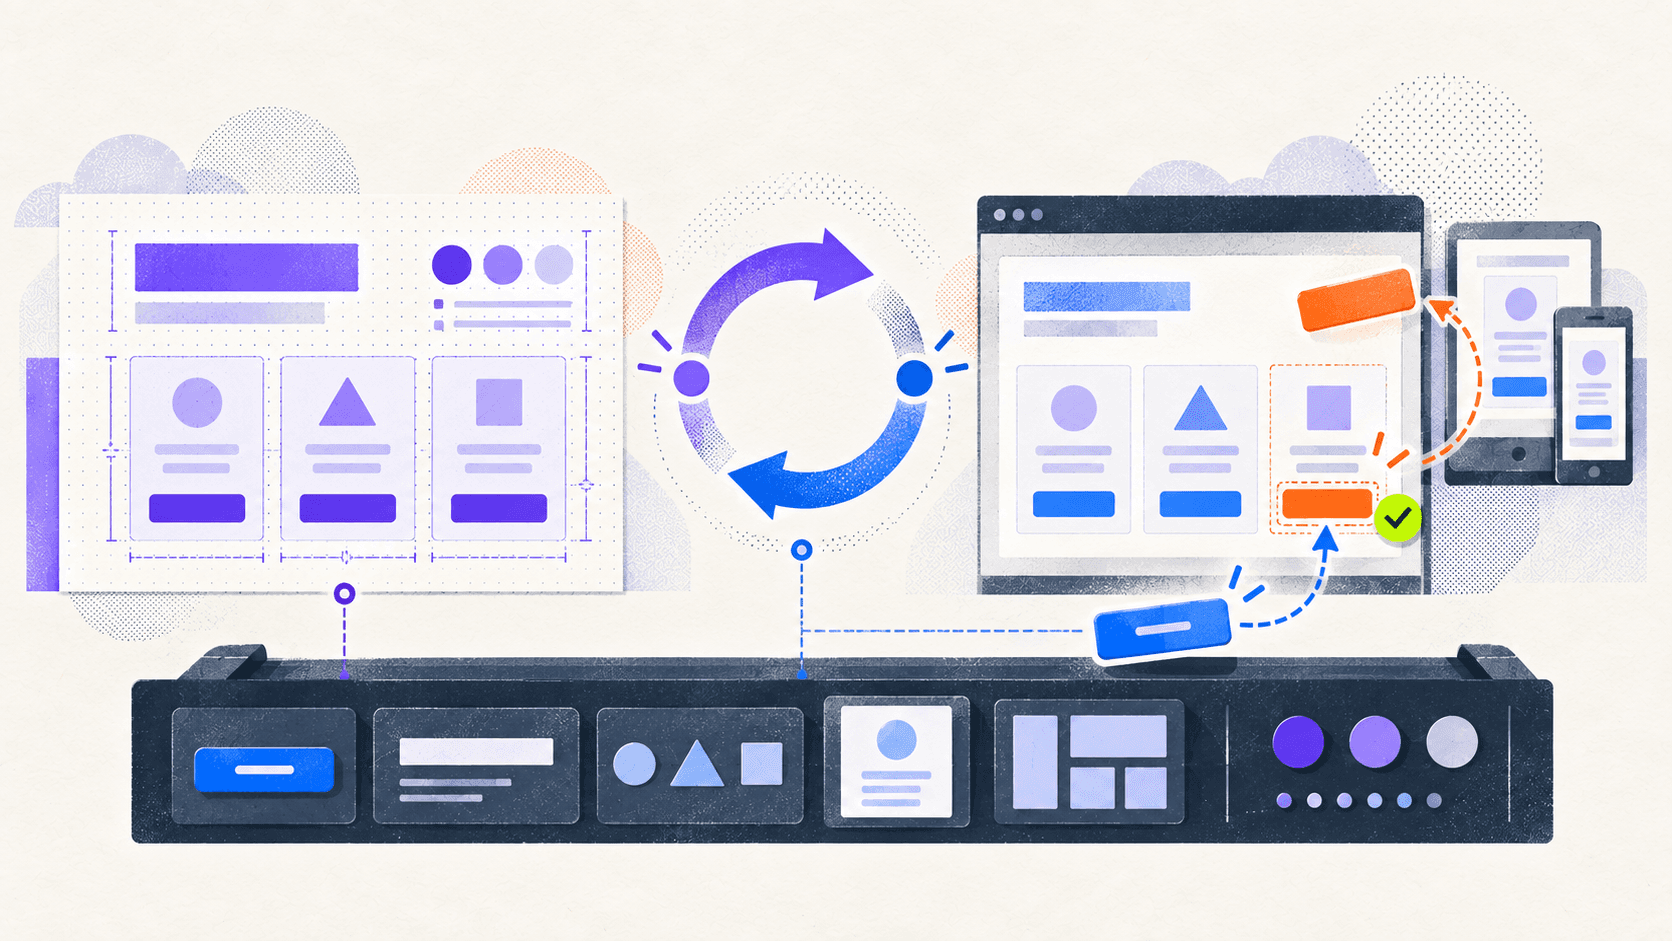
Codex produces better code when both sides are easy to interpret. In Figma, repeated elements should be components, spacing and color should use variables, layers should have semantic names, and layouts should use Auto Layout where appropriate. Annotations can explain behavior that a static frame cannot show. Figma's file-structure guidance recommends exactly these practices.
The repository needs similar clarity. Components should be discoverable, tokens should have meaningful names, and project instructions should state which libraries and commands to use. Put durable rules in project guidance instead of repeating them in every prompt.
Code Connect adds an explicit bridge. When a Figma component is mapped to its code implementation, MCP context can include its import statement, usage snippet, current property values, and custom instructions. That makes it easier for Codex to produce something like the existing <Button variant="primary"> rather than a new button made from raw markup. The behavior is described in Figma's Code Connect integration guide.
Code Connect is optional and has plan and publishing requirements. It helps component reuse, but cannot fix vague product behavior or a disorganized repository.
Before accepting a Figma-driven change, check:
Existing components and imports are reused where they fit.
Repeated values use repository tokens rather than arbitrary one-off values.
Layout, typography, spacing, colors, borders, and assets match at agreed viewports.
Hover, focus, disabled, loading, empty, and error states are handled where relevant.
Semantic HTML, labels, keyboard navigation, focus visibility, contrast, and reduced motion are reviewed.
Assets are stored in an approved location and have the correct accessibility treatment.
Lint, type-check, tests, and production build pass.
The diff contains no unrelated edits or unnecessary new dependencies.
Why Run Codex and Figma on Vagon Cloud Computer?
The Figma connection is only one part of this workflow. You also need the repository, Codex, runtime, packages, development server, browser preview, and sometimes the Figma desktop app. When those pieces live on one physical computer, changing devices often means rebuilding the environment or leaving essential tools behind.
We built Vagon Cloud Computer as a personal Windows computer in the cloud that streams a complete desktop to the device in front of you. It is not a browser IDE or a short-lived code sandbox. You can install desktop applications, clone repositories, run local servers, open browser previews, and keep the complete project environment together. Your laptop, desktop, tablet, or phone becomes the access point while your Cloud Computer hosts the workspace.
That is where Vagon fits into a Figma-to-Codex workflow. Instead of rebuilding the toolchain whenever your device changes, you can create one development and design computer, configure it once, and return to it whenever you need it.
Build the workspace once
Figma is currently included in our automatic application library. You can install Codex, Git, your editor, Node.js, package manager, and other tools manually, just as you would on a local Windows computer. Once configured, your Vagon workspace can hold:
the cloned repository and its dependencies;
Codex and the project's development tools;
Figma desktop and the authenticated design session;
the local development server and browser preview;
working files, assets, and project-specific configuration.
This is also where your Cloud Computer can simplify desktop MCP. Its 127.0.0.1 endpoint requires Figma desktop and Codex to run on the same host. Running both inside the same Cloud Computer satisfies that requirement even when you control the desktop from another device. If you use Figma's remote MCP server, the desktop app is optional, but the rest of the development environment can still remain together.
You can access your Cloud Computer from computers, tablets, and mobile devices. Smaller devices may not suit sustained development, but they can provide access for a review or quick correction. Our device-access overview explains the available options.
Add performance without migrating the project
A fixed laptop gives you one hardware configuration. With Vagon, you can change between available performance options while retaining the same desktop, applications, and files. Use a lighter option for routine implementation and review, then move to more CPU or memory for a large repository, Storybook, browser automation, or a demanding build. You do not need to copy the environment to another machine. See our scalable performance page for details.
More compute does not make Codex reason better or make Figma context more accurate. It accelerates the workloads around them: installed applications, builds, preview servers, tests, and browser sessions.
We charge active compute by the minute based on the selected performance and region, while a separate storage charge keeps your Cloud Computer's data available between sessions. The result is an on-demand workstation rather than a computer you must leave running. Check our current pricing page for live rates. Vagon Files can also move supporting assets between your local device and the cloud workspace, including while the computer is off; Git should remain the source of truth for repository history.

When does Vagon add the most value?
Vagon Cloud Computer is especially useful when you work from several devices, need Windows from a Mac, Chromebook, or tablet, want a client project separated from your personal computer, need Figma desktop and Codex on one host, or need temporary compute without migrating the project.
If one local computer already handles the complete workflow, a Cloud Computer may not remove a meaningful constraint for you. A stable internet connection is also important, and remote-display latency can matter during close visual review.
Every Vagon Cloud Computer runs as an isolated virtual machine, and we encrypt the connection to it. You still remain responsible for OpenAI and Figma accounts, repository credentials, software licenses, secret management, and company policy.
For teams and independent developers losing time to hardware limits, operating-system constraints, travel, or repeated setup, Vagon turns the entire Figma-to-Codex toolchain into one ready-to-use computer you can reopen instead of recreate.
What Common Problems Should You Expect?
Most failures come from plugin access, authentication, excessive context, or missing project mappings.
Symptom | Likely cause | What to check |
|---|---|---|
Plugin or tools don't appear | Workspace policy or a newly installed plugin hasn't loaded into the task | Ask the administrator about third-party tools and start a new task |
Authentication succeeds but the file can't be read | Wrong Figma identity, invalid link, or missing permission | Confirm the authenticated email, file link, plan membership, and file access |
Desktop tools disappear | Figma desktop is closed, the file isn't active, or MCP is disabled | Reopen the file, enable MCP in Dev Mode, and restart Figma and Codex if needed |
Codex creates generic UI | The node is too broad, the repository wasn't inspected, or mappings are missing | Narrow the selection, use a read-first prompt, and point to components and tokens |
A large frame stalls | Too much detailed design context was requested at once | Inspect metadata first, split the frame into smaller tasks, and work incrementally |
Images stop loading | Temporary Figma asset URLs expired | Retrieve the context again or download approved assets into the repository |
Tool calls are rejected | Seat limit, rate limit, or file permission | Check Figma's current access table and the authenticated user's permissions |
For desktop MCP, check that Figma is running, the file is active, and the server is enabled. See Figma's connection troubleshooting steps.
Grant only the required Figma access, keep secrets out of prompts and annotations, follow repository policy, and review the diff before merging.
Frequently Asked Questions
Do I need a paid Figma plan to use Codex with Figma?
Not always, but plan and seat affect limits and features. Some View and Collab seats have low read limits. Code Connect requires a Dev or Full seat on Organization or Enterprise; write to canvas requires a Full seat. Check the live access table.
Is the Figma plugin better than adding MCP manually?
For most app users, yes. The plugin adds Figma-specific skills for implementation, Code Connect, design-system rules, and canvas workflows. Manual MCP suits CLI-first work or a server-only connection.
Can I use the same connection in the Codex app, CLI, and IDE extension?
They can share MCP configuration on the same Codex host. The plugin remains separate, and the IDE extension does not support plugins.
Can Codex edit my original Figma file?
Only through write to canvas with the remote server, a Full seat, and edit permission. Reading a node or generating repository code does not edit Figma.
Can Codex send a running web interface back to Figma?
Yes. Code to canvas captures live UI as editable layers in supported clients. It is separate from native write to canvas, and destination permissions depend on whether the file is in drafts or shared.
Why does the generated code still look generic?
The connection only transports context. Generic output often means an oversized frame, weak Figma structure, missing mappings, or no repository inspection.
Can I run the complete workflow on Vagon Cloud Computer?
Yes. Your Vagon Cloud Computer provides a full remote Windows desktop where Codex, the cloned repository, development server, browser preview, and optional Figma desktop can stay together. Figma is currently available in our automatic installation catalog, while Codex and the rest of the development toolchain can be installed manually. Keep Codex and Figma desktop in the same Cloud Computer for desktop MCP. OpenAI, Figma, repository, and software access remain separate.
A good Figma-to-Codex workflow is deliberately narrow: select one design target, inspect the codebase, implement within its conventions, and verify the rendered result. If the real obstacle is keeping that complete setup available, create your Vagon Cloud Computer, add Figma and your development toolchain, and turn it into a design-to-code workspace you can return to from any supported device.
The simplest way to use Codex with Figma is to install the official Figma plugin in the Codex app, authorize your Figma account, open your repository in Codex, and provide a link to one specific Figma frame or layer. Then ask Codex to inspect both the design and the existing codebase before it edits anything.
That last part matters. Connecting the two tools gives Codex access to structured design context. It does not turn a frame into production-ready code with one click. The useful workflow is inspect, implement, and verify: understand the selected design, map it to the project's components and tokens, make a limited change, and compare the result with the source design.
This approach works well for frontend developers, design engineers, and product teams with an existing repository.
What Can Codex Actually Do With Figma?
Figma's Model Context Protocol server gives Codex tools for reading design information and, with the right workflow and permissions, writing information back. For a design-to-code task, Codex can receive the selected node's hierarchy, dimensions, layout, component instances, variables, screenshots, and assets. It combines that material with repository routes, UI components, tokens, tests, and project instructions. The current capabilities are documented in the Figma MCP introduction and Figma MCP tool reference.
The official Figma plugin for Codex adds more than the server connection. Its current package includes skills for implementing designs, creating Code Connect templates, generating project-specific design-system rules, and creating or updating content in Figma. A manually configured MCP server exposes Figma's tools, but it doesn't install that complete set of workflow instructions. You can see the current package in the official Figma plugin repository.
Separate four related workflows:
Figma to code: Codex reads a frame or layer and implements it in your repository.
Code to canvas: Codex captures a live web interface and sends it to Figma as editable layers.
Write to canvas: Codex creates or changes native Figma objects such as frames, components, variables, and Auto Layout structures.
Code Connect: Figma components are mapped to their real code implementations so an agent can reuse the correct imports and component APIs.
This article focuses on the first. The others have different tools and permissions. Reading a design does not let Codex modify the original file.
Which Setup Should You Choose?
Figma recommends its remote MCP server for most users because it has the widest feature set and does not require the Figma desktop app to remain open. For Codex users, the preferred path is installing the official Figma plugin in the Codex app. Manual remote MCP and desktop MCP are useful alternatives for narrower cases.
Setup | Best fit | Figma desktop required? | Plugin workflow skills included? | How you identify the design |
|---|---|---|---|---|
Codex app with the Figma plugin | The default choice for most users | No | Yes | Paste a frame or layer link |
Codex CLI with remote MCP | Terminal-first work or a raw server connection | No | No | Paste a frame or layer link |
Codex app with desktop MCP | Same-machine work that benefits from the active Figma selection | Yes | No, unless you separately install the plugin | Use the active selection or a link |
Before connecting, confirm that Codex can open and run the target repository, sign in to a Figma account with access to the file, and copy a link to the exact frame or layer. Check that your organization permits the Figma plugin. Desktop MCP also requires the current Figma desktop app and an open Design file.
Figma access and read limits depend on plan and seat type. Code Connect requires a Dev or Full seat on Organization or Enterprise; native write to canvas requires a Full seat and edit permission. Neither is required for basic read-to-code work. Check the current MCP access table.
The Codex app supports the packaged plugin; CLI connects directly to MCP servers. The IDE extension can use MCP configuration on the same host but does not support plugins. See OpenAI's MCP and plugin guides.
How Do You Install the Figma Plugin in the Codex App?
The preferred setup takes only a few steps:
Open the Codex app.
Select Plugins in the upper-left area.
Find Figma and click the + button next to it.
Select Install Figma.
Complete the Figma authentication flow and select Allow access after reviewing the request.
Return to Codex and open the repository you want to change.
These are the current steps in Figma's Codex setup guide. If the skills aren't visible, start a new task; they load with a new chat or CLI session.
Your first prompt should test the connection without changing code. Copy a link to a specific Figma frame or layer, then ask Codex to inspect it:
Use the Figma plugin to inspect this pricing section:
[FIGMA NODE URL]

Do not edit the repository yet. Summarize the component hierarchy,
layout, responsive clues, typography, colors, spacing, reusable assets,
and any Code Connect mappings. List uncertain details separately
With remote MCP, the link is the locator. Codex doesn't need to navigate the page like a browser. The Figma server extracts the node ID from the URL and returns the relevant context. A link to the exact frame is better than a link to a large file because it gives the task a clear boundary.
A healthy result identifies the selected node, describes its structure, and calls out missing information. If Codex invents a full page without discussing the frame, narrow the request.
If the plugin or its tools don't appear, check whether a workspace administrator has disabled third-party plugins or requires new tools to be approved. Also confirm that OAuth used the intended Figma identity and that this account can open the linked file.
How Do Manual Remote MCP and Desktop MCP Work?
You don't have to install the plugin to connect Codex to Figma. The manual route is useful if you work mainly in Codex CLI or want only the server tools.
Install the remote Figma MCP server with the verified command:
codex mcp add figma --urlAuthenticate with Figma, then use codex mcp list or /mcp in the Codex terminal interface to inspect the connection. Figma maintains the command and URL in its remote installation instructions.
This uses the same hosted endpoint as the plugin, so Figma desktop is not required. Supply a target node link. Raw MCP provides tools and data; the plugin also provides Figma-specific workflow skills.
When desktop MCP makes sense
The desktop server is a secondary option for same-machine work. It can read the current selection in an active Figma desktop file. Figma still recommends remote MCP for most users.
To configure it:
Open the current Figma desktop app and a Figma Design file.
Switch to Dev Mode.
Enable the desktop MCP server in the inspect panel.
In Codex, open Settings, then MCP servers, and choose Add server.
Change the server type to Streamable HTTP.
Enter
figma-desktopas the name.Enter the following URL and save:
http://127.0.0.1:3845/mcp
Keep Figma desktop open, the file active, and the server enabled. Select a frame and ask Codex to inspect it, or provide a node link. Figma documents both modes in its desktop server guide.
The loopback address is important. 127.0.0.1 means the machine where Codex is running. If Codex runs on one computer and Figma desktop runs on another, this address does not connect the two systems.
The Codex app, CLI, and IDE extension can share MCP settings when they use the same Codex host. Separate hosts keep separate configuration. Windows-native Codex and a CLI inside WSL do not share settings automatically; see the Codex Windows guide.
How Do You Implement a Figma Design in an Existing Repository?
Use three stages: inspect, implement, and verify. Codex should reconcile the design with the codebase, not treat the frame as an isolated picture.
Imagine that you're adding a three-card pricing section to an existing React and TypeScript application. The repository already contains Button, Heading, Card, and icon components, plus theme tokens and established breakpoints.
Stage 1: Inspect both sources of truth
Start with the Figma inspection prompt from the setup section. Then ask Codex to inspect the repository separately:
Inspect this repository without editing it yet.

Find:
- the route that owns the pricing page;
- existing Button, Heading, Card, and icon components;
- theme, token, and breakpoint definitions;
- styling conventions used by nearby sections;
- project instructions and asset rules;
- the relevant lint, type-check, test, and build commands.

Explain which existing primitives map to the selected Figma section.
List any conflict between the design and repository conventions
This prevents Codex from creating a second button, card, or spacing system because it was never asked to find the first one. It also reveals code decisions the design cannot communicate, such as file placement, state management, and test patterns.
If the Figma frame is large, ask Codex to inspect its structure first and retrieve detailed context only for the needed subframes. Figma's get_metadata tool returns a lighter hierarchy that an agent can use before requesting richer design context. A smaller target reduces noise and makes each review easier.
Stage 2: Implement a bounded change
Once Codex has described the mapping, give it a concrete implementation request:
Implement only the selected pricing section in [TARGET ROUTE OR FILE].

Use [FIGMA NODE URL] as the design reference. Reuse the repository's
existing components and semantic tokens where possible. Follow the nearby
file and styling conventions. Preserve unrelated behavior and do not change
shared component APIs unless the current design cannot be implemented without it.

Requirements:
- support the documented desktop and mobile layouts;
- preserve meaningful HTML structure and keyboard behavior;
- include hover, focus, disabled, and selected states where the design or
  existing component API defines them;
- use approved local assets and add useful alternative text where needed;
- do not depend on temporary Figma asset URLs;
- run [LINT COMMAND], [TYPECHECK COMMAND], [TEST COMMAND], and [BUILD COMMAND].

Before editing, summarize the files you plan to change. After editing,
report changed files, verification results, and unresolved design questions
The prompt does not ask for "pixel-perfect code," which provides no acceptance criteria. Viewports, components, states, checks, and change boundaries are measurable.
Store approved assets in the repository because temporary Figma URLs can expire. See Figma's asset troubleshooting guide.
Stage 3: Verify, compare, and correct
The first implementation is a draft. Ask Codex to run the application and compare it at the agreed viewport sizes:
Run the app at [LOCAL URL] and compare the implemented pricing section
with the Figma reference at [DESKTOP WIDTH] and [MOBILE WIDTH].

Check layout, typography, spacing, color, borders, assets, responsive
behavior, interactive states, and component reuse. Fix the largest verified
differences first. Do not replace a shared component only to match one
screenshot. Run the repository checks again and report remaining differences
Finish with a human review of the page and Git diff; visual similarity does not prove behavior or accessibility.
How Do Components, Tokens, and Code Connect Improve the Result?
Codex produces better code when both sides are easy to interpret. In Figma, repeated elements should be components, spacing and color should use variables, layers should have semantic names, and layouts should use Auto Layout where appropriate. Annotations can explain behavior that a static frame cannot show. Figma's file-structure guidance recommends exactly these practices.
The repository needs similar clarity. Components should be discoverable, tokens should have meaningful names, and project instructions should state which libraries and commands to use. Put durable rules in project guidance instead of repeating them in every prompt.
Code Connect adds an explicit bridge. When a Figma component is mapped to its code implementation, MCP context can include its import statement, usage snippet, current property values, and custom instructions. That makes it easier for Codex to produce something like the existing <Button variant="primary"> rather than a new button made from raw markup. The behavior is described in Figma's Code Connect integration guide.
Code Connect is optional and has plan and publishing requirements. It helps component reuse, but cannot fix vague product behavior or a disorganized repository.
Before accepting a Figma-driven change, check:
Existing components and imports are reused where they fit.
Repeated values use repository tokens rather than arbitrary one-off values.
Layout, typography, spacing, colors, borders, and assets match at agreed viewports.
Hover, focus, disabled, loading, empty, and error states are handled where relevant.
Semantic HTML, labels, keyboard navigation, focus visibility, contrast, and reduced motion are reviewed.
Assets are stored in an approved location and have the correct accessibility treatment.
Lint, type-check, tests, and production build pass.
The diff contains no unrelated edits or unnecessary new dependencies.
Why Run Codex and Figma on Vagon Cloud Computer?
The Figma connection is only one part of this workflow. You also need the repository, Codex, runtime, packages, development server, browser preview, and sometimes the Figma desktop app. When those pieces live on one physical computer, changing devices often means rebuilding the environment or leaving essential tools behind.
We built Vagon Cloud Computer as a personal Windows computer in the cloud that streams a complete desktop to the device in front of you. It is not a browser IDE or a short-lived code sandbox. You can install desktop applications, clone repositories, run local servers, open browser previews, and keep the complete project environment together. Your laptop, desktop, tablet, or phone becomes the access point while your Cloud Computer hosts the workspace.
That is where Vagon fits into a Figma-to-Codex workflow. Instead of rebuilding the toolchain whenever your device changes, you can create one development and design computer, configure it once, and return to it whenever you need it.
Build the workspace once
Figma is currently included in our automatic application library. You can install Codex, Git, your editor, Node.js, package manager, and other tools manually, just as you would on a local Windows computer. Once configured, your Vagon workspace can hold:
the cloned repository and its dependencies;
Codex and the project's development tools;
Figma desktop and the authenticated design session;
the local development server and browser preview;
working files, assets, and project-specific configuration.
This is also where your Cloud Computer can simplify desktop MCP. Its 127.0.0.1 endpoint requires Figma desktop and Codex to run on the same host. Running both inside the same Cloud Computer satisfies that requirement even when you control the desktop from another device. If you use Figma's remote MCP server, the desktop app is optional, but the rest of the development environment can still remain together.
You can access your Cloud Computer from computers, tablets, and mobile devices. Smaller devices may not suit sustained development, but they can provide access for a review or quick correction. Our device-access overview explains the available options.
Add performance without migrating the project
A fixed laptop gives you one hardware configuration. With Vagon, you can change between available performance options while retaining the same desktop, applications, and files. Use a lighter option for routine implementation and review, then move to more CPU or memory for a large repository, Storybook, browser automation, or a demanding build. You do not need to copy the environment to another machine. See our scalable performance page for details.
More compute does not make Codex reason better or make Figma context more accurate. It accelerates the workloads around them: installed applications, builds, preview servers, tests, and browser sessions.
We charge active compute by the minute based on the selected performance and region, while a separate storage charge keeps your Cloud Computer's data available between sessions. The result is an on-demand workstation rather than a computer you must leave running. Check our current pricing page for live rates. Vagon Files can also move supporting assets between your local device and the cloud workspace, including while the computer is off; Git should remain the source of truth for repository history.
When does Vagon add the most value?
Vagon Cloud Computer is especially useful when you work from several devices, need Windows from a Mac, Chromebook, or tablet, want a client project separated from your personal computer, need Figma desktop and Codex on one host, or need temporary compute without migrating the project.
If one local computer already handles the complete workflow, a Cloud Computer may not remove a meaningful constraint for you. A stable internet connection is also important, and remote-display latency can matter during close visual review.
Every Vagon Cloud Computer runs as an isolated virtual machine, and we encrypt the connection to it. You still remain responsible for OpenAI and Figma accounts, repository credentials, software licenses, secret management, and company policy.
For teams and independent developers losing time to hardware limits, operating-system constraints, travel, or repeated setup, Vagon turns the entire Figma-to-Codex toolchain into one ready-to-use computer you can reopen instead of recreate.
What Common Problems Should You Expect?
Most failures come from plugin access, authentication, excessive context, or missing project mappings.
Symptom | Likely cause | What to check |
|---|---|---|
Plugin or tools don't appear | Workspace policy or a newly installed plugin hasn't loaded into the task | Ask the administrator about third-party tools and start a new task |
Authentication succeeds but the file can't be read | Wrong Figma identity, invalid link, or missing permission | Confirm the authenticated email, file link, plan membership, and file access |
Desktop tools disappear | Figma desktop is closed, the file isn't active, or MCP is disabled | Reopen the file, enable MCP in Dev Mode, and restart Figma and Codex if needed |
Codex creates generic UI | The node is too broad, the repository wasn't inspected, or mappings are missing | Narrow the selection, use a read-first prompt, and point to components and tokens |
A large frame stalls | Too much detailed design context was requested at once | Inspect metadata first, split the frame into smaller tasks, and work incrementally |
Images stop loading | Temporary Figma asset URLs expired | Retrieve the context again or download approved assets into the repository |
Tool calls are rejected | Seat limit, rate limit, or file permission | Check Figma's current access table and the authenticated user's permissions |
For desktop MCP, check that Figma is running, the file is active, and the server is enabled. See Figma's connection troubleshooting steps.
Grant only the required Figma access, keep secrets out of prompts and annotations, follow repository policy, and review the diff before merging.
Frequently Asked Questions
Do I need a paid Figma plan to use Codex with Figma?
Not always, but plan and seat affect limits and features. Some View and Collab seats have low read limits. Code Connect requires a Dev or Full seat on Organization or Enterprise; write to canvas requires a Full seat. Check the live access table.
Is the Figma plugin better than adding MCP manually?
For most app users, yes. The plugin adds Figma-specific skills for implementation, Code Connect, design-system rules, and canvas workflows. Manual MCP suits CLI-first work or a server-only connection.
Can I use the same connection in the Codex app, CLI, and IDE extension?
They can share MCP configuration on the same Codex host. The plugin remains separate, and the IDE extension does not support plugins.
Can Codex edit my original Figma file?
Only through write to canvas with the remote server, a Full seat, and edit permission. Reading a node or generating repository code does not edit Figma.
Can Codex send a running web interface back to Figma?
Yes. Code to canvas captures live UI as editable layers in supported clients. It is separate from native write to canvas, and destination permissions depend on whether the file is in drafts or shared.
Why does the generated code still look generic?
The connection only transports context. Generic output often means an oversized frame, weak Figma structure, missing mappings, or no repository inspection.
Can I run the complete workflow on Vagon Cloud Computer?
Yes. Your Vagon Cloud Computer provides a full remote Windows desktop where Codex, the cloned repository, development server, browser preview, and optional Figma desktop can stay together. Figma is currently available in our automatic installation catalog, while Codex and the rest of the development toolchain can be installed manually. Keep Codex and Figma desktop in the same Cloud Computer for desktop MCP. OpenAI, Figma, repository, and software access remain separate.
A good Figma-to-Codex workflow is deliberately narrow: select one design target, inspect the codebase, implement within its conventions, and verify the rendered result. If the real obstacle is keeping that complete setup available, create your Vagon Cloud Computer, add Figma and your development toolchain, and turn it into a design-to-code workspace you can return to from any supported device.
Get Beyond Your Computer Performance
Run applications on your cloud computer with the latest generation hardware. No more crashes or lags.

Trial includes 1 hour usage + 7 days of storage.
Summarize with AI

Ready to focus on your creativity?
Vagon gives you the ability to create & render projects, collaborate, and stream applications with the power of the best hardware.

Vagon Blog
Run heavy applications on any device with
your personal computer on the cloud.
San Francisco, California
Solutions
Vagon Teams
Vagon Streams
Use Cases
Resources
Vagon Blog
How to Use 3ds Max With Claude: MCP & Computer Use
How to Use DaVinci Resolve With Claude: MCP & Computer Use
How to Use Godot With Claude: MCP & Computer Use
How to Use Unreal Engine With Claude: MCP & Computer Use
How to Use Unity With Claude: MCP & Computer Use Guide
Googlebook vs Chromebook: What Changes for Creative Work?
How to Use Claude Code With Higgsfield: MCP + Computer Use
How to Use Claude Code With Premiere Pro: MCP & Computer Use
How to Use Codex With Premiere Pro: MCP & Computer Use
Vagon Blog
Run heavy applications on any device with
your personal computer on the cloud.
San Francisco, California
Solutions
Vagon Teams
Vagon Streams
Use Cases
Resources
Vagon Blog
How to Use 3ds Max With Claude: MCP & Computer Use
How to Use DaVinci Resolve With Claude: MCP & Computer Use
How to Use Godot With Claude: MCP & Computer Use
How to Use Unreal Engine With Claude: MCP & Computer Use
How to Use Unity With Claude: MCP & Computer Use Guide
Googlebook vs Chromebook: What Changes for Creative Work?
How to Use Claude Code With Higgsfield: MCP + Computer Use
How to Use Claude Code With Premiere Pro: MCP & Computer Use
How to Use Codex With Premiere Pro: MCP & Computer Use
Vagon Blog
Run heavy applications on any device with
your personal computer on the cloud.
San Francisco, California
Solutions
Vagon Teams
Vagon Streams
Use Cases
Resources
Vagon Blog