Instant Connection for Pixel Streaming
— New Feature Automated Setup
Beginner’s Guide to Blender Viewport Navigation
Beginner’s Guide to Blender Viewport Navigation
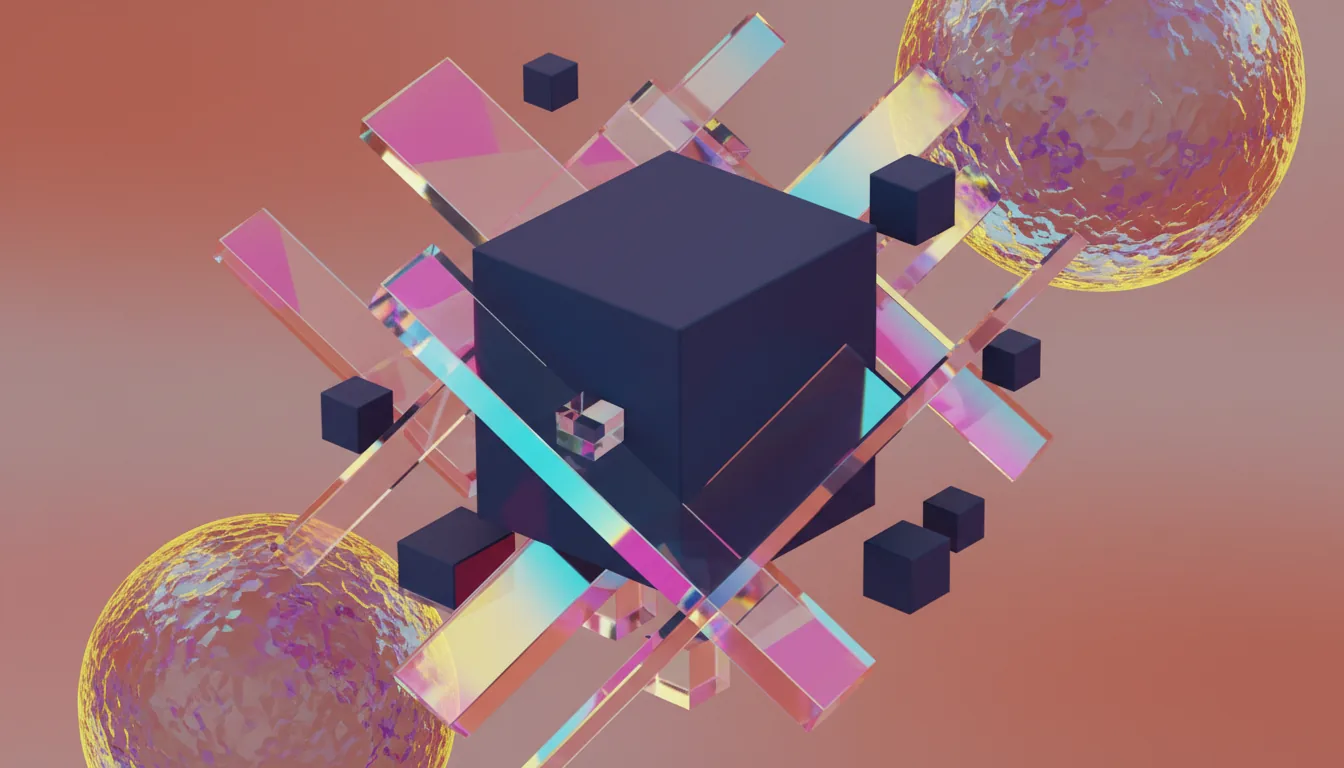
DigitalArt
Beginner’s Guide to Blender Viewport Navigation
Table of Contents
The first time I opened Blender, I accidentally zoomed into a cube’s corner and couldn’t escape for 10 minutes. No joke. I was stuck inside a digital box, wildly spinning my mouse like I was trying to escape a VR horror game.
If you've ever felt like that, lost, confused, or one scroll away from giving up, you're not alone. And you're definitely not dumb.
Blender's 3D Viewport can feel like a black hole when you're starting out. But once you understand a few basic moves, how to rotate, pan, zoom, and reset your view, it all starts to make sense. You stop fighting the interface and start building inside it.
This isn’t going to be a long-winded tutorial full of jargon. It’s just the real fundamentals. The stuff I wish someone had shown me before I rage-quit and came back six months later.
Let’s get you unstuck.
How to Select Objects in Blender
Before you can build anything in Blender, you need to be able to click on it. Sounds obvious, right? But trust me, even this part throws people off at first.
So here’s the deal:
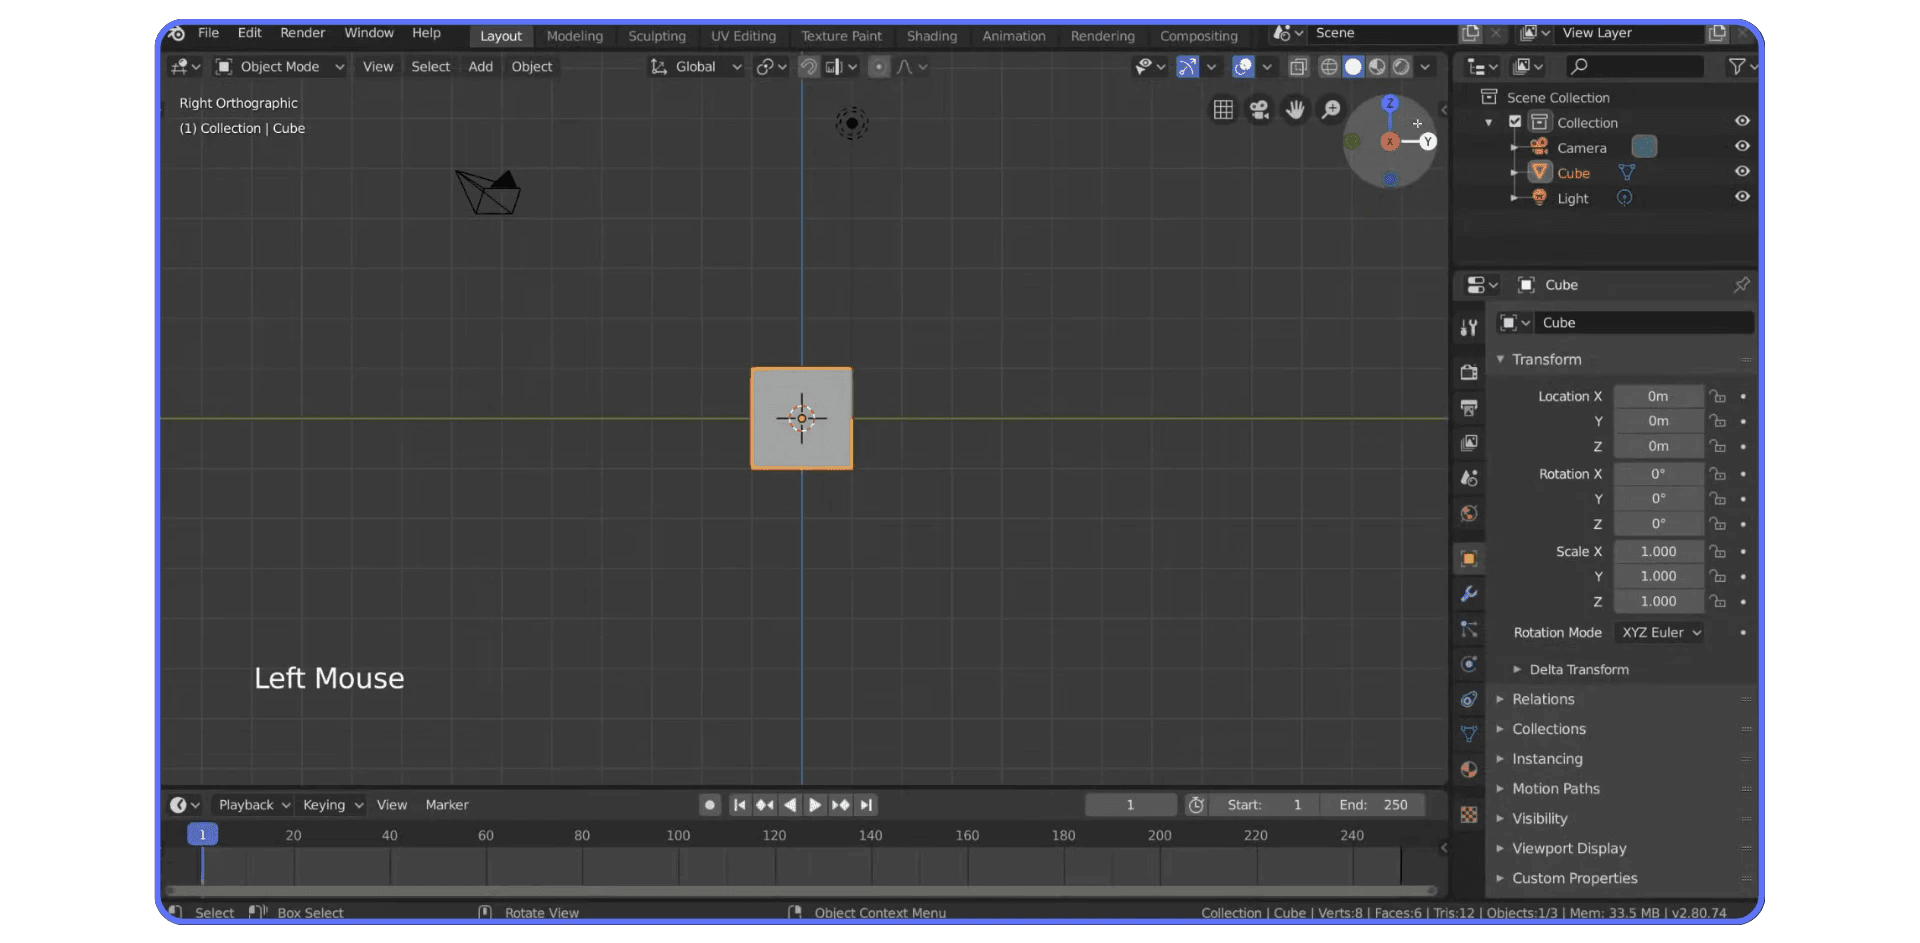
If you want to select an object, left-click it.
If you want to deselect everything, left-click the empty gray space.
That's it.
Want to select everything in the scene? Press A.
Want to deselect everything? Press Alt + A. (Yes, Blender loves hotkeys. We’ll talk more about that later.)
Now, there is a group of Blender veterans who swear by right-click to select instead. They say it reduces wrist strain and speeds up workflow. And to be fair, they’re not wrong. But if you're just starting out, left-click select is the default, and it works just fine.
There’s even a dedicated video explaining the pros and cons of right-click select if you’re curious, but for now? Let’s keep it simple. Left-click, A, Alt + A. You’re good.

If Blender’s shortcut system feels like a secret language, don’t worry—we’ve got you covered with a full guide to the most essential Blender shortcuts and hotkeys.
Getting Started with the Viewport Gizmo
Okay, now that you can actually select stuff, let’s talk about how to look around without getting completely disoriented.
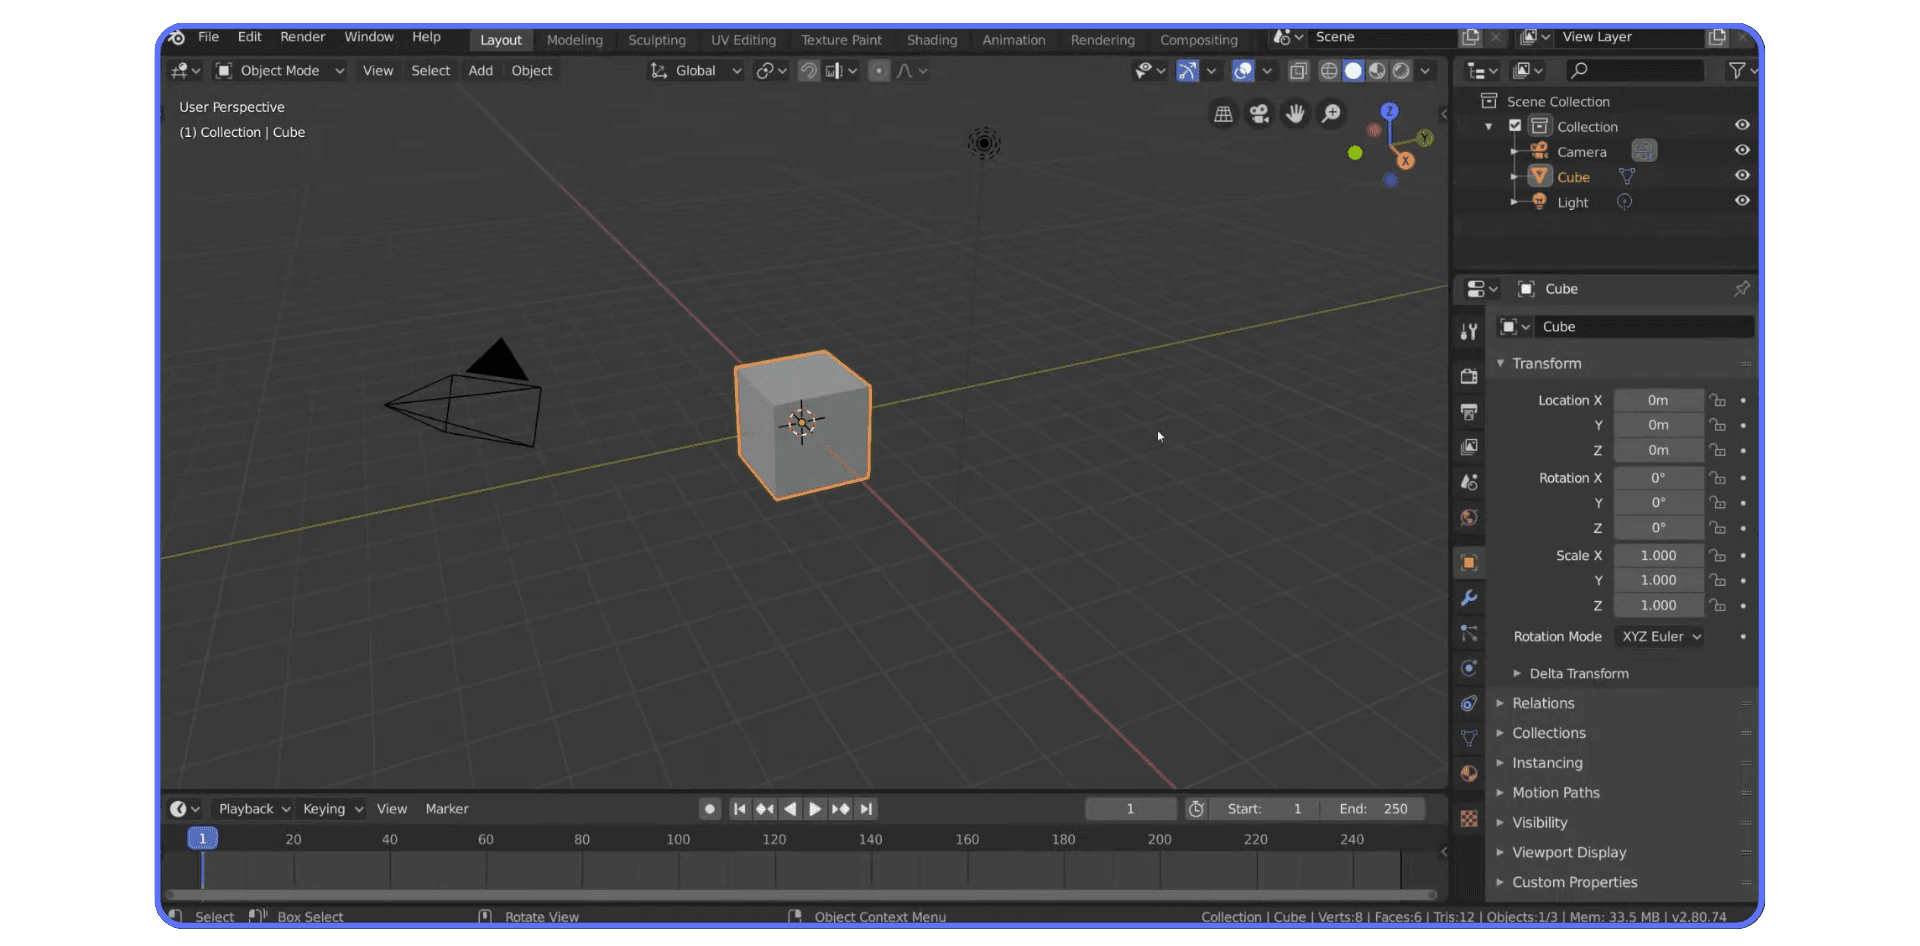
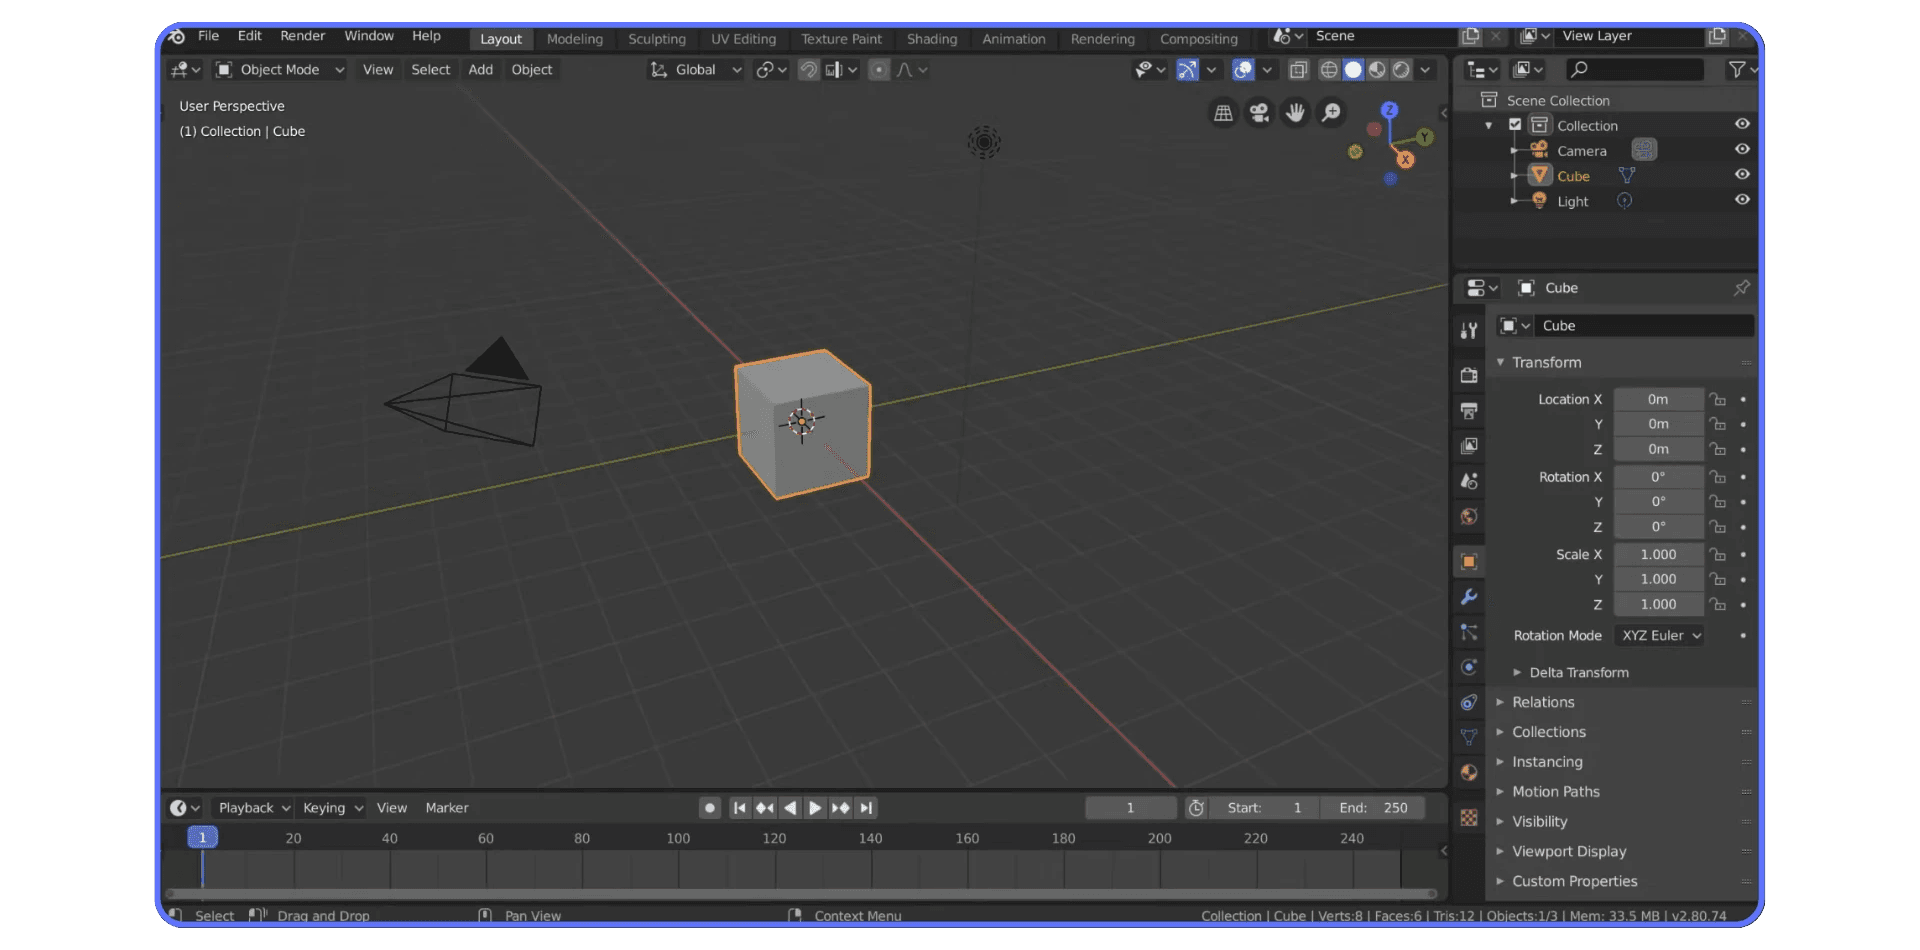
In the top-right corner of the 3D Viewport, there’s this colorful little thing called the gizmo. It looks kind of like a compass collided with a Rubik’s Cube. That’s your orientation widget, and it’s your best friend.
Hover over one of the axes, say, the blue Z axis, and click it. Boom. You're now looking straight down from the top, aka top orthographic view.
Want to see the side of your object? Click the red X or green Y axis. Each one snaps your camera to a clean, flat view of that side. No guessing, no weird angles.
But here’s where it gets better: instead of clicking, try clicking and dragging the gizmo. Now you can freely orbit around your scene, like you’re spinning it in midair. It’s way more fluid, and way more fun.
If you're more of a hotkey person, you can also just middle-click and drag anywhere in the viewport to rotate your view. Same effect, just faster once you’ve got the muscle memory down.
Either way, this is the moment where Blender starts feeling like a real 3D space, not just a UI puzzle. You’re not locked into a single view, you can literally fly around your scene.
How to Rotate, Pan, and Zoom the View
Now that you're orbiting like a pro with the gizmo, let’s get a handle on the three core moves of navigating any 3D scene: rotate, pan, and zoom. Master these, and you'll never get lost again (well, almost never).
Rotate
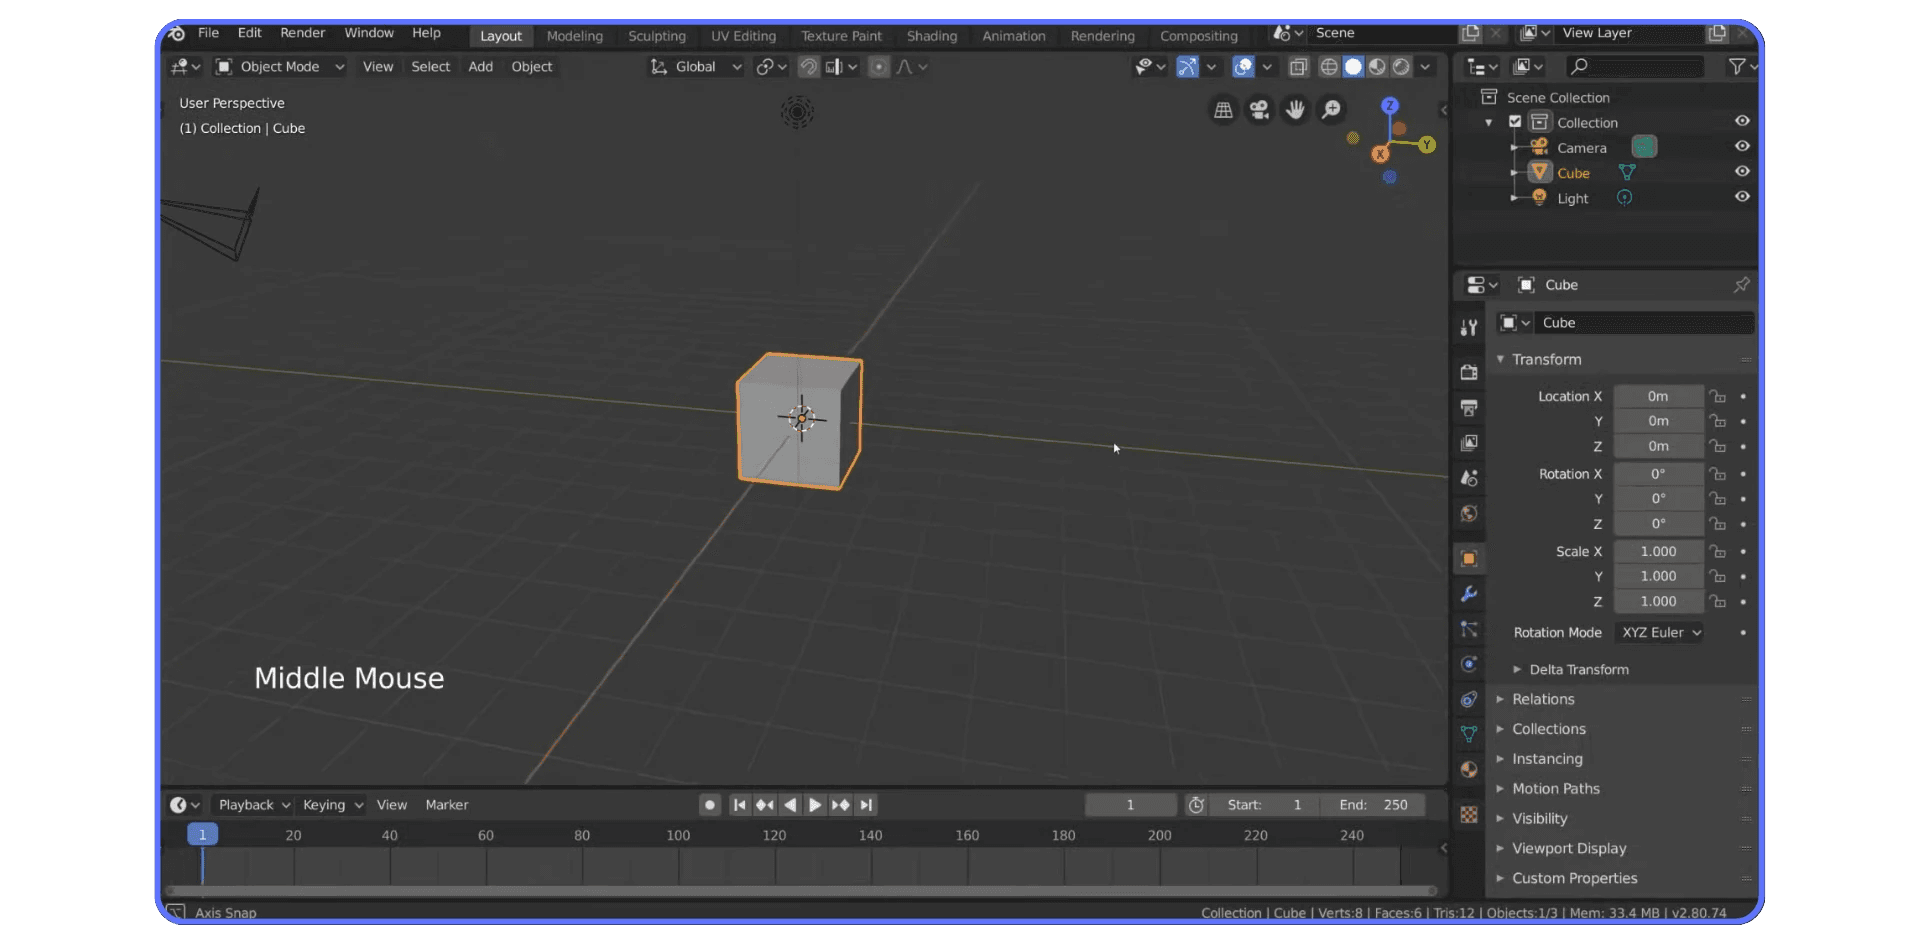
Already familiar with this if you’ve dragged the gizmo, but here's the quicker way: Middle mouse button + drag.
You can rotate from anywhere in the viewport, no gizmo required. It’s fast, it’s intuitive, and it quickly becomes second nature.
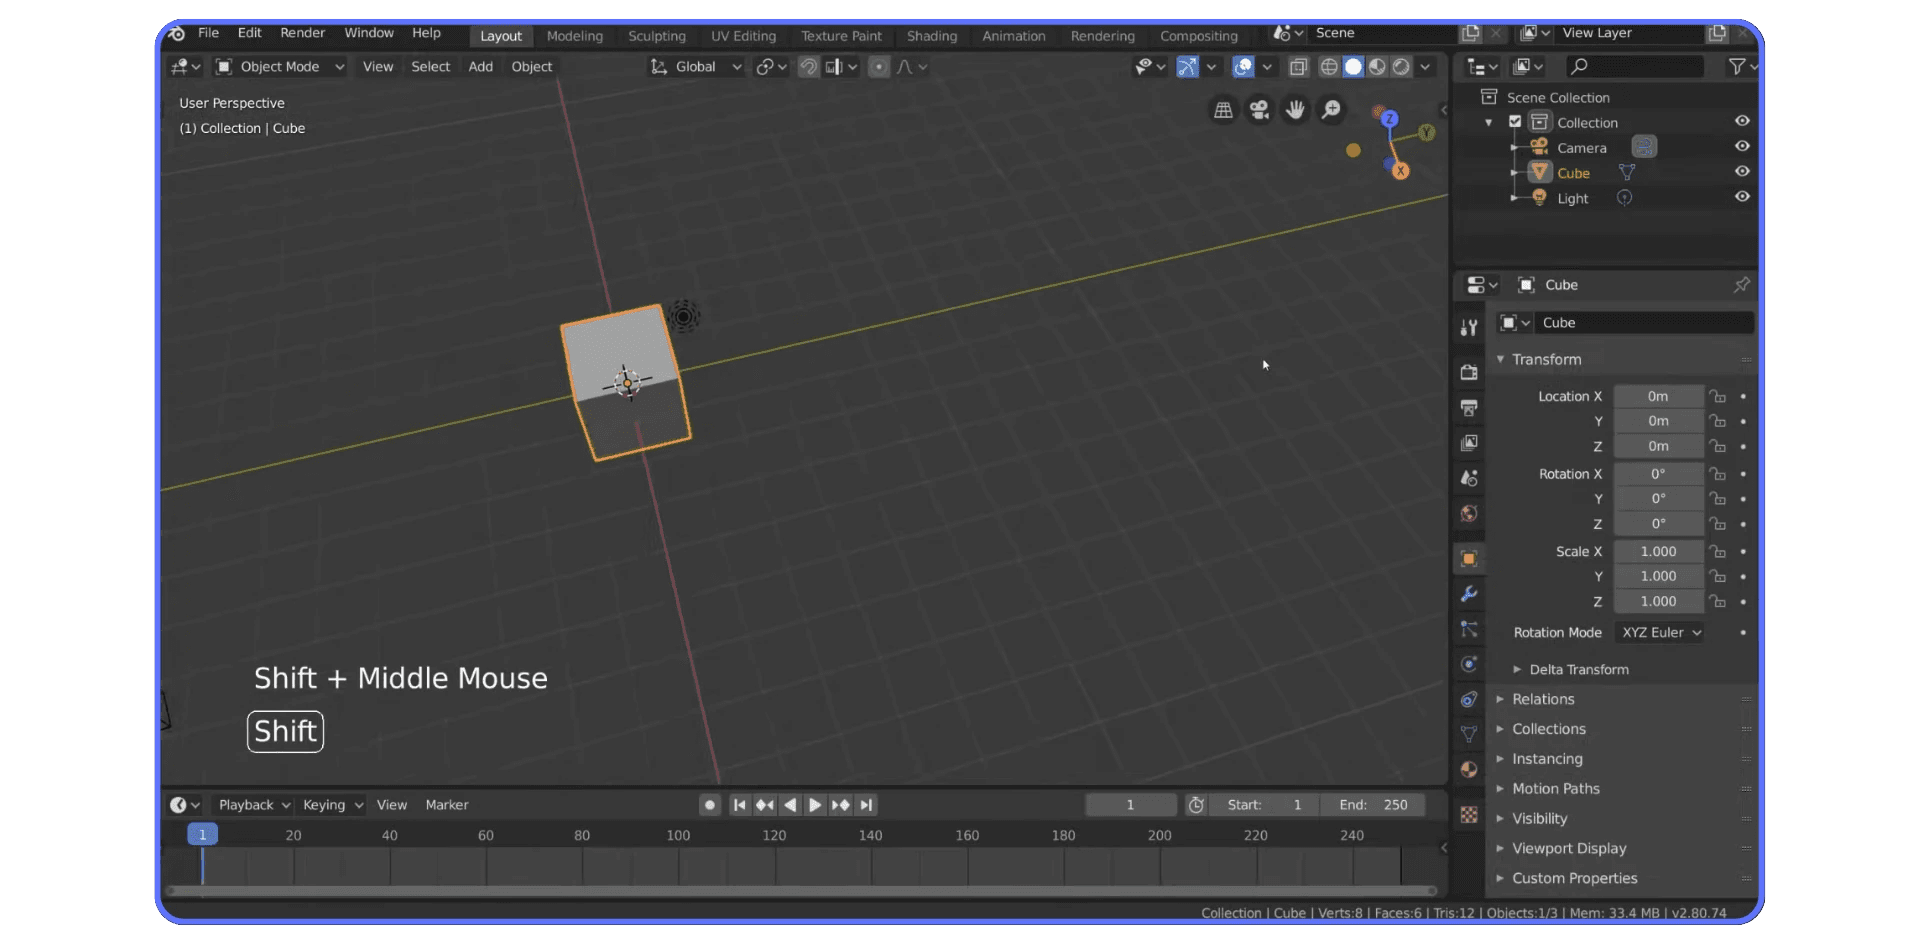
Pan
Need to shift your whole view over a bit? Hold Shift + Middle Mouse and drag.
You’ll slide across the scene like you're pushing the camera sideways. Super helpful when your object is slightly offscreen and you don’t want to rotate all the way around again.
Zoom
You’ve got a few options here.
Scroll your mouse wheel to zoom in and out.
Or use the + / – keys on your numpad.
Or click and drag the little magnifying glass icon in the top-right corner of the viewport.
They all do the same thing, so just use whatever feels most natural. Personally, I’m a scroll wheel addict.
And here’s a bonus insight: your view always rotates around a pivot point, usually the center of the grid or whatever you last focused on. So if things start feeling weird while rotating, that’s why. (We’ll fix that in the next section.)

How to Recenter and Refocus the Viewport
You’re rotating, panning, zooming, things are going well.
Until suddenly… you’re drifting off into Blender space. The cube is gone. You’re spinning around an invisible point like you’re stuck in orbit.
Yeah. That happens a lot.
Here’s how to get your view back on track.
#1: Use the Hand Icon
In the top-right corner of the viewport, right next to the gizmo, there’s a hand icon. Click and drag it. That’s Blender’s built-in pan tool, and it shifts your entire view wherever you want. Once you’ve dragged the view to the area you care about, your new pivot point gets updated. So now when you rotate? You stay focused on that spot.

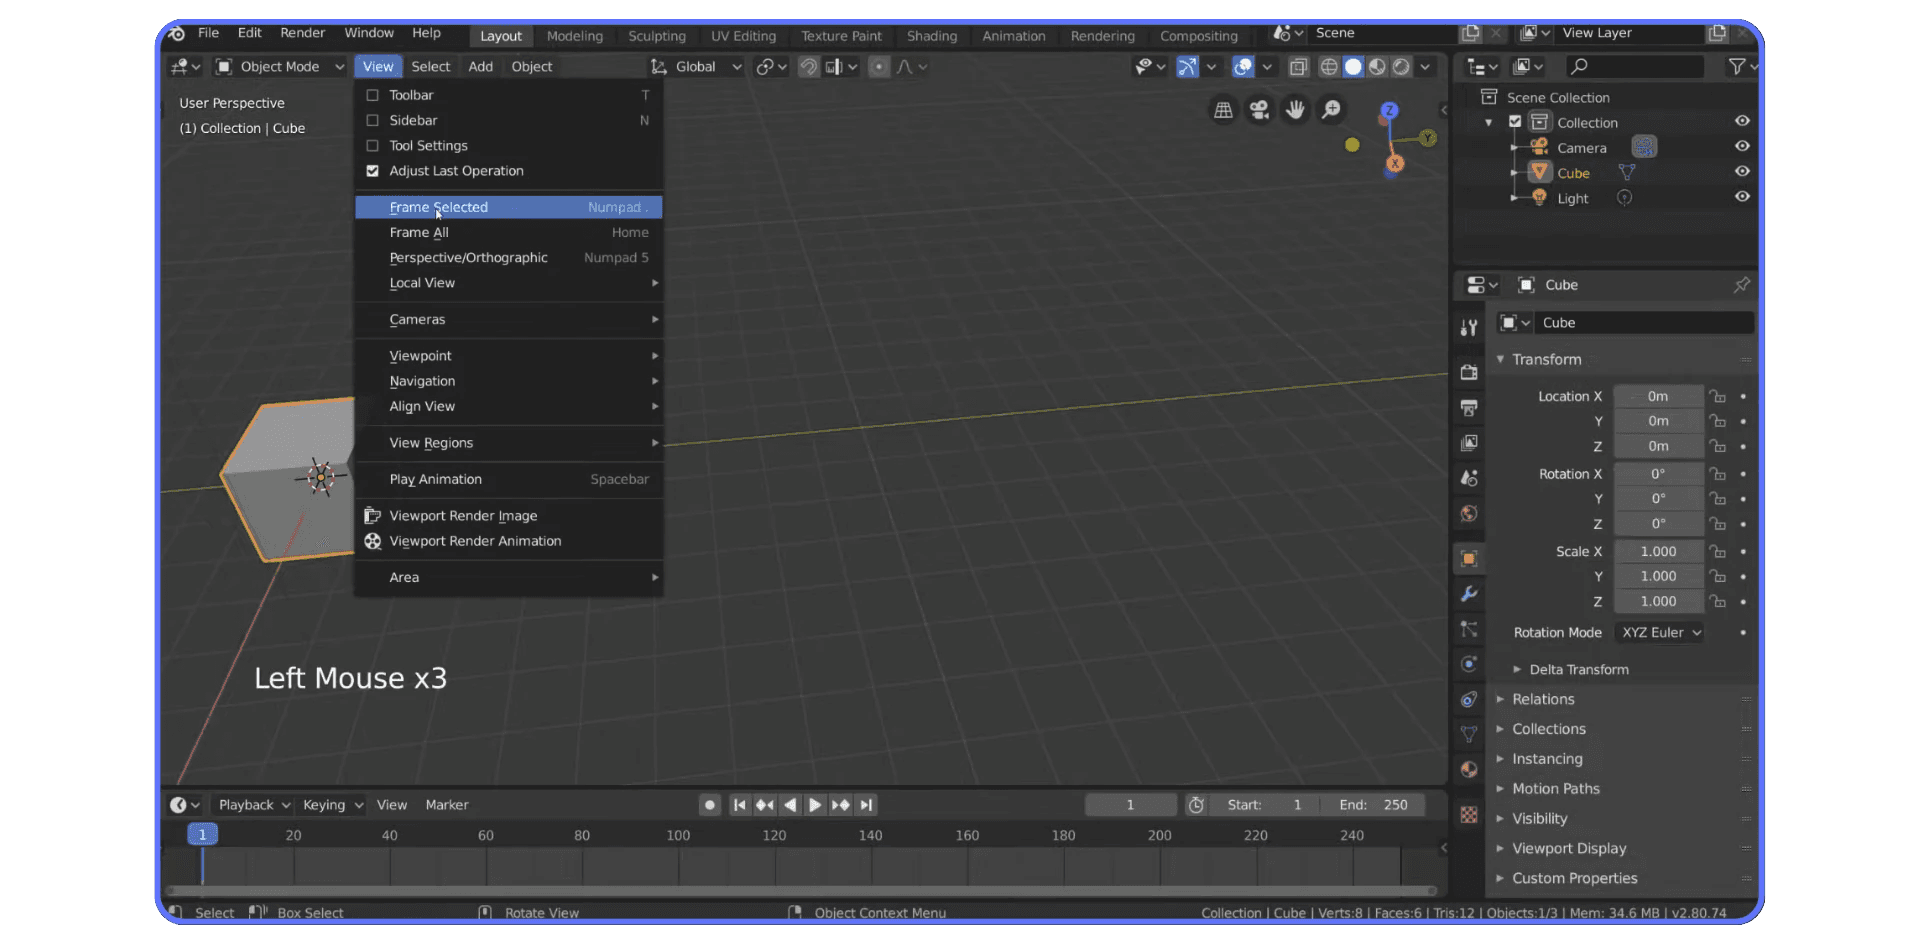
#2: Frame Selected
This one’s a game-changer. If you’ve got an object selected and want to snap the camera to it, go to the View menu > Frame Selected.
Even faster: press the . key on your numpad.
Blender will zoom in and center your object in the viewport. You’ll wonder why this isn’t the default for everything.
Once you're framed up, everything gets easier: rotating, zooming, tweaking your model, all of it. You’re no longer guessing where you are. You’re in control.
Still confused about where objects land when you add them? It probably has to do with the 3D cursor—this guide to Blender’s 3D cursor will help you take control of your scene setup.
Understanding Perspective vs Orthographic Views
Okay, here’s something that trips up almost everyone at first:
Why does my model suddenly look… weird? Flat? Too perfect?
Welcome to the world of Perspective and Orthographic views.
Blender lets you switch between them with a single click, but understanding why you’d use each makes all the difference.
Perspective View:
This is how we see in real life. Objects farther away look smaller. Parallax happens. Your 3D world feels like, well, a world.
You’ll notice this when you're orbiting your scene and things get all cinematic. It’s great for creative composition, camera setup, and just getting a feel for how your final image will look.
Orthographic View:
No perspective. No size distortion. Everything is displayed at the exact same scale, no matter how far it is from the camera.
Sounds boring, right? But trust me, this is crucial for modeling. Want to align edges perfectly? Match a 2D sketch? Lay out architecture or product designs with precision? You’ll want ortho mode every time.
You can toggle between these two by clicking the grid icon next to the camera view button, or just press NumPad 5.
And once you start switching intentionally? That’s when your Blender workflow starts to feel professional.

Once you’re comfortable with 3D space, you might be surprised that Blender handles 2D too—check out this guide to 2D animation in Blender if you want to explore a different dimension of creativity.
How to Set and Control the Camera in Blender
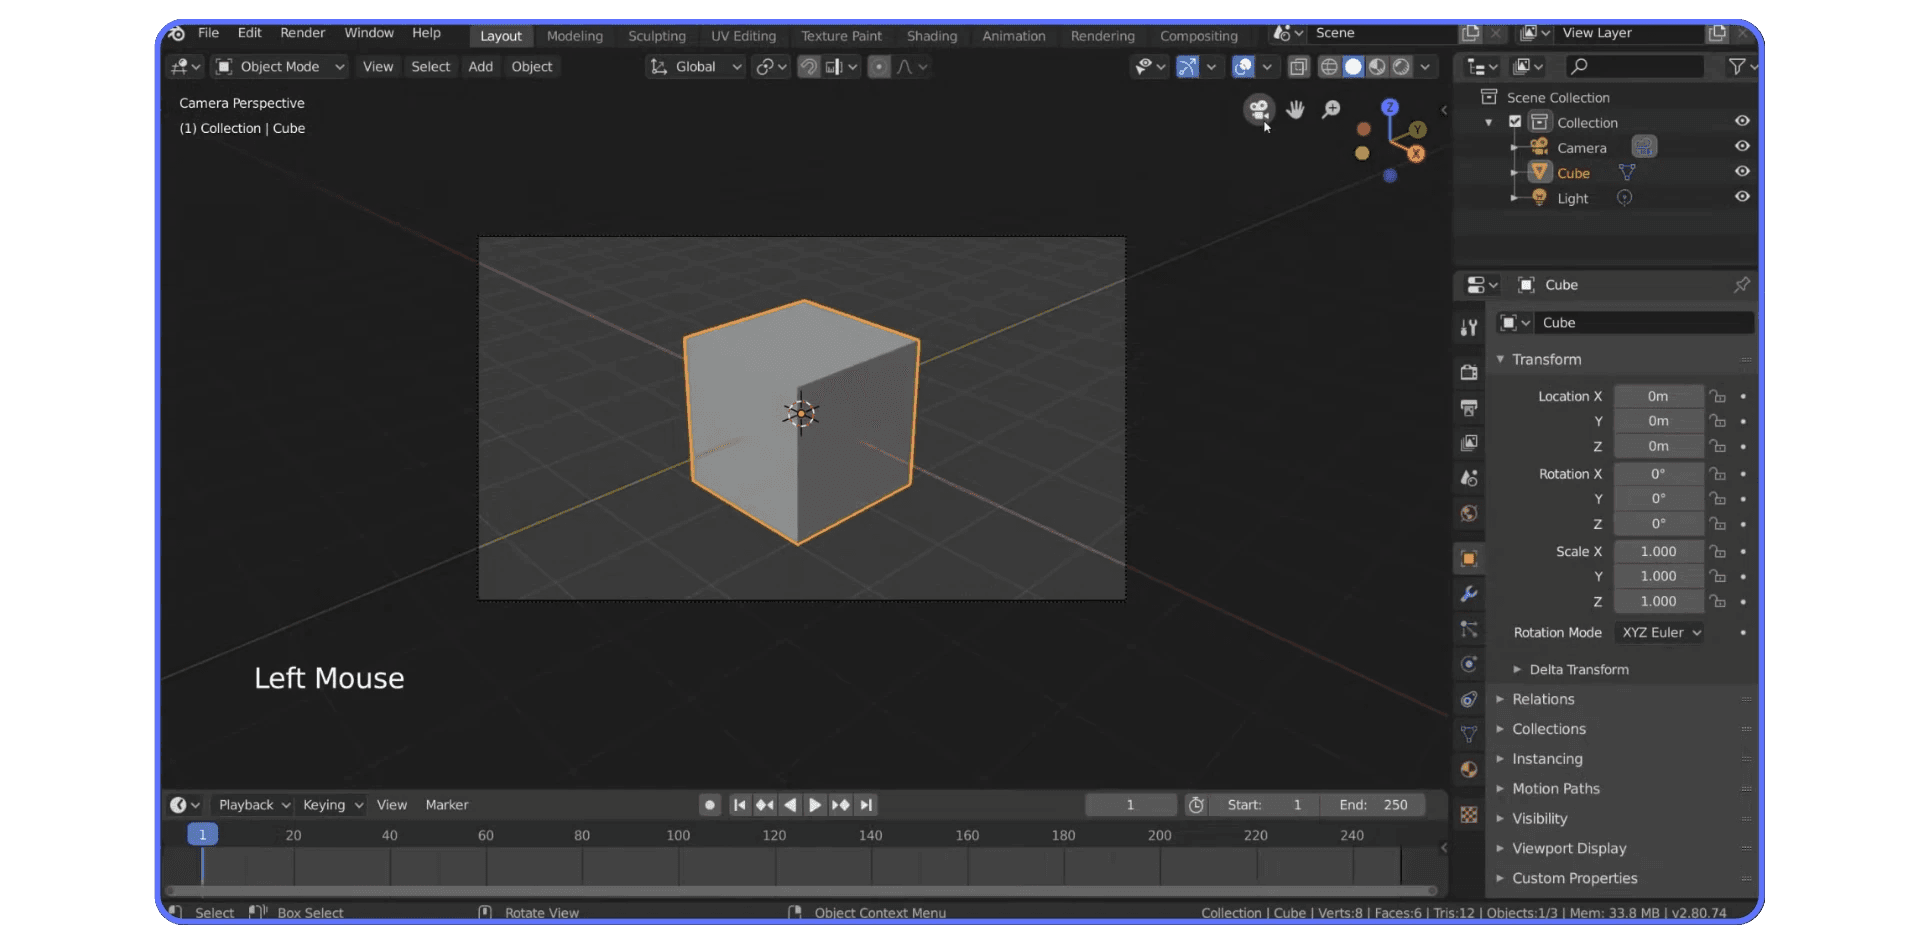
So you've been orbiting, panning, zooming… great. But when it's time to actually render something, you’re not using your eyeballs anymore. You’re using the camera.
Blender’s camera view shows exactly what will be rendered, nothing more, nothing less.
Want to see through it?
Click the camera icon near the viewport gizmo, or just tap NumPad 0. Boom. You’re in.
Now here’s where it gets cool.
If you're like me, you'll orbit into a view you love—then panic trying to match that with your camera. Don’t. Just hit Ctrl + Alt + NumPad 0 and Blender will snap the camera to your current viewport perspective.
Instant director mode.
From there:
Use
Gto move the cameraRto rotateLock to axis with
X,Y, orZif neededOr better yet, turn on camera lock (in the side panel > View > Lock Camera to View) and just move the viewport as usual while in camera mode
This is where you go from “here’s a cube” to “here’s a scene.”
And if you're planning to animate or export this as a portfolio shot? Dialing in your camera angle matters just as much as modeling.
Want to automate stuff or customize Blender to your workflow? Using Python in Blender opens up a whole new level of power once you’re ready to go deeper.
Why Viewport Navigation Really Matters
Look, you can learn every shortcut in the world—but if you can’t move through your scene, you’re stuck. Literally.
I’ve seen talented people get totally blocked in Blender just because they couldn’t figure out why they were zooming into nothing or rotating around the wrong axis. It’s not about talent. It’s about comfort.
Viewport navigation is the difference between struggling and flying.
Between fighting the UI and flowing with it.
And the best way to get better?
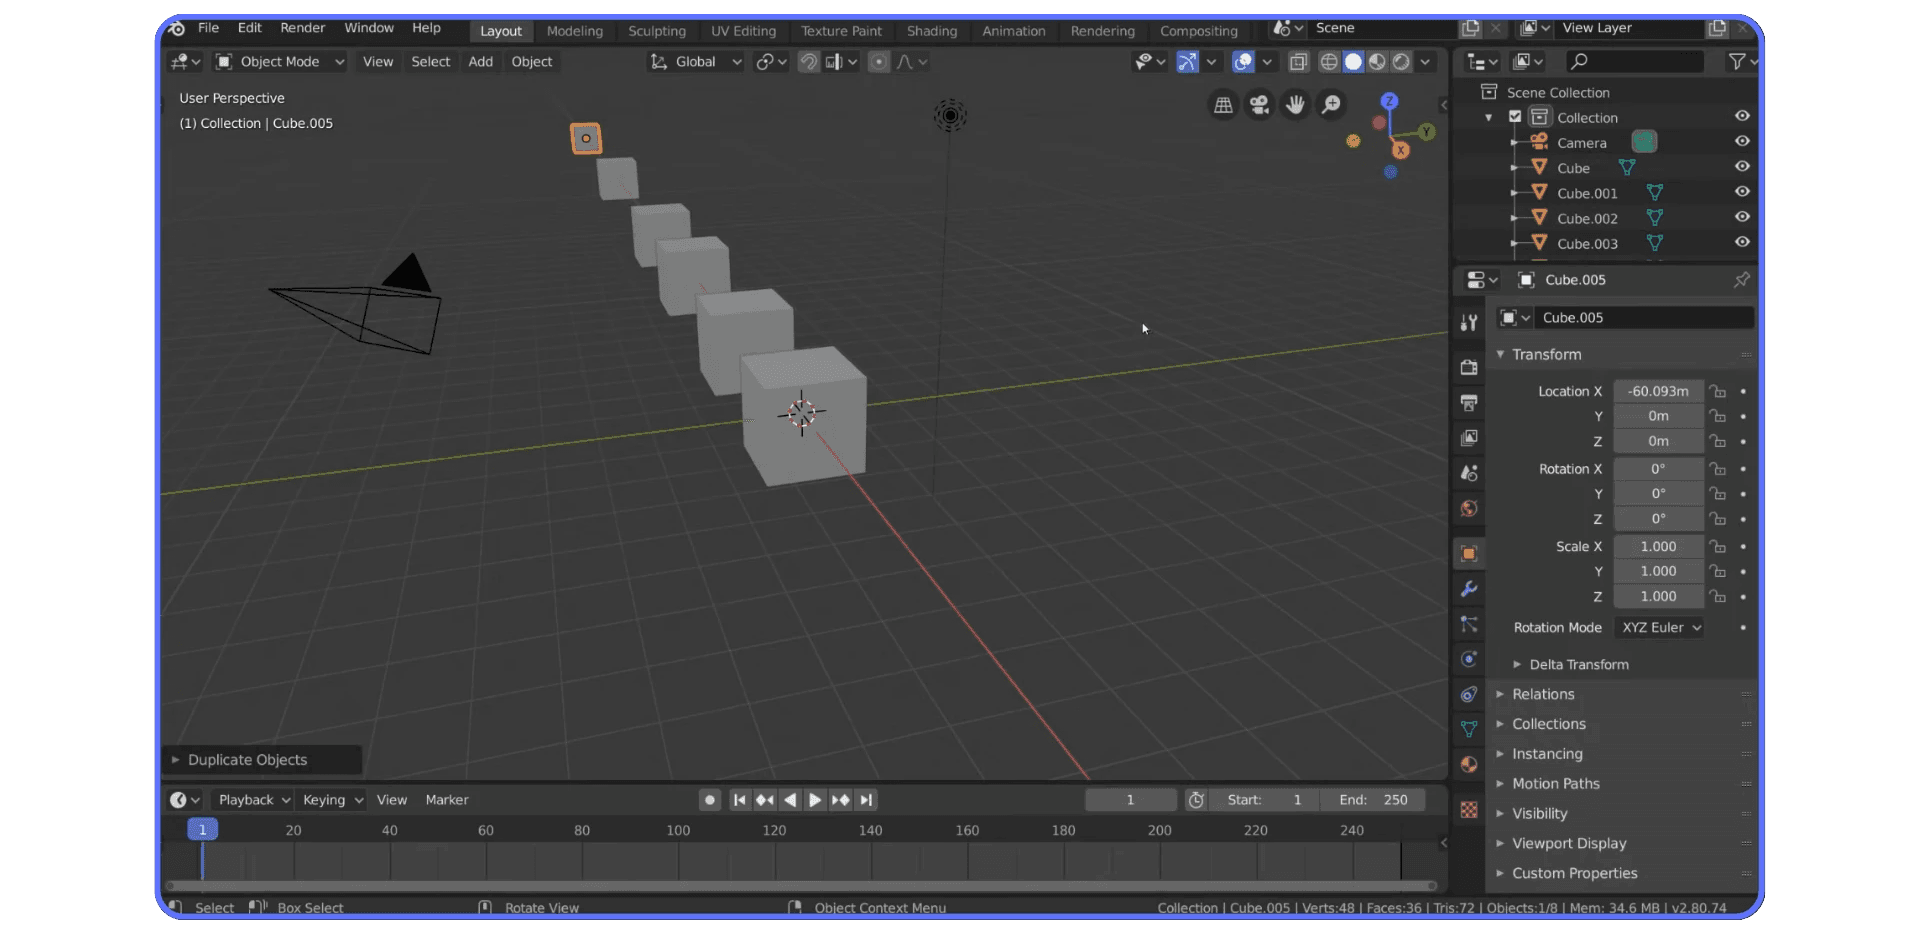
Make a sandbox scene. Drop in a few cubes. Maybe a monkey head (Shift + A > Mesh > Monkey, trust me). Spread them around. Set one off to the side, another one far in the back. Then try this:
Focus on one object using
.on the numpadOrbit around it using the gizmo
Pan over to another object
Snap to top view, then switch to orthographic mode
Zoom in, zoom out
Frame the whole scene
Drop into camera view
Set up a basic shot
Switch to perspective again
Repeat
Do it a few times, and suddenly navigation isn’t a thing you think about—it’s just something your fingers do.
And that’s the turning point. Because once you’re not thinking about navigating, you can actually focus on creating.
Once navigation feels second nature, you can start playing with more advanced tools—like experimenting with AI-powered modeling tools that can speed up your creative process.
What to Do When Blender Slows Down
So, here’s the thing.
You just learned how to navigate Blender’s viewport like a pro. You’re framing shots, switching views, orbiting like it’s second nature. You’ve got ideas. You’ve got flow. And then…
Your laptop fans go full jet engine. Everything slows to a crawl.
This is the moment I realized something: it’s not always about learning more features. Sometimes, it’s just about having the power to actually use them.
That’s where Vagon Cloud Computer comes in.
Instead of maxing out your local setup—or waiting forever for previews to catch up—you just launch a high-performance machine straight from your browser. Blender runs like it wants to run. Snappy viewport. Fast rendering. No thermal throttling. No upgrade anxiety.
And when you’re done? You shut it down. Pay only for what you use. That’s it.
I’ve personally used Vagon for projects that pushed past what my laptop could handle. Complex scenes. Cycles renders. Shader tests. It made the difference between struggling and finishing.
So if you’re starting to feel limited by your hardware, or if you just want to try Blender at full speed, give it a shot. No installs. No stress. Just your creative tools running like they should.
If you’re curious about exploring Blender on different devices, yep—even an iPad—you’ll want to check out how to use Blender on an iPad for portable creativity.
FAQs
1. Why does my zoom feel weird or inconsistent in Blender?
You're not imagining it. Blender's zoom speed depends on how far you are from the pivot point. If you're zoomed way out or not centered on anything, zooming can feel sluggish or unresponsive. Try using the Frame Selected (. on numpad) to refocus and reset your perspective. It makes a world of difference.
2. How do I stop Blender from rotating around random points?
This usually happens when you're orbiting without anything selected. Blender defaults to rotating around the world origin or your last focal point. Use Frame Selected or make sure your object is actively selected, and the viewport will behave a lot more predictably.
3. I don’t have a mouse with a middle button—how do I navigate?
Good news: Blender’s preferences let you emulate a 3-button mouse. Go to Edit > Preferences > Input and enable "Emulate 3 Button Mouse." Then you can hold Alt while left-click dragging to rotate the view. It’s not perfect, but it works.
4. Do I really need a numpad for all these shortcuts?
Not necessarily. If you’re on a laptop without one, you can enable "Emulate Numpad" under Preferences > Input. That way, the numbers on your main keyboard act like the numpad keys. You can also customize your keybindings or use the navigation gizmo in the top right corner.
5. What’s the difference between perspective and orthographic mode again?
Perspective mode gives you a natural 3D view—objects shrink as they move away from the camera. Orthographic mode flattens everything and removes depth, which is super helpful when modeling with precision or referencing 2D drawings. You’ll bounce between the two a lot depending on what you're doing.
6. Blender’s navigation feels harder than other 3D apps. Is that normal?
It can feel that way at first. But once you get comfortable with the shortcuts and viewport tools, most people actually prefer Blender’s setup. It’s fast, fluid, and fully customizable. You just have to cross that initial learning curve—and this post gets you there.
7. Can I speed up viewport performance on a slow computer?
Definitely. Start by switching to Solid View instead of Material or Rendered View. Turn off unnecessary overlays. Use simpler shaders while working, and only switch to final render settings at the end. Or better yet—use Vagon Cloud Computer to bypass the hardware limitations altogether.
The first time I opened Blender, I accidentally zoomed into a cube’s corner and couldn’t escape for 10 minutes. No joke. I was stuck inside a digital box, wildly spinning my mouse like I was trying to escape a VR horror game.
If you've ever felt like that, lost, confused, or one scroll away from giving up, you're not alone. And you're definitely not dumb.
Blender's 3D Viewport can feel like a black hole when you're starting out. But once you understand a few basic moves, how to rotate, pan, zoom, and reset your view, it all starts to make sense. You stop fighting the interface and start building inside it.
This isn’t going to be a long-winded tutorial full of jargon. It’s just the real fundamentals. The stuff I wish someone had shown me before I rage-quit and came back six months later.
Let’s get you unstuck.
How to Select Objects in Blender
Before you can build anything in Blender, you need to be able to click on it. Sounds obvious, right? But trust me, even this part throws people off at first.
So here’s the deal:
If you want to select an object, left-click it.
If you want to deselect everything, left-click the empty gray space.
That's it.
Want to select everything in the scene? Press A.
Want to deselect everything? Press Alt + A. (Yes, Blender loves hotkeys. We’ll talk more about that later.)
Now, there is a group of Blender veterans who swear by right-click to select instead. They say it reduces wrist strain and speeds up workflow. And to be fair, they’re not wrong. But if you're just starting out, left-click select is the default, and it works just fine.
There’s even a dedicated video explaining the pros and cons of right-click select if you’re curious, but for now? Let’s keep it simple. Left-click, A, Alt + A. You’re good.
If Blender’s shortcut system feels like a secret language, don’t worry—we’ve got you covered with a full guide to the most essential Blender shortcuts and hotkeys.
Getting Started with the Viewport Gizmo
Okay, now that you can actually select stuff, let’s talk about how to look around without getting completely disoriented.
In the top-right corner of the 3D Viewport, there’s this colorful little thing called the gizmo. It looks kind of like a compass collided with a Rubik’s Cube. That’s your orientation widget, and it’s your best friend.
Hover over one of the axes, say, the blue Z axis, and click it. Boom. You're now looking straight down from the top, aka top orthographic view.
Want to see the side of your object? Click the red X or green Y axis. Each one snaps your camera to a clean, flat view of that side. No guessing, no weird angles.
But here’s where it gets better: instead of clicking, try clicking and dragging the gizmo. Now you can freely orbit around your scene, like you’re spinning it in midair. It’s way more fluid, and way more fun.
If you're more of a hotkey person, you can also just middle-click and drag anywhere in the viewport to rotate your view. Same effect, just faster once you’ve got the muscle memory down.
Either way, this is the moment where Blender starts feeling like a real 3D space, not just a UI puzzle. You’re not locked into a single view, you can literally fly around your scene.
How to Rotate, Pan, and Zoom the View
Now that you're orbiting like a pro with the gizmo, let’s get a handle on the three core moves of navigating any 3D scene: rotate, pan, and zoom. Master these, and you'll never get lost again (well, almost never).
Rotate
Already familiar with this if you’ve dragged the gizmo, but here's the quicker way: Middle mouse button + drag.
You can rotate from anywhere in the viewport, no gizmo required. It’s fast, it’s intuitive, and it quickly becomes second nature.
Pan
Need to shift your whole view over a bit? Hold Shift + Middle Mouse and drag.
You’ll slide across the scene like you're pushing the camera sideways. Super helpful when your object is slightly offscreen and you don’t want to rotate all the way around again.
Zoom
You’ve got a few options here.
Scroll your mouse wheel to zoom in and out.
Or use the + / – keys on your numpad.
Or click and drag the little magnifying glass icon in the top-right corner of the viewport.
They all do the same thing, so just use whatever feels most natural. Personally, I’m a scroll wheel addict.
And here’s a bonus insight: your view always rotates around a pivot point, usually the center of the grid or whatever you last focused on. So if things start feeling weird while rotating, that’s why. (We’ll fix that in the next section.)
How to Recenter and Refocus the Viewport
You’re rotating, panning, zooming, things are going well.
Until suddenly… you’re drifting off into Blender space. The cube is gone. You’re spinning around an invisible point like you’re stuck in orbit.
Yeah. That happens a lot.
Here’s how to get your view back on track.
#1: Use the Hand Icon
In the top-right corner of the viewport, right next to the gizmo, there’s a hand icon. Click and drag it. That’s Blender’s built-in pan tool, and it shifts your entire view wherever you want. Once you’ve dragged the view to the area you care about, your new pivot point gets updated. So now when you rotate? You stay focused on that spot.
#2: Frame Selected
This one’s a game-changer. If you’ve got an object selected and want to snap the camera to it, go to the View menu > Frame Selected.
Even faster: press the . key on your numpad.
Blender will zoom in and center your object in the viewport. You’ll wonder why this isn’t the default for everything.
Once you're framed up, everything gets easier: rotating, zooming, tweaking your model, all of it. You’re no longer guessing where you are. You’re in control.
Still confused about where objects land when you add them? It probably has to do with the 3D cursor—this guide to Blender’s 3D cursor will help you take control of your scene setup.
Understanding Perspective vs Orthographic Views
Okay, here’s something that trips up almost everyone at first:
Why does my model suddenly look… weird? Flat? Too perfect?
Welcome to the world of Perspective and Orthographic views.
Blender lets you switch between them with a single click, but understanding why you’d use each makes all the difference.
Perspective View:
This is how we see in real life. Objects farther away look smaller. Parallax happens. Your 3D world feels like, well, a world.
You’ll notice this when you're orbiting your scene and things get all cinematic. It’s great for creative composition, camera setup, and just getting a feel for how your final image will look.
Orthographic View:
No perspective. No size distortion. Everything is displayed at the exact same scale, no matter how far it is from the camera.
Sounds boring, right? But trust me, this is crucial for modeling. Want to align edges perfectly? Match a 2D sketch? Lay out architecture or product designs with precision? You’ll want ortho mode every time.
You can toggle between these two by clicking the grid icon next to the camera view button, or just press NumPad 5.
And once you start switching intentionally? That’s when your Blender workflow starts to feel professional.
Once you’re comfortable with 3D space, you might be surprised that Blender handles 2D too—check out this guide to 2D animation in Blender if you want to explore a different dimension of creativity.
How to Set and Control the Camera in Blender
So you've been orbiting, panning, zooming… great. But when it's time to actually render something, you’re not using your eyeballs anymore. You’re using the camera.
Blender’s camera view shows exactly what will be rendered, nothing more, nothing less.
Want to see through it?
Click the camera icon near the viewport gizmo, or just tap NumPad 0. Boom. You’re in.
Now here’s where it gets cool.
If you're like me, you'll orbit into a view you love—then panic trying to match that with your camera. Don’t. Just hit Ctrl + Alt + NumPad 0 and Blender will snap the camera to your current viewport perspective.
Instant director mode.
From there:
Use
Gto move the cameraRto rotateLock to axis with
X,Y, orZif neededOr better yet, turn on camera lock (in the side panel > View > Lock Camera to View) and just move the viewport as usual while in camera mode
This is where you go from “here’s a cube” to “here’s a scene.”
And if you're planning to animate or export this as a portfolio shot? Dialing in your camera angle matters just as much as modeling.
Want to automate stuff or customize Blender to your workflow? Using Python in Blender opens up a whole new level of power once you’re ready to go deeper.
Why Viewport Navigation Really Matters
Look, you can learn every shortcut in the world—but if you can’t move through your scene, you’re stuck. Literally.
I’ve seen talented people get totally blocked in Blender just because they couldn’t figure out why they were zooming into nothing or rotating around the wrong axis. It’s not about talent. It’s about comfort.
Viewport navigation is the difference between struggling and flying.
Between fighting the UI and flowing with it.
And the best way to get better?
Make a sandbox scene. Drop in a few cubes. Maybe a monkey head (Shift + A > Mesh > Monkey, trust me). Spread them around. Set one off to the side, another one far in the back. Then try this:
Focus on one object using
.on the numpadOrbit around it using the gizmo
Pan over to another object
Snap to top view, then switch to orthographic mode
Zoom in, zoom out
Frame the whole scene
Drop into camera view
Set up a basic shot
Switch to perspective again
Repeat
Do it a few times, and suddenly navigation isn’t a thing you think about—it’s just something your fingers do.
And that’s the turning point. Because once you’re not thinking about navigating, you can actually focus on creating.
Once navigation feels second nature, you can start playing with more advanced tools—like experimenting with AI-powered modeling tools that can speed up your creative process.
What to Do When Blender Slows Down
So, here’s the thing.
You just learned how to navigate Blender’s viewport like a pro. You’re framing shots, switching views, orbiting like it’s second nature. You’ve got ideas. You’ve got flow. And then…
Your laptop fans go full jet engine. Everything slows to a crawl.
This is the moment I realized something: it’s not always about learning more features. Sometimes, it’s just about having the power to actually use them.
That’s where Vagon Cloud Computer comes in.
Instead of maxing out your local setup—or waiting forever for previews to catch up—you just launch a high-performance machine straight from your browser. Blender runs like it wants to run. Snappy viewport. Fast rendering. No thermal throttling. No upgrade anxiety.
And when you’re done? You shut it down. Pay only for what you use. That’s it.
I’ve personally used Vagon for projects that pushed past what my laptop could handle. Complex scenes. Cycles renders. Shader tests. It made the difference between struggling and finishing.
So if you’re starting to feel limited by your hardware, or if you just want to try Blender at full speed, give it a shot. No installs. No stress. Just your creative tools running like they should.
If you’re curious about exploring Blender on different devices, yep—even an iPad—you’ll want to check out how to use Blender on an iPad for portable creativity.
FAQs
1. Why does my zoom feel weird or inconsistent in Blender?
You're not imagining it. Blender's zoom speed depends on how far you are from the pivot point. If you're zoomed way out or not centered on anything, zooming can feel sluggish or unresponsive. Try using the Frame Selected (. on numpad) to refocus and reset your perspective. It makes a world of difference.
2. How do I stop Blender from rotating around random points?
This usually happens when you're orbiting without anything selected. Blender defaults to rotating around the world origin or your last focal point. Use Frame Selected or make sure your object is actively selected, and the viewport will behave a lot more predictably.
3. I don’t have a mouse with a middle button—how do I navigate?
Good news: Blender’s preferences let you emulate a 3-button mouse. Go to Edit > Preferences > Input and enable "Emulate 3 Button Mouse." Then you can hold Alt while left-click dragging to rotate the view. It’s not perfect, but it works.
4. Do I really need a numpad for all these shortcuts?
Not necessarily. If you’re on a laptop without one, you can enable "Emulate Numpad" under Preferences > Input. That way, the numbers on your main keyboard act like the numpad keys. You can also customize your keybindings or use the navigation gizmo in the top right corner.
5. What’s the difference between perspective and orthographic mode again?
Perspective mode gives you a natural 3D view—objects shrink as they move away from the camera. Orthographic mode flattens everything and removes depth, which is super helpful when modeling with precision or referencing 2D drawings. You’ll bounce between the two a lot depending on what you're doing.
6. Blender’s navigation feels harder than other 3D apps. Is that normal?
It can feel that way at first. But once you get comfortable with the shortcuts and viewport tools, most people actually prefer Blender’s setup. It’s fast, fluid, and fully customizable. You just have to cross that initial learning curve—and this post gets you there.
7. Can I speed up viewport performance on a slow computer?
Definitely. Start by switching to Solid View instead of Material or Rendered View. Turn off unnecessary overlays. Use simpler shaders while working, and only switch to final render settings at the end. Or better yet—use Vagon Cloud Computer to bypass the hardware limitations altogether.
Get Beyond Your Computer Performance
Run applications on your cloud computer with the latest generation hardware. No more crashes or lags.

Trial includes 1 hour usage + 7 days of storage.
Summarize with AI

Ready to focus on your creativity?
Vagon gives you the ability to create & render projects, collaborate, and stream applications with the power of the best hardware.

Vagon Blog


Run heavy applications on any device with
your personal computer on the cloud.
San Francisco, California
Solutions
Vagon Teams
Vagon Streams
Use Cases
Resources
Vagon Blog
How to Run Audacity on a Cloud Ubuntu Desktop (2026 Guide)
How to Run Darktable on a Cloud Ubuntu Desktop for RAW Photo Editing (2026 Guide)
How to Run Kdenlive on a Cloud Ubuntu Desktop (2026 Guide)
How to Run DaVinci Resolve on Linux in the Cloud (2026 Guide)
How to Run Inkscape on a Cloud Ubuntu Desktop (2026 Guide)
How to Run Krita on a Cloud Ubuntu Desktop for Digital Painting (2026 Guide)
How to Run GIMP on a Cloud Ubuntu Desktop (2026 Guide)
How to Run Jupyter on a Cloud GPU Linux Desktop (2026 Guide)
Vagon vs GitHub Codespaces: Cloud Dev Environments Compared (2026)
Vagon Blog
Run heavy applications on any device with
your personal computer on the cloud.
San Francisco, California
Solutions
Vagon Teams
Vagon Streams
Use Cases
Resources
Vagon Blog