Instant Connection for Pixel Streaming
— New Feature Automated Setup

How to Implement ConvAI with MetaHuman in Unreal Engine
How to Implement ConvAI with MetaHuman in Unreal Engine
GameDev
How to Implement ConvAI with MetaHuman in Unreal Engine
Table of Contents
What if your game characters could actually talk back? Not just repeat some canned lines or follow scripted paths — but really hold a conversation that feels natural, even a bit unpredictable? That’s exactly what happens when you bring AI-powered conversations into Unreal Engine’s MetaHuman characters.
I’ve played around with this setup recently, and honestly, it blew my mind how far things have come. MetaHumans already look stunning — like, movie-quality avatars — but adding ConvAI’s conversational intelligence takes them from pretty faces to genuine virtual personalities. Suddenly, you’re not just watching NPCs, you’re engaging with them.
If you’re a developer who’s tired of stale, one-dimensional characters, this combination might be your next best friend. It’s not perfect (yet), and there are some tricky bits to navigate. But it opens up exciting possibilities for storytelling, gaming, virtual events — you name it.
Ready to see how it works and maybe even build your own AI-driven MetaHuman? Let’s jump right in.
Why MetaHuman? Why ConvAI?
So, why bother with MetaHuman avatars when you could just build your own character models? Well, the quality is insane. MetaHumans come from Unreal’s own high-end character creation system, delivering hyper-realistic faces, detailed skin textures, and expressive animations — all out of the box. You don’t have to be a modeling wizard to get something that looks like it belongs in a AAA game or a blockbuster film.

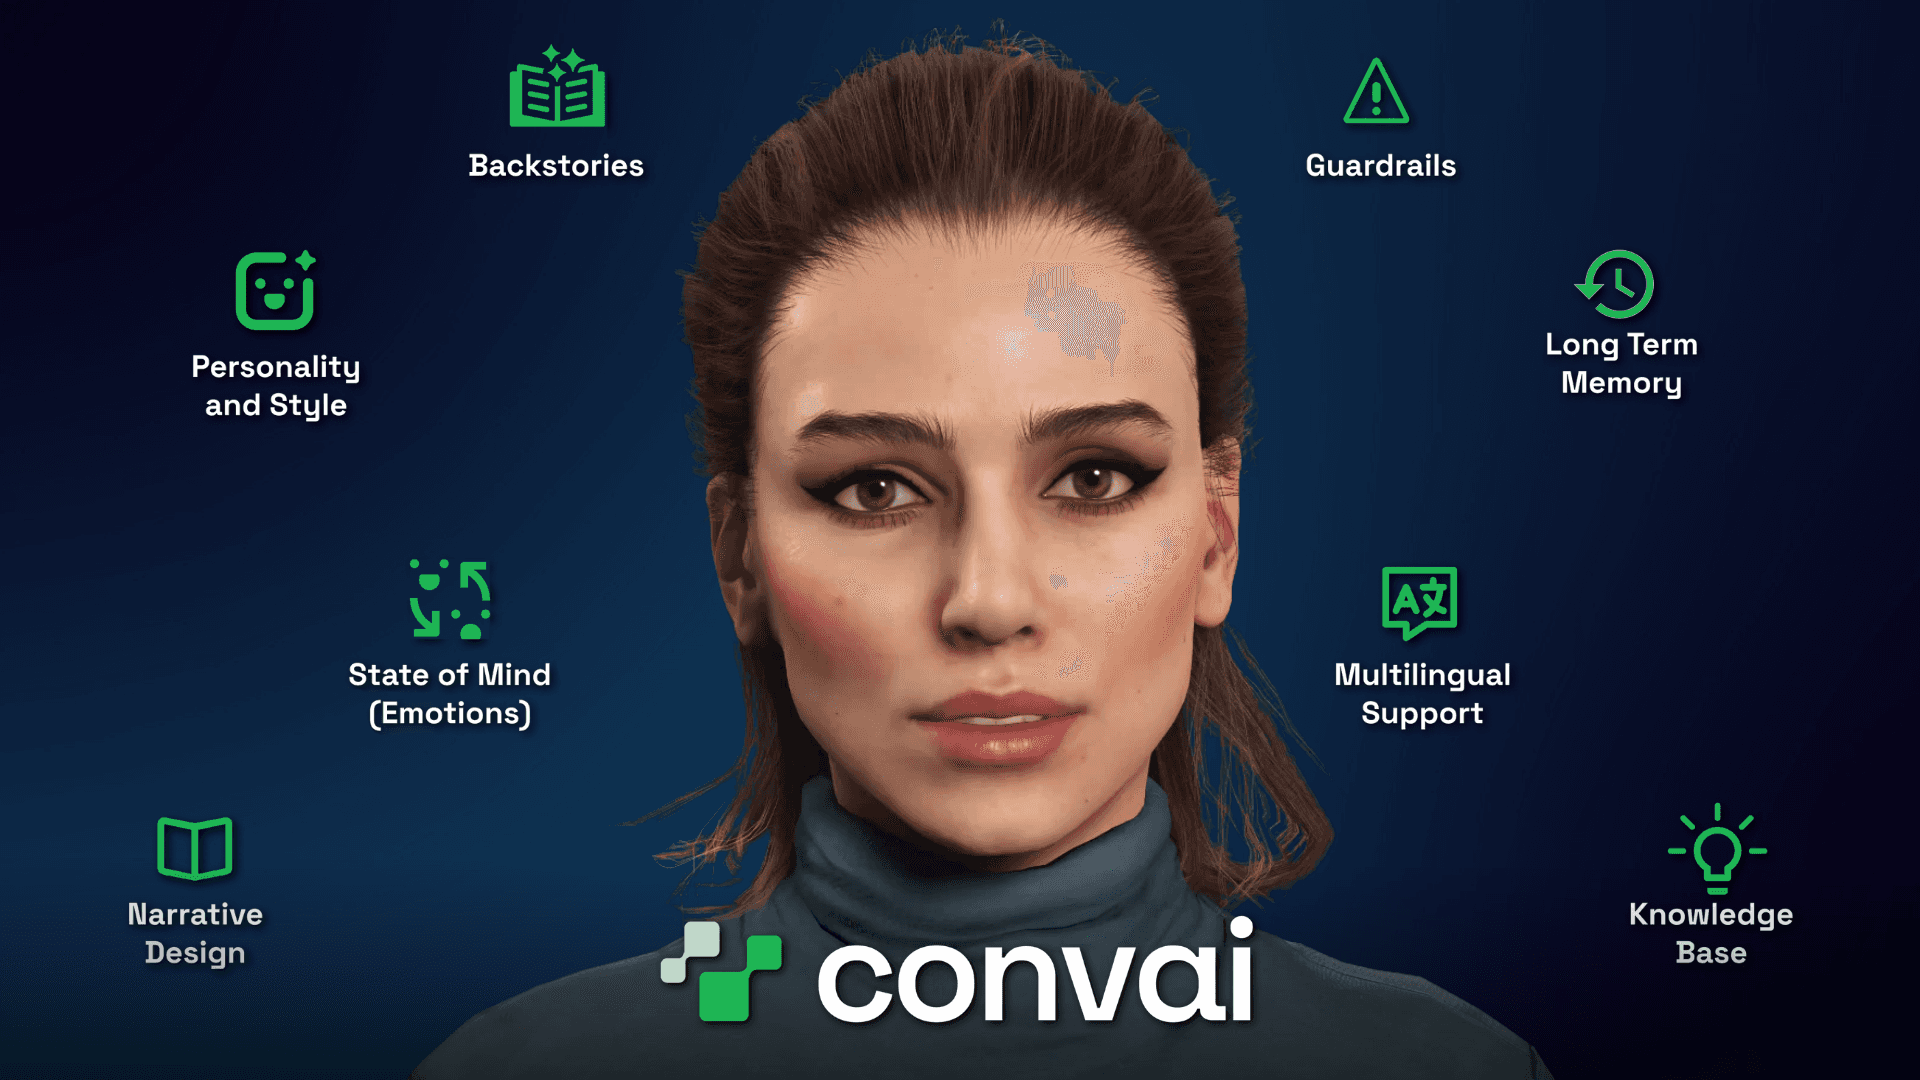
But a pretty face alone doesn’t cut it when you want believable characters. That’s where ConvAI steps in. ConvAI is all about giving your avatars the brains to match the looks. It plugs in natural language understanding, dialogue management, and the ability to hold fluid conversations — no more robotic or repetitive responses.
I think the real magic happens because these two things complement each other so well. ConvAI handles the complexity of understanding and responding, while MetaHuman brings the visual and emotional realism. Together, you get an AI-driven character that doesn’t just look alive but feels alive.
That said, ConvAI isn’t just limited to MetaHumans. You can integrate it with any character in your Unreal Engine project, whether it’s a stylized hero, a robot, or even a totally custom design. So if you want AI-powered conversations but have a specific art style or character in mind, you’re covered.
Of course, there are alternatives to ConvAI out there. Some folks use custom-built dialogue trees or other AI chat engines. But from my experience, ConvAI’s Unreal Engine integration is cleaner and faster to get going. Plus, the built-in support for actions and animations gives you a lot more control over how your AI reacts physically, not just verbally.
If you’re aiming for a conversational character that actually connects with your audience, this pairing is definitely worth a shot.
Setting Up ConvAI in Your Unreal Engine Project
Alright, now that you know why MetaHuman and ConvAI work so well together, let’s get into the nitty-gritty: how to actually set up ConvAI with your Unreal Engine characters. Whether you’re rocking a MetaHuman or your own custom avatar, the process is pretty straightforward—if you know where to look.
Step 1: Installing the ConvAI Plugin
First things first, you need the ConvAI plugin. It’s not something that comes pre-installed with Unreal, so you’ll have to grab it yourself.
Head over to the ConvAI GitHub repo and download the latest release that matches your Unreal Engine version. If you’re comfortable with Git, cloning the repo works too.
Once downloaded, unzip and drop the Convai folder into your project’s Plugins directory. If that folder doesn’t exist yet, just create it — no big deal.
Then, open up Unreal Engine, go to Edit > Plugins, search for “ConvAI,” and enable the plugin. Unreal will want to restart your project to apply the changes—go ahead and let it.
Step 2: Bringing in Your Character
With the plugin ready to roll, it’s time to get your character in.
For MetaHumans, the easiest route is via Quixel Bridge (Window > Quixel Bridge). Find a MetaHuman you like, download it, and add it to your project.

If you’re using a custom model, import it as usual (FBX or GLTF works fine). Either way, once your character is in, create a new blueprint based on ConvaiBaseCharacter (you’ll find this in the plugin’s classes).
This blueprint is where all the magic happens—it’ll hold your character mesh, ConvAI logic, and animation components.
Step 3: Hooking Up Your ConvAI Account
ConvAI uses an API key to link your Unreal project to their AI backend. So you’ll need to sign up at ConvAI’s website if you haven’t already, then grab your API key from your account dashboard.
Back in Unreal, open Edit > Project Settings, scroll down to the ConvAI section, and paste your API key in. Easy.
Step 4: Creating Your AI Character Asset
ConvAI lets you create AI characters as assets inside Unreal. In your Content Browser, right-click and pick Convai Character. Give it a name—like ConvAI_Kyle or whatever fits your project.
Inside this asset, you can set your AI’s personality, backstory, voice preferences, and more. This helps shape how your character will respond in conversations.
Then, back in your blueprint, link this ConvAI character asset in the appropriate slot. This connects your visual character to the AI brain.
Step 5: Bringing Your Character to Life with Animation and Lip Sync
A talking head without synced facial movements? Nah, that won’t cut it.
Thankfully, ConvAI provides animation blueprints and a face sync component that you can add to your character blueprint. This ties AI speech to facial expressions and lip movements, making your character feel way more alive.
You might need to make sure your character mesh has the right morph targets or bones for facial animation — MetaHumans are already set up for this, but custom models might need some extra work.
Step 6: Testing and Tweaking
Finally, drag your character blueprint into your scene and hit Play.
Start chatting, see how it responds, watch those lips move. It might not be perfect on day one—expect to spend some time fine-tuning dialogue, animations, and personality traits.
But that’s part of the fun, right? Iteration makes for better, more believable AI.
Integrating ConvAI with Your Character Blueprint
Now that you’ve got ConvAI installed and your AI character asset ready, it’s time to bring everything together inside your character’s blueprint. This step is where your avatar actually gains the smarts and the ability to talk, listen, and react.
Adding ConvAI Components to Your Blueprint
Open your character blueprint—you should already have your skeletal mesh set up, whether it’s a MetaHuman or a custom model. Here’s what you want to do next:
Add the ConvAI Controller
In the Components tab, add theConvaiControllercomponent. This is the central piece that manages conversations and AI behavior for your character.Assign Your ConvAI Character Asset
With theConvaiControllerselected, locate the property for your ConvAI Character (the asset you created earlier). Link it here so the controller knows which AI personality to use.Add Face Sync (Optional but Recommended)
To make your character’s lips move naturally during speech, add theConvaiFaceSynccomponent. MetaHumans come with all the necessary morph targets, but if you’re using a custom character, make sure your mesh supports lip sync.Set Up the Audio Input
If your experience involves voice input, set up audio capture so the AI can listen. ConvAI supports microphone input, but you’ll want to make sure your game or app requests the right permissions and processes audio correctly.
Configuring Animations and AI-Triggered Actions
One of the coolest things about ConvAI is how it can trigger animations or actions based on dialogue or context, not just chat responses. For example, your MetaHuman could nod when agreeing or gesture while talking.
Here’s how to get started:
Create Animation Montages or Blueprint Events
Define animations or events that correspond to your character’s reactions or gestures.Use ConvAI’s Action System
ConvAI lets you set up custom “actions” that your AI can trigger. Inside the blueprint, listen for these actions and play the relevant animations or trigger logic.Synchronize with Speech
Make sure the timing matches — lips sync with speech, gestures happen at the right moment. It might take some trial and error, but the results are worth it.
Pro Tips from My Experience
Start simple. Don’t try to bake in tons of custom animations or complicated logic on day one. Get the basics working—chatting and lip sync—and build up from there.
Use the built-in debugging tools in Unreal to see what the ConvAI Controller is doing at runtime. It’ll save you hours when things don’t behave as expected.
Think about personality. The AI will sound totally different depending on the backstory and personality you set in the ConvAI character asset. Play around with those to find a voice that fits your project.
Sharing Your Creation with Vagon Streams
You’ve built an AI-powered MetaHuman that talks, listens, and moves naturally. But how do you get people to actually use it without needing powerful computers or complicated installs?
That’s where Vagon Streams comes in.
Vagon supports Unreal Engine’s native pixel streaming, Unity’s render streaming, and its own streaming technology that works with almost any app. So whether you’re sharing a MetaHuman, a Unity scene, or something custom, Vagon makes streaming easy and reliable.
You simply upload your project to Vagon’s cloud servers, which have GPUs distributed worldwide. Your users or clients can then access your experience instantly from any device — laptop, tablet, or phone — with no downloads or setup needed.
Vagon handles everything behind the scenes: delivering smooth, low-latency streaming, adjusting quality based on connection speed, and allowing thousands of users to connect at the same time without issues. Plus, you get features like secure access, session recording, and support for custom inputs — all designed to keep your experience running just the way you want.
Uploading is straightforward: package your build, create a workspace on Vagon, upload your files, set your streaming options, then share the link or embed it wherever you want.
In short, sharing your AI MetaHuman doesn’t have to be complicated. With Vagon Streams, you get fast, flexible, and dependable streaming that puts your creation in front of anyone, anywhere, on any device.
Ready to get started? You can sign up and start within seconds, or book an intro meeting now. If you want to try it on action before you start, you can visit and try our demo experiences.
What if your game characters could actually talk back? Not just repeat some canned lines or follow scripted paths — but really hold a conversation that feels natural, even a bit unpredictable? That’s exactly what happens when you bring AI-powered conversations into Unreal Engine’s MetaHuman characters.
I’ve played around with this setup recently, and honestly, it blew my mind how far things have come. MetaHumans already look stunning — like, movie-quality avatars — but adding ConvAI’s conversational intelligence takes them from pretty faces to genuine virtual personalities. Suddenly, you’re not just watching NPCs, you’re engaging with them.
If you’re a developer who’s tired of stale, one-dimensional characters, this combination might be your next best friend. It’s not perfect (yet), and there are some tricky bits to navigate. But it opens up exciting possibilities for storytelling, gaming, virtual events — you name it.
Ready to see how it works and maybe even build your own AI-driven MetaHuman? Let’s jump right in.
Why MetaHuman? Why ConvAI?
So, why bother with MetaHuman avatars when you could just build your own character models? Well, the quality is insane. MetaHumans come from Unreal’s own high-end character creation system, delivering hyper-realistic faces, detailed skin textures, and expressive animations — all out of the box. You don’t have to be a modeling wizard to get something that looks like it belongs in a AAA game or a blockbuster film.
But a pretty face alone doesn’t cut it when you want believable characters. That’s where ConvAI steps in. ConvAI is all about giving your avatars the brains to match the looks. It plugs in natural language understanding, dialogue management, and the ability to hold fluid conversations — no more robotic or repetitive responses.
I think the real magic happens because these two things complement each other so well. ConvAI handles the complexity of understanding and responding, while MetaHuman brings the visual and emotional realism. Together, you get an AI-driven character that doesn’t just look alive but feels alive.
That said, ConvAI isn’t just limited to MetaHumans. You can integrate it with any character in your Unreal Engine project, whether it’s a stylized hero, a robot, or even a totally custom design. So if you want AI-powered conversations but have a specific art style or character in mind, you’re covered.
Of course, there are alternatives to ConvAI out there. Some folks use custom-built dialogue trees or other AI chat engines. But from my experience, ConvAI’s Unreal Engine integration is cleaner and faster to get going. Plus, the built-in support for actions and animations gives you a lot more control over how your AI reacts physically, not just verbally.
If you’re aiming for a conversational character that actually connects with your audience, this pairing is definitely worth a shot.
Setting Up ConvAI in Your Unreal Engine Project
Alright, now that you know why MetaHuman and ConvAI work so well together, let’s get into the nitty-gritty: how to actually set up ConvAI with your Unreal Engine characters. Whether you’re rocking a MetaHuman or your own custom avatar, the process is pretty straightforward—if you know where to look.
Step 1: Installing the ConvAI Plugin
First things first, you need the ConvAI plugin. It’s not something that comes pre-installed with Unreal, so you’ll have to grab it yourself.
Head over to the ConvAI GitHub repo and download the latest release that matches your Unreal Engine version. If you’re comfortable with Git, cloning the repo works too.
Once downloaded, unzip and drop the Convai folder into your project’s Plugins directory. If that folder doesn’t exist yet, just create it — no big deal.
Then, open up Unreal Engine, go to Edit > Plugins, search for “ConvAI,” and enable the plugin. Unreal will want to restart your project to apply the changes—go ahead and let it.
Step 2: Bringing in Your Character
With the plugin ready to roll, it’s time to get your character in.
For MetaHumans, the easiest route is via Quixel Bridge (Window > Quixel Bridge). Find a MetaHuman you like, download it, and add it to your project.
If you’re using a custom model, import it as usual (FBX or GLTF works fine). Either way, once your character is in, create a new blueprint based on ConvaiBaseCharacter (you’ll find this in the plugin’s classes).
This blueprint is where all the magic happens—it’ll hold your character mesh, ConvAI logic, and animation components.
Step 3: Hooking Up Your ConvAI Account
ConvAI uses an API key to link your Unreal project to their AI backend. So you’ll need to sign up at ConvAI’s website if you haven’t already, then grab your API key from your account dashboard.
Back in Unreal, open Edit > Project Settings, scroll down to the ConvAI section, and paste your API key in. Easy.
Step 4: Creating Your AI Character Asset
ConvAI lets you create AI characters as assets inside Unreal. In your Content Browser, right-click and pick Convai Character. Give it a name—like ConvAI_Kyle or whatever fits your project.
Inside this asset, you can set your AI’s personality, backstory, voice preferences, and more. This helps shape how your character will respond in conversations.
Then, back in your blueprint, link this ConvAI character asset in the appropriate slot. This connects your visual character to the AI brain.
Step 5: Bringing Your Character to Life with Animation and Lip Sync
A talking head without synced facial movements? Nah, that won’t cut it.
Thankfully, ConvAI provides animation blueprints and a face sync component that you can add to your character blueprint. This ties AI speech to facial expressions and lip movements, making your character feel way more alive.
You might need to make sure your character mesh has the right morph targets or bones for facial animation — MetaHumans are already set up for this, but custom models might need some extra work.
Step 6: Testing and Tweaking
Finally, drag your character blueprint into your scene and hit Play.
Start chatting, see how it responds, watch those lips move. It might not be perfect on day one—expect to spend some time fine-tuning dialogue, animations, and personality traits.
But that’s part of the fun, right? Iteration makes for better, more believable AI.
Integrating ConvAI with Your Character Blueprint
Now that you’ve got ConvAI installed and your AI character asset ready, it’s time to bring everything together inside your character’s blueprint. This step is where your avatar actually gains the smarts and the ability to talk, listen, and react.
Adding ConvAI Components to Your Blueprint
Open your character blueprint—you should already have your skeletal mesh set up, whether it’s a MetaHuman or a custom model. Here’s what you want to do next:
Add the ConvAI Controller
In the Components tab, add theConvaiControllercomponent. This is the central piece that manages conversations and AI behavior for your character.Assign Your ConvAI Character Asset
With theConvaiControllerselected, locate the property for your ConvAI Character (the asset you created earlier). Link it here so the controller knows which AI personality to use.Add Face Sync (Optional but Recommended)
To make your character’s lips move naturally during speech, add theConvaiFaceSynccomponent. MetaHumans come with all the necessary morph targets, but if you’re using a custom character, make sure your mesh supports lip sync.Set Up the Audio Input
If your experience involves voice input, set up audio capture so the AI can listen. ConvAI supports microphone input, but you’ll want to make sure your game or app requests the right permissions and processes audio correctly.
Configuring Animations and AI-Triggered Actions
One of the coolest things about ConvAI is how it can trigger animations or actions based on dialogue or context, not just chat responses. For example, your MetaHuman could nod when agreeing or gesture while talking.
Here’s how to get started:
Create Animation Montages or Blueprint Events
Define animations or events that correspond to your character’s reactions or gestures.Use ConvAI’s Action System
ConvAI lets you set up custom “actions” that your AI can trigger. Inside the blueprint, listen for these actions and play the relevant animations or trigger logic.Synchronize with Speech
Make sure the timing matches — lips sync with speech, gestures happen at the right moment. It might take some trial and error, but the results are worth it.
Pro Tips from My Experience
Start simple. Don’t try to bake in tons of custom animations or complicated logic on day one. Get the basics working—chatting and lip sync—and build up from there.
Use the built-in debugging tools in Unreal to see what the ConvAI Controller is doing at runtime. It’ll save you hours when things don’t behave as expected.
Think about personality. The AI will sound totally different depending on the backstory and personality you set in the ConvAI character asset. Play around with those to find a voice that fits your project.
Sharing Your Creation with Vagon Streams
You’ve built an AI-powered MetaHuman that talks, listens, and moves naturally. But how do you get people to actually use it without needing powerful computers or complicated installs?
That’s where Vagon Streams comes in.
Vagon supports Unreal Engine’s native pixel streaming, Unity’s render streaming, and its own streaming technology that works with almost any app. So whether you’re sharing a MetaHuman, a Unity scene, or something custom, Vagon makes streaming easy and reliable.
You simply upload your project to Vagon’s cloud servers, which have GPUs distributed worldwide. Your users or clients can then access your experience instantly from any device — laptop, tablet, or phone — with no downloads or setup needed.
Vagon handles everything behind the scenes: delivering smooth, low-latency streaming, adjusting quality based on connection speed, and allowing thousands of users to connect at the same time without issues. Plus, you get features like secure access, session recording, and support for custom inputs — all designed to keep your experience running just the way you want.
Uploading is straightforward: package your build, create a workspace on Vagon, upload your files, set your streaming options, then share the link or embed it wherever you want.
In short, sharing your AI MetaHuman doesn’t have to be complicated. With Vagon Streams, you get fast, flexible, and dependable streaming that puts your creation in front of anyone, anywhere, on any device.
Ready to get started? You can sign up and start within seconds, or book an intro meeting now. If you want to try it on action before you start, you can visit and try our demo experiences.
Scalable Pixel and Application Streaming
Run your Unity or Unreal Engine application on any device, share with your clients in minutes, with no coding.

Summarize with AI

Ready to focus on your creativity?
Vagon gives you the ability to create & render projects, collaborate, and stream applications with the power of the best hardware.

Vagon Blog


Run heavy applications on any device with
your personal computer on the cloud.
San Francisco, California
Solutions
Vagon Teams
Vagon Streams
Use Cases
Resources
Vagon Blog
How to Run Audacity on a Cloud Ubuntu Desktop (2026 Guide)
How to Run Darktable on a Cloud Ubuntu Desktop for RAW Photo Editing (2026 Guide)
How to Run Kdenlive on a Cloud Ubuntu Desktop (2026 Guide)
How to Run DaVinci Resolve on Linux in the Cloud (2026 Guide)
How to Run Inkscape on a Cloud Ubuntu Desktop (2026 Guide)
How to Run Krita on a Cloud Ubuntu Desktop for Digital Painting (2026 Guide)
How to Run GIMP on a Cloud Ubuntu Desktop (2026 Guide)
How to Run Jupyter on a Cloud GPU Linux Desktop (2026 Guide)
Vagon vs GitHub Codespaces: Cloud Dev Environments Compared (2026)
Vagon Blog
Run heavy applications on any device with
your personal computer on the cloud.
San Francisco, California
Solutions
Vagon Teams
Vagon Streams
Use Cases
Resources
Vagon Blog