Instant Connection for Pixel Streaming
— New Feature Automated Setup

How To Turn 2D Icons into 3D Renders in Blender
How To Turn 2D Icons into 3D Renders in Blender
DigitalArt
How To Turn 2D Icons into 3D Renders in Blender
Table of Contents
Let’s be honest—2D icons are everywhere. They live in your apps, your websites, your infographics. Clean, simple, and effective. But what happens when you want to give those same icons a little more presence? A little more dimension? That’s where 3D comes in.
Turning a flat SVG into a 3D object might sound like overkill at first—but it’s actually one of the fastest, most impactful ways to add depth (literally) to your visuals. Whether you’re working on a logo reveal, a UI animation, a product concept, or just experimenting with motion graphics, 3D icons give you more flexibility to move, light, and render them however you like.
And here’s the real kicker: you don’t need paid software or a Hollywood-level machine to pull this off. With Blender (yes, the free one) and a simple SVG file, you can create clean, stylized renders that look like they came out of a studio pipeline.
Personally, I love this technique because it skips the modeling phase entirely. No need to mess with vertices or retopology—you’re starting with perfectly crisp vector art and just giving it dimension. It’s fast, clean, and surprisingly fun.
This post walks you through exactly how to do it step-by-step, borrowing a clever workflow from this excellent YouTube tutorial by Polyfjord. If you’re even a little bit curious about 3D, this is a great place to start.
Best Free Sources for SVG Icons
Before you can turn anything into a slick 3D object, you need a good SVG file to work with. And luckily, the internet is full of them—completely free, cleanly designed, and ready to extrude.
Here are a few solid places to start:
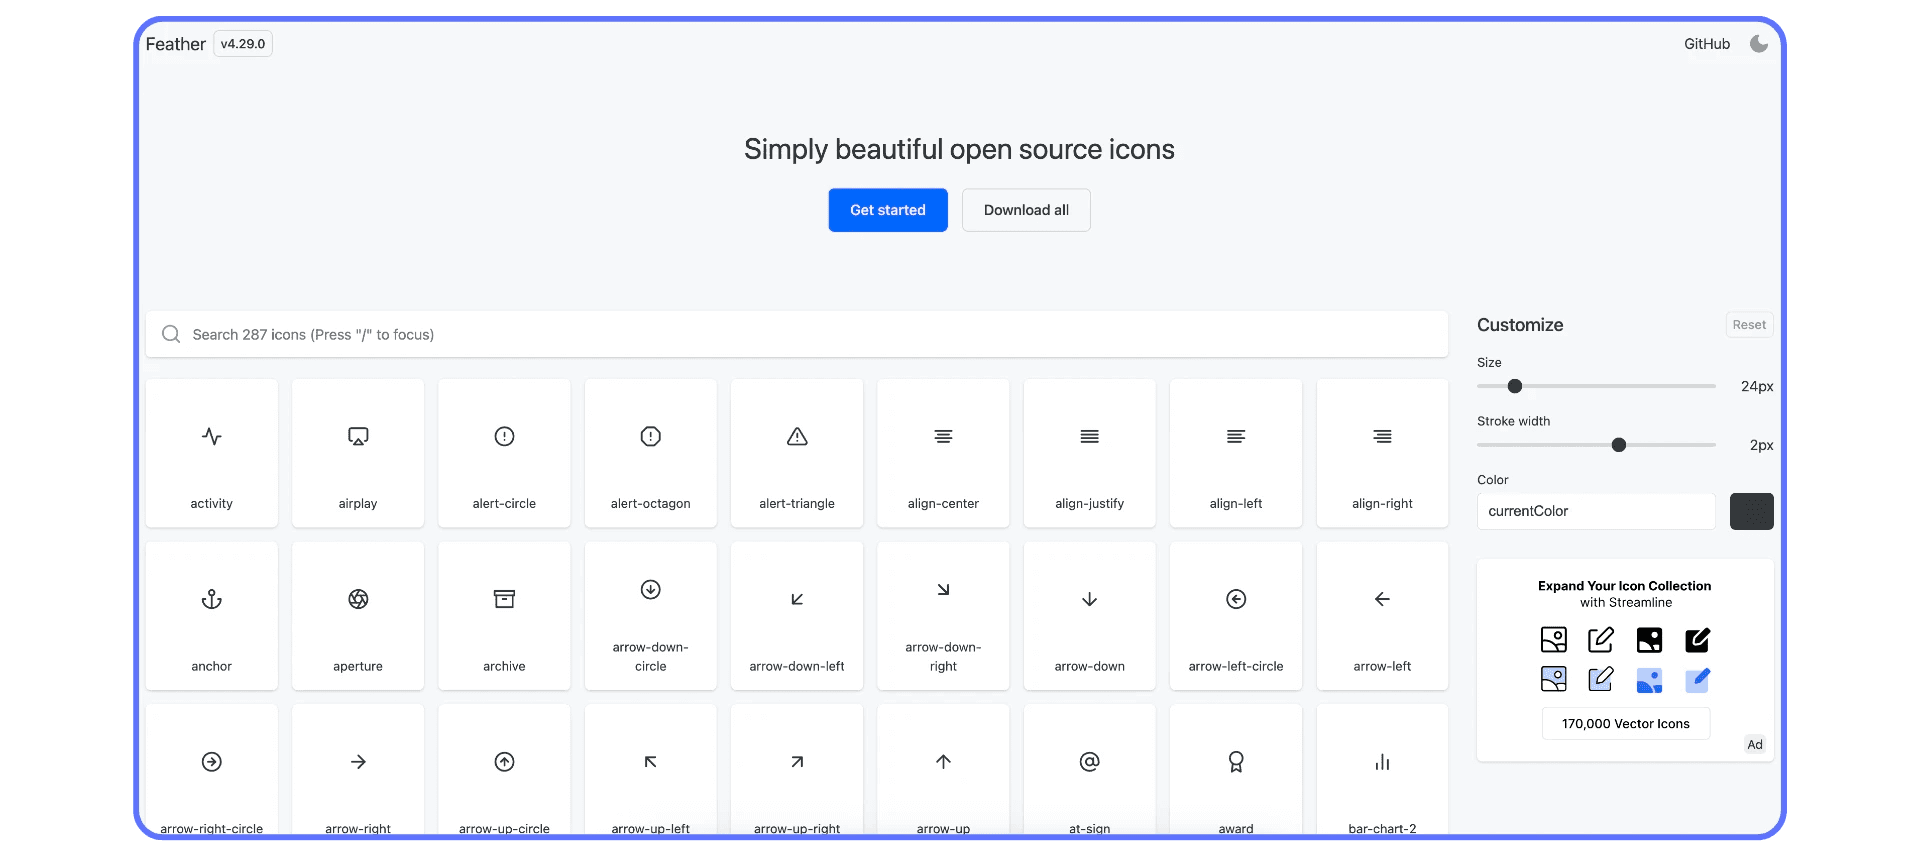
Feathericons.com
These are minimalist, open-source icons with clean lines and great proportions. Perfect for extrusion because they’re simple and don’t rely on complex fills or shadows. You don’t even need to credit anyone—just download and go.
Google Fonts → Icons
Yes, Google Fonts isn’t just for text. The icons section is a goldmine of SVG-based visuals, from UI elements to expressive shapes. They're all open source, and you'll find lots of options with balanced spacing—great for 3D use.

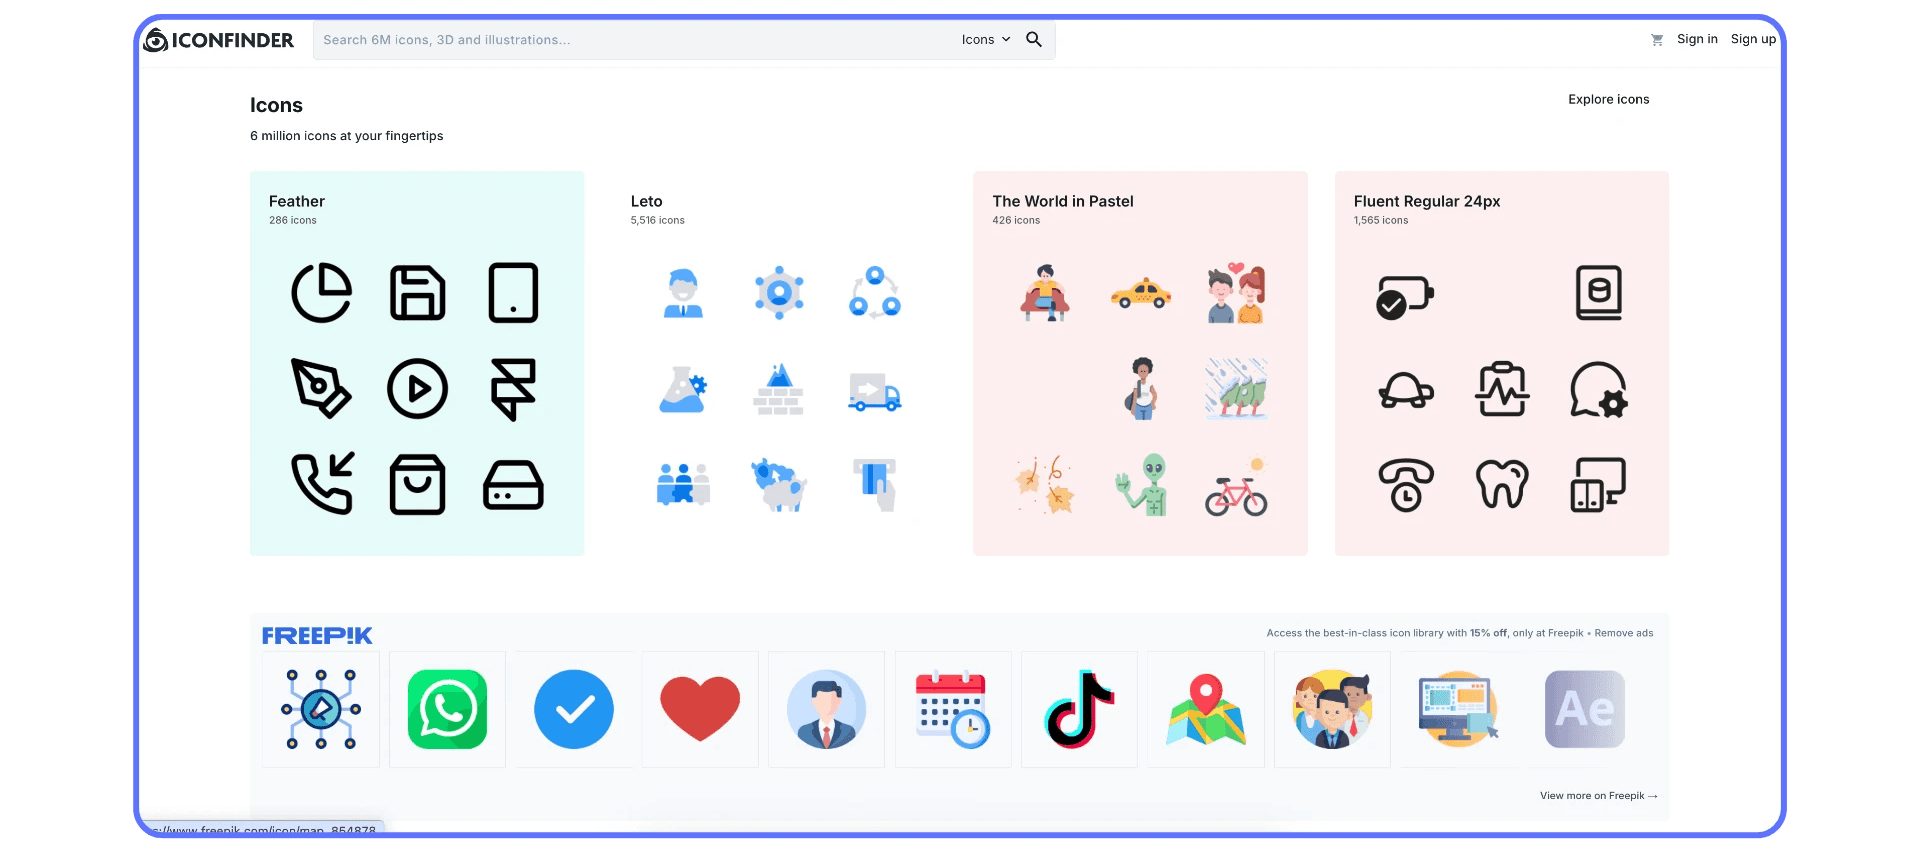
IconFinder or Similar Sites
If you’re okay with giving attribution, sites like IconFinder offer massive collections of SVGs. Just filter by “Free” and “For Commercial Use” if that’s important for your project.
Quick Tip
Not all icons play nicely in 3D. Icons with overlapping paths, too many tiny elements, or super intricate shapes might need extra cleanup in Blender. For your first few experiments, stick with simple line icons—think food, tools, weather symbols, or basic logos.
How to Import SVG Files into Blender
So, you’ve got your SVG icon. You’re fired up, you open Blender… and the file is nowhere to be seen.
Welcome to the quirks of importing SVGs into 3D.
But don’t worry. It’s totally doable—and once you’ve done it once, it’s surprisingly quick.
#1: Enable the SVG Import Add-on
Blender doesn’t import SVGs out of the box, but it includes an official add-on for it. Just go to:
Edit > Preferences > Add-ons,
search for “SVG”,
and enable “Import-Export: Scalable Vector Graphics (SVG)”.
That’s it—you’re ready to go.

#2: Import Your Icon
Now head to:
File > Import > Scalable Vector Graphics (.svg)
and select your file.
When it loads in… don’t panic. It’s tiny. Like, subatomic. Zoom all the way in, scale it up (hit S), and you’ll see your icon sitting there, made of curves.
#3: Clean Up the Weird Stuff
SVGs were made for 2D screens, not 3D meshes. So some icons might come in messy—overlapping shapes, unnecessary highlights, or extra outlines. In the tutorial by Polyfjord, for example, the hamburger icon came in with some 2D highlight shapes that needed deleting.
Here’s the general process:
Use X-ray mode (
Alt + Z) to easily select pieces hidden behind othersDelete decorative elements you don’t want (think glows, highlights, etc.)
Make sure your curves aren’t doubled up or stacked
Now you’ve got clean, usable curves—and you’re ready to make them 3D.
If you're importing SVGs on the go or exploring mobile workflows, here's a handy guide on how to use Blender on an iPad to keep your projects moving—even without a full setup.
Extrude SVGs into 3D Objects in Blender
Alright, this is where it gets satisfying.
You’ve got clean curves in Blender. Time to push them into the third dimension and turn your flat icon into something that actually exists in 3D space.
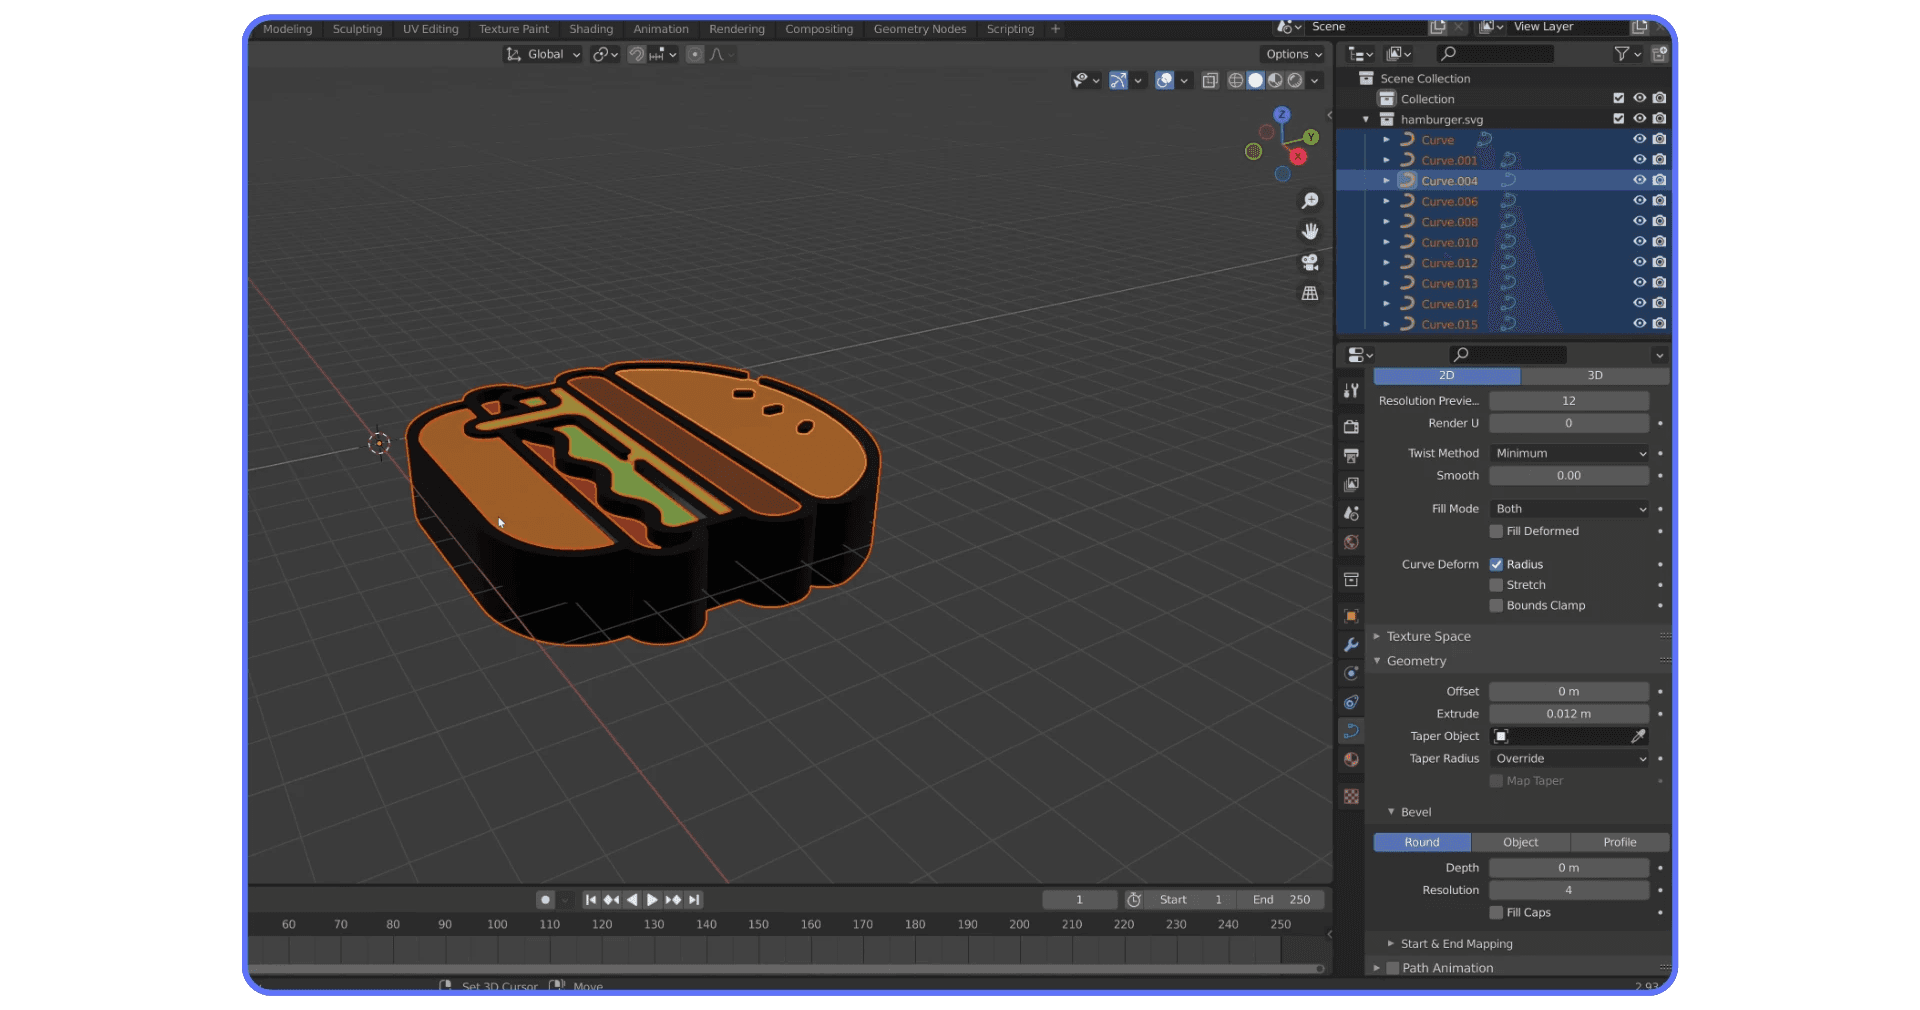
#4: Select the Right Object Data
Each part of your imported SVG is a curve object—not a mesh. That’s actually a good thing. With it selected, head to the Object Data Properties panel (the green curve icon in the sidebar), and look for the Geometry section.
#5: Use the Extrude Slider
Slide the Extrude value to the right, and boom—your icon has thickness.
Hold down Shift while dragging if you want finer control.
This part is super sensitive, and even a small value goes a long way.
You can extrude each piece individually (like the burger bun, lettuce, and seeds in the original tutorial), or multi-select them to keep things consistent. To do that:
Hold Shift to select multiple objects
Or Alt + Click to select similar elements quickly
Then adjust the extrude settings with all selected

#6: Rotate and Position the Pieces
Want to rotate the burger upright like in the tutorial?
Hit R to rotate
Hit X to lock it to the X-axis
Then move it to the center (
Gto grab, thenX,Y, orZto move along a specific axis)
If you want your icon to stand upright or sit nicely in a scene, this is the moment to arrange it cleanly.
Bonus Tip: Work in X-ray Mode
This makes it way easier to select overlapping pieces (like seeds on a bun) without missing or misclicking. Just press Alt + Z to toggle X-ray on and off.
By now, you’ve got a proper 3D version of your icon—layered, extruded, and positioned. Next, let’s make it feel more like a real object with better organization.
Pro tip: knowing the right Blender shortcuts will speed up your extrusion workflow like magic—especially when working with multiple layers.
Group and Organize Your 3D Icon Elements
Once you’ve got all your pieces extruded and placed, it’s time to clean up the chaos. Because let’s be honest—moving a burger made of 12 separate objects one piece at a time isn’t exactly fun.
Let’s get tidy.
Why Parenting Matters
In Blender, parenting means linking objects together so they move as a group. You pick one object as the “parent,” and the others follow its lead. Think of it like sticking all your layers to a magnet.
Here’s how to do it:
#7: Select Everything
Shift + Click to select all parts of your icon (or drag a box over everything)
Last click should be on the piece you want as the parent (like the bottom bun or main shape)
The last-selected object will be highlighted in a brighter outline
#8: Parent to Last
Press Ctrl + P and choose “Object (Keep Transform)”
Now when you move, rotate, or scale the parent object, everything else follows. Neat and clean.
#9: Set Origin to Geometry
If your object is rotating weirdly or off-center:
With the main parent selected, hit Right Click > Set Origin > Origin to Geometry
This makes sure your object rotates around its actual shape, not some random point in space
Bonus Tip: Rotate with Trackball for Natural Angles
Want to give your icon a more dynamic tilt?
Hit R to rotate
Then R again to enter trackball mode
Now you can rotate freely like you're spinning a dial. Great for giving objects that artsy lean.
At this point, your 3D icon is structured, grouped, and ready for the spotlight. Speaking of which…
For the technically curious, automating parts of this workflow is totally doable—especially if you’re into using Python in Blender to script repetitive tasks.
Build a Clean Lighting Setup in Blender
So you’ve got your 3D icon, and it’s looking solid—but right now, it’s floating in Blender’s grey void of sadness. What it needs is a proper lighting setup. And not just any lighting setup—a clean, dramatic, studio-style render.
Good news: You don’t need HDRIs or complicated rigs to make that happen. Just a few planes, one camera, and Blender’s Cycles engine.
Many full-length movies have been made with Blender, and these lighting techniques aren’t too far off from what pros use to build cinematic scenes.
#10: Switch to Cycles
In the Render Properties tab (camera icon), set your render engine to Cycles.
You can keep the device on CPU or GPU—whatever your machine can handle.
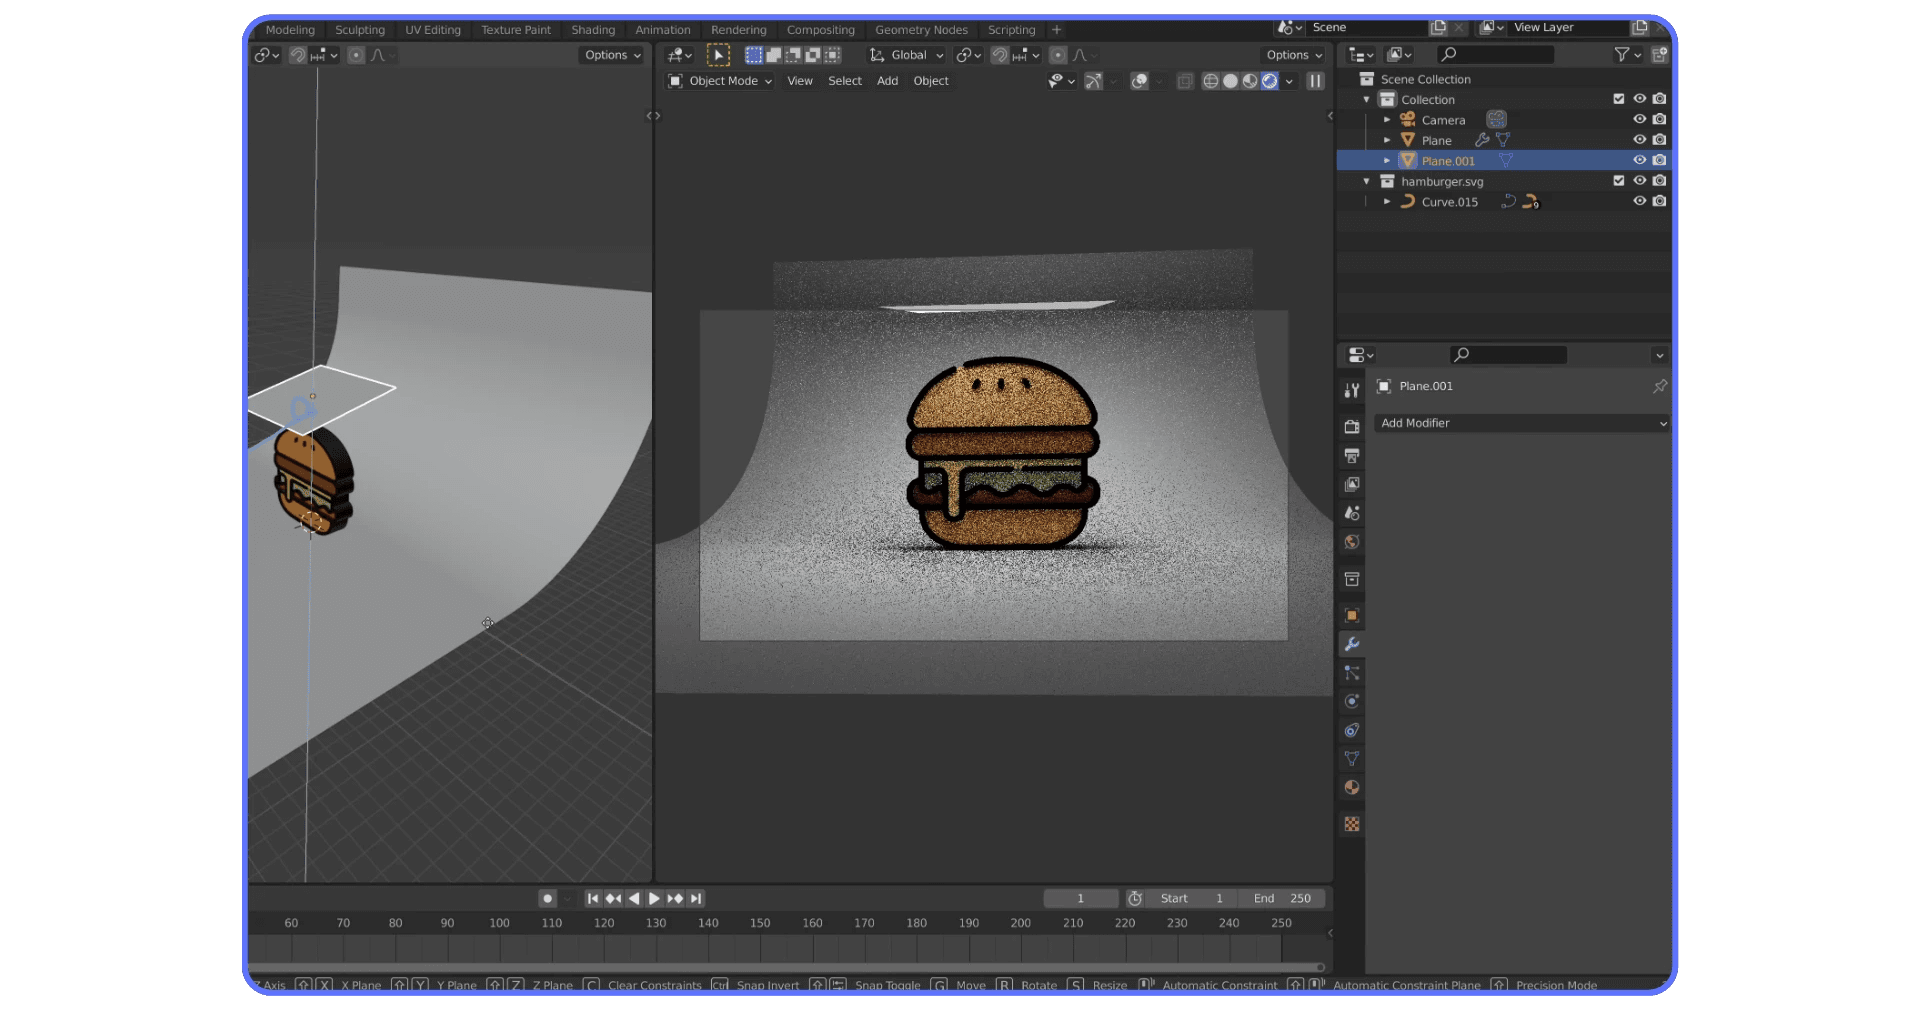
#11: Build the Backdrop
This is the photographer’s trick. Create a smooth background surface so your icon doesn’t feel like it’s floating in space.
Shift + A > Mesh > Plane
Scale it up with
SGo to side view (
NumPad 3)In Edit Mode, select the back two vertices
E to extrude up
Now you’ve got an L-shaped plane
To smooth that corner:
Go to Modifiers > Bevel
Increase Amount and Segments
Then Right Click > Shade Smooth
#12: Add a Camera
Shift + A > Camera
Hit Ctrl + Alt + NumPad 0 to snap the camera to your current view
With the camera selected, press G to move, Z to move on the vertical, or R to rotate
#13: Add a Light Plane (Softbox Style)
Forget Blender’s point lights for now—use an emission plane for soft, studio-quality light.
Shift + A > Mesh > Plane
Move it above or to the side of your icon
In the Material Properties, create a new material
Change the Surface to Emission
Increase the Strength to something like 10–100 depending on size and scene
Want more control? Use split view so you can preview changes in Rendered View (Z > Rendered). You can also press Y twice to move the light along its local Y-axis, helping you find that perfect lighting angle.
The “Mafia Interrogation” Trick
This part from Polyfjord's tutorial is just… smart.
You angle the emission plane toward the camera until it becomes a thin line in view. Then move it just outside the frame. What you get is this hyper-focused light that gives your object dramatic shadows—like it’s under a spotlight in a gritty movie.
It’s overkill for some icons. But for anything glassy or glossy? Chef’s kiss.
And if your objects are acting weird during transformations, mastering the 3D cursor in Blender can seriously level up your scene organization game.
Apply Materials Like Glass, Metal, and More
3D shapes are cool. But 3D shapes with materials? That’s where things start to come alive.
Blender’s material system gives you near-infinite control over how your object looks—glass, plastic, chrome, paper, you name it. And the best part? You only need a couple of tweaks to make your icon pop.
For more ideas on getting creative with surface materials, check out this collection of Blender tips and tricks to add personality to your objects.
#14: Select an Object and Create a Material
Pick one of your icon’s pieces—let’s say the outer edge or a bun.
Head to the Material Properties tab (the red sphere icon), click “New”, and make sure Use Nodes is enabled.
Now you can start assigning surface types.
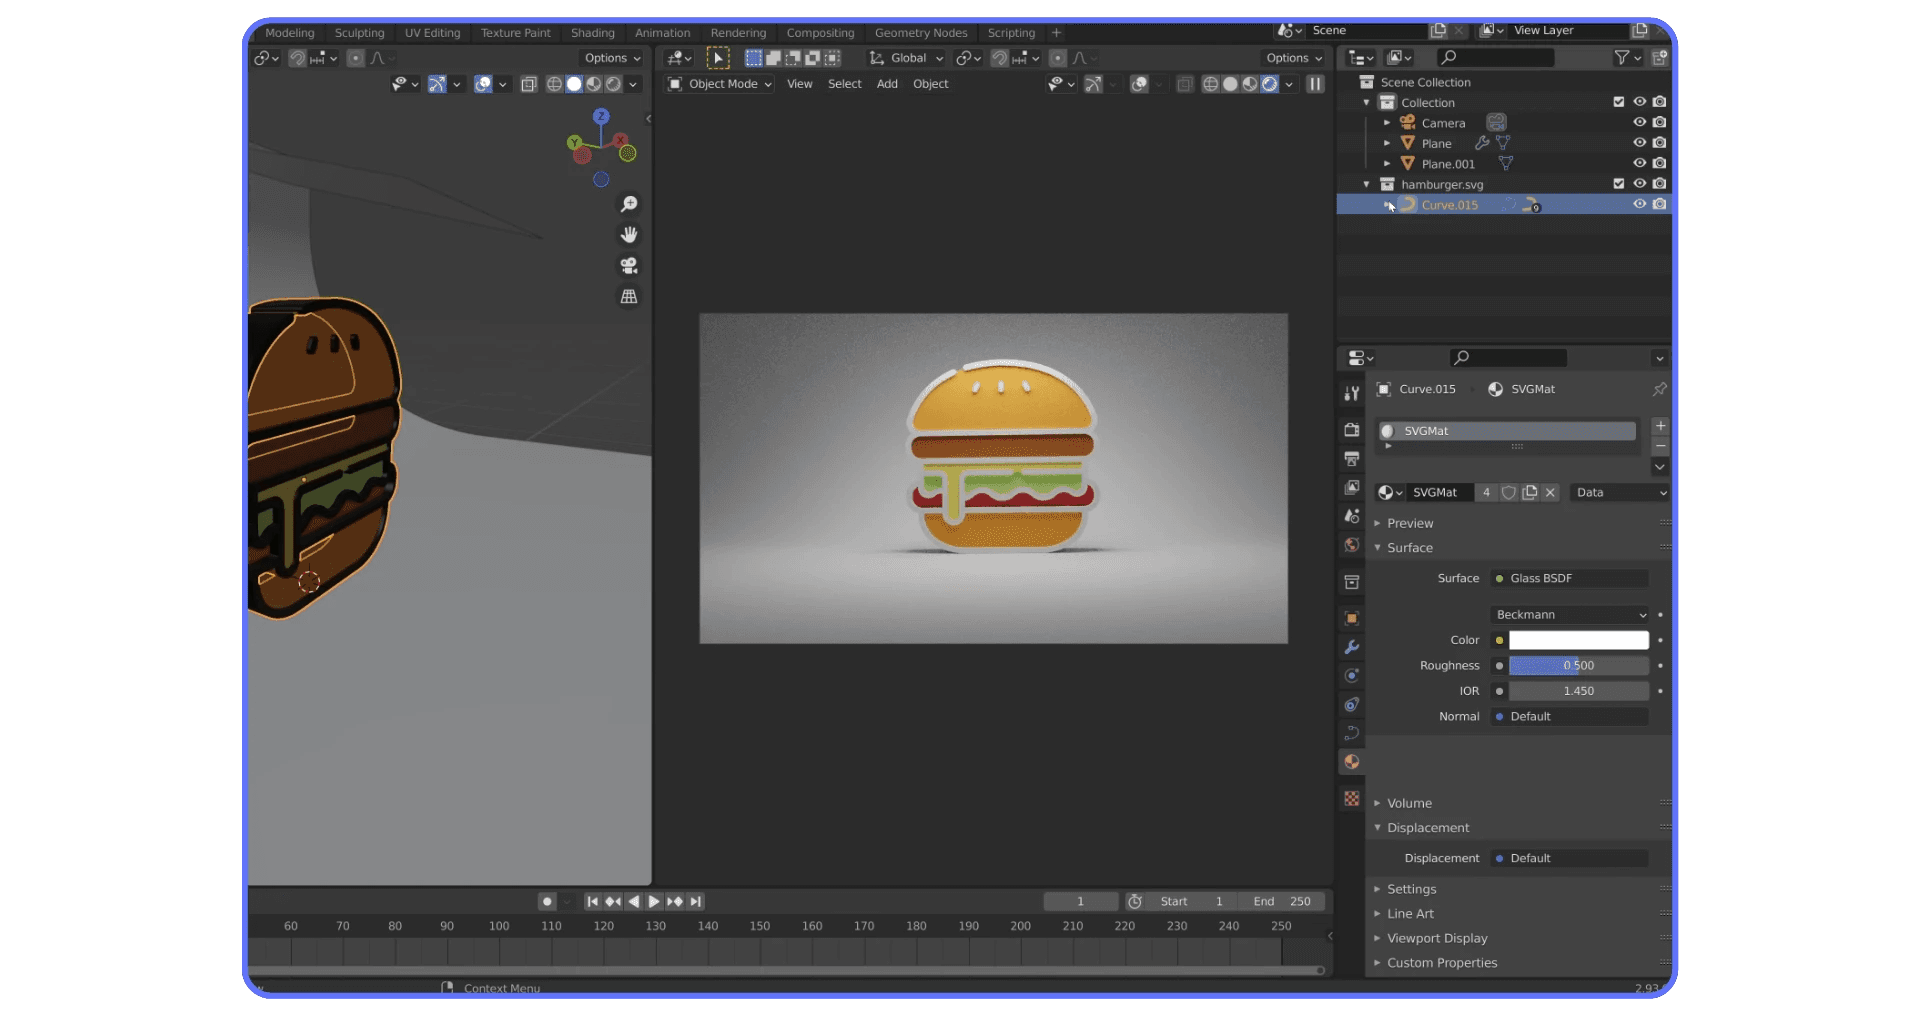
#15: Try the Glass Shader (Yes, Really)
This is where the original tutorial gets fancy: the icon’s edge is given a glass material.
Set Surface > Glass BSDF
Drop the Roughness to around
0.1or lower for sharper reflectionsWant even more shine? Crank up the IOR (Index of Refraction) for a stylized look
For extra pop, move the object up slightly on the Z-axis and rotate it a bit with R + R (trackball mode)
This tilts the icon and catches the light just right
⚠️ Warning: Glass shaders slow down render times. But when done right, they look amazing—especially with the right lighting.
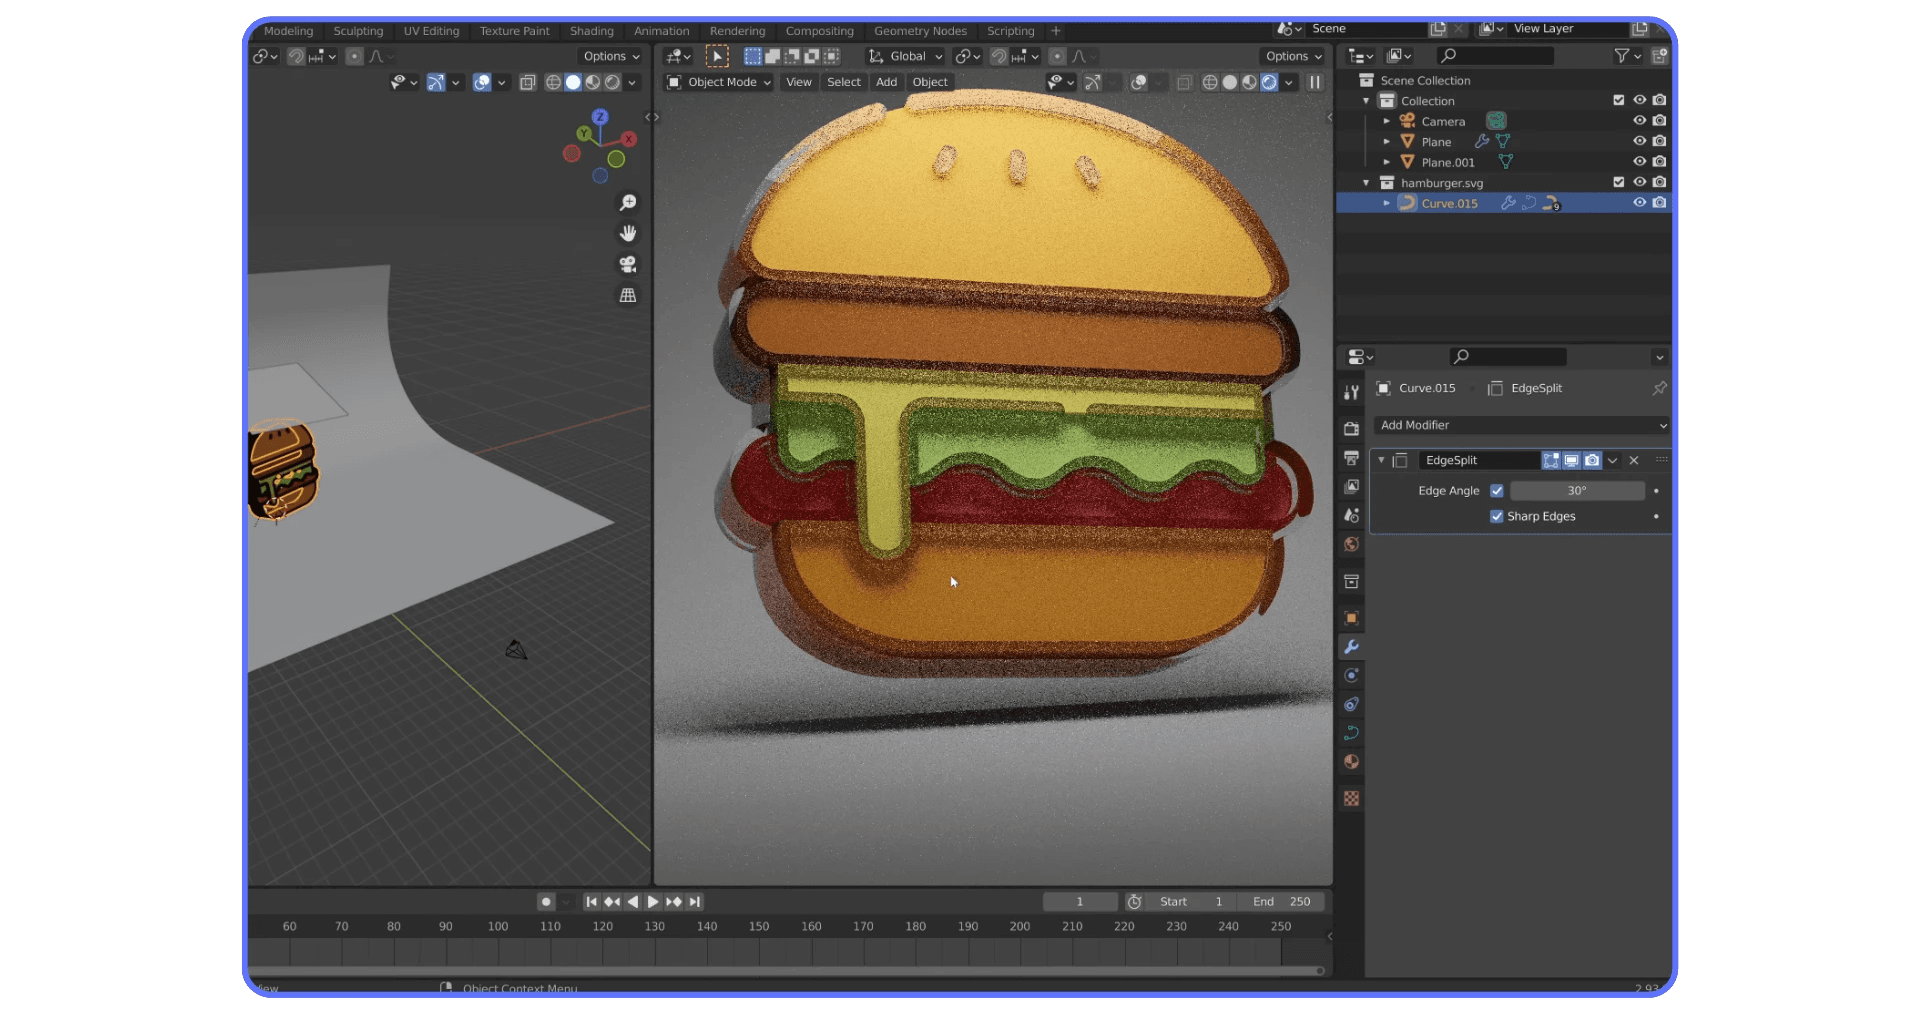
#16: Fix Weird Glass Artifacts
If your render suddenly looks… crunchy? You’re not alone.
Select the glass object
Go to Modifier Properties > Add Modifier > Edge Split
Boom. Artifacts gone. Blender just needed a little hint on where to break the smoothing
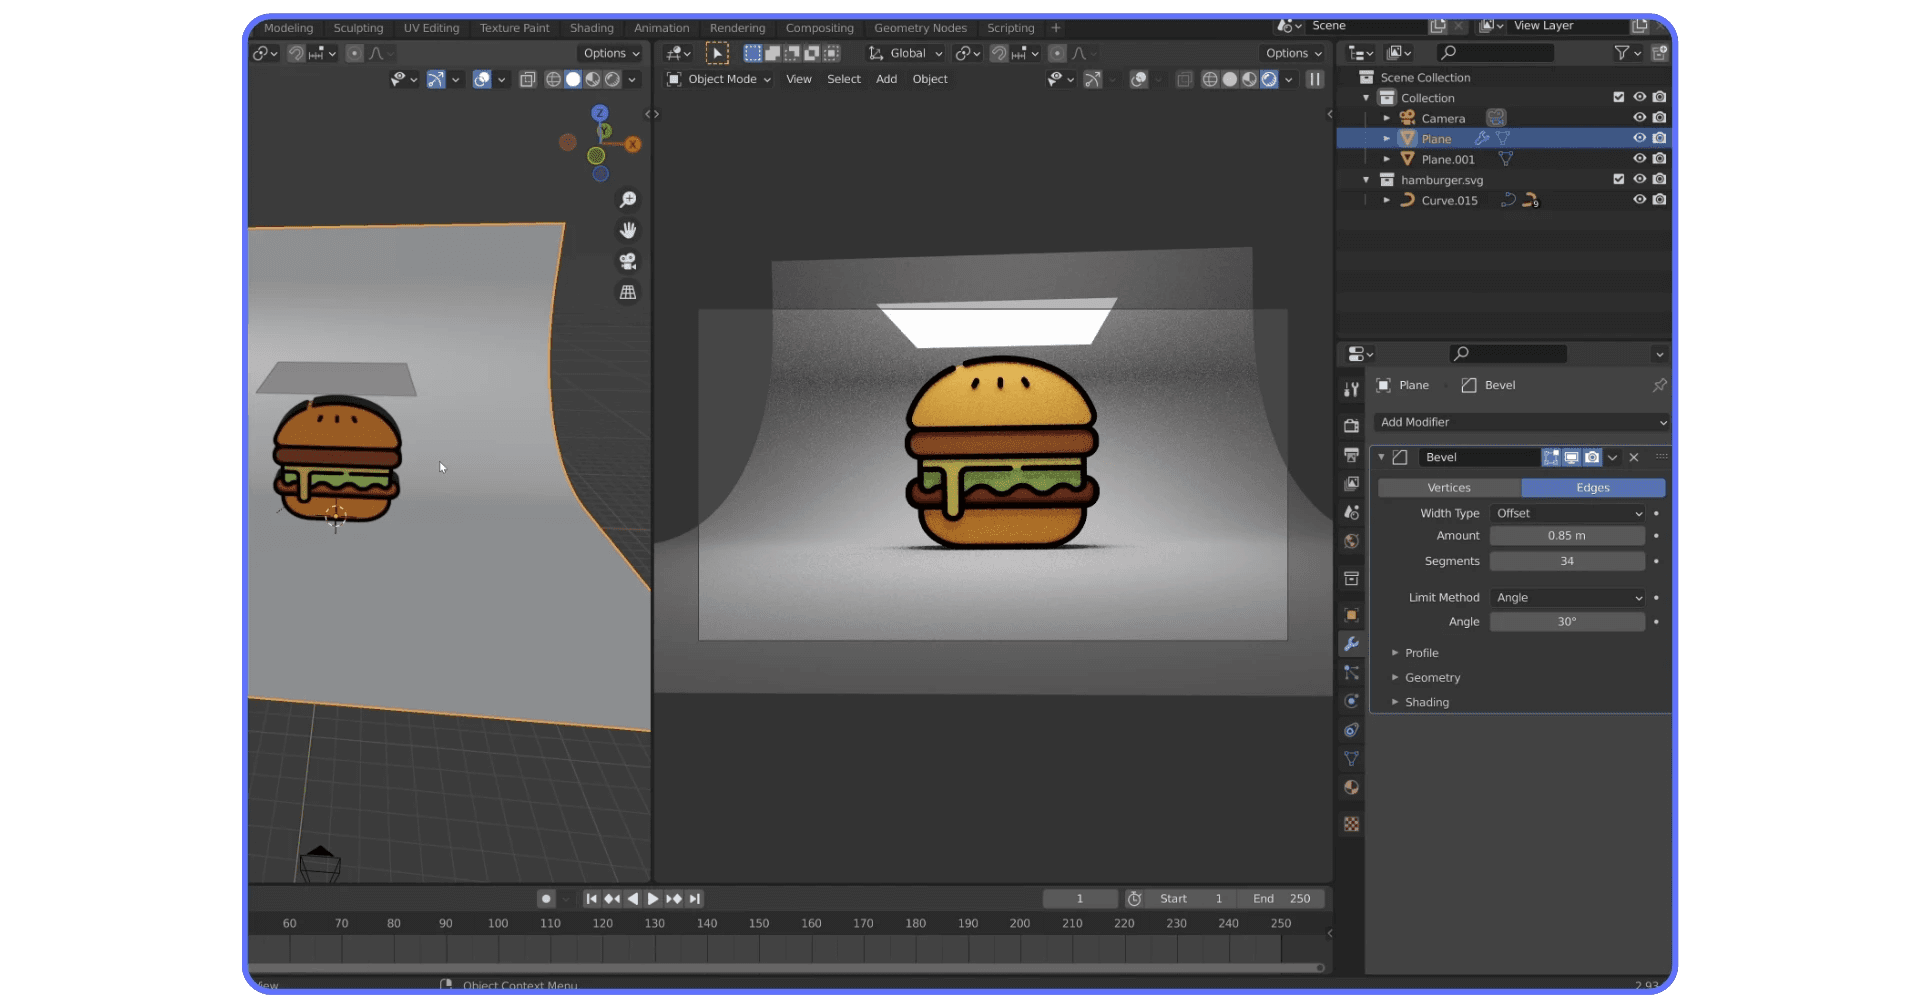
#17: Bevel for Better Highlights
Glass (and most glossy materials) really benefit from soft edges. Otherwise, the light just slides off with no interesting reflections.
Go to Object Data Properties > Geometry > Bevel
Set the Depth to something small like
0.001or0.0005Be subtle—you want shimmer, not a melted mess
#18: Tweak the Backdrop
For contrast, select the backdrop plane and change its material:
Set Surface > Diffuse
Make it slightly darker or desaturated to push focus toward the icon
This contrast is what makes your object feel grounded, not floating
By now, your icon should be looking seriously polished. You’ve got thickness, shine, shadows, and a clean background. Almost ready to hit render.
Blender Rendering Settings That Actually Matter
You’re nearly there. The icon is modeled, styled, lit like a movie scene—but don’t hit F12 just yet.
Before you render, a few small settings can make a huge difference in quality and speed.
#19: Enable Denoising
Glass shaders and soft lights = noise city.
Fix it with Blender’s built-in denoiser:
Go to Render Properties
Scroll to Denoising and check Render (and Viewport if you want preview cleanup too)
It doesn’t eliminate all noise, but it makes your final image way cleaner without losing too much detail.
#20: Set Your Resolution
For high-quality output (good enough for portfolios or thumbnails), set your resolution to something like:
1920x1920 for square renders
Or bump it higher (like 2K or 4K) if you’re cropping or printing
You can do this in the Output Properties tab (printer icon).
#21: Color Management Fixes
Ever noticed that your rendered image looks totally different from what you saw in the viewport?
Blame color management.
Scroll to the Color Management section under Render Properties
Set View Transform to Standard (instead of Filmic) if your colors look too flat or washed out
Adjust Exposure and Gamma if needed. Use Shift + drag for finer control.
These tweaks affect how Blender displays the image—not what the raw data is. But when you save the image (see below), they’ll be baked in unless you render with a full compositing setup.

#22: Save the Image Properly
Once you’ve rendered, press F3 (or Image > Save As) and:
Set format to PNG
Make sure Color Management settings are where you want them
Choose a filename that doesn’t include “untitled.blend.png” for the hundredth time
Pro tip: Save a backup version in .EXR if you plan to post-process later.
And with that… you’ve got a finished render. Want to go one step further?
Want to squeeze out even more speed? This guide to reducing rendering times is packed with practical tweaks to get your frames out faster.
Creative Ideas to Expand Your SVG Workflow
At this point, you’ve got the basics down: import an icon, give it thickness, light it well, and render it clean. But SVGs can do more than just static objects. A lot more.
Let’s talk next-level tricks.
Step 1: Turn Your Icons Into Logos
Have a clean vector logo lying around? Import it the same way as your icon.
Extrude the shapes
Add subtle bevels
Use flat colors or metallic materials
Drop in a minimal backdrop, tweak lighting—and you’ve got a professional logo render
Want a little motion? Animate a camera pan or add light flickers. Even a simple Z-axis rotation can turn a static logo into an eye-catching social asset.
This clean extrusion technique even translates well to more technical workflows like architectural modeling in Blender—just start with SVG blueprints instead of icons.
Step 2: Animate Multiple Icons Along a Curve
This trick from Polyfjord's tutorial is brilliant.
Import two SVGs (like a shopping cart and a fingerprint)
Use the Curve Modifier to wrap the smaller icon along the larger one
Duplicate it a bunch of times and boom—instant motion graphic
It’s a clever way to create visuals with deeper meaning. Like “secure shopping” represented by a cart wrapped in biometric icons. Cheesy? Maybe. Effective? Absolutely.
Step 3: Mix SVGs With Text
Want to build a typographic logo or brand layout?
Add a Text Object (
Shift + A > Text)Type your message, switch to your brand font, adjust kerning
Convert it to a mesh (
Right Click > Convert to Mesh)Extrude, bevel, material—it works just like the SVG
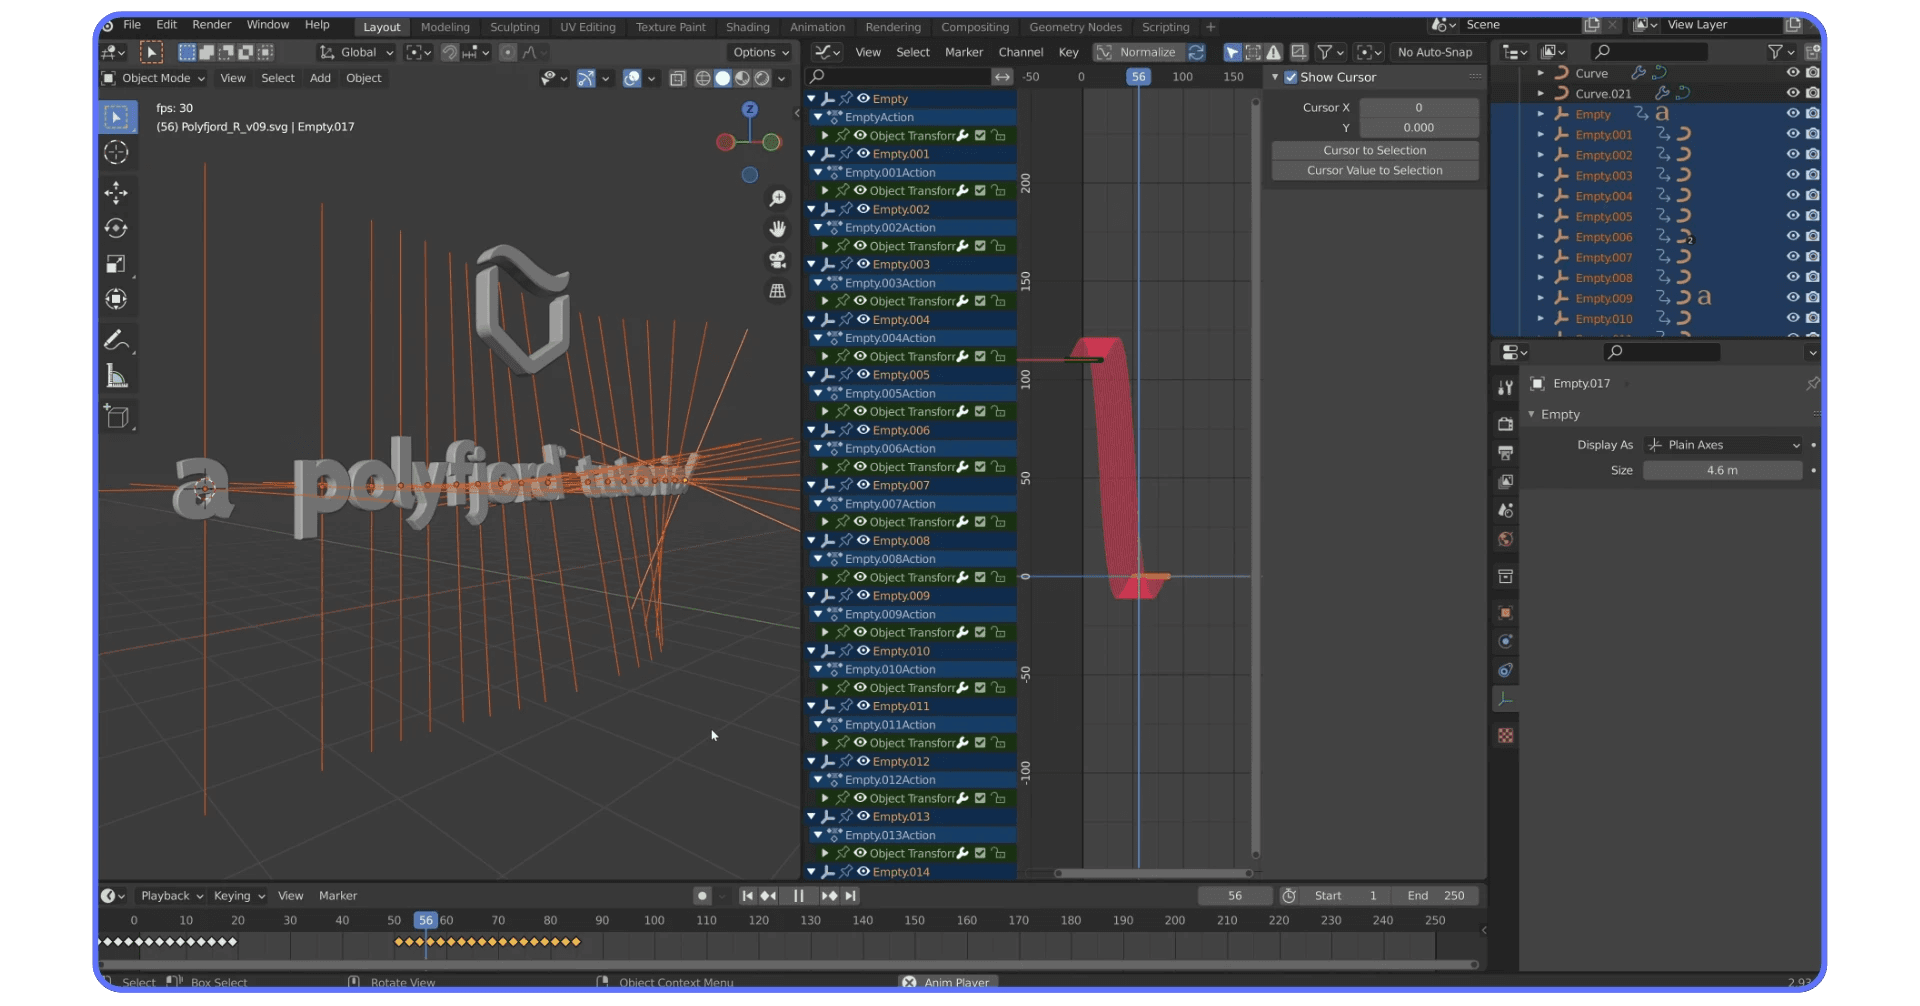
For a slick animated reveal, parent each letter to its own Empty, then animate the empties with rotation keyframes. Offset the animation slightly, and you’ve got one of those kinetic text effects you see in fancy promos.
If you're diving into stylized layouts, pairing SVG imports with this 2D animation workflow opens up even more creative possibilities.
Step 4: Create Icon Collages or Layouts
Sometimes, simple works best. Grab a bunch of icons, randomly scatter them in a scene, give each one a subtle variation in material or scale, and frame it with a nice soft light. Then throw in your logo or message.
It’s a fast way to build background visuals, presentation mockups, or even stylized headers.
So yes—SVGs aren’t just a shortcut. They’re a legit starting point for real 3D design. And with Blender, they’re yours to shape however you want.
If you’re working on icon-based design, branding, or UI visuals, this workflow saves hours. No modeling from scratch. No complex mesh edits. Just import, clean, style, render.
For even more experimental workflows, check out these AI tools for model generation to combine automation with handcrafted SVG animation.
Render Faster with Vagon Cloud Computer
You’ve built something slick. A glassy 3D icon with perfect lighting, or maybe even a full brand animation. But now you want to render it faster, test lighting variations, or maybe keep Blender open while jumping between ideas. That’s where things can start to drag—literally—especially if your local setup isn’t up for the task.
That’s where Vagon Cloud Computer comes in.
What’s Vagon Cloud Computer?
It’s a high-performance cloud computer you can launch straight from your browser. No downloads. No upgrades. Just serious GPU power when you need it.
If your laptop chokes when you enable Cycles or you’ve ever waited too long for a preview render to finish, Vagon Cloud Computer can give you a machine that actually keeps up.
Here’s how it helps with 3D icon work:
Run Blender smoothly, even with Cycles, glass shaders, and high-res lighting
Render faster, with cloud GPUs built for performance
Switch between devices, without worrying about OS or hardware limitations
Work on-demand, only when you need the power (no subscriptions unless you want one)
Why It’s a Solid Choice for Blender Users
Rendering 2D icons as 3D objects might start simple—but once you get into materials, lighting, and animations, Blender gets heavy. If you’re doing creative work and don’t want your hardware to slow you down, Vagon Cloud Computer is an easy upgrade.
You get the power of a high-end desktop—without owning one. Just open your browser, launch a Vagon machine, and get back to creating.
Try it now and see how it transforms your Blender workflow.
FAQs
1. Can I use any SVG file in Blender?
You can import most SVG files into Blender, but not all will behave nicely. Some come with overlapping paths, grouped shapes, or decorative layers that need to be cleaned up first. For best results, start with clean, simple icons—Feathericons and Google Fonts Icons are great choices.
2. Why is my imported SVG invisible or tiny in Blender?
This is totally normal. Blender often imports SVGs at a very small scale. Just zoom in, select the object, and use the scale shortcut (S) to size it up. Enabling X-ray mode (Alt + Z) can also help you find and work with hidden pieces.
3. Do I need to convert curves to meshes before rendering?
Not necessarily. Blender lets you extrude and bevel SVGs while they’re still curve objects, which is ideal for simple shapes. If you need to use more advanced modifiers or want total control over geometry, then converting to mesh is the way to go.
4. Why does the glass material look noisy or full of artifacts?
Glass shaders in Blender’s Cycles engine can be a bit demanding. If your render looks noisy or strange, try adding an Edge Split modifier to the object. Enabling Denoising and increasing your light path settings can also help clean things up.
5. Can I animate SVG icons in Blender?
Yes, definitely. Once you've extruded your icon into 3D, it's just like any other Blender object. You can animate position, rotation, scale, or use empties to control individual elements. It’s a great way to bring icons or logos to life in motion graphics.
6. How do I share my Blender scene with someone who doesn’t have Blender installed?
If you want to share a project without requiring anyone to install software, Vagon Cloud Computer is a solid solution. You can open your Blender scene on a high-performance cloud machine directly in your browser, making it easy to show, edit, or render work from anywhere.
7. What if my computer can’t handle Cycles rendering?
Rendering with Cycles can be heavy on your hardware, especially with complex lighting or glass materials. If your computer is struggling, you can try switching to the Eevee engine for faster previews. Or, you can offload the work entirely to Vagon Cloud Computer and access a powerful GPU-based setup instantly—no upgrades needed.
Let’s be honest—2D icons are everywhere. They live in your apps, your websites, your infographics. Clean, simple, and effective. But what happens when you want to give those same icons a little more presence? A little more dimension? That’s where 3D comes in.
Turning a flat SVG into a 3D object might sound like overkill at first—but it’s actually one of the fastest, most impactful ways to add depth (literally) to your visuals. Whether you’re working on a logo reveal, a UI animation, a product concept, or just experimenting with motion graphics, 3D icons give you more flexibility to move, light, and render them however you like.
And here’s the real kicker: you don’t need paid software or a Hollywood-level machine to pull this off. With Blender (yes, the free one) and a simple SVG file, you can create clean, stylized renders that look like they came out of a studio pipeline.
Personally, I love this technique because it skips the modeling phase entirely. No need to mess with vertices or retopology—you’re starting with perfectly crisp vector art and just giving it dimension. It’s fast, clean, and surprisingly fun.
This post walks you through exactly how to do it step-by-step, borrowing a clever workflow from this excellent YouTube tutorial by Polyfjord. If you’re even a little bit curious about 3D, this is a great place to start.
Best Free Sources for SVG Icons
Before you can turn anything into a slick 3D object, you need a good SVG file to work with. And luckily, the internet is full of them—completely free, cleanly designed, and ready to extrude.
Here are a few solid places to start:
Feathericons.com
These are minimalist, open-source icons with clean lines and great proportions. Perfect for extrusion because they’re simple and don’t rely on complex fills or shadows. You don’t even need to credit anyone—just download and go.
Google Fonts → Icons
Yes, Google Fonts isn’t just for text. The icons section is a goldmine of SVG-based visuals, from UI elements to expressive shapes. They're all open source, and you'll find lots of options with balanced spacing—great for 3D use.
IconFinder or Similar Sites
If you’re okay with giving attribution, sites like IconFinder offer massive collections of SVGs. Just filter by “Free” and “For Commercial Use” if that’s important for your project.
Quick Tip
Not all icons play nicely in 3D. Icons with overlapping paths, too many tiny elements, or super intricate shapes might need extra cleanup in Blender. For your first few experiments, stick with simple line icons—think food, tools, weather symbols, or basic logos.
How to Import SVG Files into Blender
So, you’ve got your SVG icon. You’re fired up, you open Blender… and the file is nowhere to be seen.
Welcome to the quirks of importing SVGs into 3D.
But don’t worry. It’s totally doable—and once you’ve done it once, it’s surprisingly quick.
#1: Enable the SVG Import Add-on
Blender doesn’t import SVGs out of the box, but it includes an official add-on for it. Just go to:
Edit > Preferences > Add-ons,
search for “SVG”,
and enable “Import-Export: Scalable Vector Graphics (SVG)”.
That’s it—you’re ready to go.
#2: Import Your Icon
Now head to:
File > Import > Scalable Vector Graphics (.svg)
and select your file.
When it loads in… don’t panic. It’s tiny. Like, subatomic. Zoom all the way in, scale it up (hit S), and you’ll see your icon sitting there, made of curves.
#3: Clean Up the Weird Stuff
SVGs were made for 2D screens, not 3D meshes. So some icons might come in messy—overlapping shapes, unnecessary highlights, or extra outlines. In the tutorial by Polyfjord, for example, the hamburger icon came in with some 2D highlight shapes that needed deleting.
Here’s the general process:
Use X-ray mode (
Alt + Z) to easily select pieces hidden behind othersDelete decorative elements you don’t want (think glows, highlights, etc.)
Make sure your curves aren’t doubled up or stacked
Now you’ve got clean, usable curves—and you’re ready to make them 3D.
If you're importing SVGs on the go or exploring mobile workflows, here's a handy guide on how to use Blender on an iPad to keep your projects moving—even without a full setup.
Extrude SVGs into 3D Objects in Blender
Alright, this is where it gets satisfying.
You’ve got clean curves in Blender. Time to push them into the third dimension and turn your flat icon into something that actually exists in 3D space.
#4: Select the Right Object Data
Each part of your imported SVG is a curve object—not a mesh. That’s actually a good thing. With it selected, head to the Object Data Properties panel (the green curve icon in the sidebar), and look for the Geometry section.
#5: Use the Extrude Slider
Slide the Extrude value to the right, and boom—your icon has thickness.
Hold down Shift while dragging if you want finer control.
This part is super sensitive, and even a small value goes a long way.
You can extrude each piece individually (like the burger bun, lettuce, and seeds in the original tutorial), or multi-select them to keep things consistent. To do that:
Hold Shift to select multiple objects
Or Alt + Click to select similar elements quickly
Then adjust the extrude settings with all selected
#6: Rotate and Position the Pieces
Want to rotate the burger upright like in the tutorial?
Hit R to rotate
Hit X to lock it to the X-axis
Then move it to the center (
Gto grab, thenX,Y, orZto move along a specific axis)
If you want your icon to stand upright or sit nicely in a scene, this is the moment to arrange it cleanly.
Bonus Tip: Work in X-ray Mode
This makes it way easier to select overlapping pieces (like seeds on a bun) without missing or misclicking. Just press Alt + Z to toggle X-ray on and off.
By now, you’ve got a proper 3D version of your icon—layered, extruded, and positioned. Next, let’s make it feel more like a real object with better organization.
Pro tip: knowing the right Blender shortcuts will speed up your extrusion workflow like magic—especially when working with multiple layers.
Group and Organize Your 3D Icon Elements
Once you’ve got all your pieces extruded and placed, it’s time to clean up the chaos. Because let’s be honest—moving a burger made of 12 separate objects one piece at a time isn’t exactly fun.
Let’s get tidy.
Why Parenting Matters
In Blender, parenting means linking objects together so they move as a group. You pick one object as the “parent,” and the others follow its lead. Think of it like sticking all your layers to a magnet.
Here’s how to do it:
#7: Select Everything
Shift + Click to select all parts of your icon (or drag a box over everything)
Last click should be on the piece you want as the parent (like the bottom bun or main shape)
The last-selected object will be highlighted in a brighter outline
#8: Parent to Last
Press Ctrl + P and choose “Object (Keep Transform)”
Now when you move, rotate, or scale the parent object, everything else follows. Neat and clean.
#9: Set Origin to Geometry
If your object is rotating weirdly or off-center:
With the main parent selected, hit Right Click > Set Origin > Origin to Geometry
This makes sure your object rotates around its actual shape, not some random point in space
Bonus Tip: Rotate with Trackball for Natural Angles
Want to give your icon a more dynamic tilt?
Hit R to rotate
Then R again to enter trackball mode
Now you can rotate freely like you're spinning a dial. Great for giving objects that artsy lean.
At this point, your 3D icon is structured, grouped, and ready for the spotlight. Speaking of which…
For the technically curious, automating parts of this workflow is totally doable—especially if you’re into using Python in Blender to script repetitive tasks.
Build a Clean Lighting Setup in Blender
So you’ve got your 3D icon, and it’s looking solid—but right now, it’s floating in Blender’s grey void of sadness. What it needs is a proper lighting setup. And not just any lighting setup—a clean, dramatic, studio-style render.
Good news: You don’t need HDRIs or complicated rigs to make that happen. Just a few planes, one camera, and Blender’s Cycles engine.
Many full-length movies have been made with Blender, and these lighting techniques aren’t too far off from what pros use to build cinematic scenes.
#10: Switch to Cycles
In the Render Properties tab (camera icon), set your render engine to Cycles.
You can keep the device on CPU or GPU—whatever your machine can handle.
#11: Build the Backdrop
This is the photographer’s trick. Create a smooth background surface so your icon doesn’t feel like it’s floating in space.
Shift + A > Mesh > Plane
Scale it up with
SGo to side view (
NumPad 3)In Edit Mode, select the back two vertices
E to extrude up
Now you’ve got an L-shaped plane
To smooth that corner:
Go to Modifiers > Bevel
Increase Amount and Segments
Then Right Click > Shade Smooth
#12: Add a Camera
Shift + A > Camera
Hit Ctrl + Alt + NumPad 0 to snap the camera to your current view
With the camera selected, press G to move, Z to move on the vertical, or R to rotate
#13: Add a Light Plane (Softbox Style)
Forget Blender’s point lights for now—use an emission plane for soft, studio-quality light.
Shift + A > Mesh > Plane
Move it above or to the side of your icon
In the Material Properties, create a new material
Change the Surface to Emission
Increase the Strength to something like 10–100 depending on size and scene
Want more control? Use split view so you can preview changes in Rendered View (Z > Rendered). You can also press Y twice to move the light along its local Y-axis, helping you find that perfect lighting angle.
The “Mafia Interrogation” Trick
This part from Polyfjord's tutorial is just… smart.
You angle the emission plane toward the camera until it becomes a thin line in view. Then move it just outside the frame. What you get is this hyper-focused light that gives your object dramatic shadows—like it’s under a spotlight in a gritty movie.
It’s overkill for some icons. But for anything glassy or glossy? Chef’s kiss.
And if your objects are acting weird during transformations, mastering the 3D cursor in Blender can seriously level up your scene organization game.
Apply Materials Like Glass, Metal, and More
3D shapes are cool. But 3D shapes with materials? That’s where things start to come alive.
Blender’s material system gives you near-infinite control over how your object looks—glass, plastic, chrome, paper, you name it. And the best part? You only need a couple of tweaks to make your icon pop.
For more ideas on getting creative with surface materials, check out this collection of Blender tips and tricks to add personality to your objects.
#14: Select an Object and Create a Material
Pick one of your icon’s pieces—let’s say the outer edge or a bun.
Head to the Material Properties tab (the red sphere icon), click “New”, and make sure Use Nodes is enabled.
Now you can start assigning surface types.
#15: Try the Glass Shader (Yes, Really)
This is where the original tutorial gets fancy: the icon’s edge is given a glass material.
Set Surface > Glass BSDF
Drop the Roughness to around
0.1or lower for sharper reflectionsWant even more shine? Crank up the IOR (Index of Refraction) for a stylized look
For extra pop, move the object up slightly on the Z-axis and rotate it a bit with R + R (trackball mode)
This tilts the icon and catches the light just right
⚠️ Warning: Glass shaders slow down render times. But when done right, they look amazing—especially with the right lighting.
#16: Fix Weird Glass Artifacts
If your render suddenly looks… crunchy? You’re not alone.
Select the glass object
Go to Modifier Properties > Add Modifier > Edge Split
Boom. Artifacts gone. Blender just needed a little hint on where to break the smoothing
#17: Bevel for Better Highlights
Glass (and most glossy materials) really benefit from soft edges. Otherwise, the light just slides off with no interesting reflections.
Go to Object Data Properties > Geometry > Bevel
Set the Depth to something small like
0.001or0.0005Be subtle—you want shimmer, not a melted mess
#18: Tweak the Backdrop
For contrast, select the backdrop plane and change its material:
Set Surface > Diffuse
Make it slightly darker or desaturated to push focus toward the icon
This contrast is what makes your object feel grounded, not floating
By now, your icon should be looking seriously polished. You’ve got thickness, shine, shadows, and a clean background. Almost ready to hit render.
Blender Rendering Settings That Actually Matter
You’re nearly there. The icon is modeled, styled, lit like a movie scene—but don’t hit F12 just yet.
Before you render, a few small settings can make a huge difference in quality and speed.
#19: Enable Denoising
Glass shaders and soft lights = noise city.
Fix it with Blender’s built-in denoiser:
Go to Render Properties
Scroll to Denoising and check Render (and Viewport if you want preview cleanup too)
It doesn’t eliminate all noise, but it makes your final image way cleaner without losing too much detail.
#20: Set Your Resolution
For high-quality output (good enough for portfolios or thumbnails), set your resolution to something like:
1920x1920 for square renders
Or bump it higher (like 2K or 4K) if you’re cropping or printing
You can do this in the Output Properties tab (printer icon).
#21: Color Management Fixes
Ever noticed that your rendered image looks totally different from what you saw in the viewport?
Blame color management.
Scroll to the Color Management section under Render Properties
Set View Transform to Standard (instead of Filmic) if your colors look too flat or washed out
Adjust Exposure and Gamma if needed. Use Shift + drag for finer control.
These tweaks affect how Blender displays the image—not what the raw data is. But when you save the image (see below), they’ll be baked in unless you render with a full compositing setup.
#22: Save the Image Properly
Once you’ve rendered, press F3 (or Image > Save As) and:
Set format to PNG
Make sure Color Management settings are where you want them
Choose a filename that doesn’t include “untitled.blend.png” for the hundredth time
Pro tip: Save a backup version in .EXR if you plan to post-process later.
And with that… you’ve got a finished render. Want to go one step further?
Want to squeeze out even more speed? This guide to reducing rendering times is packed with practical tweaks to get your frames out faster.
Creative Ideas to Expand Your SVG Workflow
At this point, you’ve got the basics down: import an icon, give it thickness, light it well, and render it clean. But SVGs can do more than just static objects. A lot more.
Let’s talk next-level tricks.
Step 1: Turn Your Icons Into Logos
Have a clean vector logo lying around? Import it the same way as your icon.
Extrude the shapes
Add subtle bevels
Use flat colors or metallic materials
Drop in a minimal backdrop, tweak lighting—and you’ve got a professional logo render
Want a little motion? Animate a camera pan or add light flickers. Even a simple Z-axis rotation can turn a static logo into an eye-catching social asset.
This clean extrusion technique even translates well to more technical workflows like architectural modeling in Blender—just start with SVG blueprints instead of icons.
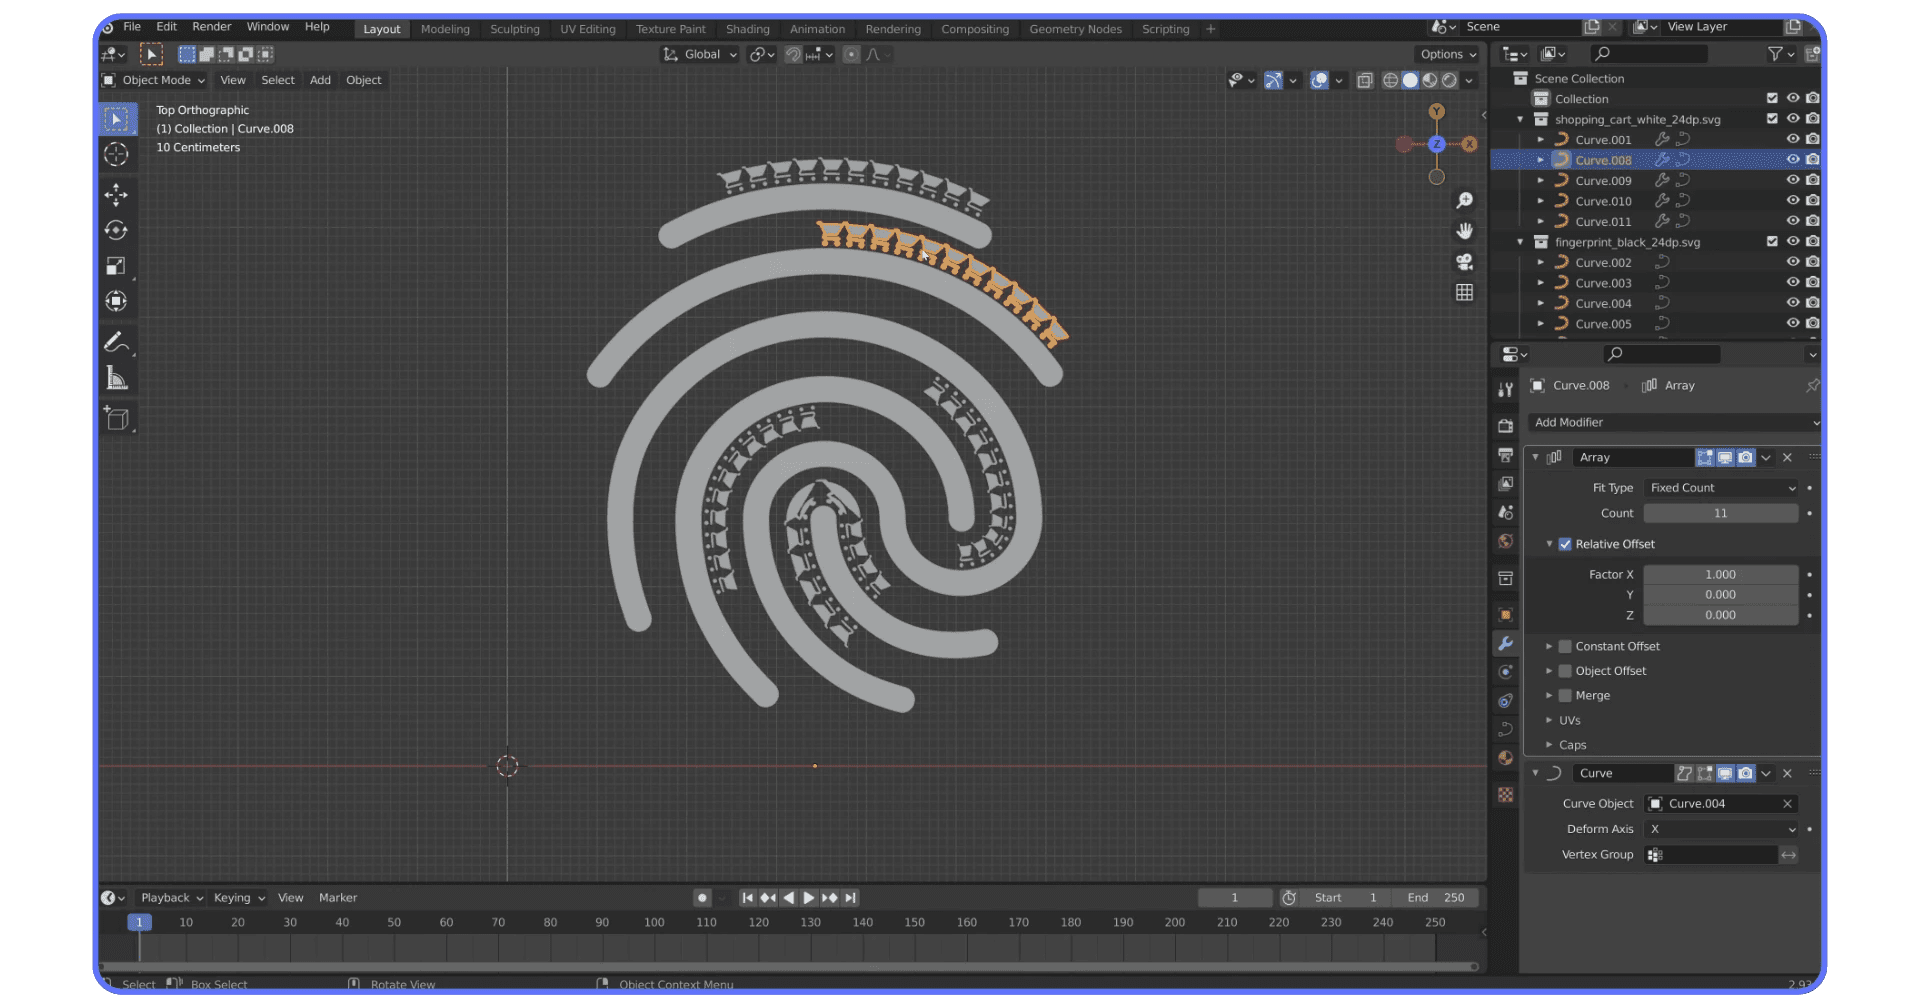
Step 2: Animate Multiple Icons Along a Curve
This trick from Polyfjord's tutorial is brilliant.
Import two SVGs (like a shopping cart and a fingerprint)
Use the Curve Modifier to wrap the smaller icon along the larger one
Duplicate it a bunch of times and boom—instant motion graphic
It’s a clever way to create visuals with deeper meaning. Like “secure shopping” represented by a cart wrapped in biometric icons. Cheesy? Maybe. Effective? Absolutely.
Step 3: Mix SVGs With Text
Want to build a typographic logo or brand layout?
Add a Text Object (
Shift + A > Text)Type your message, switch to your brand font, adjust kerning
Convert it to a mesh (
Right Click > Convert to Mesh)Extrude, bevel, material—it works just like the SVG
For a slick animated reveal, parent each letter to its own Empty, then animate the empties with rotation keyframes. Offset the animation slightly, and you’ve got one of those kinetic text effects you see in fancy promos.
If you're diving into stylized layouts, pairing SVG imports with this 2D animation workflow opens up even more creative possibilities.
Step 4: Create Icon Collages or Layouts
Sometimes, simple works best. Grab a bunch of icons, randomly scatter them in a scene, give each one a subtle variation in material or scale, and frame it with a nice soft light. Then throw in your logo or message.
It’s a fast way to build background visuals, presentation mockups, or even stylized headers.
So yes—SVGs aren’t just a shortcut. They’re a legit starting point for real 3D design. And with Blender, they’re yours to shape however you want.
If you’re working on icon-based design, branding, or UI visuals, this workflow saves hours. No modeling from scratch. No complex mesh edits. Just import, clean, style, render.
For even more experimental workflows, check out these AI tools for model generation to combine automation with handcrafted SVG animation.
Render Faster with Vagon Cloud Computer
You’ve built something slick. A glassy 3D icon with perfect lighting, or maybe even a full brand animation. But now you want to render it faster, test lighting variations, or maybe keep Blender open while jumping between ideas. That’s where things can start to drag—literally—especially if your local setup isn’t up for the task.
That’s where Vagon Cloud Computer comes in.
What’s Vagon Cloud Computer?
It’s a high-performance cloud computer you can launch straight from your browser. No downloads. No upgrades. Just serious GPU power when you need it.
If your laptop chokes when you enable Cycles or you’ve ever waited too long for a preview render to finish, Vagon Cloud Computer can give you a machine that actually keeps up.
Here’s how it helps with 3D icon work:
Run Blender smoothly, even with Cycles, glass shaders, and high-res lighting
Render faster, with cloud GPUs built for performance
Switch between devices, without worrying about OS or hardware limitations
Work on-demand, only when you need the power (no subscriptions unless you want one)
Why It’s a Solid Choice for Blender Users
Rendering 2D icons as 3D objects might start simple—but once you get into materials, lighting, and animations, Blender gets heavy. If you’re doing creative work and don’t want your hardware to slow you down, Vagon Cloud Computer is an easy upgrade.
You get the power of a high-end desktop—without owning one. Just open your browser, launch a Vagon machine, and get back to creating.
Try it now and see how it transforms your Blender workflow.
FAQs
1. Can I use any SVG file in Blender?
You can import most SVG files into Blender, but not all will behave nicely. Some come with overlapping paths, grouped shapes, or decorative layers that need to be cleaned up first. For best results, start with clean, simple icons—Feathericons and Google Fonts Icons are great choices.
2. Why is my imported SVG invisible or tiny in Blender?
This is totally normal. Blender often imports SVGs at a very small scale. Just zoom in, select the object, and use the scale shortcut (S) to size it up. Enabling X-ray mode (Alt + Z) can also help you find and work with hidden pieces.
3. Do I need to convert curves to meshes before rendering?
Not necessarily. Blender lets you extrude and bevel SVGs while they’re still curve objects, which is ideal for simple shapes. If you need to use more advanced modifiers or want total control over geometry, then converting to mesh is the way to go.
4. Why does the glass material look noisy or full of artifacts?
Glass shaders in Blender’s Cycles engine can be a bit demanding. If your render looks noisy or strange, try adding an Edge Split modifier to the object. Enabling Denoising and increasing your light path settings can also help clean things up.
5. Can I animate SVG icons in Blender?
Yes, definitely. Once you've extruded your icon into 3D, it's just like any other Blender object. You can animate position, rotation, scale, or use empties to control individual elements. It’s a great way to bring icons or logos to life in motion graphics.
6. How do I share my Blender scene with someone who doesn’t have Blender installed?
If you want to share a project without requiring anyone to install software, Vagon Cloud Computer is a solid solution. You can open your Blender scene on a high-performance cloud machine directly in your browser, making it easy to show, edit, or render work from anywhere.
7. What if my computer can’t handle Cycles rendering?
Rendering with Cycles can be heavy on your hardware, especially with complex lighting or glass materials. If your computer is struggling, you can try switching to the Eevee engine for faster previews. Or, you can offload the work entirely to Vagon Cloud Computer and access a powerful GPU-based setup instantly—no upgrades needed.
Get Beyond Your Computer Performance
Run applications on your cloud computer with the latest generation hardware. No more crashes or lags.

Trial includes 1 hour usage + 7 days of storage.
Summarize with AI

Ready to focus on your creativity?
Vagon gives you the ability to create & render projects, collaborate, and stream applications with the power of the best hardware.

Vagon Blog


Run heavy applications on any device with
your personal computer on the cloud.
San Francisco, California
Solutions
Vagon Teams
Vagon Streams
Use Cases
Resources
Vagon Blog
What Slows Down After Effects Projects?
The First 30 Minutes in Blender 3D: A Practical Workflow Guide
What’s New in Godot 4.7? Key Features, Upgrades, and Workflow Improvements
What Slows Down Blender 3D Projects?
What Slows Down Adobe Photoshop Projects?
The First 30 Minutes in Adobe Photoshop: A Practical Workflow Guide
Before You Start in Adobe Photoshop: A Practical Setup Checklist
What’s New in Unreal Engine 5.8? Key Features and Upgrade Advice
How to Run Windows on an iPad: 4 Best Ways (2026)
Vagon Blog
Run heavy applications on any device with
your personal computer on the cloud.
San Francisco, California
Solutions
Vagon Teams
Vagon Streams
Use Cases
Resources
Vagon Blog