Instant Connection for Pixel Streaming
— New Feature Automated Setup

How to Run Kdenlive on a Cloud Ubuntu Desktop (2026 Guide)
-
How to Run Kdenlive on a Cloud Ubuntu Desktop (2026 Guide)
How to Run Kdenlive on a Cloud Ubuntu Desktop (2026 Guide)
-
Table of Contents
Quick answer: To run Kdenlive in the cloud, launch a cloud Ubuntu desktop (for example on Vagon, with a GPU plan for heavier projects), install Kdenlive from apt, Flathub, or the AppImage, and edit and render on a streamed desktop. It's ideal for smooth editing of high-resolution footage and fast rendering that overwhelm a laptop, and unlike the Linux version of some editors, Kdenlive handles common consumer codecs, so your usual footage just works.
Key Takeaways
Kdenlive is a free, capable, open-source video editor, and a cloud desktop gives it more power for heavy projects.
It handles common consumer codecs like H.264 out of the box, so typical footage works without special transcoding.
Proxy editing keeps high-resolution projects smooth, and a cloud machine makes generating proxies and rendering fast.
A GPU plan speeds up effects and rendering; lighter projects can run on a strong CPU plan.
Persistent storage keeps your projects and media between sessions.
It's billed by the minute, ideal for editing and render sessions and a poor fit for idling all day.
Kdenlive rarely gets the attention flashier video editors do, yet it's quietly one of the best free tools on Linux, a genuinely capable non-linear editor with multi-track timelines, a deep effects library, proxy editing, and reliable rendering. Where it starts to strain isn't the features. It's the moment you stack several tracks of high-resolution footage, layer on effects and transitions, and try to scrub the timeline while your laptop wheezes, or you hit render and settle in for a long wait.
That's where running Kdenlive on a cloud Ubuntu desktop helps. You get more CPU, more memory, and, on a GPU plan, real graphics power, and Kdenlive runs on it with room to breathe. Playback stays smooth, renders finish faster, and when you're done you shut the machine off. And here's a nice bonus over some other editors on Linux: Kdenlive handles the common consumer codecs, so your everyday footage just works. This guide covers when a cloud machine is worth it, how to set it up, and how to get the smoothest editing experience.
What Kdenlive Is And Who Uses It
Kdenlive is a free and open-source non-linear video editor. It offers multi-track editing, a large library of effects and transitions, title creation, audio editing, keyframing, proxy editing for smooth work with heavy footage, and rendering to a wide range of formats. It's mature, actively developed, and capable of real projects, from simple cuts to multi-track productions with effects.
The people who use it are content creators and YouTubers, video hobbyists, students learning to edit, educators, and anyone who wants a capable video editor without a subscription. On Linux, Kdenlive is one of the most popular and full-featured video editors, and a common first choice for people editing video on the platform.
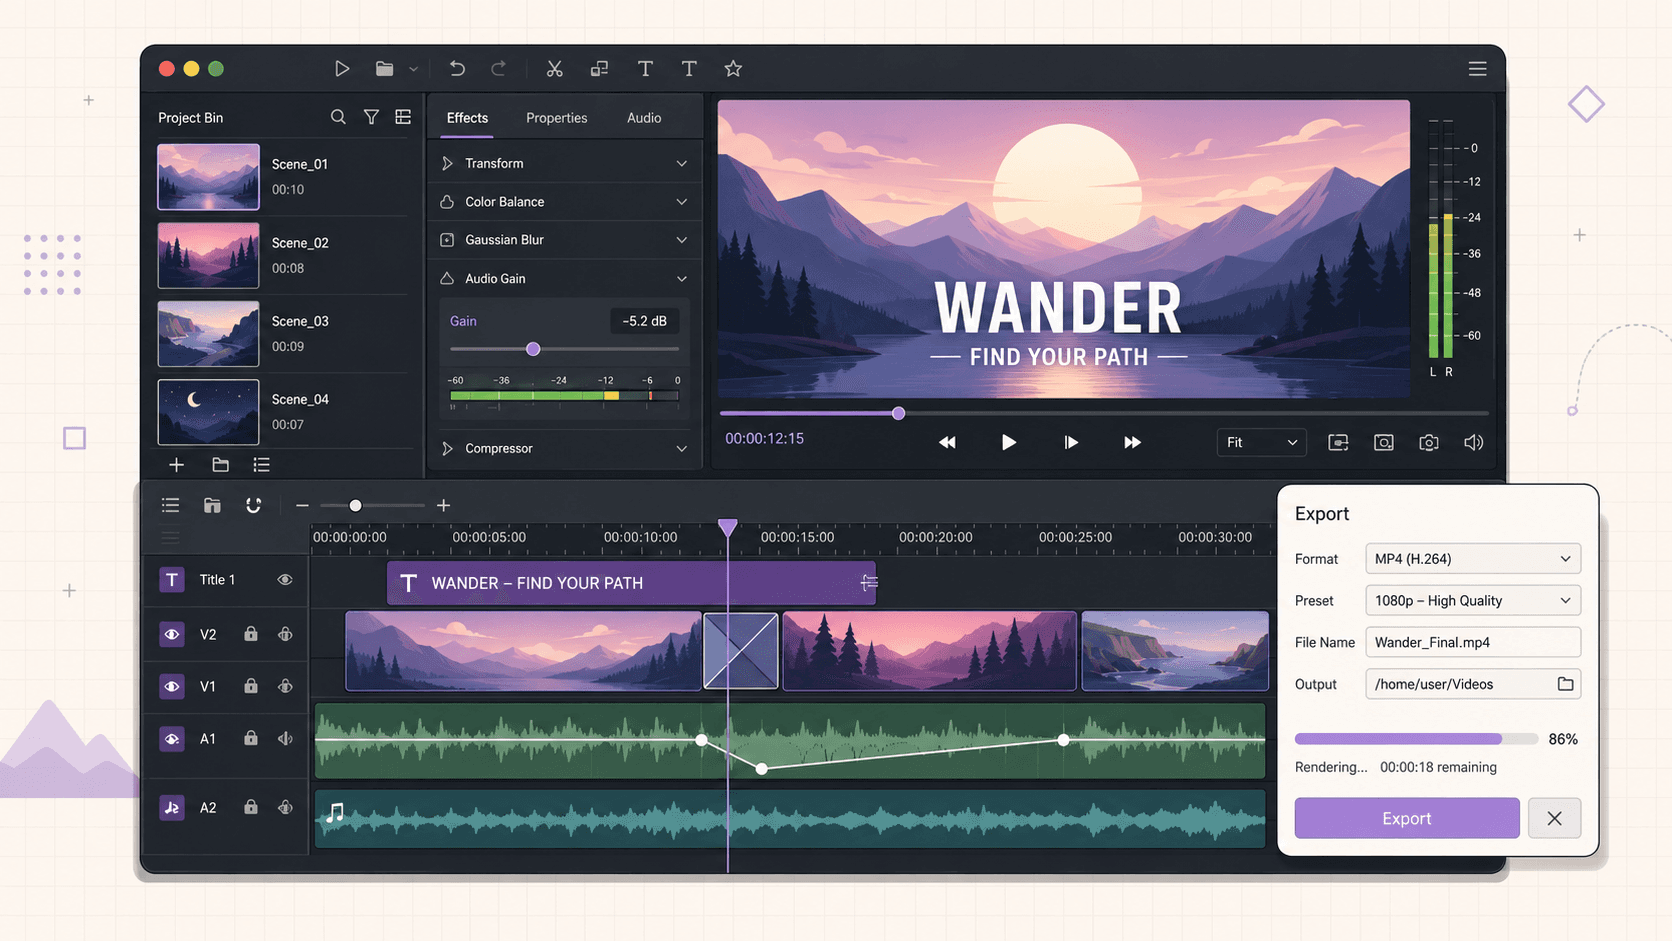
Definition: running Kdenlive in the cloud
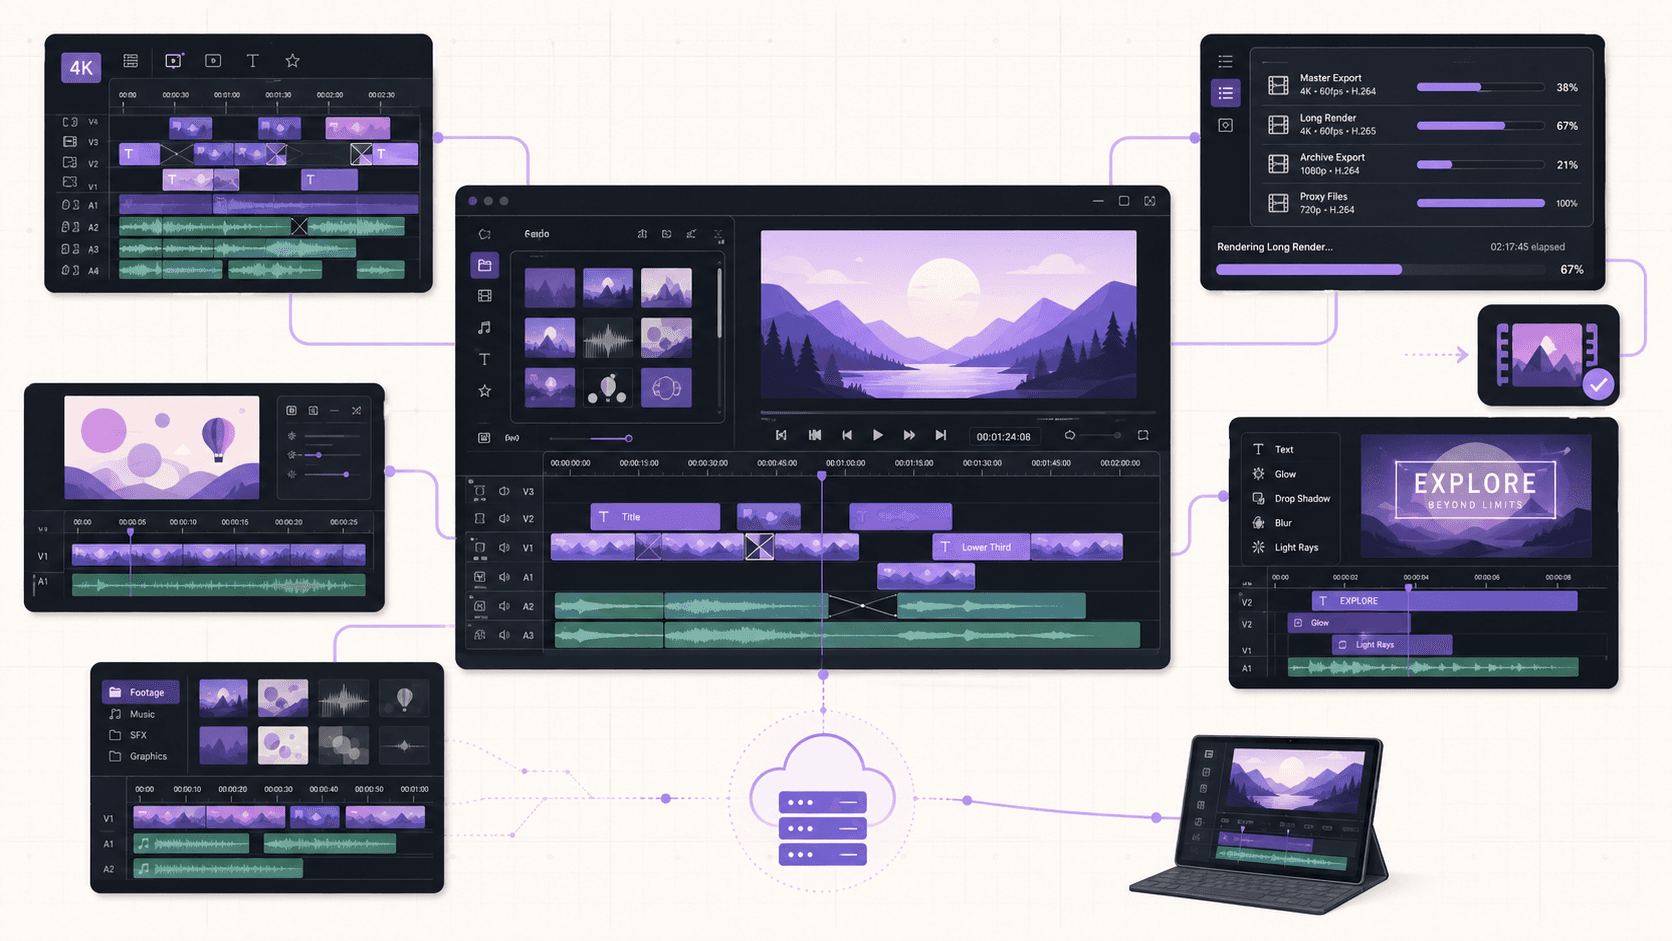
Running Kdenlive in the cloud means installing Kdenlive on a remote Ubuntu desktop and editing and rendering video there instead of on your local computer. You get more CPU, memory, and optional GPU power for heavy projects, plus the ability to edit from any device, while your own machine stays free.
Why Run Kdenlive On a Cloud Desktop
Kdenlive runs on modest hardware for simple projects, so let's be specific about what the cloud adds for demanding work.
Smooth playback on heavy projects
Editing gets heavy when you stack multiple tracks of high-resolution footage with effects. On a laptop, the timeline stutters and scrubbing lags, which makes precise editing frustrating. A cloud machine with more CPU and memory, and a GPU on the right plan, keeps playback smooth so you can edit by feel.
Faster rendering
Rendering a finished project is time-consuming, and it monopolizes your machine while it runs. A more powerful cloud machine renders faster, and your own computer stays free during the export. You can render in a focused session and download the result.
Fast proxy generation
Kdenlive's proxy editing creates lightweight versions of your footage for smooth editing. Generating proxies for a lot of footage is a heavy task that a cloud machine handles quickly, so you get to the smooth-editing part sooner.
Edit from any device
Because the desktop streams to you, you can edit from a device that couldn't handle a heavy project locally, with the actual work done on a capable cloud machine.
A clean, consistent environment
An isolated, resettable VM with persistent storage gives you a reliable Kdenlive setup that's the same every session, independent of your personal machine's state.
Kdenlive And Codecs: The Good News
If you've read about editing video on Linux, you may have run into codec headaches with some professional editors, so here's the reassuring part.
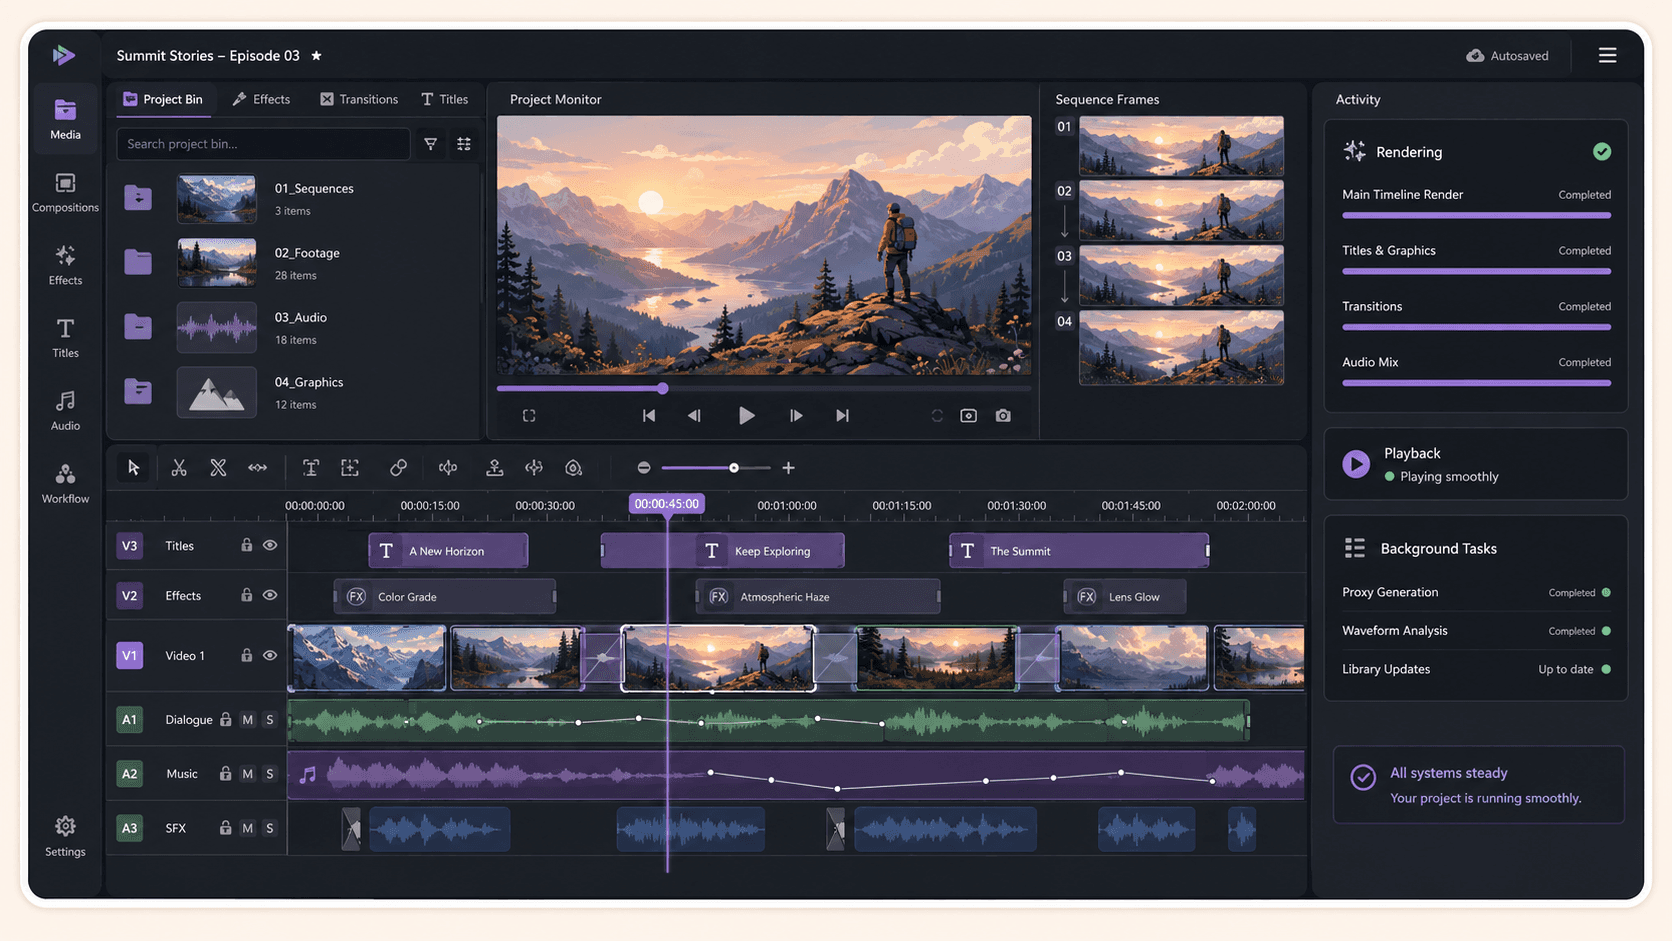
Kdenlive is built on an open multimedia framework and handles the common consumer video codecs, including H.264, that most cameras, phones, and screen recorders produce. That means you can generally drop your everyday footage onto a Kdenlive timeline and work with it directly, without the mandatory transcoding step that some other Linux editors require. This makes Kdenlive a particularly friendly choice for editing typical consumer footage on Linux, and it's a real advantage if your media is standard H.264 clips.
That said, for very heavy footage or high resolutions, proxy editing (covered next) still improves smoothness, and rendering is still faster on a powerful machine. But the key point is that you're unlikely to hit the "my footage won't import" wall that catches people out with some other editors on Linux. Your usual clips work, and a cloud machine simply makes editing and rendering them smoother and faster.
If you’re working with vector graphics from any device, this guide shows how to run Inkscape in the cloud.
Proxy Editing For Smooth High-Resolution Work
Proxy editing is Kdenlive's answer to heavy footage, and it pairs beautifully with a cloud machine.
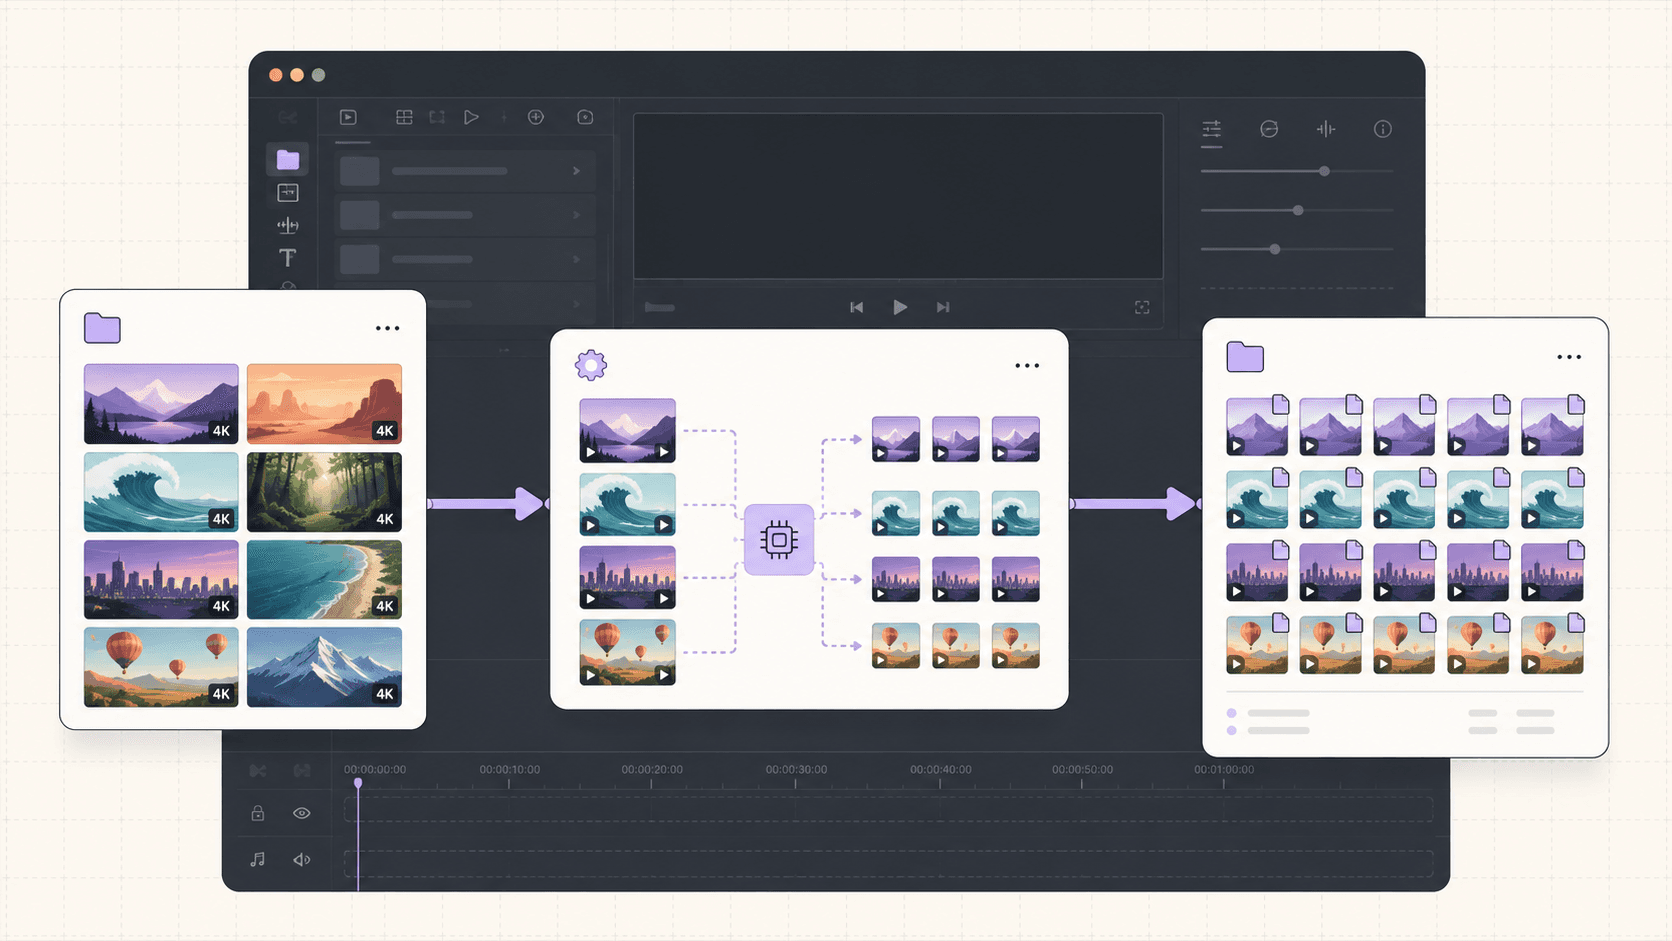
The idea is simple. Kdenlive generates lower-resolution proxy versions of your clips and uses them during editing, so the timeline stays smooth even with demanding high-resolution source footage. When you render your final project, Kdenlive automatically switches back to the full-quality originals, so your export keeps its full resolution. You get responsive editing without sacrificing final quality.
On a cloud machine, this workflow is especially effective. Generating proxies for a batch of footage is a heavy job that a powerful cloud machine completes quickly, so you spend less time waiting to start editing. Then editing with proxies is smooth, and the final render from the originals is fast on a capable machine. The tradeoff is storage, since proxies take space, so factor that into your persistent storage. For 4K and other high-resolution projects, enabling proxy editing on a cloud desktop gives you a genuinely smooth experience that a laptop editing full-resolution footage directly can't match.
When It's The Right Call, And When To Skip It
A cloud desktop is a burst tool, billed by the minute. It's the right call when you're editing heavy or high-resolution projects that strain your machine, rendering exports that take too long locally, wanting to edit from a limited device, or wanting a consistent setup. You spin it up, edit, and shut it down.
It's the wrong call if your projects are light and your current machine handles Kdenlive fine, since it's free and runs on modest hardware, or if you want an editor instantly available all day without thinking about sessions. The cloud shines for demanding projects, fast rendering, and limited devices.
If you’re creating digital paintings or illustrations remotely, you can learn how to run Krita in the cloud.
What You'll Need
A Vagon account with a payment method.
An Ubuntu plan. For heavy or high-resolution projects, a GPU plan helps with effects and rendering; lighter projects can run on a strong CPU plan.
Persistent storage, recommended, since video media and projects are large.
Step 1: Launch an Ubuntu machine
Create a computer on Vagon, choose Linux, and pick a plan. For heavy projects, a GPU plan gives smoother effects and faster rendering. It boots in about 90 seconds.
Step 2: Install Kdenlive
The simplest path through the terminal:
For the latest version, install from Flathub or download the official AppImage from kdenlive.org:
If Vagon's Ubuntu template already includes Kdenlive, you can skip straight to opening it.
Step 3: Set up your project
Create a project with the resolution and frame rate that match your footage. Arrange your workspace, the timeline, monitors, and effects panels, taking advantage of the streamed desktop's screen space.
Step 4: Enable proxy editing for heavy footage
If you're working with high-resolution or heavy footage, enable proxy editing in the project settings so Kdenlive generates lightweight versions for smooth editing.
Step 5: Add persistent storage
Add persistent storage so your projects, media, and proxies live on the machine between sessions rather than re-uploading footage each time.
Editing And Rendering With Cloud Power
Once you're set up, the cloud machine's power shows in both editing and rendering.
Editing feels smooth because the machine keeps timeline playback responsive, even with multiple tracks and effects, especially when you use proxies for heavy footage. You can scrub, trim, and arrange without the lag that makes editing painful on an underpowered laptop.
Rendering is where the time savings are most obvious. Exporting a finished project is computationally heavy, and a powerful cloud machine, particularly on a GPU plan, renders faster than a weak laptop. You configure your export settings, start the render, and either keep working elsewhere or let it finish in the background. Because your own computer isn't doing the work, it stays free. Render in a focused session, download the finished video, and shut the machine down when it's complete.
Effects, Transitions, And Titles
Kdenlive's creative tools benefit from cloud power too.
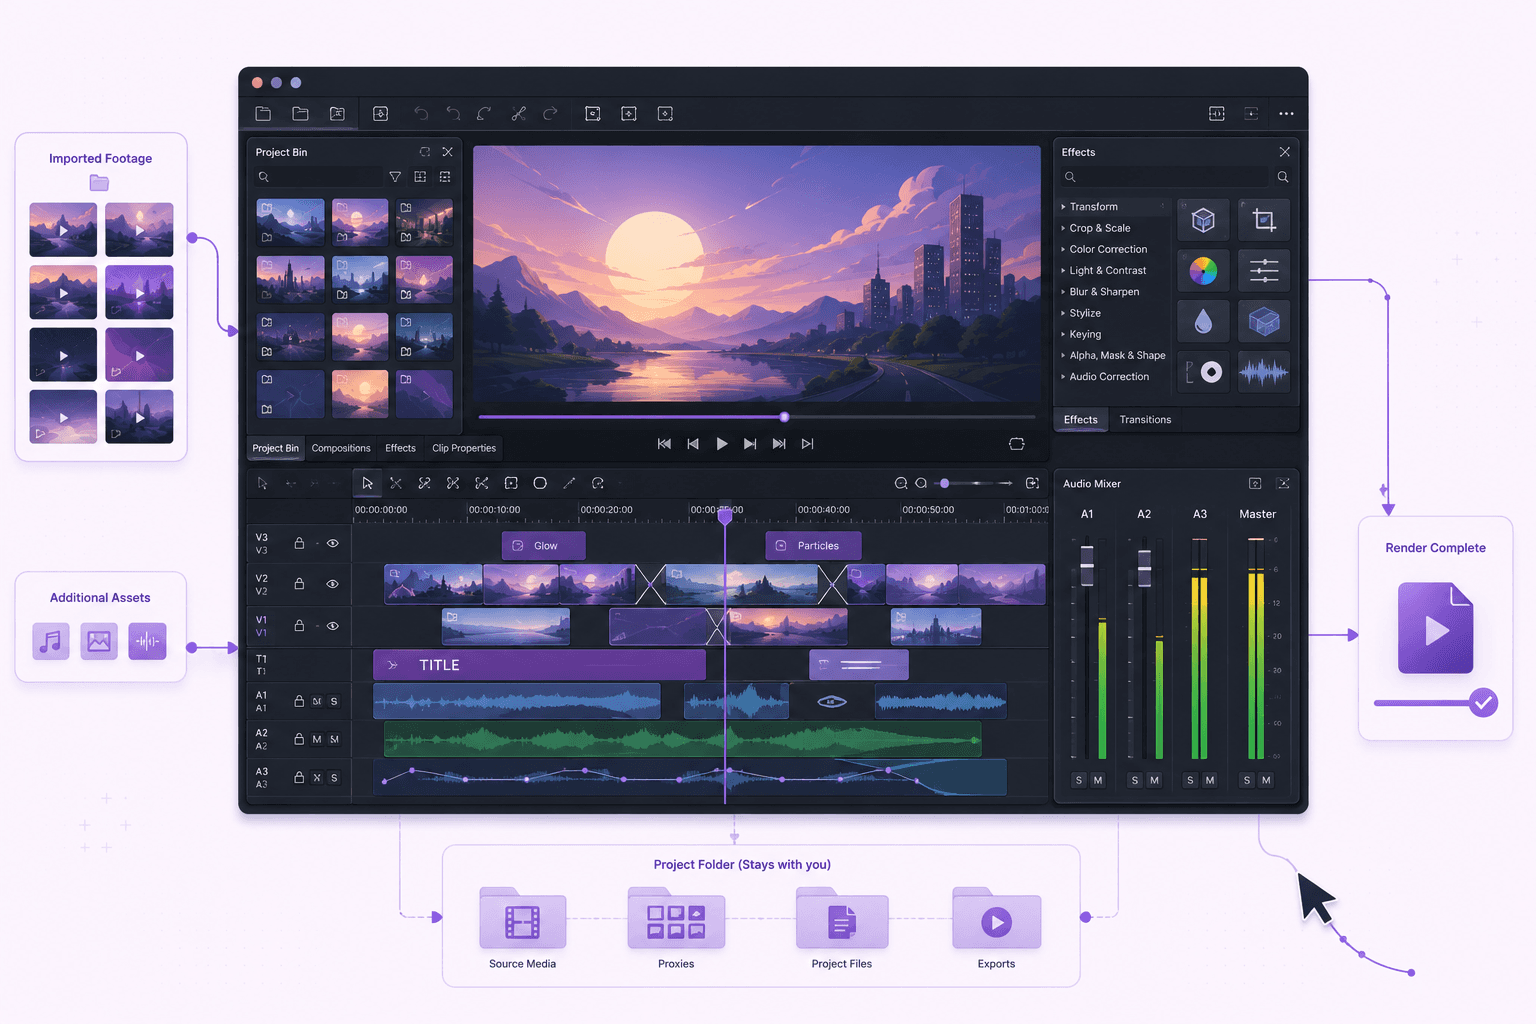
Kdenlive includes a large library of video and audio effects, transitions between clips, keyframing for animating properties over time, and a title editor for creating text and graphics. Complex effects, especially applied across high-resolution footage, are computationally demanding, and a more powerful machine applies and previews them faster, so you spend less time waiting after each adjustment. Keyframed animations and layered effects stay responsive, letting you refine your work by feel.
On a cloud desktop, this means the creative, iterative part of editing, trying an effect, adjusting it, previewing the result, stays fluid even on demanding projects. The heavy computation happens on capable hardware, so your creativity isn't bottlenecked by your device.
If you need access to image editing tools from a lower-powered device, this guide explains how to run GIMP in the cloud.
Kdenlive Compared To Other Free Editors
Knowing where Kdenlive fits among free editors helps you understand what you're getting on a cloud machine.
Among free and open-source video editors on Linux, Kdenlive stands out for being both full-featured and approachable. It offers proper multi-track editing, a deep effects and transitions library, keyframing, proxy editing, and reliable rendering, which puts it ahead of simpler free editors that lack these capabilities. Compared to more minimal tools, Kdenlive gives you room to grow into complex projects without hitting a wall.
Against the professional suites, Kdenlive covers the core of editing well and is genuinely capable, though the highest-end tools lead in specialized areas like advanced color grading or particular professional workflows. For a large share of real editing, from content creation to multi-track projects with effects, Kdenlive does the job at zero license cost, and its friendly codec handling on Linux is a practical advantage over some alternatives.
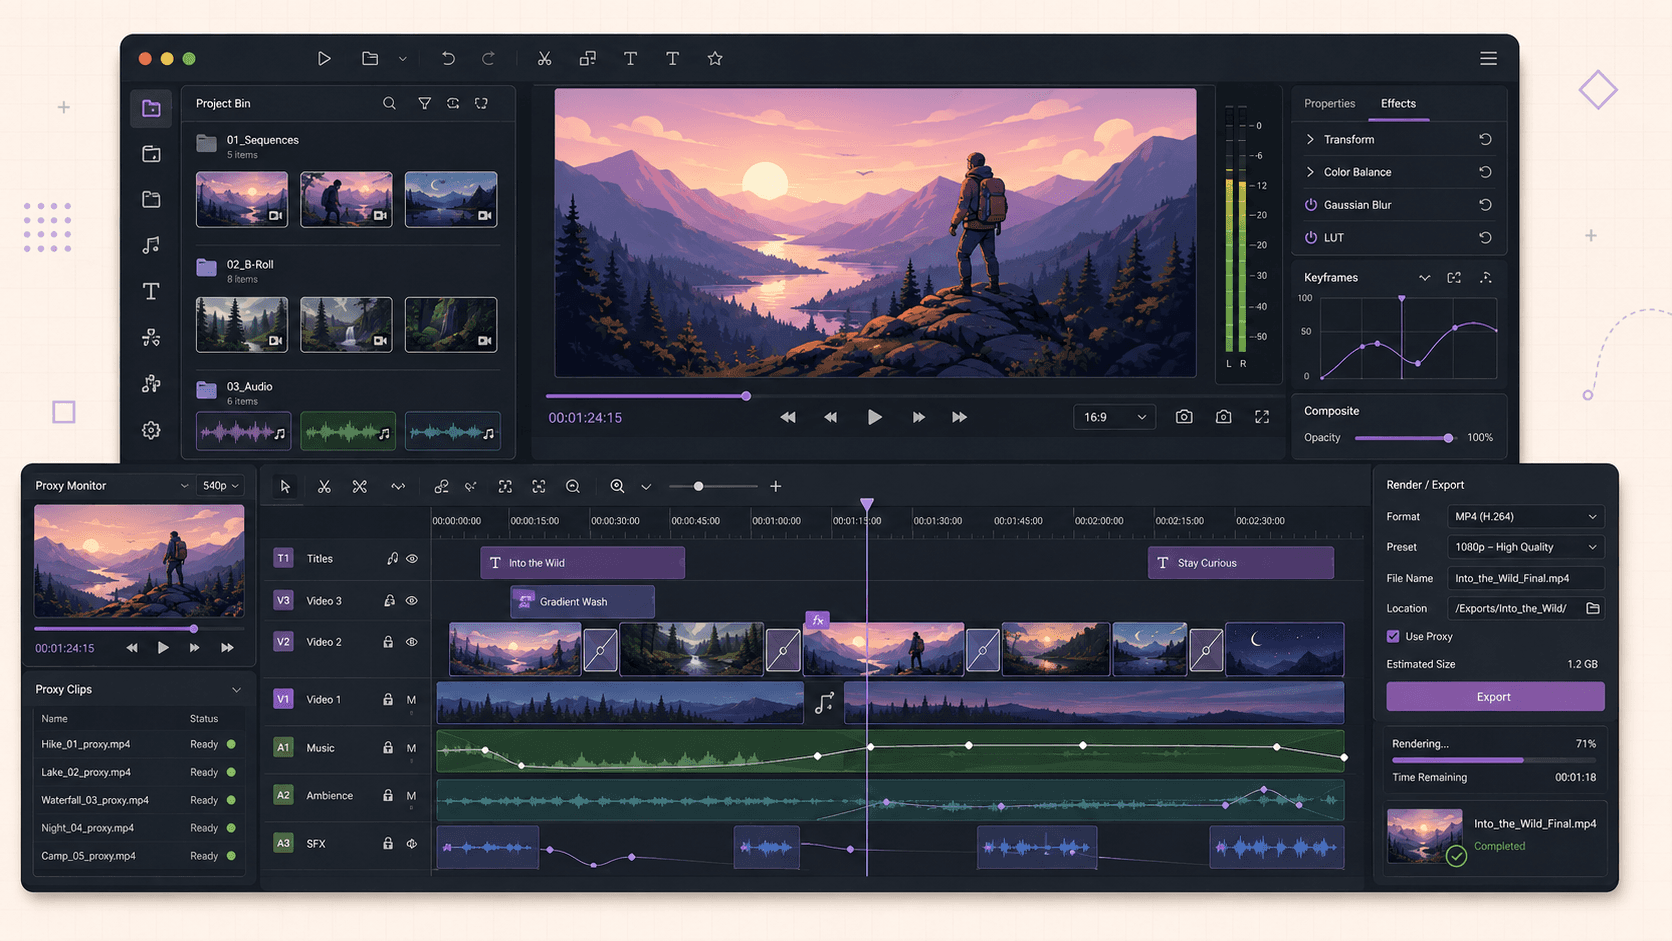
The relevance to the cloud is that Kdenlive's strengths, multi-track editing, effects, and rendering, are exactly the demanding operations a powerful machine accelerates. So running a capable free editor on hardware with real headroom is a strong combination, available for the cost of the session. For anyone editing video on Linux who wants capability without a subscription, Kdenlive on a cloud desktop is a compelling setup.
Handling Audio In Kdenlive
Video is only half of most projects, and Kdenlive's audio handling matters for a complete edit.
Kdenlive supports multiple audio tracks, audio effects, keyframed volume and levels, and syncing audio with video. You can edit dialogue, add music and sound effects, adjust levels, and apply audio effects, all within the same project as your video. For many creators, this is enough to complete a project without a separate audio tool, though you can always export audio for detailed work in a dedicated audio editor and bring it back.
On a cloud machine, audio work is light compared to video, so it doesn't demand much extra power, but having it in the same responsive environment as your video editing keeps your whole project in one place. The main benefit of the cloud here is simply that your entire edit, picture and sound, happens on one capable, consistent machine, so you're not juggling tools across devices.
If you’re working with notebooks, machine learning, or data-heavy experiments, here’s how to run Jupyter on a cloud GPU Linux desktop.
A First Session, Walked Through
If you're setting up Kdenlive on a cloud desktop for a real project, here's what a productive first session looks like once the machine is running.
Bring your footage and audio onto the machine, ideally onto persistent storage if you'll return to the project. Create your project with the right resolution and frame rate, and if your footage is high-resolution or heavy, enable proxy editing so Kdenlive generates lightweight versions for smooth editing. Let those proxies generate, which is quick on a capable machine.
Then edit as you normally would, taking advantage of the smooth playback and the headroom for effects. Arrange your clips, trim and refine your cut, layer in transitions and effects, add titles, and mix your audio. When your edit is ready, configure your export settings and start the render, letting the powerful machine handle it while you do something else or let it finish in the background.
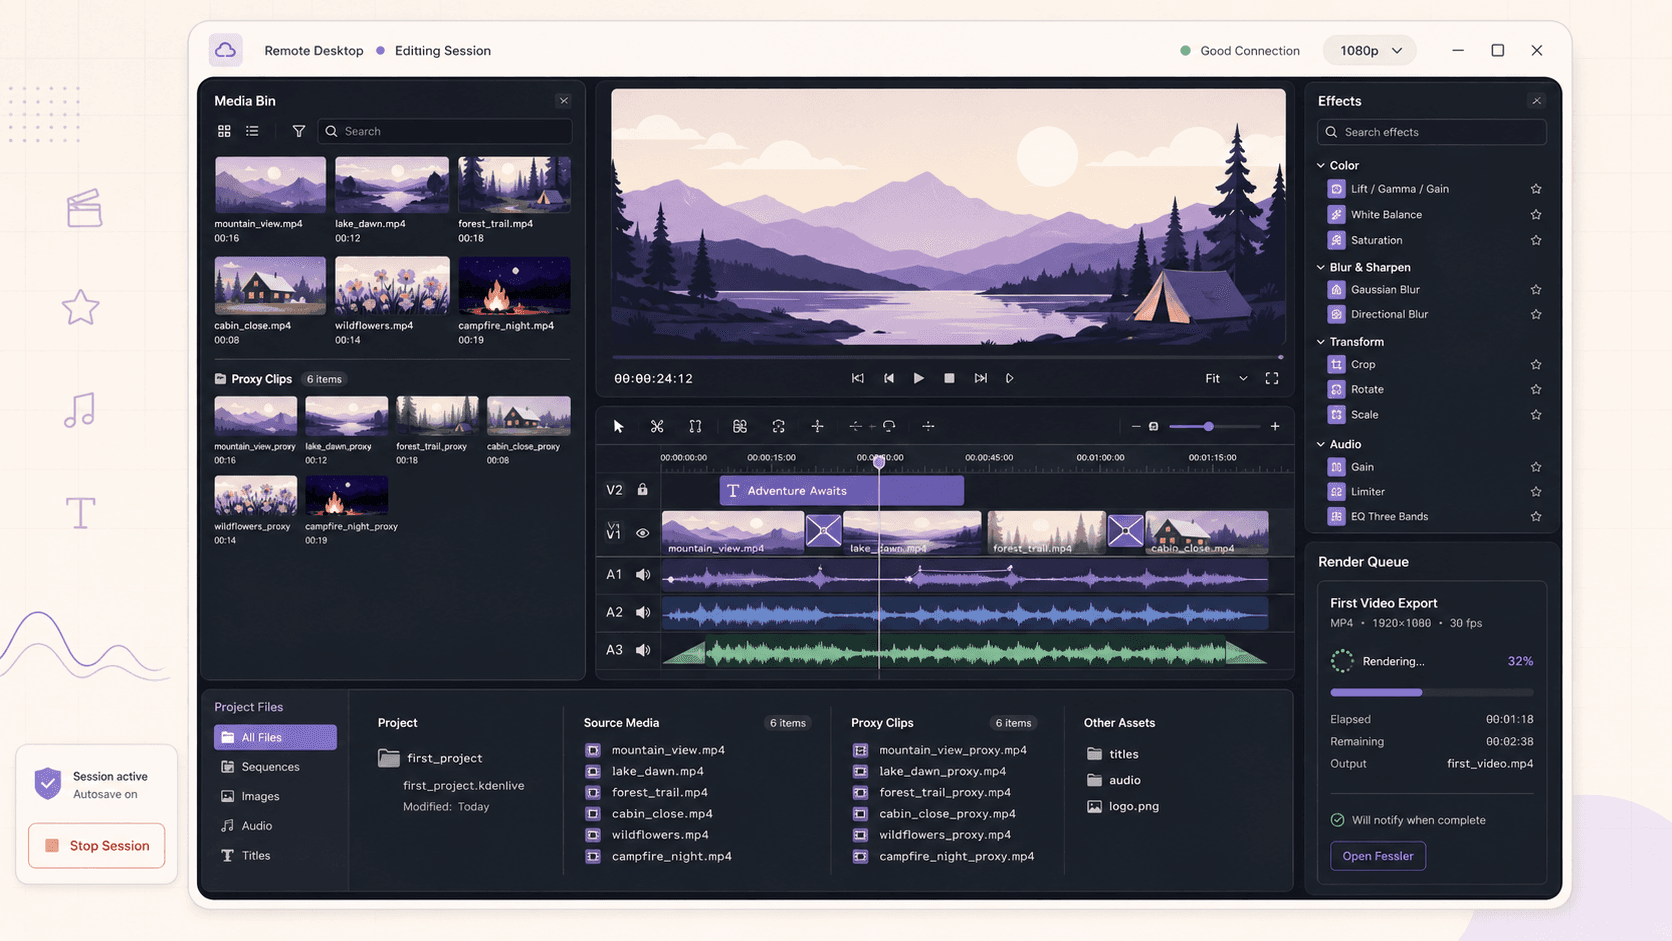
When the render's done, download your finished video, make sure your project is saved to persistent storage, and shut the machine down. Next session, with persistent storage, your project, media, and proxies are all where you left them, and you pick up immediately.
Getting Media In And Out
Video files are large, so plan your media transfer. Bring footage onto the machine by downloading from cloud storage in the browser, using a sync tool, or transferring in bulk, and keep it on persistent storage so a project spanning sessions is ready. Generating proxies on the machine, as covered, is part of setting up a heavy project.
Get your finished exports out by downloading the rendered video or syncing it to your storage. Since video exports can be sizable, keep an eye on outbound transfer beyond the included amount for large deliveries. A common pattern is to render on the machine and download only the final file rather than moving raw media back and forth.
Cost Breakdown
Your cost is the machine's running time billed by the minute, plus persistent storage (about five dollars per 50GB per month, recommended given media sizes), plus outbound transfer beyond the included 10GB per month for large exports.
The honest framing: for heavy editing and render jobs that strain your laptop, a cloud machine is efficient and you pay only for active hours. For light projects on a capable machine, Kdenlive is free and local is simpler. Use persistent storage so media is ready, work in focused sessions, and shut the machine down when you're done.
Real-World Use Cases
The content creator with 4K footage. High-resolution multi-track projects stutter on your laptop. A cloud machine with proxy editing keeps the timeline smooth.
The editor rendering a long project. A lengthy export ties up your machine for hours. A cloud machine renders faster and frees your own computer.
The creator on a light laptop. You want a capable editor but your machine can't provide the power. A cloud desktop delivers it, and Kdenlive handles your usual footage.
The student learning to edit. Full-featured video editing on real hardware, rented by the session, without buying a workstation.
The hobbyist wanting a consistent setup. A reliable Kdenlive environment ready every session on persistent storage.
Troubleshooting
The timeline stutters on high-resolution footage
Enable proxy editing so Kdenlive uses lightweight versions during editing, and choose a plan with more power, ideally a GPU plan, for heavy projects. Playback smooths out considerably with proxies.
Rendering is slow
Rendering is heavy. A GPU plan and a more powerful machine render faster. Also check your export settings, since some formats and effects are more demanding than others.
My footage won't play
Kdenlive handles common codecs, so this is less common than with some editors. If a specific clip misbehaves, transcoding it to a standard format resolves most cases, and you can do that on the same machine.
My projects and media are gone next session
You didn't add persistent storage, so the machine reset. Add persistent storage to keep your projects, media, and proxies.
If you’re choosing between a full remote desktop and a browser-based development environment, this Vagon vs. GitHub Codespaces comparison explains the key differences.
Workflow Tips For Faster Editing
A few habits make cloud editing sessions more efficient, which matters when you're paying by the minute:
Enable proxies early for heavy footage so you're editing smoothly from the start rather than fighting a laggy timeline.
Organize your media in bins before you start cutting, so you're not hunting for clips mid-edit.
Render in focused sessions, kicking off the export and letting the machine work while you do something else, then shutting down when it's done.
Save your project to persistent storage regularly so nothing is lost, and so your work is ready next session.
Match your plan to the project, using a GPU plan for heavy, effects-laden work and a lighter plan for simple cuts, so you're not overpaying for power you don't need.
Bringing It Together
Kdenlive is a capable, free video editor, and a cloud Ubuntu desktop gives it the CPU, memory, and optional GPU power to keep heavy projects smooth and render them fast, without buying a workstation. It handles common consumer codecs, so your usual footage works, and proxy editing on a powerful machine gives you a genuinely smooth high-resolution editing experience. Keep your media on persistent storage, work in focused sessions, and shut the machine down when you're done.
Hand your edits and exports to a faster machine. Create a Vagon account, launch an Ubuntu machine, install Kdenlive, and you'll be editing in a few minutes.
If you’re comparing platforms for remote GPU workloads, our Vagon vs. RunPod comparison can help you decide which option fits your workflow.
Frequently Asked Questions
Is Kdenlive free to use in the cloud?
Yes. Kdenlive is free and open-source, so there's no license cost. On a cloud desktop you only pay for the machine's running time, not for Kdenlive.
Does Kdenlive handle H.264 and common codecs on Linux?
Yes. Unlike some professional editors on Linux, Kdenlive handles common consumer codecs including H.264, so your everyday footage generally works directly without a mandatory transcoding step.
Do I need a GPU for Kdenlive in the cloud?
For heavy projects, effects, and faster rendering, a GPU plan helps. Lighter projects can run on a strong CPU plan. Match the plan to how demanding your projects are.
What is proxy editing and should I use it?
Proxy editing uses lightweight versions of your footage during editing for smooth performance, then renders from the full-quality originals. For high-resolution or heavy projects, yes, enable it; it keeps editing smooth without reducing final quality.
Will my projects persist between sessions?
Only if you add persistent storage, which is recommended given media sizes. With it, your projects, media, and proxies wait for you. Without it, you'd re-upload each session.
Can I edit 4K video in the cloud?
Yes. With a capable plan and proxy editing enabled, 4K editing is smooth on a cloud machine, and rendering is faster than on a weak laptop. A good connection keeps the streamed interface responsive.
How much faster is rendering on a cloud machine?
It depends on your project and plan, but a more powerful cloud machine, especially with a GPU, renders faster than a weak laptop and frees your own computer during the export.
Is editing responsive over a streamed desktop?
On a good connection, yes, especially with proxy editing keeping playback smooth. The heavy work happens on the cloud machine, so demanding projects are actually smoother than on an underpowered laptop.
Can I run the latest Kdenlive version?
Yes. Install from Ubuntu's repositories, Flathub, or the official AppImage, which is often the most current. On a cloud desktop you control which version you install.
How do I keep costs down?
Use persistent storage so media is ready, edit and render in focused sessions, choose a plan matched to your projects, and shut the machine down when you're done.
Can I use Kdenlive's effects and transitions on the cloud?
Yes, the full effects and transitions library works. Complex effects on high-resolution footage are demanding, and a more powerful machine, especially with a GPU, previews and renders them faster, so the creative iteration stays smooth.
Does Kdenlive support multi-track editing?
Yes. Kdenlive is a proper multi-track non-linear editor, supporting multiple video and audio tracks, which is exactly the kind of project that benefits from a powerful cloud machine to keep playback smooth.
Can I edit on an iPad or Chromebook through the cloud?
Yes. The streamed desktop runs on an iPad, Chromebook, or old laptop, with the actual editing happening on the cloud machine. A mouse or trackpad and a good connection make timeline work comfortable.
How much storage do I need for a video project?
It depends on your footage and whether you use proxies, which add to storage. Video media is large, so choose enough persistent storage for your source footage, proxies, and exports. You can scale storage to your project sizes.
Is my footage private on a cloud machine?
Each machine is an isolated VM with an encrypted connection, so your session is separate from others. Keep your media managed sensibly, and reset the machine when you're done if you'd rather leave nothing behind.
Can I move a project between my laptop and the cloud machine?
Yes. Kdenlive project files are portable, though you'll want the associated media present. Keeping your media and project on persistent storage, or syncing through cloud storage, makes moving between environments straightforward.
Quick answer: To run Kdenlive in the cloud, launch a cloud Ubuntu desktop (for example on Vagon, with a GPU plan for heavier projects), install Kdenlive from apt, Flathub, or the AppImage, and edit and render on a streamed desktop. It's ideal for smooth editing of high-resolution footage and fast rendering that overwhelm a laptop, and unlike the Linux version of some editors, Kdenlive handles common consumer codecs, so your usual footage just works.
Key Takeaways
Kdenlive is a free, capable, open-source video editor, and a cloud desktop gives it more power for heavy projects.
It handles common consumer codecs like H.264 out of the box, so typical footage works without special transcoding.
Proxy editing keeps high-resolution projects smooth, and a cloud machine makes generating proxies and rendering fast.
A GPU plan speeds up effects and rendering; lighter projects can run on a strong CPU plan.
Persistent storage keeps your projects and media between sessions.
It's billed by the minute, ideal for editing and render sessions and a poor fit for idling all day.
Kdenlive rarely gets the attention flashier video editors do, yet it's quietly one of the best free tools on Linux, a genuinely capable non-linear editor with multi-track timelines, a deep effects library, proxy editing, and reliable rendering. Where it starts to strain isn't the features. It's the moment you stack several tracks of high-resolution footage, layer on effects and transitions, and try to scrub the timeline while your laptop wheezes, or you hit render and settle in for a long wait.
That's where running Kdenlive on a cloud Ubuntu desktop helps. You get more CPU, more memory, and, on a GPU plan, real graphics power, and Kdenlive runs on it with room to breathe. Playback stays smooth, renders finish faster, and when you're done you shut the machine off. And here's a nice bonus over some other editors on Linux: Kdenlive handles the common consumer codecs, so your everyday footage just works. This guide covers when a cloud machine is worth it, how to set it up, and how to get the smoothest editing experience.
What Kdenlive Is And Who Uses It
Kdenlive is a free and open-source non-linear video editor. It offers multi-track editing, a large library of effects and transitions, title creation, audio editing, keyframing, proxy editing for smooth work with heavy footage, and rendering to a wide range of formats. It's mature, actively developed, and capable of real projects, from simple cuts to multi-track productions with effects.
The people who use it are content creators and YouTubers, video hobbyists, students learning to edit, educators, and anyone who wants a capable video editor without a subscription. On Linux, Kdenlive is one of the most popular and full-featured video editors, and a common first choice for people editing video on the platform.
Definition: running Kdenlive in the cloud
Running Kdenlive in the cloud means installing Kdenlive on a remote Ubuntu desktop and editing and rendering video there instead of on your local computer. You get more CPU, memory, and optional GPU power for heavy projects, plus the ability to edit from any device, while your own machine stays free.
Why Run Kdenlive On a Cloud Desktop
Kdenlive runs on modest hardware for simple projects, so let's be specific about what the cloud adds for demanding work.
Smooth playback on heavy projects
Editing gets heavy when you stack multiple tracks of high-resolution footage with effects. On a laptop, the timeline stutters and scrubbing lags, which makes precise editing frustrating. A cloud machine with more CPU and memory, and a GPU on the right plan, keeps playback smooth so you can edit by feel.
Faster rendering
Rendering a finished project is time-consuming, and it monopolizes your machine while it runs. A more powerful cloud machine renders faster, and your own computer stays free during the export. You can render in a focused session and download the result.
Fast proxy generation
Kdenlive's proxy editing creates lightweight versions of your footage for smooth editing. Generating proxies for a lot of footage is a heavy task that a cloud machine handles quickly, so you get to the smooth-editing part sooner.
Edit from any device
Because the desktop streams to you, you can edit from a device that couldn't handle a heavy project locally, with the actual work done on a capable cloud machine.
A clean, consistent environment
An isolated, resettable VM with persistent storage gives you a reliable Kdenlive setup that's the same every session, independent of your personal machine's state.
Kdenlive And Codecs: The Good News
If you've read about editing video on Linux, you may have run into codec headaches with some professional editors, so here's the reassuring part.
Kdenlive is built on an open multimedia framework and handles the common consumer video codecs, including H.264, that most cameras, phones, and screen recorders produce. That means you can generally drop your everyday footage onto a Kdenlive timeline and work with it directly, without the mandatory transcoding step that some other Linux editors require. This makes Kdenlive a particularly friendly choice for editing typical consumer footage on Linux, and it's a real advantage if your media is standard H.264 clips.
That said, for very heavy footage or high resolutions, proxy editing (covered next) still improves smoothness, and rendering is still faster on a powerful machine. But the key point is that you're unlikely to hit the "my footage won't import" wall that catches people out with some other editors on Linux. Your usual clips work, and a cloud machine simply makes editing and rendering them smoother and faster.
If you’re working with vector graphics from any device, this guide shows how to run Inkscape in the cloud.
Proxy Editing For Smooth High-Resolution Work
Proxy editing is Kdenlive's answer to heavy footage, and it pairs beautifully with a cloud machine.
The idea is simple. Kdenlive generates lower-resolution proxy versions of your clips and uses them during editing, so the timeline stays smooth even with demanding high-resolution source footage. When you render your final project, Kdenlive automatically switches back to the full-quality originals, so your export keeps its full resolution. You get responsive editing without sacrificing final quality.
On a cloud machine, this workflow is especially effective. Generating proxies for a batch of footage is a heavy job that a powerful cloud machine completes quickly, so you spend less time waiting to start editing. Then editing with proxies is smooth, and the final render from the originals is fast on a capable machine. The tradeoff is storage, since proxies take space, so factor that into your persistent storage. For 4K and other high-resolution projects, enabling proxy editing on a cloud desktop gives you a genuinely smooth experience that a laptop editing full-resolution footage directly can't match.
When It's The Right Call, And When To Skip It
A cloud desktop is a burst tool, billed by the minute. It's the right call when you're editing heavy or high-resolution projects that strain your machine, rendering exports that take too long locally, wanting to edit from a limited device, or wanting a consistent setup. You spin it up, edit, and shut it down.
It's the wrong call if your projects are light and your current machine handles Kdenlive fine, since it's free and runs on modest hardware, or if you want an editor instantly available all day without thinking about sessions. The cloud shines for demanding projects, fast rendering, and limited devices.
If you’re creating digital paintings or illustrations remotely, you can learn how to run Krita in the cloud.
What You'll Need
A Vagon account with a payment method.
An Ubuntu plan. For heavy or high-resolution projects, a GPU plan helps with effects and rendering; lighter projects can run on a strong CPU plan.
Persistent storage, recommended, since video media and projects are large.
Step 1: Launch an Ubuntu machine
Create a computer on Vagon, choose Linux, and pick a plan. For heavy projects, a GPU plan gives smoother effects and faster rendering. It boots in about 90 seconds.
Step 2: Install Kdenlive
The simplest path through the terminal:
For the latest version, install from Flathub or download the official AppImage from kdenlive.org:
If Vagon's Ubuntu template already includes Kdenlive, you can skip straight to opening it.
Step 3: Set up your project
Create a project with the resolution and frame rate that match your footage. Arrange your workspace, the timeline, monitors, and effects panels, taking advantage of the streamed desktop's screen space.
Step 4: Enable proxy editing for heavy footage
If you're working with high-resolution or heavy footage, enable proxy editing in the project settings so Kdenlive generates lightweight versions for smooth editing.
Step 5: Add persistent storage
Add persistent storage so your projects, media, and proxies live on the machine between sessions rather than re-uploading footage each time.
Editing And Rendering With Cloud Power
Once you're set up, the cloud machine's power shows in both editing and rendering.
Editing feels smooth because the machine keeps timeline playback responsive, even with multiple tracks and effects, especially when you use proxies for heavy footage. You can scrub, trim, and arrange without the lag that makes editing painful on an underpowered laptop.
Rendering is where the time savings are most obvious. Exporting a finished project is computationally heavy, and a powerful cloud machine, particularly on a GPU plan, renders faster than a weak laptop. You configure your export settings, start the render, and either keep working elsewhere or let it finish in the background. Because your own computer isn't doing the work, it stays free. Render in a focused session, download the finished video, and shut the machine down when it's complete.
Effects, Transitions, And Titles
Kdenlive's creative tools benefit from cloud power too.
Kdenlive includes a large library of video and audio effects, transitions between clips, keyframing for animating properties over time, and a title editor for creating text and graphics. Complex effects, especially applied across high-resolution footage, are computationally demanding, and a more powerful machine applies and previews them faster, so you spend less time waiting after each adjustment. Keyframed animations and layered effects stay responsive, letting you refine your work by feel.
On a cloud desktop, this means the creative, iterative part of editing, trying an effect, adjusting it, previewing the result, stays fluid even on demanding projects. The heavy computation happens on capable hardware, so your creativity isn't bottlenecked by your device.
If you need access to image editing tools from a lower-powered device, this guide explains how to run GIMP in the cloud.
Kdenlive Compared To Other Free Editors
Knowing where Kdenlive fits among free editors helps you understand what you're getting on a cloud machine.
Among free and open-source video editors on Linux, Kdenlive stands out for being both full-featured and approachable. It offers proper multi-track editing, a deep effects and transitions library, keyframing, proxy editing, and reliable rendering, which puts it ahead of simpler free editors that lack these capabilities. Compared to more minimal tools, Kdenlive gives you room to grow into complex projects without hitting a wall.
Against the professional suites, Kdenlive covers the core of editing well and is genuinely capable, though the highest-end tools lead in specialized areas like advanced color grading or particular professional workflows. For a large share of real editing, from content creation to multi-track projects with effects, Kdenlive does the job at zero license cost, and its friendly codec handling on Linux is a practical advantage over some alternatives.
The relevance to the cloud is that Kdenlive's strengths, multi-track editing, effects, and rendering, are exactly the demanding operations a powerful machine accelerates. So running a capable free editor on hardware with real headroom is a strong combination, available for the cost of the session. For anyone editing video on Linux who wants capability without a subscription, Kdenlive on a cloud desktop is a compelling setup.
Handling Audio In Kdenlive
Video is only half of most projects, and Kdenlive's audio handling matters for a complete edit.
Kdenlive supports multiple audio tracks, audio effects, keyframed volume and levels, and syncing audio with video. You can edit dialogue, add music and sound effects, adjust levels, and apply audio effects, all within the same project as your video. For many creators, this is enough to complete a project without a separate audio tool, though you can always export audio for detailed work in a dedicated audio editor and bring it back.
On a cloud machine, audio work is light compared to video, so it doesn't demand much extra power, but having it in the same responsive environment as your video editing keeps your whole project in one place. The main benefit of the cloud here is simply that your entire edit, picture and sound, happens on one capable, consistent machine, so you're not juggling tools across devices.
If you’re working with notebooks, machine learning, or data-heavy experiments, here’s how to run Jupyter on a cloud GPU Linux desktop.
A First Session, Walked Through
If you're setting up Kdenlive on a cloud desktop for a real project, here's what a productive first session looks like once the machine is running.
Bring your footage and audio onto the machine, ideally onto persistent storage if you'll return to the project. Create your project with the right resolution and frame rate, and if your footage is high-resolution or heavy, enable proxy editing so Kdenlive generates lightweight versions for smooth editing. Let those proxies generate, which is quick on a capable machine.
Then edit as you normally would, taking advantage of the smooth playback and the headroom for effects. Arrange your clips, trim and refine your cut, layer in transitions and effects, add titles, and mix your audio. When your edit is ready, configure your export settings and start the render, letting the powerful machine handle it while you do something else or let it finish in the background.
When the render's done, download your finished video, make sure your project is saved to persistent storage, and shut the machine down. Next session, with persistent storage, your project, media, and proxies are all where you left them, and you pick up immediately.
Getting Media In And Out
Video files are large, so plan your media transfer. Bring footage onto the machine by downloading from cloud storage in the browser, using a sync tool, or transferring in bulk, and keep it on persistent storage so a project spanning sessions is ready. Generating proxies on the machine, as covered, is part of setting up a heavy project.
Get your finished exports out by downloading the rendered video or syncing it to your storage. Since video exports can be sizable, keep an eye on outbound transfer beyond the included amount for large deliveries. A common pattern is to render on the machine and download only the final file rather than moving raw media back and forth.
Cost Breakdown
Your cost is the machine's running time billed by the minute, plus persistent storage (about five dollars per 50GB per month, recommended given media sizes), plus outbound transfer beyond the included 10GB per month for large exports.
The honest framing: for heavy editing and render jobs that strain your laptop, a cloud machine is efficient and you pay only for active hours. For light projects on a capable machine, Kdenlive is free and local is simpler. Use persistent storage so media is ready, work in focused sessions, and shut the machine down when you're done.
Real-World Use Cases
The content creator with 4K footage. High-resolution multi-track projects stutter on your laptop. A cloud machine with proxy editing keeps the timeline smooth.
The editor rendering a long project. A lengthy export ties up your machine for hours. A cloud machine renders faster and frees your own computer.
The creator on a light laptop. You want a capable editor but your machine can't provide the power. A cloud desktop delivers it, and Kdenlive handles your usual footage.
The student learning to edit. Full-featured video editing on real hardware, rented by the session, without buying a workstation.
The hobbyist wanting a consistent setup. A reliable Kdenlive environment ready every session on persistent storage.
Troubleshooting
The timeline stutters on high-resolution footage
Enable proxy editing so Kdenlive uses lightweight versions during editing, and choose a plan with more power, ideally a GPU plan, for heavy projects. Playback smooths out considerably with proxies.
Rendering is slow
Rendering is heavy. A GPU plan and a more powerful machine render faster. Also check your export settings, since some formats and effects are more demanding than others.
My footage won't play
Kdenlive handles common codecs, so this is less common than with some editors. If a specific clip misbehaves, transcoding it to a standard format resolves most cases, and you can do that on the same machine.
My projects and media are gone next session
You didn't add persistent storage, so the machine reset. Add persistent storage to keep your projects, media, and proxies.
If you’re choosing between a full remote desktop and a browser-based development environment, this Vagon vs. GitHub Codespaces comparison explains the key differences.
Workflow Tips For Faster Editing
A few habits make cloud editing sessions more efficient, which matters when you're paying by the minute:
Enable proxies early for heavy footage so you're editing smoothly from the start rather than fighting a laggy timeline.
Organize your media in bins before you start cutting, so you're not hunting for clips mid-edit.
Render in focused sessions, kicking off the export and letting the machine work while you do something else, then shutting down when it's done.
Save your project to persistent storage regularly so nothing is lost, and so your work is ready next session.
Match your plan to the project, using a GPU plan for heavy, effects-laden work and a lighter plan for simple cuts, so you're not overpaying for power you don't need.
Bringing It Together
Kdenlive is a capable, free video editor, and a cloud Ubuntu desktop gives it the CPU, memory, and optional GPU power to keep heavy projects smooth and render them fast, without buying a workstation. It handles common consumer codecs, so your usual footage works, and proxy editing on a powerful machine gives you a genuinely smooth high-resolution editing experience. Keep your media on persistent storage, work in focused sessions, and shut the machine down when you're done.
Hand your edits and exports to a faster machine. Create a Vagon account, launch an Ubuntu machine, install Kdenlive, and you'll be editing in a few minutes.
If you’re comparing platforms for remote GPU workloads, our Vagon vs. RunPod comparison can help you decide which option fits your workflow.
Frequently Asked Questions
Is Kdenlive free to use in the cloud?
Yes. Kdenlive is free and open-source, so there's no license cost. On a cloud desktop you only pay for the machine's running time, not for Kdenlive.
Does Kdenlive handle H.264 and common codecs on Linux?
Yes. Unlike some professional editors on Linux, Kdenlive handles common consumer codecs including H.264, so your everyday footage generally works directly without a mandatory transcoding step.
Do I need a GPU for Kdenlive in the cloud?
For heavy projects, effects, and faster rendering, a GPU plan helps. Lighter projects can run on a strong CPU plan. Match the plan to how demanding your projects are.
What is proxy editing and should I use it?
Proxy editing uses lightweight versions of your footage during editing for smooth performance, then renders from the full-quality originals. For high-resolution or heavy projects, yes, enable it; it keeps editing smooth without reducing final quality.
Will my projects persist between sessions?
Only if you add persistent storage, which is recommended given media sizes. With it, your projects, media, and proxies wait for you. Without it, you'd re-upload each session.
Can I edit 4K video in the cloud?
Yes. With a capable plan and proxy editing enabled, 4K editing is smooth on a cloud machine, and rendering is faster than on a weak laptop. A good connection keeps the streamed interface responsive.
How much faster is rendering on a cloud machine?
It depends on your project and plan, but a more powerful cloud machine, especially with a GPU, renders faster than a weak laptop and frees your own computer during the export.
Is editing responsive over a streamed desktop?
On a good connection, yes, especially with proxy editing keeping playback smooth. The heavy work happens on the cloud machine, so demanding projects are actually smoother than on an underpowered laptop.
Can I run the latest Kdenlive version?
Yes. Install from Ubuntu's repositories, Flathub, or the official AppImage, which is often the most current. On a cloud desktop you control which version you install.
How do I keep costs down?
Use persistent storage so media is ready, edit and render in focused sessions, choose a plan matched to your projects, and shut the machine down when you're done.
Can I use Kdenlive's effects and transitions on the cloud?
Yes, the full effects and transitions library works. Complex effects on high-resolution footage are demanding, and a more powerful machine, especially with a GPU, previews and renders them faster, so the creative iteration stays smooth.
Does Kdenlive support multi-track editing?
Yes. Kdenlive is a proper multi-track non-linear editor, supporting multiple video and audio tracks, which is exactly the kind of project that benefits from a powerful cloud machine to keep playback smooth.
Can I edit on an iPad or Chromebook through the cloud?
Yes. The streamed desktop runs on an iPad, Chromebook, or old laptop, with the actual editing happening on the cloud machine. A mouse or trackpad and a good connection make timeline work comfortable.
How much storage do I need for a video project?
It depends on your footage and whether you use proxies, which add to storage. Video media is large, so choose enough persistent storage for your source footage, proxies, and exports. You can scale storage to your project sizes.
Is my footage private on a cloud machine?
Each machine is an isolated VM with an encrypted connection, so your session is separate from others. Keep your media managed sensibly, and reset the machine when you're done if you'd rather leave nothing behind.
Can I move a project between my laptop and the cloud machine?
Yes. Kdenlive project files are portable, though you'll want the associated media present. Keeping your media and project on persistent storage, or syncing through cloud storage, makes moving between environments straightforward.
Get Beyond Your Computer Performance
Run applications on your cloud computer with the latest generation hardware. No more crashes or lags.

Trial includes 1 hour usage + 7 days of storage.
Summarize with AI

Ready to focus on your creativity?
Vagon gives you the ability to create & render projects, collaborate, and stream applications with the power of the best hardware.

Vagon Blog
Run heavy applications on any device with
your personal computer on the cloud.
San Francisco, California
Solutions
Vagon Teams
Vagon Streams
Use Cases
Resources
Vagon Blog
How to Use DaVinci Resolve With Codex: MCP & Computer Use
How to Use ComfyUI With Claude: MCP & Computer Use Guide
How to Use Rhino With Codex: MCP & Computer Use Guide
How to Use KiCad With Codex: MCP & Computer Use Guide
How to Use KiCad With Claude: MCP & Computer Use Guide Meta
How to Use FreeCAD With Codex: MCP & Computer Use
How to Use FreeCAD With Claude: MCP & Computer Use
How to Use 3ds Max With Codex: MCP & Computer Use
How to Use Houdini With Claude: MCP & Computer Use
Vagon Blog
Run heavy applications on any device with
your personal computer on the cloud.
San Francisco, California
Solutions
Vagon Teams
Vagon Streams
Use Cases
Resources
Vagon Blog
How to Use DaVinci Resolve With Codex: MCP & Computer Use
How to Use ComfyUI With Claude: MCP & Computer Use Guide
How to Use Rhino With Codex: MCP & Computer Use Guide
How to Use KiCad With Codex: MCP & Computer Use Guide
How to Use KiCad With Claude: MCP & Computer Use Guide Meta
How to Use FreeCAD With Codex: MCP & Computer Use
How to Use FreeCAD With Claude: MCP & Computer Use
How to Use 3ds Max With Codex: MCP & Computer Use
How to Use Houdini With Claude: MCP & Computer Use
Vagon Blog
Run heavy applications on any device with
your personal computer on the cloud.
San Francisco, California
Solutions
Vagon Teams
Vagon Streams
Use Cases
Resources
Vagon Blog