Instant Connection for Pixel Streaming
— New Feature Automated Setup

How To Run Unreal Engine on a Low-End Device (Even Without GPU)
How To Run Unreal Engine on a Low-End Device (Even Without GPU)
GameDev
How To Run Unreal Engine on a Low-End Device (Even Without GPU)
Table of Contents
Let me be blunt: Unreal Engine is not what you'd call lightweight. I remember the first time I tried to open up UE4 on my old Dell Inspiron, you know, the kind of laptop that wheezes if you have more than five Chrome tabs open? Yeah, that one. The fans spun like they were trying to lift off, my screen froze, and after about 10 minutes of loading... crash. No editor, no project. Just sadness.
But here’s the thing: I didn’t give up. And if you’re here, I’m guessing you don’t want to either.
So, is it possible to run Unreal Engine on a low-end device? Without a dedicated GPU? Short answer: kinda. Long answer: with a lot of clever workarounds. And honestly, sometimes it’s not about making it buttery-smooth, it’s about making it work enough to sketch ideas, prototype a scene, or test a build without begging your wallet for mercy.
Why Even Bother? Unreal On Low-End Makes More Sense Than You’d Think
I’ll admit, when I first started looking into this, I thought: What’s the point? Why torture myself? But the reality is, there are good reasons to want to run Unreal on modest hardware:
👉 You’re learning. Maybe you’re a student, or just someone experimenting at home. Spending $2k on a machine isn’t happening right now.
👉 You’re building for mobile or VR. Fun fact: Unreal can target lower-end hardware. Even Fortnite runs on phones, right? A stripped-down dev environment can match your target platform better.
👉 You just need basic prototyping. Sketch a level layout. Tweak some blueprints. You don’t always need real-time ray tracing and cinematic lighting for that.
👉 You’re on the go. Sometimes your main rig is out of reach. Maybe you’re on vacation, stuck at grandma’s house with her potato laptop. (Been there.)
Of course, let’s be honest: Unreal wants serious hardware. It thrives on big GPUs, lots of RAM, and fast storage. But if you’re willing to make sacrifices, lower resolution, minimal lighting, super basic materials, you can bend it to your will. Sort of.
And hey, worst case? You’ll learn a ton about how Unreal works under the hood. That’s valuable in itself.
If you’re still reading, I’m guessing you’re up for the challenge. Cool. Next up: let’s talk about actual techniques to squeeze Unreal onto a low-end machine, what works, what doesn’t, and what to avoid unless you like pain.
#1: Start With Mobile Template
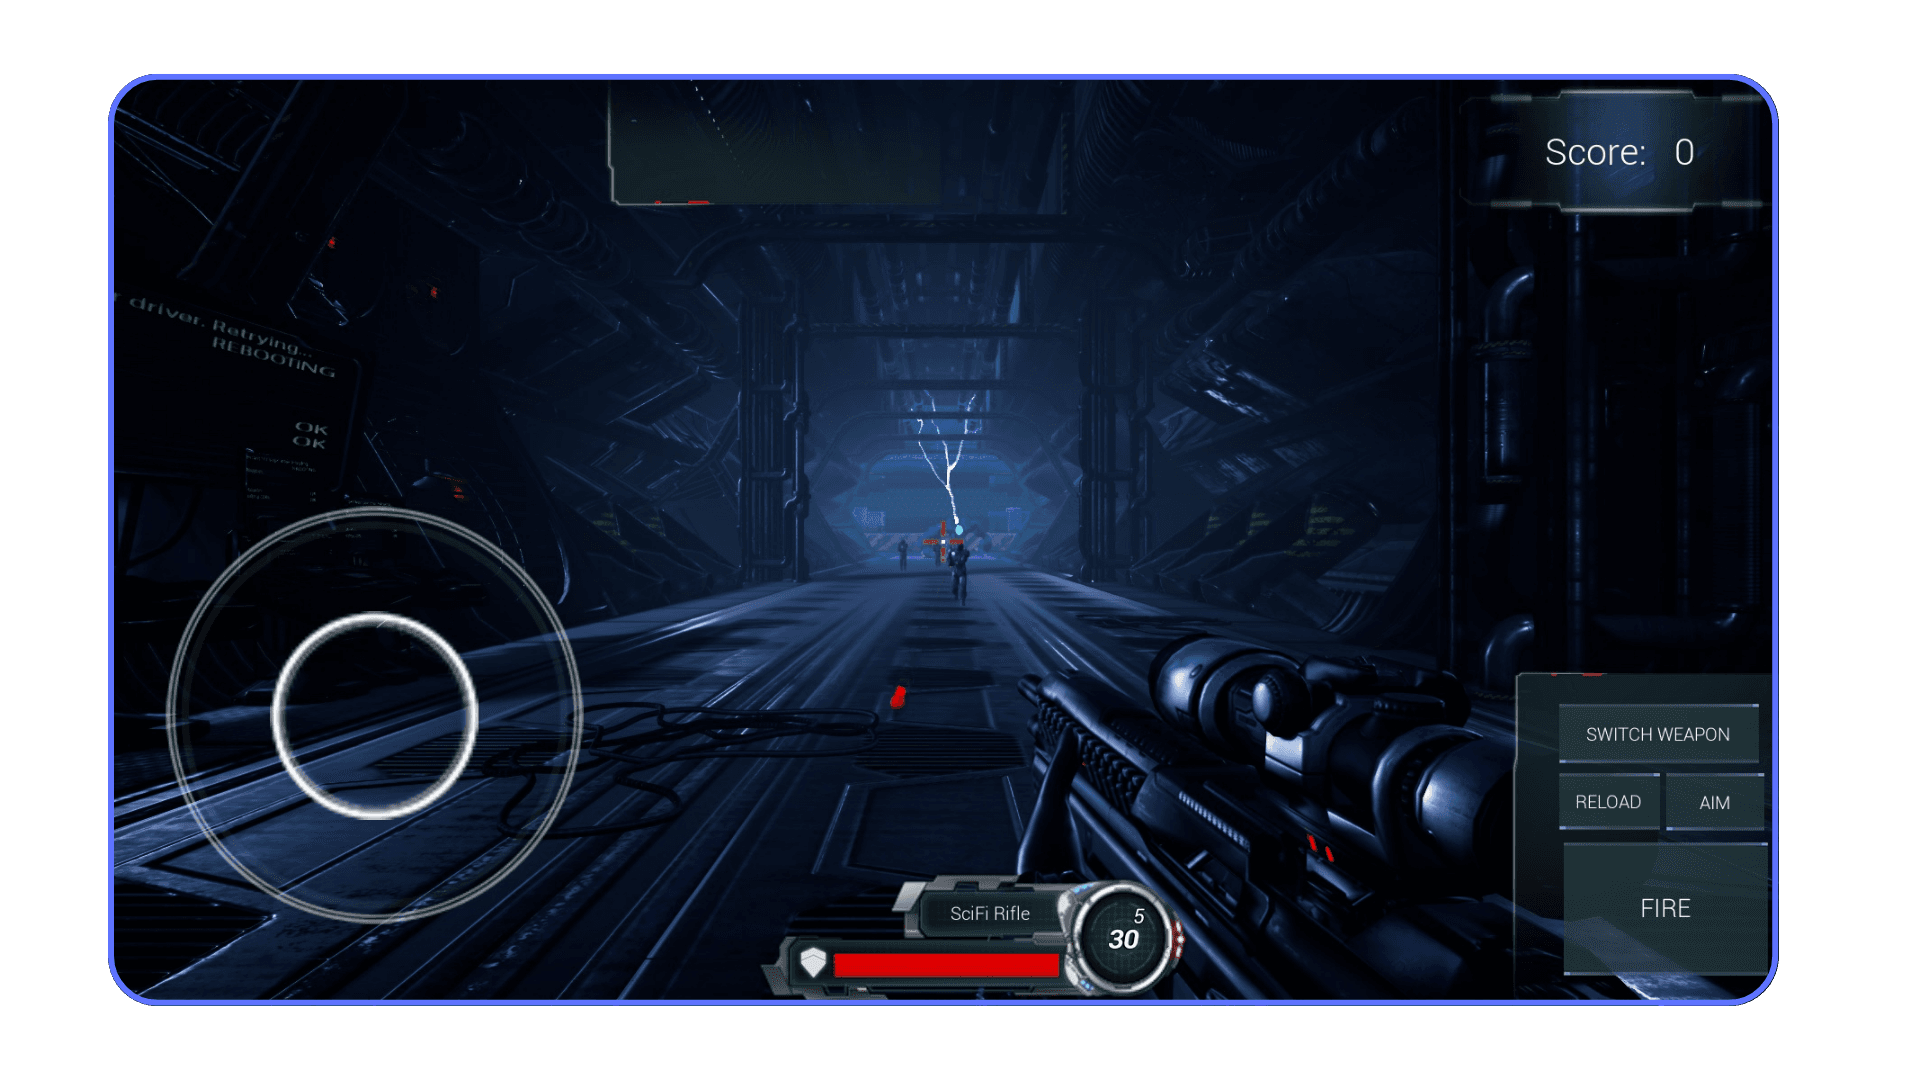
If you’re trying to run Unreal Engine on a machine that technically shouldn’t be running Unreal… this is where you start. The Mobile template.
Seriously, don’t overthink this. When you open up Unreal and click New Project, pick that Mobile template instead of the default ones. Here’s why:
👉 It’s stripped down out of the box.
Mobile templates come pre-configured with settings aimed at (you guessed it) mobile devices. That means: no high-end post-processing, no insane shader complexity, no default fancy lighting setups. I’ve seen people jump into an empty default level and wonder why their editor stutters like crazy, because they’re unknowingly running the equivalent of a high-end desktop scene on a potato.
👉 It aligns with what your hardware can handle.
The Mobile template disables a lot of the stuff that kills low-end machines: dynamic shadows, fancy materials, high shader complexity. You get a clean slate designed for low spec. And hey, if you’re targeting mobile anyway, it’s a win-win.
👉 You can actually load the project.
True story: I once tried to load a VR template on an old ThinkPad. I waited 30 minutes before giving up. Switched to Mobile template, loaded in under 3 minutes. The difference is night and day.
#2: Use 5.2 (or newer) Versions of Unreal Engine
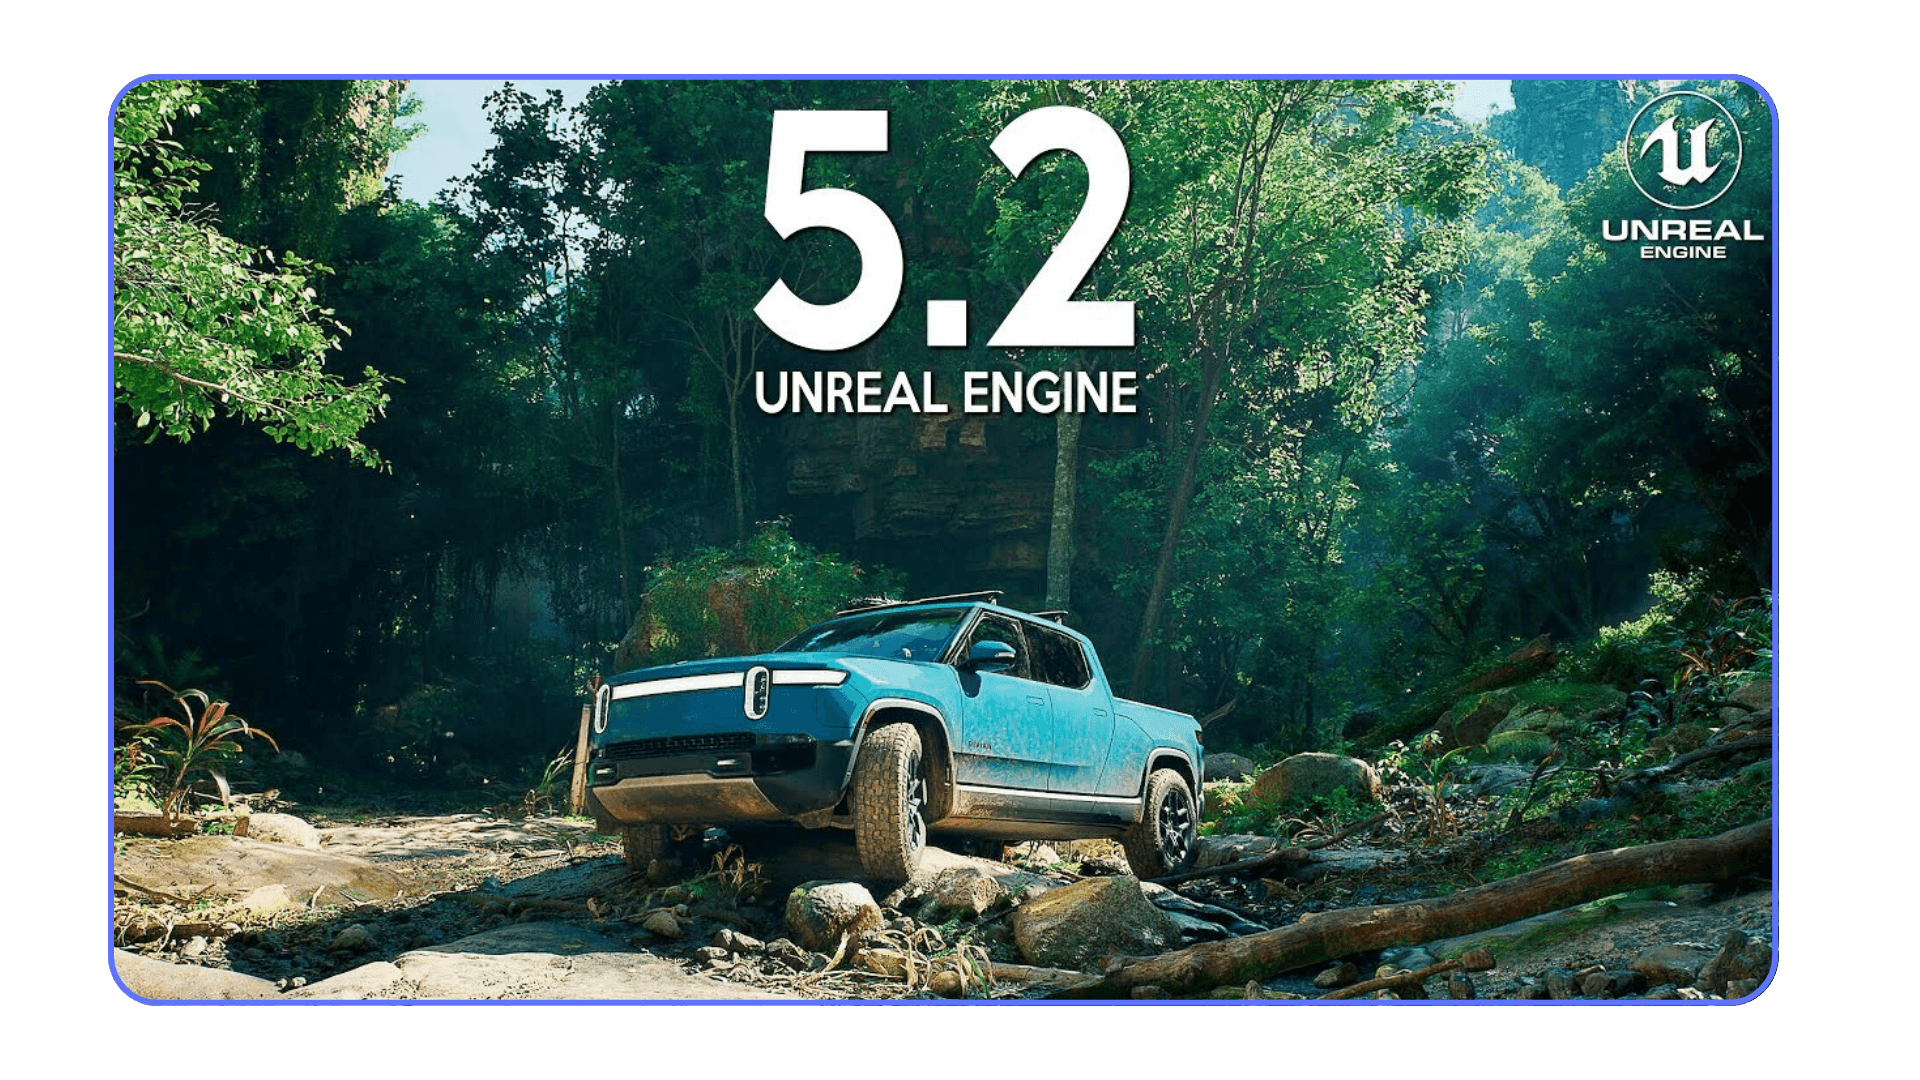
I get it. You’re thinking: Wait, I thought Unreal 5 was heavier than 4? And you’re not wrong, UE5 brings a ton of new tech like Lumen and Nanite (which are awesome but totally overkill for low-end hardware).
But here’s the thing I’ve noticed: UE5.2 and newer versions actually improve compile times and editor responsiveness compared to early 5.x builds. Epic’s been optimizing the hell out of shader compilation (the part where Unreal figures out how to draw your materials on screen).
A lot of users on forums and Reddit have mentioned that 5.2+ feels snappier, especially when you disable the fancy features. Shader compile batching, better caching, small improvements, but they add up.
⚠ Pro tip: When you set up UE5 for a low-end device:
Disable Nanite
Kill Lumen (switch to baked or no GI)
Stick to Forward Shading (I’ll cover that next)
That way, you’re using the improved core of UE5 without loading all the GPU-crushing extras.
#3: Customize Scalability & Quality Settings
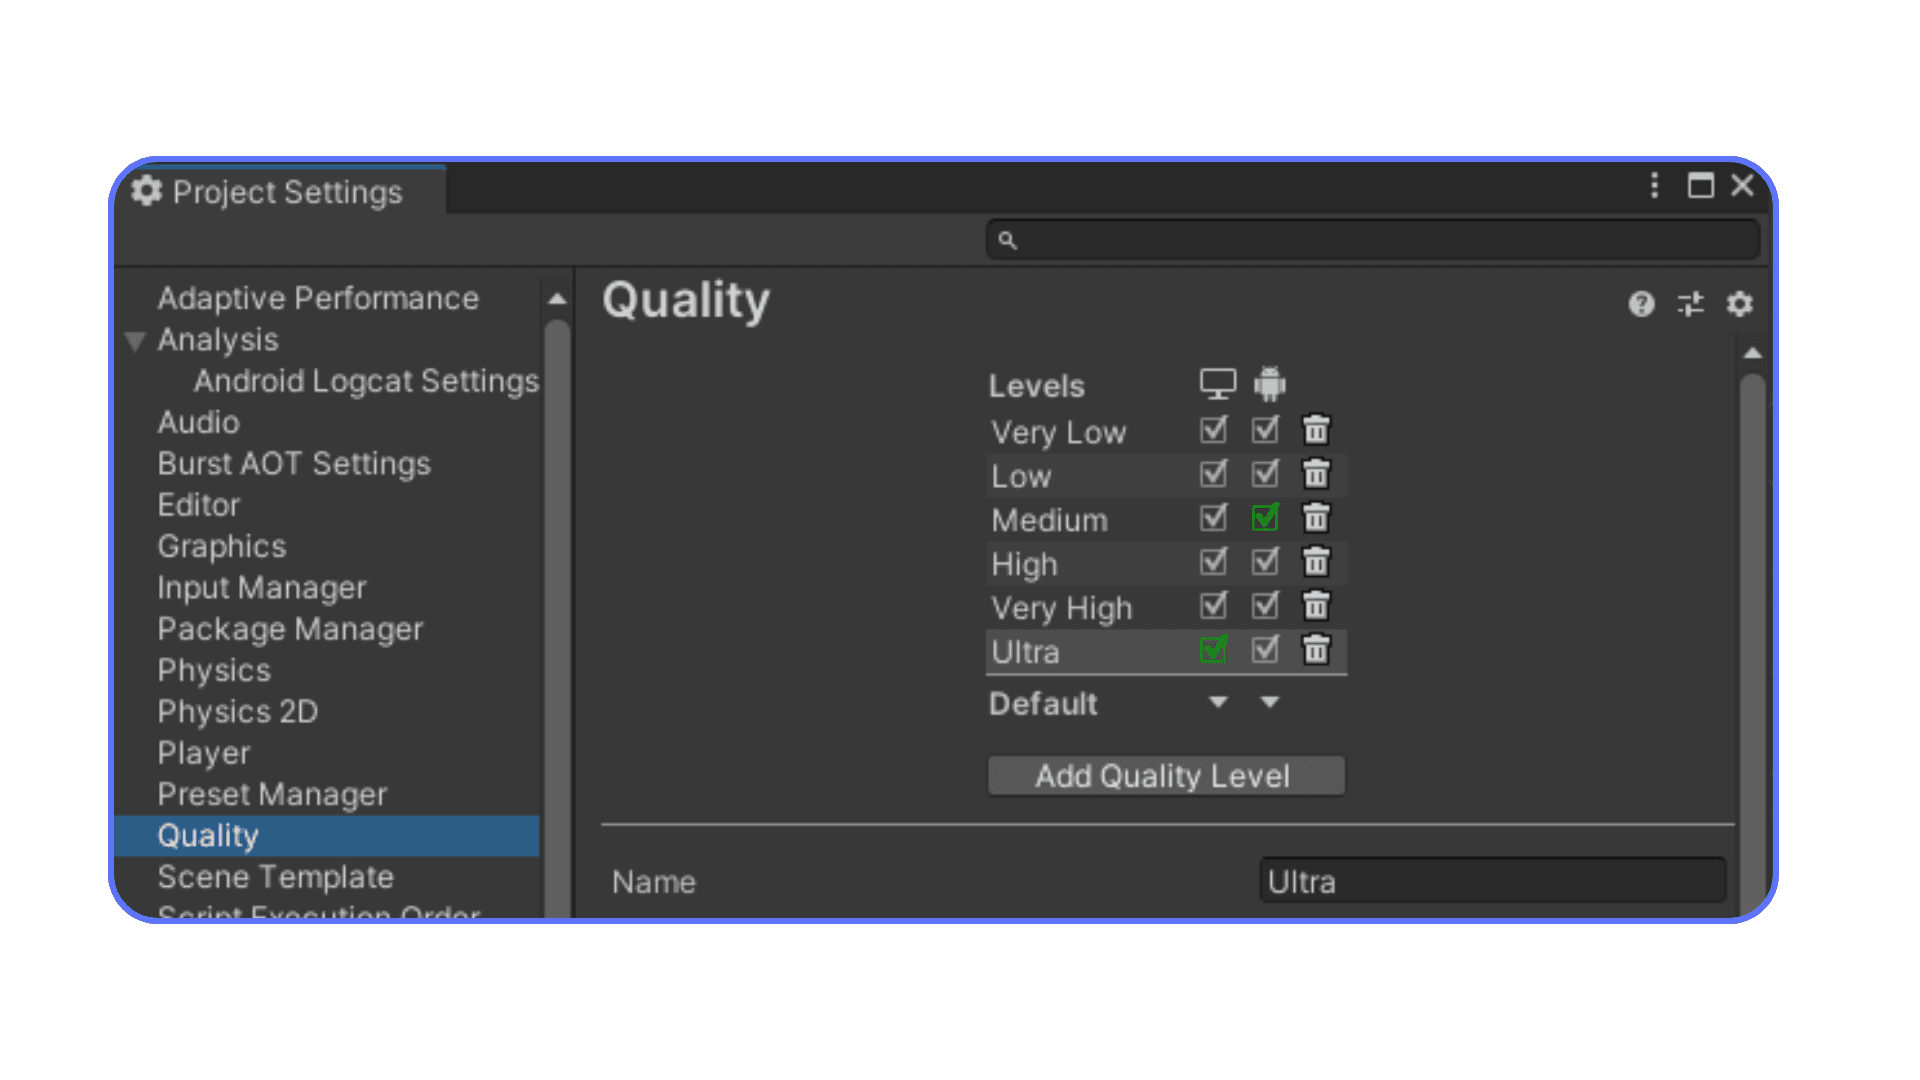
Okay, so you’ve picked the Mobile template or stripped-down project. That’s a solid start. But here’s the part people always forget: Unreal’s scalability settings are your best friend when you’re working with low-end hardware.
These settings control how fancy Unreal tries to be. Think of it like telling the engine, “Hey buddy, let’s not try to melt my laptop today, okay?”
What to do first? Open Scalability and drop everything.
You’ll find the settings under:
👉 Settings → Engine Scalability Settings in the toolbar.
Set everything—anti-aliasing, shadows, textures, effects, post-processing, view distance—to Low. Maybe Medium if you’re feeling brave (or your machine isn’t crying yet).
💡 Quick tip: Anti-aliasing and shadows are the usual performance killers. If you’re struggling, those should stay firmly on Low.
What actually happens when you lower these?
Here’s what you’re telling Unreal to stop doing:
Less geometry detail at a distance (your scene might look a bit chunkier far away, but your frame rate will thank you)
Fewer or no dynamic shadows, shadows are expensive on the GPU
Simpler lighting, fewer lights calculated per object
Lower texture resolution, no more 4K textures your screen can’t even display anyway
I once tried building a little puzzle game level on a 2014 MacBook Air (no dedicated GPU, just Intel HD graphics). It was basically unusable, until I cranked everything down. Suddenly, I could navigate the editor, move assets, and actually build stuff. Sure, it didn’t look pretty. But it worked.
One more hidden gem: the console
If you want to go further, open the console (hit the tilde ~ key) and type: r.ScreenPercentage 50
The trade-off (because there always is one). Look, I won’t sugarcoat it. When you turn everything down this far, your game’s going to look... basic. Like early PS2-era basic. But that’s not the point. The point is to get the editor usable so you can focus on gameplay, logic, and layout. You can always bump the visuals back up later, or do your polishing on a beefier machine (or, let’s be honest, a cloud setup).
#4: Switch to Forward Shading

Here’s something I wish I’d learned way earlier: Unreal’s default rendering path, deferred shading, is a beast. It’s designed for high-end machines that can handle lots of dynamic lights, complex materials, and fancy effects. Basically, the stuff that makes modern games look amazing... and low-end hardware look like it’s about to burst into flames.
If you’re working without a dedicated GPU (or with something barely hanging on, like Intel HD graphics), Forward Shading is your ticket to a smoother ride.
What is Forward Shading, and why should you care?
👉 Deferred shading = Unreal calculates lighting in multiple steps, combining lots of data about the scene’s materials, lights, shadows, etc. Super flexible. Super expensive.
👉 Forward shading = Unreal keeps it simple: it draws and lights objects in one go. Fewer passes, less memory bandwidth, less strain on your hardware.
Forward Shading was introduced mainly for VR, where performance is critical. But in my experience, it’s a godsend for low-end setups too.
Enabling it is super easy:
Open Project Settings
Go to the Rendering section
Tick the box for Forward Shading
Restart the editor (yep, gotta reboot for it to take effect)
Done. You just told Unreal: stop trying to act like it’s running on a $3,000 workstation.
Yeah, there’s always some downsides. With Forward Shading:
You lose some flexibility with dynamic lights (fewer dynamic shadows, for example)
Some advanced material features (like certain translucency effects) won’t work
You might have to rethink how you light your scenes (but hey, that’s not always a bad thing)
But honestly? On low-end hardware, you wouldn’t be using most of that stuff anyway. The goal here is to run Unreal, not to impress Digital Foundry.
I’ve used Forward Shading on a laptop with integrated graphics and gone from “editor crawling at 5 fps” to “playable at 20-30 fps.” That’s the difference between usable and unusable.
#5: Bake Your Lighting. Skip Real-Time Shadows
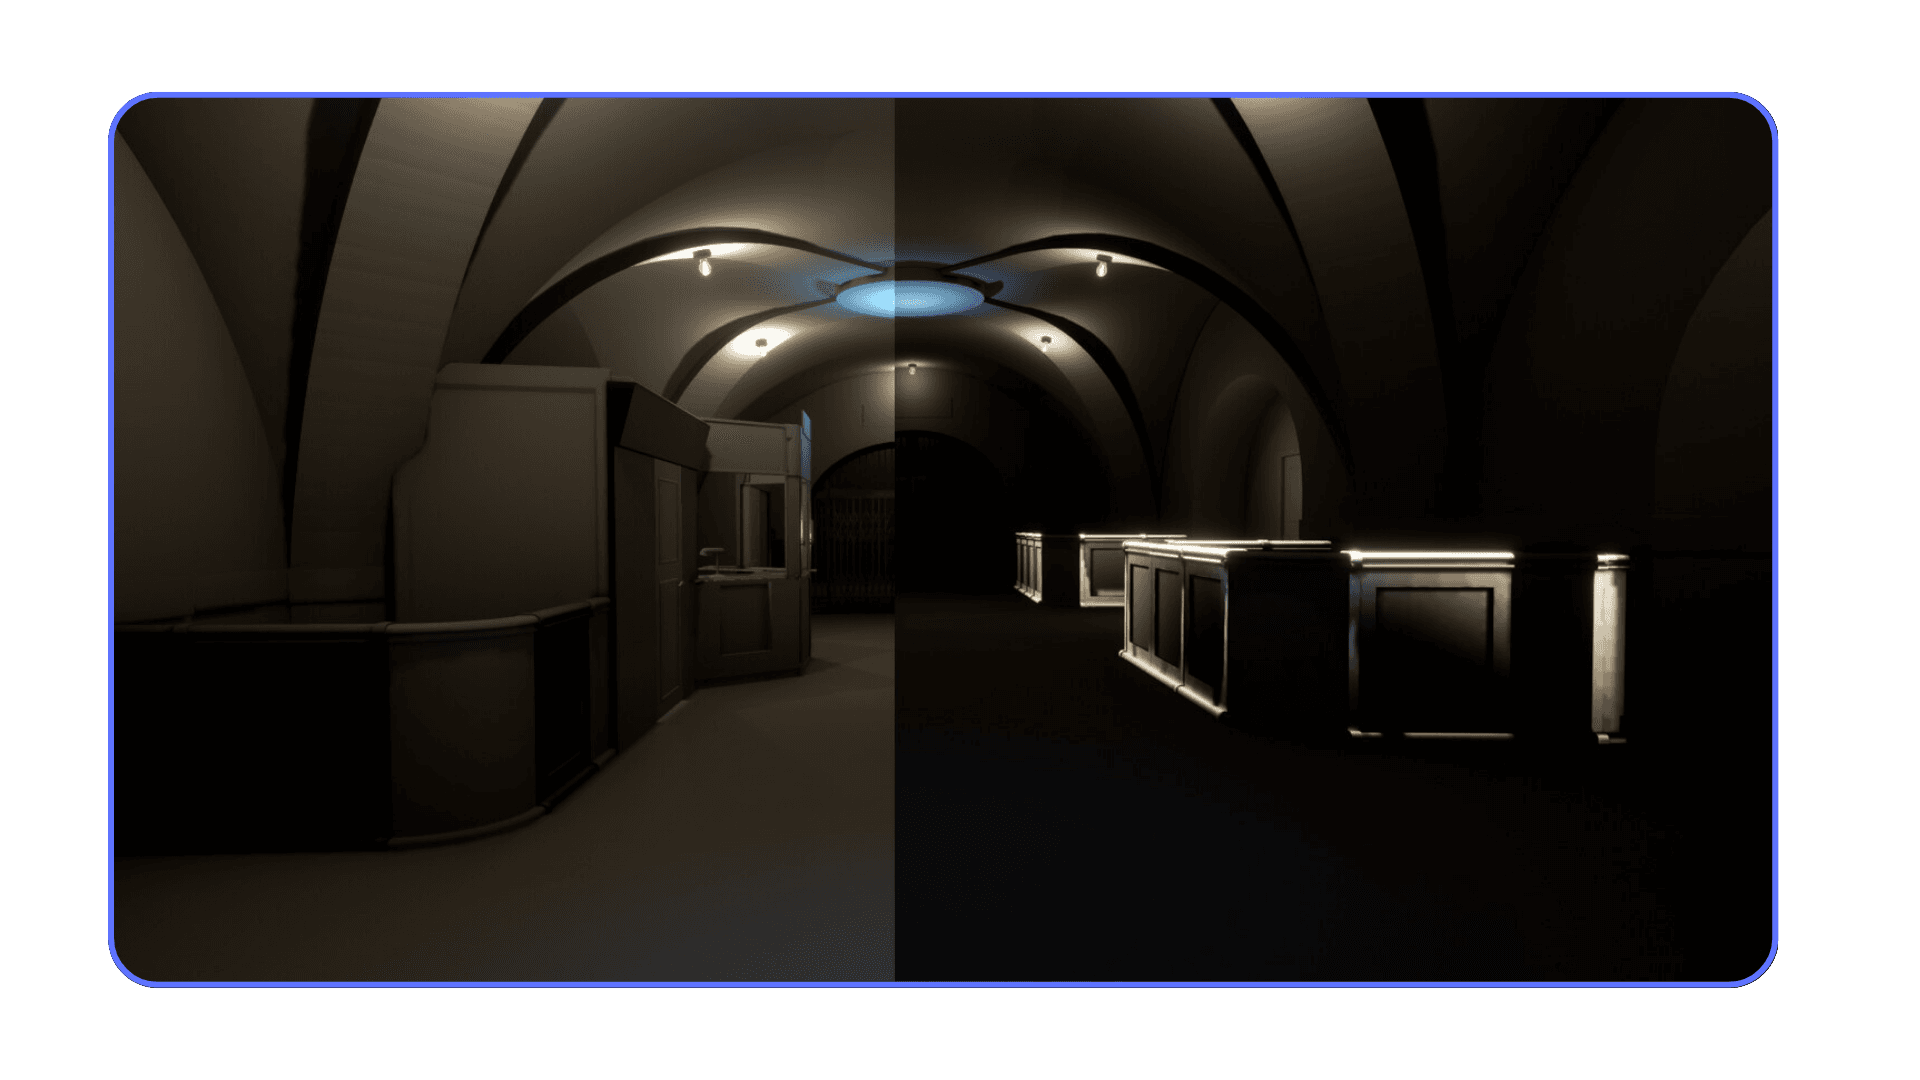
Here’s one of the biggest gotchas when trying to run Unreal on low-end hardware: real-time lighting and shadows are brutal.
I’m not kidding. Every frame, Unreal’s trying to calculate how your lights bounce, how shadows fall, how everything interacts. That’s a lot of math. And on a weak machine? Your CPU and (if you have one) your tiny GPU get absolutely hammered.
So what’s the smarter move? Bake your lighting.
What is baked lighting, anyway? Think of it like this:
Real-time lighting = your machine’s constantly figuring out the lighting in every frame, like cooking a meal from scratch every time you want to eat.
Baked lighting = you cook once, save it, and just reheat when you need it.
When you bake lighting in Unreal, it does all the heavy calculations up front. Then at runtime (or in the editor), it just shows the precomputed results. No more constant number-crunching.
How to do it?
➡ First, go to your World Settings → Lighting → set to Static or Stationary where possible.
➡ Disable dynamic shadows for lights that don’t need to move.
➡ Build your lighting (click Build → Build Lighting Only).
If you’re building for mobile or low-end, you can even dial down the quality of the baked lighting to save time on the build process itself.
💡 Tip: Use lightmaps that are reasonable in size. I’ve seen people crank up lightmap resolution and wonder why their builds take hours. Start small.
What's the trade-off? I’ll be real with you: baked lighting isn’t as flexible.
Lights don’t move dynamically at runtime
No dynamic day-night cycles (without extra tricks)
More setup time
But for static levels, puzzle games, or basic prototypes? It’s perfect. And more importantly, it means your machine can actually keep up.
Dynamic shadows look nice. They really do. But if you don’t have a GPU, they’re like kryptonite for your frame rate. Baked shadows will look cleaner and run smoother.
And if you don’t need them at all? Don’t be afraid to turn them off. I’ve seen prototypes where players didn’t even notice there were no shadows. Focus on your gameplay first, pretty shadows can come later.
#6: Master Texture Atlases & Trim Sheets

Here’s a sneaky performance killer in Unreal that a lot of beginners (and honestly, some pros) overlook: too many textures = too much memory = your machine crying for help.
When you’re working on low-end hardware, you’ve got to be smart about what your machine is loading into memory. Enter: texture atlases and trim sheets.
What are they?
👉 Texture atlas: A single texture that contains lots of smaller textures packed together. Instead of loading ten separate files, your machine loads one.
👉 Trim sheet: A texture designed to be reused across multiple objects—like edges, panels, or seams—so you can add detail without creating unique textures for everything.
In short? Both are about doing more with less.
Why does this matter on weak hardware? Every separate texture = a separate chunk of memory your machine needs to juggle. If you’re working without a GPU (or with something like Intel HD Graphics), this eats up your limited memory fast.
I’ve seen projects where folks had dozens of 2K or 4K textures on a scene… and then wondered why their editor crawled at 5 fps. When I helped them switch to a couple of atlases and trim sheets? Instant improvement. Frame rate up, loading times down.
Okay, now let's move on to the important part: How to set it up?
Plan ahead: Group similar materials onto one sheet. Example: wood planks, metal panels, decals, all combined.
Pack efficiently: Use tools like Photoshop, Substance, or even free tools like TexturePacker to build your atlas.
Adjust UVs: Yeah, this part can be tedious. You’ll need to map your meshes’ UVs to the right parts of the atlas or trim sheet. But once it’s done? Your engine load drops.
💡 Tip: Keep texture resolutions small. I know it’s tempting to work in 4K “just in case,” but if your hardware’s struggling, stick to 512x512 or 1K atlases where you can.
Let’s be honest, using atlases and trim sheets takes more setup time. You’ll spend longer in your modeling or UV phase. And you lose some flexibility (no unique texture for every tiny prop).
But if your goal is to get Unreal to run on low-end gear? It’s 100% worth it. I’ve built entire demo levels this way on machines that should have no business opening Unreal.
#7: Disable Unused Plugins
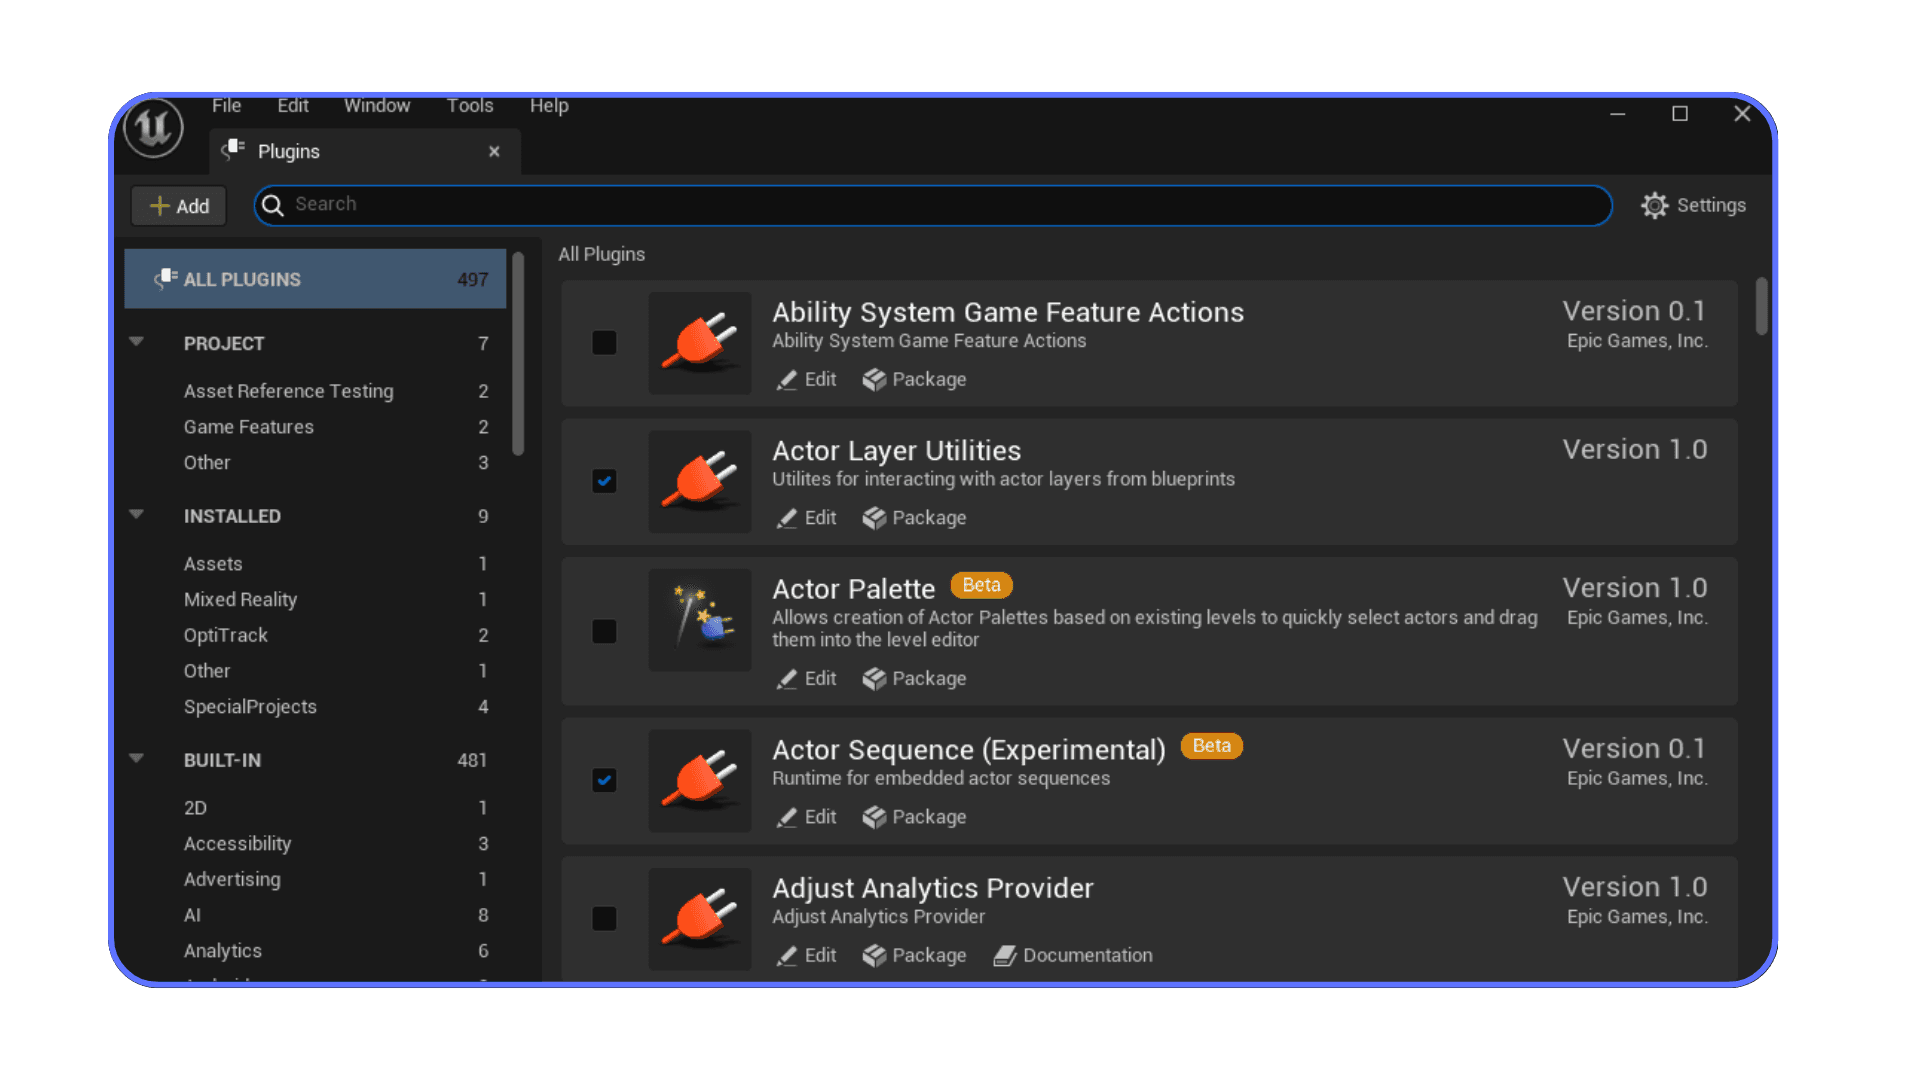
Unreal is awesome. But it’s also... bloated out of the box. I say that as someone who loves the engine. The problem? Unreal loads up all sorts of plugins and systems that you probably don’t need, especially if you’re on weak hardware.
And every extra thing it tries to load? That’s more memory eaten up, longer load times, and more ways for your machine to choke.
What’s dragging you down? Here’s a fun exercise: open your project and go to:
👉 Edit → Plugins
Scroll through that list. You’ll probably see stuff like:
ArchVis (Architectural Visualization tools)
VR plugins (OpenXR, SteamVR, Oculus...)
Lumen, Nanite, Chaos Physics
Niagara FX (Unreal’s fancy particle system)
Ask yourself: Am I actually using this? If not? Disable it.
💡 Tip: If you’re not sure what something does, Google it or check the Unreal docs. Some plugins are core parts of the engine; others are optional fluff that’s safe to disable.
How much does this help? Honestly, more than you’d think. I once stripped down a project and cut its startup memory use by 30%, just by disabling plugins I wasn’t using. The editor opened faster, ran smoother, and my old laptop stopped sounding like a jet engine.
Obviously, don’t go wild and start disabling things blindly.
Some plugins are essential for even basic projects (e.g. Blueprint system, core rendering).
If you disable something you later need, you can always re-enable it, but keep track of what you changed.
But trimming the fat? It’s one of the easiest wins when trying to run Unreal on a machine that’s not built for it.
#8: Simplify Materials & Kill the Fancy Effects
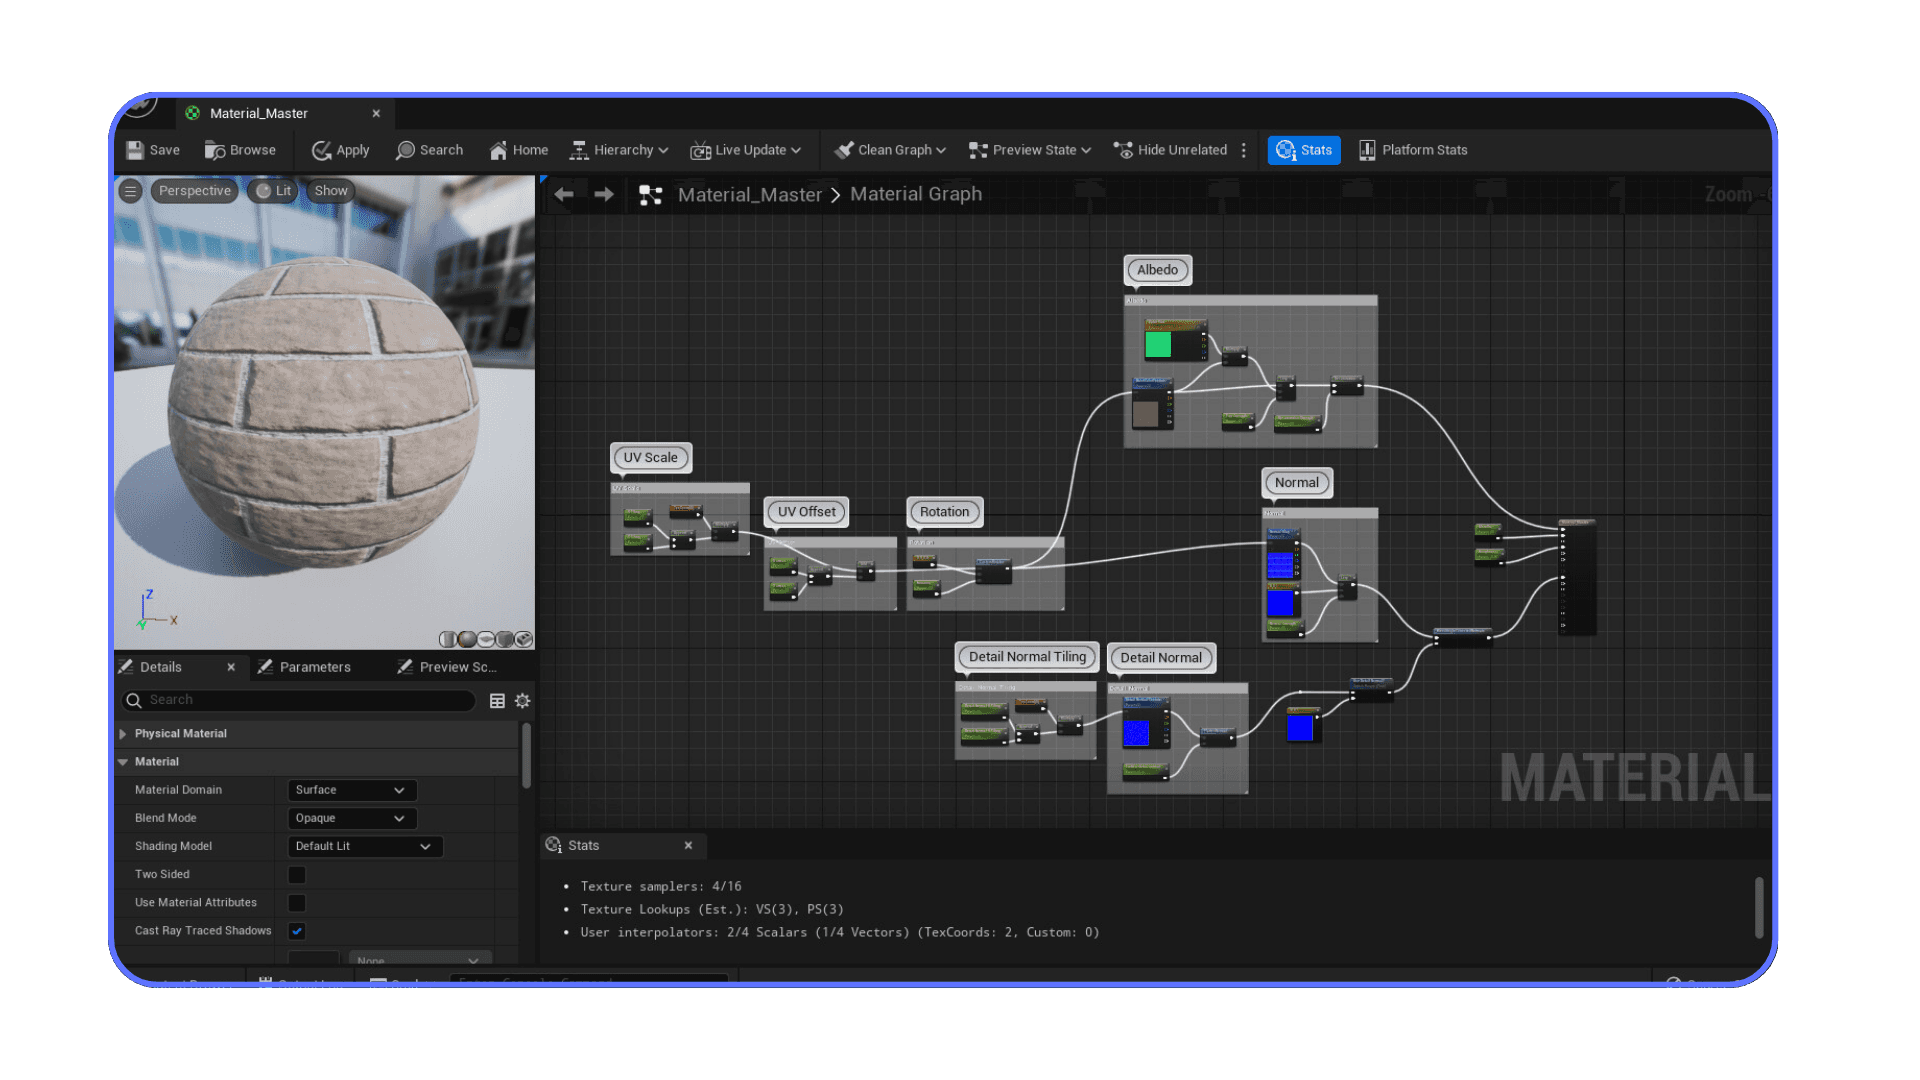
Here’s the brutal truth: Unreal’s default materials and post-process effects look gorgeous. But they’re also silently murdering your performance on low-end devices.
The good news? You don’t need ‘em. At least, not while you’re prototyping or trying to get your editor to run above 10 fps.
What’s happening under the hood? Every material in Unreal is a little math machine. The fancier the material (think: reflections, subsurface scattering, layered textures, dynamic roughness...), the more math your poor CPU/GPU combo has to crunch.
Same goes for post-processing:
👉 Motion blur
👉 Depth of field
👉 Bloom
👉 Ambient occlusion
👉 Film grain
These look nice, sure. But they come at a cost, and on weak hardware, that cost is huge.
What to do instead?
➡ Use simple materials: Flat colors or basic textures, with minimal nodes. Think: Base Color and maybe a single Roughness value. No expensive material functions, no layered shaders.
➡ Kill post-process effects:
Open your post-process volume (or camera settings)
Set all those bells and whistles, motion blur, DOF, bloom, to off
Or in the console, write the followings:
r.MotionBlurQuality 0
r.BloomQuality 0
r.AmbientOcclusionLevels 0
r.DepthOfFieldQuality 0
➡ Check material complexity view: In the viewport, you can switch to Shader Complexity mode. If your screen lights up like a Christmas tree (lots of white or red areas), those materials are expensive. Simplify.
💡 Quick tip: If you want a visual cue, think mobile game style: clean, flat, readable. That’s your target look when trying to run on low-end machines.
What’s the downside? Yeah... it won’t look super cinematic. Your shiny materials? They’ll look more like plastic or flat matte paint. Your scene might feel a little lifeless without bloom and AO.
But remember the goal here: function over form. You can’t build or test gameplay if your editor’s frozen or chugging at 2 fps. Make it work now, make it pretty later.
#9: Make Sure Unreal’s Using Your Best Hardware (Even If It’s Barely There)
Okay, this one’s for the folks who do have a dedicated GPU in their machine, even if it’s old or weak. Because here’s a thing I’ve seen happen over and over: Unreal runs, but instead of using your discrete GPU, it’s chugging along on your integrated graphics.
And if you don’t have a GPU at all? Don’t skip this, you might still find a couple of tricks to squeeze out more from what you’ve got.
Start by checking what Unreal is actually using. On Windows:
➡ Open Task Manager (Ctrl+Shift+Esc)
➡ Go to the Performance tab → GPU
➡ Fire up Unreal → see which GPU shows usage
If your discrete GPU is sitting at 0% and your iGPU is screaming at 100%... that’s your problem right there.
Okay then, how to fix it?
💡 NVIDIA GPU users:
Right-click on your UE4/UE5 shortcut
Select Run with graphics processor → High-performance NVIDIA processor
Open NVIDIA Control Panel → Manage 3D settings → add Unreal and force it to use the NVIDIA GPU
💡 AMD GPU users:
Open Radeon Settings → Switchable Graphics → set Unreal to High Performance
💡 On laptops:
Double-check your power settings. Plugged-in mode often enables higher performance. Battery saver modes can force Unreal to stick to iGPU or throttle clocks.
If you only have integrated graphics:
First off, my sincere respects with you. You’re in the trenches.
👉 Make sure background apps are closed (browser tabs, chat apps, whatever). Free up that RAM and CPU.
👉 Lower Unreal’s editor resolution: r.ScreenPercentage 50
👉 Turn off Windows eye candy: no transparency, no fancy animations.
Every little bit helps.
Why this matters so much? I once helped a friend who thought his GTX 1050 Ti laptop was just “too slow” for Unreal. Turns out, Unreal was never using the GPU at all. One control panel tweak later, and suddenly he was editing at playable frame rates. Don’t assume Unreal’s picking the right GPU. Check.
#10: Unreal Engine Isn’t Getting Lighter — It’s Getting Smarter
A few years ago, running Unreal on a weak laptop was mostly a patience game.
You could strip down the settings, bake lighting, kill post-processing, and maybe, just maybe, get away with it.
But 2025 Unreal? It’s a different beast.
The engine’s not just rendering pixels anymore, it’s thinking.
Epic’s been rolling out smarter systems with every version: procedural content generation, real-time physics simulation with Chaos, even integrated AI tools that help you generate materials, meshes, and motion. That’s awesome for creativity… but brutal for your hardware. Every new feature wants more memory, more GPU threads, and faster storage just to keep up.

You can still do the old tricks — lowering scalability, baking lights, using forward shading — and they’ll help.
But here’s what I’ve noticed lately: those optimizations only buy you time. They don’t future-proof your workflow.
Because Unreal isn’t heading back toward “lightweight.”
It’s heading toward limitless.
We’re entering this weird middle ground where even decent mid-range PCs start wheezing when you enable Nanite across a full open world or use AI-driven character tools.
Meanwhile, creators with access to scalable cloud power? They’re just… moving faster.
No waiting on shader compilation. No freezing during light builds. No juggling local storage because every project’s 200GB.
It’s not that low-end users can’t still learn or prototype locally, you absolutely can.
But if you want to use Unreal the way Epic clearly intends it to be used in 2025, with all its new real-time rendering, procedural, and AI features, you need flexibility your laptop simply can’t give you.
That’s where the next generation of workflows is heading.
Not local vs. cloud. Not high-end vs. budget.
Just smart creators using the right tool at the right time, and letting the heavy lifting happen somewhere built for it.
#11: When Local Tricks Aren’t Enough, Try Vagon Cloud Computers
So here’s my honest advice: if you’ve tried all the on-device tricks, scaling settings down, baking lighting, killing shadows, and Unreal is still dragging? It’s time to stop fighting your hardware.
👉 Pro tip: At that point, your best move isn’t squeezing out one more FPS. It’s running Unreal on hardware that’s actually built for it… even if you don’t own that hardware yourself.
That’s where cloud computers come in. And for me? The smoothest, no-headache option I’ve found is Vagon Cloud Computer.
What is Vagon Cloud Computer? How It Helps?
Vagon Cloud Computer is basically like having a high-end PC that lives in the cloud, ready whenever you need serious power, without owning or maintaining the hardware yourself. You connect through your browser, fire up a machine with a real GPU, lots of RAM, fast storage, and you’re off. No installs, no complicated setup. Just the performance you wish your laptop had.
💻 It’s really simple to set up.
No cloud engineering degree required. No worrying about setting up instances, configuring GPUs, or managing storage. You sign in, pick your machine specs, and you’re up and running in minutes.
🚀 Real GPU power, on demand.
You’re getting access to RTX-enabled GPUs, loads of RAM (think 32 GB, 64 GB, way beyond what most low-end machines have), and fast SSD storage. Unreal runs the way it should, even if you’re on a basic laptop or tablet.
🌍 Access anywhere.
On the go? No problem. I’ve spun up Vagon sessions from hotel Wi-Fi, cafés, airports. As long as your internet connection is decent, you’re in business.
⚡ Flexible and scalable.
Need more power for a heavy build? Just scale up. Done for the day? Shut it down and stop paying. No long-term commitment.
🖥 Browser-based.
No installs. No weird client software. You’re working through your browser, which means less friction and no bloat on your machine.
If your machine can’t handle Unreal locally, stop stressing over every last optimization tweak. Vagon lets you focus on building and creating, not fighting with hardware. I’ve used it when traveling or demoing projects, and it’s been a game-changer.
Honestly, once you try working this way, it’s hard to go back. Sign up and try now for your project.
Final Thoughts
Trying to run Unreal Engine on a low-end machine feels like trying to climb a mountain in flip-flops. You can throw every optimization trick in the book at it, scale down the quality, bake your lighting, simplify your materials, and sure, you might get it limping along well enough to prototype or test some ideas.
But at a certain point, it stops being fun and starts being a battle against your own hardware. And honestly? That’s energy better spent building, creating, and experimenting.
That’s why I think solutions like Vagon Cloud Computer make so much sense. You stop worrying about what your local machine can handle and just... work. Wherever you are. On whatever device you have.
So if your laptop’s begging for mercy, maybe it’s time to stop fighting it, and start using tools that actually help you focus on what matters: making awesome stuff in Unreal.
Frequently Asked Questions (FAQs)
1. Can I run Unreal Engine on 4GB RAM or integrated graphics?
You can technically run Unreal Engine on 4 GB of RAM and integrated graphics, but you’ll hit serious limitations fast. The engine might open, but it won’t be happy about it. Expect sluggish performance, long load times, and constant slowdowns unless you take drastic steps, like turning every setting down to Low, baking all your lighting, and working with super simple scenes. Even then, it’s going to feel like a struggle unless you’re doing the most basic prototyping.
2. Is Unreal Engine 5 better or worse than Unreal Engine 4 for low-end PCs?
Out of the box, Unreal Engine 5 is heavier because of features like Nanite and Lumen that really want a beefy GPU. But here’s the twist, if you turn off those features and configure UE5 smartly (using mobile preview, forward shading, baked lighting), UE5.2 and newer can actually perform as well or better than UE4. This is thanks to improvements in shader compilation, caching, and general editor responsiveness.
3. What Unreal Engine settings should I lower first for better performance?
If you want the biggest bang for your buck on a low-end machine, start by setting all your Engine Scalability Settings to Low or Medium. Switch from deferred shading to forward shading in your project settings, that alone can give a noticeable boost. Bake your lighting instead of relying on real-time shadows, simplify your materials (keep them basic, with as few nodes as possible), and combine textures into atlases to reduce memory use.
4. What console commands help Unreal Engine run better on weak hardware?
A few quick console commands can work wonders when you’re struggling with editor lag. Try r.ScreenPercentage 50 to render the viewport at half resolution, r.MotionBlurQuality 0 and r.BloomQuality 0 to kill expensive effects, r.AmbientOcclusionLevels 0 to drop AO, and even t.maxfps 15 if you’re just working in the editor and want to save power. These tweaks can take you from barely usable to at least functional.
5. Should I use an older version of Unreal Engine for low-end computers?
Not always. While UE4 generally runs lighter by default, UE5.2 and newer versions include optimizations that actually make the editor feel snappier, especially after you disable high-end features like Nanite and Lumen. If you’re on extremely weak hardware, UE4 might feel a bit smoother at first. But don’t write off UE5 without trying a properly stripped-down setup.
6. How can I figure out the hardware requirements for my Unreal Engine game?
A smart way to estimate requirements is to start with a minimal scene and profile it on your target hardware, say, a system with integrated graphics and 8 GB of RAM. Use Unreal’s built-in profiler to watch polycounts, draw calls, texture memory, and frame timings. Slowly add complexity and see where performance starts to tank. That gives you a realistic baseline for what your game can demand.
7. What Unreal Engine features actually help performance on low-end devices?
Forward Shading is one of the biggest unsung heroes, it cuts down rendering overhead dramatically compared to deferred shading. The mobile renderer preview can also give you a boost, since it disables a lot of desktop-focused effects. Combine those with baked lighting and simplified materials, and you’ll be surprised how far Unreal can go on modest hardware.
Let me be blunt: Unreal Engine is not what you'd call lightweight. I remember the first time I tried to open up UE4 on my old Dell Inspiron, you know, the kind of laptop that wheezes if you have more than five Chrome tabs open? Yeah, that one. The fans spun like they were trying to lift off, my screen froze, and after about 10 minutes of loading... crash. No editor, no project. Just sadness.
But here’s the thing: I didn’t give up. And if you’re here, I’m guessing you don’t want to either.
So, is it possible to run Unreal Engine on a low-end device? Without a dedicated GPU? Short answer: kinda. Long answer: with a lot of clever workarounds. And honestly, sometimes it’s not about making it buttery-smooth, it’s about making it work enough to sketch ideas, prototype a scene, or test a build without begging your wallet for mercy.
Why Even Bother? Unreal On Low-End Makes More Sense Than You’d Think
I’ll admit, when I first started looking into this, I thought: What’s the point? Why torture myself? But the reality is, there are good reasons to want to run Unreal on modest hardware:
👉 You’re learning. Maybe you’re a student, or just someone experimenting at home. Spending $2k on a machine isn’t happening right now.
👉 You’re building for mobile or VR. Fun fact: Unreal can target lower-end hardware. Even Fortnite runs on phones, right? A stripped-down dev environment can match your target platform better.
👉 You just need basic prototyping. Sketch a level layout. Tweak some blueprints. You don’t always need real-time ray tracing and cinematic lighting for that.
👉 You’re on the go. Sometimes your main rig is out of reach. Maybe you’re on vacation, stuck at grandma’s house with her potato laptop. (Been there.)
Of course, let’s be honest: Unreal wants serious hardware. It thrives on big GPUs, lots of RAM, and fast storage. But if you’re willing to make sacrifices, lower resolution, minimal lighting, super basic materials, you can bend it to your will. Sort of.
And hey, worst case? You’ll learn a ton about how Unreal works under the hood. That’s valuable in itself.
If you’re still reading, I’m guessing you’re up for the challenge. Cool. Next up: let’s talk about actual techniques to squeeze Unreal onto a low-end machine, what works, what doesn’t, and what to avoid unless you like pain.
#1: Start With Mobile Template
If you’re trying to run Unreal Engine on a machine that technically shouldn’t be running Unreal… this is where you start. The Mobile template.
Seriously, don’t overthink this. When you open up Unreal and click New Project, pick that Mobile template instead of the default ones. Here’s why:
👉 It’s stripped down out of the box.
Mobile templates come pre-configured with settings aimed at (you guessed it) mobile devices. That means: no high-end post-processing, no insane shader complexity, no default fancy lighting setups. I’ve seen people jump into an empty default level and wonder why their editor stutters like crazy, because they’re unknowingly running the equivalent of a high-end desktop scene on a potato.
👉 It aligns with what your hardware can handle.
The Mobile template disables a lot of the stuff that kills low-end machines: dynamic shadows, fancy materials, high shader complexity. You get a clean slate designed for low spec. And hey, if you’re targeting mobile anyway, it’s a win-win.
👉 You can actually load the project.
True story: I once tried to load a VR template on an old ThinkPad. I waited 30 minutes before giving up. Switched to Mobile template, loaded in under 3 minutes. The difference is night and day.
#2: Use 5.2 (or newer) Versions of Unreal Engine
I get it. You’re thinking: Wait, I thought Unreal 5 was heavier than 4? And you’re not wrong, UE5 brings a ton of new tech like Lumen and Nanite (which are awesome but totally overkill for low-end hardware).
But here’s the thing I’ve noticed: UE5.2 and newer versions actually improve compile times and editor responsiveness compared to early 5.x builds. Epic’s been optimizing the hell out of shader compilation (the part where Unreal figures out how to draw your materials on screen).
A lot of users on forums and Reddit have mentioned that 5.2+ feels snappier, especially when you disable the fancy features. Shader compile batching, better caching, small improvements, but they add up.
⚠ Pro tip: When you set up UE5 for a low-end device:
Disable Nanite
Kill Lumen (switch to baked or no GI)
Stick to Forward Shading (I’ll cover that next)
That way, you’re using the improved core of UE5 without loading all the GPU-crushing extras.
#3: Customize Scalability & Quality Settings
Okay, so you’ve picked the Mobile template or stripped-down project. That’s a solid start. But here’s the part people always forget: Unreal’s scalability settings are your best friend when you’re working with low-end hardware.
These settings control how fancy Unreal tries to be. Think of it like telling the engine, “Hey buddy, let’s not try to melt my laptop today, okay?”
What to do first? Open Scalability and drop everything.
You’ll find the settings under:
👉 Settings → Engine Scalability Settings in the toolbar.
Set everything—anti-aliasing, shadows, textures, effects, post-processing, view distance—to Low. Maybe Medium if you’re feeling brave (or your machine isn’t crying yet).
💡 Quick tip: Anti-aliasing and shadows are the usual performance killers. If you’re struggling, those should stay firmly on Low.
What actually happens when you lower these?
Here’s what you’re telling Unreal to stop doing:
Less geometry detail at a distance (your scene might look a bit chunkier far away, but your frame rate will thank you)
Fewer or no dynamic shadows, shadows are expensive on the GPU
Simpler lighting, fewer lights calculated per object
Lower texture resolution, no more 4K textures your screen can’t even display anyway
I once tried building a little puzzle game level on a 2014 MacBook Air (no dedicated GPU, just Intel HD graphics). It was basically unusable, until I cranked everything down. Suddenly, I could navigate the editor, move assets, and actually build stuff. Sure, it didn’t look pretty. But it worked.
One more hidden gem: the console
If you want to go further, open the console (hit the tilde ~ key) and type: r.ScreenPercentage 50
The trade-off (because there always is one). Look, I won’t sugarcoat it. When you turn everything down this far, your game’s going to look... basic. Like early PS2-era basic. But that’s not the point. The point is to get the editor usable so you can focus on gameplay, logic, and layout. You can always bump the visuals back up later, or do your polishing on a beefier machine (or, let’s be honest, a cloud setup).
#4: Switch to Forward Shading
Here’s something I wish I’d learned way earlier: Unreal’s default rendering path, deferred shading, is a beast. It’s designed for high-end machines that can handle lots of dynamic lights, complex materials, and fancy effects. Basically, the stuff that makes modern games look amazing... and low-end hardware look like it’s about to burst into flames.
If you’re working without a dedicated GPU (or with something barely hanging on, like Intel HD graphics), Forward Shading is your ticket to a smoother ride.
What is Forward Shading, and why should you care?
👉 Deferred shading = Unreal calculates lighting in multiple steps, combining lots of data about the scene’s materials, lights, shadows, etc. Super flexible. Super expensive.
👉 Forward shading = Unreal keeps it simple: it draws and lights objects in one go. Fewer passes, less memory bandwidth, less strain on your hardware.
Forward Shading was introduced mainly for VR, where performance is critical. But in my experience, it’s a godsend for low-end setups too.
Enabling it is super easy:
Open Project Settings
Go to the Rendering section
Tick the box for Forward Shading
Restart the editor (yep, gotta reboot for it to take effect)
Done. You just told Unreal: stop trying to act like it’s running on a $3,000 workstation.
Yeah, there’s always some downsides. With Forward Shading:
You lose some flexibility with dynamic lights (fewer dynamic shadows, for example)
Some advanced material features (like certain translucency effects) won’t work
You might have to rethink how you light your scenes (but hey, that’s not always a bad thing)
But honestly? On low-end hardware, you wouldn’t be using most of that stuff anyway. The goal here is to run Unreal, not to impress Digital Foundry.
I’ve used Forward Shading on a laptop with integrated graphics and gone from “editor crawling at 5 fps” to “playable at 20-30 fps.” That’s the difference between usable and unusable.
#5: Bake Your Lighting. Skip Real-Time Shadows
Here’s one of the biggest gotchas when trying to run Unreal on low-end hardware: real-time lighting and shadows are brutal.
I’m not kidding. Every frame, Unreal’s trying to calculate how your lights bounce, how shadows fall, how everything interacts. That’s a lot of math. And on a weak machine? Your CPU and (if you have one) your tiny GPU get absolutely hammered.
So what’s the smarter move? Bake your lighting.
What is baked lighting, anyway? Think of it like this:
Real-time lighting = your machine’s constantly figuring out the lighting in every frame, like cooking a meal from scratch every time you want to eat.
Baked lighting = you cook once, save it, and just reheat when you need it.
When you bake lighting in Unreal, it does all the heavy calculations up front. Then at runtime (or in the editor), it just shows the precomputed results. No more constant number-crunching.
How to do it?
➡ First, go to your World Settings → Lighting → set to Static or Stationary where possible.
➡ Disable dynamic shadows for lights that don’t need to move.
➡ Build your lighting (click Build → Build Lighting Only).
If you’re building for mobile or low-end, you can even dial down the quality of the baked lighting to save time on the build process itself.
💡 Tip: Use lightmaps that are reasonable in size. I’ve seen people crank up lightmap resolution and wonder why their builds take hours. Start small.
What's the trade-off? I’ll be real with you: baked lighting isn’t as flexible.
Lights don’t move dynamically at runtime
No dynamic day-night cycles (without extra tricks)
More setup time
But for static levels, puzzle games, or basic prototypes? It’s perfect. And more importantly, it means your machine can actually keep up.
Dynamic shadows look nice. They really do. But if you don’t have a GPU, they’re like kryptonite for your frame rate. Baked shadows will look cleaner and run smoother.
And if you don’t need them at all? Don’t be afraid to turn them off. I’ve seen prototypes where players didn’t even notice there were no shadows. Focus on your gameplay first, pretty shadows can come later.
#6: Master Texture Atlases & Trim Sheets
Here’s a sneaky performance killer in Unreal that a lot of beginners (and honestly, some pros) overlook: too many textures = too much memory = your machine crying for help.
When you’re working on low-end hardware, you’ve got to be smart about what your machine is loading into memory. Enter: texture atlases and trim sheets.
What are they?
👉 Texture atlas: A single texture that contains lots of smaller textures packed together. Instead of loading ten separate files, your machine loads one.
👉 Trim sheet: A texture designed to be reused across multiple objects—like edges, panels, or seams—so you can add detail without creating unique textures for everything.
In short? Both are about doing more with less.
Why does this matter on weak hardware? Every separate texture = a separate chunk of memory your machine needs to juggle. If you’re working without a GPU (or with something like Intel HD Graphics), this eats up your limited memory fast.
I’ve seen projects where folks had dozens of 2K or 4K textures on a scene… and then wondered why their editor crawled at 5 fps. When I helped them switch to a couple of atlases and trim sheets? Instant improvement. Frame rate up, loading times down.
Okay, now let's move on to the important part: How to set it up?
Plan ahead: Group similar materials onto one sheet. Example: wood planks, metal panels, decals, all combined.
Pack efficiently: Use tools like Photoshop, Substance, or even free tools like TexturePacker to build your atlas.
Adjust UVs: Yeah, this part can be tedious. You’ll need to map your meshes’ UVs to the right parts of the atlas or trim sheet. But once it’s done? Your engine load drops.
💡 Tip: Keep texture resolutions small. I know it’s tempting to work in 4K “just in case,” but if your hardware’s struggling, stick to 512x512 or 1K atlases where you can.
Let’s be honest, using atlases and trim sheets takes more setup time. You’ll spend longer in your modeling or UV phase. And you lose some flexibility (no unique texture for every tiny prop).
But if your goal is to get Unreal to run on low-end gear? It’s 100% worth it. I’ve built entire demo levels this way on machines that should have no business opening Unreal.
#7: Disable Unused Plugins
Unreal is awesome. But it’s also... bloated out of the box. I say that as someone who loves the engine. The problem? Unreal loads up all sorts of plugins and systems that you probably don’t need, especially if you’re on weak hardware.
And every extra thing it tries to load? That’s more memory eaten up, longer load times, and more ways for your machine to choke.
What’s dragging you down? Here’s a fun exercise: open your project and go to:
👉 Edit → Plugins
Scroll through that list. You’ll probably see stuff like:
ArchVis (Architectural Visualization tools)
VR plugins (OpenXR, SteamVR, Oculus...)
Lumen, Nanite, Chaos Physics
Niagara FX (Unreal’s fancy particle system)
Ask yourself: Am I actually using this? If not? Disable it.
💡 Tip: If you’re not sure what something does, Google it or check the Unreal docs. Some plugins are core parts of the engine; others are optional fluff that’s safe to disable.
How much does this help? Honestly, more than you’d think. I once stripped down a project and cut its startup memory use by 30%, just by disabling plugins I wasn’t using. The editor opened faster, ran smoother, and my old laptop stopped sounding like a jet engine.
Obviously, don’t go wild and start disabling things blindly.
Some plugins are essential for even basic projects (e.g. Blueprint system, core rendering).
If you disable something you later need, you can always re-enable it, but keep track of what you changed.
But trimming the fat? It’s one of the easiest wins when trying to run Unreal on a machine that’s not built for it.
#8: Simplify Materials & Kill the Fancy Effects
Here’s the brutal truth: Unreal’s default materials and post-process effects look gorgeous. But they’re also silently murdering your performance on low-end devices.
The good news? You don’t need ‘em. At least, not while you’re prototyping or trying to get your editor to run above 10 fps.
What’s happening under the hood? Every material in Unreal is a little math machine. The fancier the material (think: reflections, subsurface scattering, layered textures, dynamic roughness...), the more math your poor CPU/GPU combo has to crunch.
Same goes for post-processing:
👉 Motion blur
👉 Depth of field
👉 Bloom
👉 Ambient occlusion
👉 Film grain
These look nice, sure. But they come at a cost, and on weak hardware, that cost is huge.
What to do instead?
➡ Use simple materials: Flat colors or basic textures, with minimal nodes. Think: Base Color and maybe a single Roughness value. No expensive material functions, no layered shaders.
➡ Kill post-process effects:
Open your post-process volume (or camera settings)
Set all those bells and whistles, motion blur, DOF, bloom, to off
Or in the console, write the followings:
r.MotionBlurQuality 0
r.BloomQuality 0
r.AmbientOcclusionLevels 0
r.DepthOfFieldQuality 0
➡ Check material complexity view: In the viewport, you can switch to Shader Complexity mode. If your screen lights up like a Christmas tree (lots of white or red areas), those materials are expensive. Simplify.
💡 Quick tip: If you want a visual cue, think mobile game style: clean, flat, readable. That’s your target look when trying to run on low-end machines.
What’s the downside? Yeah... it won’t look super cinematic. Your shiny materials? They’ll look more like plastic or flat matte paint. Your scene might feel a little lifeless without bloom and AO.
But remember the goal here: function over form. You can’t build or test gameplay if your editor’s frozen or chugging at 2 fps. Make it work now, make it pretty later.
#9: Make Sure Unreal’s Using Your Best Hardware (Even If It’s Barely There)
Okay, this one’s for the folks who do have a dedicated GPU in their machine, even if it’s old or weak. Because here’s a thing I’ve seen happen over and over: Unreal runs, but instead of using your discrete GPU, it’s chugging along on your integrated graphics.
And if you don’t have a GPU at all? Don’t skip this, you might still find a couple of tricks to squeeze out more from what you’ve got.
Start by checking what Unreal is actually using. On Windows:
➡ Open Task Manager (Ctrl+Shift+Esc)
➡ Go to the Performance tab → GPU
➡ Fire up Unreal → see which GPU shows usage
If your discrete GPU is sitting at 0% and your iGPU is screaming at 100%... that’s your problem right there.
Okay then, how to fix it?
💡 NVIDIA GPU users:
Right-click on your UE4/UE5 shortcut
Select Run with graphics processor → High-performance NVIDIA processor
Open NVIDIA Control Panel → Manage 3D settings → add Unreal and force it to use the NVIDIA GPU
💡 AMD GPU users:
Open Radeon Settings → Switchable Graphics → set Unreal to High Performance
💡 On laptops:
Double-check your power settings. Plugged-in mode often enables higher performance. Battery saver modes can force Unreal to stick to iGPU or throttle clocks.
If you only have integrated graphics:
First off, my sincere respects with you. You’re in the trenches.
👉 Make sure background apps are closed (browser tabs, chat apps, whatever). Free up that RAM and CPU.
👉 Lower Unreal’s editor resolution: r.ScreenPercentage 50
👉 Turn off Windows eye candy: no transparency, no fancy animations.
Every little bit helps.
Why this matters so much? I once helped a friend who thought his GTX 1050 Ti laptop was just “too slow” for Unreal. Turns out, Unreal was never using the GPU at all. One control panel tweak later, and suddenly he was editing at playable frame rates. Don’t assume Unreal’s picking the right GPU. Check.
#10: Unreal Engine Isn’t Getting Lighter — It’s Getting Smarter
A few years ago, running Unreal on a weak laptop was mostly a patience game.
You could strip down the settings, bake lighting, kill post-processing, and maybe, just maybe, get away with it.
But 2025 Unreal? It’s a different beast.
The engine’s not just rendering pixels anymore, it’s thinking.
Epic’s been rolling out smarter systems with every version: procedural content generation, real-time physics simulation with Chaos, even integrated AI tools that help you generate materials, meshes, and motion. That’s awesome for creativity… but brutal for your hardware. Every new feature wants more memory, more GPU threads, and faster storage just to keep up.
You can still do the old tricks — lowering scalability, baking lights, using forward shading — and they’ll help.
But here’s what I’ve noticed lately: those optimizations only buy you time. They don’t future-proof your workflow.
Because Unreal isn’t heading back toward “lightweight.”
It’s heading toward limitless.
We’re entering this weird middle ground where even decent mid-range PCs start wheezing when you enable Nanite across a full open world or use AI-driven character tools.
Meanwhile, creators with access to scalable cloud power? They’re just… moving faster.
No waiting on shader compilation. No freezing during light builds. No juggling local storage because every project’s 200GB.
It’s not that low-end users can’t still learn or prototype locally, you absolutely can.
But if you want to use Unreal the way Epic clearly intends it to be used in 2025, with all its new real-time rendering, procedural, and AI features, you need flexibility your laptop simply can’t give you.
That’s where the next generation of workflows is heading.
Not local vs. cloud. Not high-end vs. budget.
Just smart creators using the right tool at the right time, and letting the heavy lifting happen somewhere built for it.
#11: When Local Tricks Aren’t Enough, Try Vagon Cloud Computers
So here’s my honest advice: if you’ve tried all the on-device tricks, scaling settings down, baking lighting, killing shadows, and Unreal is still dragging? It’s time to stop fighting your hardware.
👉 Pro tip: At that point, your best move isn’t squeezing out one more FPS. It’s running Unreal on hardware that’s actually built for it… even if you don’t own that hardware yourself.
That’s where cloud computers come in. And for me? The smoothest, no-headache option I’ve found is Vagon Cloud Computer.
What is Vagon Cloud Computer? How It Helps?
Vagon Cloud Computer is basically like having a high-end PC that lives in the cloud, ready whenever you need serious power, without owning or maintaining the hardware yourself. You connect through your browser, fire up a machine with a real GPU, lots of RAM, fast storage, and you’re off. No installs, no complicated setup. Just the performance you wish your laptop had.
💻 It’s really simple to set up.
No cloud engineering degree required. No worrying about setting up instances, configuring GPUs, or managing storage. You sign in, pick your machine specs, and you’re up and running in minutes.
🚀 Real GPU power, on demand.
You’re getting access to RTX-enabled GPUs, loads of RAM (think 32 GB, 64 GB, way beyond what most low-end machines have), and fast SSD storage. Unreal runs the way it should, even if you’re on a basic laptop or tablet.
🌍 Access anywhere.
On the go? No problem. I’ve spun up Vagon sessions from hotel Wi-Fi, cafés, airports. As long as your internet connection is decent, you’re in business.
⚡ Flexible and scalable.
Need more power for a heavy build? Just scale up. Done for the day? Shut it down and stop paying. No long-term commitment.
🖥 Browser-based.
No installs. No weird client software. You’re working through your browser, which means less friction and no bloat on your machine.
If your machine can’t handle Unreal locally, stop stressing over every last optimization tweak. Vagon lets you focus on building and creating, not fighting with hardware. I’ve used it when traveling or demoing projects, and it’s been a game-changer.
Honestly, once you try working this way, it’s hard to go back. Sign up and try now for your project.
Final Thoughts
Trying to run Unreal Engine on a low-end machine feels like trying to climb a mountain in flip-flops. You can throw every optimization trick in the book at it, scale down the quality, bake your lighting, simplify your materials, and sure, you might get it limping along well enough to prototype or test some ideas.
But at a certain point, it stops being fun and starts being a battle against your own hardware. And honestly? That’s energy better spent building, creating, and experimenting.
That’s why I think solutions like Vagon Cloud Computer make so much sense. You stop worrying about what your local machine can handle and just... work. Wherever you are. On whatever device you have.
So if your laptop’s begging for mercy, maybe it’s time to stop fighting it, and start using tools that actually help you focus on what matters: making awesome stuff in Unreal.
Frequently Asked Questions (FAQs)
1. Can I run Unreal Engine on 4GB RAM or integrated graphics?
You can technically run Unreal Engine on 4 GB of RAM and integrated graphics, but you’ll hit serious limitations fast. The engine might open, but it won’t be happy about it. Expect sluggish performance, long load times, and constant slowdowns unless you take drastic steps, like turning every setting down to Low, baking all your lighting, and working with super simple scenes. Even then, it’s going to feel like a struggle unless you’re doing the most basic prototyping.
2. Is Unreal Engine 5 better or worse than Unreal Engine 4 for low-end PCs?
Out of the box, Unreal Engine 5 is heavier because of features like Nanite and Lumen that really want a beefy GPU. But here’s the twist, if you turn off those features and configure UE5 smartly (using mobile preview, forward shading, baked lighting), UE5.2 and newer can actually perform as well or better than UE4. This is thanks to improvements in shader compilation, caching, and general editor responsiveness.
3. What Unreal Engine settings should I lower first for better performance?
If you want the biggest bang for your buck on a low-end machine, start by setting all your Engine Scalability Settings to Low or Medium. Switch from deferred shading to forward shading in your project settings, that alone can give a noticeable boost. Bake your lighting instead of relying on real-time shadows, simplify your materials (keep them basic, with as few nodes as possible), and combine textures into atlases to reduce memory use.
4. What console commands help Unreal Engine run better on weak hardware?
A few quick console commands can work wonders when you’re struggling with editor lag. Try r.ScreenPercentage 50 to render the viewport at half resolution, r.MotionBlurQuality 0 and r.BloomQuality 0 to kill expensive effects, r.AmbientOcclusionLevels 0 to drop AO, and even t.maxfps 15 if you’re just working in the editor and want to save power. These tweaks can take you from barely usable to at least functional.
5. Should I use an older version of Unreal Engine for low-end computers?
Not always. While UE4 generally runs lighter by default, UE5.2 and newer versions include optimizations that actually make the editor feel snappier, especially after you disable high-end features like Nanite and Lumen. If you’re on extremely weak hardware, UE4 might feel a bit smoother at first. But don’t write off UE5 without trying a properly stripped-down setup.
6. How can I figure out the hardware requirements for my Unreal Engine game?
A smart way to estimate requirements is to start with a minimal scene and profile it on your target hardware, say, a system with integrated graphics and 8 GB of RAM. Use Unreal’s built-in profiler to watch polycounts, draw calls, texture memory, and frame timings. Slowly add complexity and see where performance starts to tank. That gives you a realistic baseline for what your game can demand.
7. What Unreal Engine features actually help performance on low-end devices?
Forward Shading is one of the biggest unsung heroes, it cuts down rendering overhead dramatically compared to deferred shading. The mobile renderer preview can also give you a boost, since it disables a lot of desktop-focused effects. Combine those with baked lighting and simplified materials, and you’ll be surprised how far Unreal can go on modest hardware.
Get Beyond Your Computer Performance
Run applications on your cloud computer with the latest generation hardware. No more crashes or lags.

Trial includes 1 hour usage + 7 days of storage.
Summarize with AI

Ready to focus on your creativity?
Vagon gives you the ability to create & render projects, collaborate, and stream applications with the power of the best hardware.

Vagon Blog


Run heavy applications on any device with
your personal computer on the cloud.
San Francisco, California
Solutions
Vagon Teams
Vagon Streams
Use Cases
Resources
Vagon Blog
How to Run Inkscape on a Cloud Ubuntu Desktop (2026 Guide)
How to Run Krita on a Cloud Ubuntu Desktop for Digital Painting (2026 Guide)
How to Run GIMP on a Cloud Ubuntu Desktop (2026 Guide)
How to Run Jupyter on a Cloud GPU Linux Desktop (2026 Guide)
Vagon vs GitHub Codespaces: Cloud Dev Environments Compared (2026)
Vagon vs RunPod: Which Cloud GPU Is Right for You? (2026 Comparison)
How to Watch Your AI Agent Work on a Cloud Ubuntu Desktop (2026 Guide)
How to Run a Local LLM on Ubuntu in the Cloud (2026 Guide)
How to Run Blender on a Cloud GPU (Ubuntu): The Complete 2026 Guide
Vagon Blog
Run heavy applications on any device with
your personal computer on the cloud.
San Francisco, California
Solutions
Vagon Teams
Vagon Streams
Use Cases
Resources
Vagon Blog