A Beginner's Complete Guide to Rhino 3D

A Beginner's Complete Guide to Rhino 3D

A Beginner's Complete Guide to Rhino 3D

#Architecture

#Architecture

#Architecture

Marketing & Growth

Published on December 2, 2024

Published on December 2, 2024

Published on December 2, 2024

Table of Contents

Are you curious about the design software that powers some of the most stunning architectural marvels, intricate jewelry, and groundbreaking product prototypes? 

Welcome to the world of Rhino 3D, a tool beloved by designers, architects, and engineers alike for its unmatched precision and versatility. Whether you're stepping into 3D modeling for the first time or seeking a tool to refine your creative process, Rhino 3D is a name you'll want to know. 

In this guide, we'll explore the story behind Rhino, its unique capabilities, and why it’s a favorite across diverse industries. Let’s dive into the details that make Rhino 3D a true game-changer in the design world.

What is Rhino 3D?

Rhino 3D, often referred to simply as Rhino, is a powerhouse software in the realm of 3D computer graphics and computer-aided design (CAD). Unlike traditional polygon-based modeling tools, Rhino is built on Non-Uniform Rational B-Splines (NURBS), a mathematical system that allows for the creation of highly precise curves and surfaces. This unique foundation makes Rhino an indispensable tool for industries requiring detailed and complex modeling, from architecture to automotive design.

Developed by Robert McNeel & Associates, Rhino was initially conceived in the early 1990s to serve marine designers, helping them create accurate models for fabrication in shipyards. Over time, its capabilities evolved far beyond its original purpose. Today, Rhino is celebrated for its adaptability, catering to a vast array of creative and technical fields while maintaining its user-friendly interface and powerful features.

Why is Rhino 3D So Popular?

Rhino 3D’s widespread appeal stems from its ability to cater to a variety of needs with precision and ease. Here are some of the features that make it stand out:

  • Precision and Flexibility: Rhino excels at creating accurate representations of complex curves, surfaces, and solids, making it a go-to for designs requiring intricate details or mathematical accuracy. Whether you're crafting the hull of a boat or designing a custom engagement ring, Rhino offers unparalleled control.

  • Industry Versatility: Rhino is used in a wide range of industries, including architecture, jewelry design, product development, automotive design, and even marine engineering. Its flexibility allows professionals to experiment with everything from organic shapes to mechanical components.

what is rhino 3d
  • Interoperability: Collaboration is seamless with Rhino. The software supports over 30 file formats for importing and exporting, enabling users to integrate their work into other CAD platforms without hassle.

  • Customization: With an extensive library of plugins and an open software development kit (SDK), Rhino allows users to tailor the software to their specific needs. This extensibility has given rise to powerful add-ons like Grasshopper, a visual programming tool used for parametric design.

  • User-Friendly Design: While Rhino is powerful, its intuitive interface makes it approachable for both beginners and seasoned professionals. Unlike some CAD tools that feel overwhelming, Rhino strikes a balance between advanced functionality and ease of use.

Key Industries and Applications

Rhino’s broad utility makes it an indispensable tool across many fields:

  • Architecture: Architects use Rhino for everything from conceptual sketches to detailed models. Its integration with Building Information Modeling (BIM) platforms makes it a favorite for streamlining workflows.

  • Jewelry Design: With its precision and detail, Rhino is a go-to for jewelers looking to create custom pieces or prototypes ready for 3D printing.

  • Product Design: Whether it’s a sleek electronic gadget or ergonomic furniture, Rhino helps designers refine their ideas with precision and speed.

  • Automotive and Marine Design: Designers rely on Rhino to craft smooth, aerodynamic surfaces for cars, boats, and other vehicles. Its tools make it easy to balance aesthetics with functionality.

Rhino 3D stands out as a dynamic and versatile tool for creators across industries. Whether you're designing a skyscraper, a piece of fine jewelry, or an innovative consumer product, Rhino provides the precision and flexibility you need to bring your ideas to life. In the next sections, we’ll delve even deeper into how Rhino works and how you can harness its features for your projects.

Chapter 1: Getting Started with Rhino 3D

Diving into Rhino 3D is a thrilling step toward mastering one of the most versatile 3D modeling tools available. To set yourself up for success, you need to ensure your hardware and software are ready, get acquainted with the user interface, and learn some basic commands. Here’s a detailed guide to help you start strong.

System Requirements and Installation

Rhino 3D is a robust application, but its performance depends significantly on your hardware. Ensuring your computer meets or exceeds the recommended specifications is crucial for a seamless modeling experience.

Minimum System Requirements

  • Operating System: Windows 10 or later, macOS 11 (Big Sur) or later

  • Processor: 64-bit Intel or AMD processor (ARM processors are not supported)

  • RAM: 8 GB

  • Graphics: OpenGL 4.1 capable video card with 4 GB of VRAM

  • Disk Space: 5 GB of free disk space for installation

  • Input Devices: Multi-button mouse with a scroll wheel

  • Internet Connection: Required for license validation and updates

Recommended System Requirements

For optimal performance, especially with complex models and high-resolution rendering, consider these specifications:

  • Processor: Multi-core processor with high clock speed (Intel i7/i9, AMD Ryzen 7/9)

  • RAM: 16 GB or more

  • Graphics: Dedicated GPU (NVIDIA GeForce RTX series or AMD Radeon Pro series) with 8 GB VRAM or higher

  • Storage: SSD for faster file access and application load times

  • Monitor: High-resolution display with a color-calibrated screen for precise visuals

For those looking to optimize performance or seeking specific hardware advice, explore Best Computers for Rhino 3D. This guide provides insights into setups designed for smooth modeling and rendering.

Installation Process

Installing Rhino 3D is simple and straightforward. Here’s a step-by-step guide:

rhino 3d modelling
  • Step 1: Download the Installer Visit the official Rhino 3D website and download the installer for your operating system. Ensure you select the correct version for Windows or macOS.

  • Step 2: Run the Installer For Windows:

    • Launch the installer and follow the on-screen prompts.

    • Choose between "Complete" (all features) or "Custom" (select specific components) installation.

  • For Mac:

    • Drag the Rhino application icon into the Applications folder.

  • Step 3: Accept the License Agreement Read and accept the license agreement to proceed with the installation.

  • Step 4: License Validation When you first open Rhino, you’ll be prompted to validate your license:

    • Enter your license key manually.

    • Alternatively, sign in to your Rhino account to activate an online license.

  • Step 5: Update and Customize After installation, allow Rhino to check for updates. You can also begin customizing the interface to suit your workflow preferences.

A stable internet connection is recommended during the installation process to ensure successful license validation and access to updates.

Understanding the Interface

Rhino’s user interface is designed to be approachable for beginners while offering the depth needed for advanced users. Knowing where to find key tools and how to navigate the workspace is essential.

Overview of the User Interface

  • Menu Bar: Located at the top, the menu bar provides access to all commands and features, organized into logical categories.

  • Toolbar: Positioned below the menu bar, it contains icons for commonly used tools. Toolbars can be customized for quick access to your favorite commands.

  • Command Line: Found at the top or bottom of the workspace, this is where you can input commands directly. It also displays prompts and options for active commands.

  • Properties Panel: Typically docked on the right, this panel displays details about selected objects, such as material, dimensions, and transformations.

  • Layers Panel: Used for organizing your model into layers, enabling you to manage visibility and apply different attributes to objects efficiently.

  • Viewports: Rhino provides multiple viewports (Top, Front, Right, and Perspective) to visualize your model from various angles.

rhino 3d interface

Navigating the 3D Viewport

  • Pan: Hold the right mouse button while dragging to move the view horizontally or vertically.

  • Zoom: Scroll the mouse wheel forward or backward to zoom in or out.

  • Rotate View: Hold the right mouse button and move the mouse in the Perspective viewport to orbit around the model.

  • Reset View: Use the Zoom Extents command to fit your model into the viewport.

These controls make it easy to explore and manipulate your models from any angle, helping you stay precise and creative.

Keyboard Shortcuts in Rhino 3D

Keyboard shortcuts in Rhino 3D are designed to enhance your workflow by making frequently used commands and operations quicker and easier to access. They span across various categories, including navigation, object manipulation, modeling commands, and viewport control, giving you flexibility and speed as you work. Here’s a glimpse into how shortcuts can streamline your experience:

General Shortcuts

These help you manage your workspace efficiently:

  • Ctrl + Z: Undo the last action.

  • Ctrl + Y: Redo the last undone action.

  • Ctrl + S: Save your project.

Modeling Shortcuts

Essential for creating and editing designs:

  • L: Activate the Line command for drawing straight lines.

  • C: Open the Circle command to create circles with ease.

  • M: Move objects within your model.

Viewport Navigation

Navigate through your workspace seamlessly:

  • Shift + Right Mouse Button: Pan the view.

  • Mouse Wheel Scroll: Zoom in or out of the model.

Customizing Shortcuts

rhino 3d keyboard shortcuts

One of Rhino's great features is the ability to create custom shortcuts to suit your workflow. By going to Tools > Options > Keyboard (Windows) or Rhinoceros > Preferences (Mac), you can tailor commands to specific key combinations for even faster access.

Keyboard shortcuts exist for virtually every task in Rhino 3D, from snapping to grids and toggling display modes to managing viewports and object attributes. As you become more familiar with the software, adding shortcuts to your toolkit will save you time and make your workflow smoother. For a deeper dive into shortcuts that can revolutionize your Rhino experience, explore Rhino 3D Keyboard Shortcuts.

Chapter 2: Core Concepts in Rhino 3D

Understanding the core concepts of Rhino 3D is the key to unlocking its potential. These foundational principles allow you to create detailed, precise, and beautiful models. In this chapter, we’ll explain NURBS geometry, the relationship between curves, surfaces, and solids, and the importance of layers for organizing your projects. Whether you’re new to 3D modeling or transitioning from another software, this guide will set you on the right path.

Understanding NURBS Geometry

NURBS, which stands for Non-Uniform Rational B-Splines, is the foundation of how Rhino 3D handles geometry. Unlike traditional modeling methods that use polygons to approximate shapes, NURBS is all about smoothness and accuracy. This makes Rhino ideal for industries like architecture, jewelry design, and product development, where precision matters.

Let’s break it down:

  • Control Points: Imagine these as pins that pull and shape the curve. The more points you have, the more control you gain over its shape.

  • Degree: Think of this as the curve’s flexibility. A higher degree results in a smoother, more flowing shape.

  • Knots: These determine how much influence each control point has. It’s like adjusting the tension in a rubber band.

  • Evaluation Rule: This is the math behind the scenes, ensuring the curve remains smooth and accurate.

rhino 3d faster

In simple terms, NURBS gives you the freedom to design organic, free-form shapes with the confidence that they’ll be mathematically precise. For example, if you’re designing a car’s hood, NURBS ensures the curves are smooth and can be easily adjusted if needed.

Introduction to Curves, Surfaces, and Solids

Everything in Rhino starts with curves. These are the backbone of your design, defining the edges and boundaries of your model. From these curves, you can create surfaces, and with surfaces, you can form solids. Let’s look at each:

  • Curves: These are like the skeleton of your design. Curves can be simple (like straight lines or arcs) or complex (like free-form squiggles). For example, if you’re designing a vase, you might start with a single curve that outlines its profile.

  • Surfaces: Once you have curves, you can stretch or connect them to create surfaces. A surface has area but no thickness, like a piece of paper. Surfaces can be combined or trimmed to form complex shapes. In the vase example, you might revolve the curve around an axis to create a smooth surface.

  • Solids: When surfaces are joined together to enclose a space, they become solids. Solids represent real-world objects that can be manufactured or 3D-printed. Closing the vase’s surface turns it into a solid, ready for fabrication.

The process of going from curves to surfaces to solids is intuitive and mirrors how many real-world objects are constructed. Mastering this flow helps you create models that are not only detailed but also structurally sound.

Layers and Organization

As your designs grow more complex, keeping things organized becomes crucial. Rhino uses layers to help you group objects, control their visibility, and make edits more manageable. Think of layers like folders in a filing cabinet—they let you separate different parts of your model for clarity and efficiency.

Here’s how layers work:

  • Layer Management: The Layer Manager is your control panel. You can create new layers, rename them, and assign objects to specific layers. For instance, in a house model, you might have layers for walls, furniture, and electrical components.

  • Visibility Controls: Layers let you turn specific parts of your model on or off. If you want to focus on just the walls in your house model, you can temporarily hide other layers like furniture or decorations.

  • Color Coding: Assigning colors to layers helps you quickly identify different parts of your model. For example, you could use blue for structural elements, red for mechanical systems, and green for furniture.

Using layers not only makes your workflow more organized but also allows you to collaborate more effectively. Team members can work on specific layers without interfering with other parts of the design.

Mastering NURBS geometry, understanding the relationship between curves, surfaces, and solids, and learning how to use layers effectively are essential steps to thriving in Rhino 3D. These fundamentals might feel straightforward, but they are the core of every design you’ll create. With practice, these tools become second nature, opening up endless opportunities to transform your creative visions into reality. Every model you build starts with these basics, and as you grow more confident, you’ll find yourself creating intricate and professional designs effortlessly.

Chapter 3: Essential Tools and Features

Mastering Rhino 3D's essential tools and features is crucial for creating precise and intricate designs. This chapter explores the fundamental aspects of drawing and editing curves, creating and modifying surfaces, solid modeling, and applying transformations and editing techniques.

Drawing and Editing Curves

Curves are the foundation of most designs in Rhino 3D, serving as the building blocks for more complex geometries. Rhino offers a variety of tools to create different types of curves:

  • Lines and Polylines: Straight segments that can be combined to form polylines.

  • Arcs and Circles: Curved segments defined by center points and radii.

  • Ellipses and Spirals: More complex curves for specialized designs.

Once created, curves can be edited using control points, allowing for precise adjustments to their shape and flow. Commands like PointsOn enable the manipulation of these control points, providing flexibility in refining your design.

Creating and Modifying Surfaces

rhino 3d slow

Surfaces in Rhino are generated from curves and can be manipulated to achieve the desired form. Key methods for creating surfaces include:

  • Lofting: Connecting multiple curves to form a surface that smoothly transitions between them.

  • Sweeping: Dragging a profile curve along one or more path curves to create a surface.

  • Revolving: Rotating a curve around an axis to produce a symmetrical surface.

After creation, surfaces can be edited by adjusting their control points or using commands like Trim and Extend to modify their boundaries. Understanding the underlying structure of surfaces, such as isocurves and control point grids, is essential for effective editing.

Solid Modeling

Solid modeling involves creating three-dimensional objects that have volume and can represent real-world items. In Rhino, solids are often constructed by combining surfaces or using solid primitives like boxes, spheres, and cylinders. Key techniques include:

  • Boolean Operations: Combining or subtracting solids to form complex shapes using commands like BooleanUnion, BooleanDifference, and BooleanIntersection.

  • Filleting and Chamfering: Rounding or beveling edges to refine the solid's appearance and functionality.

Solid modeling is integral for designs intended for manufacturing, as it ensures the model is watertight and accurately represents the physical object.

Transformations and Editing

Transformations allow for the manipulation of objects' position, scale, and orientation within the modeling space. Common transformation commands include:

  • Move: Shifts objects from one location to another.

  • Rotate: Turns objects around a specified axis.

  • Scale: Resizes objects proportionally or non-uniformly.

  • Mirror: Creates a flipped copy of objects across a defined plane.

Editing tools such as Trim, Extend, and Split enable precise modifications to objects, allowing for the refinement of designs to meet specific requirements.

By mastering these essential tools and features, you establish a strong foundation in Rhino 3D, empowering you to create detailed and accurate models with confidence.

Chapter 4: Advanced Modeling Techniques

As you progress in Rhino 3D, diving into advanced modeling techniques opens up a world of creative possibilities. These methods allow you to craft intricate, organic forms, dynamic parametric models, and detailed mesh geometries. In this chapter, we’ll explore three powerful techniques: Subdivision Modeling, Parametric Design with Grasshopper, and Working with Meshes. Each offers unique advantages that can elevate your design work to the next level.

Subdivision Modeling

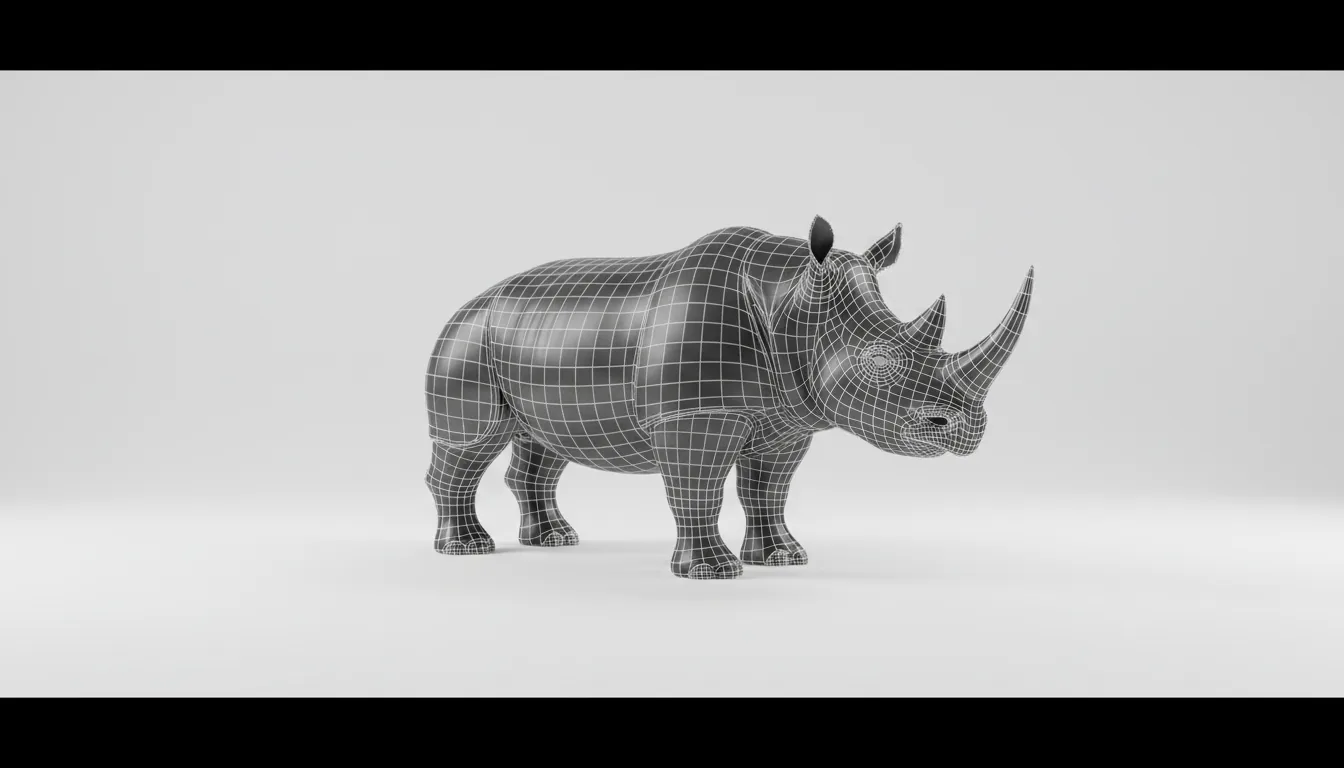
Subdivision modeling is a method used to create smooth, organic shapes by refining a basic polygonal structure. This technique is particularly useful for designs that demand fluid, natural forms, such as character modeling, furniture design, or sculptural elements. With the introduction of SubD (Subdivision Surfaces) in Rhino 7, this process has become more intuitive and flexible.

The key to subdivision modeling lies in its workflow:

  • Start with a Control Mesh: This is your base structure, made up of simple polygons like squares or triangles. Think of it as the skeleton of your design.

  • Refine through Subdivision Levels: Each level adds detail and smoothness, transforming the blocky control mesh into a refined, polished shape.

  • Creases and Corners: You can define specific edges or points to remain sharp, preserving important details like ridges or corners.

Subdivision modeling is ideal for projects that require both creativity and precision. You can quickly iterate on shapes while maintaining the flexibility to adjust details at any stage.

Parametric Design with Grasshopper

Grasshopper, Rhino’s built-in visual programming tool, takes design to a whole new level by enabling parametric and algorithmic modeling. Instead of manually adjusting every element of your model, Grasshopper lets you create rules and relationships between components. This means you can tweak parameters and see real-time changes in your design.

rhino 3d render faster

Grasshopper’s standout features include:

  • Visual Interface: You don’t need to know coding. Instead, you work with a drag-and-drop system, connecting components like a flowchart to build your model.

  • Dynamic Adjustments: Change a single parameter—like the height of a building or the radius of a curve—and the entire design updates instantly.

  • Extensive Plugins: Grasshopper’s functionality can be expanded with plugins like Kangaroo for physics simulations or Ladybug for environmental analysis.

Grasshopper is particularly popular in architecture and industrial design, where adaptability and efficiency are crucial. It allows you to explore multiple design options quickly, optimize performance, and create complex patterns or structures that would be difficult to achieve manually.

Working with Meshes

Meshes, made up of vertices, edges, and faces, are a fundamental part of 3D design, especially in tasks like 3D printing, rendering, and simulation. While Rhino is primarily a NURBS-based software, it offers robust tools for working with meshes, ensuring your designs are ready for real-world applications.

Here’s what you need to know about meshes in Rhino:

  • Creating Meshes: You can generate meshes from existing NURBS surfaces or import them from other software. Rhino provides control over the density and quality of the mesh, allowing you to balance detail and performance.

  • Editing Meshes: Rhino includes tools to refine and modify meshes, such as smoothing, repairing, and splitting. These are essential for cleaning up imported models or preparing designs for manufacturing.

  • Subdivision and Smoothing: By applying subdivision techniques like Catmull–Clark, you can transform rough meshes into smoother, more detailed versions, making them suitable for rendering or presentation.

Working with meshes bridges the gap between conceptual modeling and practical applications. Whether you’re preparing a 3D print or creating assets for visualization, mastering mesh tools ensures your designs meet the highest standards. You can check out our curation of best assets for Rhino 3D, for better understanding.

Incorporating these advanced techniques into your process opens the door to exciting creative and technical possibilities in Rhino 3D. With subdivision modeling, you can craft smooth, flowing forms that feel organic and natural. Grasshopper introduces the power of parametric design, giving you the flexibility to experiment and adapt your models with ease. Meanwhile, working with meshes ensures your designs are ready for practical applications, from 3D printing to rendering. As you continue to explore and practice, these methods will become essential tools that enhance both your creativity and efficiency.

Chapter 5: Rendering and Visualization

Rendering and visualization are the magic that brings your Rhino 3D models to life. They transform technical designs into realistic images that showcase texture, lighting, and mood, allowing your audience to connect with the final concept. Whether you’re creating a pitch for a client or refining your own creative vision, a well-rendered image can make all the difference. In this chapter, we’ll explore how to set up an effective rendering workflow, use Rhino’s built-in tools, integrate advanced third-party renderers, and craft presentation outputs that tell a story.

Rendering in Rhino

Rendering is like putting the final strokes on a painting. While the model itself provides the structure, rendering adds the color, light, and shadow that bring it to life. In Rhino, this process is tightly integrated into the design workflow, making it accessible for beginners and versatile enough for professionals. By adjusting materials, lighting, and environments, you can transform a simple wireframe into a scene that feels tangible and realistic.

One of the advantages of rendering in Rhino is its real-time visual feedback. Just as an artist adjusts brushstrokes while stepping back to examine the canvas, you can tweak settings and see the impact immediately. This iterative process ensures your renders evolve alongside your creative intentions.

Setting Up a Rendering Workflow

Think of rendering as preparing for a photoshoot. Before taking a photo, a photographer adjusts the lighting, chooses the background, and selects the best angles. Similarly, rendering requires thoughtful preparation to ensure the final image captures your design in the best possible light.

Start by organizing your model. Grouping objects logically and assigning them to layers is like organizing props for a set—it makes everything easier to manage. Once your model is tidy, it’s time to assign materials. Materials are the clothes your model wears, defining its texture, color, and reflectivity. For example, a glossy white surface will reflect light differently from matte wood, dramatically altering the final render’s feel.

rhino 3d better performance

Lighting is another critical component. Without good lighting, even the best materials will fall flat. Rhino offers tools like directional lights, which simulate sunlight, and point lights, similar to spotlights in photography. Experimenting with these is much like setting up studio lights for a portrait—you want to highlight key areas while creating depth and contrast.

Finally, adjust the environment. Just as a photographer chooses a background to complement their subject, you can define the ground plane, background, and reflections to enhance your render. For example, a reflective floor can add a sleek, professional look, while a warm gradient background creates an inviting atmosphere.

Basic Rendering with Rhino Render

Rhino Render is the native rendering engine that comes built into the software. Think of it as the automatic mode on a DSLR camera—it’s easy to use but still produces great results. Powered by the Cycles rendering engine, Rhino Render balances speed and quality, making it ideal for quick visualization and iterative workflows.

To begin, you’ll prepare your scene by assigning materials, positioning lights, and framing the model with the camera tool. Once everything is set, clicking the render button generates the image, applying all the settings you’ve defined. If you’re short on time, you can optimize render settings by lowering sample counts or using the built-in denoising feature, which smooths out any grainy artifacts without compromising too much detail. For more tips on boosting rendering performance, check out How to Render Faster on Rhinoceros.

Rhino Render’s real-time preview is especially useful for fine-tuning your setup. Adjustments to material glossiness or light intensity appear instantly, much like adjusting the aperture or ISO on a camera and seeing the result through the viewfinder.

Integrating with Third-Party Renderers

While Rhino Render is powerful, certain projects may demand the advanced features of third-party renderers like V-Ray, KeyShot, or Maxwell Render. These tools are like swapping your camera lens for a specialized one—they add functionality tailored to specific needs.

For example, V-Ray excels at creating photorealistic lighting effects, handling global illumination and reflections with incredible accuracy. KeyShot, known for its simplicity, is perfect for product designers who need fast, high-quality visuals without diving deep into technical details. Maxwell Render focuses on physical accuracy, making it ideal for architectural visualizations that require precise light and material behavior.

Integrating these tools into Rhino is straightforward. After installing the renderer’s plugin, its features become accessible directly within Rhino’s interface. This means you can assign materials, set up lighting, and tweak advanced settings without leaving your Rhino workspace. These renderers provide unparalleled control, allowing you to create visuals that rival professional photography.

Creating Presentation Outputs

A render is more than just a pretty picture—it’s a storytelling tool. Once your render is complete, the next step is to craft presentation outputs that clearly convey your design intent. This is where post-processing comes in, much like editing photos in Photoshop after a shoot. You can adjust brightness, contrast, and color balance to enhance the image’s impact. Subtle edits, like increasing the vibrancy of a material or softening harsh shadows, can take your render to the next level.

In addition, compositing can add depth to your presentations. By combining different render passes—like shadows, reflections, and ambient occlusion—you can achieve a layered look that feels rich and dynamic. Think of it as assembling a puzzle where each piece adds another dimension to the story.

When presenting to clients or stakeholders, consider the overall layout of your outputs. Including annotations, dimensions, or even exploded views alongside your renders helps communicate your design in a way that’s both visually appealing and easy to understand. It’s like designing a magazine spread—every element should work together to draw the viewer in and highlight key details.

Chapter 6: File Management and Collaboration

Managing files and collaborating effectively in Rhino 3D is like being the conductor of a complex orchestra. Every component needs to work in harmony, whether you're transferring files between programs or handling massive projects with numerous moving parts. This chapter dives into how to seamlessly import and export files and strategies for managing large projects efficiently.

Importing and Exporting Files

Rhino’s ability to handle a wide variety of file formats makes it a bridge between different design tools. Whether you're receiving a concept from AutoCAD or exporting a model for 3D printing, understanding how to transfer files correctly ensures your work remains accurate and intact.

  • Mind the Scale: Always check the unit settings before importing files. Imagine importing a blueprint of a house and finding it’s the size of a dollhouse—avoiding this requires aligning units between the source file and your Rhino project. Adjust units in Rhino’s settings to match the incoming file for consistency.

  • Simplify Before You Import: Clean up files before importing them into Rhino. Extra layers, duplicate objects, or unnecessary annotations can clutter your workspace, much like bringing too much baggage on a trip.

  • Match the Format to the Purpose: When exporting, choose the right file type for the job. For example, STL files are perfect for 3D printing, while DWG is best for sharing with AutoCAD users. Each format has its own quirks—learn what they are to avoid surprises.

  • Optimize for Performance: If you're exporting a model for rendering or simulation, ensure normals face outward and all surfaces are watertight. It’s like proofreading your essay before submission—you’ll catch small errors that could cause big problems later.

Pro Tip: Use Rhino’s preview tools while exporting. These show how your settings affect the output, helping you avoid issues before they reach the next software.

Managing Large Projects

Handling complex projects in Rhino requires more than just technical skills—it’s about organization and foresight. Think of it as managing a big event: planning, delegation, and attention to detail are key.

  • Divide and Conquer: Use Rhino’s 'Worksession' feature to split large projects into manageable chunks. For example, in a building design, keep the façade, interiors, and landscape in separate files and link them into one session. This way, team members can work on their parts without stepping on each other’s toes.

  • Master the Art of Layers: Layers in Rhino are like color-coded folders in a filing cabinet. Assign objects to specific layers based on their function or material. Need to focus on just the steel structure? Turn off all other layers and dive in without distractions.

  • Declutter Regularly: Over time, large projects accumulate unused blocks, layers, and geometry. Use the 'Purge' command to clean house. It’s like spring cleaning—getting rid of what you don’t need keeps your workspace tidy and efficient.

  • Keep It Light: For large, detailed models, simplify display settings by switching to 'Wireframe' mode or reducing render mesh density in Document Properties. This is like turning off unnecessary apps on your phone to save battery—it speeds up performance and reduces crashes.

  • Document Your Work: Add annotations and notes to your model. This is especially important for collaboration, as it’s like leaving sticky notes for your team so they understand your thought process.

Pro Tip: Save incremental versions of your file. If something goes wrong, you can go back in time and recover earlier stages of your project without losing progress.

Using Rhino 3D on Cloud Computer

Using Rhino 3D on a cloud computer can revolutionize the way you approach design and modeling. Whether you're working on a low-spec device or tackling resource-intensive projects, cloud computing provides a powerful and efficient solution. Vagon offers tailored cloud solutions for professionals and creatives who want to supercharge their workflow with high-performance GPUs and CPUs.

With Vagon, you can seamlessly run Rhino 3D on a virtual high-end machine, allowing you to handle complex geometries, intricate designs, and heavy rendering tasks without the limitations of local hardware. Say goodbye to lag and crashes, and hello to smooth, uninterrupted performance. Our guide on running Rhino 3D on a Cloud Computer will help you set up your Rhino workspace in just a few steps, unlocking the full potential of your projects.

Empower your creativity with Vagon and focus on what you do best—creating.

Chapter 7: Troubleshooting and Best Practices

Navigating Rhino 3D can be both rewarding and challenging, especially for newcomers. Understanding common pitfalls, optimizing your workflow, and addressing technical challenges early on can significantly improve your modeling experience. This chapter explores common beginner mistakes, strategies for optimization, and solutions to frequent technical issues like software crashes.

Common Beginner Mistakes

Starting with Rhino 3D often feels like learning a new language; it’s easy to make errors that can hinder progress. A frequent issue is neglecting proper model organization. Without a structured approach, your workspace can become cluttered, making navigation and editing cumbersome. It’s akin to working at a disorganized desk, where finding the right tool becomes a task in itself.

rhino 3d crash fix

Another common mistake is overlooking the importance of mastering basic commands and navigation tools. Jumping straight into complex modeling without a solid grasp of the fundamentals can lead to frustration. It’s like trying to write a novel without understanding grammar—the lack of foundational knowledge can impede effective communication of ideas.

Optimizing Your Workflow

Efficiency in Rhino 3D stems from thoughtful organization and customization. Utilizing layers strategically allows you to categorize and control different elements of your model, much like organizing files into clearly labeled folders. This practice enhances clarity and simplifies the modeling process.

Customizing toolbars and creating keyboard shortcuts for frequently used commands can significantly speed up your workflow. This is similar to arranging your workspace so that essential tools are within easy reach, reducing the time spent searching for them.

Regularly saving incremental versions of your work is a crucial habit. It ensures that you have access to previous stages of your project, allowing you to revert to earlier versions if necessary, much like having a series of backup drafts in writing.

Common Rhino 3D Crashes

Even with the best practices in place, technical challenges like software crashes can occur, disrupting your workflow. Here are some of the most common crashes in Rhino 3D and how to resolve them:

  • Crash During Startup
    This often results from incompatible plugins or outdated drivers. To fix this, disable third-party plugins by starting Rhino in safe mode and updating your GPU drivers. Ensuring your operating system and Rhino version are compatible is also essential.

  • Crash During File Import/Export
    Large or complex files can overwhelm the system, leading to crashes. Simplify imported files by reducing unnecessary layers or geometry before bringing them into Rhino. For exporting, ensure you’re using the correct file format and adjust settings, such as mesh density, to reduce the computational load.

  • Crash While Rendering
    Rendering crashes are typically caused by insufficient system resources or high-resolution settings. Lower the render quality or resolution temporarily and check if your GPU drivers are updated. For long rendering tasks, consider using cloud-based rendering services to offload the heavy lifting.

  • Unresponsive Software with Large Models
    Working with large models can strain your hardware, causing Rhino to become unresponsive. To mitigate this, adjust display settings to "Wireframe" mode or lower the render mesh density. Using Rhino’s "Purge" command to clean up unused elements like layers or blocks can also improve performance.

By identifying the root cause of crashes and applying these solutions, you can maintain a smoother and more reliable workflow. For those seeking a comprehensive guide to troubleshooting technical issues, refer to the article Common Rhino 3D Crashes and How to Fix Them, which outlines practical solutions for common problems.

Resources for Learning More

Continuous learning is vital to mastering Rhino 3D. Engaging with tutorials, online courses, and community forums can provide valuable insights and techniques. These resources offer opportunities to learn from experienced users, much like apprenticeships provide hands-on learning from seasoned professionals.

For those starting their journey, the "Rhino 3D for Beginners" course on Udemy offers a concise introduction to the software's interface and basic modeling tools, making it ideal for absolute beginners.

Alternatively, Domestika's "Introduction to Rhinoceros 3D" provides a more in-depth exploration, covering 2D elements, 3D modeling, and rendering techniques, suitable for those seeking a comprehensive foundation.

You can check out some of the best courses for Rhino 3D by visiting our guide.

Chapter 8: Applications and Industry Use Cases 

Rhino 3D's versatility has made it a cornerstone in various industries, enabling professionals to bring intricate designs to life with precision and creativity. This chapter explores how Rhino is applied across different sectors, highlighting its capabilities and providing practical insights for each field.

Architecture

rhino 3d for architecture

In architecture, Rhino serves as a powerful tool for concept modeling and presentation. Its ability to handle complex geometries allows architects to explore innovative forms and structures that traditional CAD software may struggle with. For instance, Rhino's freeform modeling capabilities enable the creation of unique, organic shapes, facilitating the design of avant-garde buildings.

Integration with Building Information Modeling (BIM) workflows is also streamlined through Rhino's compatibility with various file formats and its support for plugins like VisualARQ. This integration ensures that conceptual designs can transition smoothly into detailed, data-rich models required for construction documentation.

Practical Tip: Utilize Rhino's Grasshopper plugin to develop parametric models, allowing for quick iterations and optimization of architectural designs. This approach enables architects to adapt to changing project requirements efficiently.

Jewelry Design

Jewelry designers leverage Rhino for precision modeling of small-scale objects. The software's NURBS-based modeling ensures that intricate details are captured accurately, which is crucial for creating pieces that are both aesthetically pleasing and manufacturable. Designers can craft complex patterns and forms, pushing the boundaries of traditional jewelry design.

Rhino also facilitates the creation of 3D printable designs, allowing for rapid prototyping and production. By exporting models in formats compatible with 3D printers, designers can produce physical prototypes to assess form, fit, and function before final production.

Practical Tip: When preparing models for 3D printing, ensure that all surfaces are joined into a watertight solid to prevent printing errors. Rhino's 'Show Edges' tool can help identify and fix naked edges that may cause issues during printing.

Product Design

In product design, Rhino excels in prototyping and manufacturing processes. Its precise modeling tools allow designers to develop detailed prototypes that can be tested and refined before mass production. This iterative process helps in identifying potential design flaws early, saving time and resources.

The software's capabilities in surface design are particularly beneficial for consumer products, where aesthetics play a significant role. Designers can create smooth, complex surfaces that enhance the visual appeal and ergonomics of products, from household items to electronics.

Practical Tip: Leverage Rhino's 'Match Surface' command to ensure continuity between adjacent surfaces, resulting in smoother transitions and a more polished final product.

Automotive and Marine Design

rhino 3d automative

Rhino's proficiency in handling streamlined surfaces makes it ideal for automotive and marine design. Designers can model the sleek, aerodynamic forms required in vehicle design, optimizing for both performance and aesthetics. The software's precision ensures that these designs meet stringent industry standards.

Working with complex forms is simplified through Rhino's robust toolset, allowing for the creation and manipulation of intricate geometries. This capability is essential in designing components that integrate seamlessly within the overall vehicle structure.

Practical Tip: Use Rhino's 'Analyze' tools to assess curvature and surface quality, ensuring that designs meet aerodynamic and hydrodynamic requirements.

Chapter 9: Plugins and Extensions

Rhino 3D is a powerhouse on its own, but its true strength lies in its flexibility. By incorporating plugins and extensions, you can turn Rhino into a tailored solution for your specific needs, whether you're an architect, product designer, or jewelry artist. In this chapter, we’ll explore some of the most popular plugins, how to customize workflows with scripts, and the importance of keeping your tools up to date.

Popular Plugins for Rhino

Think of plugins as extra tools in your toolbox—they enhance Rhino’s capabilities and make specialized tasks much easier. A few standout plugins are practically must-haves for professionals:

  • Grasshopper: This isn’t just a plugin; it’s a game-changer. Grasshopper brings parametric design to Rhino, letting you create complex forms through a visual, node-based interface. It’s like having a digital lab for experimenting with design ideas. Architects and designers love it for its flexibility and power.

  • PanelingTools: If your project involves patterns or repetitive structures, PanelingTools is your friend. It helps you create both 2D and 3D panel layouts, making it ideal for anything from façade designs to intricate surface textures.

  • VisualARQ: This plugin is a lifeline for architects. It adds BIM (Building Information Modeling) features to Rhino, letting you create parametric walls, doors, windows, and more. It’s a bridge between Rhino’s freeform modeling and the structured world of construction documentation.

Other plugins like V-Ray for Rhino, which is renowned for its photorealistic rendering, and RhinoCAM, perfect for CNC machining, can take your designs to the next level. For a detailed list of must-have plugins, check out Essential Rhino 3D Plugins to Boost Your Designs.

Adding Functionality with Third-Party Extensions

Rhino’s versatility doesn’t stop with built-in plugins. Third-party extensions allow you to fine-tune Rhino for your specific needs. These range from niche tools for specialized industries to general enhancements that improve workflows. Many of these extensions are available through Rhino’s Package Manager, making them easy to find and install. Before adding any extension, take a moment to consider how it fits into your workflow and whether it aligns with your project’s demands.

Customizing Rhino with Scripts

For those who love diving deeper, scripting offers a way to make Rhino truly your own. Whether you want to automate repetitive tasks or develop custom tools, Rhino’s scripting capabilities are a treasure trove.

  • RhinoScript: This is a great starting point. It’s a VBScript-based language that’s ideal for beginners who want to automate straightforward tasks like batch file processing or object transformations.

  • Python: If you’re looking for more flexibility, Python is your go-to. It’s widely used, easy to learn, and capable of handling more complex operations. With Python, you can even integrate Rhino with other software or tools in your workflow.

Scripting is like learning a new skill—you start with the basics and gradually build confidence. Begin by automating small tasks, like renaming layers or adjusting object properties, and work your way up to creating custom modeling tools. Rhino’s documentation and community forums are fantastic resources for learning.

Future-Proofing with Updates

Keeping Rhino and your plugins up-to-date is like maintaining a well-tuned car. It ensures everything runs smoothly, and you get access to the latest features and improvements. Updates often include bug fixes, performance enhancements, and new tools that can make your work easier and more efficient.

Before updating, make sure to back up your work and check if your critical plugins are compatible with the latest version of Rhino. There’s nothing worse than updating only to find that your favorite plugin isn’t ready yet.

Staying informed about updates doesn’t require much effort—subscribe to Rhino’s newsletter, follow their official channels, or join community forums. This way, you’ll always know what’s new and how it can benefit your projects.

Chapter 10: Rhino 3D and Alternative Software Comparisons

Choosing the right 3D design software is a critical decision—it can shape your workflow, influence creativity, and impact project outcomes. Rhino 3D is a powerful tool renowned for its versatility and precision, but how does it stack up against other industry-leading software? This section breaks down the strengths of Rhino 3D compared to SketchUp, Fusion 360, CATIA, and AutoCAD, helping you determine the best fit for your needs. You can also check out our guide assessing the best alternatives of Rhino 3D.

rhino 3d alternative

Rhino 3D vs. SketchUp

Rhino 3D and SketchUp are both popular, but they serve distinct audiences. Rhino is the go-to choice for intricate designs that demand precision. Its NURBS-based modeling system excels at creating smooth, detailed curves and surfaces, making it ideal for projects in architecture, industrial design, and 3D printing. Rhino is like a sculptor's chisel—perfect for fine, detailed work.

SketchUp, on the other hand, is all about simplicity and speed. Its intuitive interface allows beginners to dive in quickly, making it a favorite for architects and interior designers focused on concept modeling. Think of SketchUp as a pencil sketch: quick, flexible, and perfect for exploring ideas. However, it may struggle with the level of complexity Rhino handles effortlessly.

Rhino 3D vs. Fusion 360

Rhino 3D shines when it comes to freeform design and surface modeling. It’s a top pick for creatives who need flexibility and precision. Its ability to integrate with a wide range of other tools and file formats makes it versatile across industries.

Fusion 360, however, offers an all-in-one solution for CAD, CAM, and CAE (design, manufacturing, and engineering simulation). With its cloud-based setup, Fusion 360 allows teams to collaborate in real-time, making it a strong contender for engineering-focused workflows. If you’re part of a team that designs and tests products collaboratively, Fusion 360 is like a Swiss Army knife—it does everything, but it may not be as specialized as Rhino in freeform design. You can check out our Rhino 3D vs Fusion 360 comparison guide for better understanding.

Rhino 3D vs. CATIA

Rhino 3D is beloved in creative fields like architecture and product design, where flexibility and aesthetic precision are key. Its ability to craft organic, smooth forms makes it indispensable for artistic and innovative projects. 

CATIA, on the other hand, dominates technical industries like aerospace, automotive, and manufacturing. With its parametric design tools and capacity to handle large-scale engineering projects, CATIA is like a precision-engineered machine: robust, reliable, and perfect for large assemblies and simulations. If your work involves heavy-duty engineering with a focus on functionality, CATIA is often the better choice You can check out our Rhino 3D vs CATIA comparison guide for better understanding.

AutoCAD vs. Rhino 3D

AutoCAD has been a staple in the design industry for decades, particularly for 2D drafting and structured, technical work. It’s the go-to tool for creating precise construction documents and flat designs. If your projects involve detailed floor plans or schematics, AutoCAD is like a meticulously organized filing system.

Rhino 3D, however, thrives in the realm of creative 3D modeling. It’s particularly adept at crafting complex shapes and smooth surfaces that are challenging to achieve with other software. For designers sculpting products or creating intricate models, Rhino feels more fluid and intuitive compared to AutoCAD’s rigid structure. You can check out our Rhino 3D vs AutoCAD comparison guide for better understanding.

How to Choose the Right Software

Selecting the right software ultimately depends on what you need to accomplish. Rhino 3D is perfect for designers who value flexibility, creativity, and precision. If your focus is on creating organic, freeform shapes or detailed surface models, Rhino is hard to beat.

If your work revolves around technical drawings and structured designs, AutoCAD is a reliable choice. For collaborative engineering projects that require simulations or manufacturing integration, Fusion 360’s cloud-based features are invaluable. CATIA is a powerhouse for large-scale, technical engineering tasks in industries like aerospace, while SketchUp is ideal for quick, intuitive concept modeling in architecture.

By understanding the strengths of each software, you can make an informed choice that aligns with your workflow, industry, and project goals. Whether you need precision, speed, or collaboration, the right tool is out there waiting for you.

Frequently Asked Questions (FAQs)

  1. What is Rhino 3D software used for?
    Rhino 3D is widely used for creating detailed 3D models in architecture, jewelry design, product development, and more.

  2. Is Rhino 3D beginner-friendly?
    Yes, Rhino offers an intuitive interface and robust tools that are accessible for beginners while remaining powerful for professionals.

  3. What industries use Rhino 3D the most?
    Industries such as architecture, automotive design, jewelry making, and product prototyping frequently use Rhino 3D for its precision and flexibility.

  4. What are NURBS modeling tools, and why are they important in Rhino?
    NURBS (Non-Uniform Rational B-Splines) are mathematical representations of curves and surfaces, allowing for smooth, precise, and editable models in Rhino 3D.

  5. How does Rhino 3D compare to other CAD software?
    Rhino excels at freeform modeling and precision, making it ideal for creative industries. Unlike other CAD tools, it supports a wide variety of plugins and file formats.

  6. Can Rhino 3D handle large and complex models?
    Yes, Rhino is designed to manage complex models effectively, offering tools like layers, worksessions, and optimization features to streamline workflows.

  7. Why does Rhino 3D slow down with large models?
    Rhino 3D’s performance may slow with highly detailed or large models due to hardware limitations like insufficient RAM or GPU power. Optimizing layers, reducing polygon count, and using cloud computing can help mitigate this issue.

  8. Can I improve Rhino 3D performance with a cloud computer?
    Absolutely! Using a cloud computer like Vagon allows you to leverage high-performance hardware for smooth 3D modeling, even with resource-intensive designs.

  9. How does Vagon enhance the Rhino 3D experience?
    Vagon provides powerful cloud computers equipped with high-end GPUs and CPUs, ensuring lag-free performance for Rhino 3D. It’s an excellent solution for users with low-spec devices or large, complex projects.

  10. Is it easy to set up Rhino 3D on a cloud computer with Vagon?
    Yes, Vagon offers a seamless setup for running Rhino 3D on a cloud computer. With just a few clicks, you can access your virtual high-performance machine and get started.

Get Beyond Your Computer Performance

Run applications on your cloud computer with the latest generation hardware. No more crashes or lags.

Trial includes 1 hour usage + 7 days of storage.

Get Beyond Your Computer Performance

Run applications on your cloud computer with the latest generation hardware. No more crashes or lags.

Trial includes 1 hour usage + 7 days of storage.

Ready to focus on your creativity?

Vagon gives you the ability to create & render projects, collaborate, and stream applications with the power of the best hardware.