Instant Connection for Pixel Streaming
— New Feature Automated Setup

Best Assets for Cinema 4D: Materials, HDRIs, Models, and Workflow Tips
Best Assets for Cinema 4D: Materials, HDRIs, Models, and Workflow Tips
DigitalArt
Best Assets for Cinema 4D: Materials, HDRIs, Models, and Workflow Tips
Table of Contents
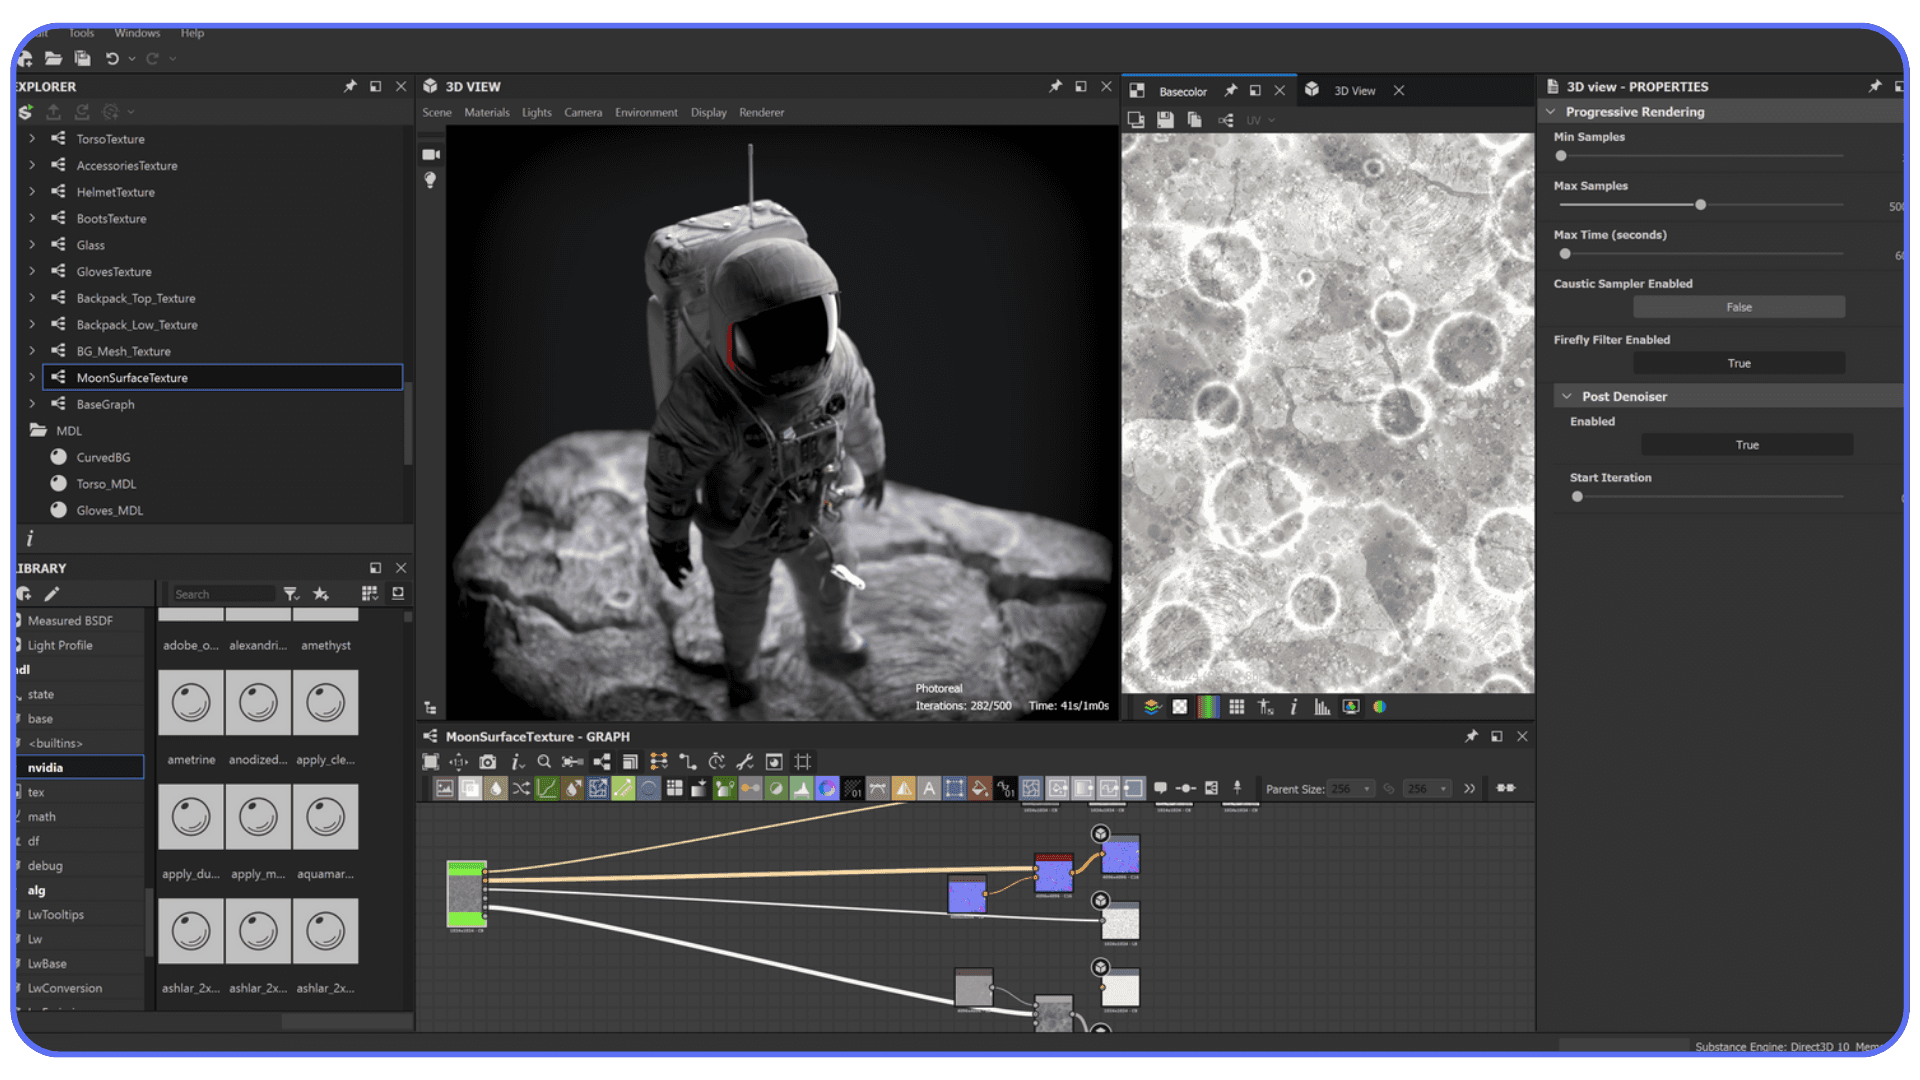
A while back I opened a simple scene in c 4d just to test a lighting setup. It was nothing ambitious. A desk, a lamp, and a couple of objects meant to fill the frame. But the moment it loaded, the whole thing felt strangely lifeless. The textures looked flat, the shadows felt muddy, and it had that unmistakable “student project” look I thought I had left behind years ago.
I tried adjusting lights, swapping roughness values, even rebuilding the scene from scratch. Nothing helped. Then I dropped in a proper asset pack. A real HDRI, a few solid materials, and a model that wasn’t held together by bad geometry. Suddenly the whole scene looked intentional. It felt like something I actually wanted to show someone.
That was when it clicked for me. The thing that slows artists down isn’t always lack of skill or even weak hardware. Most of the time it’s the hours lost fighting the basics. The right assets don’t just make a scene prettier. They give you back the energy you waste trying to fix things that never should have been broken in the first place.
Why Assets Matter More Than People Think
I used to assume most of my time in 3D went into creativity. Modeling, shading, building stories inside a scene. Then I started tracking how many hours I spent fixing the same basic problems over and over. Bad reflections. Plastic looking metals. Environments that never felt grounded. Turns out the real time sink wasn’t the art. It was the scaffolding around the art.
That’s where good assets change everything. They remove the invisible weight you carry when you’re always rebuilding the same materials or hunting for a lighting setup that actually behaves. I’ve watched artists who felt slow or unconfident suddenly move twice as fast once they started using proper material packs and HDRIs. Not because the assets did the work for them, but because the assets cleared the road.
People sometimes think relying on assets makes your work less personal. In reality, it frees up the part that is personal. When you aren’t stuck remodeling a simple chair or trying to fake natural shadows, you have more time to shape the idea behind the shot.
And since we’re being honest, almost nobody factors the real cost of their time into their workflow. You can worry about the Cinema 4D price, compare versions, argue about subscriptions, all of it. But if you spend hours every week rebuilding what someone already solved beautifully, the bigger cost isn’t the software. It’s the lost momentum. Good assets prevent that slow drag and let you focus on the parts of your project that actually matter.
If this sounds familiar, a lot of it overlaps with the everyday issues most artists run into, from sluggish viewports to lighting behaving unpredictably, which we’ve broken down in detail in our guide on common Cinema 4D problems and how to fix them.
The Asset Categories That Actually Change Your Workflow
There’s a moment every artist hits where they realize their scene isn’t struggling because of talent. It’s struggling because the building blocks aren’t helping. Once you sort out those foundations, everything else starts to feel lighter. These are the asset types that consistently make that difference.
This difference becomes even clearer when you compare how asset ecosystems shape workflows across tools, especially in discussions like Blender vs Cinema 4D, where asset availability plays a bigger role than most people expect.
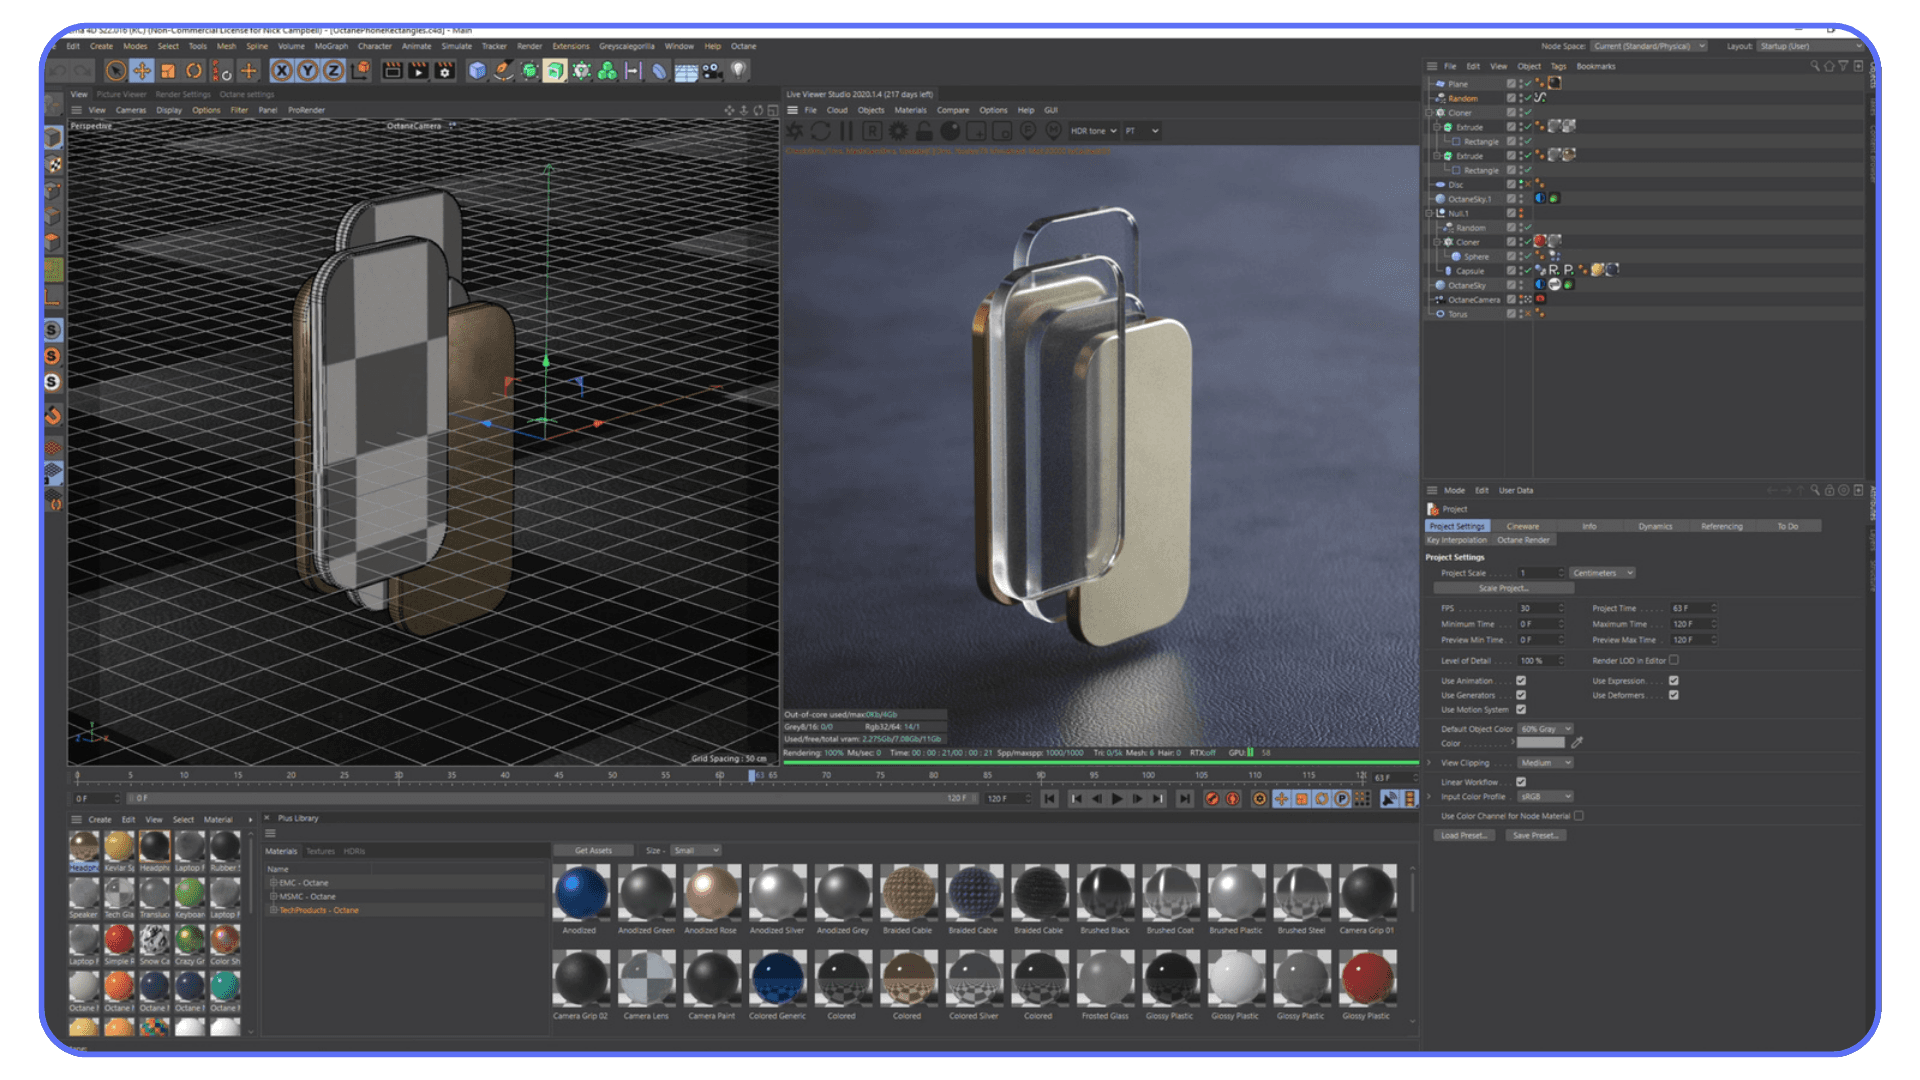
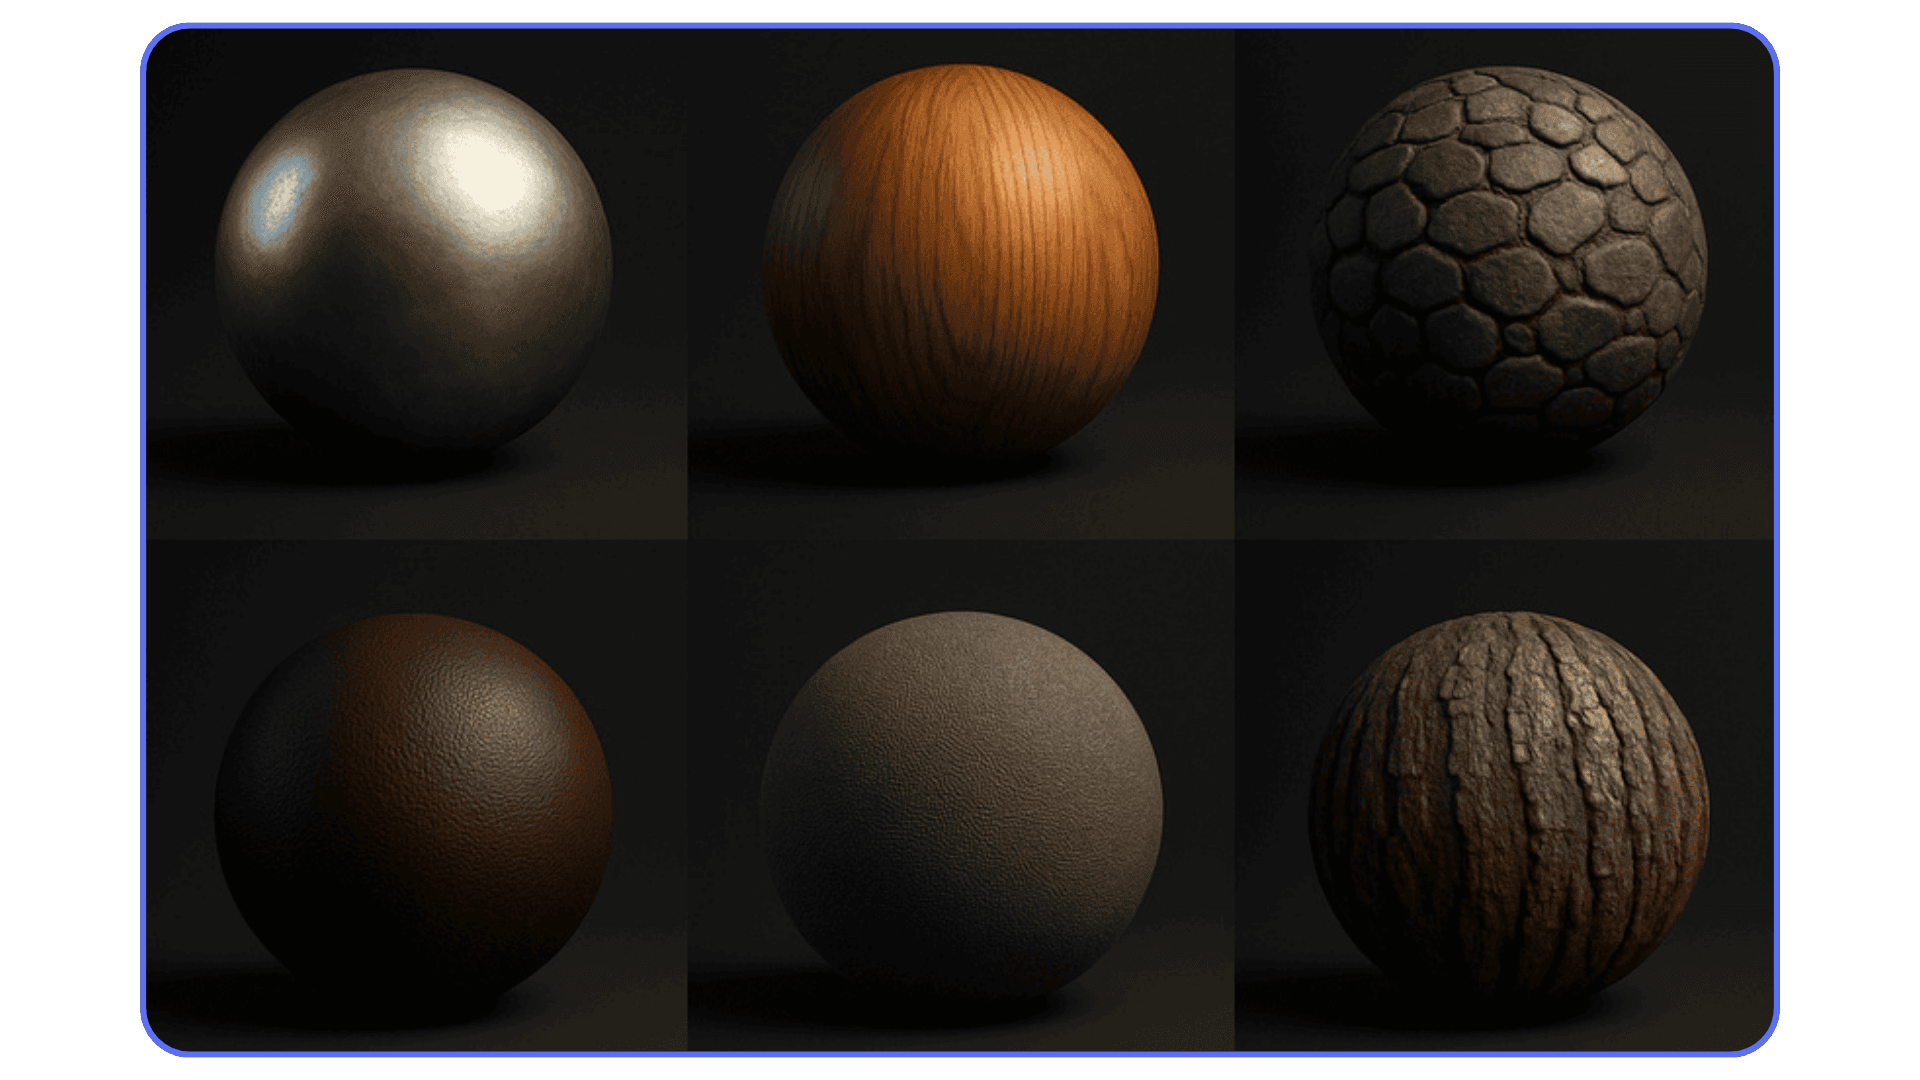
#1. Materials That Don’t Fall Apart Up Close
Most people figure out pretty quickly that the default materials look fine from a distance but fall apart the second you place a camera near them. Good material libraries fix that instantly. They hold detail where it matters, react properly to light, and keep your scene from drifting into that glossy, artificial look that’s hard to unsee once you notice it.
When you’re on a deadline, a solid material pack is one of the most reliable ways to raise the floor of your work without giving up creative control.
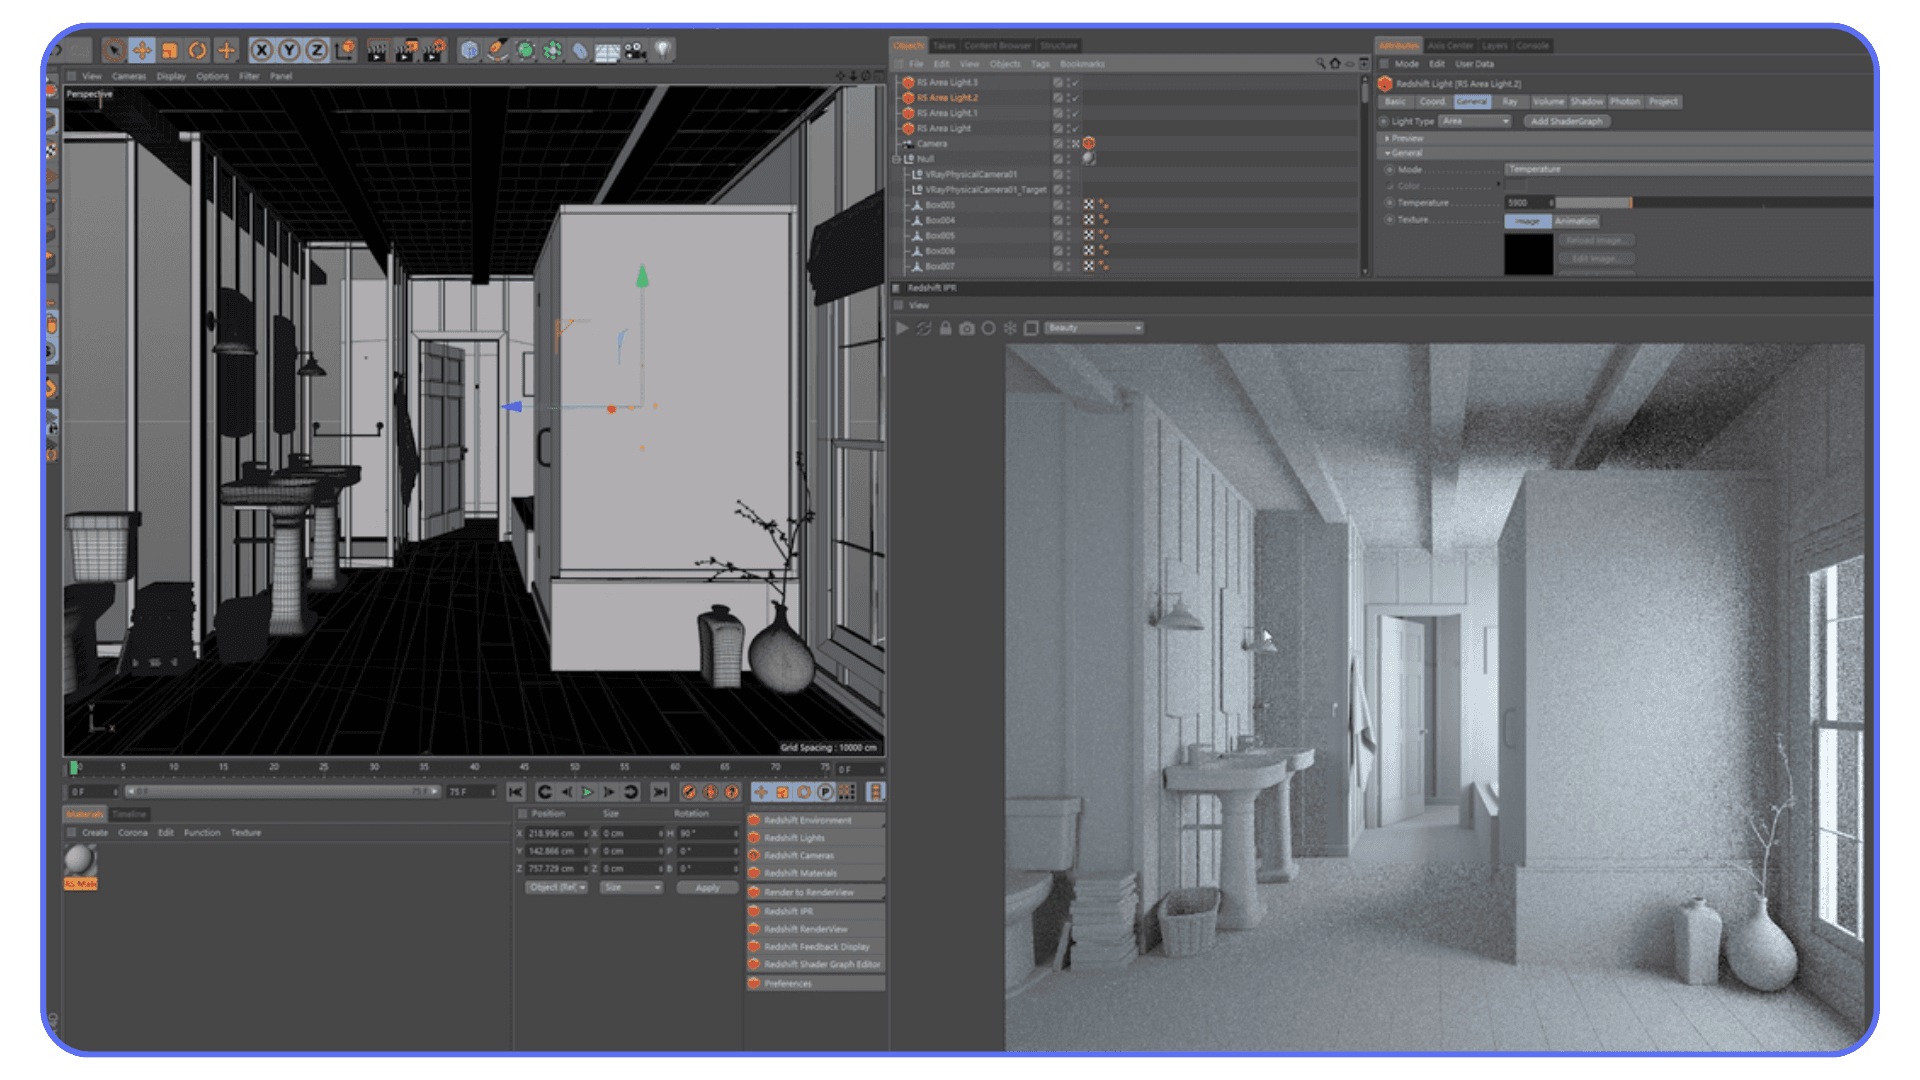
#2. HDRIs That Stop You From Fighting Your Lighting
Lighting is supposed to support the scene, not become the scene. The wrong HDRI can make even a strong model feel flat. A good one gives you shape, believable reflections, and a sense of place without wrestling dozens of lights. It’s one of the few upgrades that immediately makes your entire project feel more intentional.
Good HDRIs make you faster, but more importantly, they make your decisions clearer.
#3. Model Packs That Don’t Break When You Hit Render
There are two types of models: the ones that look good in the thumbnail, and the ones that survive a real workflow. Clean topology, proper UVs, and manageable poly counts matter more than most people think. A bad model can tank your render times or break simulations.
A good model pack can handle lighting, close ups, and animation without begging for repairs. That alone can save hours.
#4. Motion Graphics Toolkits That Actually Help
Even if you’re comfortable inside MoGraph, preset toolkits can speed up repetitive tasks. They’re not meant to replace your sense of style. They just remove the friction from setups you’ve built a hundred times already. The trick is using them as foundations, not final products.
They’re especially useful when you need to explore options fast.
#5. Character and Rigging Assets That Don’t Fight You
Rigging is one of those tasks that feels simple until you try doing it cleanly. A solid rig or animation preset gives you a dependable starting point. You can always tweak or simplify as needed, but at least you’re starting from something stable rather than a half working skeleton you built at midnight.
#6. Simulation Helpers That Take Out the Guesswork
Cloth presets, physics helpers, looping animation bases. These small tools remove a lot of the trial and error that usually eats time at the end of a project. Using them doesn’t make your work generic. It just makes the fundamentals consistent so you can focus on style instead of debugging gravity.
The Best Cinema4D Asset Libraries in 2025
Every artist eventually builds a personal toolkit, but a few libraries show up in almost every serious workflow. Not because they’re trendy, but because they solve real problems quickly. These are the ones I see people rely on when deadlines get tight or when a scene needs to level up fast.
#1. Greyscalegorilla Plus
If there’s a name almost everyone recognizes, it’s Greyscalegorilla. Their HDRIs and materials are the reason many artists stop wrestling with lighting and start actually designing. The packs feel grounded, not overly polished, and they work well right out of the box.
The only real hesitation I hear is that all the subscriptions in the 4d cinema world start to stack up. When someone is already thinking about the cinema 4d cost, adding another recurring payment can feel heavy. But if you use their tools often, the time you save usually makes up for it.

#2. The Pixel Lab
Pixel Lab has a long history of making practical, everyday model packs that fit naturally into scenes. Kitchens, offices, industrial parts, small props. They’re reliable, clean, and don’t crumble under real lighting. I’ve seen these save entire projects when someone needed a believable environment fast.
They don’t chase trends, which means their assets age surprisingly well.

#3. Redshift Material Packs
When someone wants photoreal surfaces inside c4d maxon, this is usually where they land. The materials handle detail without feeling noisy, and they respond well to real world lighting. They’re especially strong for product shots and architectural work.
They can be overkill for simple motion graphics, though. Not every project needs materials built for extreme close ups.
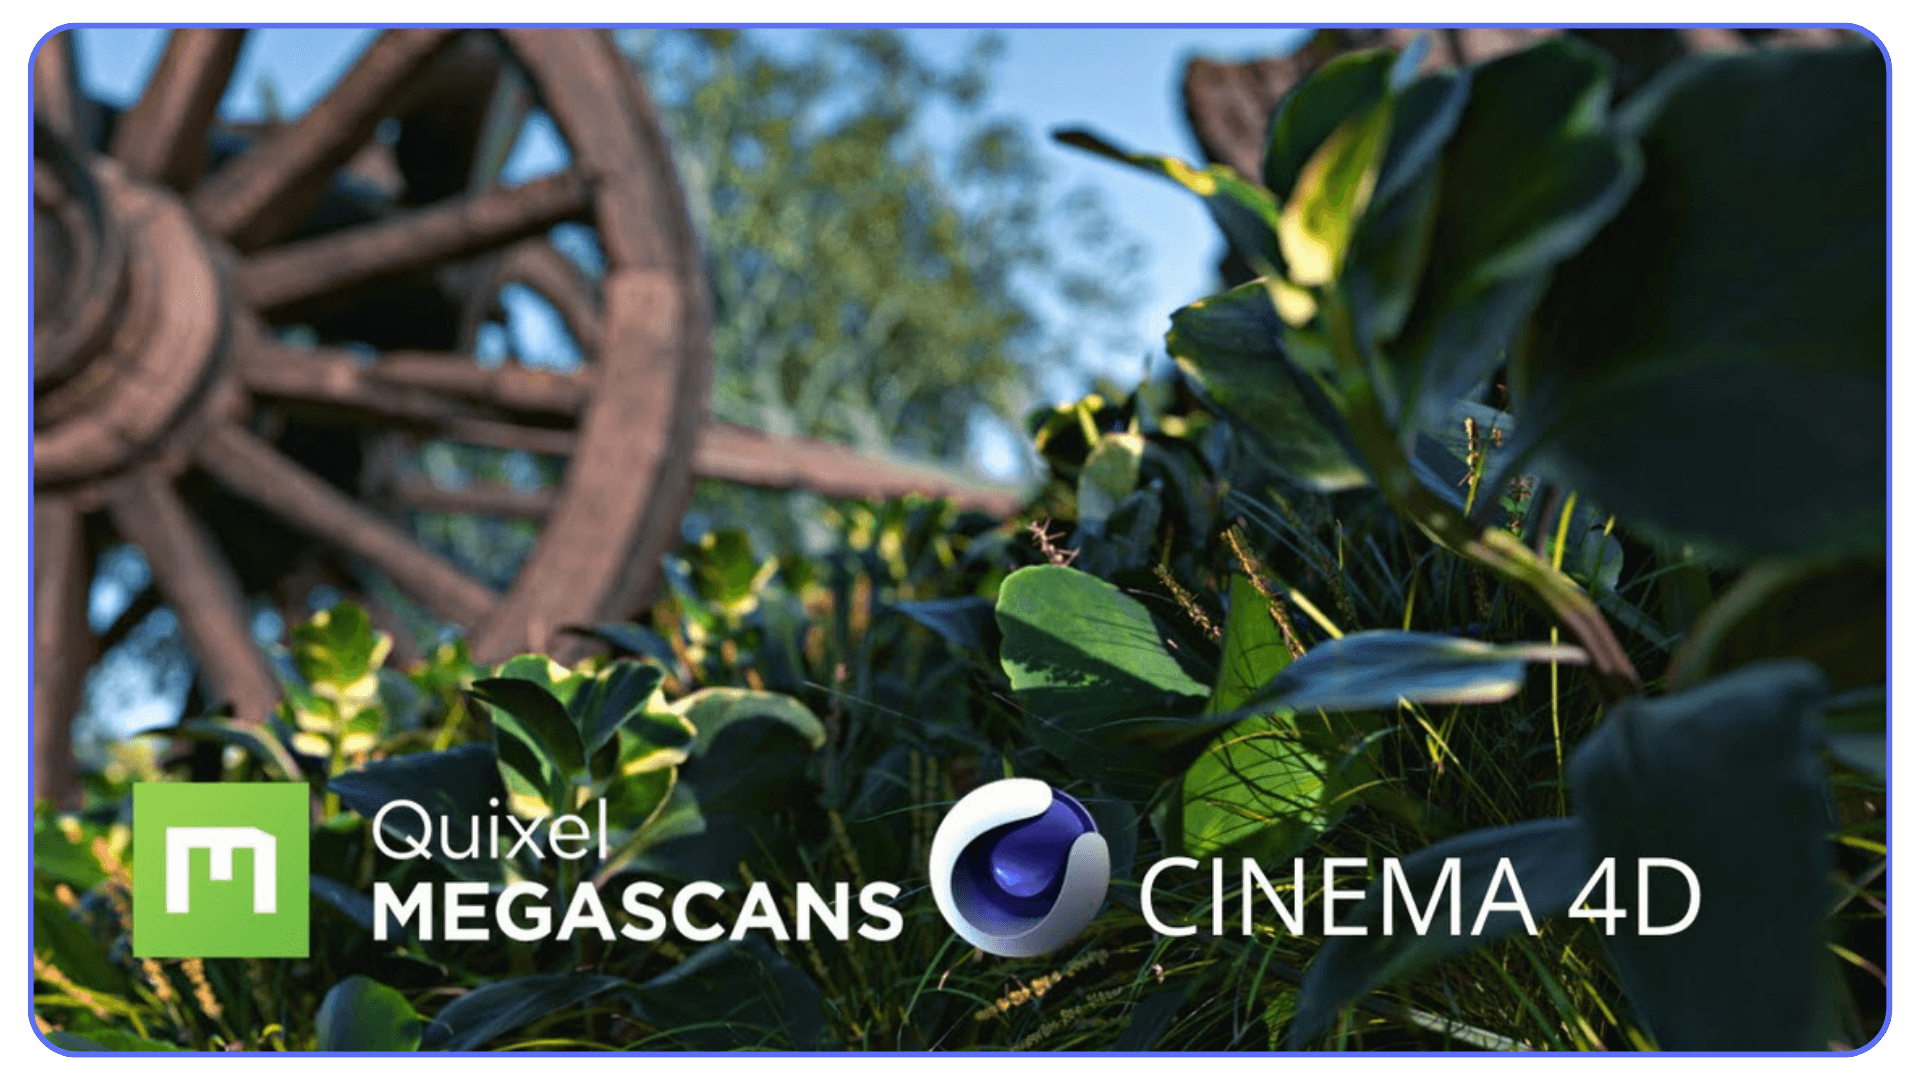
#4. Quixel Megascans
Megascans is the kind of library that feels impossible until you use it. Real scanned surfaces, vegetation, debris, structures. The quality is insane. The catch is that some assets are heavy. If your scene is already struggling, dropping a 4k scanned rock into it might not be the move.
But when you need realism fast, nothing beats it.
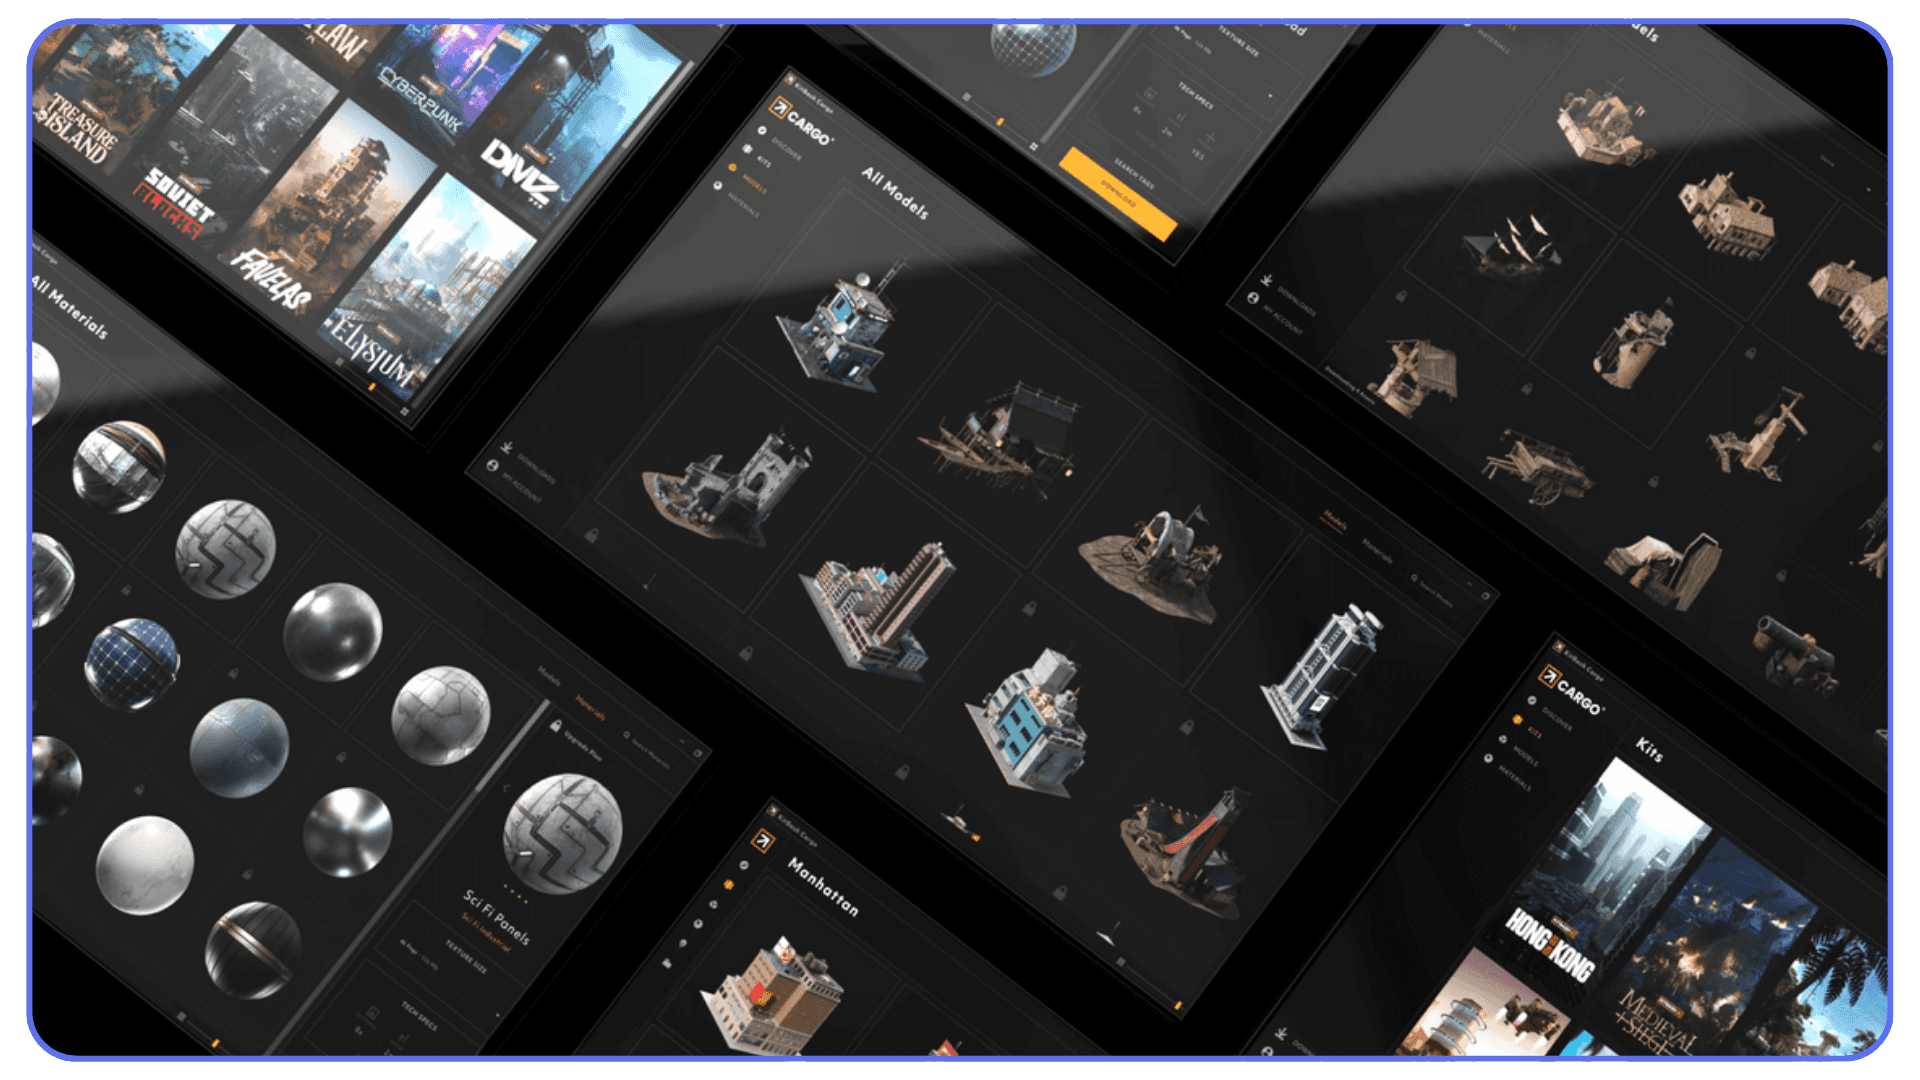
#5. Kitbash3D
If you’ve ever needed a city, a sci-fi world, or a full environment and didn’t have three weeks to spare, Kitbash3D is the usual solution. Their worlds are huge, stylized, and easy to customize. They make it simple to block out a shot or create a believable setting in a few hours.
Just be aware that some of their packs are recognizable. A little modification goes a long way.
#6. Indie Creator Tools
Some of the most useful tools come from small creators who solve one very specific problem. A clever transition rig. A physics helper. A set of stylized materials that doesn’t look like anything else. These often fill gaps the bigger libraries ignore.
They’re affordable, lightweight, and usually made by artists who actively use the tools themselves. That alone makes them worth keeping an eye on.
How to Choose Assets Without Wasting Money
Most artists don’t struggle because they lack options. They struggle because they pick the wrong ones. A scene can have great lighting, strong modeling, and smart art direction, but if the underlying assets don’t match your workflow, everything feels heavier than it should. Choosing well isn’t about taste. It’s about protecting your time.
Start With the Bottleneck You Hit Most Often
If your scenes usually fall apart during texturing, don’t start by buying model packs. If lighting always feels flat, don’t buy a giant environment library. Identify where your frustration shows up, then pick assets that directly remove that pain point.
Good assets should feel like relief, not decoration.
Test Scene Weight Before Committing
Some packs look incredible but behave terribly once they’re inside a real project. High resolution textures, dense topology, or huge HDRIs can slow your viewport to a crawl. Before you buy something big, check how heavy the files are and whether they fit the scale of projects you actually work on.
You don’t need the biggest pack on the market. You need the one that keeps you fast.
Pick Assets That Age Well
Trendy materials, neon palettes, ultra specific props, over stylized effects. They all look exciting the day you buy them and outdated six months later. The assets worth paying for are the ones that still look right long after you forget when you installed them.
Think longevity, not novelty.
Think About the Total Cost of Your Workflow
Artists often worry about the cinema 4d price because it’s the big number they see once a year. But the real cost comes from everything around it. The add ons, render engines, textures, models, and tools you rely on. If a pack saves you hours every week, it’s usually worth far more than something that looks cool but only gets used twice a year.
Your time has value, even if you don’t always calculate it that way.
Look for Packs That Support Your Render Engine
Some assets shine in one renderer and fall flat in another. Redshift materials behave differently from Arnold materials. Physical renders need different maps than GPU based engines. Make sure the pack you want fits the tools you already use.
The best asset in the world is useless if it doesn’t speak the same language as your pipeline.
If you’re still building confidence with materials, lighting, or MoGraph, pairing good assets with strong learning resources like these Cinema 4D tutorials for beginners and advanced users helps everything click faster.
Common Mistakes Artists Make With Assets
Assets make life easier, but they can also create problems when they’re used without intention. Most of the issues I see aren’t dramatic. They’re small habits that slowly pull a scene off track. Once you know what to watch for, it's easier to avoid the traps.
Dropping Too Many Assets Into a Scene
It happens all the time. Someone finds a great model pack and suddenly every corner of the frame is filled with something. Good assets don’t fix weak composition. They can even hide it. A crowded scene feels noisy, not detailed, and it makes lighting harder than it needs to be.
Use assets like seasoning. Enough to shape the scene, not overwhelm it.
Mixing Styles Without Realizing It
One of the fastest ways to break realism is to combine models that weren’t built for the same world. A hyper realistic scanned object next to a stylized prop looks off, even if both are technically well made. It’s the visual equivalent of someone speaking a different language in the middle of a conversation.
Pick a style and stay consistent.
Treating Presets as Finished Work
A preset should be the start of an idea, not the end. Whether it’s a MoGraph setup or a character rig, dropping it directly into a client project without adjusting anything usually shows. The shape is there, but the personality isn’t. Even small changes help it feel like it belongs to your scene instead of someone else’s.
Ignoring UVs Because the Model “Looked Fine”
A lot of assets look great until a close up reveals stretched textures or repeated patterns that don’t match the surface. It’s easy to assume the creator handled UVs correctly, but many packs prioritize shape over technical cleanup. Checking UVs early saves you from last minute panic later.
Forgetting to Optimize Before Animation or Simulation
Some assets aren’t meant to deform, collide, or simulate. Cloth, dynamics, and character animation behave unpredictably when geometry isn’t clean. Reducing poly counts or retopologizing key models prevents the classic problem where everything looks normal until the moment something moves.
Overestimating What Your Hardware Can Handle
Even great assets behave badly when your system is already stressed. High resolution textures, large HDRIs, and heavy models stack up quickly. When the viewport starts lagging, your creativity slows with it. That’s the part most people underestimate.
This is also the moment many artists consider working on a cloud machine, especially when scenes get too heavy for a small laptop. But we’ll come back to that later.
Choosing the right machine matters, and if you’re evaluating upgrades, this breakdown of the best laptops and workstations for Cinema 4D helps put real numbers behind those decisions.
Trends Shaping Asset Use in 2025
The way artists use assets keeps changing, and the shift has been especially fast this year. Some of these trends have been building for a while, but now they’re becoming part of everyday workflows. They shape how people build scenes, how they collaborate, and even how they think about starting a project.
#1. AI Generated Materials Are Becoming Normal
A year ago, AI materials felt like experiments. Now they show up everywhere. Artists use them to generate base textures, then refine them inside their renderer. They aren’t replacing traditional materials, but they’re speeding up the early phase where you just need something believable to block the shot. The trick is knowing when to use them and when you still need a handcrafted shader.
#2. Procedural Thinking Is Spreading From Houdini
A lot of Cinema 4D users watched Houdini artists build entire scenes with procedural systems and wanted a taste of that freedom. Now more asset packs are built around the same idea. Modular pieces, procedural rigs, customizable generators. It’s a natural evolution of c4d culture: stay flexible, build fast, and keep options open until the last moment.
#3. Larger Libraries Mean Higher Expectations
Clients and studios expect more variety and more realism because they know the assets exist. If someone wants a photoreal interior, they assume you already have access to materials, models, and lighting setups that hit that level. The bar keeps rising, not because artists got slower, but because the tools got better.
#4. Real Time Tools Influence Look Development
Even if you’re not rendering in real time, tools built for game engines are shaping how people build scenes. Faster iteration, quicker lighting previews, and lightweight assets that behave well in complex setups. It pushes artists to build smarter scenes instead of huge ones.
#5. More Artists Are Sharing Asset Workflows
Artists used to hide their libraries like trade secrets. Now they post screenshots, folder structures, breakdowns, and video walkthroughs. It’s easier to learn how others organize their assets, and it helps new artists avoid the trap of collecting files without building a system.
This also comes up when artists move between tools or compare pipelines, especially in conversations like Maya vs Cinema 4D, where asset workflows often influence which software feels faster in real production.
Try Your Asset Heavy Scenes on Vagon Cloud Computer
At some point every Cinema 4D artist hits the same wall. You grab a beautiful material pack, load a detailed environment, add a couple of 4K textures, and suddenly your viewport starts lagging behind every mouse movement. It’s not a creative problem. It’s a hardware ceiling quietly telling you your scene has grown faster than your computer can handle.
That’s where Vagon Cloud Computer steps in. Instead of trimming your scenes, lowering texture sizes, hiding half your objects, or praying your laptop survives one more Redshift preview, you can open the exact same project on a high performance cloud machine and get your speed back instantly. No rebuilding. No compromises. Just more room for your assets to breathe.
Large HDRIs load at full resolution without the usual stutter. Heavy geometry stays responsive when you orbit around it. Simulations run without that sinking feeling that you might crash the file. And when you render, you’re not stuck waiting through long test passes every time you adjust a light or shader.
It also smooths out collaboration. If you need to send a scene to a client or teammate, you don’t have to pack textures or strip proxies to make the file smaller. They can open it on Vagon directly and see the scene exactly as you built it, even if it’s packed with models, foliage, scans, or complex materials.
For artists who rely on big asset libraries or who regularly build dense projects, Vagon Cloud Computer isn’t just an escape hatch. It becomes the place where your heaviest scenes actually feel comfortable to work in. If you’ve reached the point where your workflow feels slower than your ideas, giving your projects a home on Vagon is probably the bigger upgrade than any hardware refresh.
This is also why more artists are experimenting with remote setups, including ways to run Cinema 4D on an iPad when local machines can’t comfortably handle asset heavy scenes.

Understanding how your renderer uses hardware also makes a big difference, especially when you know how to use GPU acceleration in Cinema 4D effectively.
Final Thoughts
Most artists start using assets because they want speed. They keep using them because they realize how much better their work looks when the foundations are solid. Strong materials, clean models, reliable HDRIs, smart presets. These aren’t shortcuts. They’re the parts of a workflow that let your ideas show up the way you imagined them.
When you’re not busy rebuilding the basics, you have more time to shape the mood of a scene, push a design, explore variations, or polish an animation. That’s the real value of good assets. They remove the friction that slows your thinking down. They give you room to experiment again.
And when your projects get bigger, when you want to use higher quality packs, or when the scenes you build finally outgrow your machine, you have options. You can scale your setup, reorganize your workflow, or switch to a cloud machine when you need the extra headroom. What matters is that your tools support your ideas instead of fighting them.
In the end, the best assets aren’t the ones with the most excitement around them. They’re the ones you forget about because they blend into your process. They make your scenes clearer, your work faster, and your decisions easier. Once you have that foundation, everything else you build in Cinema 4D becomes a lot more enjoyable.
FAQs
1. What types of assets should a beginner invest in first?
Start with materials and HDRIs. They make the biggest visual difference with the least effort. Even simple scenes look stronger when the lighting behaves well and surfaces react realistically. You don’t need huge libraries right away. One reliable pack for each category is enough to lift your work.
2. Are free assets worth using?
Some are great, especially from community creators or scanned libraries that offer smaller selections at no cost. Just check for clean topology and reasonable file sizes. Free assets can help you learn, but they’re not always built for heavy production.
3. Do asset packs replace actual skill?
Not even close. Assets remove the repetitive groundwork, but they won’t decide your composition, animation, color, pacing, or style. Think of them like studio lighting in photography. They help the final image, but they don’t tell you what to shoot.
4. How do I keep my asset library organized?
Sort by type first: materials, HDRIs, models, rigs, simulations. Then sort by purpose: environments, props, characters, architecture, motion tools. A clear folder structure saves hours when your project grows and you can’t remember where something lives.
5. Why do some assets slow down my viewport?
Usually because of high resolution textures, dense geometry, or heavy displacement. Reducing texture sizes or creating proxy versions helps, but using stronger hardware or a cloud machine can be the smoother solution when the project is large.
6. Should I use the same assets across different projects?
Absolutely. Reuse is part of a healthy workflow. Just tweak them so they fit the new style or direction. A well made asset is flexible enough to appear in multiple scenes without standing out.
7. How do I know if an asset pack is actually good?
Look for real previews, not just marketing images. Check if the materials respond to light in believable ways, if the models have clean UVs, and if the creator shows wireframes or ungraded renders. Good creators are confident enough to show the raw work.
8. What’s the biggest mistake people make with assets?
Using too many without thinking about the story of the scene. Good work is intentional. Even the best assets can't save a shot that’s overloaded or inconsistent in style.
9. Is it worth buying assets if I already know how to model and texture?
Yes. Your skills don’t disappear. You just stop spending time on tasks that don’t need your full attention. The more experienced you become, the more you appreciate tools that help you stay focused on the creative decisions instead of the busywork.
A while back I opened a simple scene in c 4d just to test a lighting setup. It was nothing ambitious. A desk, a lamp, and a couple of objects meant to fill the frame. But the moment it loaded, the whole thing felt strangely lifeless. The textures looked flat, the shadows felt muddy, and it had that unmistakable “student project” look I thought I had left behind years ago.
I tried adjusting lights, swapping roughness values, even rebuilding the scene from scratch. Nothing helped. Then I dropped in a proper asset pack. A real HDRI, a few solid materials, and a model that wasn’t held together by bad geometry. Suddenly the whole scene looked intentional. It felt like something I actually wanted to show someone.
That was when it clicked for me. The thing that slows artists down isn’t always lack of skill or even weak hardware. Most of the time it’s the hours lost fighting the basics. The right assets don’t just make a scene prettier. They give you back the energy you waste trying to fix things that never should have been broken in the first place.
Why Assets Matter More Than People Think
I used to assume most of my time in 3D went into creativity. Modeling, shading, building stories inside a scene. Then I started tracking how many hours I spent fixing the same basic problems over and over. Bad reflections. Plastic looking metals. Environments that never felt grounded. Turns out the real time sink wasn’t the art. It was the scaffolding around the art.
That’s where good assets change everything. They remove the invisible weight you carry when you’re always rebuilding the same materials or hunting for a lighting setup that actually behaves. I’ve watched artists who felt slow or unconfident suddenly move twice as fast once they started using proper material packs and HDRIs. Not because the assets did the work for them, but because the assets cleared the road.
People sometimes think relying on assets makes your work less personal. In reality, it frees up the part that is personal. When you aren’t stuck remodeling a simple chair or trying to fake natural shadows, you have more time to shape the idea behind the shot.
And since we’re being honest, almost nobody factors the real cost of their time into their workflow. You can worry about the Cinema 4D price, compare versions, argue about subscriptions, all of it. But if you spend hours every week rebuilding what someone already solved beautifully, the bigger cost isn’t the software. It’s the lost momentum. Good assets prevent that slow drag and let you focus on the parts of your project that actually matter.
If this sounds familiar, a lot of it overlaps with the everyday issues most artists run into, from sluggish viewports to lighting behaving unpredictably, which we’ve broken down in detail in our guide on common Cinema 4D problems and how to fix them.
The Asset Categories That Actually Change Your Workflow
There’s a moment every artist hits where they realize their scene isn’t struggling because of talent. It’s struggling because the building blocks aren’t helping. Once you sort out those foundations, everything else starts to feel lighter. These are the asset types that consistently make that difference.
This difference becomes even clearer when you compare how asset ecosystems shape workflows across tools, especially in discussions like Blender vs Cinema 4D, where asset availability plays a bigger role than most people expect.
#1. Materials That Don’t Fall Apart Up Close
Most people figure out pretty quickly that the default materials look fine from a distance but fall apart the second you place a camera near them. Good material libraries fix that instantly. They hold detail where it matters, react properly to light, and keep your scene from drifting into that glossy, artificial look that’s hard to unsee once you notice it.
When you’re on a deadline, a solid material pack is one of the most reliable ways to raise the floor of your work without giving up creative control.
#2. HDRIs That Stop You From Fighting Your Lighting
Lighting is supposed to support the scene, not become the scene. The wrong HDRI can make even a strong model feel flat. A good one gives you shape, believable reflections, and a sense of place without wrestling dozens of lights. It’s one of the few upgrades that immediately makes your entire project feel more intentional.
Good HDRIs make you faster, but more importantly, they make your decisions clearer.
#3. Model Packs That Don’t Break When You Hit Render
There are two types of models: the ones that look good in the thumbnail, and the ones that survive a real workflow. Clean topology, proper UVs, and manageable poly counts matter more than most people think. A bad model can tank your render times or break simulations.
A good model pack can handle lighting, close ups, and animation without begging for repairs. That alone can save hours.
#4. Motion Graphics Toolkits That Actually Help
Even if you’re comfortable inside MoGraph, preset toolkits can speed up repetitive tasks. They’re not meant to replace your sense of style. They just remove the friction from setups you’ve built a hundred times already. The trick is using them as foundations, not final products.
They’re especially useful when you need to explore options fast.
#5. Character and Rigging Assets That Don’t Fight You
Rigging is one of those tasks that feels simple until you try doing it cleanly. A solid rig or animation preset gives you a dependable starting point. You can always tweak or simplify as needed, but at least you’re starting from something stable rather than a half working skeleton you built at midnight.
#6. Simulation Helpers That Take Out the Guesswork
Cloth presets, physics helpers, looping animation bases. These small tools remove a lot of the trial and error that usually eats time at the end of a project. Using them doesn’t make your work generic. It just makes the fundamentals consistent so you can focus on style instead of debugging gravity.
The Best Cinema4D Asset Libraries in 2025
Every artist eventually builds a personal toolkit, but a few libraries show up in almost every serious workflow. Not because they’re trendy, but because they solve real problems quickly. These are the ones I see people rely on when deadlines get tight or when a scene needs to level up fast.
#1. Greyscalegorilla Plus
If there’s a name almost everyone recognizes, it’s Greyscalegorilla. Their HDRIs and materials are the reason many artists stop wrestling with lighting and start actually designing. The packs feel grounded, not overly polished, and they work well right out of the box.
The only real hesitation I hear is that all the subscriptions in the 4d cinema world start to stack up. When someone is already thinking about the cinema 4d cost, adding another recurring payment can feel heavy. But if you use their tools often, the time you save usually makes up for it.
#2. The Pixel Lab
Pixel Lab has a long history of making practical, everyday model packs that fit naturally into scenes. Kitchens, offices, industrial parts, small props. They’re reliable, clean, and don’t crumble under real lighting. I’ve seen these save entire projects when someone needed a believable environment fast.
They don’t chase trends, which means their assets age surprisingly well.
#3. Redshift Material Packs
When someone wants photoreal surfaces inside c4d maxon, this is usually where they land. The materials handle detail without feeling noisy, and they respond well to real world lighting. They’re especially strong for product shots and architectural work.
They can be overkill for simple motion graphics, though. Not every project needs materials built for extreme close ups.
#4. Quixel Megascans
Megascans is the kind of library that feels impossible until you use it. Real scanned surfaces, vegetation, debris, structures. The quality is insane. The catch is that some assets are heavy. If your scene is already struggling, dropping a 4k scanned rock into it might not be the move.
But when you need realism fast, nothing beats it.
#5. Kitbash3D
If you’ve ever needed a city, a sci-fi world, or a full environment and didn’t have three weeks to spare, Kitbash3D is the usual solution. Their worlds are huge, stylized, and easy to customize. They make it simple to block out a shot or create a believable setting in a few hours.
Just be aware that some of their packs are recognizable. A little modification goes a long way.
#6. Indie Creator Tools
Some of the most useful tools come from small creators who solve one very specific problem. A clever transition rig. A physics helper. A set of stylized materials that doesn’t look like anything else. These often fill gaps the bigger libraries ignore.
They’re affordable, lightweight, and usually made by artists who actively use the tools themselves. That alone makes them worth keeping an eye on.
How to Choose Assets Without Wasting Money
Most artists don’t struggle because they lack options. They struggle because they pick the wrong ones. A scene can have great lighting, strong modeling, and smart art direction, but if the underlying assets don’t match your workflow, everything feels heavier than it should. Choosing well isn’t about taste. It’s about protecting your time.
Start With the Bottleneck You Hit Most Often
If your scenes usually fall apart during texturing, don’t start by buying model packs. If lighting always feels flat, don’t buy a giant environment library. Identify where your frustration shows up, then pick assets that directly remove that pain point.
Good assets should feel like relief, not decoration.
Test Scene Weight Before Committing
Some packs look incredible but behave terribly once they’re inside a real project. High resolution textures, dense topology, or huge HDRIs can slow your viewport to a crawl. Before you buy something big, check how heavy the files are and whether they fit the scale of projects you actually work on.
You don’t need the biggest pack on the market. You need the one that keeps you fast.
Pick Assets That Age Well
Trendy materials, neon palettes, ultra specific props, over stylized effects. They all look exciting the day you buy them and outdated six months later. The assets worth paying for are the ones that still look right long after you forget when you installed them.
Think longevity, not novelty.
Think About the Total Cost of Your Workflow
Artists often worry about the cinema 4d price because it’s the big number they see once a year. But the real cost comes from everything around it. The add ons, render engines, textures, models, and tools you rely on. If a pack saves you hours every week, it’s usually worth far more than something that looks cool but only gets used twice a year.
Your time has value, even if you don’t always calculate it that way.
Look for Packs That Support Your Render Engine
Some assets shine in one renderer and fall flat in another. Redshift materials behave differently from Arnold materials. Physical renders need different maps than GPU based engines. Make sure the pack you want fits the tools you already use.
The best asset in the world is useless if it doesn’t speak the same language as your pipeline.
If you’re still building confidence with materials, lighting, or MoGraph, pairing good assets with strong learning resources like these Cinema 4D tutorials for beginners and advanced users helps everything click faster.
Common Mistakes Artists Make With Assets
Assets make life easier, but they can also create problems when they’re used without intention. Most of the issues I see aren’t dramatic. They’re small habits that slowly pull a scene off track. Once you know what to watch for, it's easier to avoid the traps.
Dropping Too Many Assets Into a Scene
It happens all the time. Someone finds a great model pack and suddenly every corner of the frame is filled with something. Good assets don’t fix weak composition. They can even hide it. A crowded scene feels noisy, not detailed, and it makes lighting harder than it needs to be.
Use assets like seasoning. Enough to shape the scene, not overwhelm it.
Mixing Styles Without Realizing It
One of the fastest ways to break realism is to combine models that weren’t built for the same world. A hyper realistic scanned object next to a stylized prop looks off, even if both are technically well made. It’s the visual equivalent of someone speaking a different language in the middle of a conversation.
Pick a style and stay consistent.
Treating Presets as Finished Work
A preset should be the start of an idea, not the end. Whether it’s a MoGraph setup or a character rig, dropping it directly into a client project without adjusting anything usually shows. The shape is there, but the personality isn’t. Even small changes help it feel like it belongs to your scene instead of someone else’s.
Ignoring UVs Because the Model “Looked Fine”
A lot of assets look great until a close up reveals stretched textures or repeated patterns that don’t match the surface. It’s easy to assume the creator handled UVs correctly, but many packs prioritize shape over technical cleanup. Checking UVs early saves you from last minute panic later.
Forgetting to Optimize Before Animation or Simulation
Some assets aren’t meant to deform, collide, or simulate. Cloth, dynamics, and character animation behave unpredictably when geometry isn’t clean. Reducing poly counts or retopologizing key models prevents the classic problem where everything looks normal until the moment something moves.
Overestimating What Your Hardware Can Handle
Even great assets behave badly when your system is already stressed. High resolution textures, large HDRIs, and heavy models stack up quickly. When the viewport starts lagging, your creativity slows with it. That’s the part most people underestimate.
This is also the moment many artists consider working on a cloud machine, especially when scenes get too heavy for a small laptop. But we’ll come back to that later.
Choosing the right machine matters, and if you’re evaluating upgrades, this breakdown of the best laptops and workstations for Cinema 4D helps put real numbers behind those decisions.
Trends Shaping Asset Use in 2025
The way artists use assets keeps changing, and the shift has been especially fast this year. Some of these trends have been building for a while, but now they’re becoming part of everyday workflows. They shape how people build scenes, how they collaborate, and even how they think about starting a project.
#1. AI Generated Materials Are Becoming Normal
A year ago, AI materials felt like experiments. Now they show up everywhere. Artists use them to generate base textures, then refine them inside their renderer. They aren’t replacing traditional materials, but they’re speeding up the early phase where you just need something believable to block the shot. The trick is knowing when to use them and when you still need a handcrafted shader.
#2. Procedural Thinking Is Spreading From Houdini
A lot of Cinema 4D users watched Houdini artists build entire scenes with procedural systems and wanted a taste of that freedom. Now more asset packs are built around the same idea. Modular pieces, procedural rigs, customizable generators. It’s a natural evolution of c4d culture: stay flexible, build fast, and keep options open until the last moment.
#3. Larger Libraries Mean Higher Expectations
Clients and studios expect more variety and more realism because they know the assets exist. If someone wants a photoreal interior, they assume you already have access to materials, models, and lighting setups that hit that level. The bar keeps rising, not because artists got slower, but because the tools got better.
#4. Real Time Tools Influence Look Development
Even if you’re not rendering in real time, tools built for game engines are shaping how people build scenes. Faster iteration, quicker lighting previews, and lightweight assets that behave well in complex setups. It pushes artists to build smarter scenes instead of huge ones.
#5. More Artists Are Sharing Asset Workflows
Artists used to hide their libraries like trade secrets. Now they post screenshots, folder structures, breakdowns, and video walkthroughs. It’s easier to learn how others organize their assets, and it helps new artists avoid the trap of collecting files without building a system.
This also comes up when artists move between tools or compare pipelines, especially in conversations like Maya vs Cinema 4D, where asset workflows often influence which software feels faster in real production.
Try Your Asset Heavy Scenes on Vagon Cloud Computer
At some point every Cinema 4D artist hits the same wall. You grab a beautiful material pack, load a detailed environment, add a couple of 4K textures, and suddenly your viewport starts lagging behind every mouse movement. It’s not a creative problem. It’s a hardware ceiling quietly telling you your scene has grown faster than your computer can handle.
That’s where Vagon Cloud Computer steps in. Instead of trimming your scenes, lowering texture sizes, hiding half your objects, or praying your laptop survives one more Redshift preview, you can open the exact same project on a high performance cloud machine and get your speed back instantly. No rebuilding. No compromises. Just more room for your assets to breathe.
Large HDRIs load at full resolution without the usual stutter. Heavy geometry stays responsive when you orbit around it. Simulations run without that sinking feeling that you might crash the file. And when you render, you’re not stuck waiting through long test passes every time you adjust a light or shader.
It also smooths out collaboration. If you need to send a scene to a client or teammate, you don’t have to pack textures or strip proxies to make the file smaller. They can open it on Vagon directly and see the scene exactly as you built it, even if it’s packed with models, foliage, scans, or complex materials.
For artists who rely on big asset libraries or who regularly build dense projects, Vagon Cloud Computer isn’t just an escape hatch. It becomes the place where your heaviest scenes actually feel comfortable to work in. If you’ve reached the point where your workflow feels slower than your ideas, giving your projects a home on Vagon is probably the bigger upgrade than any hardware refresh.
This is also why more artists are experimenting with remote setups, including ways to run Cinema 4D on an iPad when local machines can’t comfortably handle asset heavy scenes.
Understanding how your renderer uses hardware also makes a big difference, especially when you know how to use GPU acceleration in Cinema 4D effectively.
Final Thoughts
Most artists start using assets because they want speed. They keep using them because they realize how much better their work looks when the foundations are solid. Strong materials, clean models, reliable HDRIs, smart presets. These aren’t shortcuts. They’re the parts of a workflow that let your ideas show up the way you imagined them.
When you’re not busy rebuilding the basics, you have more time to shape the mood of a scene, push a design, explore variations, or polish an animation. That’s the real value of good assets. They remove the friction that slows your thinking down. They give you room to experiment again.
And when your projects get bigger, when you want to use higher quality packs, or when the scenes you build finally outgrow your machine, you have options. You can scale your setup, reorganize your workflow, or switch to a cloud machine when you need the extra headroom. What matters is that your tools support your ideas instead of fighting them.
In the end, the best assets aren’t the ones with the most excitement around them. They’re the ones you forget about because they blend into your process. They make your scenes clearer, your work faster, and your decisions easier. Once you have that foundation, everything else you build in Cinema 4D becomes a lot more enjoyable.
FAQs
1. What types of assets should a beginner invest in first?
Start with materials and HDRIs. They make the biggest visual difference with the least effort. Even simple scenes look stronger when the lighting behaves well and surfaces react realistically. You don’t need huge libraries right away. One reliable pack for each category is enough to lift your work.
2. Are free assets worth using?
Some are great, especially from community creators or scanned libraries that offer smaller selections at no cost. Just check for clean topology and reasonable file sizes. Free assets can help you learn, but they’re not always built for heavy production.
3. Do asset packs replace actual skill?
Not even close. Assets remove the repetitive groundwork, but they won’t decide your composition, animation, color, pacing, or style. Think of them like studio lighting in photography. They help the final image, but they don’t tell you what to shoot.
4. How do I keep my asset library organized?
Sort by type first: materials, HDRIs, models, rigs, simulations. Then sort by purpose: environments, props, characters, architecture, motion tools. A clear folder structure saves hours when your project grows and you can’t remember where something lives.
5. Why do some assets slow down my viewport?
Usually because of high resolution textures, dense geometry, or heavy displacement. Reducing texture sizes or creating proxy versions helps, but using stronger hardware or a cloud machine can be the smoother solution when the project is large.
6. Should I use the same assets across different projects?
Absolutely. Reuse is part of a healthy workflow. Just tweak them so they fit the new style or direction. A well made asset is flexible enough to appear in multiple scenes without standing out.
7. How do I know if an asset pack is actually good?
Look for real previews, not just marketing images. Check if the materials respond to light in believable ways, if the models have clean UVs, and if the creator shows wireframes or ungraded renders. Good creators are confident enough to show the raw work.
8. What’s the biggest mistake people make with assets?
Using too many without thinking about the story of the scene. Good work is intentional. Even the best assets can't save a shot that’s overloaded or inconsistent in style.
9. Is it worth buying assets if I already know how to model and texture?
Yes. Your skills don’t disappear. You just stop spending time on tasks that don’t need your full attention. The more experienced you become, the more you appreciate tools that help you stay focused on the creative decisions instead of the busywork.
Get Beyond Your Computer Performance
Run applications on your cloud computer with the latest generation hardware. No more crashes or lags.

Trial includes 1 hour usage + 7 days of storage.
Summarize with AI

Ready to focus on your creativity?
Vagon gives you the ability to create & render projects, collaborate, and stream applications with the power of the best hardware.

Vagon Blog


Run heavy applications on any device with
your personal computer on the cloud.
San Francisco, California
Solutions
Vagon Teams
Vagon Streams
Use Cases
Resources
Vagon Blog
What Slows Down After Effects Projects?
The First 30 Minutes in Blender 3D: A Practical Workflow Guide
What’s New in Godot 4.7? Key Features, Upgrades, and Workflow Improvements
What Slows Down Blender 3D Projects?
What Slows Down Adobe Photoshop Projects?
The First 30 Minutes in Adobe Photoshop: A Practical Workflow Guide
Before You Start in Adobe Photoshop: A Practical Setup Checklist
What’s New in Unreal Engine 5.8? Key Features and Upgrade Advice
How to Run Windows on an iPad: 4 Best Ways (2026)
Vagon Blog
Run heavy applications on any device with
your personal computer on the cloud.
San Francisco, California
Solutions
Vagon Teams
Vagon Streams
Use Cases
Resources
Vagon Blog