Instant Connection for Pixel Streaming
— New Feature Automated Setup

How to Rasterize in Photoshop Without Losing Editability
How to Rasterize in Photoshop Without Losing Editability
DigitalArt
How to Rasterize in Photoshop Without Losing Editability
Table of Contents
You’re editing along, everything’s fine, and then Photoshop interrupts you with that familiar message about rasterizing. Two buttons. OK or Cancel. Most people don’t stop to think. They just click OK and keep moving.
That popup exists because Photoshop is about to let you do something permanent. Text layers, shapes, and Smart Objects aren’t made of pixels. They’re instructions. Fonts, vectors, references. Tools like brushes, erasers, and many filters only work on real pixels, so Photoshop has to convert the layer before it lets you continue.
That’s why certain actions are blocked. Not because Photoshop is being difficult, but because once a layer is rasterized, you lose flexibility. You can paint on it, distort it, and manipulate it freely, but you can’t go back and edit the text or scale it cleanly anymore.
I used to click past that warning without thinking. Everyone does. The problem shows up later, when you reopen a file and realize the text is locked in forever. Once you understand why that popup appears, it stops being an annoyance and starts feeling like a decision point.
What Rasterizing Really Means in Practice
At its core, rasterizing is simple. Photoshop takes something flexible and turns it into pixels. That’s it. But the implications are bigger than the definition makes it sound.
Text layers are live. They remember the font, the size, the spacing. Shape layers are vectors, built from paths and math instead of colored dots. Smart Objects are even smarter. They’re basically containers that protect whatever’s inside them. All of these can be resized again and again without falling apart.
When you rasterize, Photoshop throws all that away and replaces it with a fixed grid of pixels. Every letter, curve, and edge gets baked into the image. From that point on, Photoshop treats it like a photo. No memory of how it was made. Just color values.
What do you gain? Control. Total freedom. You can paint directly on text. Smudge edges. Warp details in ways vectors never allow. For a lot of creative work, that freedom matters. Especially when you’re doing texture-heavy designs, hand-drawn effects, or anything that needs to feel imperfect.
What do you lose? Flexibility. Permanently. You can’t change the wording later. You can’t scale it up without losing sharpness. You can’t swap fonts or tweak spacing because there is no font anymore. Just pixels pretending they were never anything else.
In my experience, this is where people get tripped up. Rasterizing feels harmless because nothing visibly breaks in the moment. The file looks fine. Everything works. The damage only shows itself later, usually when a client asks for “one small text change” or you need a different export size.
Rasterizing isn’t good or bad. It’s a trade. You’re exchanging editability for direct manipulation. Once you see it that way, the decision becomes clearer. Sometimes you need pixels. Sometimes you really don’t. The trick is knowing which situation you’re in before you click that button.
Common Situations Where Photoshop Forces Rasterizing
Photoshop usually doesn’t ask you to rasterize out of nowhere. It does it when you try to use a tool that simply can’t work on non-pixel layers. Once you notice the pattern, those warnings stop feeling random.
The most common trigger is text. The moment you grab a brush and try to paint directly on a text layer, Photoshop shuts it down. Same thing if you try to erase part of a letter or use the Smudge tool. Text layers are still editable fonts at that point, not pixels, so Photoshop won’t let pixel-based tools touch them.
Filters are another big one. Some filters work fine on Smart Objects or vector layers. Others don’t. Older filters especially expect raw pixel data. Try running one of those on text or a shape layer and you’ll get the rasterize prompt immediately.
Shapes cause similar confusion. Shape layers look like pixels on screen, but they’re actually vectors. You can resize them endlessly and tweak their fill and stroke. The second you try to distort them with pixel-only tools or paint inside them directly, Photoshop asks for rasterization.
Imported assets can also trigger this. Logos from Illustrator, SVG files, or even some AI-generated graphics often come in as Smart Objects. They feel like images, but they’re protected containers. If you try to edit them destructively without opening the Smart Object first, Photoshop steps in.
The key thing to understand is this. Photoshop isn’t being inconsistent. It’s checking whether the tool you chose works on instructions or only on pixels. If it’s the latter, rasterizing becomes mandatory.
Once you recognize these situations early, you can pause and decide what you actually want. Do you really need to paint on that text, or would a mask do the job? Should you open the Smart Object instead of flattening it? That split second of awareness saves a lot of cleanup later.
This is where most good workflows are made or broken. Not by avoiding rasterizing entirely, but by choosing it intentionally instead of being forced into it.
How to Rasterize in Photoshop (The Right Way)
There are only two ways people actually rasterize layers in Photoshop, and both do the same thing. The difference is control.
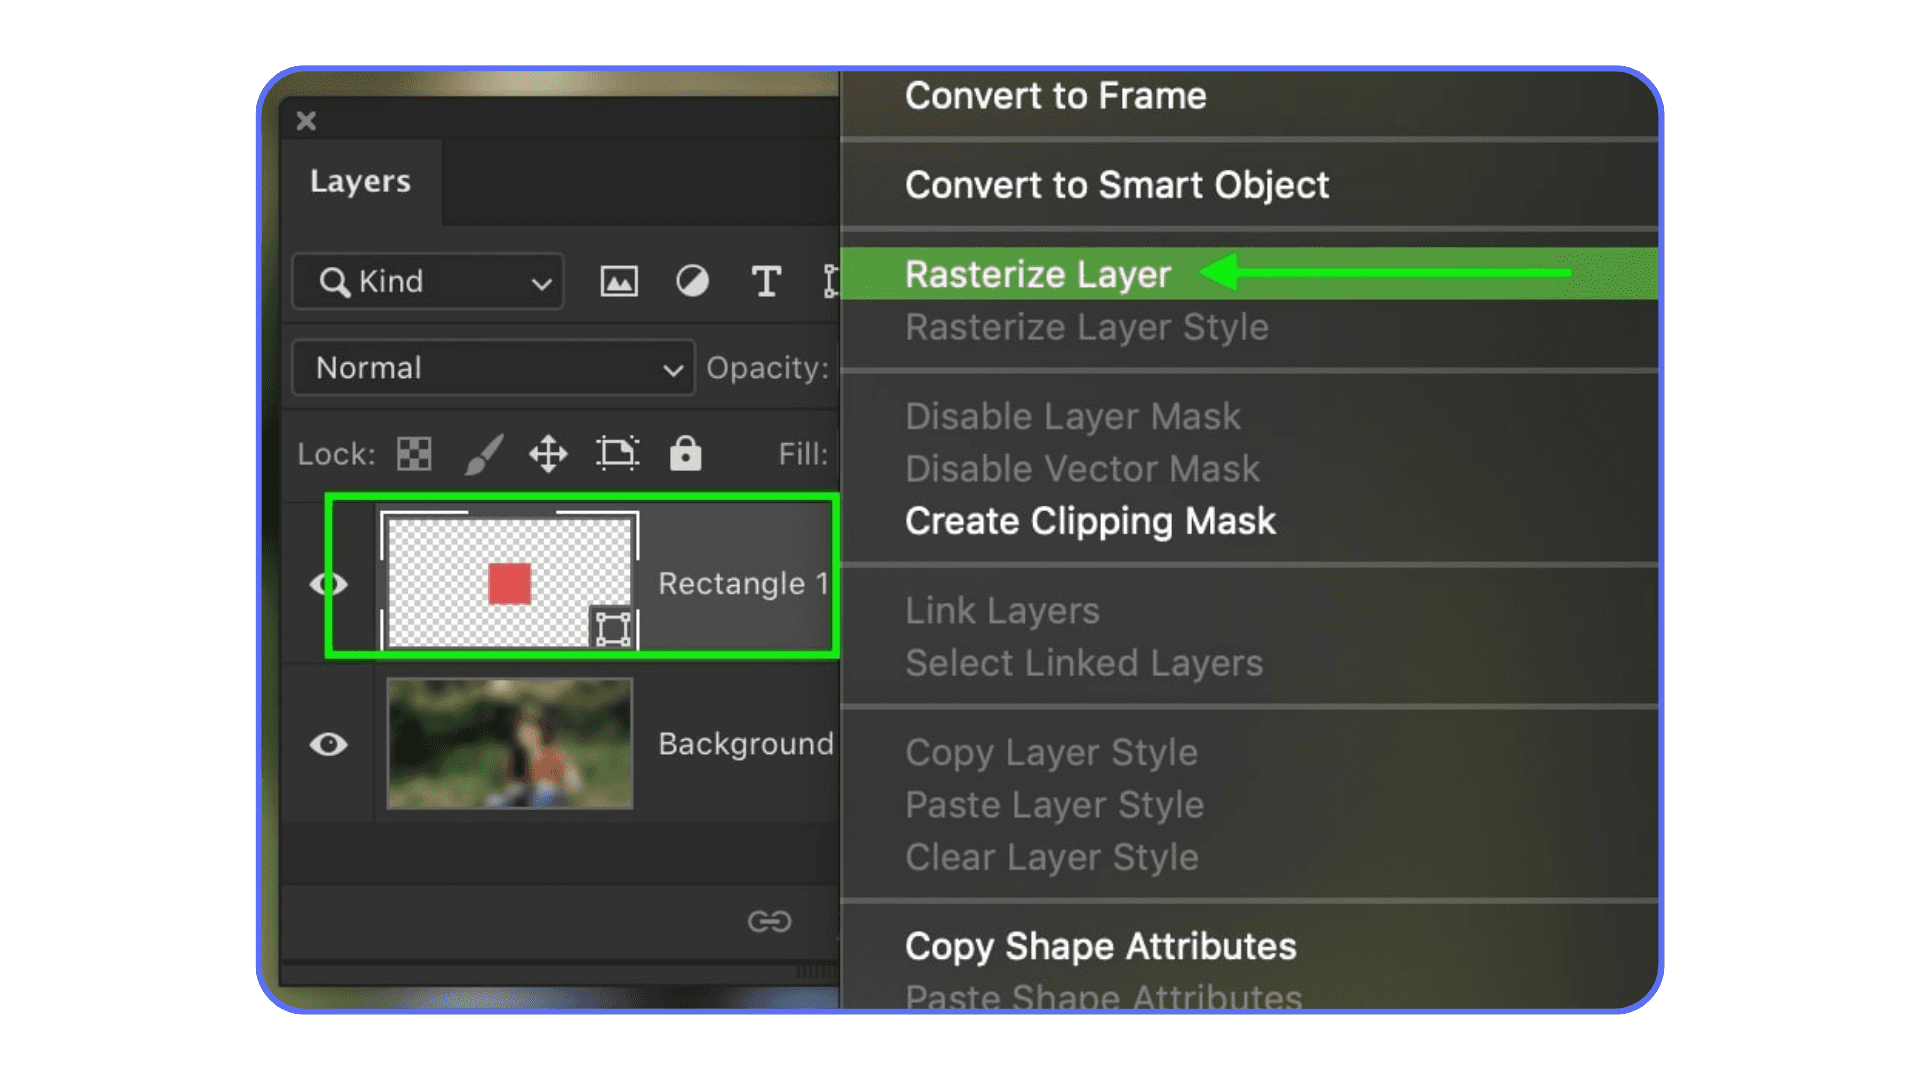
The fastest method lives in the Layers panel. You right-click the layer you’re working on and choose Rasterize Layer. If it’s a text layer, you’ll see Rasterize Type. For shapes, Rasterize Shape. For Smart Objects, Rasterize Layer again, which is Photoshop’s quiet way of saying “this is permanent.”
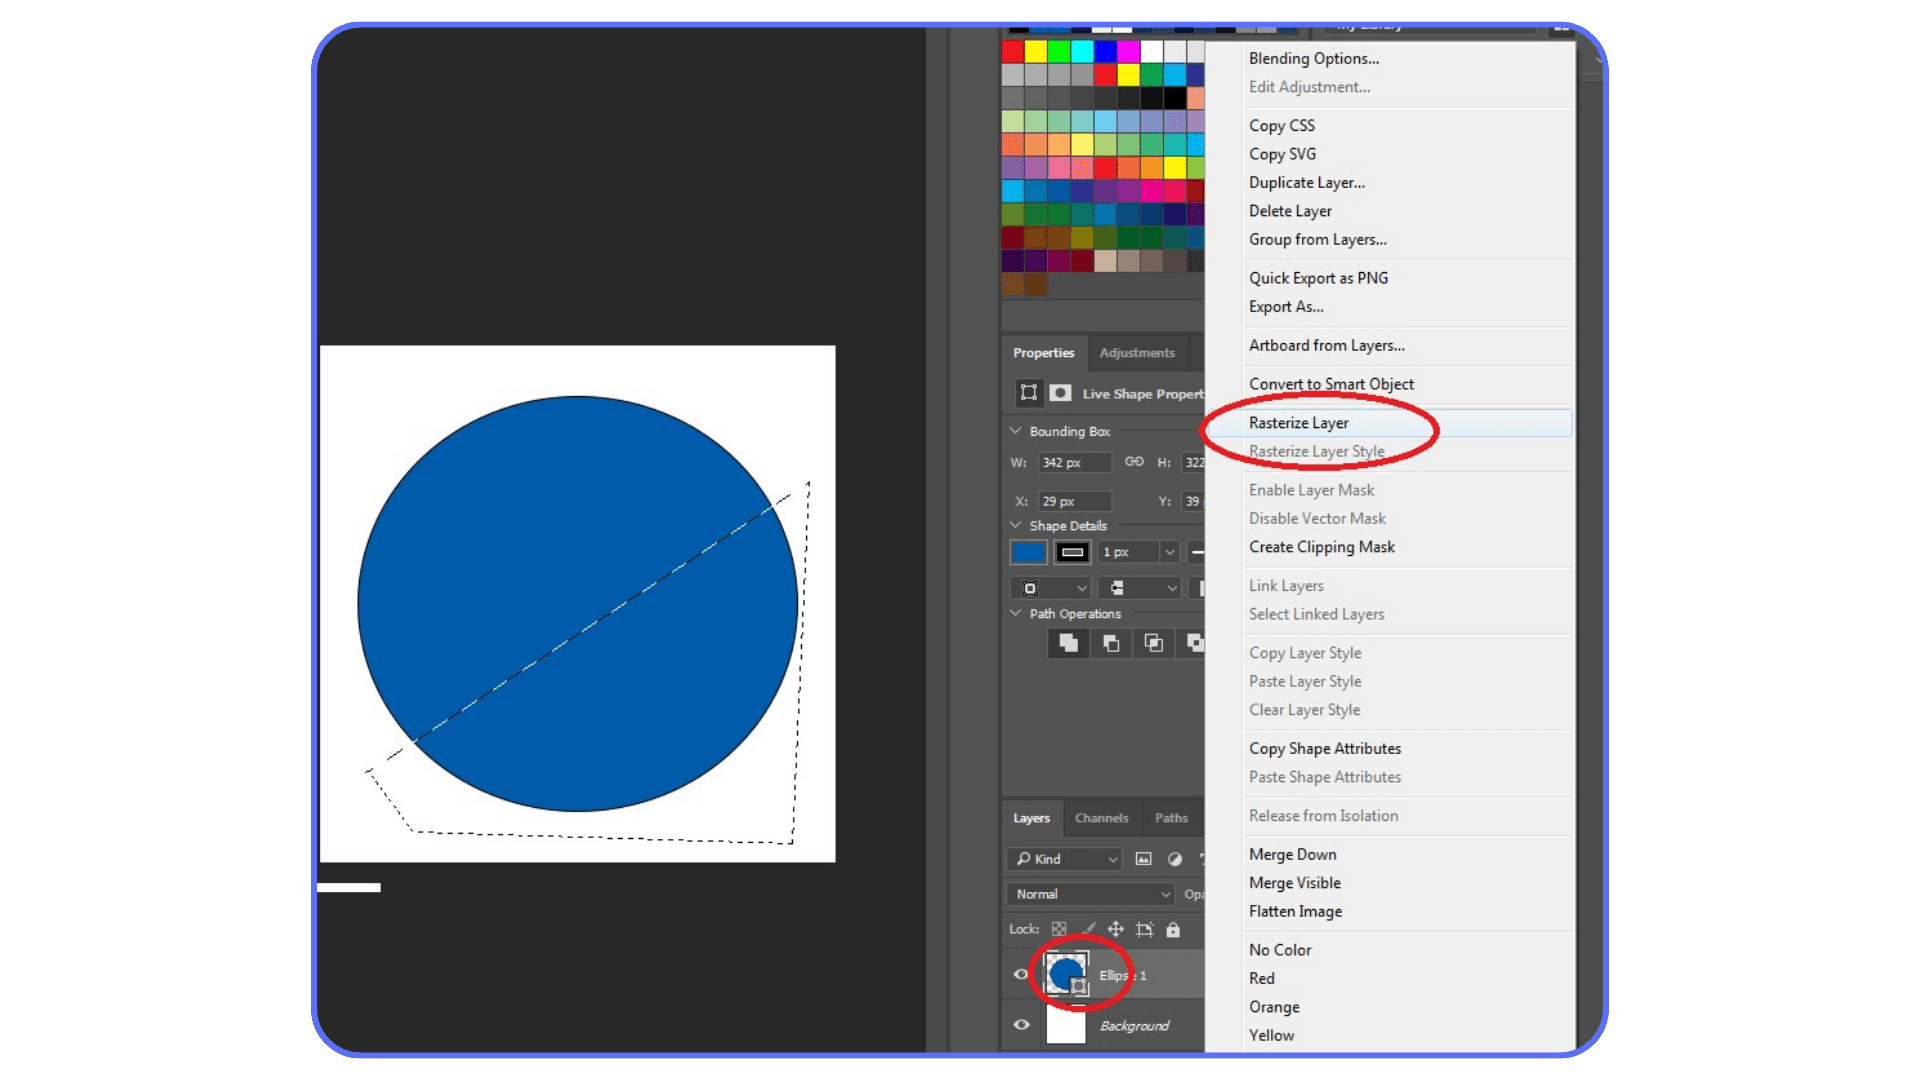
This method is quick and contextual. It’s what most people use because it’s right there, under the cursor, when the warning pops up.
The second method runs through the top menu. Go to Layer → Rasterize, then pick what you want to rasterize. Type, Shape, Fill, Smart Object, or the whole layer. This route gives you a bit more intention. You’re choosing to rasterize, not just reacting to a popup.
Here’s where things matter. Rasterizing text is usually the most common case. Let’s say you’ve typed a headline, positioned it, and now you want to add hand-painted texture across the letters. Rasterizing converts that text into pixels so the brush actually works. Totally valid. But once you do it, that headline is frozen. No font changes. No spelling fixes. Miss a typo and you’re retyping from scratch.
Shapes behave the same way. Rasterize a vector shape and it stops being mathematically perfect. You gain the ability to distort, erase, and paint freely, but you lose infinite scalability.
Smart Objects are the biggest trap. Rasterizing a Smart Object throws away its protective layer entirely. Any embedded file, any resolution independence, gone. In most cases, opening the Smart Object and editing it directly is the safer move. Rasterizing should be the last option, not the first instinct.
A habit that saves real time is duplicating the layer before rasterizing. Keep the original hidden. Rasterize the copy. That way, when you need to revise something later, you’re not stuck recreating work you already solved once.
Rasterizing itself is easy. The decision around it is where experience shows. Clicking OK is effortless. Choosing the right moment to do it is the actual skill.
Smart Habits Before You Rasterize Anything
Rasterizing isn’t dangerous. Careless rasterizing is. A few small habits make a massive difference, especially once files get complex.
First rule, always duplicate the layer. Every time. It takes half a second and saves hours later. Keep the original text, shape, or Smart Object hidden and untouched. Rasterize the copy and work on that. When changes come up, and they always do, you’ll be glad you didn’t burn the bridge behind you.

Layer names matter more than people admit. A rasterized layer called “Layer 12 copy” is a future headache. Rename it. “Headline raster” or “Texture base” tells you what it is and why it exists. When you’re scanning a file months later, this clarity is gold.
Before rasterizing, ask yourself if you even need to. A lot of effects that seem to require rasterizing don’t. Masks let you hide and reveal without destroying anything. Adjustment layers can change color and contrast without touching pixels. In many cases, working on a new empty layer clipped to the original gives you the same result without locking anything in.
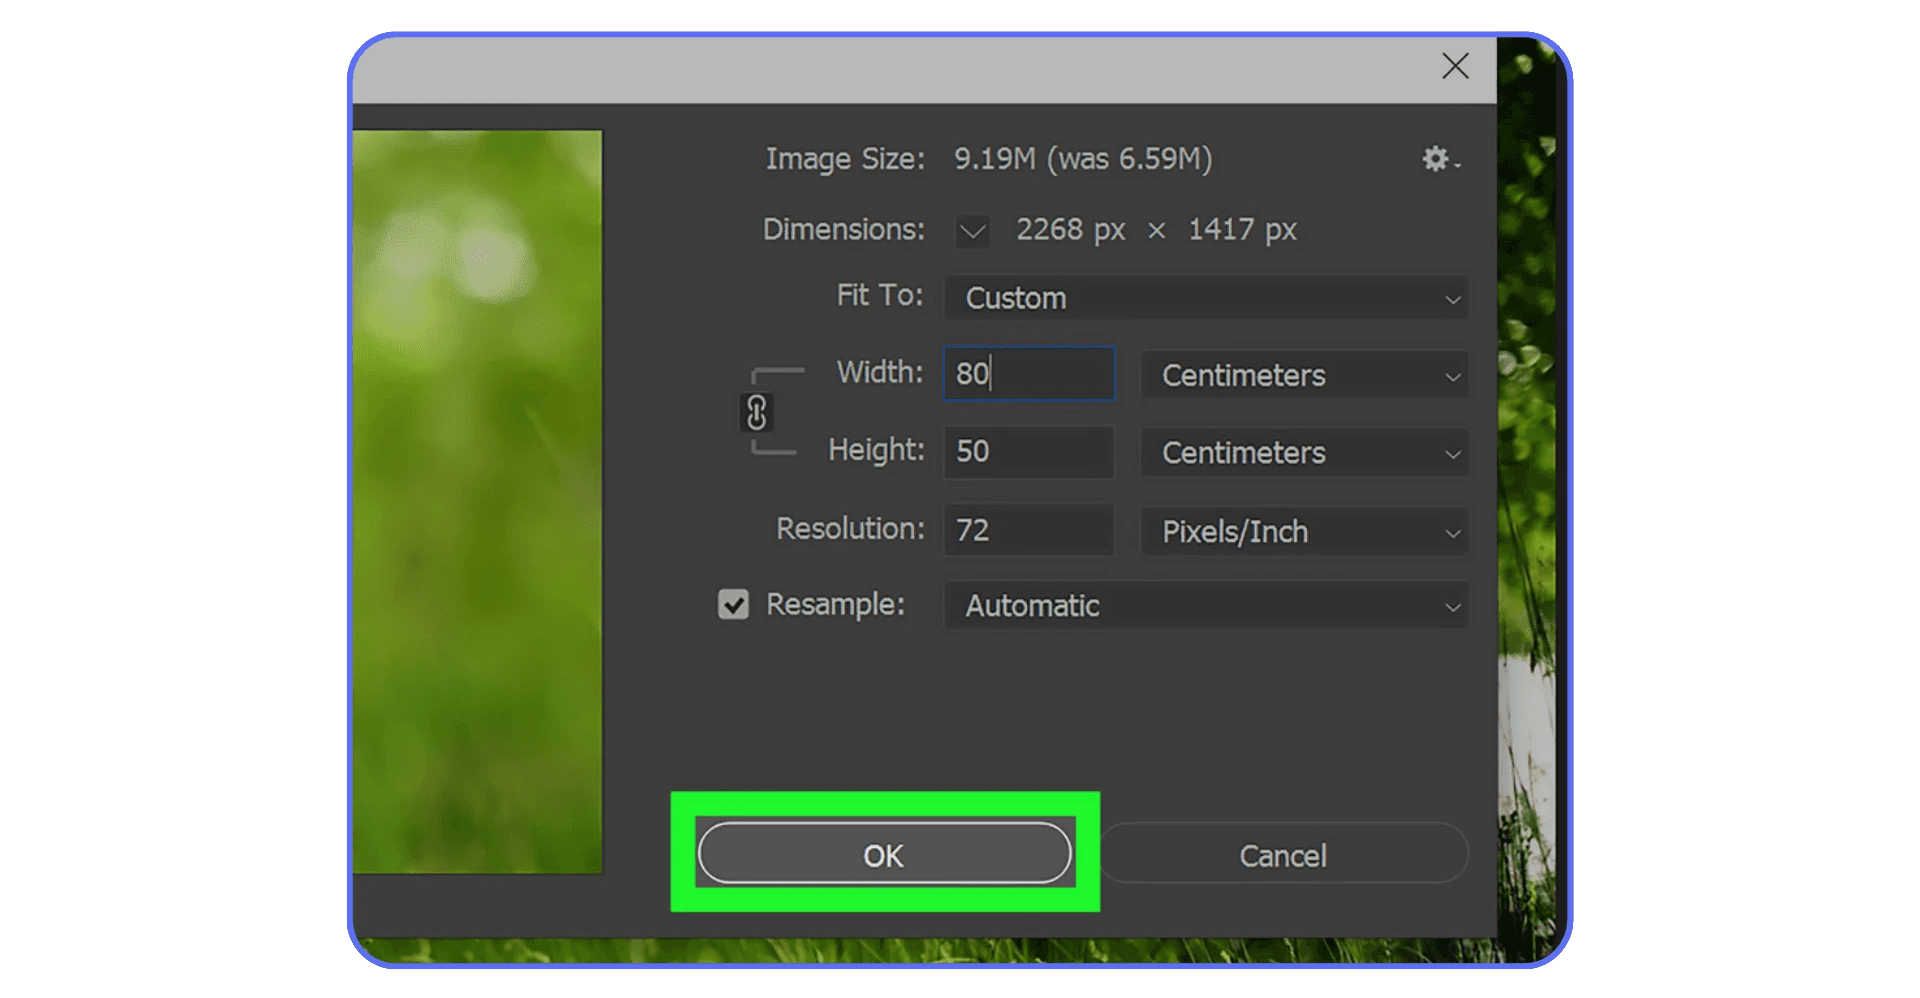
Resolution is another quiet trap. Once rasterized, scaling up means losing quality. If there’s any chance the asset will need to be bigger later, rasterize at the largest size you’ll realistically need. Downsizing is forgiving. Upsizing is not.
These habits don’t slow you down. They actually speed you up over time. You spend less energy fixing avoidable mistakes and more time pushing the design where it needs to go. Rasterizing becomes a deliberate step instead of a reflex.
And that’s the shift that separates clean, flexible files from ones that quietly fall apart under pressure.
Mistakes That Come Back to Bite You
The most common mistake is rasterizing too early. Everything feels finished in the moment, so you lock it in. Then the project evolves. Copy changes. Sizes change. Platforms change. Suddenly that “final” text isn’t final at all, and you’re stuck rebuilding something that used to be editable.
Another classic one is confusing rasterizing with flattening. Rasterizing affects a single layer. Flattening crushes everything into one. I’ve seen people rasterize carefully, then flatten the file out of habit before exporting. At that point, all the smart decisions you made earlier are gone. If you need a flattened export, save a copy and flatten that. Never the working file.
People also underestimate how much quality they lose when scaling rasterized layers. It doesn’t always look bad immediately, especially on screen. The damage shows up later, usually in print or high-resolution exports, where edges look soft and details feel off. By then, it’s too late to fix cleanly.
One mistake that flies under the radar is rasterizing to solve the wrong problem. Sometimes Photoshop blocks an action because you’re on the wrong layer or using the wrong tool, not because rasterizing is required. Clicking OK becomes a shortcut instead of thinking through the workflow. Over time, that habit turns flexible files into fragile ones.
None of these mistakes feel dramatic when they happen. That’s why they’re dangerous. Rasterizing doesn’t crash Photoshop or throw errors. It just quietly limits your options later. And design work has a way of demanding options long after you thought you were done.
Avoiding these mistakes isn’t about being cautious. It’s about staying adaptable. The more room you leave yourself, the less painful revisions become.
Not everyone has access to a powerful GPU, and plenty of people still need Photoshop to behave on more limited setups.
When You Should Avoid Rasterizing Altogether
There are plenty of situations where rasterizing feels like the obvious solution, but it’s actually the wrong move. Especially if you care about flexibility later.
If the goal is to hide or reveal part of a layer, masks are almost always better. A layer mask lets you erase visually without deleting anything. You can paint black, paint white, change your mind, and keep going. Rasterizing just to use the Eraser is usually unnecessary.
Adjustment layers are another big one. Changing color, contrast, or tone doesn’t require rasterizing. Adjustment layers sit on top and modify how things look without touching the original pixels. You can tweak them endlessly, turn them off, or remove them entirely. Rasterizing first just limits your options.
Smart Objects exist specifically to avoid destructive edits. If you’re applying filters or transformations, converting a layer to a Smart Object often solves the problem without rasterizing. You get the effect, but you keep the ability to adjust it later. Rasterizing a Smart Object should be the last resort, not the default response.
There are also times when rasterizing is just a shortcut for impatience. You want the tool to work now, so you click OK without thinking about where the file is headed. That’s fine for quick experiments or throwaway assets. It’s risky for anything that might need revisions, exports, or reuse.
Avoiding rasterizing doesn’t make you slower or more precious. It keeps your files alive longer. When a project stretches beyond the first draft, non-destructive choices start paying dividends. Rasterizing has its place, but it shouldn’t be your opening move.
Choosing the right PC or laptop makes a noticeable difference once raster-heavy projects become the norm.
Rasterizing, File Size, and Performance
This is the part almost nobody connects to rasterizing until their machine starts gasping for air.
Every time you rasterize, you’re committing pixels to the file. Real pixels. High-resolution ones. Do that a few times with large text blocks, AI-generated images, or detailed textures, and your PSD quietly balloons in size. What started as a clean, lightweight file turns into a multi-gigabyte monster without much warning.
Photoshop has to keep all of that in memory. Every raster layer adds to the load. More pixels mean more RAM usage, more disk caching, and slower redraws when you zoom, pan, or transform. You feel it as lag. Brush strokes stutter. Undo takes longer. Saving becomes a small emotional event.
This gets worse with modern workflows. AI-generated assets tend to be huge. High bit depth files, massive canvases, dozens of layers. Rasterizing those assets locks all that data in place instead of letting Photoshop reference it efficiently. The flexibility is gone, and the performance cost stays.
On a powerful local machine, you might get away with it for a while. On a laptop, especially a few years old, raster-heavy projects are where things start to fall apart. Fans spin up. Battery drains fast. Photoshop crashes at the worst possible moment.
The frustrating part is that rasterizing often feels like the cause of creative freedom, not performance problems. You rasterize so you can keep working. Then the file slows down so much that working becomes painful anyway.
This is usually the point where people assume Photoshop is the problem. Most of the time, it’s not. It’s just doing exactly what you asked, handling millions of pixels on hardware that’s running out of headroom.
Understanding this connection changes how you work. Rasterizing isn’t just a creative decision. It’s a technical one. Every rasterized layer is a performance commitment, whether you notice it immediately or not.
At that point, performance stops being abstract and starts being about real hardware choices, especially your GPU, which plays a bigger role in Photoshop than most people realize.
If your GPU isn’t configured properly, Photoshop can bottleneck even on decent machines, especially once rasterized layers pile up.
Using Vagon Cloud Computer for Heavy Photoshop Work
This is usually where the conversation shifts from technique to reality.
Once your Photoshop files get dense with raster layers, high-resolution assets, and AI-generated elements, the bottleneck stops being skill. It becomes hardware. At a certain point, no amount of careful layer management saves you from the limits of your local machine.
I’ve noticed this especially with raster-heavy workflows. You do everything right. You duplicate layers. You avoid destructive edits where you can. But the moment you commit to pixels at scale, Photoshop needs raw power. CPU, GPU, RAM. A lot of it.
This is where Vagon Cloud Computer fits naturally, not as a magic button, but as a practical workaround. Instead of forcing your laptop or desktop to carry the entire load, you run Photoshop on a high-performance cloud machine. More memory, stronger GPUs, no thermal throttling. The file doesn’t care where the power comes from. It just runs smoother.
For projects involving large rasterized text effects, detailed retouching, or massive AI-generated images, the difference is noticeable. Brushes stay responsive. Zooming doesn’t lag. Saving stops feeling risky. You can focus on the creative decisions instead of watching the progress bar crawl.
There’s also a collaboration angle that matters more than people expect. When the heavy lifting happens in the cloud, sharing access to a working environment becomes simpler. No sending gigantic PSDs back and forth. No worrying about whether someone else’s machine can even open the file without choking.
Vagon isn’t something you need for every Photoshop task. Lightweight edits and quick comps work fine locally. But once rasterizing becomes a core part of the workflow, especially at high resolutions, cloud hardware stops feeling like overkill and starts feeling like common sense.
It doesn’t change how rasterizing works. It just gives you enough headroom to use it without constantly fighting your tools.
This also matters if you’re working across devices, like starting edits on a desktop and continuing them on an iPad without downgrading your workflow.
This approach also opens doors for devices that normally struggle with Photoshop, including Chromebooks.
Final Thoughts
Rasterizing isn’t the villain it’s sometimes made out to be. It’s just a commitment. Once you understand that, the whole thing feels a lot less mysterious.
The real issue isn’t rasterizing itself. It’s doing it on autopilot. Clicking OK without thinking. Treating that warning like background noise instead of a decision. When you slow down for half a second and ask what you’re giving up, your files get cleaner, your revisions get easier, and your stress level drops more than you’d expect.
I think the healthiest mindset is this. Rasterizing is a finishing move, not a starting point. Use it when you need full pixel control. Avoid it when flexibility still matters. Keep originals around. Give future you a fighting chance.
Photoshop hasn’t changed this rule in years, and it probably won’t. Pixels are powerful, but they’re unforgiving. Once you accept that tradeoff and work with it instead of against it, rasterizing stops being a problem and starts being just another tool you know how to use well.
FAQs
1. What actually changes when I rasterize a layer?
Photoshop converts the layer into fixed pixels. Any underlying data like fonts, vector paths, or Smart Object links is removed. From that point on, Photoshop only sees color values. You gain full pixel-level control, but you lose the ability to edit the original structure of the layer.
2. What happens when you rasterize text in Photoshop?
Text becomes an image. You can paint on it, erase parts of letters, distort edges, and apply any filter you want. You can’t edit the text, change fonts, or fix spelling anymore. If you think the wording might change later, keep a live copy of the text hidden in the file.
3. Can rasterizing be undone later?
Only in very limited situations. If the file is still open and the action is in your history, you can undo it. Once you save, close, and reopen the file, rasterizing is permanent unless you kept an unrasterized version of the layer.
4. Is rasterizing the same as flattening?
No, and confusing the two causes real damage. Rasterizing affects one layer. Flattening merges every visible layer into a single background layer. Flattening removes masks, adjustment layers, blend modes, and editability across the entire file.
5. Does rasterizing improve Photoshop performance?
Sometimes, but often it makes things worse. Rasterized layers increase file size and memory usage. In small files, the difference is negligible. In large or AI-heavy projects, rasterizing can slow down brushes, transforms, and saving.
6. When should I rasterize instead of using a Smart Object?
Rasterize only when you need direct pixel edits that Smart Objects don’t allow, like hand-painting details or erasing parts of a design. If filters or transformations are the goal, Smart Objects are usually the better option.
7. Should I rasterize before exporting or sharing a file?
Usually no. Photoshop handles rasterization during export automatically. Keeping your working file non-destructive gives you more flexibility if revisions come back.
8. What’s the safest workflow if I know I’ll need to rasterize?
Duplicate the layer, hide the original, and rasterize the copy. Name it clearly. That one habit prevents most irreversible mistakes.
9. Why does Photoshop force rasterizing for some tools but not others?
Some tools were built to work only with pixels. Brushes, erasers, smudge tools, and certain filters don’t understand vectors or live text. Photoshop forces rasterization so those tools can function correctly.
10. Is rasterizing bad practice?
No. Blind rasterizing is. When it’s intentional and timed correctly, rasterizing is a powerful part of professional workflows.
You’re editing along, everything’s fine, and then Photoshop interrupts you with that familiar message about rasterizing. Two buttons. OK or Cancel. Most people don’t stop to think. They just click OK and keep moving.
That popup exists because Photoshop is about to let you do something permanent. Text layers, shapes, and Smart Objects aren’t made of pixels. They’re instructions. Fonts, vectors, references. Tools like brushes, erasers, and many filters only work on real pixels, so Photoshop has to convert the layer before it lets you continue.
That’s why certain actions are blocked. Not because Photoshop is being difficult, but because once a layer is rasterized, you lose flexibility. You can paint on it, distort it, and manipulate it freely, but you can’t go back and edit the text or scale it cleanly anymore.
I used to click past that warning without thinking. Everyone does. The problem shows up later, when you reopen a file and realize the text is locked in forever. Once you understand why that popup appears, it stops being an annoyance and starts feeling like a decision point.
What Rasterizing Really Means in Practice
At its core, rasterizing is simple. Photoshop takes something flexible and turns it into pixels. That’s it. But the implications are bigger than the definition makes it sound.
Text layers are live. They remember the font, the size, the spacing. Shape layers are vectors, built from paths and math instead of colored dots. Smart Objects are even smarter. They’re basically containers that protect whatever’s inside them. All of these can be resized again and again without falling apart.
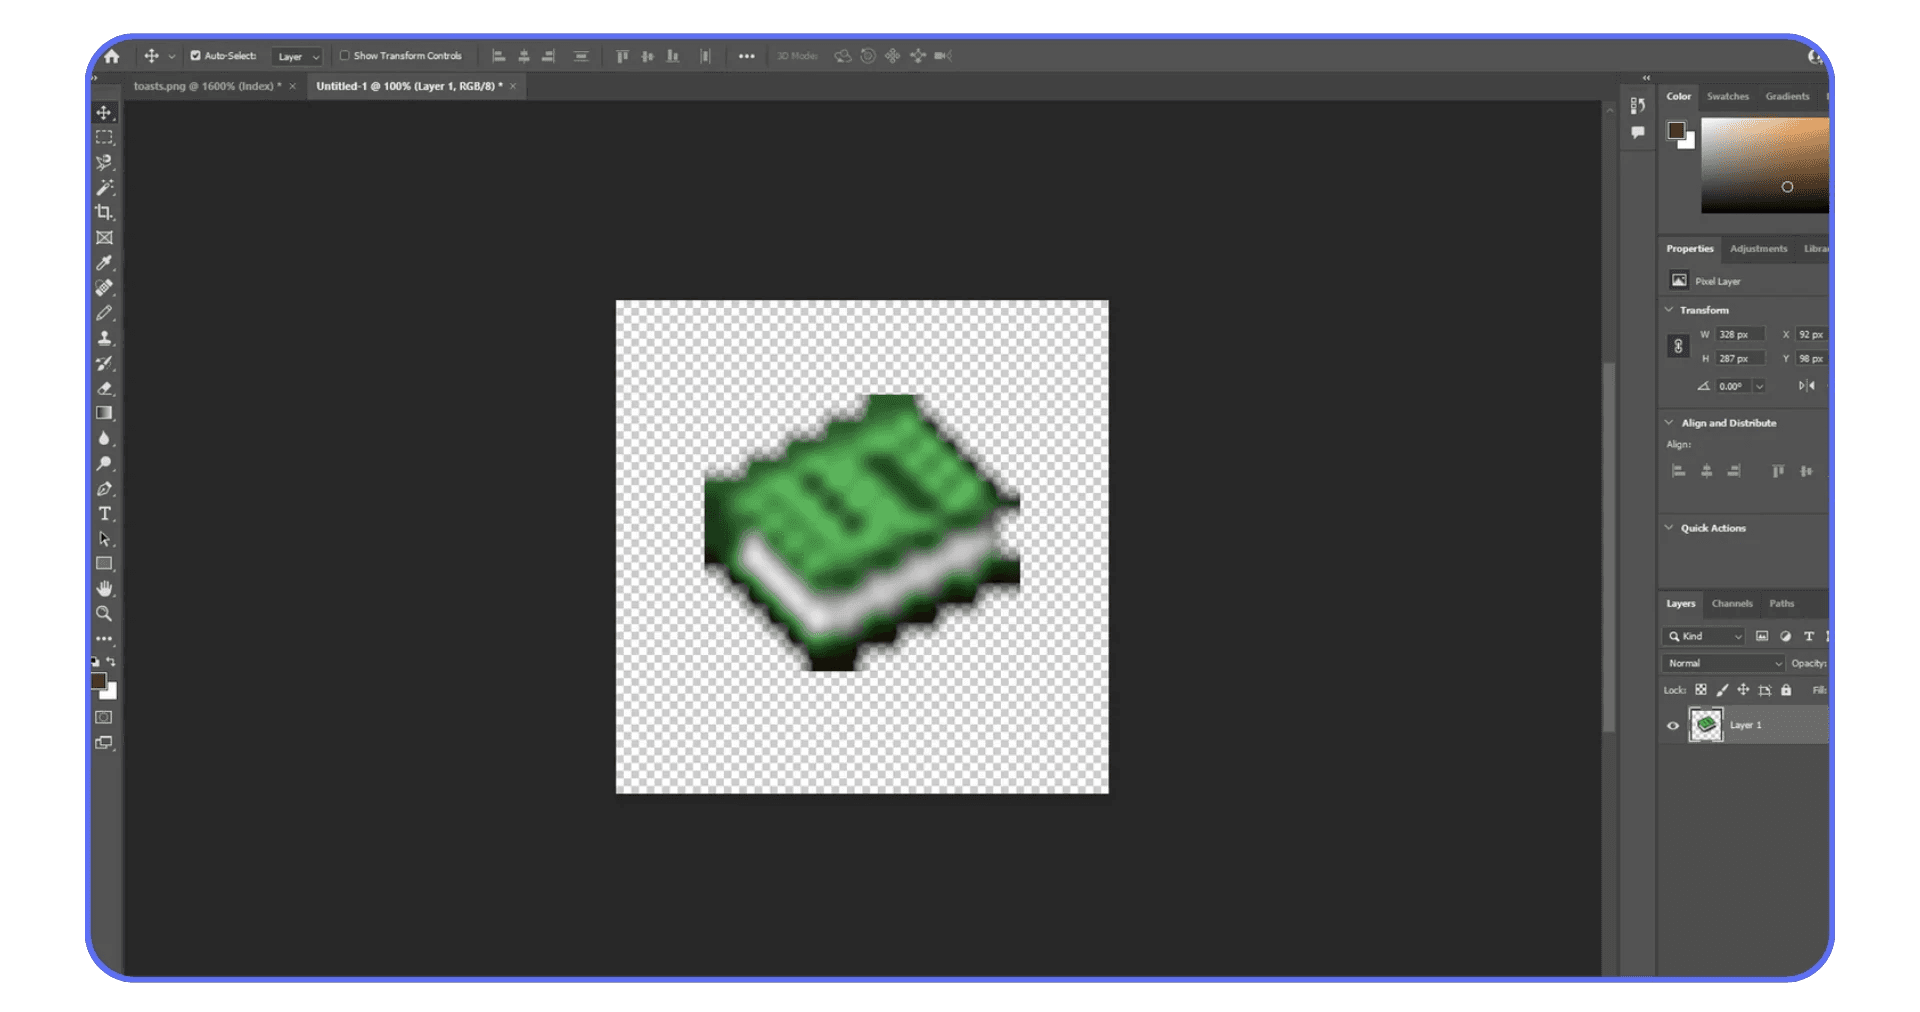
When you rasterize, Photoshop throws all that away and replaces it with a fixed grid of pixels. Every letter, curve, and edge gets baked into the image. From that point on, Photoshop treats it like a photo. No memory of how it was made. Just color values.
What do you gain? Control. Total freedom. You can paint directly on text. Smudge edges. Warp details in ways vectors never allow. For a lot of creative work, that freedom matters. Especially when you’re doing texture-heavy designs, hand-drawn effects, or anything that needs to feel imperfect.
What do you lose? Flexibility. Permanently. You can’t change the wording later. You can’t scale it up without losing sharpness. You can’t swap fonts or tweak spacing because there is no font anymore. Just pixels pretending they were never anything else.
In my experience, this is where people get tripped up. Rasterizing feels harmless because nothing visibly breaks in the moment. The file looks fine. Everything works. The damage only shows itself later, usually when a client asks for “one small text change” or you need a different export size.
Rasterizing isn’t good or bad. It’s a trade. You’re exchanging editability for direct manipulation. Once you see it that way, the decision becomes clearer. Sometimes you need pixels. Sometimes you really don’t. The trick is knowing which situation you’re in before you click that button.
Common Situations Where Photoshop Forces Rasterizing
Photoshop usually doesn’t ask you to rasterize out of nowhere. It does it when you try to use a tool that simply can’t work on non-pixel layers. Once you notice the pattern, those warnings stop feeling random.
The most common trigger is text. The moment you grab a brush and try to paint directly on a text layer, Photoshop shuts it down. Same thing if you try to erase part of a letter or use the Smudge tool. Text layers are still editable fonts at that point, not pixels, so Photoshop won’t let pixel-based tools touch them.
Filters are another big one. Some filters work fine on Smart Objects or vector layers. Others don’t. Older filters especially expect raw pixel data. Try running one of those on text or a shape layer and you’ll get the rasterize prompt immediately.
Shapes cause similar confusion. Shape layers look like pixels on screen, but they’re actually vectors. You can resize them endlessly and tweak their fill and stroke. The second you try to distort them with pixel-only tools or paint inside them directly, Photoshop asks for rasterization.
Imported assets can also trigger this. Logos from Illustrator, SVG files, or even some AI-generated graphics often come in as Smart Objects. They feel like images, but they’re protected containers. If you try to edit them destructively without opening the Smart Object first, Photoshop steps in.
The key thing to understand is this. Photoshop isn’t being inconsistent. It’s checking whether the tool you chose works on instructions or only on pixels. If it’s the latter, rasterizing becomes mandatory.
Once you recognize these situations early, you can pause and decide what you actually want. Do you really need to paint on that text, or would a mask do the job? Should you open the Smart Object instead of flattening it? That split second of awareness saves a lot of cleanup later.
This is where most good workflows are made or broken. Not by avoiding rasterizing entirely, but by choosing it intentionally instead of being forced into it.
How to Rasterize in Photoshop (The Right Way)
There are only two ways people actually rasterize layers in Photoshop, and both do the same thing. The difference is control.
The fastest method lives in the Layers panel. You right-click the layer you’re working on and choose Rasterize Layer. If it’s a text layer, you’ll see Rasterize Type. For shapes, Rasterize Shape. For Smart Objects, Rasterize Layer again, which is Photoshop’s quiet way of saying “this is permanent.”
This method is quick and contextual. It’s what most people use because it’s right there, under the cursor, when the warning pops up.
The second method runs through the top menu. Go to Layer → Rasterize, then pick what you want to rasterize. Type, Shape, Fill, Smart Object, or the whole layer. This route gives you a bit more intention. You’re choosing to rasterize, not just reacting to a popup.
Here’s where things matter. Rasterizing text is usually the most common case. Let’s say you’ve typed a headline, positioned it, and now you want to add hand-painted texture across the letters. Rasterizing converts that text into pixels so the brush actually works. Totally valid. But once you do it, that headline is frozen. No font changes. No spelling fixes. Miss a typo and you’re retyping from scratch.
Shapes behave the same way. Rasterize a vector shape and it stops being mathematically perfect. You gain the ability to distort, erase, and paint freely, but you lose infinite scalability.
Smart Objects are the biggest trap. Rasterizing a Smart Object throws away its protective layer entirely. Any embedded file, any resolution independence, gone. In most cases, opening the Smart Object and editing it directly is the safer move. Rasterizing should be the last option, not the first instinct.
A habit that saves real time is duplicating the layer before rasterizing. Keep the original hidden. Rasterize the copy. That way, when you need to revise something later, you’re not stuck recreating work you already solved once.
Rasterizing itself is easy. The decision around it is where experience shows. Clicking OK is effortless. Choosing the right moment to do it is the actual skill.
Smart Habits Before You Rasterize Anything
Rasterizing isn’t dangerous. Careless rasterizing is. A few small habits make a massive difference, especially once files get complex.
First rule, always duplicate the layer. Every time. It takes half a second and saves hours later. Keep the original text, shape, or Smart Object hidden and untouched. Rasterize the copy and work on that. When changes come up, and they always do, you’ll be glad you didn’t burn the bridge behind you.
Layer names matter more than people admit. A rasterized layer called “Layer 12 copy” is a future headache. Rename it. “Headline raster” or “Texture base” tells you what it is and why it exists. When you’re scanning a file months later, this clarity is gold.
Before rasterizing, ask yourself if you even need to. A lot of effects that seem to require rasterizing don’t. Masks let you hide and reveal without destroying anything. Adjustment layers can change color and contrast without touching pixels. In many cases, working on a new empty layer clipped to the original gives you the same result without locking anything in.
Resolution is another quiet trap. Once rasterized, scaling up means losing quality. If there’s any chance the asset will need to be bigger later, rasterize at the largest size you’ll realistically need. Downsizing is forgiving. Upsizing is not.
These habits don’t slow you down. They actually speed you up over time. You spend less energy fixing avoidable mistakes and more time pushing the design where it needs to go. Rasterizing becomes a deliberate step instead of a reflex.
And that’s the shift that separates clean, flexible files from ones that quietly fall apart under pressure.
Mistakes That Come Back to Bite You
The most common mistake is rasterizing too early. Everything feels finished in the moment, so you lock it in. Then the project evolves. Copy changes. Sizes change. Platforms change. Suddenly that “final” text isn’t final at all, and you’re stuck rebuilding something that used to be editable.
Another classic one is confusing rasterizing with flattening. Rasterizing affects a single layer. Flattening crushes everything into one. I’ve seen people rasterize carefully, then flatten the file out of habit before exporting. At that point, all the smart decisions you made earlier are gone. If you need a flattened export, save a copy and flatten that. Never the working file.
People also underestimate how much quality they lose when scaling rasterized layers. It doesn’t always look bad immediately, especially on screen. The damage shows up later, usually in print or high-resolution exports, where edges look soft and details feel off. By then, it’s too late to fix cleanly.
One mistake that flies under the radar is rasterizing to solve the wrong problem. Sometimes Photoshop blocks an action because you’re on the wrong layer or using the wrong tool, not because rasterizing is required. Clicking OK becomes a shortcut instead of thinking through the workflow. Over time, that habit turns flexible files into fragile ones.
None of these mistakes feel dramatic when they happen. That’s why they’re dangerous. Rasterizing doesn’t crash Photoshop or throw errors. It just quietly limits your options later. And design work has a way of demanding options long after you thought you were done.
Avoiding these mistakes isn’t about being cautious. It’s about staying adaptable. The more room you leave yourself, the less painful revisions become.
Not everyone has access to a powerful GPU, and plenty of people still need Photoshop to behave on more limited setups.
When You Should Avoid Rasterizing Altogether
There are plenty of situations where rasterizing feels like the obvious solution, but it’s actually the wrong move. Especially if you care about flexibility later.
If the goal is to hide or reveal part of a layer, masks are almost always better. A layer mask lets you erase visually without deleting anything. You can paint black, paint white, change your mind, and keep going. Rasterizing just to use the Eraser is usually unnecessary.
Adjustment layers are another big one. Changing color, contrast, or tone doesn’t require rasterizing. Adjustment layers sit on top and modify how things look without touching the original pixels. You can tweak them endlessly, turn them off, or remove them entirely. Rasterizing first just limits your options.
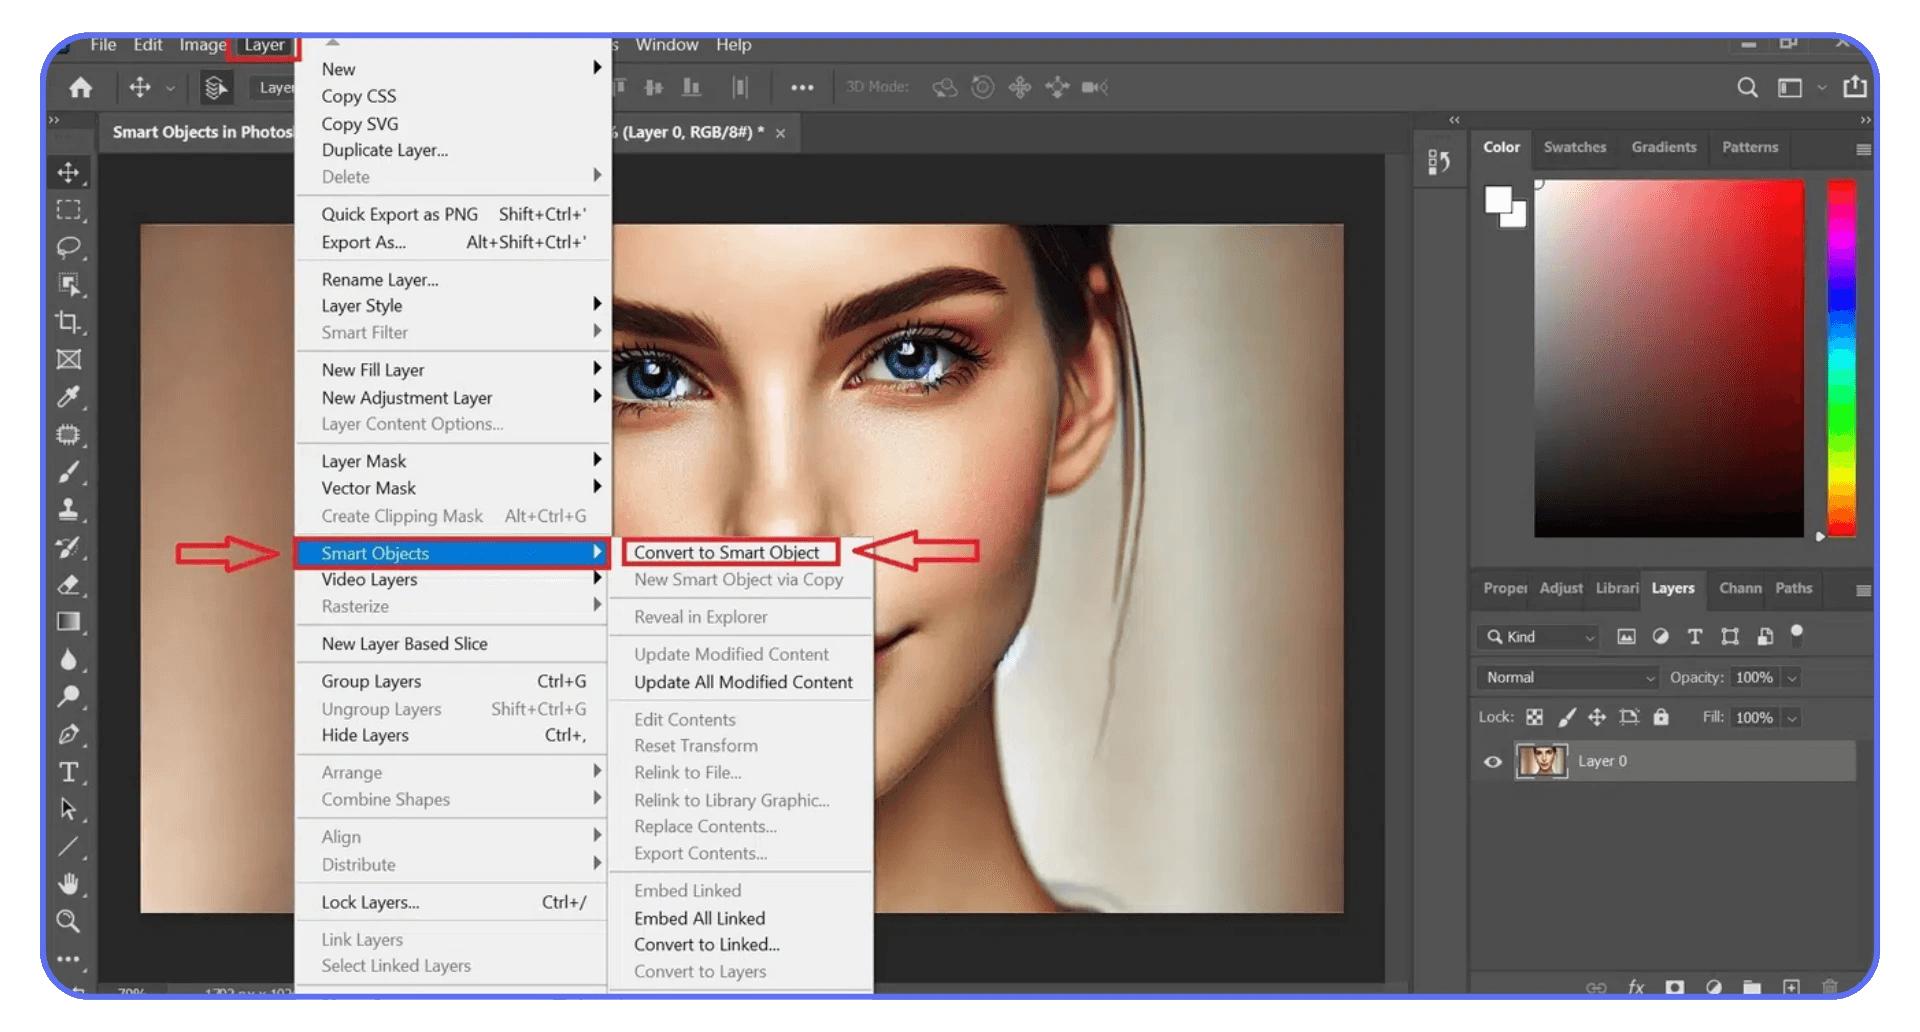
Smart Objects exist specifically to avoid destructive edits. If you’re applying filters or transformations, converting a layer to a Smart Object often solves the problem without rasterizing. You get the effect, but you keep the ability to adjust it later. Rasterizing a Smart Object should be the last resort, not the default response.
There are also times when rasterizing is just a shortcut for impatience. You want the tool to work now, so you click OK without thinking about where the file is headed. That’s fine for quick experiments or throwaway assets. It’s risky for anything that might need revisions, exports, or reuse.
Avoiding rasterizing doesn’t make you slower or more precious. It keeps your files alive longer. When a project stretches beyond the first draft, non-destructive choices start paying dividends. Rasterizing has its place, but it shouldn’t be your opening move.
Choosing the right PC or laptop makes a noticeable difference once raster-heavy projects become the norm.
Rasterizing, File Size, and Performance
This is the part almost nobody connects to rasterizing until their machine starts gasping for air.
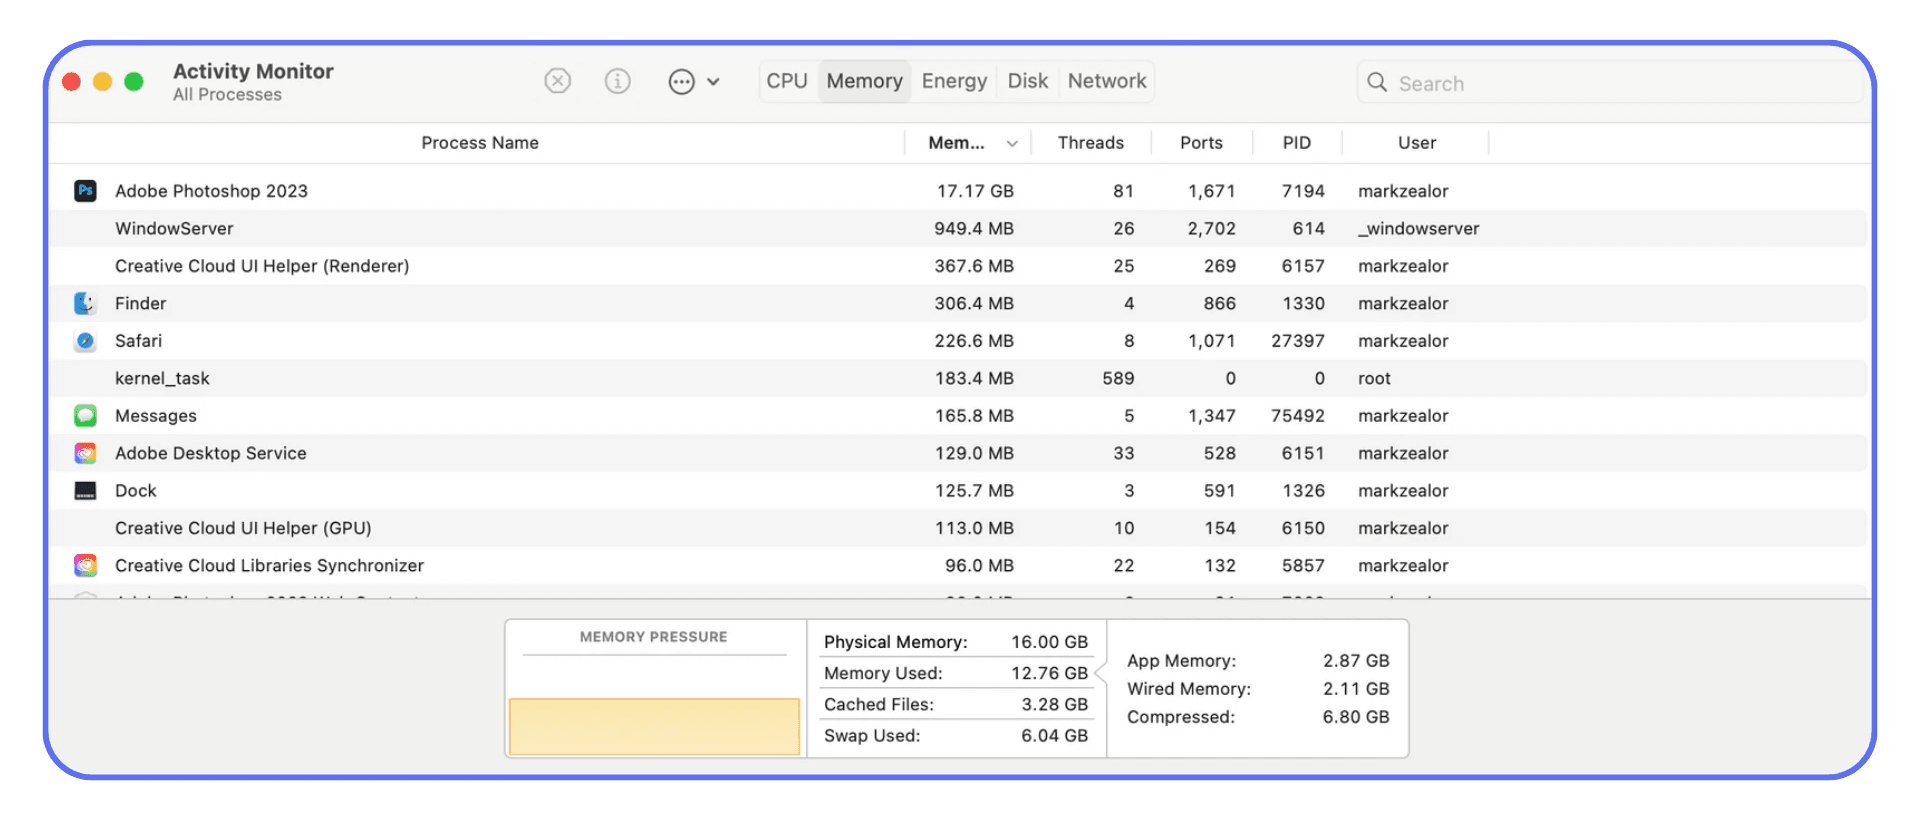
Every time you rasterize, you’re committing pixels to the file. Real pixels. High-resolution ones. Do that a few times with large text blocks, AI-generated images, or detailed textures, and your PSD quietly balloons in size. What started as a clean, lightweight file turns into a multi-gigabyte monster without much warning.
Photoshop has to keep all of that in memory. Every raster layer adds to the load. More pixels mean more RAM usage, more disk caching, and slower redraws when you zoom, pan, or transform. You feel it as lag. Brush strokes stutter. Undo takes longer. Saving becomes a small emotional event.
This gets worse with modern workflows. AI-generated assets tend to be huge. High bit depth files, massive canvases, dozens of layers. Rasterizing those assets locks all that data in place instead of letting Photoshop reference it efficiently. The flexibility is gone, and the performance cost stays.
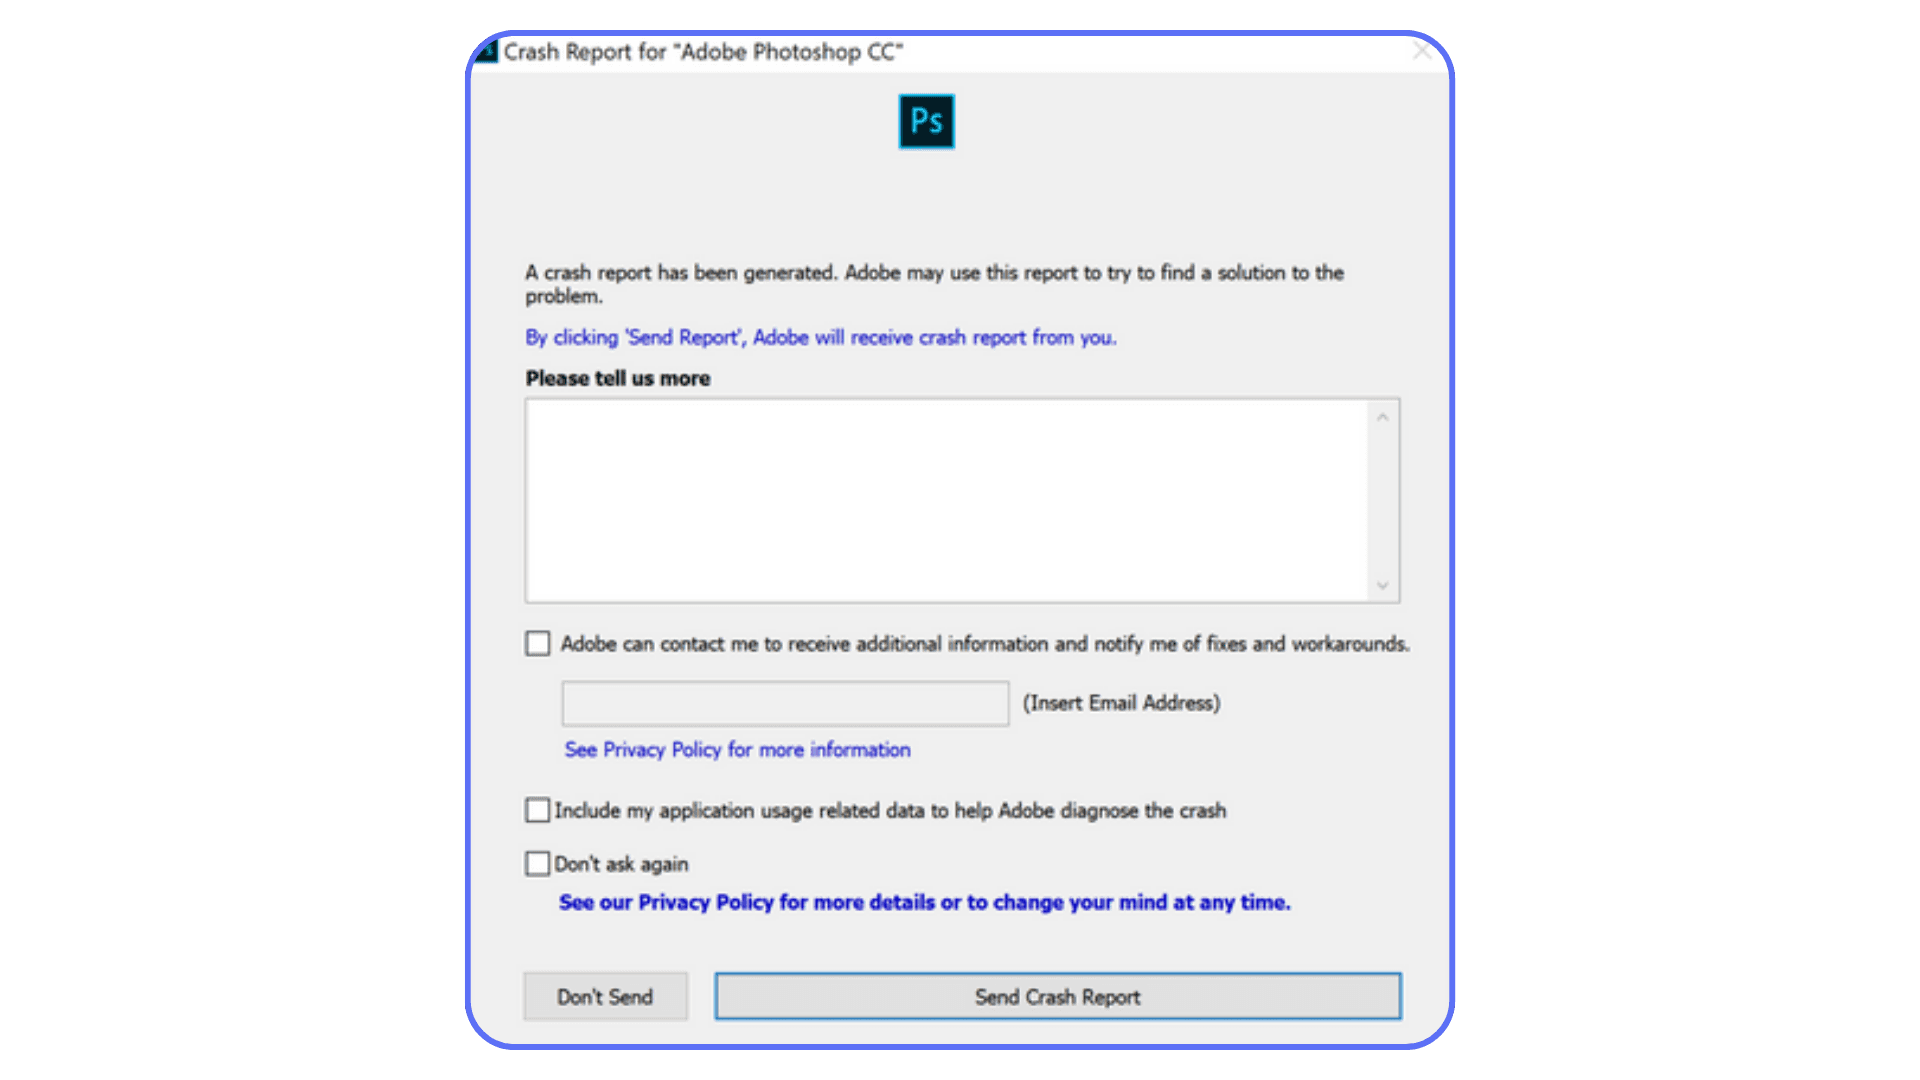
On a powerful local machine, you might get away with it for a while. On a laptop, especially a few years old, raster-heavy projects are where things start to fall apart. Fans spin up. Battery drains fast. Photoshop crashes at the worst possible moment.
The frustrating part is that rasterizing often feels like the cause of creative freedom, not performance problems. You rasterize so you can keep working. Then the file slows down so much that working becomes painful anyway.
This is usually the point where people assume Photoshop is the problem. Most of the time, it’s not. It’s just doing exactly what you asked, handling millions of pixels on hardware that’s running out of headroom.
Understanding this connection changes how you work. Rasterizing isn’t just a creative decision. It’s a technical one. Every rasterized layer is a performance commitment, whether you notice it immediately or not.
At that point, performance stops being abstract and starts being about real hardware choices, especially your GPU, which plays a bigger role in Photoshop than most people realize.
If your GPU isn’t configured properly, Photoshop can bottleneck even on decent machines, especially once rasterized layers pile up.
Using Vagon Cloud Computer for Heavy Photoshop Work
This is usually where the conversation shifts from technique to reality.
Once your Photoshop files get dense with raster layers, high-resolution assets, and AI-generated elements, the bottleneck stops being skill. It becomes hardware. At a certain point, no amount of careful layer management saves you from the limits of your local machine.
I’ve noticed this especially with raster-heavy workflows. You do everything right. You duplicate layers. You avoid destructive edits where you can. But the moment you commit to pixels at scale, Photoshop needs raw power. CPU, GPU, RAM. A lot of it.
This is where Vagon Cloud Computer fits naturally, not as a magic button, but as a practical workaround. Instead of forcing your laptop or desktop to carry the entire load, you run Photoshop on a high-performance cloud machine. More memory, stronger GPUs, no thermal throttling. The file doesn’t care where the power comes from. It just runs smoother.
For projects involving large rasterized text effects, detailed retouching, or massive AI-generated images, the difference is noticeable. Brushes stay responsive. Zooming doesn’t lag. Saving stops feeling risky. You can focus on the creative decisions instead of watching the progress bar crawl.
There’s also a collaboration angle that matters more than people expect. When the heavy lifting happens in the cloud, sharing access to a working environment becomes simpler. No sending gigantic PSDs back and forth. No worrying about whether someone else’s machine can even open the file without choking.
Vagon isn’t something you need for every Photoshop task. Lightweight edits and quick comps work fine locally. But once rasterizing becomes a core part of the workflow, especially at high resolutions, cloud hardware stops feeling like overkill and starts feeling like common sense.
It doesn’t change how rasterizing works. It just gives you enough headroom to use it without constantly fighting your tools.
This also matters if you’re working across devices, like starting edits on a desktop and continuing them on an iPad without downgrading your workflow.
This approach also opens doors for devices that normally struggle with Photoshop, including Chromebooks.
Final Thoughts
Rasterizing isn’t the villain it’s sometimes made out to be. It’s just a commitment. Once you understand that, the whole thing feels a lot less mysterious.
The real issue isn’t rasterizing itself. It’s doing it on autopilot. Clicking OK without thinking. Treating that warning like background noise instead of a decision. When you slow down for half a second and ask what you’re giving up, your files get cleaner, your revisions get easier, and your stress level drops more than you’d expect.
I think the healthiest mindset is this. Rasterizing is a finishing move, not a starting point. Use it when you need full pixel control. Avoid it when flexibility still matters. Keep originals around. Give future you a fighting chance.
Photoshop hasn’t changed this rule in years, and it probably won’t. Pixels are powerful, but they’re unforgiving. Once you accept that tradeoff and work with it instead of against it, rasterizing stops being a problem and starts being just another tool you know how to use well.
FAQs
1. What actually changes when I rasterize a layer?
Photoshop converts the layer into fixed pixels. Any underlying data like fonts, vector paths, or Smart Object links is removed. From that point on, Photoshop only sees color values. You gain full pixel-level control, but you lose the ability to edit the original structure of the layer.
2. What happens when you rasterize text in Photoshop?
Text becomes an image. You can paint on it, erase parts of letters, distort edges, and apply any filter you want. You can’t edit the text, change fonts, or fix spelling anymore. If you think the wording might change later, keep a live copy of the text hidden in the file.
3. Can rasterizing be undone later?
Only in very limited situations. If the file is still open and the action is in your history, you can undo it. Once you save, close, and reopen the file, rasterizing is permanent unless you kept an unrasterized version of the layer.
4. Is rasterizing the same as flattening?
No, and confusing the two causes real damage. Rasterizing affects one layer. Flattening merges every visible layer into a single background layer. Flattening removes masks, adjustment layers, blend modes, and editability across the entire file.
5. Does rasterizing improve Photoshop performance?
Sometimes, but often it makes things worse. Rasterized layers increase file size and memory usage. In small files, the difference is negligible. In large or AI-heavy projects, rasterizing can slow down brushes, transforms, and saving.
6. When should I rasterize instead of using a Smart Object?
Rasterize only when you need direct pixel edits that Smart Objects don’t allow, like hand-painting details or erasing parts of a design. If filters or transformations are the goal, Smart Objects are usually the better option.
7. Should I rasterize before exporting or sharing a file?
Usually no. Photoshop handles rasterization during export automatically. Keeping your working file non-destructive gives you more flexibility if revisions come back.
8. What’s the safest workflow if I know I’ll need to rasterize?
Duplicate the layer, hide the original, and rasterize the copy. Name it clearly. That one habit prevents most irreversible mistakes.
9. Why does Photoshop force rasterizing for some tools but not others?
Some tools were built to work only with pixels. Brushes, erasers, smudge tools, and certain filters don’t understand vectors or live text. Photoshop forces rasterization so those tools can function correctly.
10. Is rasterizing bad practice?
No. Blind rasterizing is. When it’s intentional and timed correctly, rasterizing is a powerful part of professional workflows.
Get Beyond Your Computer Performance
Run applications on your cloud computer with the latest generation hardware. No more crashes or lags.

Trial includes 1 hour usage + 7 days of storage.
Summarize with AI

Ready to focus on your creativity?
Vagon gives you the ability to create & render projects, collaborate, and stream applications with the power of the best hardware.

Vagon Blog


Run heavy applications on any device with
your personal computer on the cloud.
San Francisco, California
Solutions
Vagon Teams
Vagon Streams
Use Cases
Resources
Vagon Blog
What Slows Down After Effects Projects?
The First 30 Minutes in Blender 3D: A Practical Workflow Guide
What’s New in Godot 4.7? Key Features, Upgrades, and Workflow Improvements
What Slows Down Blender 3D Projects?
What Slows Down Adobe Photoshop Projects?
The First 30 Minutes in Adobe Photoshop: A Practical Workflow Guide
Before You Start in Adobe Photoshop: A Practical Setup Checklist
What’s New in Unreal Engine 5.8? Key Features and Upgrade Advice
How to Run Windows on an iPad: 4 Best Ways (2026)
Vagon Blog
Run heavy applications on any device with
your personal computer on the cloud.
San Francisco, California
Solutions
Vagon Teams
Vagon Streams
Use Cases
Resources
Vagon Blog