Instant Connection for Pixel Streaming
— New Feature Automated Setup
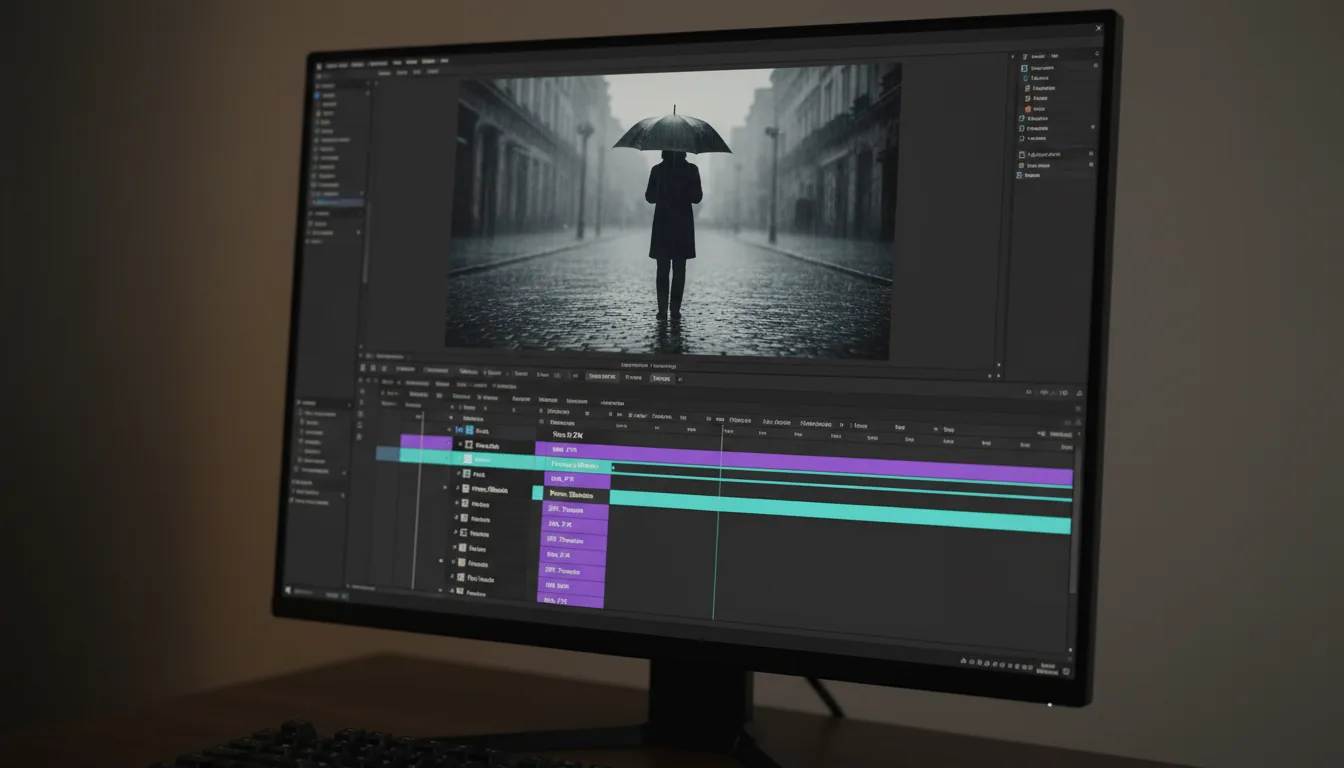
How to Improve Render Quality in After Effects with Better Layer Composition
How to Improve Render Quality in After Effects with Better Layer Composition
VideoProduction
How to Improve Render Quality in After Effects with Better Layer Composition
Table of Contents
The render finishes. No errors. You hit play and immediately feel it.
Something’s off.
The animation works, but the image looks soft. A little muddy. Not broken enough to panic, just bad enough to bother you. So you do what everyone does. You check the render settings. Best Settings, full resolution, higher bitrate. Maybe a second export, just in case.
Most of the time, that doesn’t fix it.
Here’s my honest take: render quality problems rarely start in the Render Queue. They start way earlier. In the composition itself. In how layers are stacked, blended, pre-composed, and pushed around.
After Effects doesn’t clean things up for you at export. It renders exactly what you built. Every shortcut included.
That’s why a comp can feel sharp in preview and still fall apart in the final render. The structure just couldn’t support it.
Once you treat layer composition as part of render quality, not just organization, a lot of these problems stop showing up.
Why Layer Composition Quietly Controls Render Quality
Here’s the part most people don’t like hearing. After Effects isn’t smart about your intentions. It’s literal.
Every frame is calculated from the bottom layer up. Every blending mode, every adjustment layer, every pre-comp is math stacked on top of more math. When your composition is messy, the render doesn’t politely ignore that mess. It multiplies it.
In preview, a lot of this gets masked. Lower resolution. Skipped samples. Effects running in draft mode. Your eye fills in the gaps and thinks, yeah, that’s fine. Then you render at full quality and suddenly all those small compromises line up and become visible.
I’ve noticed this most with overly layered comps. Dozens of adjustment layers. Effects stacked three or four deep on the same layer. Pre-comps inside pre-comps where nobody remembers what’s actually happening anymore. It works. Until it doesn’t.
Blending modes are a big one. Stack enough of them and you start introducing subtle contrast loss and color shifts. Nothing dramatic. Just enough to make the final image feel flat. Same with transparency. Semi-transparent layers on top of other semi-transparent layers can quietly soften edges in ways you don’t notice until export.
Pre-comps can help or hurt here. A clean, intentional pre-comp can isolate complexity and protect quality. A lazy pre-comp just hides problems and makes them harder to track. I’ve opened old projects where fixing one soft edge meant digging through five nested comps. Not fun.
The key thing to understand is this: render quality isn’t added at the end. It’s inherited. The final render can only be as good as the weakest part of the layer stack.
That’s why two projects with identical render settings can look completely different. One was built cleanly. The other survived on previews and hope.
Once you accept that, the focus shifts. Less time tweaking export options. More time building comps that don’t sabotage themselves.
If you are wondering why stronger machines actually change render behavior, a lot of it comes down to how After Effects uses the GPU. This guide on GPU usage in After Effects explains why more powerful setups make complex layer compositions far easier to handle.
Building Cleaner Comps That Actually Render Better
This is where things start to improve fast. Not by adding more effects, but by taking some pressure off the timeline.
The biggest shift for me was realizing that not every problem needs to live in the same comp. Early on, I used to stack everything together. Animation, color tweaks, glows, noise, motion blur. One long timeline. It felt efficient. It wasn’t.
Once a comp gets dense, quality suffers in subtle ways. Edges soften. Colors drift. Motion blur starts to look smeary instead of sharp. Nothing screams “broken,” but the image loses bite.
Pre-comps are the obvious fix, but they need intention. A good pre-comp isolates complexity. A bad one just hides it. If I’m animating a logo with multiple effects, I’ll pre-comp it once the motion is locked. That pre-comp becomes a clean element I can treat like footage. Fewer recalculations. Fewer surprises at render.

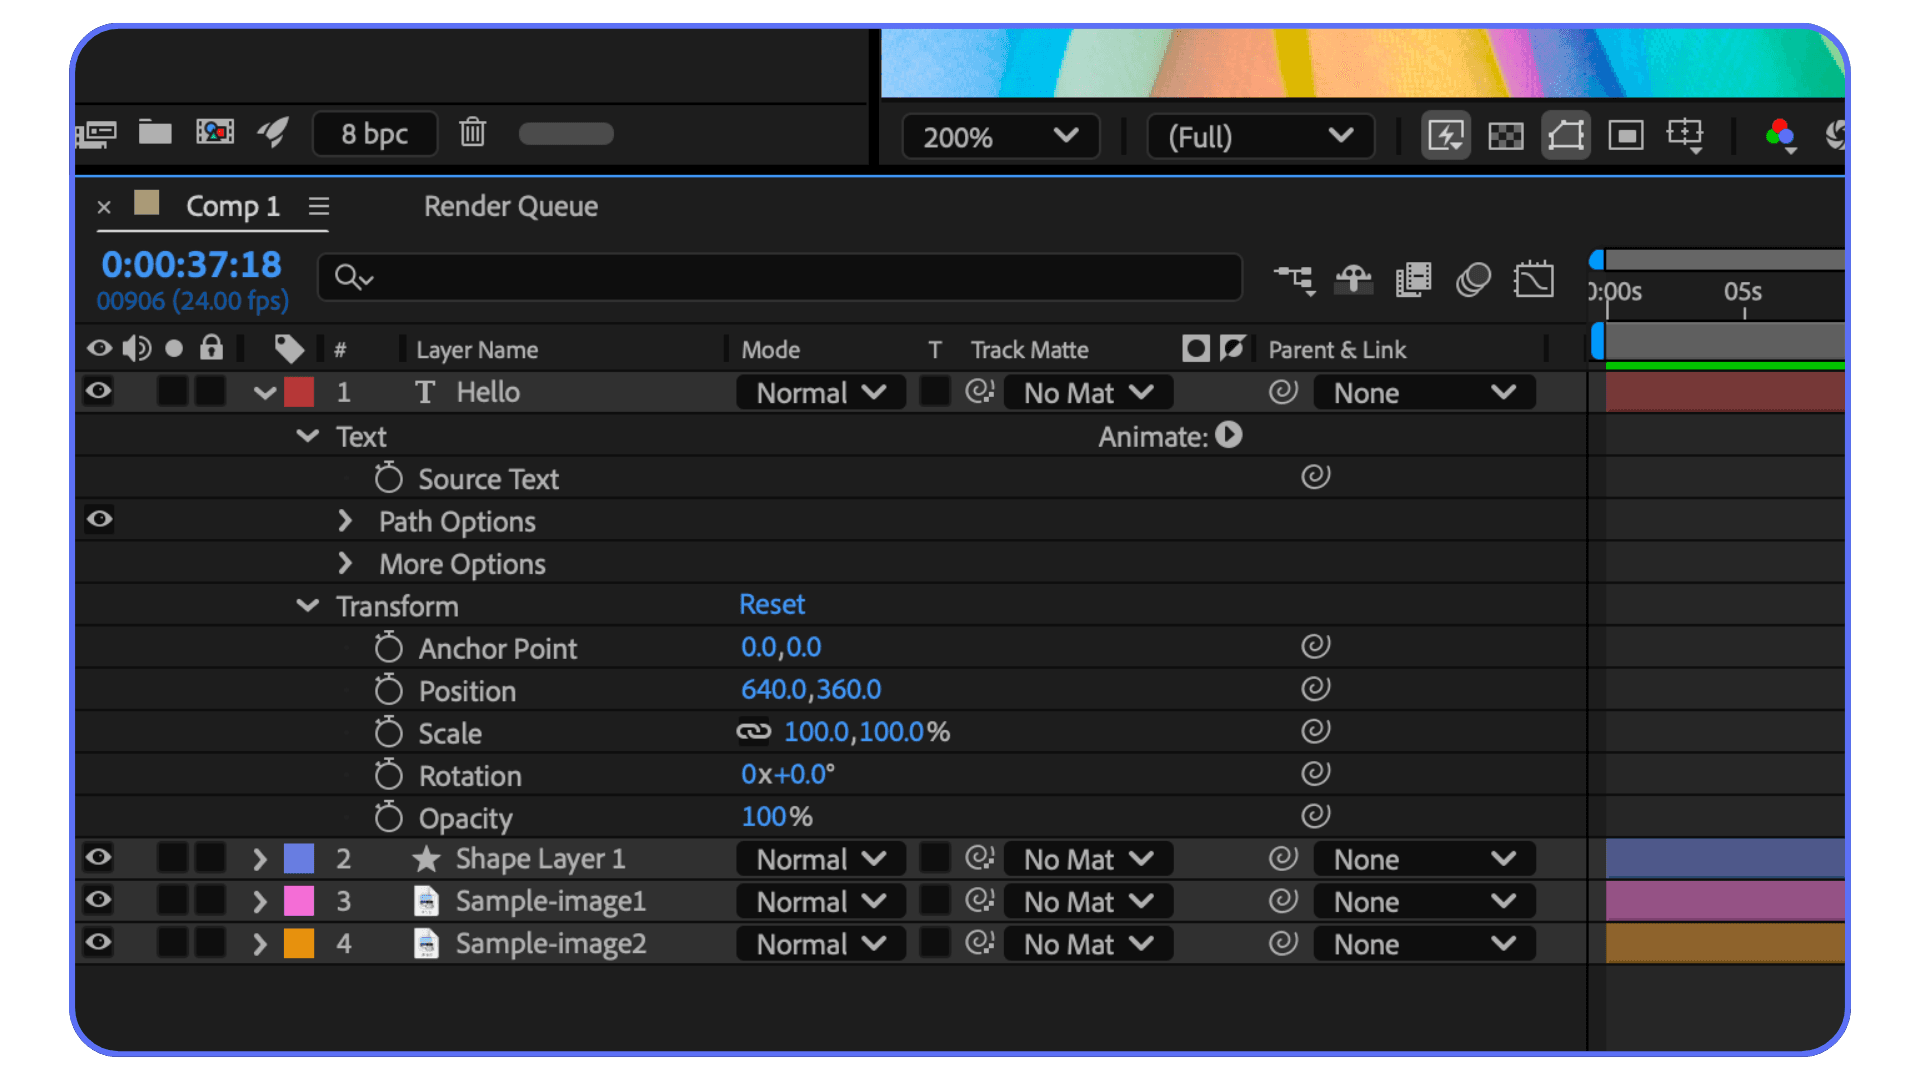
Adjustment layers deserve extra caution. They’re powerful, but they’re also dangerous. I’ve seen single adjustment layers sitting at the top of a comp quietly affecting 30 layers underneath. Sometimes that’s fine. Sometimes it’s why everything looks dull at export. If an adjustment only needs to affect one element, it shouldn’t be global. Period.
Layer order matters more than people admit. One misplaced adjustment layer or blending mode can undo a lot of careful work. I make it a habit to solo layers during final checks. If something looks softer than expected, I start toggling visibility from the top down. The culprit usually shows itself quickly.
Another habit that helps is collapsing complexity early. If an element no longer needs to stay live, flatten it. Pre-render it. Bring it back in as footage. You’re not giving up control. You’re protecting quality.
Clean comps don’t just render faster. They render more predictably. And predictability is what keeps your final output looking like what you actually designed, not a watered-down version of it.
If you are comparing After Effects to other tools because of performance or render quality concerns, it’s worth understanding how performance expectations differ between platforms. This After Effects vs DaVinci Resolve comparison comes up often for exactly that reason.
Pre-Rendering and Layer Isolation
This is where opinions start to split. Some people avoid pre-rendering like it’s a trap. Others do it too early and regret it later. I’ve done both.
Pre-rendering works best when it’s used as a pressure release valve. Not a shortcut. If a section of your comp is heavy, I mean particle systems, complex motion blur, AI-generated elements, deep effect stacks, forcing After Effects to recalculate that on every frame of the final render is asking for trouble. Not just slower renders, but inconsistent quality.
I usually pre-render once motion is locked. Not color. Not timing tweaks. Motion. That’s the point where the math stops changing frame to frame. Bring that pre-render back in as a high-quality file or image sequence, drop it into the main comp, and suddenly everything downstream behaves better.
Layer isolation helps in the same way. Instead of letting one noisy, effect-heavy layer interact with everything else, isolate it. Give it its own space. Its own comp. Its own render logic. When layers stop fighting each other, edges get cleaner and blending becomes more predictable.

One mistake I see a lot is pre-rendering too much, too early. If you bake something down before you’re confident, you lock in bad decisions. Soft edges stay soft. Bad color stays bad. Pre-rendering isn’t a fix. It’s a commitment.
Another mistake is ignoring alpha handling. If you’re bringing pre-renders back with transparency, make sure your color settings and alpha interpretation are correct. Premultiplied alpha mistakes can quietly ruin an otherwise clean comp. I’ve lost hours to that one.
When used right, pre-rendering does two things. It stabilizes quality and reduces risk. After Effects has fewer variables to juggle, and your final render stops feeling like a gamble.
If you are spending a lot of time checking layer order and isolating problems, speeding up how you navigate the timeline helps more than you’d expect. A solid grasp of After Effects keyboard shortcuts makes those final quality checks far less painful.
Color, Blending, and Bit Depth (The Silent Quality Killers)
This is the part where good comps quietly lose their edge.
Everything can look fine while you’re working. Then the final render comes out flatter than expected. Less contrast. Less punch. You didn’t change anything obvious, so what happened?
Most of the time, it’s layered color math stacking up.
Blending modes are powerful, but they’re not free. Stack a few overlays, add a screen layer, throw an adjustment layer on top, and suddenly you’re compressing contrast without realizing it. Each blend looks harmless on its own. Together, they soften the image. Not dramatically. Just enough to feel wrong.
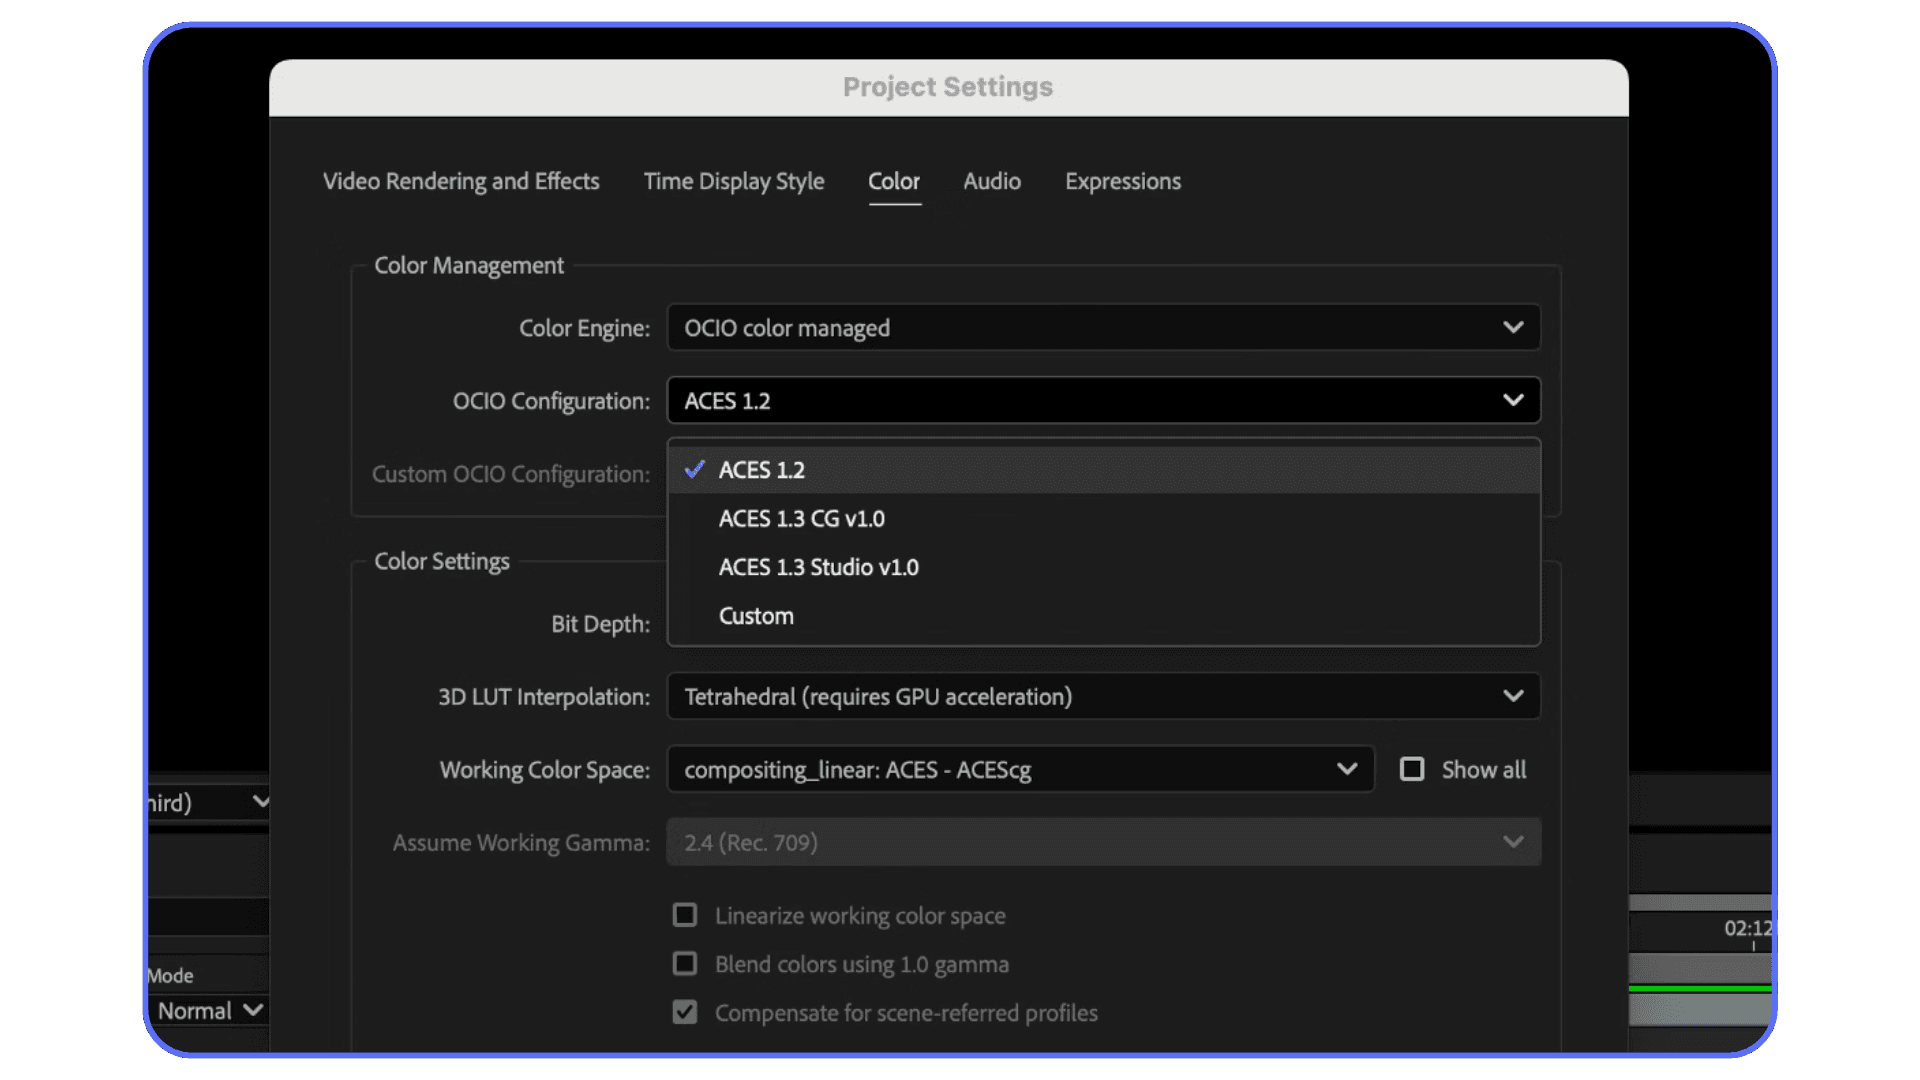
Bit depth plays into this more than people expect. Working in 8-bit with heavy gradients, glows, or transparency is asking for banding and mushy transitions. You might not see it in preview. You’ll definitely see it after export. Switching a comp to 16-bit doesn’t magically fix everything, but it gives your layers more room to breathe. Fewer rounding errors. Smoother blends.
I’ve also noticed people overusing adjustment layers for color. One global color tweak on top of everything sounds clean, but it can flatten depth fast. Sometimes it’s better to color elements in their own pre-comps, then do a lighter touch globally. More control. Less damage.
Another quiet issue is stacking semi-transparent layers. Transparency on top of transparency on top of transparency slowly erodes edge clarity. Logos suffer here. Text suffers even more. If something needs to be sharp, ask yourself if it really needs opacity at all.
None of this is exciting. It’s not flashy. But this is where render quality is either protected or slowly chipped away. The more intentional you are with color and blending, the closer your final render stays to what you saw in the comp window.
If you are at the point where performance issues make you question the tool itself, you’re not alone. Many artists start comparing workflows or even exploring alternatives to Adobe After Effects when hardware limitations become a constant blocker.
Render Settings Should Match the Composition, Not Fight It
Render settings get way too much credit.
Don’t get me wrong. You can absolutely ruin a good comp with bad export choices. But no render preset is going to rescue a composition that’s already struggling.
The mistake I see most is people treating render settings like a quality boost. Crank everything to max and hope for the best. That usually just makes a slow render that faithfully preserves all the problems you built upstream.
What actually helps is alignment.
If your comp relies on fine detail, small text, or subtle gradients, render at full resolution. Not “close enough.” Full. Dropping resolution to save time is fine for previews, but it always comes back to bite you at final.
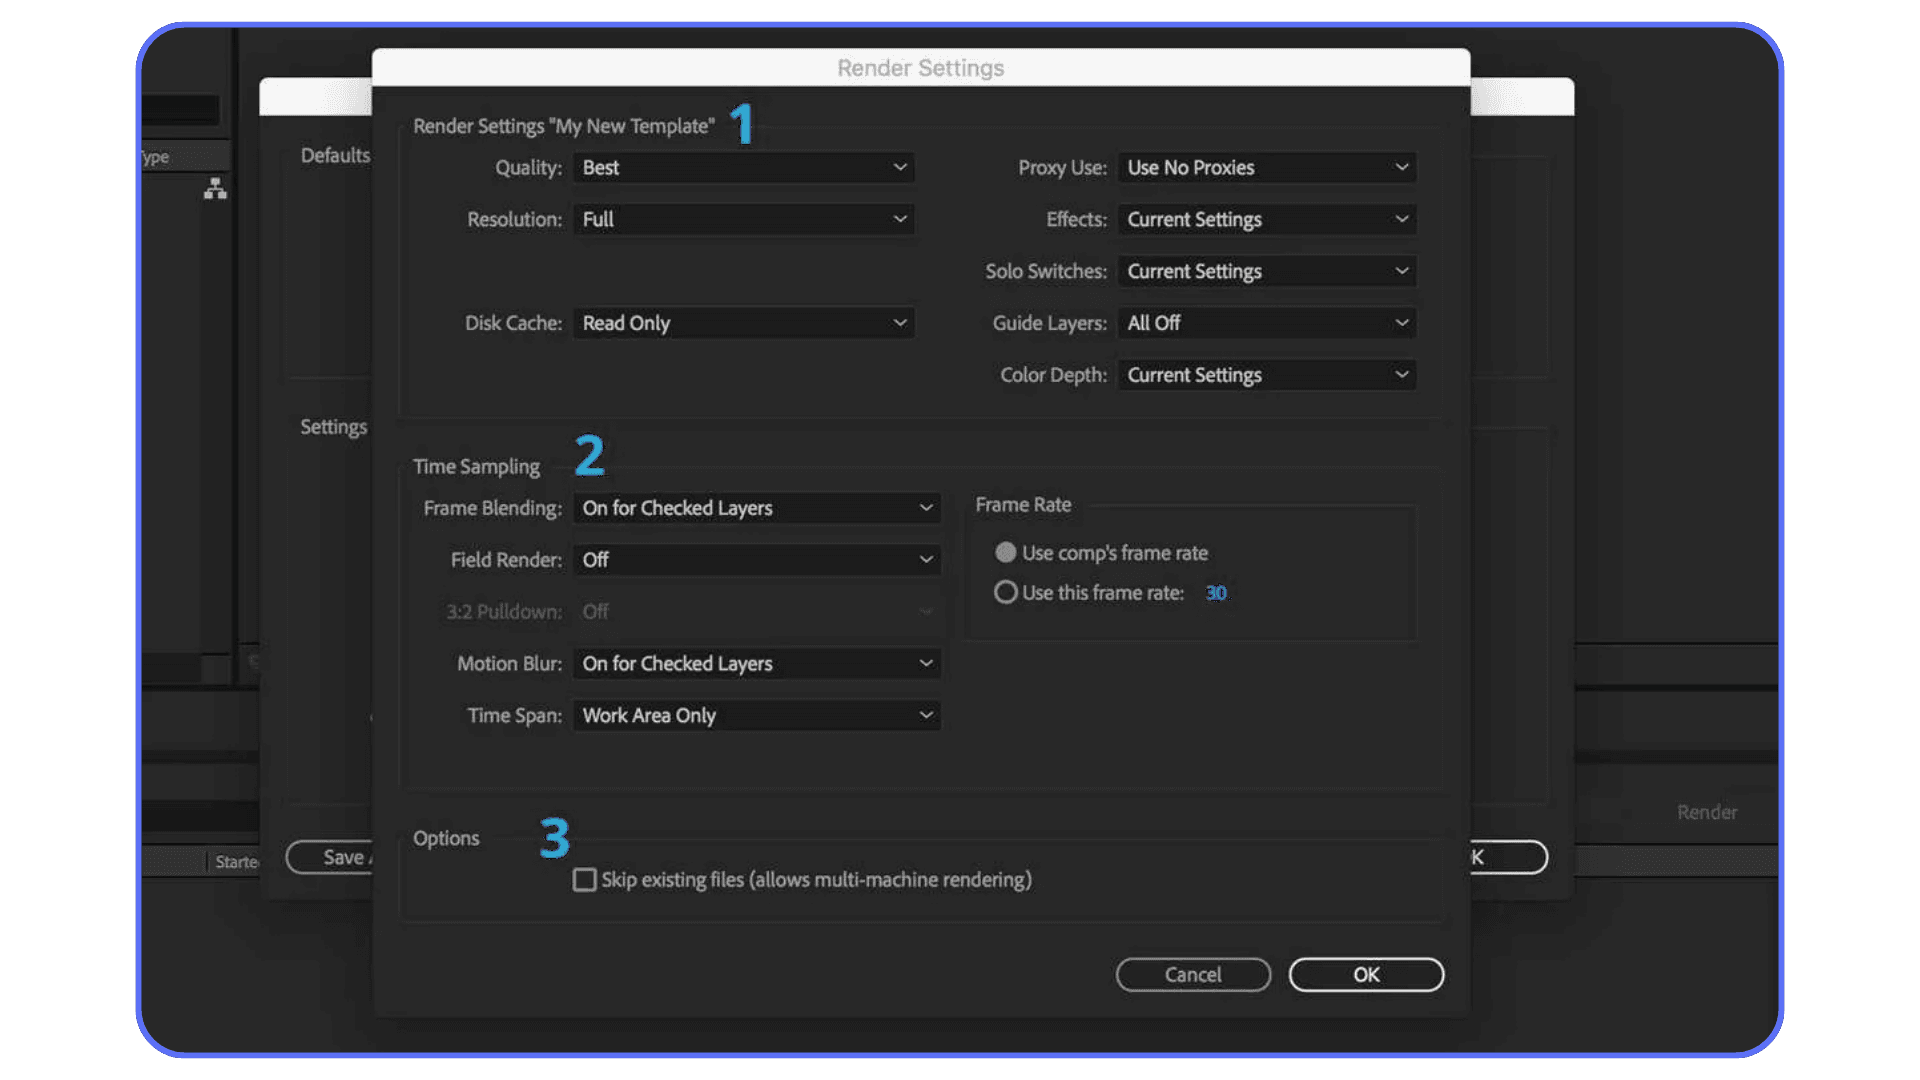
Sampling matters too. Effects that rely on motion blur or temporal sampling need enough data to look clean. If you’ve isolated and pre-rendered heavy sections properly, this becomes easier. Fewer moving parts means fewer compromises.
Image sequences deserve more love here. They’re not glamorous, but they’re reliable. If a frame fails, you don’t lose everything. More importantly, they preserve quality better through complex pipelines. I almost always render to an image sequence first, then compress afterward. It’s one extra step. It saves a lot of pain.
Media Encoder can help, but it’s not a magic layer either. It’s great for delivery formats and batch exports. I still prefer rendering the master directly from After Effects when quality matters most, then letting Encoder handle compression.
The goal isn’t to squeeze quality out of export settings. It’s to avoid losing the quality you already built. When render settings respect the composition instead of trying to override it, the final result feels predictable. And predictable is good.
If you are trying to review or work on After Effects projects from an iPad, whether for client feedback or quick tweaks, there are actually a few practical ways to do it without flattening everything down too early. This breakdown on running After Effects on iPad explains what’s realistic and what isn’t.
When the Computer Becomes the Problem
There’s a point where you’ve done everything right and After Effects still struggles.
Clean comps. Sensible pre-comps. Thoughtful color work. Solid render settings. And yet previews crawl, frames drop, or the final render takes hours longer than it should. This is usually when people start second-guessing their work, even though the real issue isn’t creative at all.
It’s hardware.
Layer-heavy compositions are brutal on a machine. AI-generated assets, high bit depth, motion blur, and multiple blending modes all stack up fast. After Effects has to calculate every interaction, every frame. When your system runs out of headroom, quality is often the first silent casualty. You lower preview resolution. You disable effects. You tell yourself it’ll be fine at final render.
Sometimes it is. Sometimes it isn’t.
I’ve noticed that when a machine is pushed too hard, people unconsciously compromise. Effects stay in draft mode longer than they should. Previews get trusted too much. Final checks get rushed because nobody wants to re-render for another three hours. None of this shows up in tutorials, but it absolutely affects output quality.
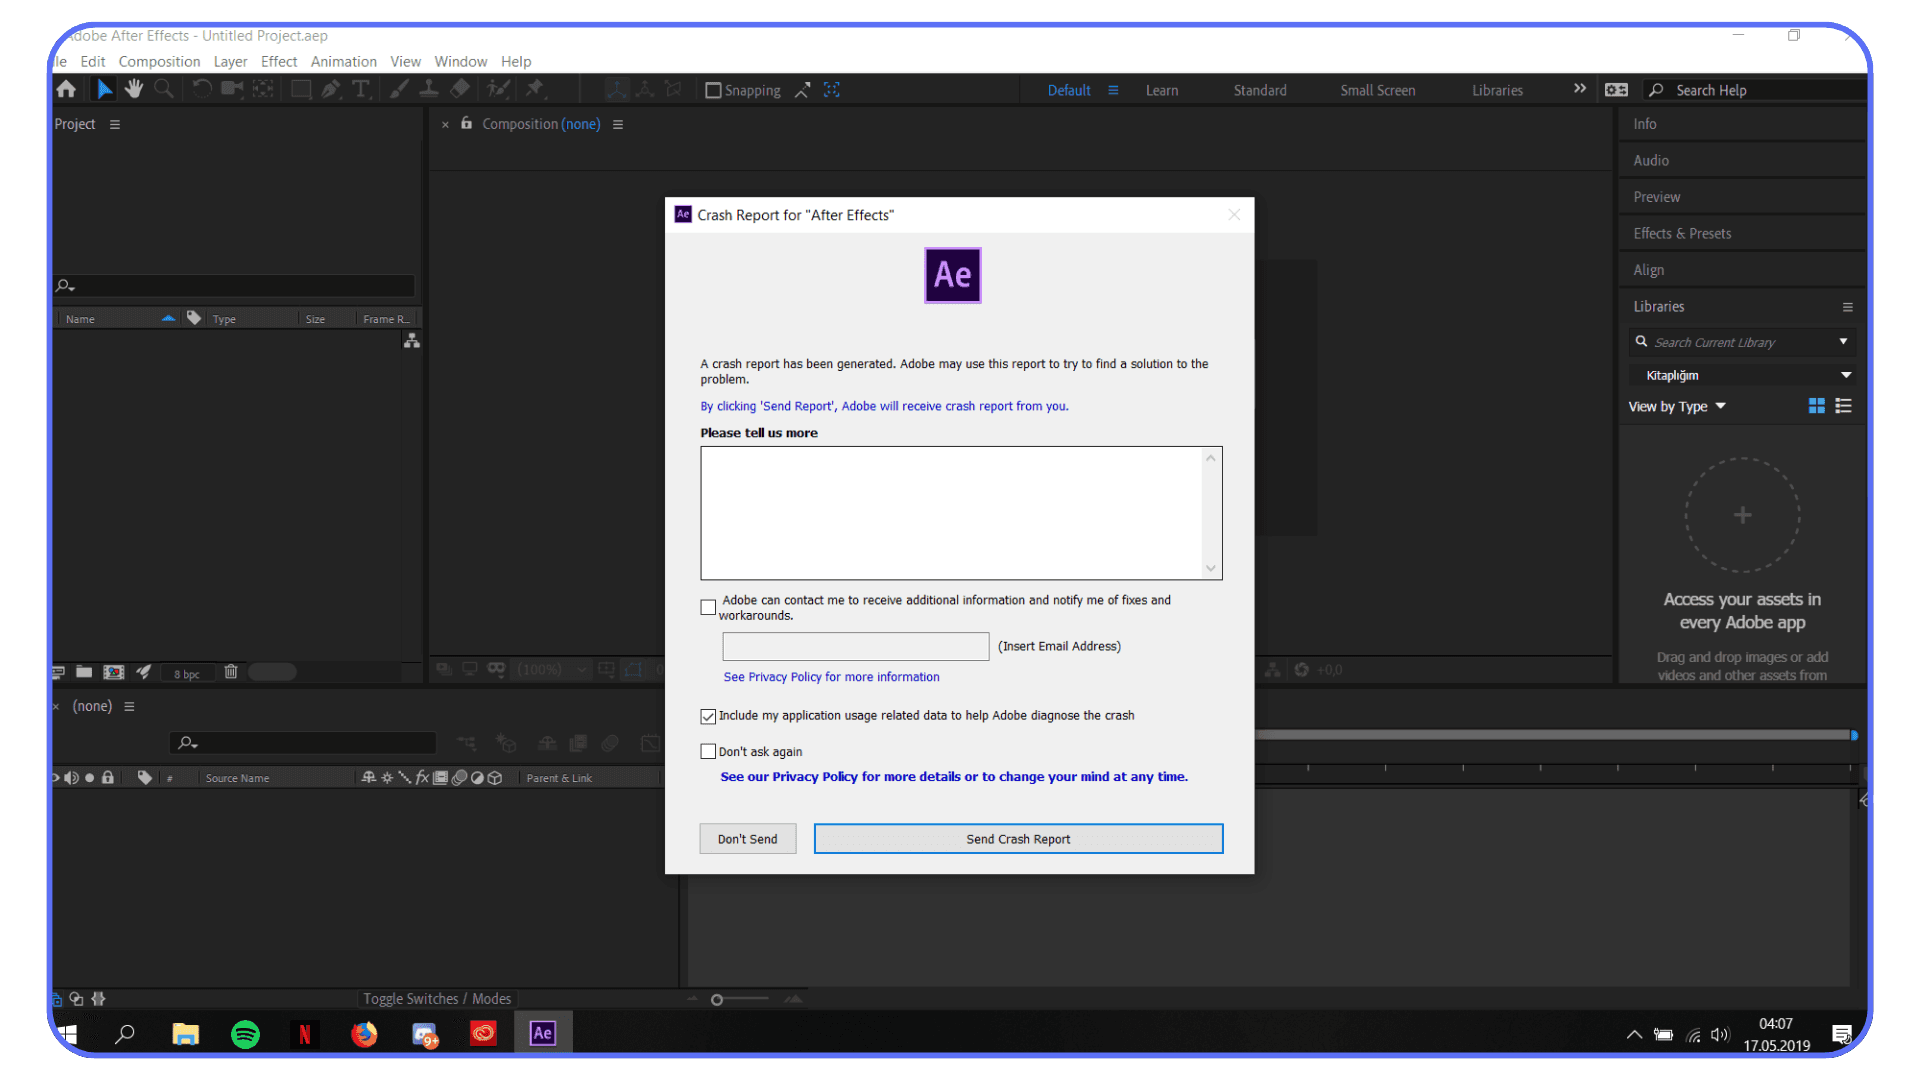
This is also where crashes and corrupted renders sneak in. Not because the project is wrong, but because the system just can’t keep everything stable under load. And once you’re on deadline, stability matters as much as sharp pixels.
At this point, you’ve got two choices. Simplify further and accept limits, or move the heavy lifting somewhere else.
That’s where cloud machines start to make sense. Not as a shortcut, and definitely not as a replacement for good composition habits, but as a way to let those habits actually pay off.
Let’s talk about that.
If you are constantly fighting slow previews or long renders, it might not be your workflow at all. Sometimes it’s simply that your hardware can’t keep up anymore, and this guide on finding the best laptops and prebuilt PCs for After Effects helps clarify where those limits usually show up.
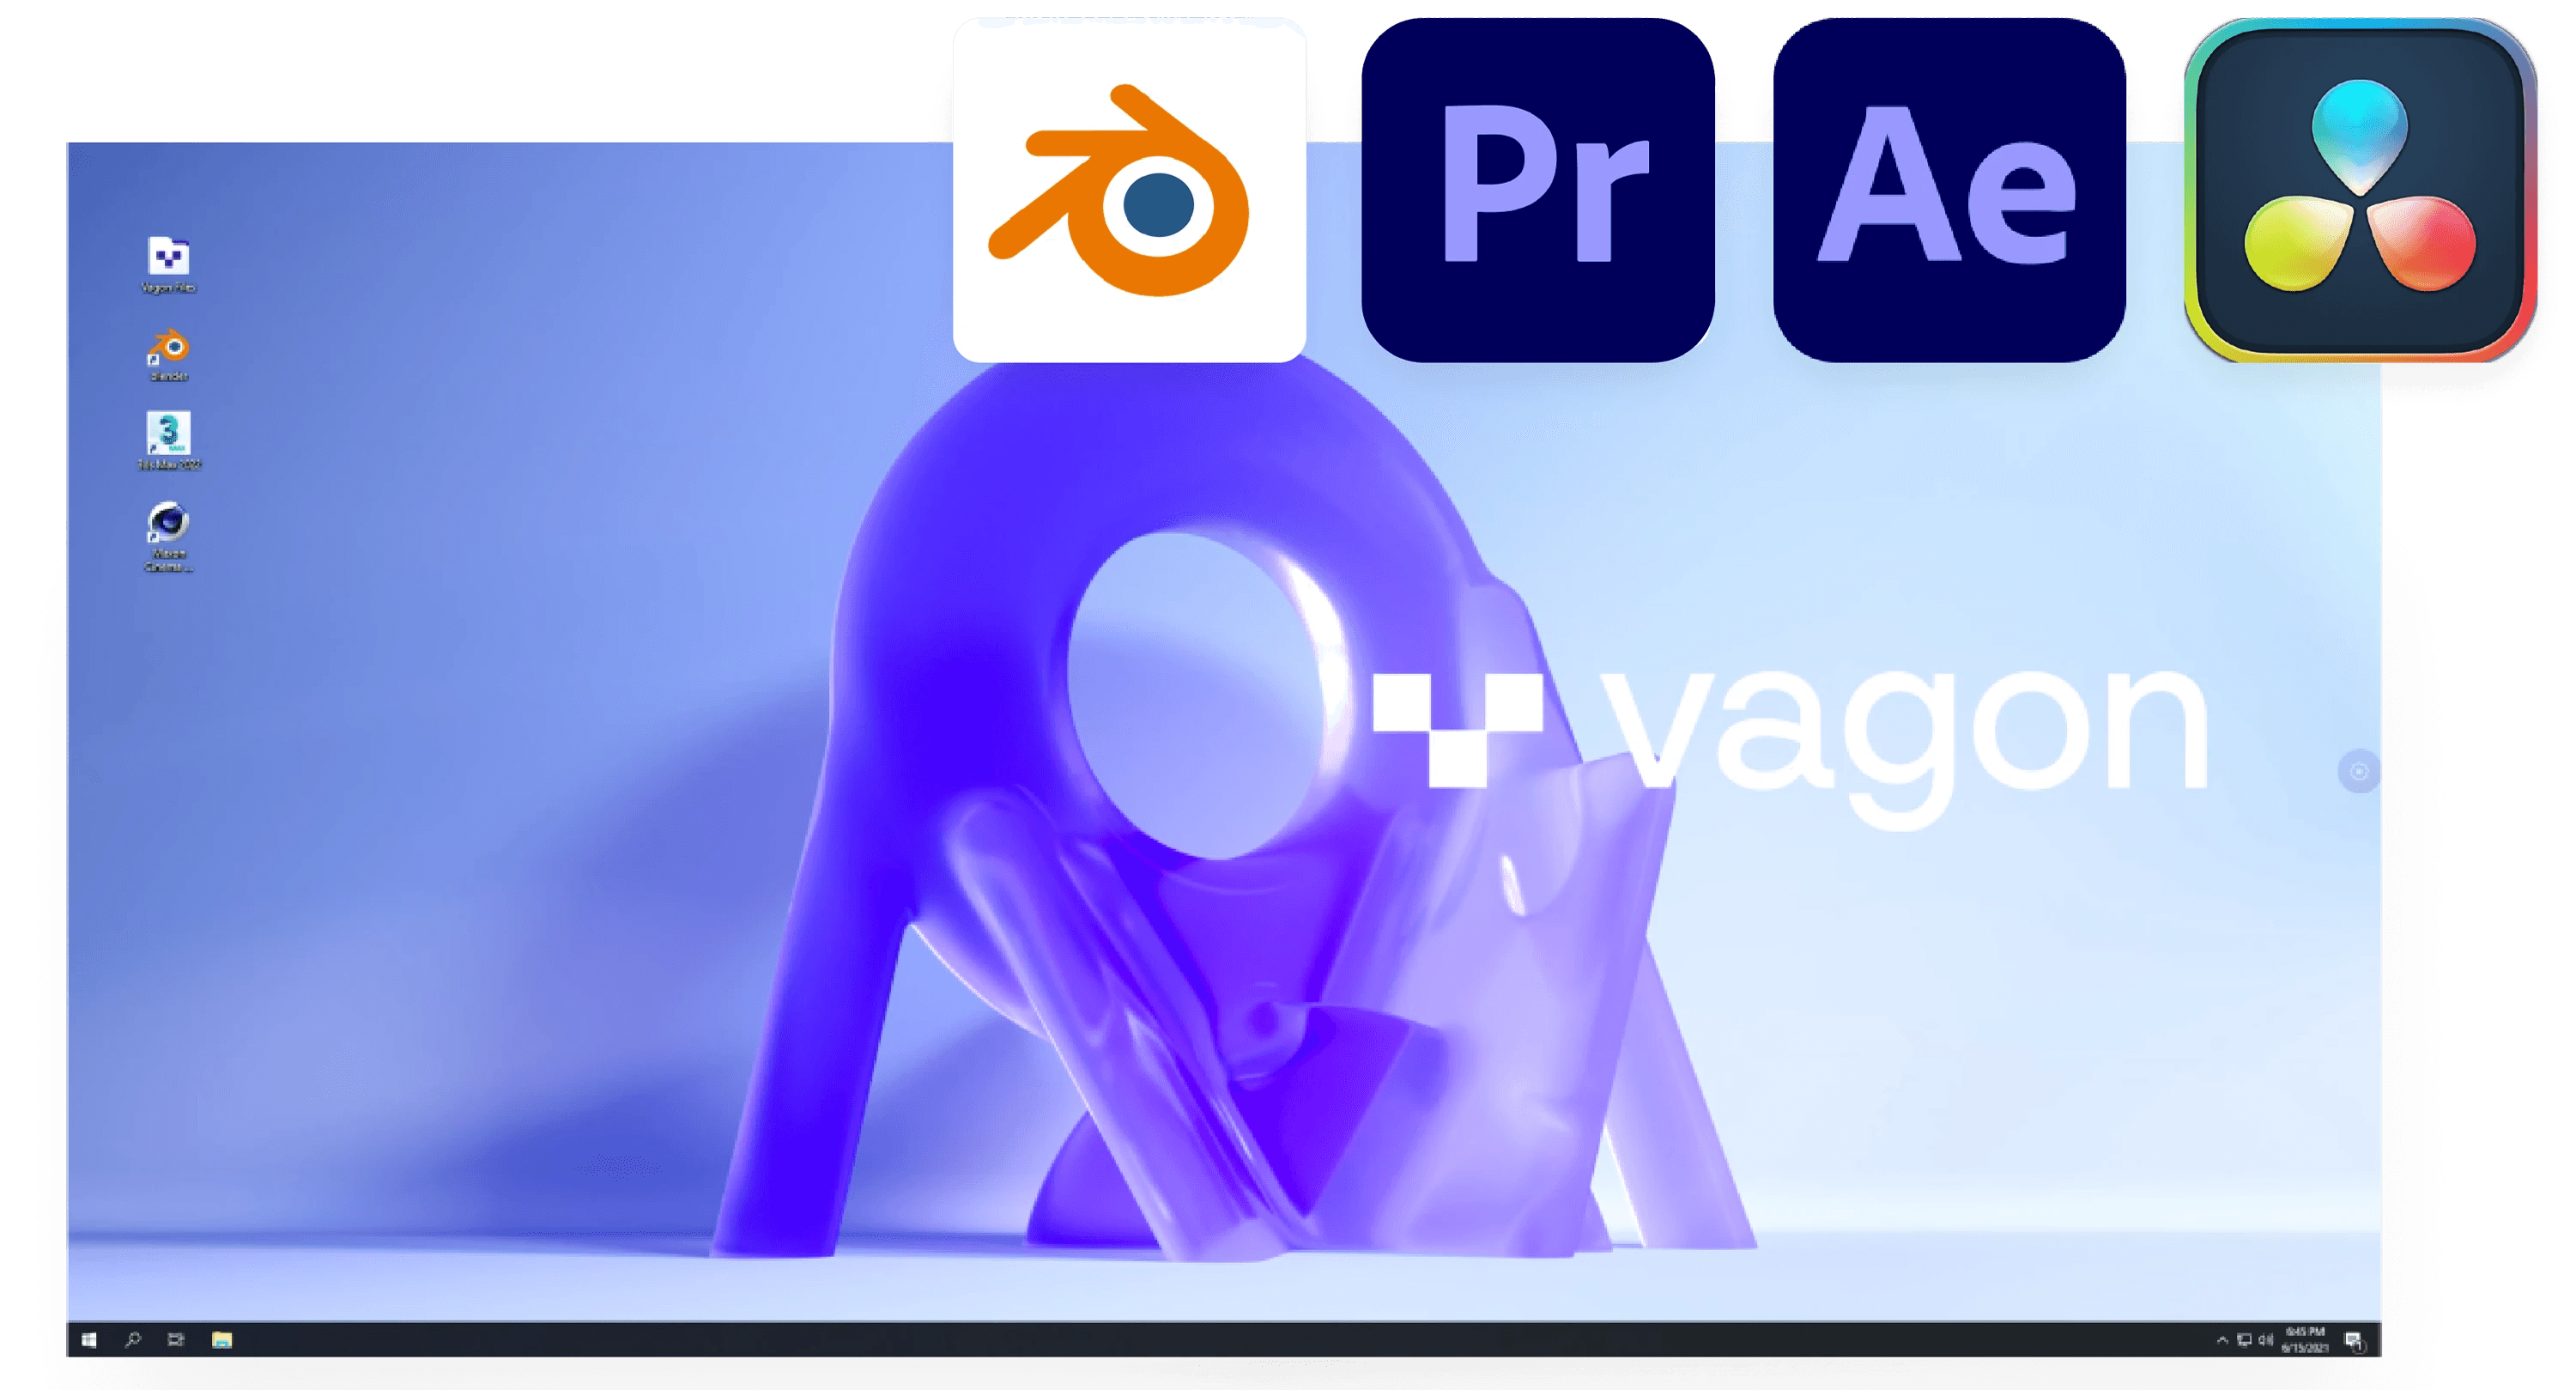
Using Vagon Cloud Computer to Finish What Your Comp Started
Once your composition is built cleanly, good layer structure, smart pre-comps, proper color handling, your local machine can easily become the weakest link. At that point, the issue isn’t skill or setup. It’s raw horsepower.
Vagon Cloud Computer gives you access to high-performance machines that can actually keep up with complex After Effects projects. Same After Effects interface. Same project files. But now you’re working on hardware that isn’t gasping for air every time you enable motion blur or switch back to full resolution.
What changes immediately is how you work. You stop relying on half-resolution previews as a crutch. You leave effects enabled longer because you can afford to. You render image sequences without watching the clock like it’s a countdown. That alone improves quality, because you’re making decisions based on what the comp really looks like, not a compromised version of it.
This becomes even more useful when AI-generated assets enter the mix. Those elements tend to be heavy. High resolution. Lots of detail. On a local machine, the temptation is to flatten early or downgrade just to keep things moving. On Vagon, you don’t have to. You can keep your layers live, your comps intact, and still finish on time.
Another underrated benefit is collaboration and delivery. Instead of simplifying projects just so someone else can open them, you can share the same cloud environment. Same setup. Same performance. Fewer surprises. Fewer “it looks different on my machine” conversations.
Vagon Cloud Computer doesn’t replace good composition habits. It rewards them. If you’ve already done the work to build clean, intentional After Effects comps, this is how you let that work show up in the final render.
Final Thoughts
The biggest shift for me wasn’t learning a new render preset or finding a better codec. It was realizing that render quality is mostly decided long before you hit Render.
Layer composition is where sharpness is protected or slowly lost. Every pre-comp, every blending mode, every adjustment layer either supports the final image or quietly chips away at it. By the time you’re exporting, all you’re really doing is revealing the truth of the comp.
Good structure makes everything else easier. Previews become more trustworthy. Renders become predictable. And when you pair that with hardware that can actually keep up, whether that’s your own machine or something like Vagon Cloud Computer, the quality you designed is the quality you deliver.
If there’s one habit worth keeping, it’s this: build your comps like the render already matters. Because it does.
FAQs
1. Why does my After Effects render look worse than the preview?
Because previews lie a little. They run at lower resolution, skip samples, and often ignore draft-quality issues. Your final render doesn’t. It shows the full result of your layer stack, blending modes, bit depth, and pre-comps. If the comp structure is messy, the render exposes it.
2. Do pre-comps reduce quality?
They can, but only when used poorly. A clean, intentional pre-comp usually helps quality by isolating complexity. A rushed pre-comp that hides bad blending or color decisions can make things worse. The rule I follow: pre-comp to simplify, not to avoid fixing problems.
3. Is working in 16-bit really necessary?
If you’re using gradients, glows, transparency, or color-heavy effects, yes. 8-bit runs out of precision fast and that shows up as banding or soft transitions in the final render. 16-bit gives your layers more breathing room without a huge performance hit.
4. Should I always pre-render heavy layers?
Not always. Pre-render once motion is locked and you’re confident in the look. Pre-rendering too early locks in mistakes. Pre-rendering too late wastes time and increases render risk. Timing matters more than the technique itself.
5. Why does stacking adjustment layers reduce sharpness?
Each adjustment layer applies math across everything underneath it. Stack enough of them and contrast gets compressed, edges soften, and color depth suffers. If an adjustment only needs to affect one element, keep it local.
6. Are render settings less important than composition?
They’re important, but they’re not corrective. Render settings can preserve quality. They can’t create it. A strong comp with sensible settings beats a weak comp with perfect export options every time.
7. When does using a cloud computer make sense?
When your comp is clean but your machine is holding you back. Long renders, unstable previews, disabled effects, or rushed final checks are signs. Cloud machines like Vagon Cloud Computer don’t fix bad comps, but they let good ones finish properly.
8. Can cloud rendering improve quality, not just speed?
Indirectly, yes. When performance stops being a constraint, you make better decisions. Higher-quality previews, fewer compromises, more confidence in final output. That adds up.
9. What’s the single most common mistake that hurts render quality?
Letting “temporary” shortcuts become permanent. Draft effects left on. Adjustment layers stacked out of convenience. Pre-comps created to hide chaos. Those always show up at export.
The render finishes. No errors. You hit play and immediately feel it.
Something’s off.
The animation works, but the image looks soft. A little muddy. Not broken enough to panic, just bad enough to bother you. So you do what everyone does. You check the render settings. Best Settings, full resolution, higher bitrate. Maybe a second export, just in case.
Most of the time, that doesn’t fix it.
Here’s my honest take: render quality problems rarely start in the Render Queue. They start way earlier. In the composition itself. In how layers are stacked, blended, pre-composed, and pushed around.
After Effects doesn’t clean things up for you at export. It renders exactly what you built. Every shortcut included.
That’s why a comp can feel sharp in preview and still fall apart in the final render. The structure just couldn’t support it.
Once you treat layer composition as part of render quality, not just organization, a lot of these problems stop showing up.
Why Layer Composition Quietly Controls Render Quality
Here’s the part most people don’t like hearing. After Effects isn’t smart about your intentions. It’s literal.
Every frame is calculated from the bottom layer up. Every blending mode, every adjustment layer, every pre-comp is math stacked on top of more math. When your composition is messy, the render doesn’t politely ignore that mess. It multiplies it.
In preview, a lot of this gets masked. Lower resolution. Skipped samples. Effects running in draft mode. Your eye fills in the gaps and thinks, yeah, that’s fine. Then you render at full quality and suddenly all those small compromises line up and become visible.
I’ve noticed this most with overly layered comps. Dozens of adjustment layers. Effects stacked three or four deep on the same layer. Pre-comps inside pre-comps where nobody remembers what’s actually happening anymore. It works. Until it doesn’t.
Blending modes are a big one. Stack enough of them and you start introducing subtle contrast loss and color shifts. Nothing dramatic. Just enough to make the final image feel flat. Same with transparency. Semi-transparent layers on top of other semi-transparent layers can quietly soften edges in ways you don’t notice until export.
Pre-comps can help or hurt here. A clean, intentional pre-comp can isolate complexity and protect quality. A lazy pre-comp just hides problems and makes them harder to track. I’ve opened old projects where fixing one soft edge meant digging through five nested comps. Not fun.
The key thing to understand is this: render quality isn’t added at the end. It’s inherited. The final render can only be as good as the weakest part of the layer stack.
That’s why two projects with identical render settings can look completely different. One was built cleanly. The other survived on previews and hope.
Once you accept that, the focus shifts. Less time tweaking export options. More time building comps that don’t sabotage themselves.
If you are wondering why stronger machines actually change render behavior, a lot of it comes down to how After Effects uses the GPU. This guide on GPU usage in After Effects explains why more powerful setups make complex layer compositions far easier to handle.
Building Cleaner Comps That Actually Render Better
This is where things start to improve fast. Not by adding more effects, but by taking some pressure off the timeline.
The biggest shift for me was realizing that not every problem needs to live in the same comp. Early on, I used to stack everything together. Animation, color tweaks, glows, noise, motion blur. One long timeline. It felt efficient. It wasn’t.
Once a comp gets dense, quality suffers in subtle ways. Edges soften. Colors drift. Motion blur starts to look smeary instead of sharp. Nothing screams “broken,” but the image loses bite.
Pre-comps are the obvious fix, but they need intention. A good pre-comp isolates complexity. A bad one just hides it. If I’m animating a logo with multiple effects, I’ll pre-comp it once the motion is locked. That pre-comp becomes a clean element I can treat like footage. Fewer recalculations. Fewer surprises at render.
Adjustment layers deserve extra caution. They’re powerful, but they’re also dangerous. I’ve seen single adjustment layers sitting at the top of a comp quietly affecting 30 layers underneath. Sometimes that’s fine. Sometimes it’s why everything looks dull at export. If an adjustment only needs to affect one element, it shouldn’t be global. Period.
Layer order matters more than people admit. One misplaced adjustment layer or blending mode can undo a lot of careful work. I make it a habit to solo layers during final checks. If something looks softer than expected, I start toggling visibility from the top down. The culprit usually shows itself quickly.
Another habit that helps is collapsing complexity early. If an element no longer needs to stay live, flatten it. Pre-render it. Bring it back in as footage. You’re not giving up control. You’re protecting quality.
Clean comps don’t just render faster. They render more predictably. And predictability is what keeps your final output looking like what you actually designed, not a watered-down version of it.
If you are comparing After Effects to other tools because of performance or render quality concerns, it’s worth understanding how performance expectations differ between platforms. This After Effects vs DaVinci Resolve comparison comes up often for exactly that reason.
Pre-Rendering and Layer Isolation
This is where opinions start to split. Some people avoid pre-rendering like it’s a trap. Others do it too early and regret it later. I’ve done both.
Pre-rendering works best when it’s used as a pressure release valve. Not a shortcut. If a section of your comp is heavy, I mean particle systems, complex motion blur, AI-generated elements, deep effect stacks, forcing After Effects to recalculate that on every frame of the final render is asking for trouble. Not just slower renders, but inconsistent quality.
I usually pre-render once motion is locked. Not color. Not timing tweaks. Motion. That’s the point where the math stops changing frame to frame. Bring that pre-render back in as a high-quality file or image sequence, drop it into the main comp, and suddenly everything downstream behaves better.
Layer isolation helps in the same way. Instead of letting one noisy, effect-heavy layer interact with everything else, isolate it. Give it its own space. Its own comp. Its own render logic. When layers stop fighting each other, edges get cleaner and blending becomes more predictable.
One mistake I see a lot is pre-rendering too much, too early. If you bake something down before you’re confident, you lock in bad decisions. Soft edges stay soft. Bad color stays bad. Pre-rendering isn’t a fix. It’s a commitment.
Another mistake is ignoring alpha handling. If you’re bringing pre-renders back with transparency, make sure your color settings and alpha interpretation are correct. Premultiplied alpha mistakes can quietly ruin an otherwise clean comp. I’ve lost hours to that one.
When used right, pre-rendering does two things. It stabilizes quality and reduces risk. After Effects has fewer variables to juggle, and your final render stops feeling like a gamble.
If you are spending a lot of time checking layer order and isolating problems, speeding up how you navigate the timeline helps more than you’d expect. A solid grasp of After Effects keyboard shortcuts makes those final quality checks far less painful.
Color, Blending, and Bit Depth (The Silent Quality Killers)
This is the part where good comps quietly lose their edge.
Everything can look fine while you’re working. Then the final render comes out flatter than expected. Less contrast. Less punch. You didn’t change anything obvious, so what happened?
Most of the time, it’s layered color math stacking up.
Blending modes are powerful, but they’re not free. Stack a few overlays, add a screen layer, throw an adjustment layer on top, and suddenly you’re compressing contrast without realizing it. Each blend looks harmless on its own. Together, they soften the image. Not dramatically. Just enough to feel wrong.
Bit depth plays into this more than people expect. Working in 8-bit with heavy gradients, glows, or transparency is asking for banding and mushy transitions. You might not see it in preview. You’ll definitely see it after export. Switching a comp to 16-bit doesn’t magically fix everything, but it gives your layers more room to breathe. Fewer rounding errors. Smoother blends.
I’ve also noticed people overusing adjustment layers for color. One global color tweak on top of everything sounds clean, but it can flatten depth fast. Sometimes it’s better to color elements in their own pre-comps, then do a lighter touch globally. More control. Less damage.
Another quiet issue is stacking semi-transparent layers. Transparency on top of transparency on top of transparency slowly erodes edge clarity. Logos suffer here. Text suffers even more. If something needs to be sharp, ask yourself if it really needs opacity at all.
None of this is exciting. It’s not flashy. But this is where render quality is either protected or slowly chipped away. The more intentional you are with color and blending, the closer your final render stays to what you saw in the comp window.
If you are at the point where performance issues make you question the tool itself, you’re not alone. Many artists start comparing workflows or even exploring alternatives to Adobe After Effects when hardware limitations become a constant blocker.
Render Settings Should Match the Composition, Not Fight It
Render settings get way too much credit.
Don’t get me wrong. You can absolutely ruin a good comp with bad export choices. But no render preset is going to rescue a composition that’s already struggling.
The mistake I see most is people treating render settings like a quality boost. Crank everything to max and hope for the best. That usually just makes a slow render that faithfully preserves all the problems you built upstream.
What actually helps is alignment.
If your comp relies on fine detail, small text, or subtle gradients, render at full resolution. Not “close enough.” Full. Dropping resolution to save time is fine for previews, but it always comes back to bite you at final.
Sampling matters too. Effects that rely on motion blur or temporal sampling need enough data to look clean. If you’ve isolated and pre-rendered heavy sections properly, this becomes easier. Fewer moving parts means fewer compromises.
Image sequences deserve more love here. They’re not glamorous, but they’re reliable. If a frame fails, you don’t lose everything. More importantly, they preserve quality better through complex pipelines. I almost always render to an image sequence first, then compress afterward. It’s one extra step. It saves a lot of pain.
Media Encoder can help, but it’s not a magic layer either. It’s great for delivery formats and batch exports. I still prefer rendering the master directly from After Effects when quality matters most, then letting Encoder handle compression.
The goal isn’t to squeeze quality out of export settings. It’s to avoid losing the quality you already built. When render settings respect the composition instead of trying to override it, the final result feels predictable. And predictable is good.
If you are trying to review or work on After Effects projects from an iPad, whether for client feedback or quick tweaks, there are actually a few practical ways to do it without flattening everything down too early. This breakdown on running After Effects on iPad explains what’s realistic and what isn’t.
When the Computer Becomes the Problem
There’s a point where you’ve done everything right and After Effects still struggles.
Clean comps. Sensible pre-comps. Thoughtful color work. Solid render settings. And yet previews crawl, frames drop, or the final render takes hours longer than it should. This is usually when people start second-guessing their work, even though the real issue isn’t creative at all.
It’s hardware.
Layer-heavy compositions are brutal on a machine. AI-generated assets, high bit depth, motion blur, and multiple blending modes all stack up fast. After Effects has to calculate every interaction, every frame. When your system runs out of headroom, quality is often the first silent casualty. You lower preview resolution. You disable effects. You tell yourself it’ll be fine at final render.
Sometimes it is. Sometimes it isn’t.
I’ve noticed that when a machine is pushed too hard, people unconsciously compromise. Effects stay in draft mode longer than they should. Previews get trusted too much. Final checks get rushed because nobody wants to re-render for another three hours. None of this shows up in tutorials, but it absolutely affects output quality.
This is also where crashes and corrupted renders sneak in. Not because the project is wrong, but because the system just can’t keep everything stable under load. And once you’re on deadline, stability matters as much as sharp pixels.
At this point, you’ve got two choices. Simplify further and accept limits, or move the heavy lifting somewhere else.
That’s where cloud machines start to make sense. Not as a shortcut, and definitely not as a replacement for good composition habits, but as a way to let those habits actually pay off.
Let’s talk about that.
If you are constantly fighting slow previews or long renders, it might not be your workflow at all. Sometimes it’s simply that your hardware can’t keep up anymore, and this guide on finding the best laptops and prebuilt PCs for After Effects helps clarify where those limits usually show up.
Using Vagon Cloud Computer to Finish What Your Comp Started
Once your composition is built cleanly, good layer structure, smart pre-comps, proper color handling, your local machine can easily become the weakest link. At that point, the issue isn’t skill or setup. It’s raw horsepower.
Vagon Cloud Computer gives you access to high-performance machines that can actually keep up with complex After Effects projects. Same After Effects interface. Same project files. But now you’re working on hardware that isn’t gasping for air every time you enable motion blur or switch back to full resolution.
What changes immediately is how you work. You stop relying on half-resolution previews as a crutch. You leave effects enabled longer because you can afford to. You render image sequences without watching the clock like it’s a countdown. That alone improves quality, because you’re making decisions based on what the comp really looks like, not a compromised version of it.
This becomes even more useful when AI-generated assets enter the mix. Those elements tend to be heavy. High resolution. Lots of detail. On a local machine, the temptation is to flatten early or downgrade just to keep things moving. On Vagon, you don’t have to. You can keep your layers live, your comps intact, and still finish on time.
Another underrated benefit is collaboration and delivery. Instead of simplifying projects just so someone else can open them, you can share the same cloud environment. Same setup. Same performance. Fewer surprises. Fewer “it looks different on my machine” conversations.
Vagon Cloud Computer doesn’t replace good composition habits. It rewards them. If you’ve already done the work to build clean, intentional After Effects comps, this is how you let that work show up in the final render.
Final Thoughts
The biggest shift for me wasn’t learning a new render preset or finding a better codec. It was realizing that render quality is mostly decided long before you hit Render.
Layer composition is where sharpness is protected or slowly lost. Every pre-comp, every blending mode, every adjustment layer either supports the final image or quietly chips away at it. By the time you’re exporting, all you’re really doing is revealing the truth of the comp.
Good structure makes everything else easier. Previews become more trustworthy. Renders become predictable. And when you pair that with hardware that can actually keep up, whether that’s your own machine or something like Vagon Cloud Computer, the quality you designed is the quality you deliver.
If there’s one habit worth keeping, it’s this: build your comps like the render already matters. Because it does.
FAQs
1. Why does my After Effects render look worse than the preview?
Because previews lie a little. They run at lower resolution, skip samples, and often ignore draft-quality issues. Your final render doesn’t. It shows the full result of your layer stack, blending modes, bit depth, and pre-comps. If the comp structure is messy, the render exposes it.
2. Do pre-comps reduce quality?
They can, but only when used poorly. A clean, intentional pre-comp usually helps quality by isolating complexity. A rushed pre-comp that hides bad blending or color decisions can make things worse. The rule I follow: pre-comp to simplify, not to avoid fixing problems.
3. Is working in 16-bit really necessary?
If you’re using gradients, glows, transparency, or color-heavy effects, yes. 8-bit runs out of precision fast and that shows up as banding or soft transitions in the final render. 16-bit gives your layers more breathing room without a huge performance hit.
4. Should I always pre-render heavy layers?
Not always. Pre-render once motion is locked and you’re confident in the look. Pre-rendering too early locks in mistakes. Pre-rendering too late wastes time and increases render risk. Timing matters more than the technique itself.
5. Why does stacking adjustment layers reduce sharpness?
Each adjustment layer applies math across everything underneath it. Stack enough of them and contrast gets compressed, edges soften, and color depth suffers. If an adjustment only needs to affect one element, keep it local.
6. Are render settings less important than composition?
They’re important, but they’re not corrective. Render settings can preserve quality. They can’t create it. A strong comp with sensible settings beats a weak comp with perfect export options every time.
7. When does using a cloud computer make sense?
When your comp is clean but your machine is holding you back. Long renders, unstable previews, disabled effects, or rushed final checks are signs. Cloud machines like Vagon Cloud Computer don’t fix bad comps, but they let good ones finish properly.
8. Can cloud rendering improve quality, not just speed?
Indirectly, yes. When performance stops being a constraint, you make better decisions. Higher-quality previews, fewer compromises, more confidence in final output. That adds up.
9. What’s the single most common mistake that hurts render quality?
Letting “temporary” shortcuts become permanent. Draft effects left on. Adjustment layers stacked out of convenience. Pre-comps created to hide chaos. Those always show up at export.
Get Beyond Your Computer Performance
Run applications on your cloud computer with the latest generation hardware. No more crashes or lags.

Trial includes 1 hour usage + 7 days of storage.
Summarize with AI

Ready to focus on your creativity?
Vagon gives you the ability to create & render projects, collaborate, and stream applications with the power of the best hardware.

Vagon Blog


Run heavy applications on any device with
your personal computer on the cloud.
San Francisco, California
Solutions
Vagon Teams
Vagon Streams
Use Cases
Resources
Vagon Blog
What Slows Down After Effects Projects?
The First 30 Minutes in Blender 3D: A Practical Workflow Guide
What’s New in Godot 4.7? Key Features, Upgrades, and Workflow Improvements
What Slows Down Blender 3D Projects?
What Slows Down Adobe Photoshop Projects?
The First 30 Minutes in Adobe Photoshop: A Practical Workflow Guide
Before You Start in Adobe Photoshop: A Practical Setup Checklist
What’s New in Unreal Engine 5.8? Key Features and Upgrade Advice
How to Run Windows on an iPad: 4 Best Ways (2026)
Vagon Blog
Run heavy applications on any device with
your personal computer on the cloud.
San Francisco, California
Solutions
Vagon Teams
Vagon Streams
Use Cases
Resources
Vagon Blog