Instant Connection for Pixel Streaming
— New Feature Automated Setup
How to Reduce Rendering Times in Premiere Pro in 2026
How to Reduce Rendering Times in Premiere Pro in 2026
VideoProduction
How to Reduce Rendering Times in Premiere Pro in 2026
Table of Contents
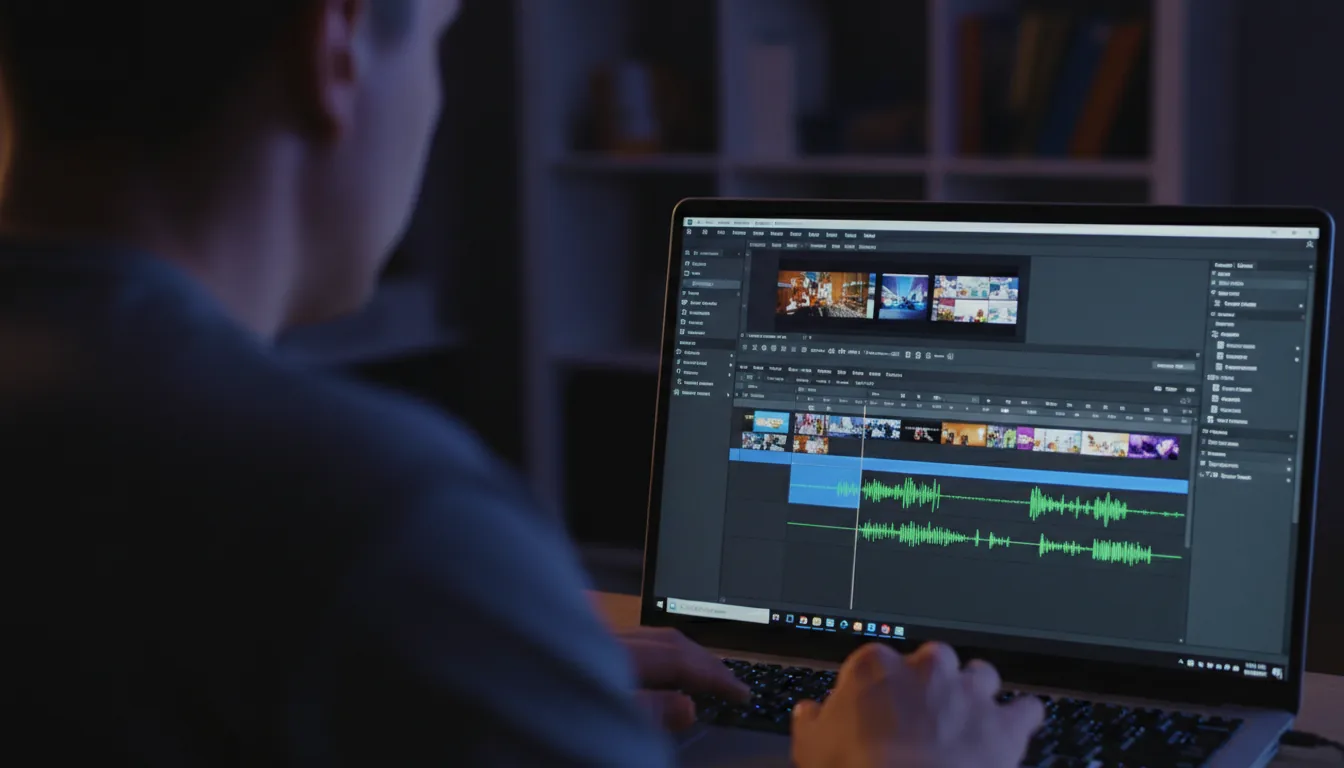
I’ve lost count of how many times I’ve hit export, glanced at the progress bar, and immediately started doing the math in my head. Can I answer emails before this finishes? Make coffee? Step away and come back? Even on projects that don’t feel heavy while editing, exports have a way of dragging on longer than expected.
That’s why rendering feels so painful. It’s not just the waiting. It’s how that waiting leaks into everything else.
Slow renders quietly shape creative decisions. When exporting takes forever, you experiment less. You hesitate before trying another color grade or layering an effect that might improve the cut. Not because it’s a bad idea, but because every test comes with the cost of another long wait. Over time, that friction pushes edits toward “good enough” instead of “as good as it could be.”
Revisions suffer next. A small client note that should take minutes suddenly stretches into an hour because exporting again feels expensive. You batch changes instead of responding fluidly. Feedback loops slow down, and projects take longer than they should.
Then there’s delivery confidence. When render times are unpredictable, you stop trusting your setup. You build in extra buffer time. You export earlier than necessary just in case something goes wrong. Instead of focusing fully on the work, part of your attention is always on whether the export will finish on time.
This guide isn’t about tricks, hidden checkboxes, or magic presets. Those don’t exist. It’s about understanding where render time actually goes in Premiere Pro and how to take control of it. Once you understand the process, the fixes stop feeling random and start feeling intentional.
Rendering vs Previewing vs Exporting
One of the biggest reasons rendering feels so frustrating in Premiere Pro is that the same word gets used for different things. If you don’t separate them, it’s easy to fix the wrong problem and still end up watching a progress bar crawl.
When you’re working on the timeline, Premiere is focused on playback. It’s trying to show you something smooth enough to edit, even if that means cutting corners. The colored bars above your clips reflect this. Red means Premiere can’t play the section smoothly without rendering. Yellow means it probably can. Green means preview files already exist.
This is preview rendering. Its job is to make editing tolerable, not to prepare your final video.
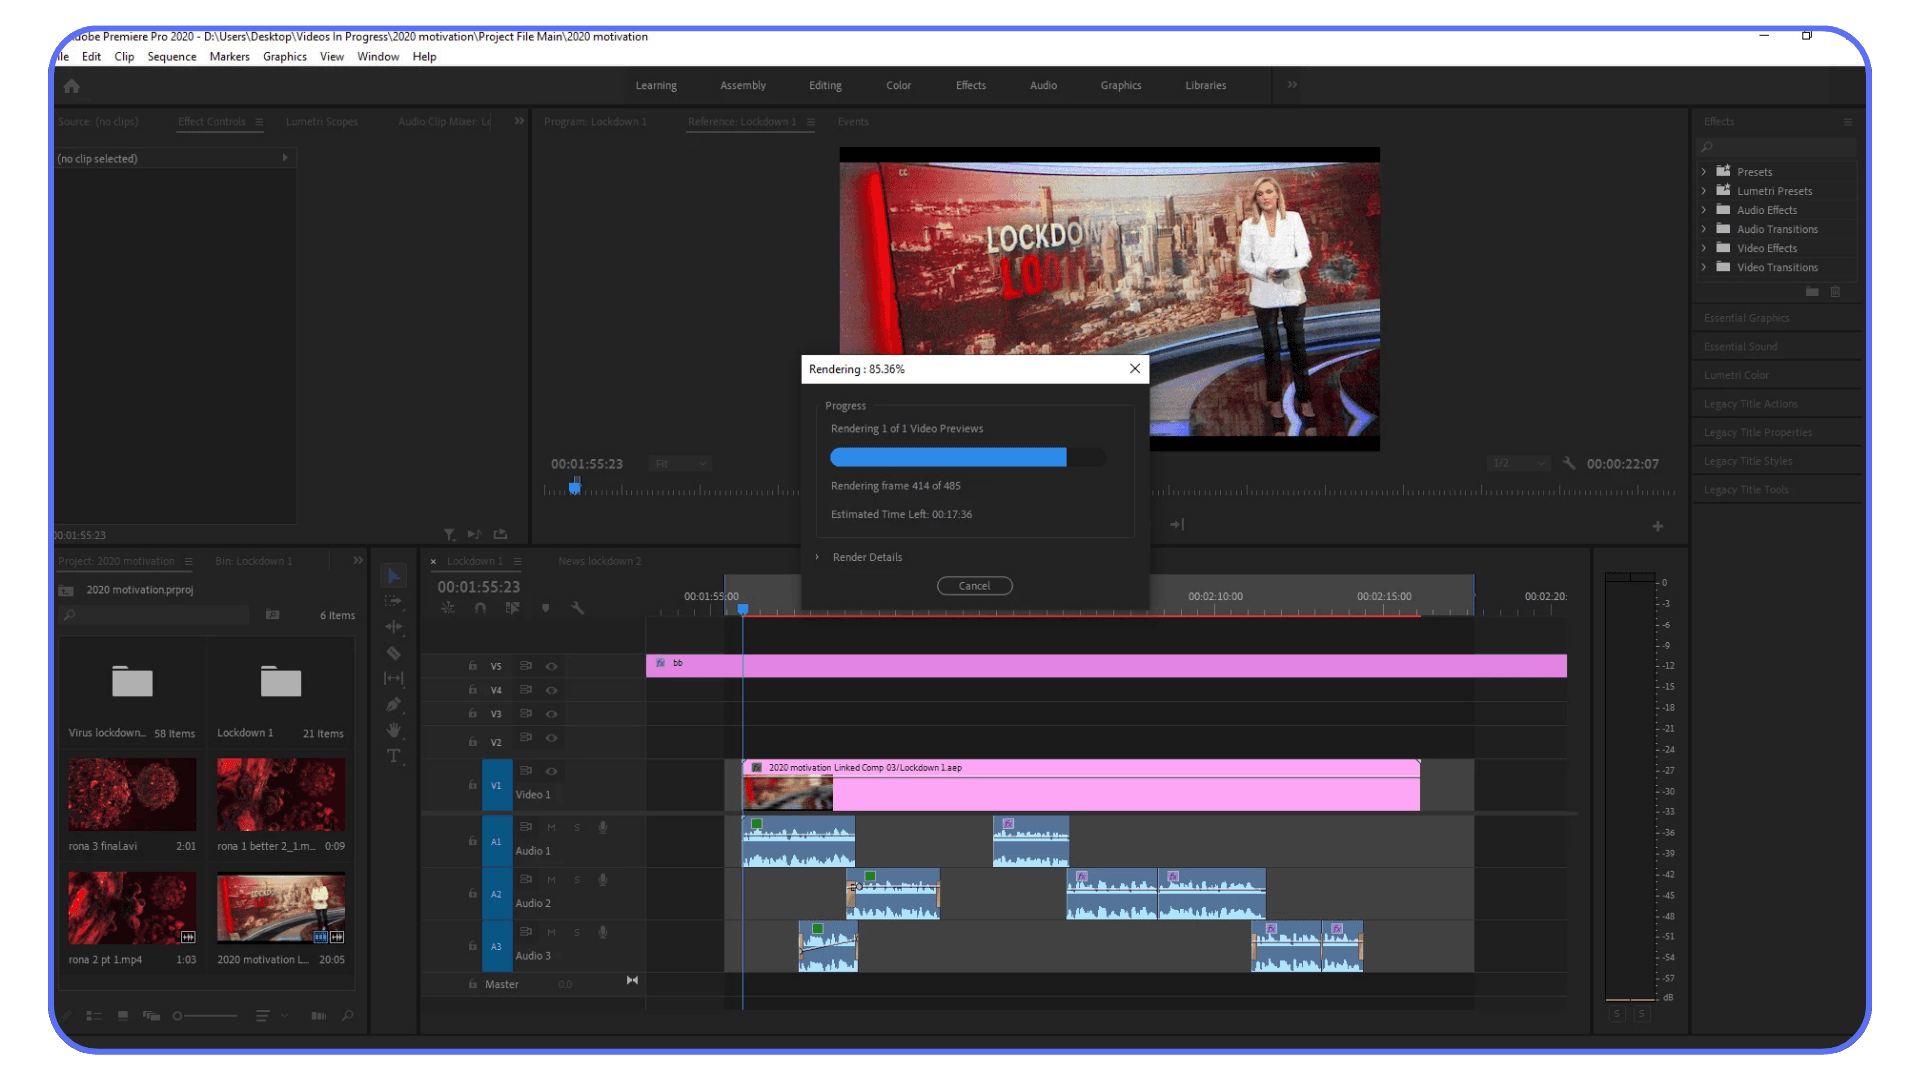
Exporting is a different process. This is when Premiere stops taking shortcuts and processes everything at full resolution and quality. Every effect, every scale, every color adjustment gets recalculated properly and written into a file. Even timelines that play perfectly in real time can take a long time to export because the workload is much heavier.
A lot of wasted time comes from mismatched settings. If your sequence settings, preview format, and export settings don’t align, Premiere may process the same parts of your timeline more than once. First to help you edit. Then again during export. From your perspective, it just feels slow. From Premiere’s perspective, it’s doing exactly what it was told.
Understanding this distinction matters. Optimizing for smooth playback is not the same as optimizing for fast exports. Once you separate those two goals, the rest of the decisions in this guide start to make a lot more sense.
How Premiere Pro Really Uses Your Hardware
This is where a lot of assumptions fall apart. Premiere Pro doesn’t treat your computer as one big pool of power. It pulls from different components at different stages, and whichever part can’t keep up sets the pace for the entire render.
CPU Responsibilities During Export
Despite how GPU-centric editing has become, the CPU still does a huge amount of work during exports.
It’s responsible for things like:
Decoding many types of footage
Handling effects that aren’t GPU-accelerated
Managing parts of the final encode process
This is why clock speed often matters more than raw core count. During long exports, a CPU with fewer, faster cores can outperform a higher-core chip that slows down under sustained load.
GPU Acceleration and Its Limits
The GPU helps when Premiere can actually use it. Color correction, scaling, some transitions, and many AI-powered effects benefit from GPU acceleration.
But there are limits:
Not every effect supports GPU acceleration
GPU acceleration must be enabled and supported by drivers
When something isn’t supported, Premiere quietly falls back to the CPU
That’s why a powerful GPU doesn’t always translate to fast exports. If your timeline leans heavily on CPU-bound tasks, the GPU may sit there underused.
RAM’s Role in Stability vs Speed
RAM rarely makes exports faster on its own. What it does is keep things from falling apart.
When Premiere runs low on available memory, it starts swapping data to disk. That’s when performance drops sharply and exports become unpredictable. Once you have enough RAM to avoid that, adding more usually improves stability, not speed.
Storage as a Hidden Bottleneck
Storage is the bottleneck most people don’t think about. During export, Premiere is constantly reading source media, preview files, and cache, while also writing the final file.
If those live on a slow drive:
CPUs and GPUs sit idle waiting for data
Export times stretch out even on powerful systems
Fast storage doesn’t make renders instant, but slow storage can make them painfully slow.
Rendering speed is almost never about one impressive spec. It’s about balance. The moment one component can’t keep up, everything else waits.
That’s why upgrading the wrong part of your system often feels disappointing. Until you understand which component is holding things back, you’re guessing. And guessing gets expensive fast.
Premiere Pro Settings That Directly Impact Render Time
Before changing your workflow or blaming hardware, it’s worth making sure Premiere itself isn’t working against you. A lot of slow renders come from settings that look harmless, stay untouched for years, and quietly add extra work to every export.
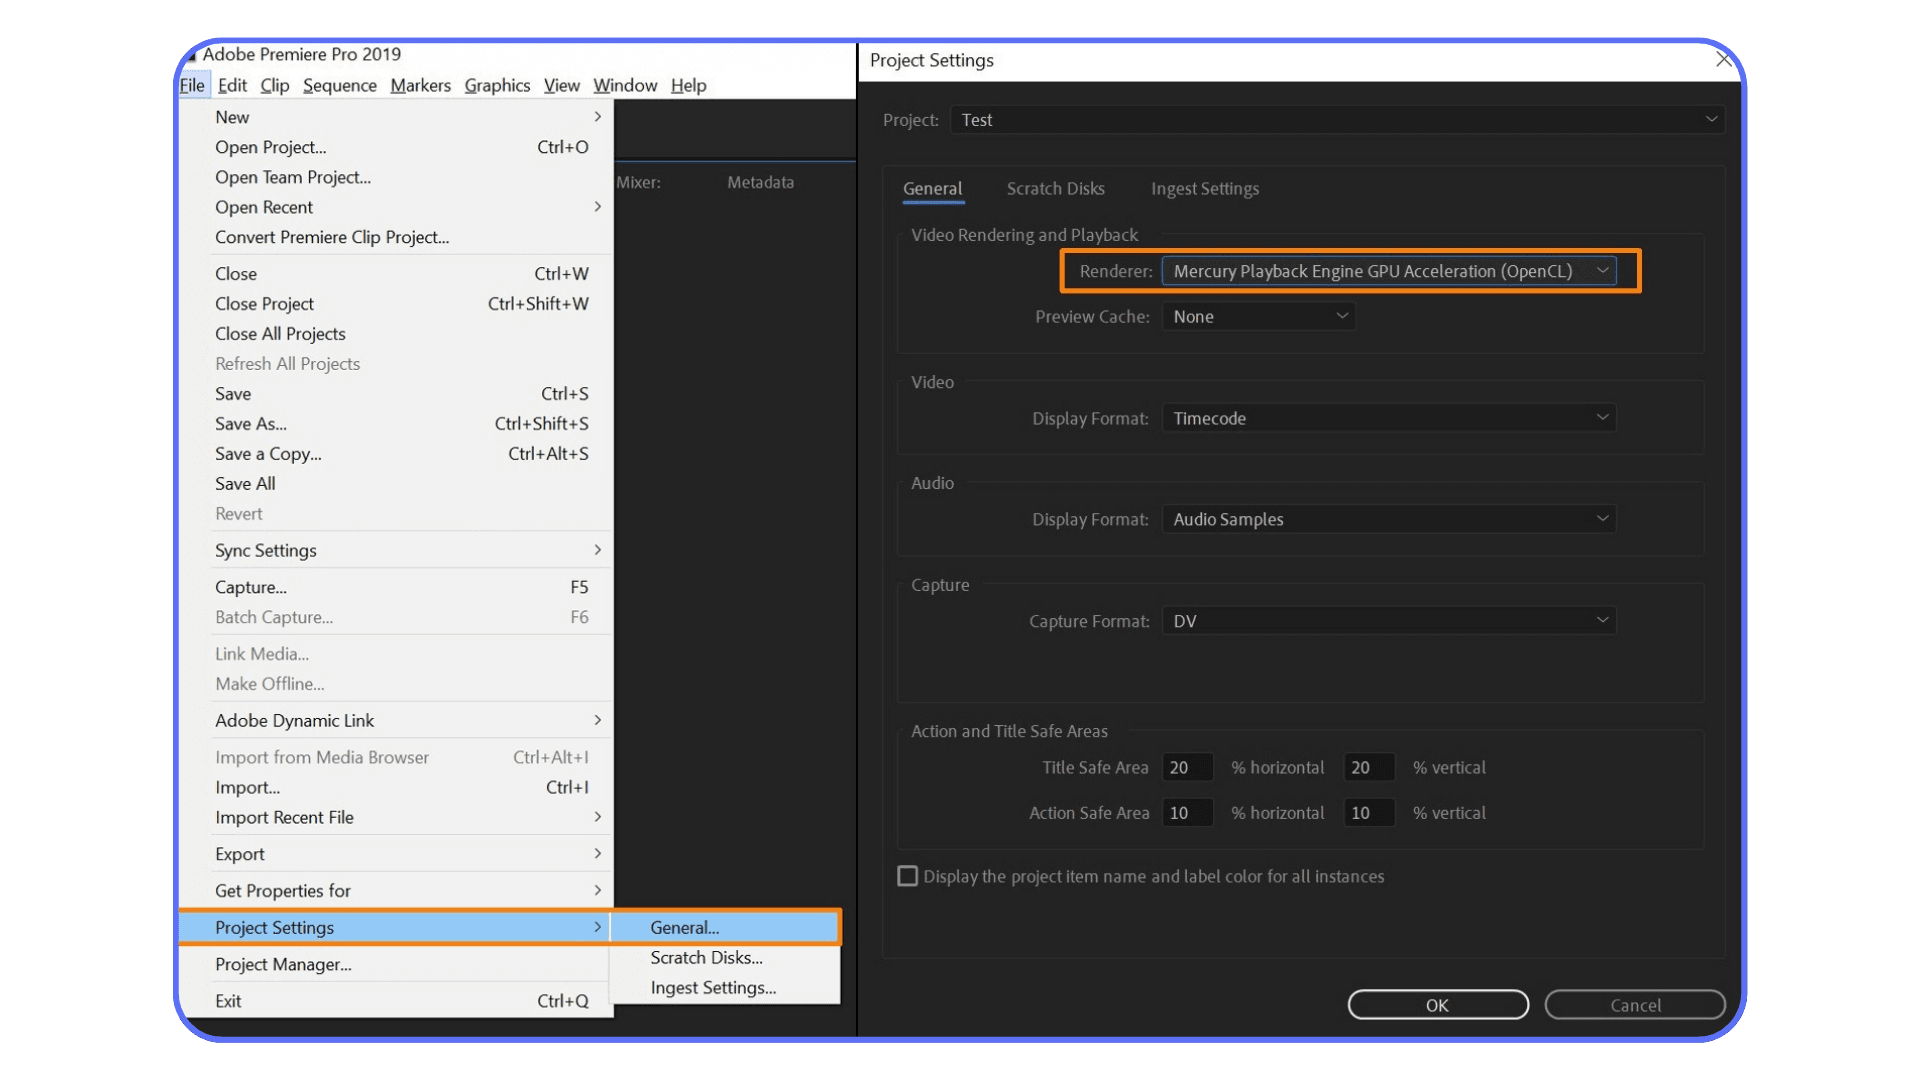
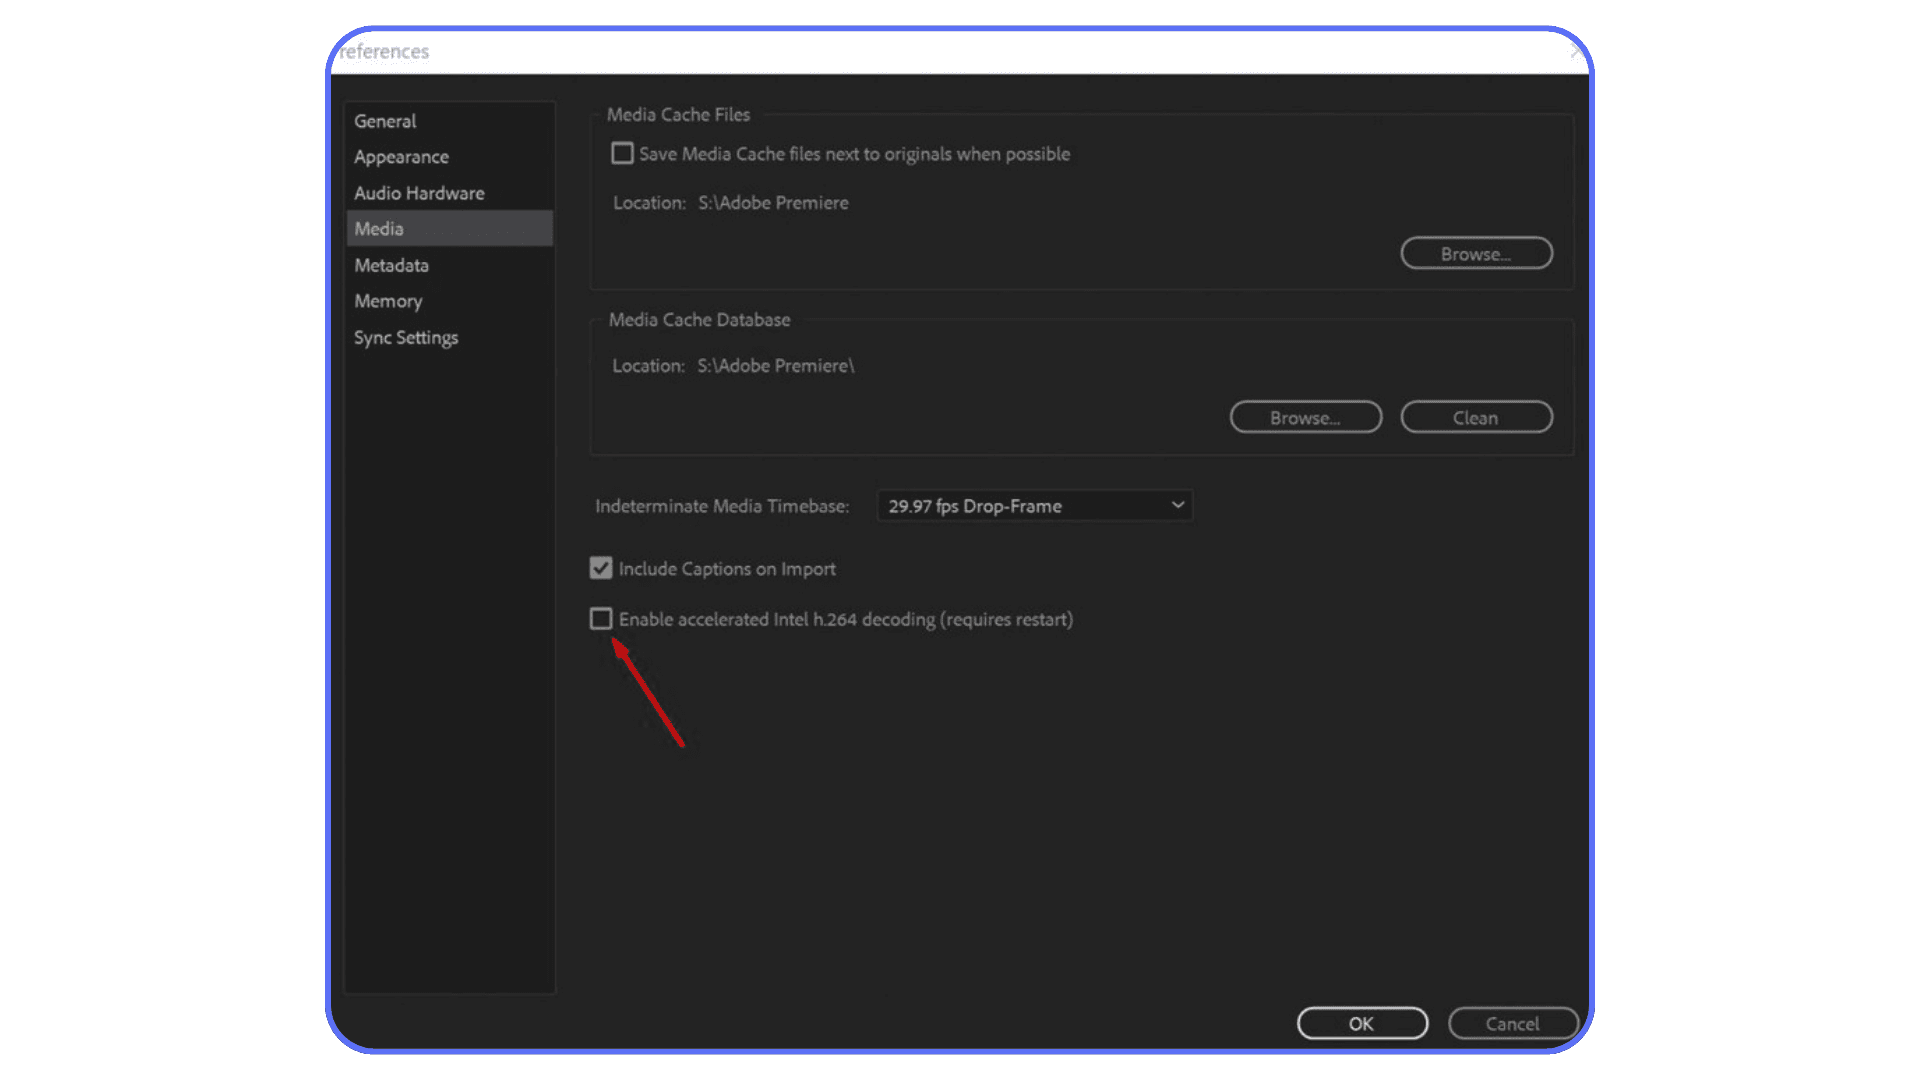
GPU Acceleration Being Disabled or Unsupported
This happens more often than people think. Premiere can fall back to CPU-only rendering without making a big deal about it.
A few common reasons:
GPU drivers are outdated or incompatible
A new project was created with default settings
The system switched GPUs on a laptop
The selected renderer isn’t supported by your hardware
When GPU acceleration isn’t active, effects that could run on the GPU get pushed onto the CPU instead. Export times jump, and it’s not always obvious why.
Sequence Settings That Don’t Match Footage
Mismatched sequence settings force Premiere to do extra work on every frame.
Typical culprits include:
Frame rate mismatches that require interpolation
Resolution mismatches that trigger constant scaling
Pixel aspect ratio differences
These don’t always show up as obvious problems in the timeline, but they add processing overhead during export. Matching your sequence to your source footage removes work Premiere never needed to do.
Preview Formats and When They Help Exports
Preview files are useful, but only under specific conditions.
They help exports when:
The preview codec matches the export codec
The preview resolution matches the sequence
“Use Previews” is enabled during export
They don’t help when:
The preview format is different from the export format
Effects force full reprocessing anyway
In those cases, Premiere ignores previews entirely and re-renders everything from scratch.
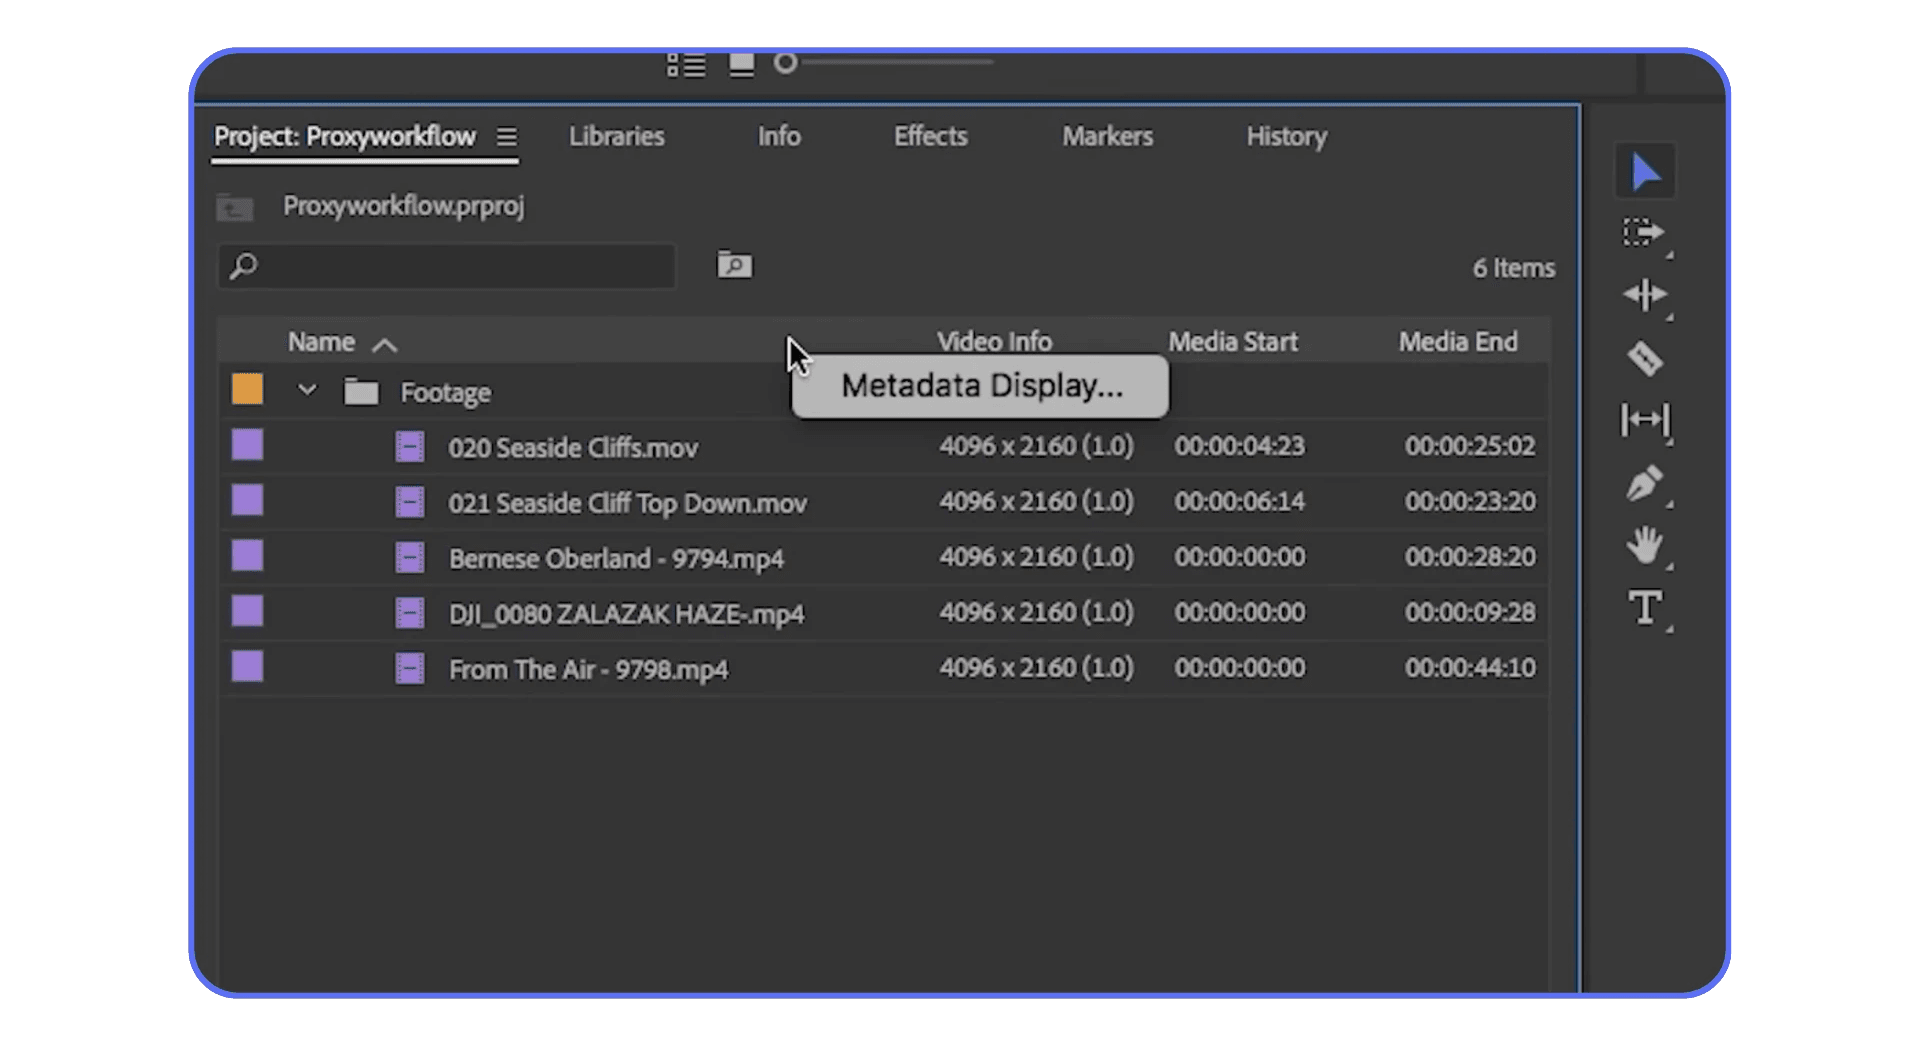
Media Cache Behavior and Maintenance
Media cache files pile up fast, especially on long or complex projects. Over time, they can slow things down in subtle ways.
Good cache habits include:
Clearing cache periodically
Keeping cache on a fast SSD
Avoiding cache on system drives with low free space
Cache issues rarely crash Premiere, but they do make exports slower and less predictable.
Individually, each of these settings might only add a little extra processing. Together, they stack.
A slight frame rate mismatch, GPU acceleration not kicking in, previews being ignored, and a bloated cache can turn a reasonable export into a painfully slow one. The frustrating part is that none of these feel dramatic on their own.
Once these settings are aligned, Premiere stops fighting itself. And when that happens, render times usually improve more than people expect.
Cloud-based workflows also make it possible to work from lighter devices, and this look at using Adobe Premiere Pro on an iPad shows how editors are extending their setups beyond traditional desktops.
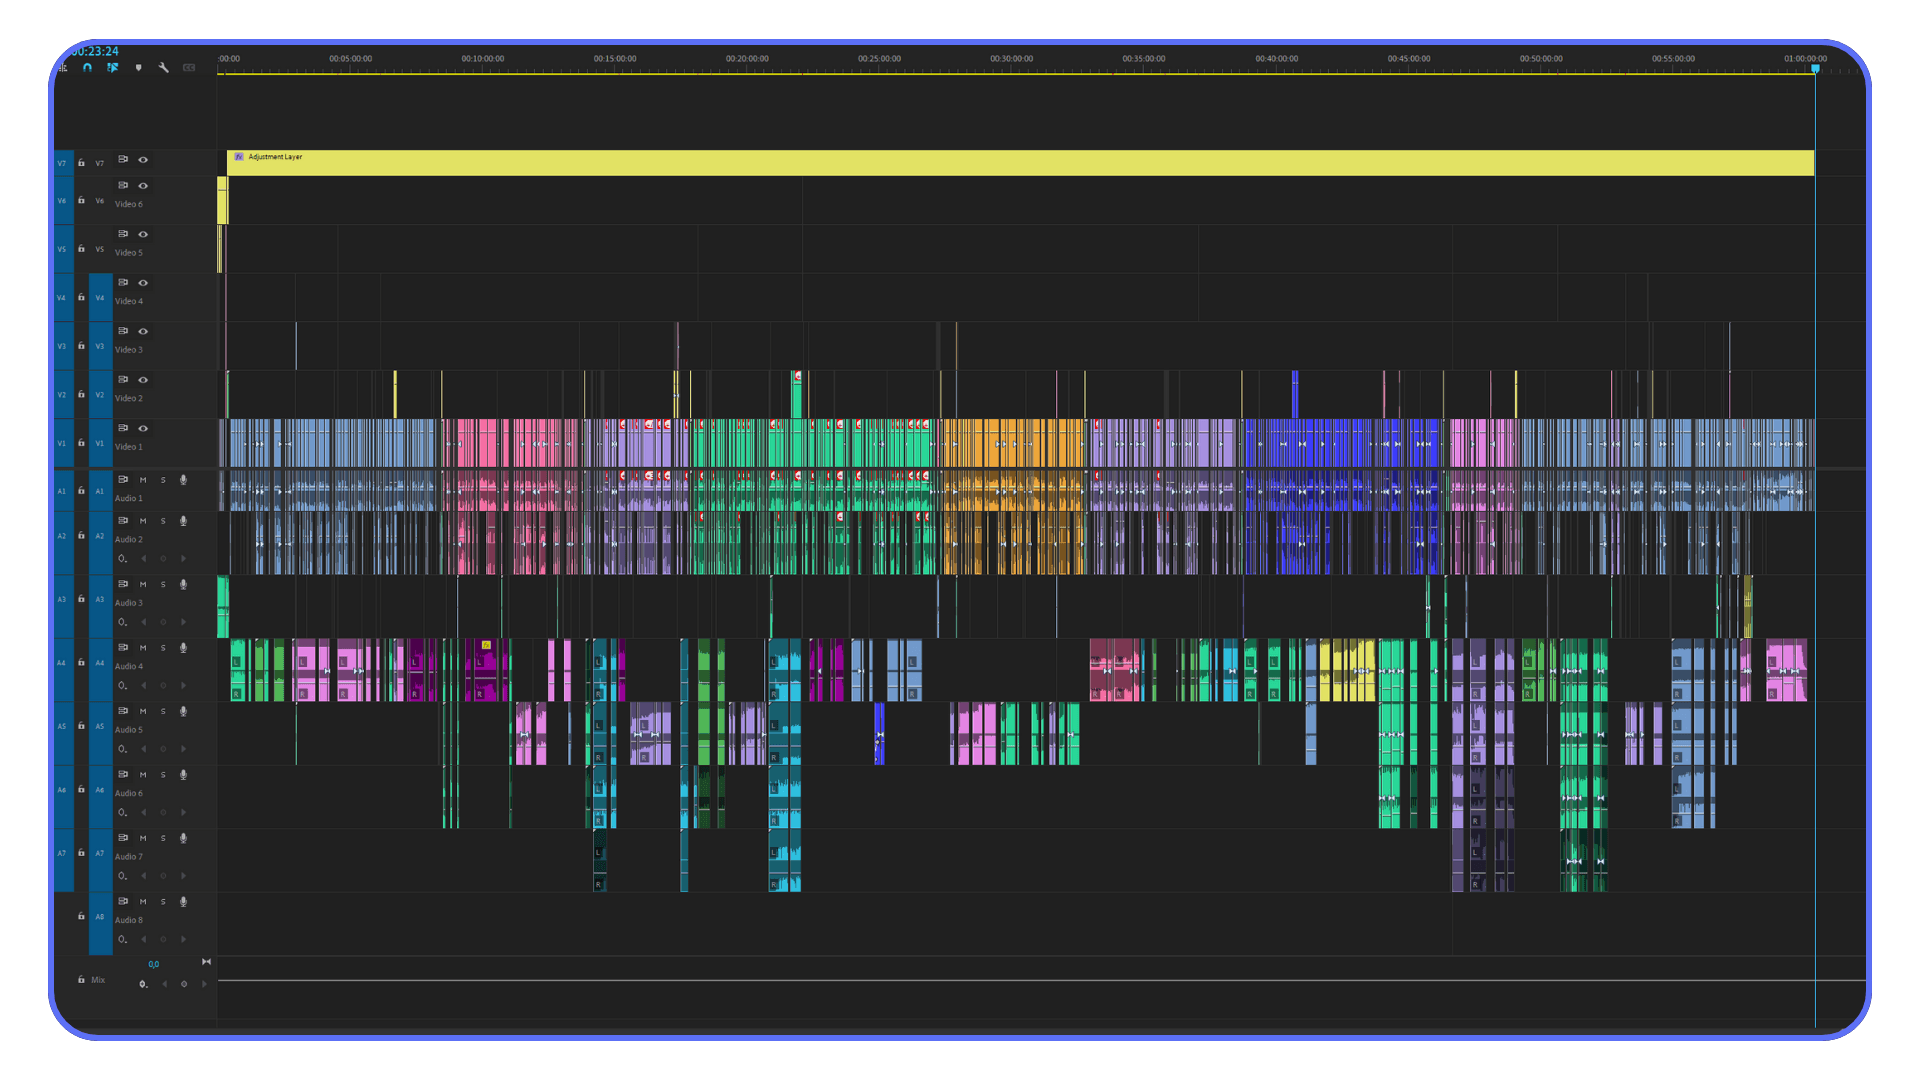
Timeline Habits That Quietly Slow Everything Down
Even with perfect settings, the way a timeline is built can add a surprising amount of render time. These aren’t mistakes so much as habits. They feel convenient while you’re editing, but Premiere pays for them later during export.
Effect Stacking vs Consolidation
Premiere makes it easy to stack effects. Multiple Lumetri instances, adjustment layers on top of adjustment layers, duplicated effects with small tweaks. It all works, but every layer adds more processing during export.
Once a look is locked, consolidating effects can make a real difference. Baking color into a single Lumetri pass or rendering a finalized clip removes repeated calculations Premiere would otherwise do on every frame.
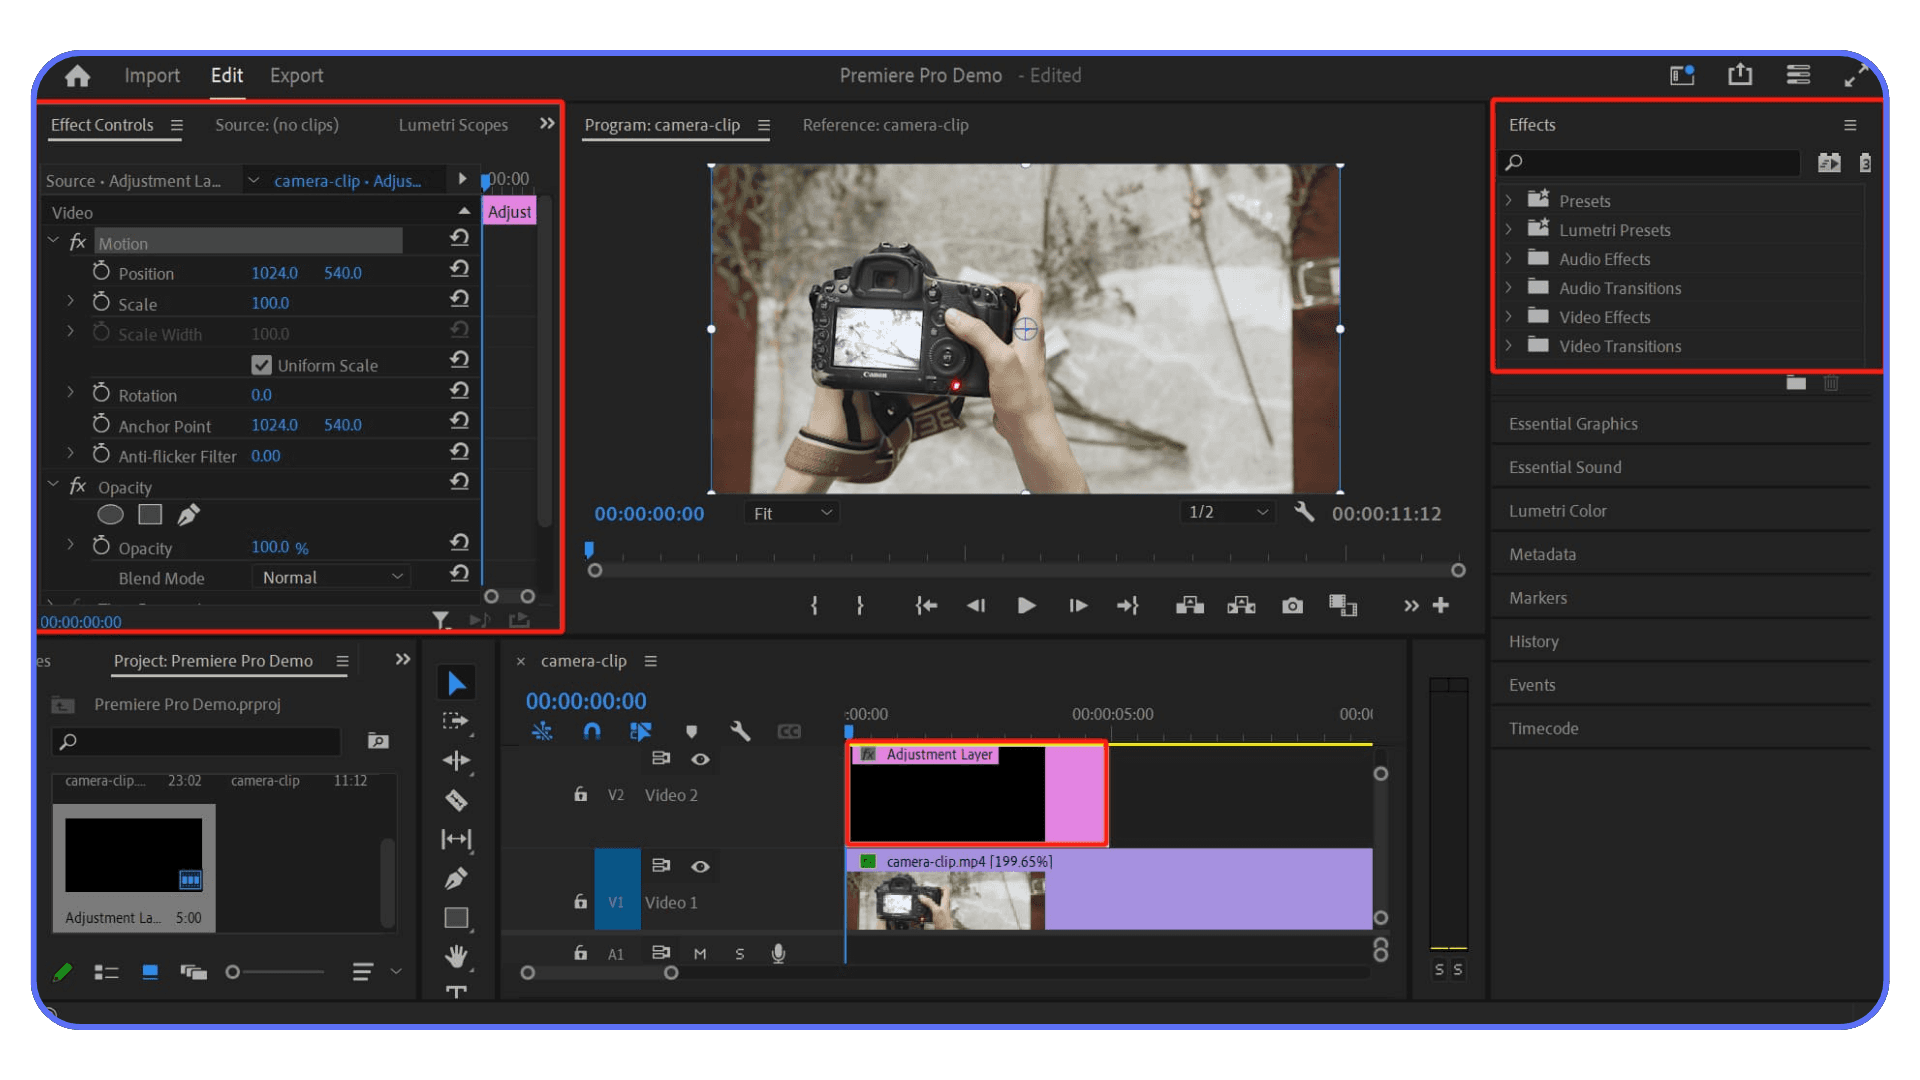
Overuse of Adjustment Layers
Adjustment layers are powerful, but they’re also blunt instruments. When you apply heavy effects to an adjustment layer, Premiere processes them across the entire frame for every clip underneath, even if only part of the image actually needs it.
On longer timelines, that full-frame processing adds up fast. Using adjustment layers selectively, rather than everywhere by default, keeps exports lighter.
Leaving Heavy Effects Enabled Too Early
Some effects are simply expensive. Noise reduction, stabilization, motion blur, and many AI-driven tools can slow things down dramatically.
Leaving them enabled while you’re still cutting means Premiere is constantly recalculating work that isn’t final yet. Disabling these effects until the edit is locked can improve both playback and export speed, without sacrificing quality in the end.
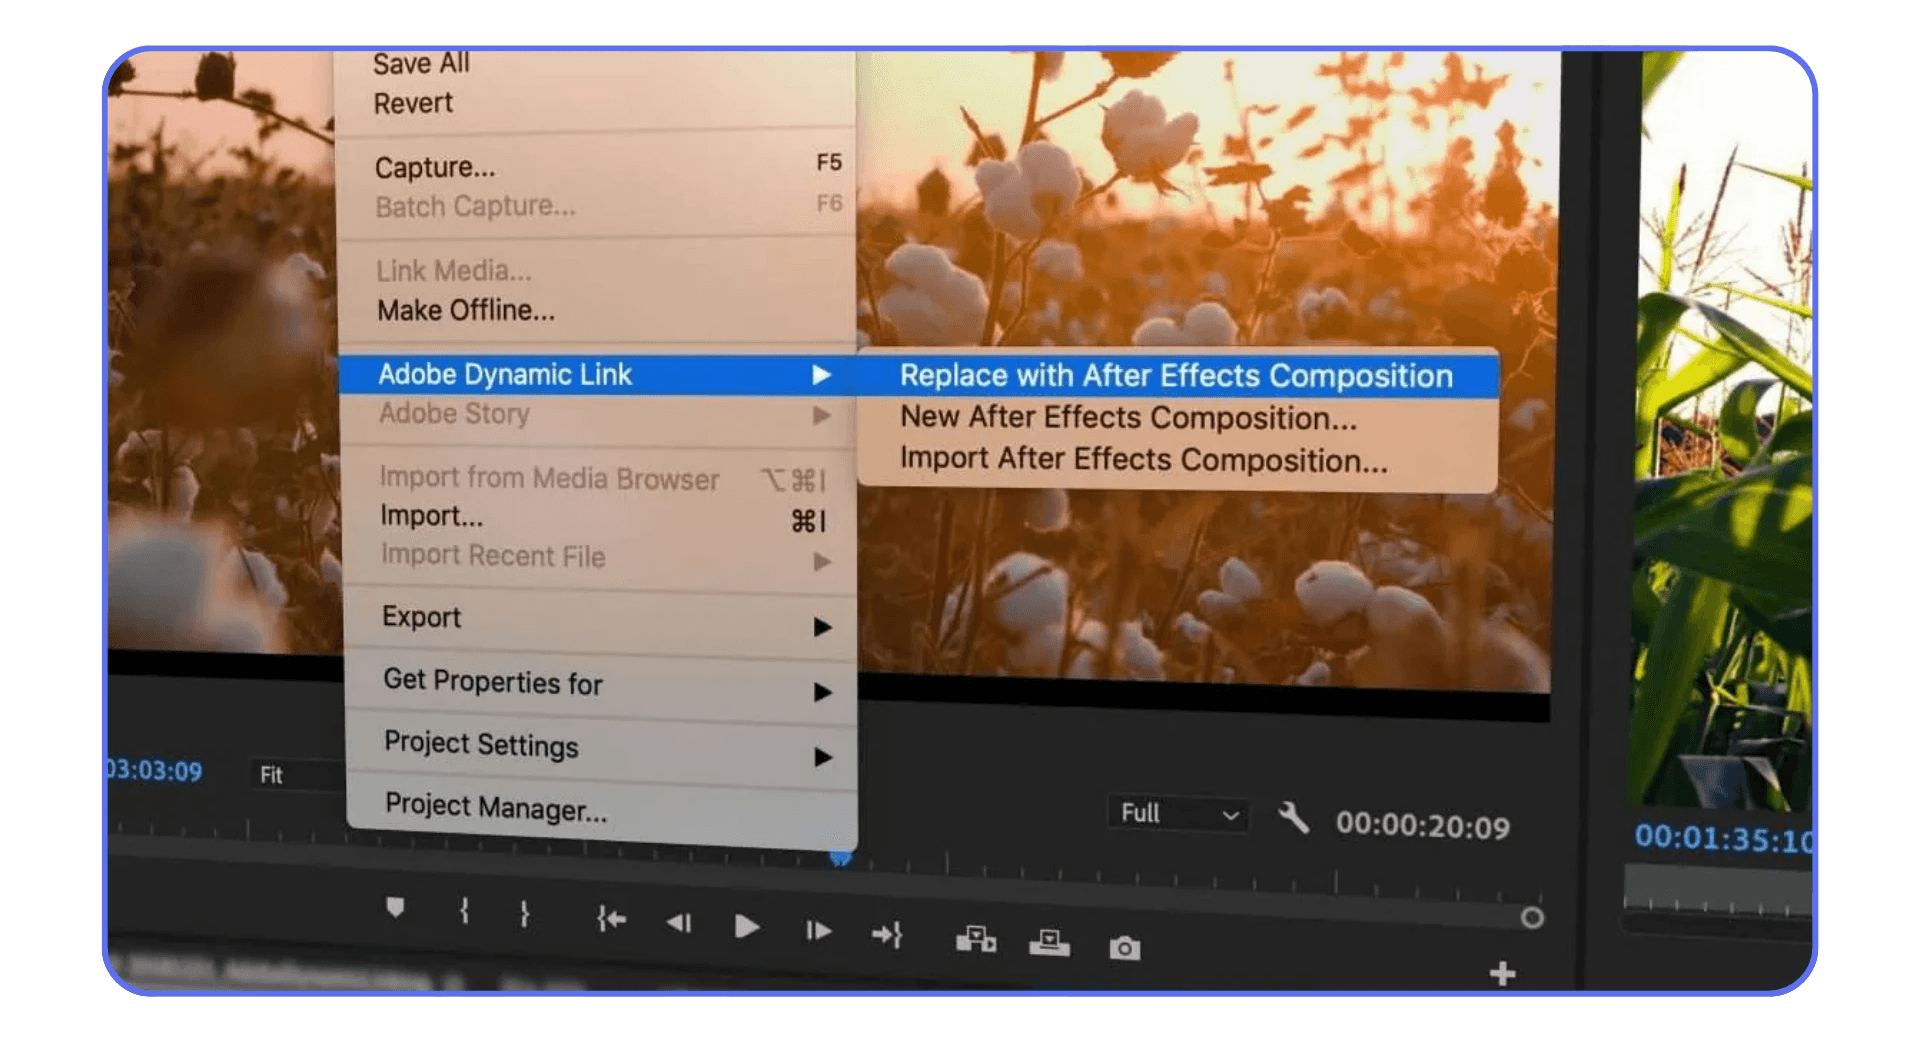
Dynamic Link vs Rendered Assets
Dynamic Link feels elegant. Drop an After Effects comp into Premiere and keep everything live. In practice, it often slows exports to a crawl.
For complex comps, rendering them out and importing the result as a video file is usually faster and more stable. You lose some flexibility, but you gain predictability and speed where it matters most.
None of these habits are wrong. They’re common because they save time in the moment. The trade-off is that Premiere has to do more work later.
The key is being intentional. Knowing when convenience helps the edit, and when it quietly taxes every export that follows.
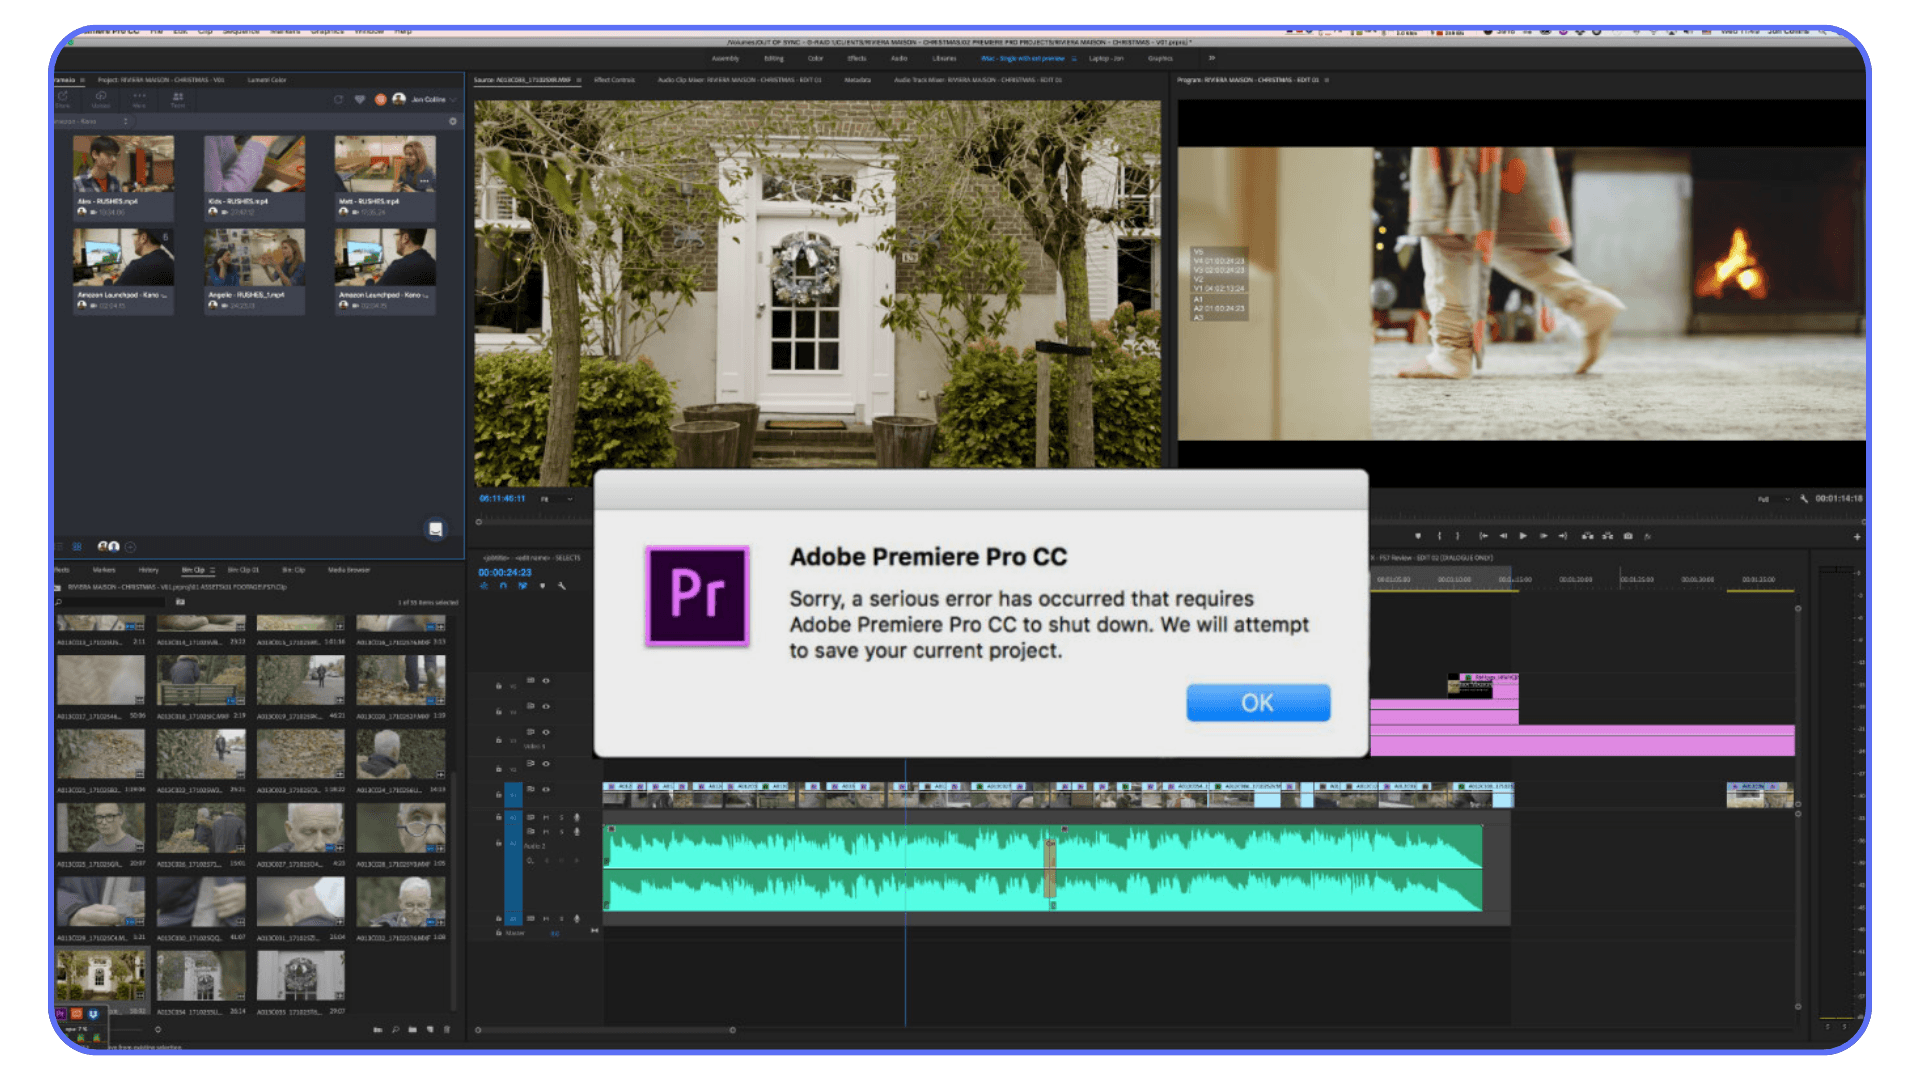
If slow renders are happening alongside freezes or unexpected shutdowns, this guide on how to stop Premiere Pro from crashing covers the stability issues that often show up before performance completely falls apart.
Proxy Workflows: When They Help and When They Don’t
Proxies get recommended a lot, usually as a blanket fix for performance problems. In reality, they’re incredibly useful in the right situations and mostly pointless in others. Knowing the difference saves time and frustration.
Footage Types That Benefit From Proxies
Proxies shine when the original media is genuinely hard to decode in real time. This usually includes:
4K and higher resolutions
Long-GOP codecs like H.264 and H.265
High frame rate footage
Log or RAW formats
In these cases, proxies don’t just make playback smoother. They make the entire editing experience feel lighter and more responsive.
Situations Where Proxies Waste Time
If your system already handles the footage comfortably, proxies can become overhead.
Short projects
Lightweight codecs
Simple timelines with minimal effects
Here, the time spent generating and managing proxies can exceed any performance gain.
Common Proxy Mistakes
Most proxy frustrations come from setup issues rather than the idea itself.
Choosing proxy formats that are still too heavy
Forgetting to toggle back to full-resolution media
Accidentally exporting with proxies enabled
Premiere usually handles the switching correctly, but it’s still worth double-checking before final export.
Proxies don’t directly make final exports faster. What they do is speed up everything before that point. When playback is smooth and scrubbing is instant, decisions happen faster. Cuts lock sooner. Fewer test exports are needed.
That indirect effect often saves more time than any single export optimization ever could.
When performance issues become constant, some editors start questioning the tool itself, and looking through these Premiere Pro alternatives can help clarify whether the slowdown is workflow-related or software-related.
Pre-Rendering Strategies for Heavy Timelines
At a certain point, optimization stops being about settings and starts being about commitment. If a timeline is packed with effects, Premiere has to recalculate a lot of the same work over and over. Pre-rendering is how you tell it, “this part is done, stop thinking so hard.”
Render and Replace Use Cases
Render and Replace is one of Premiere’s most practical tools when things get heavy. It lets you take a clip or section with complex effects and turn it into a baked video file, while keeping the option to revert later.
It’s especially useful for:
Stabilized clips that won’t change anymore
Complex motion graphics
Layered color work that’s already approved
Once replaced, Premiere treats that section like normal footage. No effects to recalculate. No surprises during export.
Smart Rendering Explained Realistically
Smart Rendering sounds like a cheat code, but it’s very particular. When it works, Premiere can skip re-encoding parts of the timeline and simply copy existing frames into the final file.
The conditions matter:
Sequence, preview, and export settings must match
The codec has to support smart rendering
Certain effects will force reprocessing anyway
That’s why many editors never see it kick in. When the setup is right, though, export times can drop dramatically. When it’s not, nothing changes.
Selective Pre-Rendering
Pre-rendering doesn’t have to mean locking the entire timeline. Often, only a few sections are causing trouble.
Selective pre-rendering focuses on:
Effect-heavy shots
Dense layers
Clips that always trigger red render bars
By rendering only those areas, you reduce the overall load without boxing yourself into a final edit too early.
Pre-rendering works best when it’s intentional. It’s a signal that a creative decision is final, at least for now.
Knowing when to lock something saves more than render time. It reduces mental overhead. Premiere stops recalculating the same work, and you stop second-guessing parts of the edit that are already done.
When used thoughtfully, pre-rendering doesn’t limit flexibility. It gives it back where it actually matters.
For editors who reach a point where optimization isn’t enough anymore, this PC build and computer buying guide for Premiere Pro lays out what actually makes a difference when upgrading hardware and what usually doesn’t.
What “Normal” Render Times Actually Look Like
One of the hardest things about dealing with slow renders is not knowing whether something is actually wrong. You hit export, it takes forever, and you’re left wondering if Premiere is misbehaving or if this is just the cost of doing heavier work.
For clean 1080p timelines, expectations are fairly straightforward. Basic cuts, light color correction, a few titles. On a reasonably modern system, these should export quickly and consistently. If that kind of project is taking an hour, something is off. Usually it’s a settings mismatch, GPU acceleration not kicking in, or Premiere reprocessing work unnecessarily.
4K timelines change the picture fast. Even without heavy effects, you’re dealing with four times the data. Add scaling, log footage, or multiple layers and export times climb quickly. At that point, waiting ten or twenty minutes can be completely normal, even on decent hardware.
Effects matter more than resolution. A short timeline with noise reduction, stabilization, or AI-driven effects can take longer to export than a much longer project with clean cuts. Two projects that look similar in duration can behave very differently once Premiere starts calculating what’s under the hood.
This is why comparisons are tricky. Someone else’s export finished in five minutes because their codec was easier, their effects lighter, or their settings better aligned. It doesn’t automatically mean your system is slow.
What matters most is consistency. If similar projects suddenly take much longer than they used to, that’s a sign something changed. A driver update, a new effect, a setting you didn’t realize was enabled. If render times are always long but predictable, that usually points to hardware limits rather than a misconfiguration.
Understanding what “normal” looks like for your type of work helps you decide what’s worth fixing and what’s simply part of the workload.
If proxies are new to you or your current setup feels messy, this guide on how to create video proxies on Premiere Pro walks through a clean workflow that avoids the most common performance-killing mistakes.
When Optimization Stops Working
There’s a point where tweaking settings stops paying off. You’ve matched your sequence, cleaned up the timeline, optimized exports, and renders are still slower than they should be. That’s usually the moment when Premiere isn’t the real bottleneck anymore.
You start to notice it during longer exports. Short videos might be fine, but anything sustained causes performance to drop. Fans ramp up. Clock speeds dip. On laptops especially, thermal throttling quietly stretches render times far beyond what the specs suggest should be possible.
This is also where hardware upgrades start to disappoint. Adding more RAM improves stability but not speed. A better GPU sits underused because the CPU can’t keep up. Faster storage helps, but only if storage was the limiting factor to begin with. Upgrading one part rarely fixes the whole picture.
The hidden cost shows up in how you plan your work. You avoid exporting late. You schedule renders around breaks. You delay revisions because you know how long they’ll take. None of that shows up on a spec sheet, but it adds up fast.
At this stage, the problem isn’t that your machine is bad. It’s that modern editing, especially with high-resolution footage and AI-driven effects, demands sustained performance most local systems weren’t designed to deliver. Once you hit that ceiling, optimization can only take you so far.
That’s usually when editors start looking for alternatives. Not shortcuts, but ways to remove a limitation they keep running into.
If you’re trying to understand why your GPU isn’t helping as much as you expected, this breakdown on choosing the best GPU for Premiere Pro explains which specs actually matter for rendering and which ones mostly look good on paper.
Rendering with Vagon Cloud Computer
This is usually the moment when editors stop asking which setting they missed and start asking a different question. Why does everything slow down the moment a project gets heavy?
Local machines are great at short bursts of work. A quick export, a short timeline, a light revision. The problems start when rendering becomes sustained. Long exports push CPUs and GPUs at full load for extended periods. On laptops, thermal throttling kicks in and performance drops mid-export. On desktops, resources get tied up for hours, and background processes start competing for power. Even strong machines slow down once heat, power limits, and system load stack up.
What most editors actually need isn’t constant maximum performance. It’s access to serious power at specific moments. Final exports. Tight revision windows. Heavy color passes. AI-driven effects. Buying hardware for those peak moments often means paying for power that sits idle most of the time. That’s where the idea of burst performance starts to make sense.
Vagon Cloud Computer lets you run Premiere Pro on high-performance cloud hardware instead of your local machine. Your laptop or desktop becomes a window, not the engine doing the work. The rendering happens on CPUs and GPUs designed for sustained loads, so export times stay consistent instead of slowing down halfway through.
That consistency changes how rendering feels day to day. You stop guessing how long an export will take. You don’t build extra buffer time into deadlines just in case. Long renders become predictable, which makes planning revisions and deliveries far easier.
There’s also a workflow benefit that shows up quickly when more than one person is involved. Instead of matching hardware, shipping large files back and forth, or troubleshooting performance differences, everyone works in the same environment. Same performance, same behavior, fewer surprises.
This isn’t about replacing local machines or skipping good Premiere practices. It’s about removing the ceiling that appears once projects demand more than local hardware can comfortably deliver. For many editors, cloud rendering isn’t a shortcut. It’s a way to keep momentum when everything else is already optimized.
Final Thoughts
Rendering will always take time. That part doesn’t change. What does change is how much of that time feels unnecessary.
Slow exports usually aren’t caused by one obvious mistake. They come from small choices stacking up. A mismatched sequence setting here. Heavy effects left on too early there. Export presets reused long after the project outgrew them. None of these feel dramatic on their own, but together they quietly drag everything down.
Once you understand how Premiere Pro actually works, those choices stop being guesses. You start editing with intent. You know when playback matters and when export speed matters. You know which fixes are worth your time and which ones won’t move the needle.
For many projects, that understanding alone is enough. Renders become predictable. Revisions feel manageable again. Waiting stops dominating the day.
And when optimization isn’t enough anymore, at least you know why. At that point, the question isn’t about Premiere settings or editing skill. It’s about where the work runs and how much performance you can access when it really counts.
The goal isn’t to eliminate rendering. It’s to stop letting it interrupt the creative flow. When renders feel boring instead of stressful, you know you’ve done it right.
FAQs
1. Why is my Premiere Pro export so slow even though playback is smooth?
Because playback and export are doing different jobs. Premiere is very forgiving during playback. It cuts corners to keep things moving. During export, it doesn’t. Every effect, scale, and color adjustment is processed at full quality. A timeline that plays smoothly can still take a long time to export if there’s heavy processing happening under the hood.
2. Does rendering previews actually make exports faster?
Sometimes. Only if your preview format matches your export settings and you enable “Use Previews” during export. If those don’t line up, Premiere ignores preview files completely and re-renders everything. That’s why preview rendering often feels useless for export speed.
3. Should I always use GPU acceleration?
Yes, if your hardware supports it and it’s stable. GPU acceleration can significantly reduce render times for supported effects. The problem is that it can silently turn off due to driver issues, unsupported hardware, or project settings. It’s worth checking regularly, especially if export times suddenly get worse.
4. Do proxies speed up final exports?
No, not directly. Proxies speed up editing, not exporting. Their real value is momentum. When editing feels responsive, you lock cuts faster and need fewer test exports. That indirect effect often saves more time than people expect.
5. Why does “Maximum Render Quality” slow everything down?
Because it improves scaling quality, and scaling is expensive. If you’re not resizing footage, it usually does nothing except add processing time. It’s useful in specific cases, but leaving it on by default is a common mistake.
6. Is Adobe Media Encoder faster than exporting directly from Premiere Pro?
Not automatically. Media Encoder is great for queueing exports and keeping Premiere free so you can keep working. It doesn’t magically speed up renders. In some cases, exporting directly from Premiere is just as fast or faster.
7. How do I know if my hardware is the real bottleneck?
Look for consistency. If similar projects always take a long time to export, even after optimizing settings and workflows, you’re likely hitting hardware limits. Thermal throttling, long sustained renders, and underused GPUs are common signs.
8. When does cloud rendering make sense?
Cloud rendering makes sense when projects demand more sustained performance than your local machine can comfortably deliver. Heavy timelines, tight deadlines, frequent revisions, or AI-driven effects are typical scenarios. It’s most effective after you’ve already optimized Premiere itself.
I’ve lost count of how many times I’ve hit export, glanced at the progress bar, and immediately started doing the math in my head. Can I answer emails before this finishes? Make coffee? Step away and come back? Even on projects that don’t feel heavy while editing, exports have a way of dragging on longer than expected.
That’s why rendering feels so painful. It’s not just the waiting. It’s how that waiting leaks into everything else.
Slow renders quietly shape creative decisions. When exporting takes forever, you experiment less. You hesitate before trying another color grade or layering an effect that might improve the cut. Not because it’s a bad idea, but because every test comes with the cost of another long wait. Over time, that friction pushes edits toward “good enough” instead of “as good as it could be.”
Revisions suffer next. A small client note that should take minutes suddenly stretches into an hour because exporting again feels expensive. You batch changes instead of responding fluidly. Feedback loops slow down, and projects take longer than they should.
Then there’s delivery confidence. When render times are unpredictable, you stop trusting your setup. You build in extra buffer time. You export earlier than necessary just in case something goes wrong. Instead of focusing fully on the work, part of your attention is always on whether the export will finish on time.
This guide isn’t about tricks, hidden checkboxes, or magic presets. Those don’t exist. It’s about understanding where render time actually goes in Premiere Pro and how to take control of it. Once you understand the process, the fixes stop feeling random and start feeling intentional.
Rendering vs Previewing vs Exporting
One of the biggest reasons rendering feels so frustrating in Premiere Pro is that the same word gets used for different things. If you don’t separate them, it’s easy to fix the wrong problem and still end up watching a progress bar crawl.
When you’re working on the timeline, Premiere is focused on playback. It’s trying to show you something smooth enough to edit, even if that means cutting corners. The colored bars above your clips reflect this. Red means Premiere can’t play the section smoothly without rendering. Yellow means it probably can. Green means preview files already exist.
This is preview rendering. Its job is to make editing tolerable, not to prepare your final video.
Exporting is a different process. This is when Premiere stops taking shortcuts and processes everything at full resolution and quality. Every effect, every scale, every color adjustment gets recalculated properly and written into a file. Even timelines that play perfectly in real time can take a long time to export because the workload is much heavier.
A lot of wasted time comes from mismatched settings. If your sequence settings, preview format, and export settings don’t align, Premiere may process the same parts of your timeline more than once. First to help you edit. Then again during export. From your perspective, it just feels slow. From Premiere’s perspective, it’s doing exactly what it was told.
Understanding this distinction matters. Optimizing for smooth playback is not the same as optimizing for fast exports. Once you separate those two goals, the rest of the decisions in this guide start to make a lot more sense.
How Premiere Pro Really Uses Your Hardware
This is where a lot of assumptions fall apart. Premiere Pro doesn’t treat your computer as one big pool of power. It pulls from different components at different stages, and whichever part can’t keep up sets the pace for the entire render.
CPU Responsibilities During Export
Despite how GPU-centric editing has become, the CPU still does a huge amount of work during exports.
It’s responsible for things like:
Decoding many types of footage
Handling effects that aren’t GPU-accelerated
Managing parts of the final encode process
This is why clock speed often matters more than raw core count. During long exports, a CPU with fewer, faster cores can outperform a higher-core chip that slows down under sustained load.
GPU Acceleration and Its Limits
The GPU helps when Premiere can actually use it. Color correction, scaling, some transitions, and many AI-powered effects benefit from GPU acceleration.
But there are limits:
Not every effect supports GPU acceleration
GPU acceleration must be enabled and supported by drivers
When something isn’t supported, Premiere quietly falls back to the CPU
That’s why a powerful GPU doesn’t always translate to fast exports. If your timeline leans heavily on CPU-bound tasks, the GPU may sit there underused.
RAM’s Role in Stability vs Speed
RAM rarely makes exports faster on its own. What it does is keep things from falling apart.
When Premiere runs low on available memory, it starts swapping data to disk. That’s when performance drops sharply and exports become unpredictable. Once you have enough RAM to avoid that, adding more usually improves stability, not speed.
Storage as a Hidden Bottleneck
Storage is the bottleneck most people don’t think about. During export, Premiere is constantly reading source media, preview files, and cache, while also writing the final file.
If those live on a slow drive:
CPUs and GPUs sit idle waiting for data
Export times stretch out even on powerful systems
Fast storage doesn’t make renders instant, but slow storage can make them painfully slow.
Rendering speed is almost never about one impressive spec. It’s about balance. The moment one component can’t keep up, everything else waits.
That’s why upgrading the wrong part of your system often feels disappointing. Until you understand which component is holding things back, you’re guessing. And guessing gets expensive fast.
Premiere Pro Settings That Directly Impact Render Time
Before changing your workflow or blaming hardware, it’s worth making sure Premiere itself isn’t working against you. A lot of slow renders come from settings that look harmless, stay untouched for years, and quietly add extra work to every export.
GPU Acceleration Being Disabled or Unsupported
This happens more often than people think. Premiere can fall back to CPU-only rendering without making a big deal about it.
A few common reasons:
GPU drivers are outdated or incompatible
A new project was created with default settings
The system switched GPUs on a laptop
The selected renderer isn’t supported by your hardware
When GPU acceleration isn’t active, effects that could run on the GPU get pushed onto the CPU instead. Export times jump, and it’s not always obvious why.
Sequence Settings That Don’t Match Footage
Mismatched sequence settings force Premiere to do extra work on every frame.
Typical culprits include:
Frame rate mismatches that require interpolation
Resolution mismatches that trigger constant scaling
Pixel aspect ratio differences
These don’t always show up as obvious problems in the timeline, but they add processing overhead during export. Matching your sequence to your source footage removes work Premiere never needed to do.
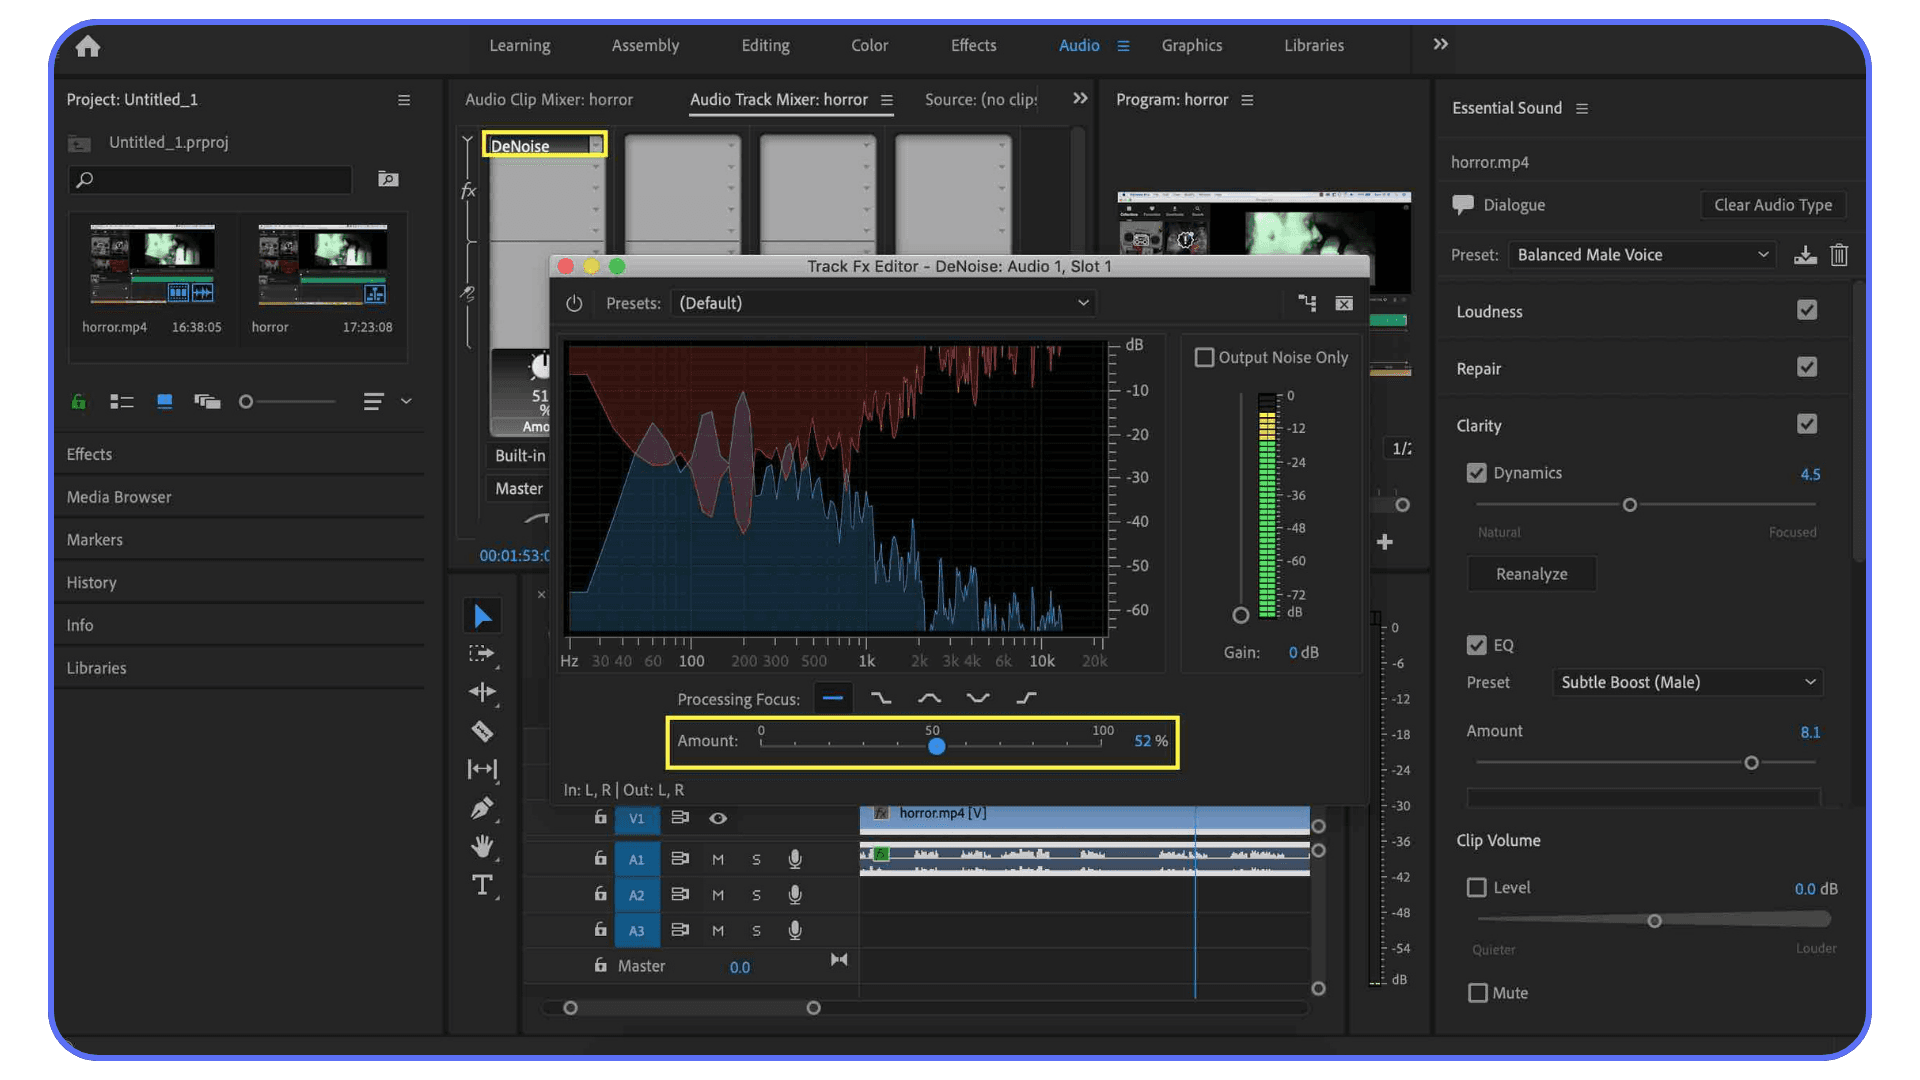
Preview Formats and When They Help Exports
Preview files are useful, but only under specific conditions.
They help exports when:
The preview codec matches the export codec
The preview resolution matches the sequence
“Use Previews” is enabled during export
They don’t help when:
The preview format is different from the export format
Effects force full reprocessing anyway
In those cases, Premiere ignores previews entirely and re-renders everything from scratch.
Media Cache Behavior and Maintenance
Media cache files pile up fast, especially on long or complex projects. Over time, they can slow things down in subtle ways.
Good cache habits include:
Clearing cache periodically
Keeping cache on a fast SSD
Avoiding cache on system drives with low free space
Cache issues rarely crash Premiere, but they do make exports slower and less predictable.
Individually, each of these settings might only add a little extra processing. Together, they stack.
A slight frame rate mismatch, GPU acceleration not kicking in, previews being ignored, and a bloated cache can turn a reasonable export into a painfully slow one. The frustrating part is that none of these feel dramatic on their own.
Once these settings are aligned, Premiere stops fighting itself. And when that happens, render times usually improve more than people expect.
Cloud-based workflows also make it possible to work from lighter devices, and this look at using Adobe Premiere Pro on an iPad shows how editors are extending their setups beyond traditional desktops.
Timeline Habits That Quietly Slow Everything Down
Even with perfect settings, the way a timeline is built can add a surprising amount of render time. These aren’t mistakes so much as habits. They feel convenient while you’re editing, but Premiere pays for them later during export.
Effect Stacking vs Consolidation
Premiere makes it easy to stack effects. Multiple Lumetri instances, adjustment layers on top of adjustment layers, duplicated effects with small tweaks. It all works, but every layer adds more processing during export.
Once a look is locked, consolidating effects can make a real difference. Baking color into a single Lumetri pass or rendering a finalized clip removes repeated calculations Premiere would otherwise do on every frame.
Overuse of Adjustment Layers
Adjustment layers are powerful, but they’re also blunt instruments. When you apply heavy effects to an adjustment layer, Premiere processes them across the entire frame for every clip underneath, even if only part of the image actually needs it.
On longer timelines, that full-frame processing adds up fast. Using adjustment layers selectively, rather than everywhere by default, keeps exports lighter.
Leaving Heavy Effects Enabled Too Early
Some effects are simply expensive. Noise reduction, stabilization, motion blur, and many AI-driven tools can slow things down dramatically.
Leaving them enabled while you’re still cutting means Premiere is constantly recalculating work that isn’t final yet. Disabling these effects until the edit is locked can improve both playback and export speed, without sacrificing quality in the end.
Dynamic Link vs Rendered Assets
Dynamic Link feels elegant. Drop an After Effects comp into Premiere and keep everything live. In practice, it often slows exports to a crawl.
For complex comps, rendering them out and importing the result as a video file is usually faster and more stable. You lose some flexibility, but you gain predictability and speed where it matters most.
None of these habits are wrong. They’re common because they save time in the moment. The trade-off is that Premiere has to do more work later.
The key is being intentional. Knowing when convenience helps the edit, and when it quietly taxes every export that follows.
If slow renders are happening alongside freezes or unexpected shutdowns, this guide on how to stop Premiere Pro from crashing covers the stability issues that often show up before performance completely falls apart.
Proxy Workflows: When They Help and When They Don’t
Proxies get recommended a lot, usually as a blanket fix for performance problems. In reality, they’re incredibly useful in the right situations and mostly pointless in others. Knowing the difference saves time and frustration.
Footage Types That Benefit From Proxies
Proxies shine when the original media is genuinely hard to decode in real time. This usually includes:
4K and higher resolutions
Long-GOP codecs like H.264 and H.265
High frame rate footage
Log or RAW formats
In these cases, proxies don’t just make playback smoother. They make the entire editing experience feel lighter and more responsive.
Situations Where Proxies Waste Time
If your system already handles the footage comfortably, proxies can become overhead.
Short projects
Lightweight codecs
Simple timelines with minimal effects
Here, the time spent generating and managing proxies can exceed any performance gain.
Common Proxy Mistakes
Most proxy frustrations come from setup issues rather than the idea itself.
Choosing proxy formats that are still too heavy
Forgetting to toggle back to full-resolution media
Accidentally exporting with proxies enabled
Premiere usually handles the switching correctly, but it’s still worth double-checking before final export.
Proxies don’t directly make final exports faster. What they do is speed up everything before that point. When playback is smooth and scrubbing is instant, decisions happen faster. Cuts lock sooner. Fewer test exports are needed.
That indirect effect often saves more time than any single export optimization ever could.
When performance issues become constant, some editors start questioning the tool itself, and looking through these Premiere Pro alternatives can help clarify whether the slowdown is workflow-related or software-related.
Pre-Rendering Strategies for Heavy Timelines
At a certain point, optimization stops being about settings and starts being about commitment. If a timeline is packed with effects, Premiere has to recalculate a lot of the same work over and over. Pre-rendering is how you tell it, “this part is done, stop thinking so hard.”
Render and Replace Use Cases
Render and Replace is one of Premiere’s most practical tools when things get heavy. It lets you take a clip or section with complex effects and turn it into a baked video file, while keeping the option to revert later.
It’s especially useful for:
Stabilized clips that won’t change anymore
Complex motion graphics
Layered color work that’s already approved
Once replaced, Premiere treats that section like normal footage. No effects to recalculate. No surprises during export.
Smart Rendering Explained Realistically
Smart Rendering sounds like a cheat code, but it’s very particular. When it works, Premiere can skip re-encoding parts of the timeline and simply copy existing frames into the final file.
The conditions matter:
Sequence, preview, and export settings must match
The codec has to support smart rendering
Certain effects will force reprocessing anyway
That’s why many editors never see it kick in. When the setup is right, though, export times can drop dramatically. When it’s not, nothing changes.
Selective Pre-Rendering
Pre-rendering doesn’t have to mean locking the entire timeline. Often, only a few sections are causing trouble.
Selective pre-rendering focuses on:
Effect-heavy shots
Dense layers
Clips that always trigger red render bars
By rendering only those areas, you reduce the overall load without boxing yourself into a final edit too early.
Pre-rendering works best when it’s intentional. It’s a signal that a creative decision is final, at least for now.
Knowing when to lock something saves more than render time. It reduces mental overhead. Premiere stops recalculating the same work, and you stop second-guessing parts of the edit that are already done.
When used thoughtfully, pre-rendering doesn’t limit flexibility. It gives it back where it actually matters.
For editors who reach a point where optimization isn’t enough anymore, this PC build and computer buying guide for Premiere Pro lays out what actually makes a difference when upgrading hardware and what usually doesn’t.
What “Normal” Render Times Actually Look Like
One of the hardest things about dealing with slow renders is not knowing whether something is actually wrong. You hit export, it takes forever, and you’re left wondering if Premiere is misbehaving or if this is just the cost of doing heavier work.
For clean 1080p timelines, expectations are fairly straightforward. Basic cuts, light color correction, a few titles. On a reasonably modern system, these should export quickly and consistently. If that kind of project is taking an hour, something is off. Usually it’s a settings mismatch, GPU acceleration not kicking in, or Premiere reprocessing work unnecessarily.
4K timelines change the picture fast. Even without heavy effects, you’re dealing with four times the data. Add scaling, log footage, or multiple layers and export times climb quickly. At that point, waiting ten or twenty minutes can be completely normal, even on decent hardware.
Effects matter more than resolution. A short timeline with noise reduction, stabilization, or AI-driven effects can take longer to export than a much longer project with clean cuts. Two projects that look similar in duration can behave very differently once Premiere starts calculating what’s under the hood.
This is why comparisons are tricky. Someone else’s export finished in five minutes because their codec was easier, their effects lighter, or their settings better aligned. It doesn’t automatically mean your system is slow.
What matters most is consistency. If similar projects suddenly take much longer than they used to, that’s a sign something changed. A driver update, a new effect, a setting you didn’t realize was enabled. If render times are always long but predictable, that usually points to hardware limits rather than a misconfiguration.
Understanding what “normal” looks like for your type of work helps you decide what’s worth fixing and what’s simply part of the workload.
If proxies are new to you or your current setup feels messy, this guide on how to create video proxies on Premiere Pro walks through a clean workflow that avoids the most common performance-killing mistakes.
When Optimization Stops Working
There’s a point where tweaking settings stops paying off. You’ve matched your sequence, cleaned up the timeline, optimized exports, and renders are still slower than they should be. That’s usually the moment when Premiere isn’t the real bottleneck anymore.
You start to notice it during longer exports. Short videos might be fine, but anything sustained causes performance to drop. Fans ramp up. Clock speeds dip. On laptops especially, thermal throttling quietly stretches render times far beyond what the specs suggest should be possible.
This is also where hardware upgrades start to disappoint. Adding more RAM improves stability but not speed. A better GPU sits underused because the CPU can’t keep up. Faster storage helps, but only if storage was the limiting factor to begin with. Upgrading one part rarely fixes the whole picture.
The hidden cost shows up in how you plan your work. You avoid exporting late. You schedule renders around breaks. You delay revisions because you know how long they’ll take. None of that shows up on a spec sheet, but it adds up fast.
At this stage, the problem isn’t that your machine is bad. It’s that modern editing, especially with high-resolution footage and AI-driven effects, demands sustained performance most local systems weren’t designed to deliver. Once you hit that ceiling, optimization can only take you so far.
That’s usually when editors start looking for alternatives. Not shortcuts, but ways to remove a limitation they keep running into.
If you’re trying to understand why your GPU isn’t helping as much as you expected, this breakdown on choosing the best GPU for Premiere Pro explains which specs actually matter for rendering and which ones mostly look good on paper.
Rendering with Vagon Cloud Computer
This is usually the moment when editors stop asking which setting they missed and start asking a different question. Why does everything slow down the moment a project gets heavy?
Local machines are great at short bursts of work. A quick export, a short timeline, a light revision. The problems start when rendering becomes sustained. Long exports push CPUs and GPUs at full load for extended periods. On laptops, thermal throttling kicks in and performance drops mid-export. On desktops, resources get tied up for hours, and background processes start competing for power. Even strong machines slow down once heat, power limits, and system load stack up.
What most editors actually need isn’t constant maximum performance. It’s access to serious power at specific moments. Final exports. Tight revision windows. Heavy color passes. AI-driven effects. Buying hardware for those peak moments often means paying for power that sits idle most of the time. That’s where the idea of burst performance starts to make sense.
Vagon Cloud Computer lets you run Premiere Pro on high-performance cloud hardware instead of your local machine. Your laptop or desktop becomes a window, not the engine doing the work. The rendering happens on CPUs and GPUs designed for sustained loads, so export times stay consistent instead of slowing down halfway through.
That consistency changes how rendering feels day to day. You stop guessing how long an export will take. You don’t build extra buffer time into deadlines just in case. Long renders become predictable, which makes planning revisions and deliveries far easier.
There’s also a workflow benefit that shows up quickly when more than one person is involved. Instead of matching hardware, shipping large files back and forth, or troubleshooting performance differences, everyone works in the same environment. Same performance, same behavior, fewer surprises.
This isn’t about replacing local machines or skipping good Premiere practices. It’s about removing the ceiling that appears once projects demand more than local hardware can comfortably deliver. For many editors, cloud rendering isn’t a shortcut. It’s a way to keep momentum when everything else is already optimized.
Final Thoughts
Rendering will always take time. That part doesn’t change. What does change is how much of that time feels unnecessary.
Slow exports usually aren’t caused by one obvious mistake. They come from small choices stacking up. A mismatched sequence setting here. Heavy effects left on too early there. Export presets reused long after the project outgrew them. None of these feel dramatic on their own, but together they quietly drag everything down.
Once you understand how Premiere Pro actually works, those choices stop being guesses. You start editing with intent. You know when playback matters and when export speed matters. You know which fixes are worth your time and which ones won’t move the needle.
For many projects, that understanding alone is enough. Renders become predictable. Revisions feel manageable again. Waiting stops dominating the day.
And when optimization isn’t enough anymore, at least you know why. At that point, the question isn’t about Premiere settings or editing skill. It’s about where the work runs and how much performance you can access when it really counts.
The goal isn’t to eliminate rendering. It’s to stop letting it interrupt the creative flow. When renders feel boring instead of stressful, you know you’ve done it right.
FAQs
1. Why is my Premiere Pro export so slow even though playback is smooth?
Because playback and export are doing different jobs. Premiere is very forgiving during playback. It cuts corners to keep things moving. During export, it doesn’t. Every effect, scale, and color adjustment is processed at full quality. A timeline that plays smoothly can still take a long time to export if there’s heavy processing happening under the hood.
2. Does rendering previews actually make exports faster?
Sometimes. Only if your preview format matches your export settings and you enable “Use Previews” during export. If those don’t line up, Premiere ignores preview files completely and re-renders everything. That’s why preview rendering often feels useless for export speed.
3. Should I always use GPU acceleration?
Yes, if your hardware supports it and it’s stable. GPU acceleration can significantly reduce render times for supported effects. The problem is that it can silently turn off due to driver issues, unsupported hardware, or project settings. It’s worth checking regularly, especially if export times suddenly get worse.
4. Do proxies speed up final exports?
No, not directly. Proxies speed up editing, not exporting. Their real value is momentum. When editing feels responsive, you lock cuts faster and need fewer test exports. That indirect effect often saves more time than people expect.
5. Why does “Maximum Render Quality” slow everything down?
Because it improves scaling quality, and scaling is expensive. If you’re not resizing footage, it usually does nothing except add processing time. It’s useful in specific cases, but leaving it on by default is a common mistake.
6. Is Adobe Media Encoder faster than exporting directly from Premiere Pro?
Not automatically. Media Encoder is great for queueing exports and keeping Premiere free so you can keep working. It doesn’t magically speed up renders. In some cases, exporting directly from Premiere is just as fast or faster.
7. How do I know if my hardware is the real bottleneck?
Look for consistency. If similar projects always take a long time to export, even after optimizing settings and workflows, you’re likely hitting hardware limits. Thermal throttling, long sustained renders, and underused GPUs are common signs.
8. When does cloud rendering make sense?
Cloud rendering makes sense when projects demand more sustained performance than your local machine can comfortably deliver. Heavy timelines, tight deadlines, frequent revisions, or AI-driven effects are typical scenarios. It’s most effective after you’ve already optimized Premiere itself.
Get Beyond Your Computer Performance
Run applications on your cloud computer with the latest generation hardware. No more crashes or lags.

Trial includes 1 hour usage + 7 days of storage.
Summarize with AI

Ready to focus on your creativity?
Vagon gives you the ability to create & render projects, collaborate, and stream applications with the power of the best hardware.

Vagon Blog


Run heavy applications on any device with
your personal computer on the cloud.
San Francisco, California
Solutions
Vagon Teams
Vagon Streams
Use Cases
Resources
Vagon Blog
How to Run Ollama in the Cloud on a GPU Ubuntu Desktop (2026 Guide)
How to Run Ubuntu on an iPad (That Actually Works in 2026)
How to Get an Ubuntu Desktop in the Cloud (GPU Optional): The Complete 2026 Guide
What Slows Down After Effects Projects?
The First 30 Minutes in Blender 3D: A Practical Workflow Guide
What’s New in Godot 4.7? Key Features, Upgrades, and Workflow Improvements
What Slows Down Blender 3D Projects?
What Slows Down Adobe Photoshop Projects?
The First 30 Minutes in Adobe Photoshop: A Practical Workflow Guide
Vagon Blog
Run heavy applications on any device with
your personal computer on the cloud.
San Francisco, California
Solutions
Vagon Teams
Vagon Streams
Use Cases
Resources
Vagon Blog