Instant Connection for Pixel Streaming
— New Feature Automated Setup

Essential Premiere Pro Keyboard Shortcuts That Actually Make You Faster
Essential Premiere Pro Keyboard Shortcuts That Actually Make You Faster
VideoProduction
Essential Premiere Pro Keyboard Shortcuts That Actually Make You Faster
Table of Contents
I didn’t realize how bad my workflow was until I watched another editor fly through a timeline without touching the mouse. Barely moving their hands. Cuts landing exactly where they wanted. Meanwhile, I was still dragging clips around like it was 2015.
That was the moment it clicked. Editing speed isn’t about talent or taste. It’s about how little friction you allow between your brain and the timeline.
Let’s fix that.
Why Keyboard Shortcuts Matter
Most editors know shortcuts exist. Fewer actually commit to them. And I think that’s because the payoff feels abstract at first. You save half a second here, a second there. Big deal, right?
Except it adds up fast.
I’ve timed this before. On a basic talking-head edit, the difference between mouse-heavy editing and shortcut-first editing was about 18 minutes. On a longer client project with B-roll, music, trims, fixes? Over an hour. Gone. Just from not reaching for menus.
The bigger issue is cognitive drag. Every time you stop to hunt for a tool, your brain drops out of creative mode and into UI mode. That context switch is brutal. It’s why edits feel exhausting even when the work isn’t hard.
Shortcuts keep you in flow. Hands on the keyboard. Eyes on the timeline. Decisions happening faster than doubt can creep in.
There’s also a quiet confidence that comes with it. When you know the keys, Premiere stops feeling like software you operate and starts feeling like an instrument you play. Corny, maybe. Still true.
One more thing I’ve noticed. Editors who avoid shortcuts often over-edit. They nudge clips, second-guess cuts, fiddle endlessly. Speed forces clarity. When cutting is fast, you trust your instincts more.
And no, you don’t need to memorize everything at once. You really don’t. Start with a handful. Let muscle memory do the rest. Your brain is better at this than you think.
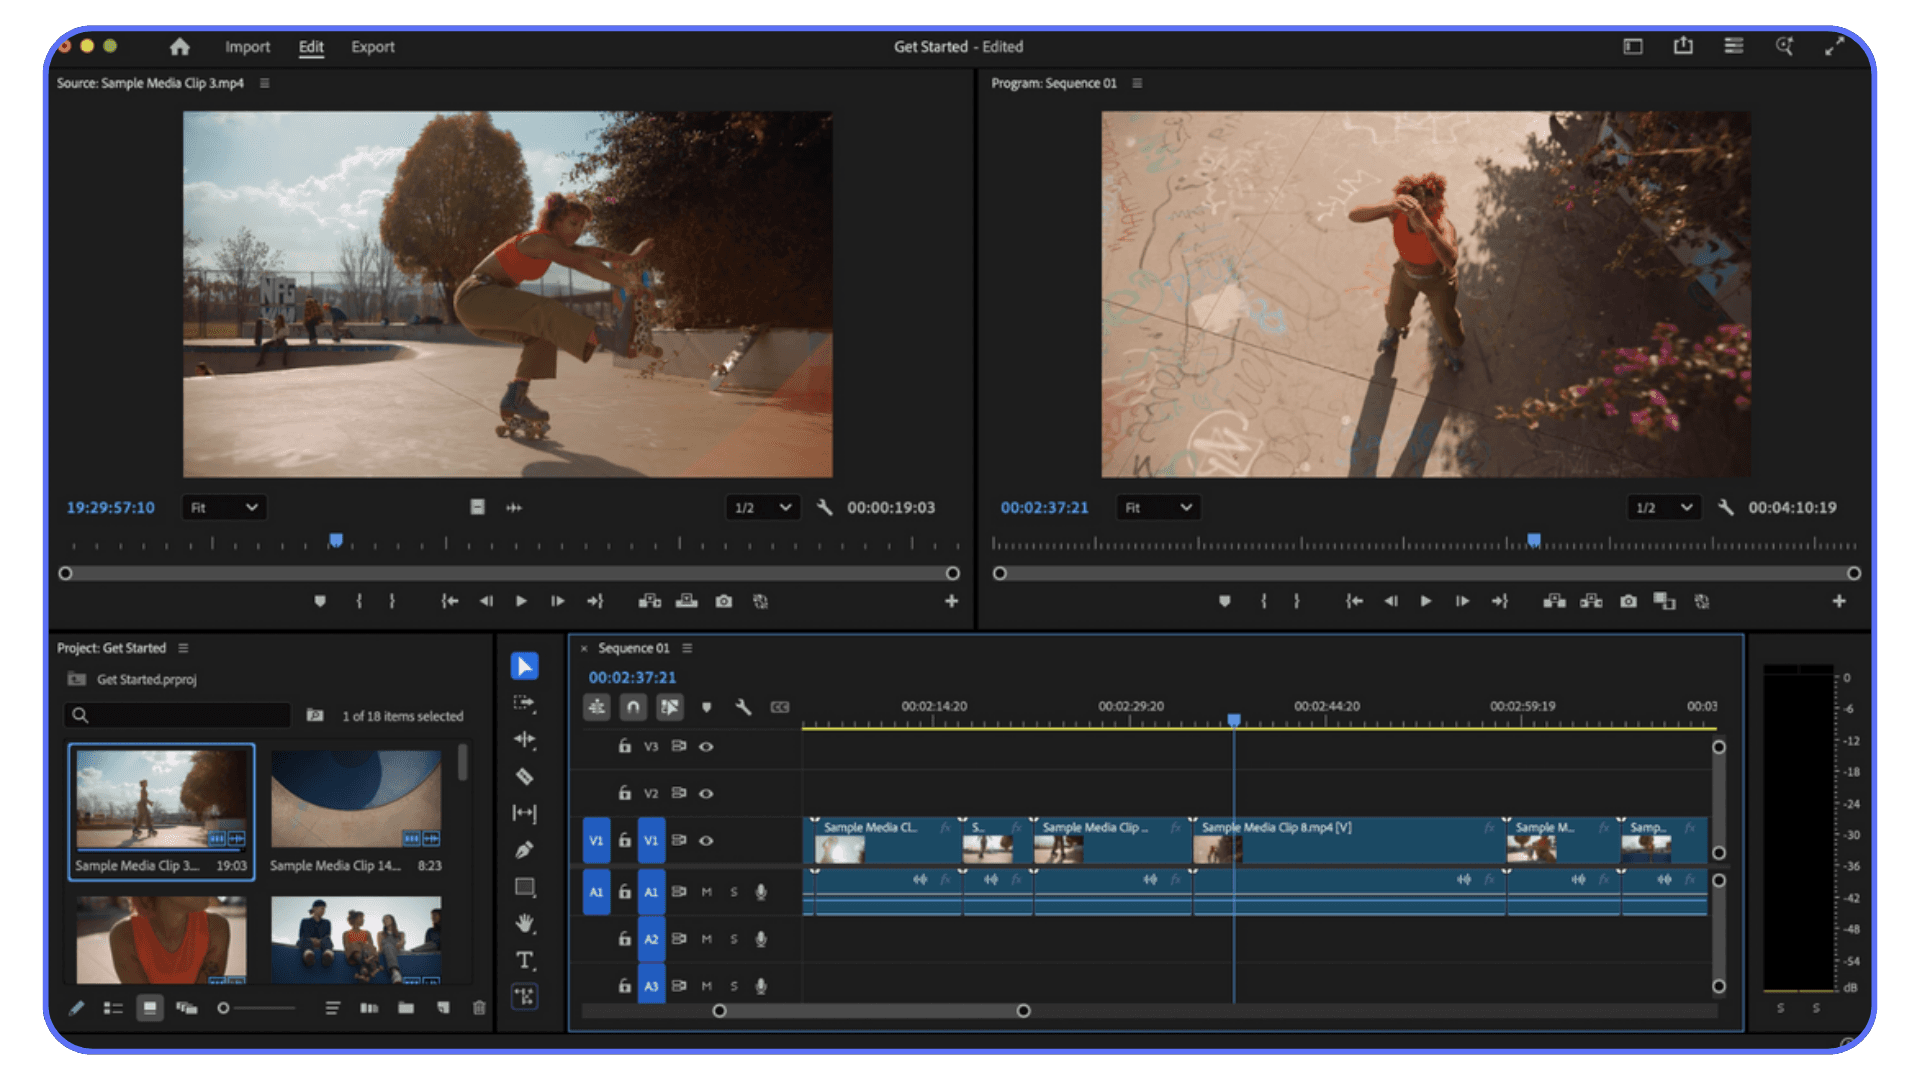
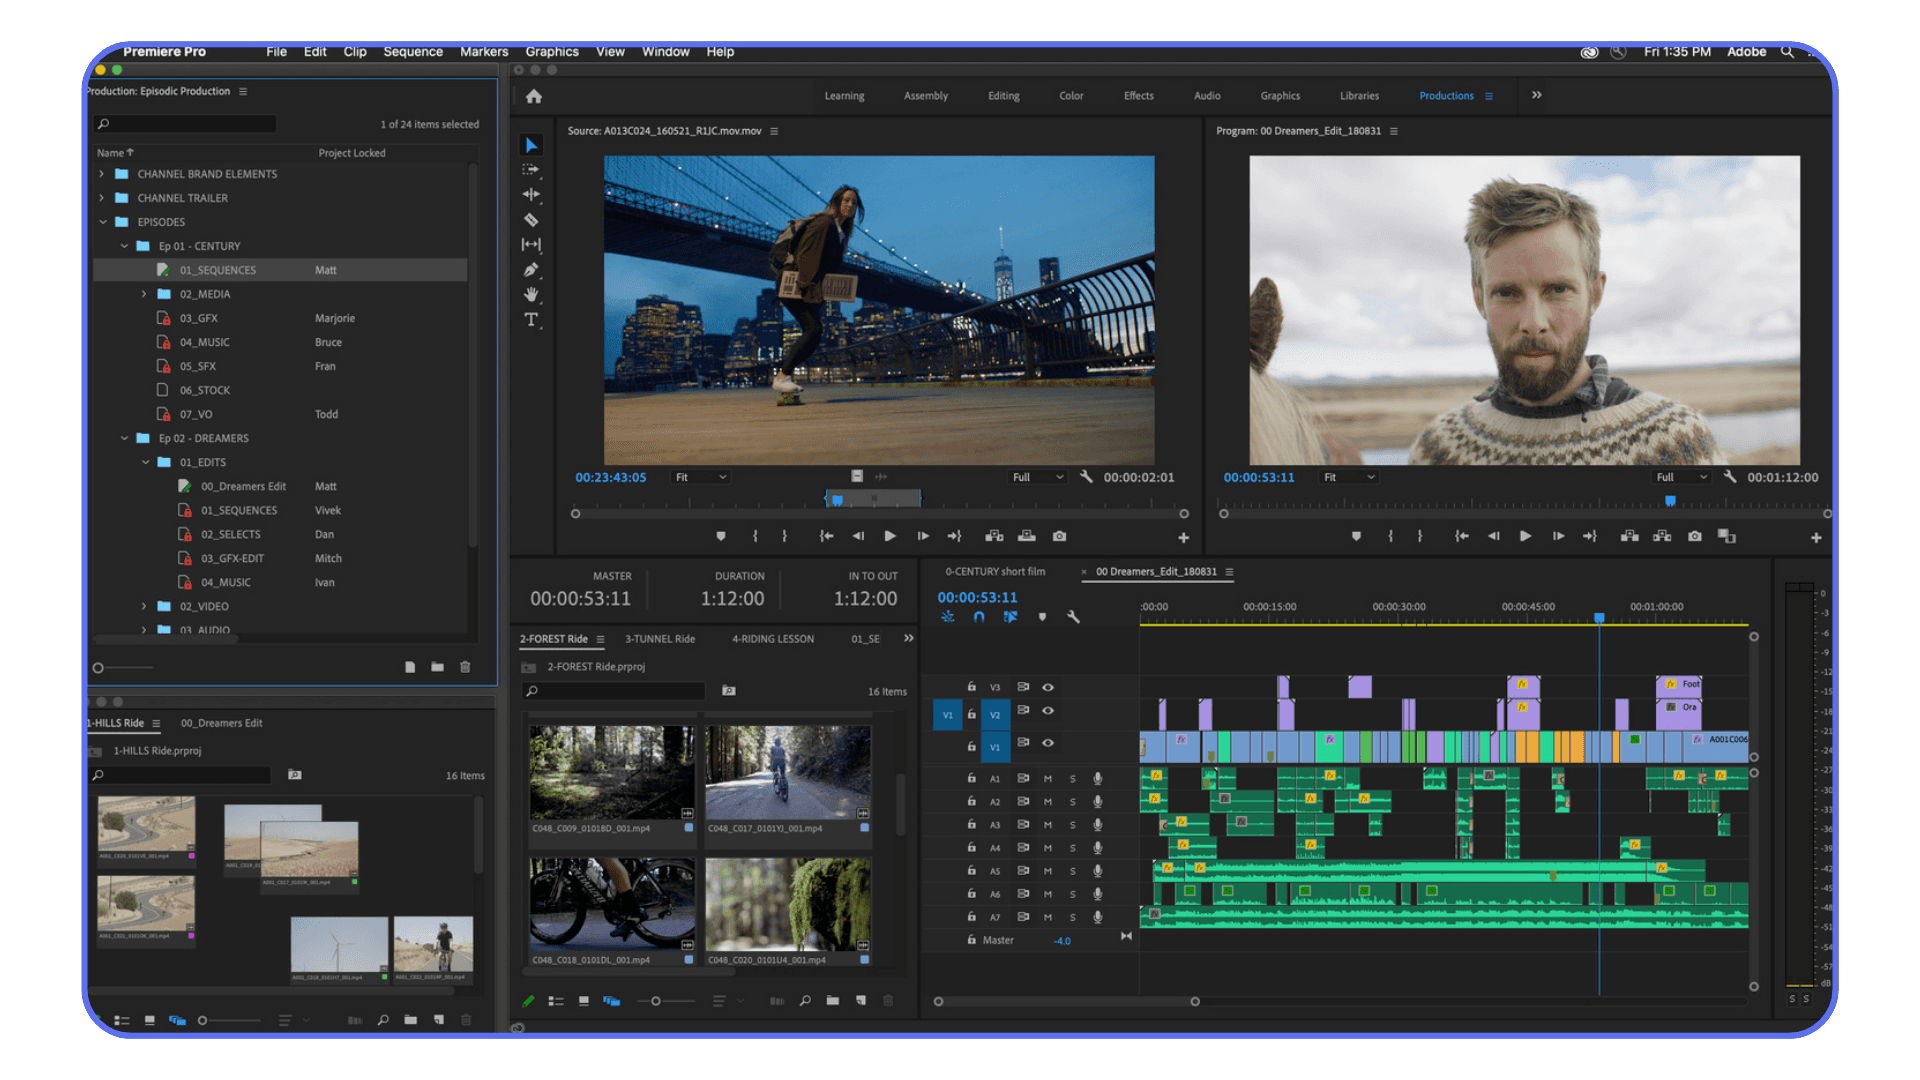
Core Playback and Navigation Shortcuts You’ll Use Constantly
If you only learn one group of shortcuts, make it this one. Playback and navigation are where most editors waste time without realizing it. Tiny pauses. Constant mouse movement. Death by a thousand clicks.
Let’s start with the obvious one.
Spacebar.
Play. Pause. You already know this. But I still see people clicking the play button. Don’t. Every time your hand leaves the keyboard, you’re slowing yourself down.
Now the real workhorses.
J, K, L.
This is transport control, and it’s criminally underused.
L plays forward
J plays backward
K stops
Tap L multiple times and playback speeds up. Same with J in reverse. This is perfect for skimming dialogue, reviewing cuts, or hunting for awkward pauses without scrubbing like a caveman.
Once this clicks, scrubbing with the mouse starts to feel clumsy.
For precision, you’ve got the arrow keys.
Left and right arrows move one frame at a time
Hold Shift and tap them to jump several frames
This is how you land cuts exactly where they should be. Not close. Exact.
Timeline zoom matters more than people admit.
+ zooms in
- zooms out
Keep one hand near these keys. You’ll be zooming constantly, and that’s a good thing. Editing without zooming is like cutting with blurry vision.
There’s also vertical navigation, which gets overlooked.
Page Up / Page Down jumps between edits on the timeline
This is huge when reviewing cuts quickly. No dragging. No guessing where the next edit is.
Here’s a small habit that changed everything for me. I stopped trying to see the entire timeline at once. Instead, I zoom in aggressively, move fast with shortcuts, then zoom out just enough to regain context. Rinse. Repeat.
If playback and navigation feel effortless, everything else becomes easier. You’re no longer fighting the timeline. You’re gliding through it.
Editing Essentials That Actually Speed You Up
This is where shortcuts stop being “nice to have” and start doing real damage. In a good way.
Let’s talk cutting.
Add Edit
Ctrl + K on Windows
Cmd + K on macOS
This drops a cut exactly at the playhead. No razor tool. No clicking. Just park the playhead and split. I use this constantly. Dialogue edits, B-roll trims, music beats. If you’re still switching tools for this, you’re working too hard.
Now pair that with Ripple Delete.
Shift + Delete
This removes a clip and closes the gap automatically. It sounds small, but it changes everything. Dead air gone. Mistakes erased cleanly. No dragging clips back into place afterward.
Once you combine Add Edit and Ripple Delete, rough cuts move fast. Like, surprisingly fast.
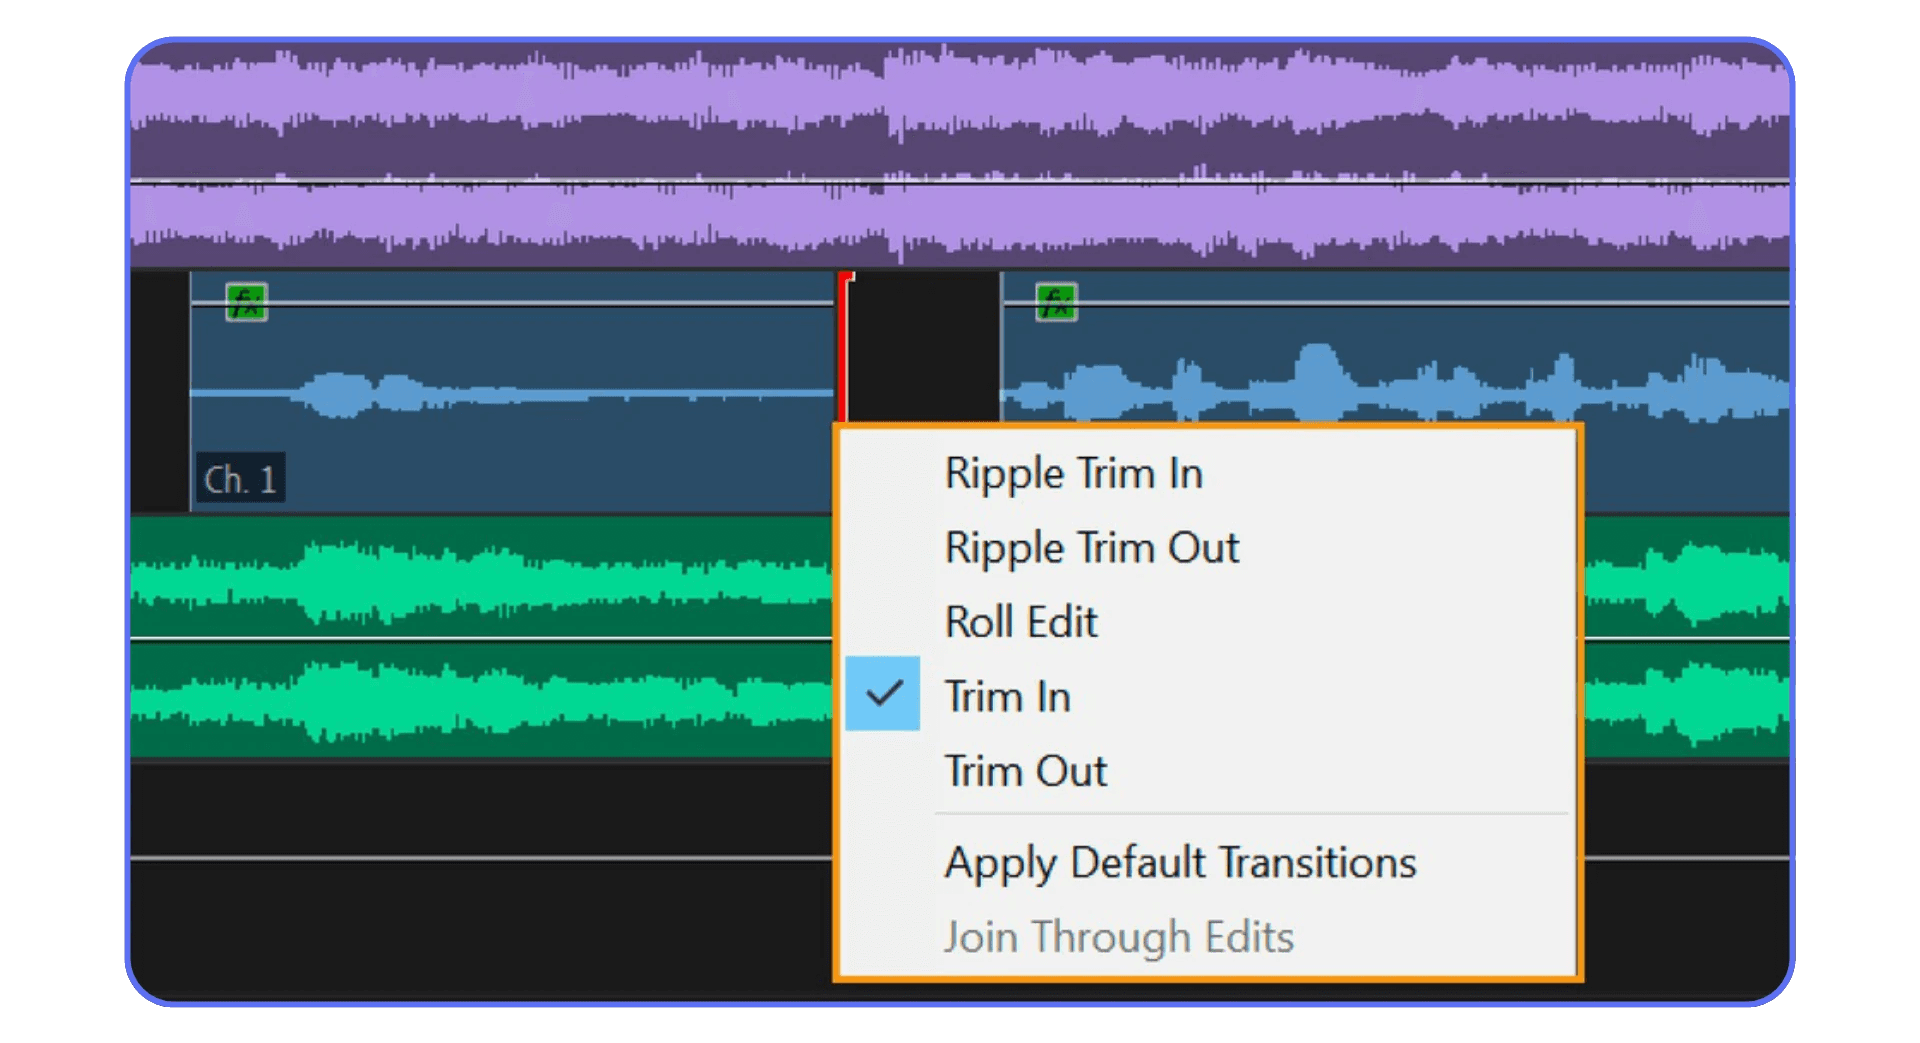
Next up, insert vs overwrite. This one trips people up.
Comma (,) = Insert
Period (.) = Overwrite
Insert pushes everything forward. Overwrite replaces what’s already there. Simple idea, massive impact. When you know which one you’re using, your timeline stays intentional instead of accidental.
I’ve noticed newer editors avoid these because they feel risky. Totally fair. But once you trust them, dragging clips feels unbearably slow.
Then there are Mark In and Mark Out.
I sets an in point
O sets an out point
You can use these in the source monitor or directly on the timeline. This is how you define exactly what you want without trimming after the fact. It’s cleaner. It’s faster. It’s how Premiere is meant to be used.
Here’s a small but important one.
Q and W.
These ripple trim to the playhead. Q trims everything to the left. W trims everything to the right. If you edit dialogue, podcasts, interviews, or talking heads, these keys are gold.
One warning. Speed makes mistakes louder. If your timeline organization is messy, these shortcuts can cause chaos. Name your tracks. Lock what you’re not touching. Respect the ripple.
When these become muscle memory, something funny happens. You stop thinking about tools altogether. You’re just making decisions. Cut here. Remove that. Keep this.
That’s the goal.
If you are questioning whether Premiere Pro is still the right tool for you, especially after hitting performance limits, it’s worth knowing what the real alternatives look like.
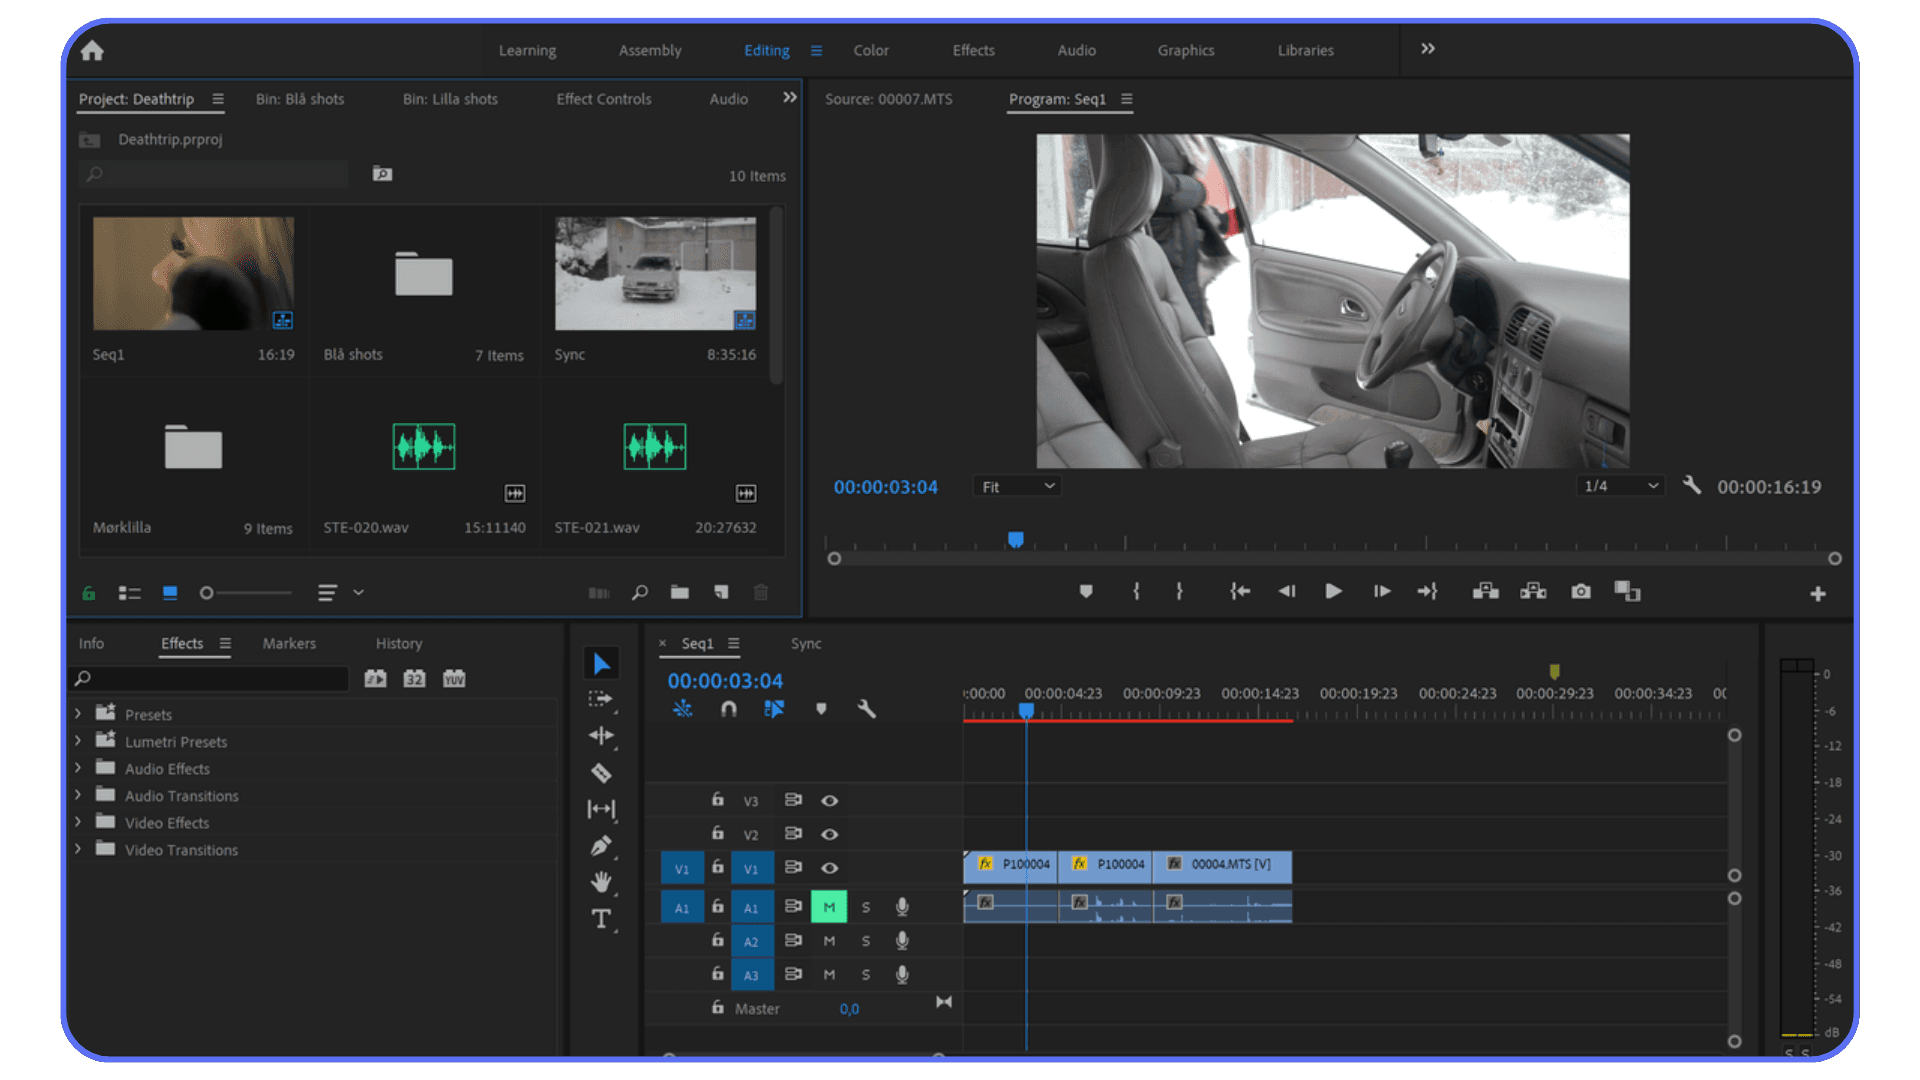
Tool and Panel Shortcuts That Keep You in Flow
Here’s where a lot of editors quietly sabotage themselves. They know the cutting shortcuts, but they still bounce between tools like they’re window shopping. Click. Click. Click. Flow gone.
You don’t need every tool. You just need fast access to the right ones.
Let’s start with the basics.
V for Selection Tool.
This is home base. If something feels weird, hit V. You’ll use it constantly, but ideally less than you think.
C for Razor Tool.
Yes, Add Edit is faster in most cases. But sometimes you really do want to slice multiple tracks in one gesture. C, click, V. Done. Don’t live here. Visit when needed.
B for Ripple Edit Tool.
This lets you trim and close gaps in one move. I use this when shaping dialogue or tightening pacing across several clips. It’s powerful. Also dangerous. Respect it.
N for Rolling Edit Tool.
This one’s subtle. It moves the edit point between two clips without changing the total duration. Great for micro-adjustments when timing feels off but the overall rhythm works.
Z for Zoom Tool.
I don’t camp here, but it’s handy for quick zooms when the + and - keys feel too slow for what you’re doing. Z, drag, V. Muscle memory makes this fast.
Now let’s talk panels, because this is where flow really lives or dies.
Shift + 1 to Shift + 9 switches between panels. Timeline, source, program, project. If you ever find yourself clicking panel tabs, this is your fix. Once these shortcuts stick, Premiere feels snappier even though nothing actually changed.
One habit I had to unlearn was overusing tools. Most cuts can be done with the selection tool plus keyboard shortcuts. Tools are helpers, not destinations.
If your hand is constantly leaving the keyboard, something’s off. Editing should feel like typing, not like playing whack-a-mole with UI elements.
If you are considering upgrading your setup instead of changing how you work, it helps to know what parts actually matter for Premiere Pro and which ones don’t.
Organization and Safety Shortcuts You’ll Be Glad You Learned
These aren’t the shortcuts that make flashy YouTube demos. They’re the ones that quietly save projects. And sanity.
Let’s start with the obvious one people still forget.
Save.
Ctrl + S or Cmd + S
Yes, Premiere autosaves. No, that doesn’t mean you should trust it with your livelihood. I hit save almost compulsively. After a good cut. Before a risky move. Always before playback on a heavy timeline.
If something goes sideways, Undo is your parachute.
Ctrl + Z / Cmd + Z
Ctrl + Shift + Z / Cmd + Shift + Z for redo
Premiere’s undo stack is deep, but not infinite. If you’re doing a lot of ripple-heavy edits, save first. Ask me how I learned that.
Selection shortcuts matter more than they sound.
Ctrl + A / Cmd + A selects everything
Shift + Ctrl + A / Shift + Cmd + A deselects all
Deselect is underrated. When edits behave strangely, it’s often because something is selected that shouldn’t be. Clearing selection fixes more problems than tutorials ever mention.

Then there’s track targeting and locking. Not shortcuts everyone memorizes, but habits everyone should build. Lock tracks you’re not touching. Mute what you don’t need. Fewer accidents, fewer surprises.
Here’s a small workflow tip I swear by. Before any major trim pass, I duplicate the sequence. Not the project. Just the sequence. Two seconds of work that can save hours of regret.
These shortcuts won’t make you feel faster in the moment. But over time, they create a sense of safety. And when you feel safe, you edit faster. You take more risks. You commit.
If you are dealing with random freezes or crash messages that break your rhythm, it’s usually not bad luck and it’s often fixable.
Customizing Shortcuts Without Breaking Your Brain
Premiere’s default shortcuts are decent. Not perfect. And depending on your keyboard, your hand size, or whether you’re on a laptop, some of them are just awkward.
The good news is Premiere lets you change almost everything.
Go to Keyboard Shortcuts in the preferences and you’ll see the full map. It looks intimidating at first. It’s not. Think of it as rearranging your desk, not rebuilding the house.
My rule is simple. If I do something dozens of times per edit, it deserves an easy key. If I do it once a week, it can live somewhere weird.
For example, some editors remap Ripple Delete closer to their left hand. Others move Add Edit to a single key. Totally valid. The goal isn’t copying someone else’s setup. It’s reducing hand travel.
One mistake I see a lot is over-customizing too early. Don’t do that. You’ll forget what you changed, and muscle memory will fight you. Live with the defaults for a while. Notice what feels slow. Then adjust one or two things at a time.
Also, be careful when switching machines. If you edit on multiple computers, export your keyboard shortcut preset. Premiere makes this easy, and it’ll save you from that awful moment when nothing works the way your hands expect.
There’s no universal perfect layout. There’s only the layout your hands stop thinking about.
Once shortcuts fade into the background, editing becomes weirdly calm. Fast, but calm.
If you are spending more time waiting on exports than actually editing, there are practical ways to shave minutes or even hours off your render times.
A Real Editing Scenario, Keys and All
Let’s make this concrete.
Imagine you’re cutting a five-minute talking-head video with B-roll. Nothing fancy. Just clean pacing, good rhythm, no dead air.
I start in the source monitor and skim footage using L and J. When something feels usable, I tap I at the start, O at the end, then drop it into the timeline with Comma or Period depending on whether I want to insert or overwrite. No dragging. No guessing.
On the timeline, playback is almost entirely J, K, L. When I hear a breath or stumble, I park the playhead, hit Ctrl + K to cut, nudge forward a few frames with the arrow keys, cut again, then Shift + Delete to ripple it out. That entire move takes maybe two seconds.
For tightening pacing, Q and W do most of the work. I don’t trim edges manually unless I have to. These keys remove everything up to or after the playhead instantly. It feels aggressive at first. Then it feels addictive.
When I need to adjust a cut without changing overall timing, N for rolling edit. Tiny moves. Big difference. If I lose my place visually, + to zoom in, - to zoom out. No mouse wheel acrobatics.
Panel switching happens constantly. Shift + 3 for the timeline. Shift + 1 for the project. It’s subtle, but not clicking tabs keeps me mentally locked into the edit.
Here’s the thing. None of these shortcuts are impressive on their own. The speed comes from chaining them. One decision flows into the next without interruption.
This is where people usually ask, “Do shortcuts really matter that much?” After doing this for years, I think they’re the difference between feeling in control of a timeline and feeling like you’re negotiating with it.
If you are working with 4K or long-form footage on a modest machine, proxies can be a lifesaver when they’re set up the right way.
When the Timeline Is Fast but the Machine Isn’t
This is the part nobody warns you about.
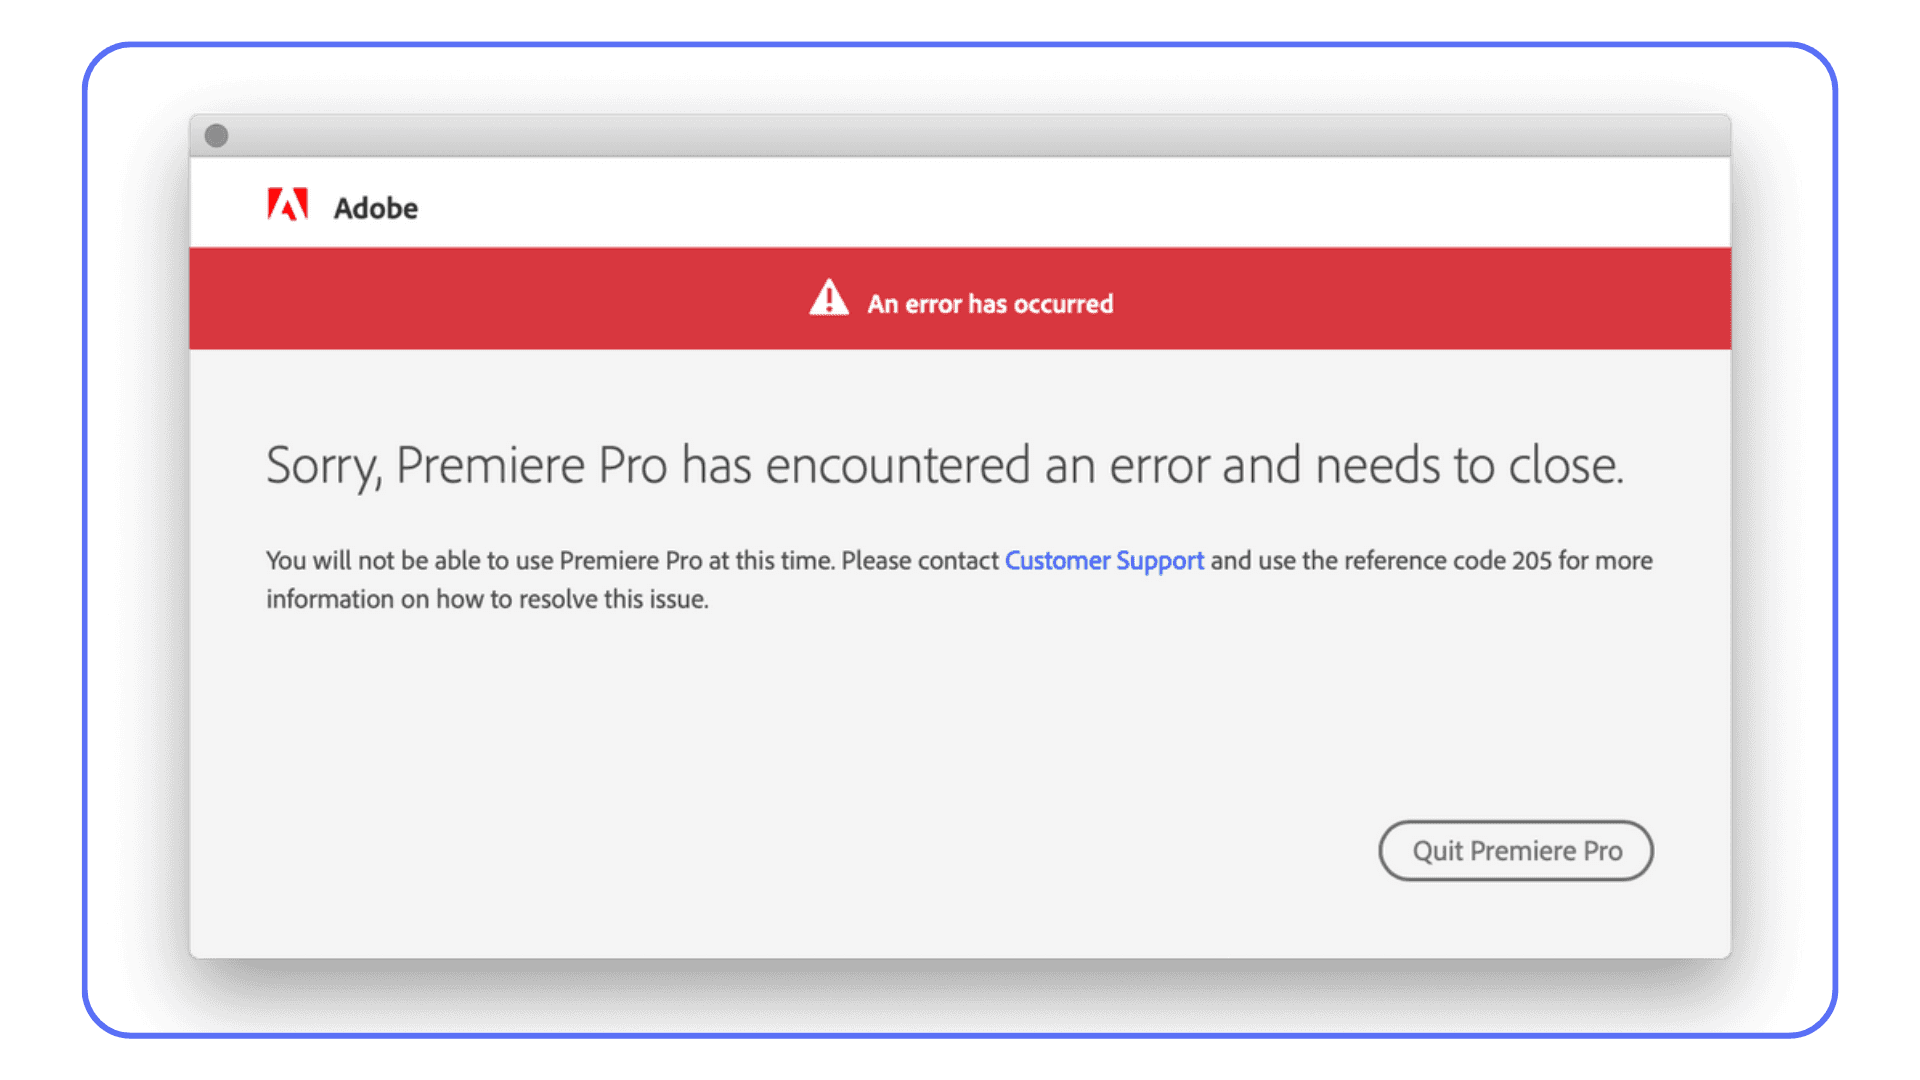
You finally get good with shortcuts. Your hands move without thinking. Cuts land clean. Playback feels intentional. And then… the timeline starts dropping frames. Audio stutters. Scrubbing feels sticky. You hit play and there’s a half-second delay that absolutely kills the rhythm.
That’s not a shortcut problem. That’s hardware tapping out.
It usually shows up when projects get real. Long interviews. 4K footage. Log files. Nested sequences. A couple of effects stacked because the client “just wants to see options.” Suddenly Premiere is doing math your machine doesn’t love.
I’ve seen editors blame themselves here. They assume they’re doing something wrong. They’re not. They’re just asking a lot from limited hardware.
Proxies help, and they’re worth using. Lowering playback resolution helps too. But there’s a ceiling. At some point, no amount of optimization makes a laptop feel like a workstation.
This is also where speed becomes frustrating instead of fun. When your brain moves faster than playback, editing feels like driving with the handbrake on. You hesitate. You second-guess. You stop trusting your instincts again.
That’s usually the signal. Not that you need to relearn shortcuts. But that your workflow has outgrown your local machine.
If you are starting to feel playback lag once timelines get heavy, especially with effects or color work, the GPU you’re using matters more than most people realize.
Using Vagon Cloud Computer When Your Local Setup Hits Its Limit
At a certain point, there’s no clever workaround left. Your shortcuts are solid. Your workflow is clean. But your computer just can’t keep up.
This is where Vagon Cloud Computer becomes a very practical option, not a theoretical one.
Instead of running Premiere Pro on your own machine, you run it on a high-performance cloud computer. CPU, GPU, RAM, all handled remotely. What you see on your screen is a live stream of that machine. What you control is still Premiere. Same interface. Same shortcuts. Same muscle memory.
The difference is responsiveness.
Heavy codecs play back smoothly. Scrubbing doesn’t lag. Renders don’t bring everything to a halt. You can work on demanding projects from a laptop that would normally struggle just opening the timeline.
What I like about this approach is that it doesn’t ask you to change how you edit. You don’t relearn tools. You don’t simplify your cuts just to survive playback. You keep working the way you already know how, just without fighting hardware limits.
It also makes collaboration and mobility easier. Open the same project from different devices. Work while traveling. Hand off files without juggling external drives or praying a machine can handle them.
This isn’t something you need for every edit. Light projects run fine locally. But when timelines get heavy and deadlines don’t care about your specs, having access to real power on demand is hard to ignore.
Shortcuts make you fast. Vagon makes sure speed doesn’t get wasted waiting on your machine.
If you are editing on the move or away from your main workstation, there are ways to work with Premiere Pro on an iPad without giving up desktop-level control.
Final Thoughts
If there’s one pattern I’ve seen over and over, it’s this. Editors don’t feel slow because they lack talent. They feel slow because friction creeps in everywhere.
Too many clicks. Too much waiting. Too much fighting the timeline.
Keyboard shortcuts strip a lot of that away. They turn editing into something closer to instinct. You stop thinking about tools and start reacting to what you see and hear. That’s when edits get sharper. That’s when decisions feel confident instead of tentative.
But shortcuts only get you so far if the machine can’t keep up. When playback stutters or scrubbing lags, even the best habits start to fray. That’s where something like Vagon Cloud Computer fits naturally into the picture. Not as a replacement for skill, but as a way to let skill actually show up without resistance.
I think the real win is this. Once your hands know the keys and your system responds instantly, editing stops feeling like work you push through. It starts feeling like momentum you ride.
And that’s the point. Not speed for its own sake. Speed that keeps you in the creative zone long enough to do your best work.
FAQs
1. Do I really need to memorize all these shortcuts to get faster?
No. And honestly, trying to memorize everything at once usually backfires. In my experience, speed comes from learning a small set and using them constantly. Start with playback, add edit, ripple delete, and mark in/out. Once those are automatic, the rest stack naturally.
2. How long does it take for shortcuts to feel natural?
Usually a couple of weeks of real editing. Not practice sessions. Real projects. The first few days feel awkward. Then one day you catch yourself cutting without thinking about keys at all. That’s the turning point.
3. Are Premiere Pro’s default shortcuts actually good enough?
Mostly, yes. Adobe’s defaults are fine for most editors. I’d avoid heavy customization early on. Live with the defaults, notice what slows you down, then adjust one or two things. Customizing too much too soon just creates confusion.
4. What if shortcuts make me mess up my timeline faster?
That’s a real risk. Speed amplifies mistakes. Lock tracks you’re not touching. Duplicate sequences before major edits. Save often. Shortcuts don’t replace discipline. They reward it.
5. Do shortcuts matter if my computer is slow anyway?
They still matter, but there’s a ceiling. Shortcuts help you make decisions faster. Hardware determines how quickly Premiere responds to those decisions. If playback lags or scrubbing stutters, speed feels wasted. That’s usually a hardware issue, not a workflow one.
6. Is using a cloud computer like Vagon Cloud Computer hard to get used to?
Not really. From an editing perspective, Premiere behaves the same. Same interface. Same shortcuts. Same muscle memory. The main difference is that heavy timelines feel smoother, especially on machines that would normally struggle.
7. Should beginners focus on shortcuts or storytelling first?
Story always comes first. But shortcuts help you stay focused on story instead of tools. You don’t need mastery on day one. Just enough speed that the software doesn’t interrupt your thinking.
I didn’t realize how bad my workflow was until I watched another editor fly through a timeline without touching the mouse. Barely moving their hands. Cuts landing exactly where they wanted. Meanwhile, I was still dragging clips around like it was 2015.
That was the moment it clicked. Editing speed isn’t about talent or taste. It’s about how little friction you allow between your brain and the timeline.
Let’s fix that.
Why Keyboard Shortcuts Matter
Most editors know shortcuts exist. Fewer actually commit to them. And I think that’s because the payoff feels abstract at first. You save half a second here, a second there. Big deal, right?
Except it adds up fast.
I’ve timed this before. On a basic talking-head edit, the difference between mouse-heavy editing and shortcut-first editing was about 18 minutes. On a longer client project with B-roll, music, trims, fixes? Over an hour. Gone. Just from not reaching for menus.
The bigger issue is cognitive drag. Every time you stop to hunt for a tool, your brain drops out of creative mode and into UI mode. That context switch is brutal. It’s why edits feel exhausting even when the work isn’t hard.
Shortcuts keep you in flow. Hands on the keyboard. Eyes on the timeline. Decisions happening faster than doubt can creep in.
There’s also a quiet confidence that comes with it. When you know the keys, Premiere stops feeling like software you operate and starts feeling like an instrument you play. Corny, maybe. Still true.
One more thing I’ve noticed. Editors who avoid shortcuts often over-edit. They nudge clips, second-guess cuts, fiddle endlessly. Speed forces clarity. When cutting is fast, you trust your instincts more.
And no, you don’t need to memorize everything at once. You really don’t. Start with a handful. Let muscle memory do the rest. Your brain is better at this than you think.
Core Playback and Navigation Shortcuts You’ll Use Constantly
If you only learn one group of shortcuts, make it this one. Playback and navigation are where most editors waste time without realizing it. Tiny pauses. Constant mouse movement. Death by a thousand clicks.
Let’s start with the obvious one.
Spacebar.
Play. Pause. You already know this. But I still see people clicking the play button. Don’t. Every time your hand leaves the keyboard, you’re slowing yourself down.
Now the real workhorses.
J, K, L.
This is transport control, and it’s criminally underused.
L plays forward
J plays backward
K stops
Tap L multiple times and playback speeds up. Same with J in reverse. This is perfect for skimming dialogue, reviewing cuts, or hunting for awkward pauses without scrubbing like a caveman.
Once this clicks, scrubbing with the mouse starts to feel clumsy.
For precision, you’ve got the arrow keys.
Left and right arrows move one frame at a time
Hold Shift and tap them to jump several frames
This is how you land cuts exactly where they should be. Not close. Exact.
Timeline zoom matters more than people admit.
+ zooms in
- zooms out
Keep one hand near these keys. You’ll be zooming constantly, and that’s a good thing. Editing without zooming is like cutting with blurry vision.
There’s also vertical navigation, which gets overlooked.
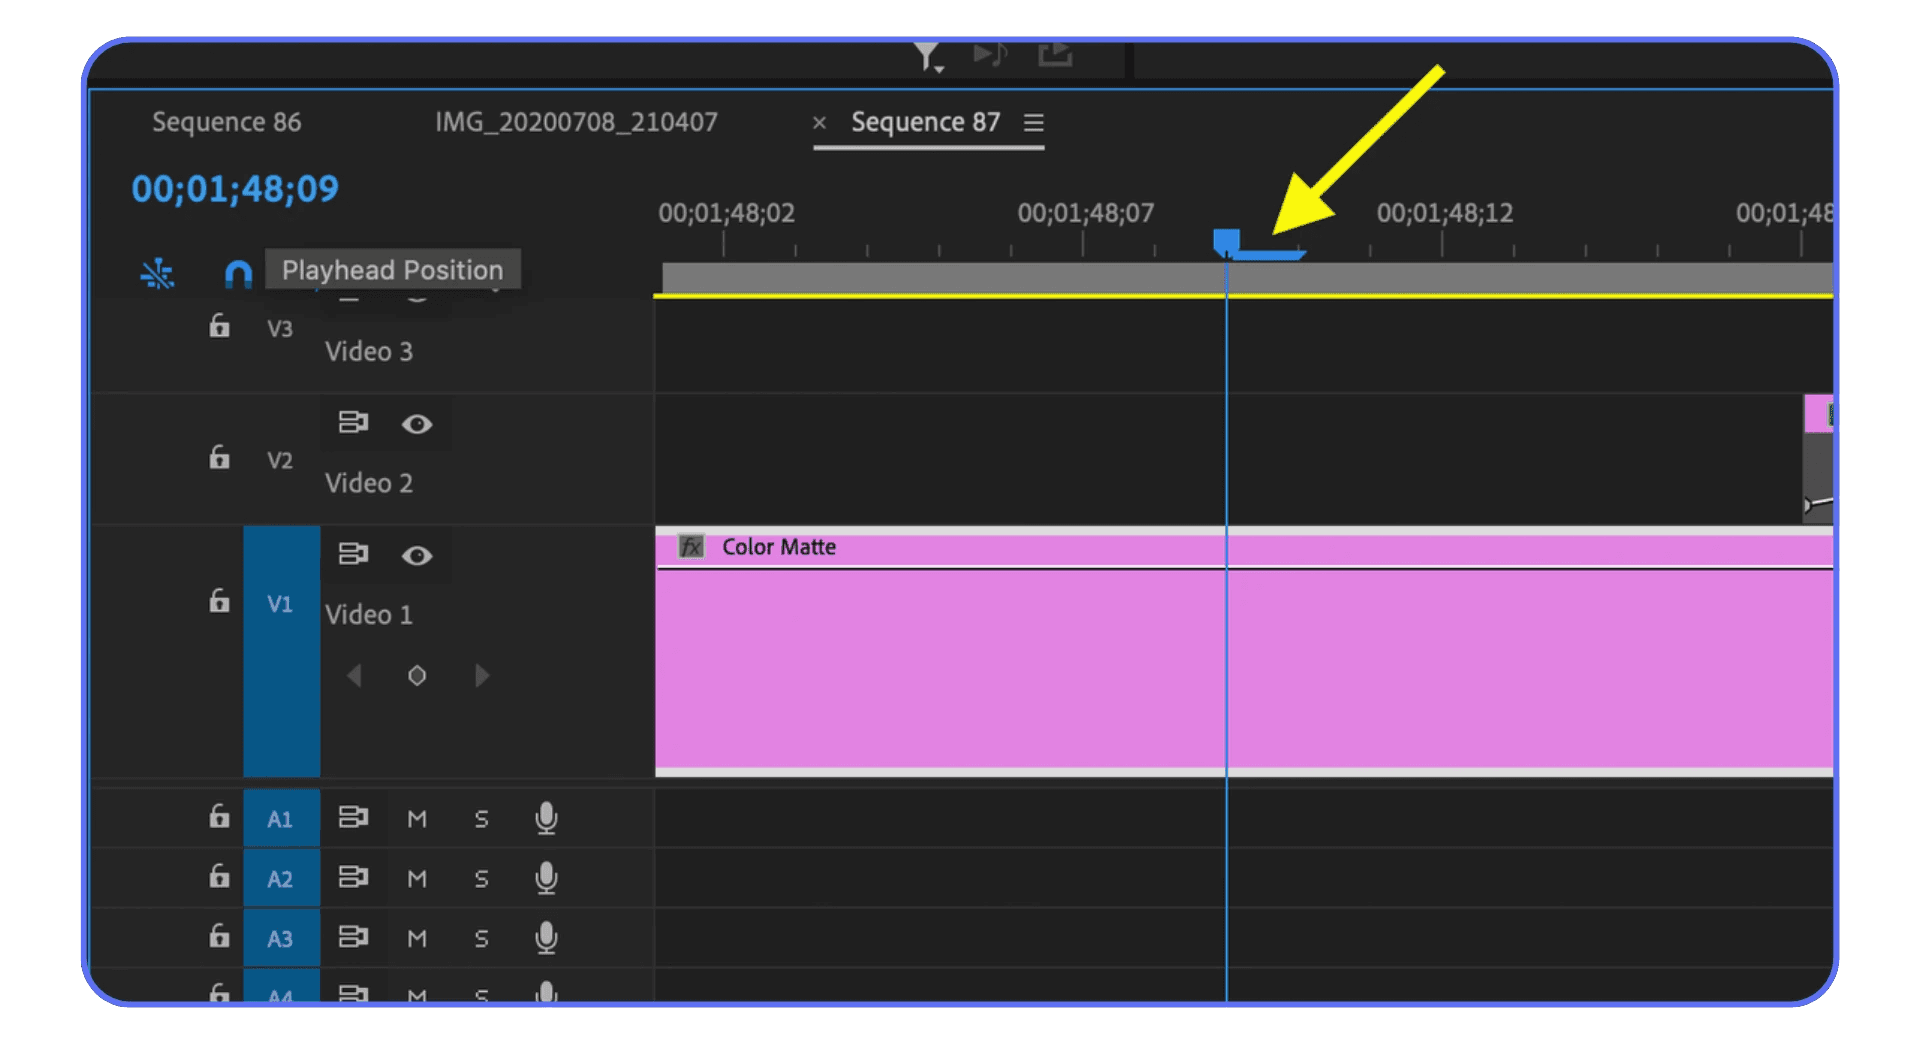
Page Up / Page Down jumps between edits on the timeline
This is huge when reviewing cuts quickly. No dragging. No guessing where the next edit is.
Here’s a small habit that changed everything for me. I stopped trying to see the entire timeline at once. Instead, I zoom in aggressively, move fast with shortcuts, then zoom out just enough to regain context. Rinse. Repeat.
If playback and navigation feel effortless, everything else becomes easier. You’re no longer fighting the timeline. You’re gliding through it.
Editing Essentials That Actually Speed You Up
This is where shortcuts stop being “nice to have” and start doing real damage. In a good way.
Let’s talk cutting.
Add Edit
Ctrl + K on Windows
Cmd + K on macOS
This drops a cut exactly at the playhead. No razor tool. No clicking. Just park the playhead and split. I use this constantly. Dialogue edits, B-roll trims, music beats. If you’re still switching tools for this, you’re working too hard.
Now pair that with Ripple Delete.
Shift + Delete
This removes a clip and closes the gap automatically. It sounds small, but it changes everything. Dead air gone. Mistakes erased cleanly. No dragging clips back into place afterward.
Once you combine Add Edit and Ripple Delete, rough cuts move fast. Like, surprisingly fast.
Next up, insert vs overwrite. This one trips people up.
Comma (,) = Insert
Period (.) = Overwrite
Insert pushes everything forward. Overwrite replaces what’s already there. Simple idea, massive impact. When you know which one you’re using, your timeline stays intentional instead of accidental.
I’ve noticed newer editors avoid these because they feel risky. Totally fair. But once you trust them, dragging clips feels unbearably slow.
Then there are Mark In and Mark Out.
I sets an in point
O sets an out point
You can use these in the source monitor or directly on the timeline. This is how you define exactly what you want without trimming after the fact. It’s cleaner. It’s faster. It’s how Premiere is meant to be used.
Here’s a small but important one.
Q and W.
These ripple trim to the playhead. Q trims everything to the left. W trims everything to the right. If you edit dialogue, podcasts, interviews, or talking heads, these keys are gold.
One warning. Speed makes mistakes louder. If your timeline organization is messy, these shortcuts can cause chaos. Name your tracks. Lock what you’re not touching. Respect the ripple.
When these become muscle memory, something funny happens. You stop thinking about tools altogether. You’re just making decisions. Cut here. Remove that. Keep this.
That’s the goal.
If you are questioning whether Premiere Pro is still the right tool for you, especially after hitting performance limits, it’s worth knowing what the real alternatives look like.
Tool and Panel Shortcuts That Keep You in Flow
Here’s where a lot of editors quietly sabotage themselves. They know the cutting shortcuts, but they still bounce between tools like they’re window shopping. Click. Click. Click. Flow gone.
You don’t need every tool. You just need fast access to the right ones.
Let’s start with the basics.
V for Selection Tool.
This is home base. If something feels weird, hit V. You’ll use it constantly, but ideally less than you think.
C for Razor Tool.
Yes, Add Edit is faster in most cases. But sometimes you really do want to slice multiple tracks in one gesture. C, click, V. Done. Don’t live here. Visit when needed.
B for Ripple Edit Tool.
This lets you trim and close gaps in one move. I use this when shaping dialogue or tightening pacing across several clips. It’s powerful. Also dangerous. Respect it.
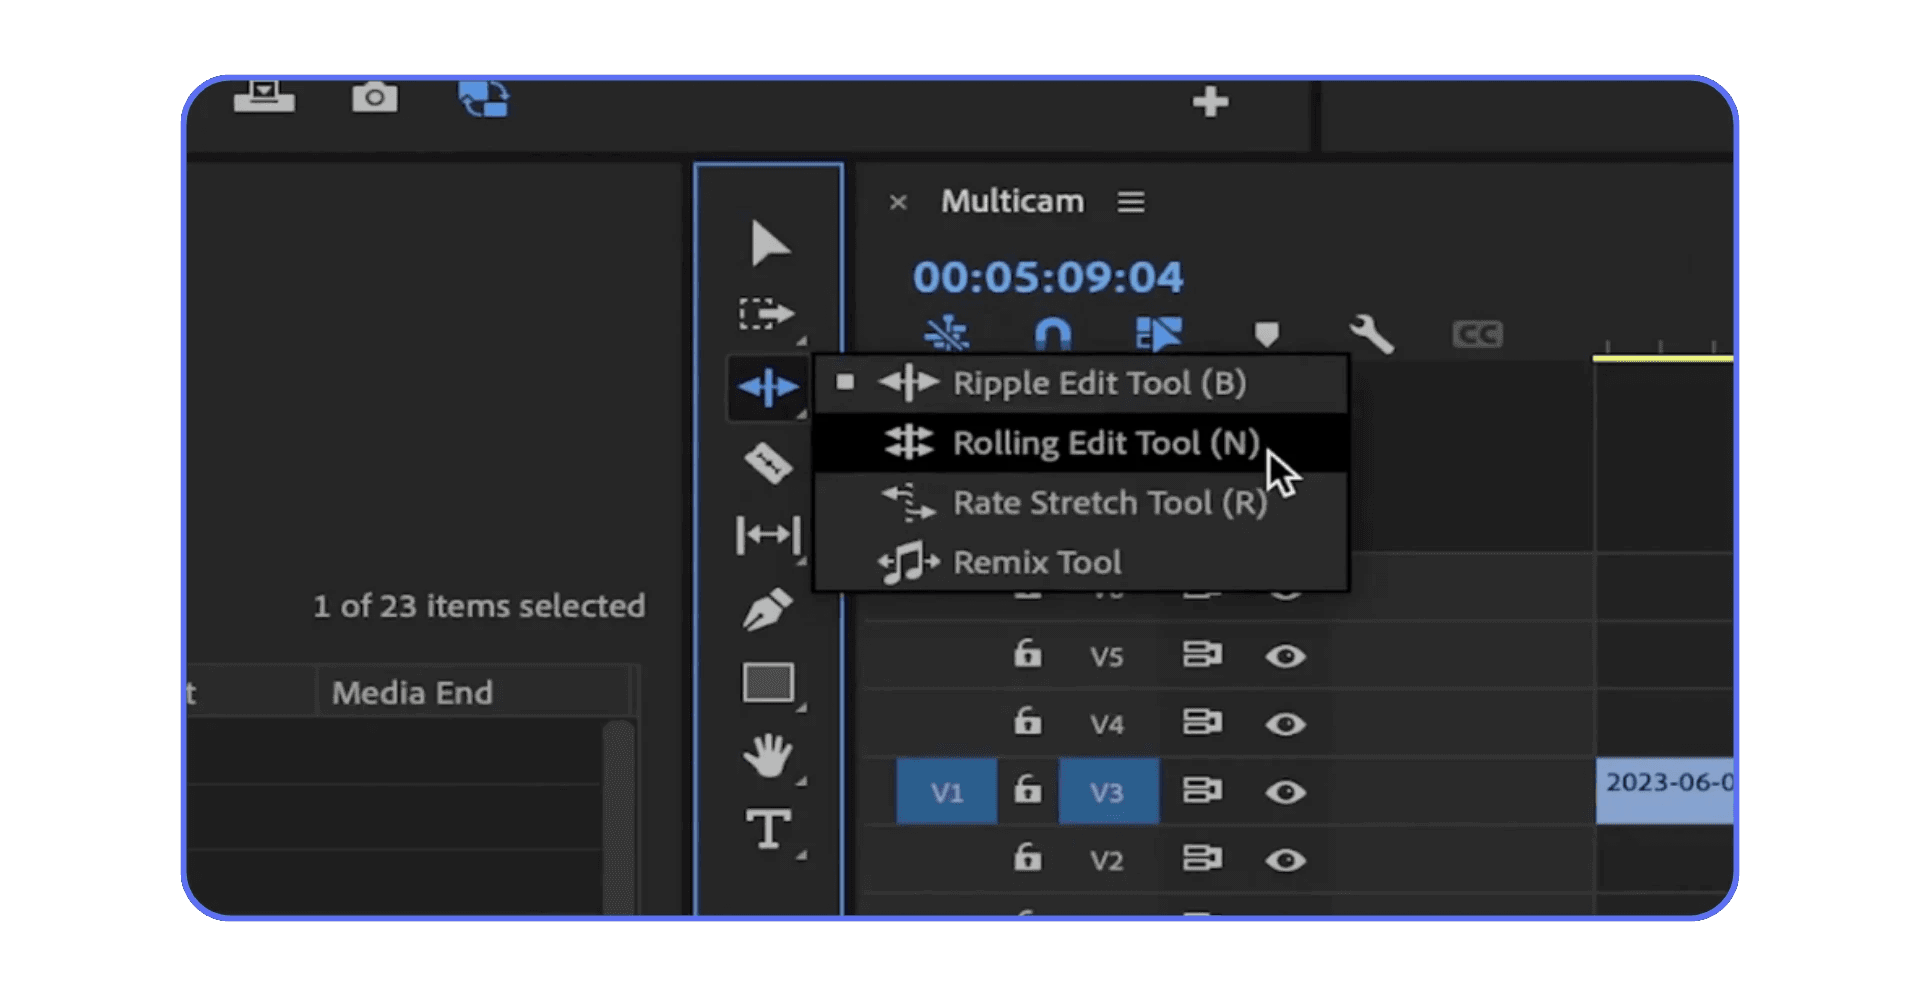
N for Rolling Edit Tool.
This one’s subtle. It moves the edit point between two clips without changing the total duration. Great for micro-adjustments when timing feels off but the overall rhythm works.
Z for Zoom Tool.
I don’t camp here, but it’s handy for quick zooms when the + and - keys feel too slow for what you’re doing. Z, drag, V. Muscle memory makes this fast.
Now let’s talk panels, because this is where flow really lives or dies.
Shift + 1 to Shift + 9 switches between panels. Timeline, source, program, project. If you ever find yourself clicking panel tabs, this is your fix. Once these shortcuts stick, Premiere feels snappier even though nothing actually changed.
One habit I had to unlearn was overusing tools. Most cuts can be done with the selection tool plus keyboard shortcuts. Tools are helpers, not destinations.
If your hand is constantly leaving the keyboard, something’s off. Editing should feel like typing, not like playing whack-a-mole with UI elements.
If you are considering upgrading your setup instead of changing how you work, it helps to know what parts actually matter for Premiere Pro and which ones don’t.
Organization and Safety Shortcuts You’ll Be Glad You Learned
These aren’t the shortcuts that make flashy YouTube demos. They’re the ones that quietly save projects. And sanity.
Let’s start with the obvious one people still forget.
Save.
Ctrl + S or Cmd + S
Yes, Premiere autosaves. No, that doesn’t mean you should trust it with your livelihood. I hit save almost compulsively. After a good cut. Before a risky move. Always before playback on a heavy timeline.
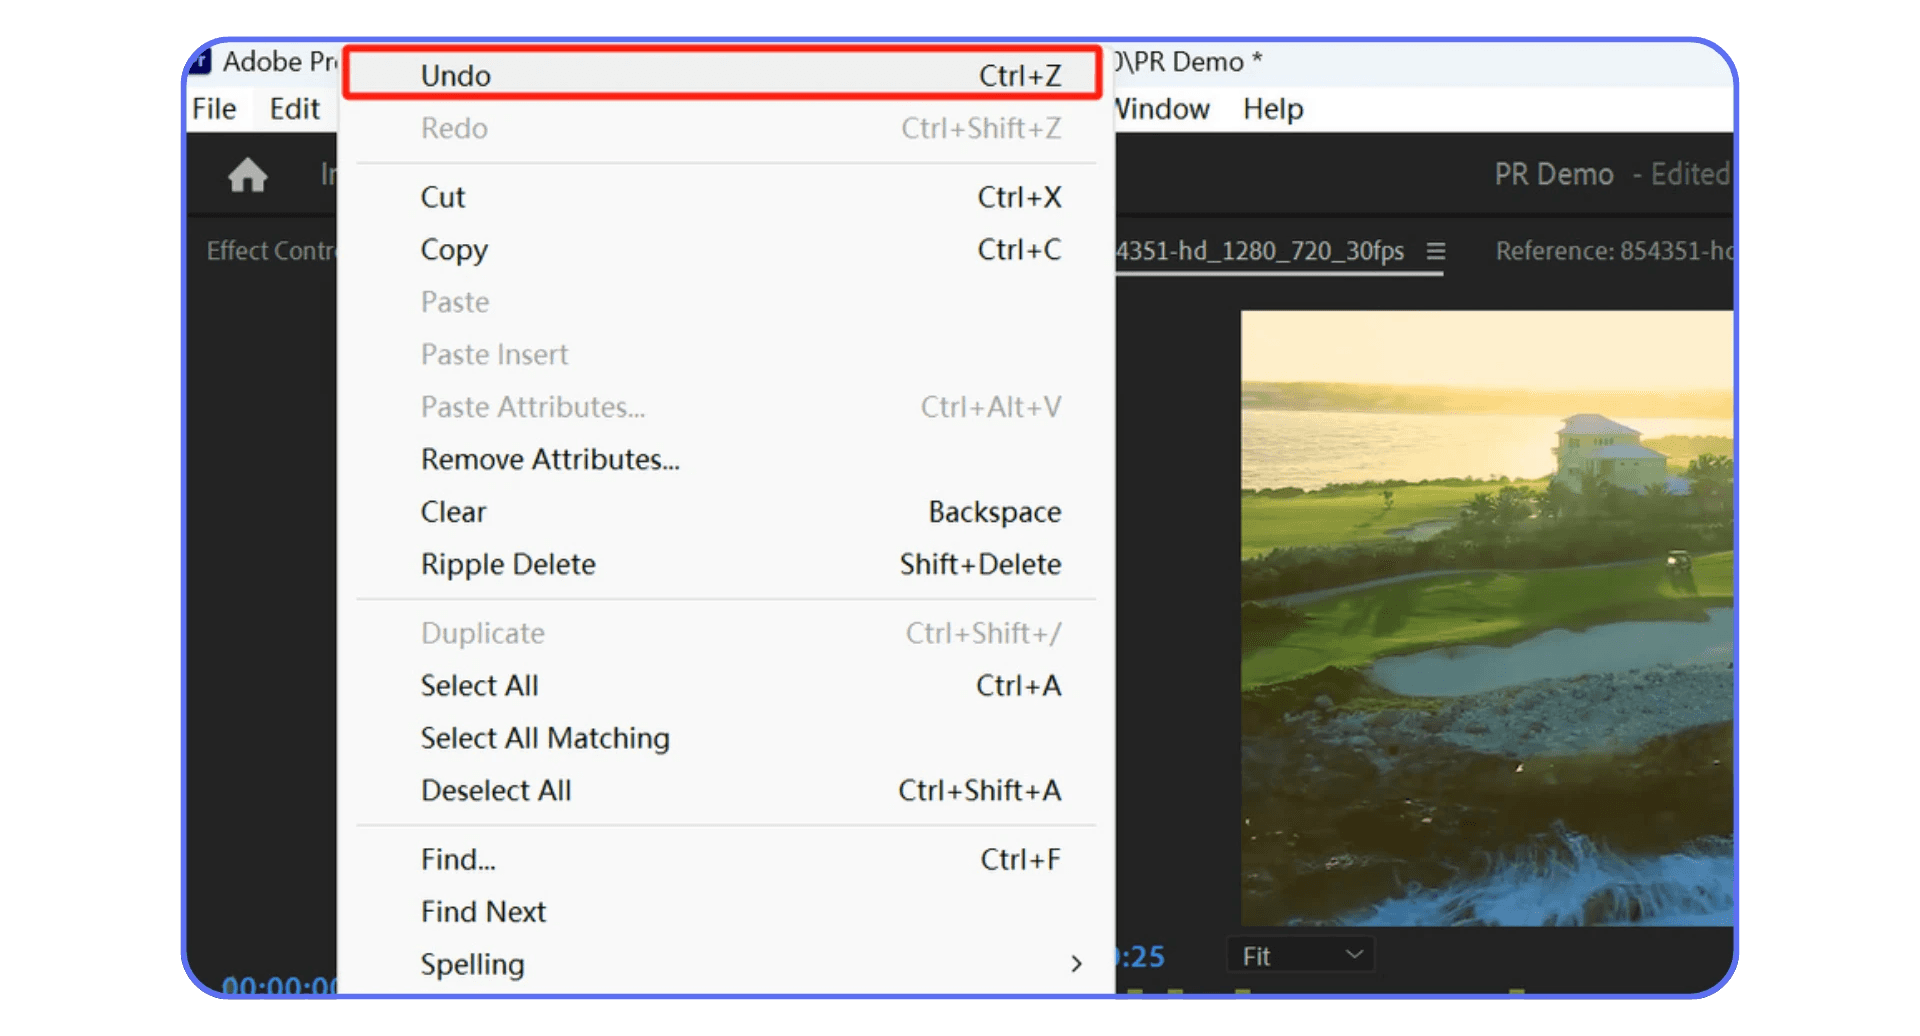
If something goes sideways, Undo is your parachute.
Ctrl + Z / Cmd + Z
Ctrl + Shift + Z / Cmd + Shift + Z for redo
Premiere’s undo stack is deep, but not infinite. If you’re doing a lot of ripple-heavy edits, save first. Ask me how I learned that.
Selection shortcuts matter more than they sound.
Ctrl + A / Cmd + A selects everything
Shift + Ctrl + A / Shift + Cmd + A deselects all
Deselect is underrated. When edits behave strangely, it’s often because something is selected that shouldn’t be. Clearing selection fixes more problems than tutorials ever mention.
Then there’s track targeting and locking. Not shortcuts everyone memorizes, but habits everyone should build. Lock tracks you’re not touching. Mute what you don’t need. Fewer accidents, fewer surprises.
Here’s a small workflow tip I swear by. Before any major trim pass, I duplicate the sequence. Not the project. Just the sequence. Two seconds of work that can save hours of regret.
These shortcuts won’t make you feel faster in the moment. But over time, they create a sense of safety. And when you feel safe, you edit faster. You take more risks. You commit.
If you are dealing with random freezes or crash messages that break your rhythm, it’s usually not bad luck and it’s often fixable.
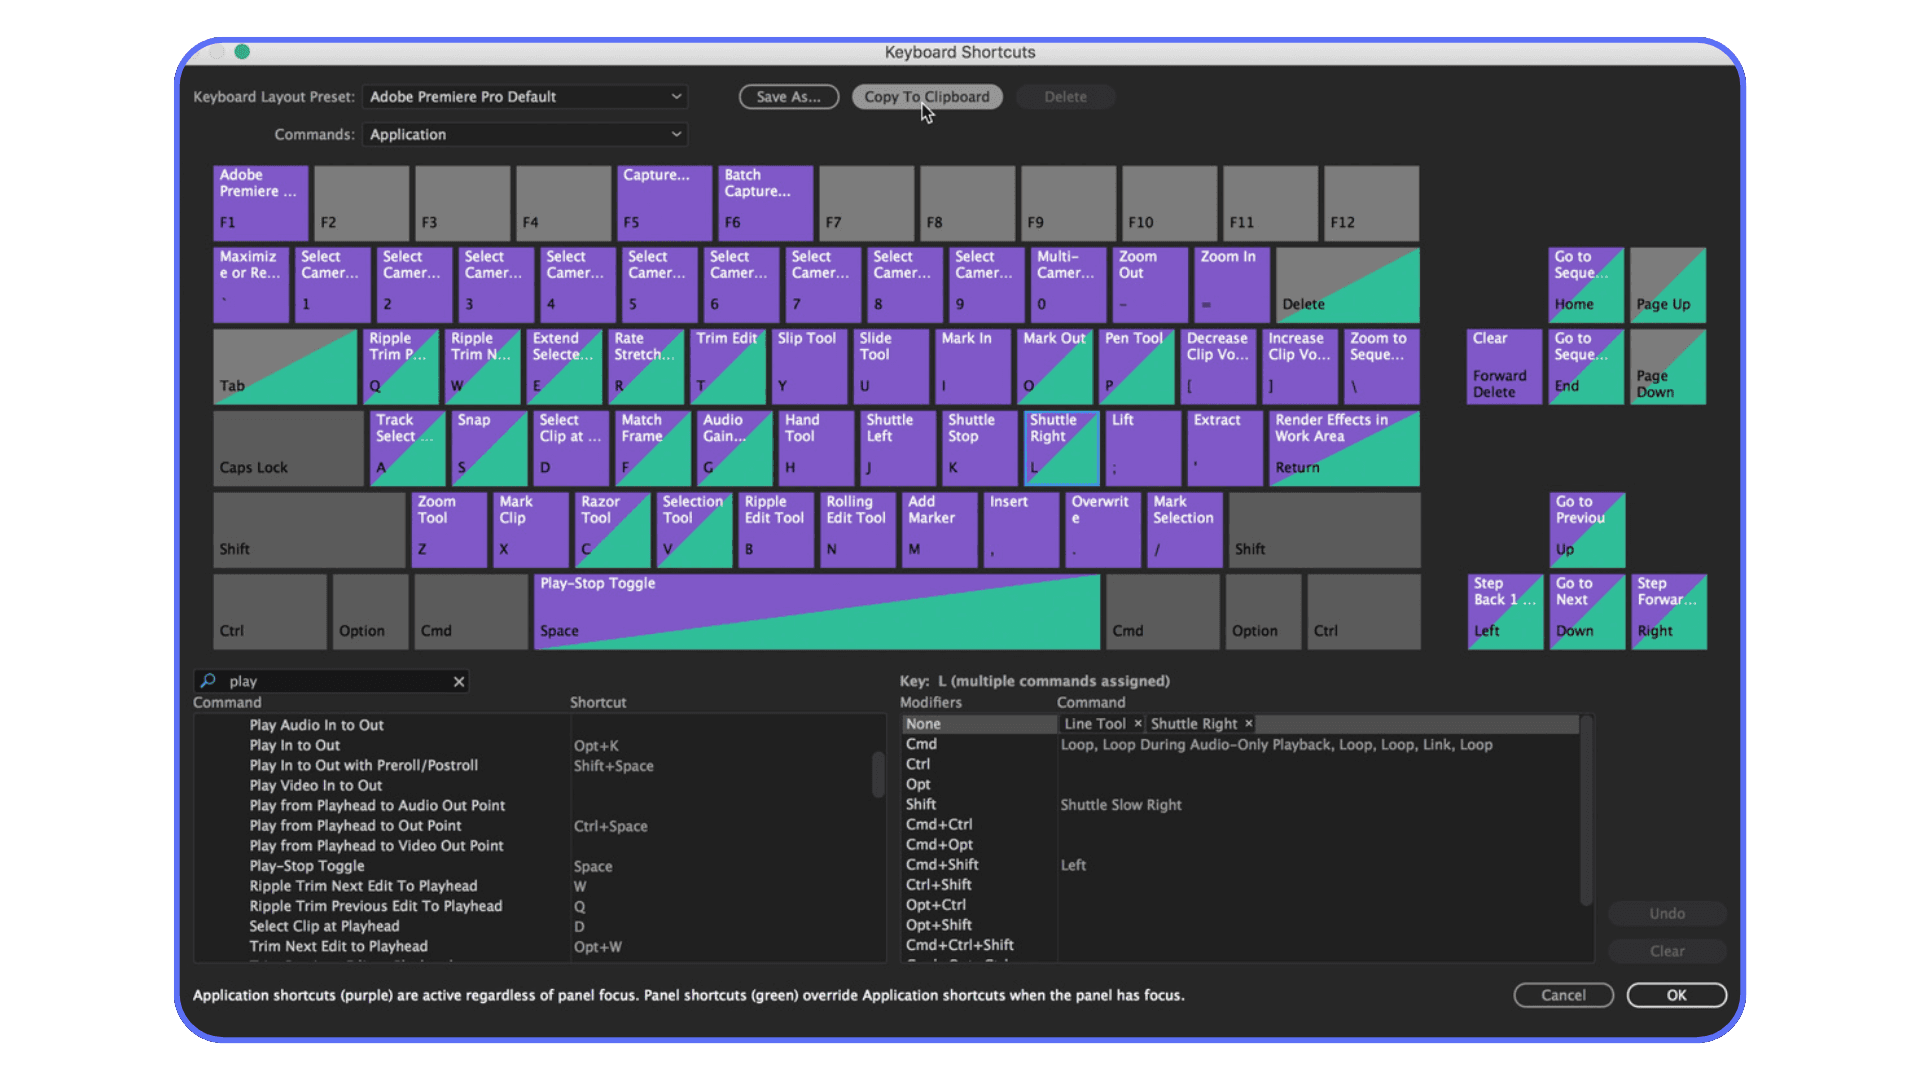
Customizing Shortcuts Without Breaking Your Brain
Premiere’s default shortcuts are decent. Not perfect. And depending on your keyboard, your hand size, or whether you’re on a laptop, some of them are just awkward.
The good news is Premiere lets you change almost everything.
Go to Keyboard Shortcuts in the preferences and you’ll see the full map. It looks intimidating at first. It’s not. Think of it as rearranging your desk, not rebuilding the house.
My rule is simple. If I do something dozens of times per edit, it deserves an easy key. If I do it once a week, it can live somewhere weird.
For example, some editors remap Ripple Delete closer to their left hand. Others move Add Edit to a single key. Totally valid. The goal isn’t copying someone else’s setup. It’s reducing hand travel.
One mistake I see a lot is over-customizing too early. Don’t do that. You’ll forget what you changed, and muscle memory will fight you. Live with the defaults for a while. Notice what feels slow. Then adjust one or two things at a time.
Also, be careful when switching machines. If you edit on multiple computers, export your keyboard shortcut preset. Premiere makes this easy, and it’ll save you from that awful moment when nothing works the way your hands expect.
There’s no universal perfect layout. There’s only the layout your hands stop thinking about.
Once shortcuts fade into the background, editing becomes weirdly calm. Fast, but calm.
If you are spending more time waiting on exports than actually editing, there are practical ways to shave minutes or even hours off your render times.
A Real Editing Scenario, Keys and All
Let’s make this concrete.
Imagine you’re cutting a five-minute talking-head video with B-roll. Nothing fancy. Just clean pacing, good rhythm, no dead air.
I start in the source monitor and skim footage using L and J. When something feels usable, I tap I at the start, O at the end, then drop it into the timeline with Comma or Period depending on whether I want to insert or overwrite. No dragging. No guessing.
On the timeline, playback is almost entirely J, K, L. When I hear a breath or stumble, I park the playhead, hit Ctrl + K to cut, nudge forward a few frames with the arrow keys, cut again, then Shift + Delete to ripple it out. That entire move takes maybe two seconds.
For tightening pacing, Q and W do most of the work. I don’t trim edges manually unless I have to. These keys remove everything up to or after the playhead instantly. It feels aggressive at first. Then it feels addictive.
When I need to adjust a cut without changing overall timing, N for rolling edit. Tiny moves. Big difference. If I lose my place visually, + to zoom in, - to zoom out. No mouse wheel acrobatics.
Panel switching happens constantly. Shift + 3 for the timeline. Shift + 1 for the project. It’s subtle, but not clicking tabs keeps me mentally locked into the edit.
Here’s the thing. None of these shortcuts are impressive on their own. The speed comes from chaining them. One decision flows into the next without interruption.
This is where people usually ask, “Do shortcuts really matter that much?” After doing this for years, I think they’re the difference between feeling in control of a timeline and feeling like you’re negotiating with it.
If you are working with 4K or long-form footage on a modest machine, proxies can be a lifesaver when they’re set up the right way.
When the Timeline Is Fast but the Machine Isn’t
This is the part nobody warns you about.
You finally get good with shortcuts. Your hands move without thinking. Cuts land clean. Playback feels intentional. And then… the timeline starts dropping frames. Audio stutters. Scrubbing feels sticky. You hit play and there’s a half-second delay that absolutely kills the rhythm.
That’s not a shortcut problem. That’s hardware tapping out.
It usually shows up when projects get real. Long interviews. 4K footage. Log files. Nested sequences. A couple of effects stacked because the client “just wants to see options.” Suddenly Premiere is doing math your machine doesn’t love.
I’ve seen editors blame themselves here. They assume they’re doing something wrong. They’re not. They’re just asking a lot from limited hardware.
Proxies help, and they’re worth using. Lowering playback resolution helps too. But there’s a ceiling. At some point, no amount of optimization makes a laptop feel like a workstation.
This is also where speed becomes frustrating instead of fun. When your brain moves faster than playback, editing feels like driving with the handbrake on. You hesitate. You second-guess. You stop trusting your instincts again.
That’s usually the signal. Not that you need to relearn shortcuts. But that your workflow has outgrown your local machine.
If you are starting to feel playback lag once timelines get heavy, especially with effects or color work, the GPU you’re using matters more than most people realize.
Using Vagon Cloud Computer When Your Local Setup Hits Its Limit
At a certain point, there’s no clever workaround left. Your shortcuts are solid. Your workflow is clean. But your computer just can’t keep up.
This is where Vagon Cloud Computer becomes a very practical option, not a theoretical one.
Instead of running Premiere Pro on your own machine, you run it on a high-performance cloud computer. CPU, GPU, RAM, all handled remotely. What you see on your screen is a live stream of that machine. What you control is still Premiere. Same interface. Same shortcuts. Same muscle memory.
The difference is responsiveness.
Heavy codecs play back smoothly. Scrubbing doesn’t lag. Renders don’t bring everything to a halt. You can work on demanding projects from a laptop that would normally struggle just opening the timeline.
What I like about this approach is that it doesn’t ask you to change how you edit. You don’t relearn tools. You don’t simplify your cuts just to survive playback. You keep working the way you already know how, just without fighting hardware limits.
It also makes collaboration and mobility easier. Open the same project from different devices. Work while traveling. Hand off files without juggling external drives or praying a machine can handle them.
This isn’t something you need for every edit. Light projects run fine locally. But when timelines get heavy and deadlines don’t care about your specs, having access to real power on demand is hard to ignore.
Shortcuts make you fast. Vagon makes sure speed doesn’t get wasted waiting on your machine.
If you are editing on the move or away from your main workstation, there are ways to work with Premiere Pro on an iPad without giving up desktop-level control.
Final Thoughts
If there’s one pattern I’ve seen over and over, it’s this. Editors don’t feel slow because they lack talent. They feel slow because friction creeps in everywhere.
Too many clicks. Too much waiting. Too much fighting the timeline.
Keyboard shortcuts strip a lot of that away. They turn editing into something closer to instinct. You stop thinking about tools and start reacting to what you see and hear. That’s when edits get sharper. That’s when decisions feel confident instead of tentative.
But shortcuts only get you so far if the machine can’t keep up. When playback stutters or scrubbing lags, even the best habits start to fray. That’s where something like Vagon Cloud Computer fits naturally into the picture. Not as a replacement for skill, but as a way to let skill actually show up without resistance.
I think the real win is this. Once your hands know the keys and your system responds instantly, editing stops feeling like work you push through. It starts feeling like momentum you ride.
And that’s the point. Not speed for its own sake. Speed that keeps you in the creative zone long enough to do your best work.
FAQs
1. Do I really need to memorize all these shortcuts to get faster?
No. And honestly, trying to memorize everything at once usually backfires. In my experience, speed comes from learning a small set and using them constantly. Start with playback, add edit, ripple delete, and mark in/out. Once those are automatic, the rest stack naturally.
2. How long does it take for shortcuts to feel natural?
Usually a couple of weeks of real editing. Not practice sessions. Real projects. The first few days feel awkward. Then one day you catch yourself cutting without thinking about keys at all. That’s the turning point.
3. Are Premiere Pro’s default shortcuts actually good enough?
Mostly, yes. Adobe’s defaults are fine for most editors. I’d avoid heavy customization early on. Live with the defaults, notice what slows you down, then adjust one or two things. Customizing too much too soon just creates confusion.
4. What if shortcuts make me mess up my timeline faster?
That’s a real risk. Speed amplifies mistakes. Lock tracks you’re not touching. Duplicate sequences before major edits. Save often. Shortcuts don’t replace discipline. They reward it.
5. Do shortcuts matter if my computer is slow anyway?
They still matter, but there’s a ceiling. Shortcuts help you make decisions faster. Hardware determines how quickly Premiere responds to those decisions. If playback lags or scrubbing stutters, speed feels wasted. That’s usually a hardware issue, not a workflow one.
6. Is using a cloud computer like Vagon Cloud Computer hard to get used to?
Not really. From an editing perspective, Premiere behaves the same. Same interface. Same shortcuts. Same muscle memory. The main difference is that heavy timelines feel smoother, especially on machines that would normally struggle.
7. Should beginners focus on shortcuts or storytelling first?
Story always comes first. But shortcuts help you stay focused on story instead of tools. You don’t need mastery on day one. Just enough speed that the software doesn’t interrupt your thinking.
Get Beyond Your Computer Performance
Run applications on your cloud computer with the latest generation hardware. No more crashes or lags.

Trial includes 1 hour usage + 7 days of storage.
Summarize with AI

Ready to focus on your creativity?
Vagon gives you the ability to create & render projects, collaborate, and stream applications with the power of the best hardware.

Vagon Blog


Run heavy applications on any device with
your personal computer on the cloud.
San Francisco, California
Solutions
Vagon Teams
Vagon Streams
Use Cases
Resources
Vagon Blog
How to Run Audacity on a Cloud Ubuntu Desktop (2026 Guide)
How to Run Darktable on a Cloud Ubuntu Desktop for RAW Photo Editing (2026 Guide)
How to Run Kdenlive on a Cloud Ubuntu Desktop (2026 Guide)
How to Run DaVinci Resolve on Linux in the Cloud (2026 Guide)
How to Run Inkscape on a Cloud Ubuntu Desktop (2026 Guide)
How to Run Krita on a Cloud Ubuntu Desktop for Digital Painting (2026 Guide)
How to Run GIMP on a Cloud Ubuntu Desktop (2026 Guide)
How to Run Jupyter on a Cloud GPU Linux Desktop (2026 Guide)
Vagon vs GitHub Codespaces: Cloud Dev Environments Compared (2026)
Vagon Blog
Run heavy applications on any device with
your personal computer on the cloud.
San Francisco, California
Solutions
Vagon Teams
Vagon Streams
Use Cases
Resources
Vagon Blog