Instant Connection for Pixel Streaming
— New Feature Automated Setup
Secret Adobe Premiere Pro Features Most Editors Never Use
Secret Adobe Premiere Pro Features Most Editors Never Use
VideoProduction
Secret Adobe Premiere Pro Features Most Editors Never Use
Table of Contents
I’ve been using Premiere Pro for years, and I’m still regularly annoyed by how much time I wasted early on doing things the hard way. Not because Premiere is bad. Because it hides some of its best features in plain sight and never really tells you they exist.
Quick question. How many hours have you burned dragging clips around, fixing the same audio issue over and over, or rebuilding edits that Premiere could have handled for you automatically? If the answer is “too many,” you’re not alone. Most editors never move past the obvious tools, and Premiere quietly lets that happen.
The funny part is this. The features that actually make Premiere fast, stable, and even enjoyable aren’t advanced or locked behind plugins. They’re already there. You just weren’t shown where to look.
Hidden Workflow Boosters Editors Rarely Use
Let’s start with the stuff that doesn’t look impressive on paper. No cinematic buzz. No flashy buttons. Just small switches that quietly change how fast you move through a timeline.
Timeline Scrolling Is Probably Working Against You
By default, Premiere scrolls the timeline in a way that feels… fine. Until you realize there are options. Smooth Scroll. Page Scroll. No Scroll at all.
I’ve noticed most editors never touch this setting. They just accept the default and adapt their hands around it. That’s backwards.
If you do a lot of trimming while playing back, smooth scrolling keeps your eyes locked on the playhead. If you’re precise and cut-heavy, no scroll keeps everything stable so nothing jumps under your cursor. It sounds minor. It’s not. This alone can make long sessions feel less tiring.
And yes, it takes about thirty seconds to test all three and pick one. Worth it.
Swapping Clips Without Wrecking Your Timeline
Here’s one I wish someone had shown me years ago.
You don’t have to lift, drag, zoom, re-align, and pray when swapping two clips. Hold the modifier key and drag one clip onto another. Premiere just switches their positions. No ripple chaos. No gaps. No re-trimming.
This is especially useful when you’re experimenting with pacing. Trying two reaction shots. Testing different b-roll beats. It keeps you in decision mode instead of cleanup mode.
Editing should feel like thinking, not housekeeping.
Replacing Clips Without Losing Your Work
There’s a built-in replace function that keeps timing, effects, and edits intact while swapping the underlying clip. This is huge when you’re:
Replacing proxies with high-res footage
Updating b-roll after client feedback
Fixing a bad take without rebuilding the edit
A lot of editors still delete the old clip and drag in the new one manually. I’ve done it too. It works. It’s also a waste of time and focus.
Once you get used to replacing instead of rebuilding, revisions stop feeling scary.
When These Tricks Actually Matter
If you’re cutting a 30-second meme once a week, sure, none of this is life-changing.
But if you’re editing long interviews, YouTube videos, social cuts, or client projects with revisions, these small workflow boosters stack up fast. Ten seconds saved here. Twenty there. Multiply that across a week. Or a year.
That’s the real secret with Premiere. Speed doesn’t come from working faster. It comes from removing friction you didn’t realize you were tolerating.
This pairs especially well with proxies. If you’re not already using them, here’s a full walkthrough on how to create video proxies in Premiere Pro.
Productivity Features That Don’t Look Powerful
Some Premiere features suffer from a branding problem. They don’t look exciting. They don’t promise cinematic results. So people ignore them. Big mistake.
Freeform View Is Not Just For Organizing Clips
The first time I saw Freeform View, I thought, okay, neat. Then I went back to list view and forgot about it for months.
That was dumb.
Freeform View lets you spread clips out visually inside the Project panel. You can group shots by vibe, scene, or energy. Wide shots over here. Closeups over there. Sketchy b-roll in a messy corner you promise to clean up later.
If you’re a visual thinker, this clicks immediately. It feels closer to storyboarding than file management. And when you’re building structure before cutting, it’s shockingly useful.
I’ve noticed it’s especially helpful on documentary or interview-heavy projects where the story isn’t locked yet. You’re not hunting filenames. You’re recognizing shots.
Scene Edit Detection Saves You From Other People’s Timelines
Ever get handed a single exported video and asked to “make some changes”?
Scene Edit Detection is Premiere quietly saying, fine, I’ll help.
It analyzes the clip and automatically cuts it at edit points. Is it perfect? No. Is it fast enough to save you an hour of manual slicing? Absolutely.
This feature shines when you’re repurposing content. Podcasts. Webinars. Old brand videos. Anything that already went through an edit once and now needs a second life.
If you work with agencies or clients who love sending flattened files, this tool pays for itself in one afternoon.
Auto Reframe Is Better Than It Gets Credit For
Auto Reframe gets dismissed a lot. Some editors try it once, see an awkward crop, and write it off.
That’s fair. It’s not magic.
But if you’re adapting horizontal footage for vertical or square formats, it’s still one of the fastest starting points you have. Especially for talking heads, interviews, and basic movement.
The trick is not to treat it as final. Treat it as a rough pass that gets you 80 percent there. Tweak the framing where it misses. You’ll still finish way faster than starting from scratch.
For social-heavy workflows, this saves real time. Not theoretical time. Actual deadline-saving time.
The Quiet Advantage Of These Tools
None of these features scream power user. That’s why they get skipped.
But they all do the same thing. They reduce cognitive load. Less searching. Less rebuilding. Fewer tiny decisions that drain energy over a long edit.
Premiere gets easier when you stop forcing everything through the timeline and let the software help you organize, detect, and adapt.
Panels Most Editors Open Once and Forget
Premiere has a habit of hiding serious power behind panels that look… boring. Flat UI. Sliders. Buttons that don’t scream “this will save you hours.” So people click them once, shrug, and go back to doing things manually.
I’ve been there.
Essential Graphics Is Way More Than Titles
Most editors treat Essential Graphics as the place where titles live. Add text. Change font. Done.
That’s barely scratching the surface.
You can build reusable motion graphics templates here. Lower thirds, animated callouts, branded transitions. Stuff you’d normally think requires After Effects. And once you build them, you can reuse them across projects without rebuilding anything.
This matters a lot if you work with clients or recurring formats. You stop redesigning. You start dropping in assets that already behave.
Is it as powerful as After Effects? No. And that’s fine. The point is speed, not perfection.
Essential Sound Fixes Audio Earlier Than You Think You Should
I used to leave audio for the end. Big mistake. That habit alone made edits feel heavier than they needed to be.
Essential Sound lets you tag clips as Dialogue, Music, or Ambience and apply smart presets instantly. Noise reduction. Ducking. Loudness balancing. All without touching keyframes.
Is it perfect? No. You’ll still hear artifacts if you push it too far. But for 80 percent of projects, it gets you clean, usable audio fast.
And here’s the underrated part. When audio sounds decent early, editing feels easier. You make better pacing decisions. You stop second-guessing cuts because the sound isn’t fighting you.
Lumetri Color Works Best When You Stop Grading Clip By Clip
A lot of editors use Lumetri like a filter panel. Adjust exposure. Fix white balance. Move on.
Where it actually shines is consistency.
Using adjustment layers, presets, and scopes lets you apply one look across dozens of clips without repeating yourself. It’s not about making things flashy. It’s about avoiding that slow drift where shots start to feel mismatched and you can’t quite tell why.
Once you stop grading each clip in isolation, color becomes faster and less emotional. Which is exactly what you want at the end of a long edit.
The Common Thread
These panels don’t replace skill. They replace repetition.
If you find yourself doing the same fix over and over, Premiere probably already has a panel designed to handle it in one place. The trick is trusting those tools early instead of saving them for cleanup.
Performance issues don’t just show up during editing. Exports are often where things really slow down, which is why we also put together a guide on reducing rendering times in Premiere Pro.
Keyboard Shortcuts That Actually Matter
Let’s get this out of the way. You do not need to memorize every shortcut in Premiere. That’s a great way to feel productive and change nothing.
What actually matters are the shortcuts that remove friction from decisions you make constantly.
Select Everything Under The Playhead
This one is criminally underrated.
With a single key, you can select all clips under the playhead across tracks. No lassoing. No shift-click gymnastics. Just instant control.
This is perfect for moving sections, deleting moments, or applying quick changes without breaking your flow. Once you use it a few times, reaching for the mouse starts to feel silly.
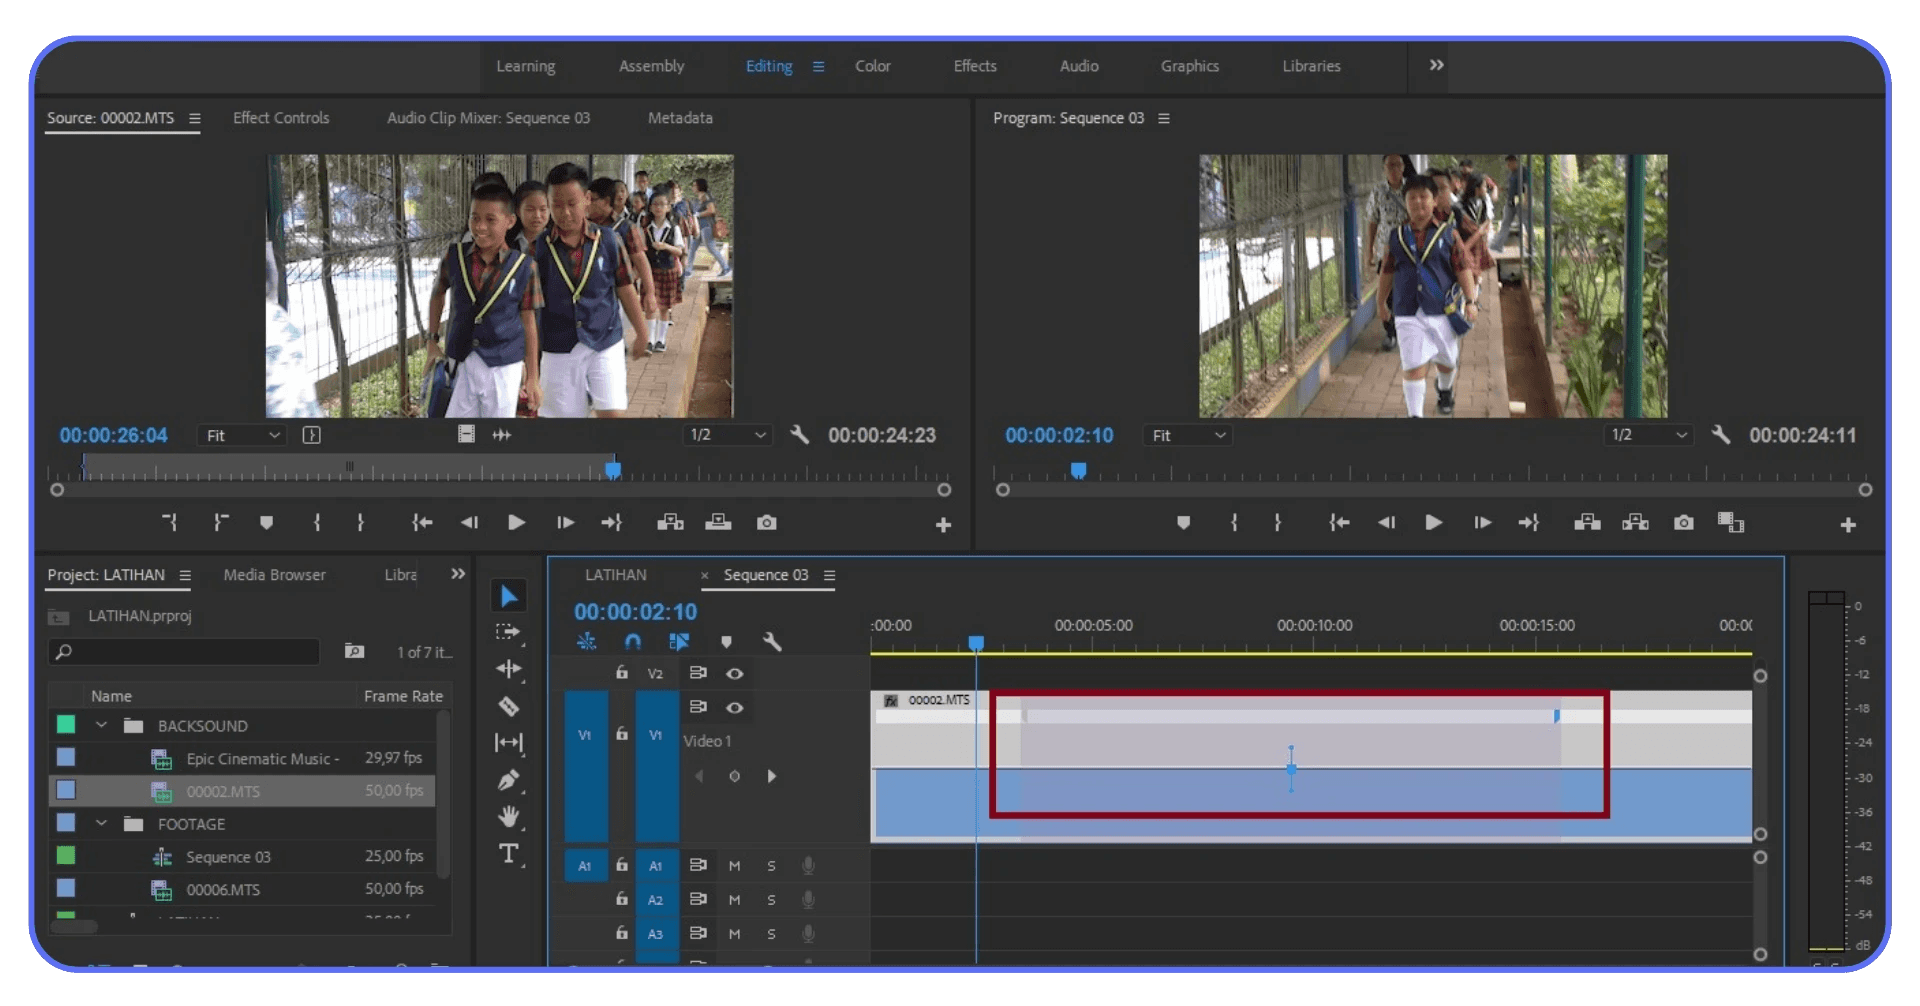
Ripple Trims That Clean Up After You
Ripple trimming forward and backward is one of those things that sounds technical until you try it.
Instead of cutting, deleting, and closing gaps manually, you trim and everything shifts automatically. Your timeline stays tight. Your focus stays on the edit.
If you do dialogue-heavy work, this alone can cut your editing time dramatically. It keeps momentum alive, which is half the battle.
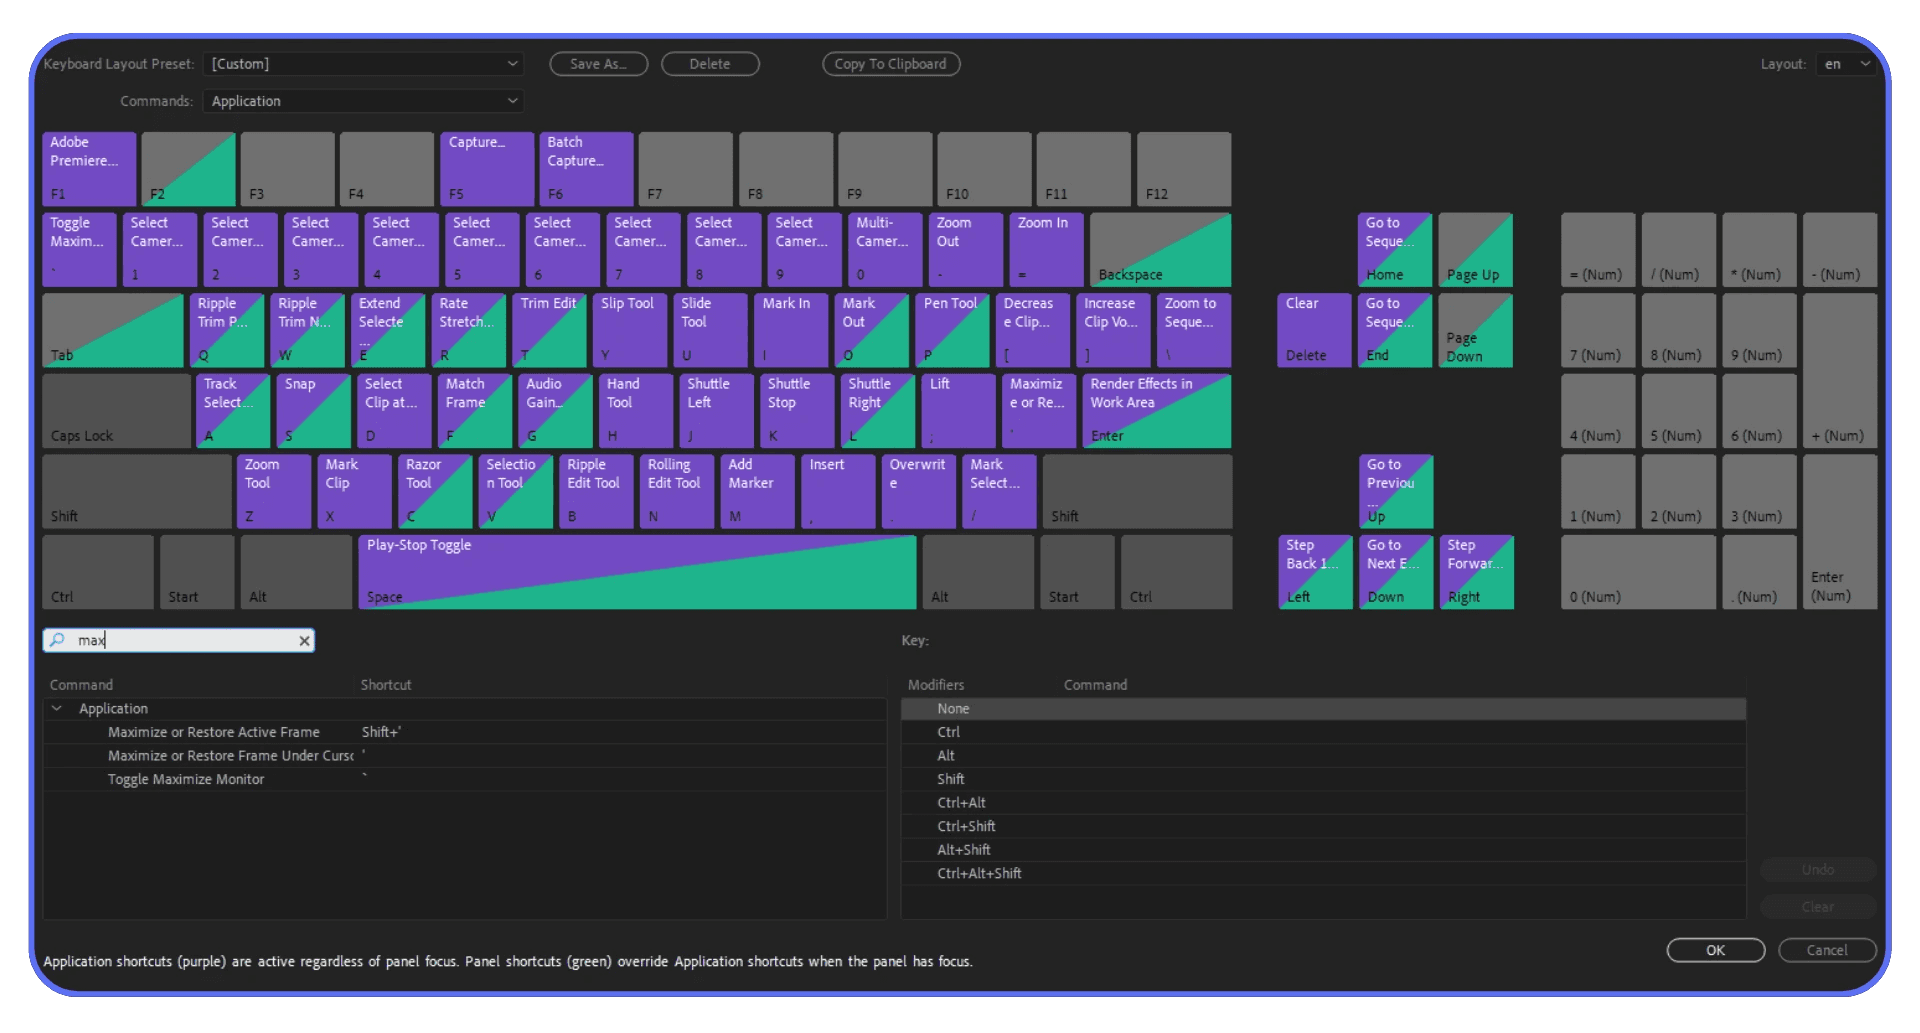
One Key To Rule Your Panels
There’s a shortcut that maximizes whatever panel your cursor is over. Timeline. Program monitor. Project panel. Full screen, instantly.
This doesn’t sound like a big deal until you realize how often you’re resizing panels manually or squinting at tiny waveforms. One key. Full focus. Then back again.
It’s a small quality-of-life improvement that adds up over long sessions.
Why Fewer Shortcuts Win
I think five shortcuts used constantly beat fifty used rarely.
The goal isn’t to become a keyboard wizard. It’s to stop interrupting your thinking. Every time you pause to search for a tool, your edit slows down.
Shortcuts aren’t about speed. They’re about staying in the zone.
Advanced Editing Tools Hiding in Plain Sight
These are the features people nod at in tutorials and then quietly never touch again. Usually because they feel “advanced.” Or risky. Or like something you’ll figure out later.
Later rarely comes.
Time Remapping Is More Than Speed Ramps
Most editors use speed changes in one of two ways. Slow motion or fast forward. End of story.
Time remapping lets you control speed inside a clip with actual intention. Gradual slowdowns. Sudden punches. Holding a moment for emphasis without cutting away.
Used sparingly, this adds energy without screaming effect. Used badly, it looks like a YouTube montage from 2014. Taste matters here.
Where it shines is storytelling. Emphasizing reactions. Letting a beat breathe. Creating rhythm without adding more cuts.
Audio Ducking That Doesn’t Fight You
Manually keyframing music under dialogue is one of those tasks that feels productive but drains your soul.
Premiere’s audio ducking does this automatically. It listens for dialogue and lowers music where needed. You can adjust sensitivity, fade length, and overall balance without touching a single keyframe.
Is it perfect? No. But it’s consistent. And consistency beats precision when you’re on a deadline.
For podcasts, interviews, and talking-head videos, this feature alone can save you an hour per project.
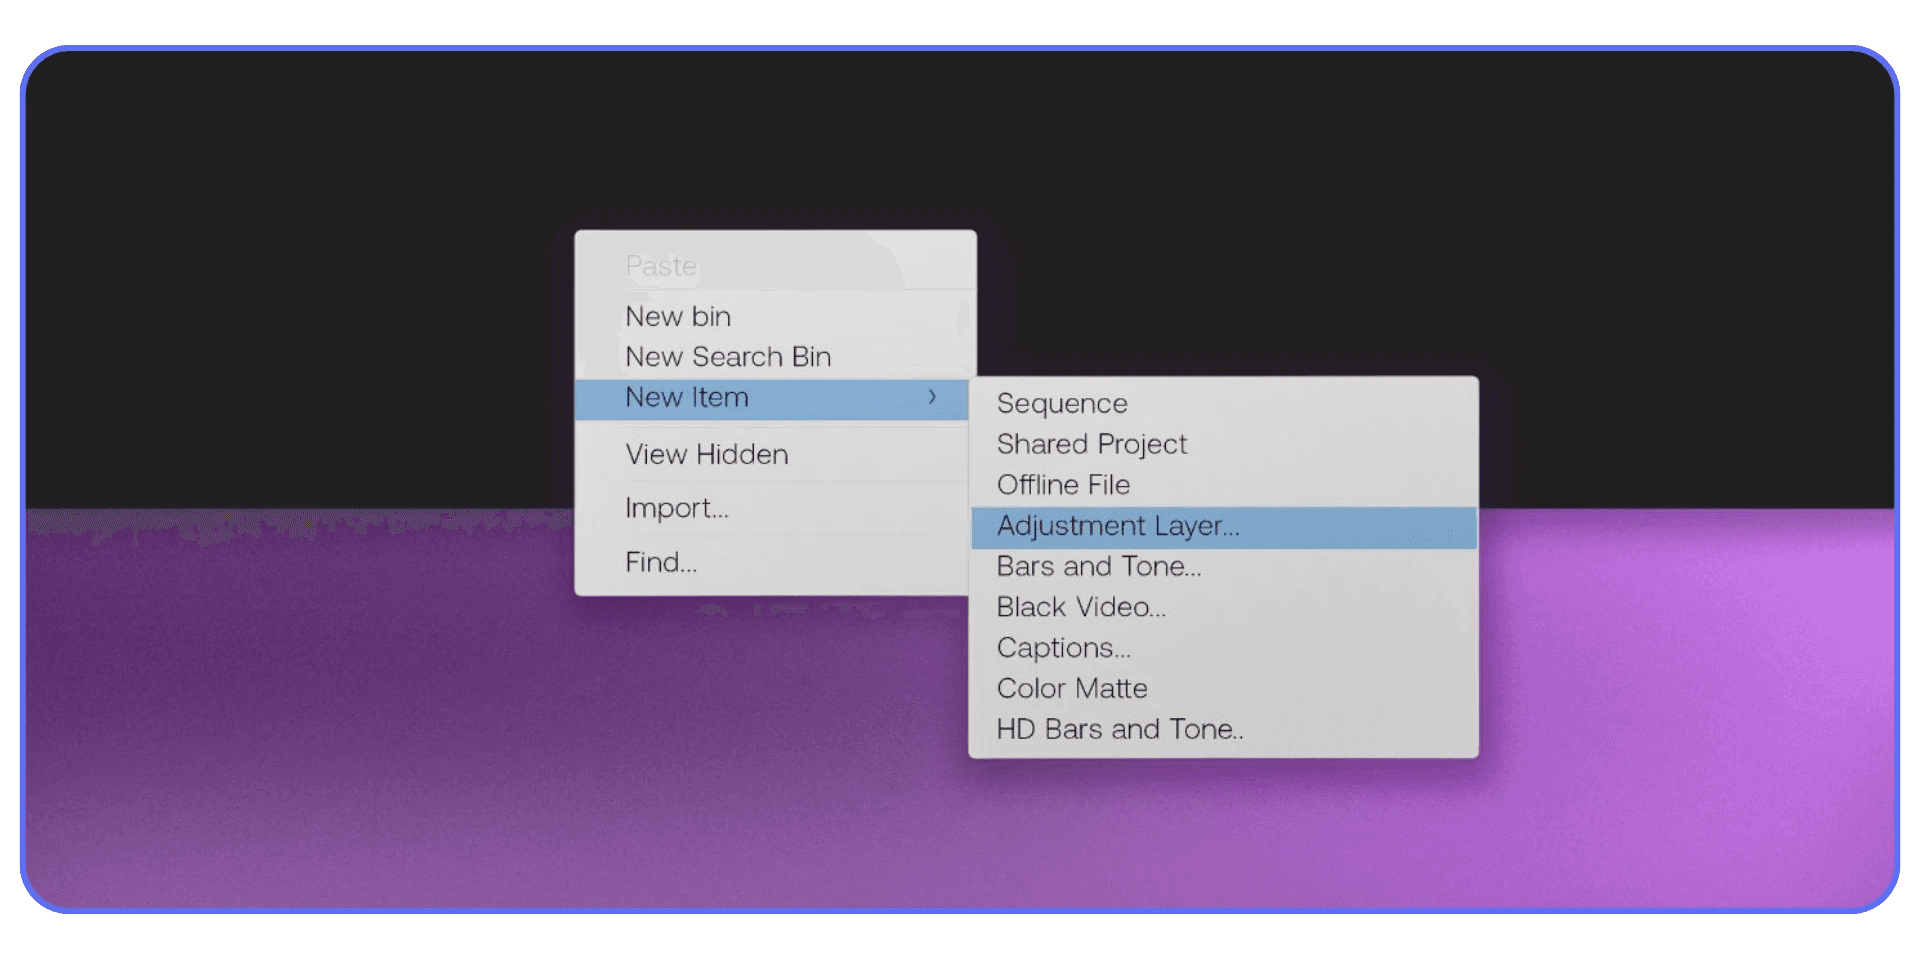
Adjustment Layers Save You From Yourself
If you’re applying the same color correction, blur, or effect to multiple clips one by one, stop.
Adjustment layers let you apply effects once and affect everything underneath. Change your mind later? One tweak updates the entire section.
This isn’t just faster. It’s safer. You avoid tiny inconsistencies that creep in when edits get long and fatigue sets in.
When These Tools Are Too Much
Not every project needs this level of control. Simple cuts are still valid. Overusing advanced tools can slow you down if you’re not careful.
The trick is knowing they exist so you can reach for them when the edit asks for it. Not forcing them into everything.
AI Features That Are Genuinely Useful
Adobe has been talking about AI for years now. Some of it felt like future-speak. Some of it felt half baked. Lately though, a few tools have crossed the line from “interesting demo” to “yeah, I’d actually use this.”
Still, not all of them deserve your trust. Yet.
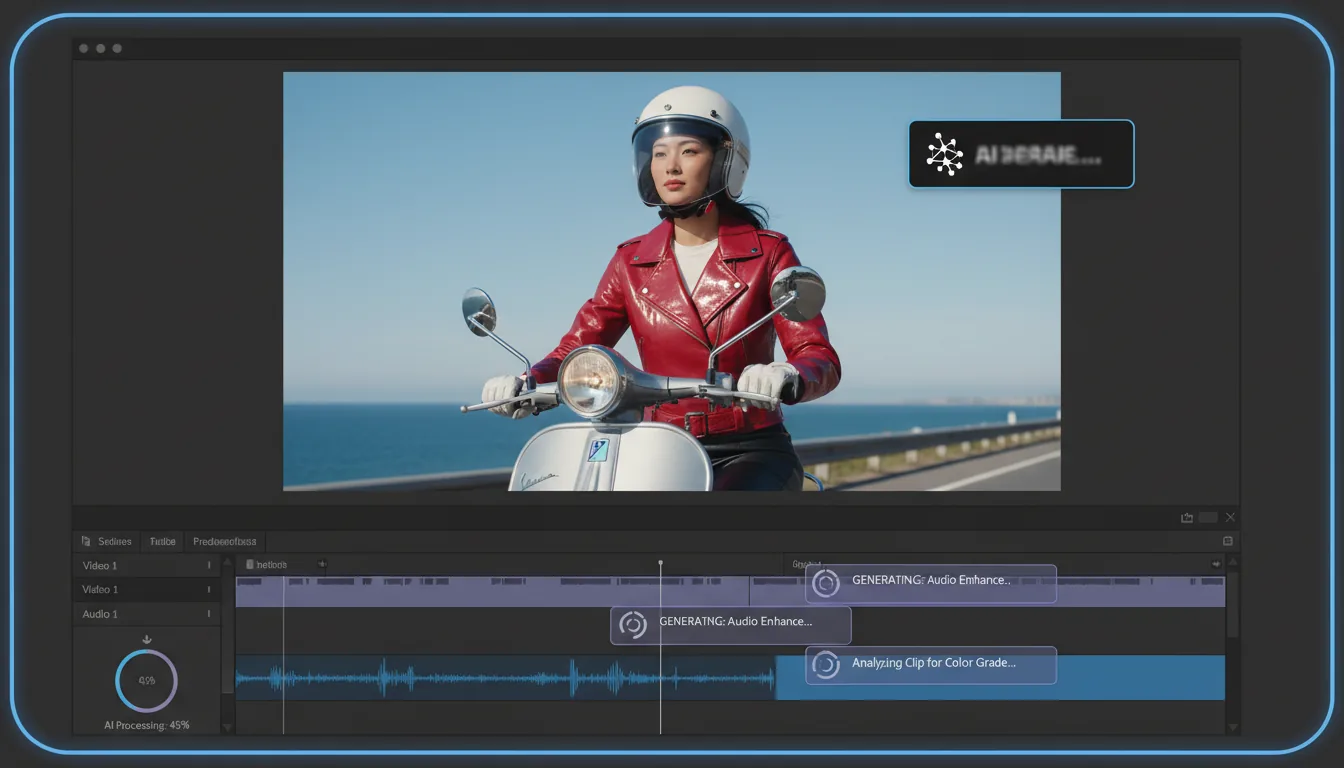
Generative Extend Is Shockingly Practical
The idea sounds wild. Extend a clip beyond its original length using AI. Extra frames. Extra ambient audio. No reshoot.
I was skeptical. Then I tried it on a shot that ended just a second too early. And it worked. Not perfectly. But clean enough that no one noticed.
This is not a tool for creating new moments. It’s a tool for saving edits that are almost right. Holding a reaction a beat longer. Letting a wide shot breathe before a cut. Fixing timing without rebuilding structure.
If you rely on it constantly, something’s wrong upstream. But as a safety net, it’s genuinely useful.
Visual Search Feels Like Cheating When It Works
Being able to search your footage by describing what’s in it sounds like marketing fluff. Until you’re deep in a project with hundreds of clips and you vaguely remember “that shot with the laptop and the coffee.”
When it works, it feels unreal. Type a description. Get usable results. No scrubbing. No guessing filenames.
It’s not flawless. Complex scenes can confuse it. But for broad searches, especially in b-roll heavy projects, it saves real time.
This is one of those features that gets better as Adobe keeps training it. Worth using now. Worth trusting more later.
AI Captions And Translation Are Good Enough To Stop Procrastinating
Auto captions used to be something you avoided until the very end. Now they’re fast, accurate enough, and easy to tweak.
Are they perfect? No. Names get messed up. Industry terms still need review. But they’re good enough to remove the mental block that stops people from adding captions at all.
For social content, that matters. A lot.
Where The Hype Still Outpaces Reality
Some AI tools still feel like experiments. They work great in controlled demos and fall apart in messy real projects.
That’s okay. The key is not treating AI as a replacement for editing. It’s an assistant. A time saver. A way to remove boring steps so you can focus on decisions that matter.
Used that way, these tools actually help. Used blindly, they just add frustration.
Common Editing Mistakes These Features Fix
A lot of Premiere frustration isn’t about bugs or crashes. It’s about habits. Small ones, repeated until everything feels heavier than it should.
One big mistake is doing everything manually because it feels safer. Dragging clips, deleting gaps by hand, rebuilding edits after revisions. It gives the illusion of control, but it quietly slows you down. Tools like Replace Clip, ripple trims, and adjustment layers exist to protect structure while you experiment. If revisions feel stressful, it’s usually a workflow problem, not a creative one.
Another common issue is leaving audio until the very end. I used to do this. It made pacing feel off even when the visuals were fine. Bad audio throws off your sense of timing and makes you second-guess good cuts. Features like Essential Sound and automatic ducking let you get audio to “good enough” early, which makes the whole edit feel smoother.
There’s also the habit of fighting the timeline instead of configuring it. Default settings aren’t sacred. Timeline behavior, selection tools, and panel layouts are just starting points. A few small changes can make Premiere feel completely different.
And finally, overcorrecting instead of batching. Fixing color or volume clip by clip is where fatigue and inconsistency creep in. Adjustment layers and presets exist so you can make one decision and apply it broadly, then refine if needed.
Most editing pain comes from repeating yourself without realizing it. Premiere’s so-called secret features aren’t flashy. They’re quiet fixes for problems you’ve probably accepted as normal.
Real-World Use Cases
This is where all of this stops being theoretical.
On real projects, you’re not trying to be clever. You’re trying to finish on time without hating the process.
Long-form interviews and podcasts get heavy fast. Lots of dialogue, constant trimming, tiny pacing changes that add up. Scene Edit Detection helps when you’re handed flattened files. Essential Sound makes dialogue usable early so pacing decisions actually make sense. Ripple trims keep timelines tight while you cut filler and dead air. Together, they turn long edits into something manageable.
Social media work benefits even more. Auto Reframe gets horizontal footage into vertical formats quickly, not perfectly, but close enough that you’re adjusting instead of rebuilding. Add adjustment layers and reusable graphics, and making multiple versions stops feeling like punishment.
Client revisions are where good workflows really show their value. Swapping clips without breaking timing, replacing b-roll while keeping effects, updating color or audio globally. Revisions become boring. And boring is good. It means the timeline isn’t fragile anymore.
Tight deadlines bring it all together. When a shot ends a beat too early or pacing is just off, tools like time remapping and Generative Extend help polish what’s already working instead of forcing a rebuild.
Across all of these scenarios, the pattern is the same. The more complex the project, the more these features matter. Not because they’re flashy, but because they remove friction when things get messy.
If you’re deciding between upgrading your local machine or going cloud-based, our PC build and computer buying guide for Premiere Pro breaks down what actually matters for editing performance.
When Your Hardware Becomes the Limiting Factor
Here’s the part most Premiere tutorials skip. At a certain point, Premiere isn’t slow because you’re doing something wrong. It’s slow because your machine is done negotiating.
Once you start using these features consistently, the load adds up. AI tools need headroom. Long timelines eat RAM. Color scopes, adjustment layers, and stacked effects pile on. Playback stutters, scrubbing lags, and turning on one more feature feels risky. That’s usually when people blame Premiere, and I think that’s misplaced.
This is where Vagon Cloud Computer actually makes sense in a very practical way. You’re running Premiere on a high-performance remote machine instead of whatever hardware is on your desk. More GPU headroom, more memory, fewer compromises.
The real benefit isn’t just faster exports. It’s that you stop editing defensively. You don’t avoid features because they might crash your system, flatten timelines early, or simplify edits just to keep things responsive. You just work.
It also changes where you can work from. Older laptops and lightweight setups suddenly feel capable again because the heavy lifting isn’t happening locally. This isn’t mandatory for everyone, but if you’ve ever thought, “I’d use this feature, but my computer can’t handle it,” that’s when this kind of setup earns its place.
Knowing Premiere’s hidden features matters. Having the performance to actually use them without friction matters just as much.
A lot of this slowdown comes down to GPU limitations, especially once you start stacking effects and using AI tools. If you want a deeper breakdown, we’ve already covered how to choose the best GPU for Premiere Pro in detail.
This also opens up more flexible workflows, including setups where Premiere Pro is accessed from devices like tablets. We’ve explored how editors use Premiere Pro on an iPad when local hardware isn’t enough.
Final Thoughts
I think a lot of people misunderstand why Premiere Pro feels hard sometimes. It’s not missing tools. Most editors just never get far enough into their workflow to see what’s already there. They stick to the obvious features, hit friction, and assume that’s normal.
Once you start using Premiere the way it was designed to be used, something shifts. You stop dragging everything manually, stop rebuilding edits, and revisions stop feeling risky. Speed comes from reducing friction, not rushing.
The same goes for performance. When hardware limits your choices, you edit conservatively. When those limits disappear, you experiment more, push timing, and try features you would have skipped before. That’s where real improvement happens.
Premiere’s so-called secret features aren’t secrets. They’re just quiet and easy to miss. But once you find them, they change how editing feels day to day. And that’s the point. Not knowing more buttons, but knowing how to work in a way that lets you stay creative longer without burning out.
And if Premiere still doesn’t fit your workflow, that’s okay too. We’ve also compared the best Premiere Pro alternatives for editors who want a different approach.
FAQs
1. Are these features only useful for advanced editors?
Not really. Some of them sound advanced, but most are about removing friction, not adding complexity. Even beginners benefit from things like ripple trims, Essential Sound, or adjustment layers. In fact, learning these early can save you from building bad habits that are hard to unlearn later.
2. Will using these features slow down my system?
Some of them can, yes. AI tools, color scopes, and long timelines put real pressure on your hardware. That’s not a Premiere flaw, it’s just the cost of more powerful features. If your machine is already struggling, you might notice lag. That’s usually a performance issue, not a workflow one.
3. Do I need plugins to get this kind of speed in Premiere Pro?
In my experience, no. Plugins can help in specific cases, but most day-to-day speed gains come from using Premiere’s built-in tools properly. A lot of people buy plugins to fix problems the software already solved, just quietly.
4. Is Auto Reframe or AI editing “cheating”?
I don’t think so. These tools don’t make creative decisions for you. They handle repetitive or technical steps so you can focus on timing, story, and feel. You still have to review and adjust the results. Think of them as assistants, not replacements.
5. When does a cloud computer setup actually make sense?
Usually when you start avoiding features because your hardware can’t handle them. If you’re flattening timelines early, skipping AI tools, or dreading exports, that’s a sign. If your current setup feels smooth and responsive, you’re probably fine where you are.
6. Do these features apply to short-form content too?
Absolutely. Social and short-form edits often benefit the most. Auto Reframe, captions, reusable graphics, and fast revisions matter more when you’re producing a lot of content quickly. Small time savings add up fast in those workflows.
I’ve been using Premiere Pro for years, and I’m still regularly annoyed by how much time I wasted early on doing things the hard way. Not because Premiere is bad. Because it hides some of its best features in plain sight and never really tells you they exist.
Quick question. How many hours have you burned dragging clips around, fixing the same audio issue over and over, or rebuilding edits that Premiere could have handled for you automatically? If the answer is “too many,” you’re not alone. Most editors never move past the obvious tools, and Premiere quietly lets that happen.
The funny part is this. The features that actually make Premiere fast, stable, and even enjoyable aren’t advanced or locked behind plugins. They’re already there. You just weren’t shown where to look.
Hidden Workflow Boosters Editors Rarely Use
Let’s start with the stuff that doesn’t look impressive on paper. No cinematic buzz. No flashy buttons. Just small switches that quietly change how fast you move through a timeline.
Timeline Scrolling Is Probably Working Against You
By default, Premiere scrolls the timeline in a way that feels… fine. Until you realize there are options. Smooth Scroll. Page Scroll. No Scroll at all.
I’ve noticed most editors never touch this setting. They just accept the default and adapt their hands around it. That’s backwards.
If you do a lot of trimming while playing back, smooth scrolling keeps your eyes locked on the playhead. If you’re precise and cut-heavy, no scroll keeps everything stable so nothing jumps under your cursor. It sounds minor. It’s not. This alone can make long sessions feel less tiring.
And yes, it takes about thirty seconds to test all three and pick one. Worth it.
Swapping Clips Without Wrecking Your Timeline
Here’s one I wish someone had shown me years ago.
You don’t have to lift, drag, zoom, re-align, and pray when swapping two clips. Hold the modifier key and drag one clip onto another. Premiere just switches their positions. No ripple chaos. No gaps. No re-trimming.
This is especially useful when you’re experimenting with pacing. Trying two reaction shots. Testing different b-roll beats. It keeps you in decision mode instead of cleanup mode.
Editing should feel like thinking, not housekeeping.
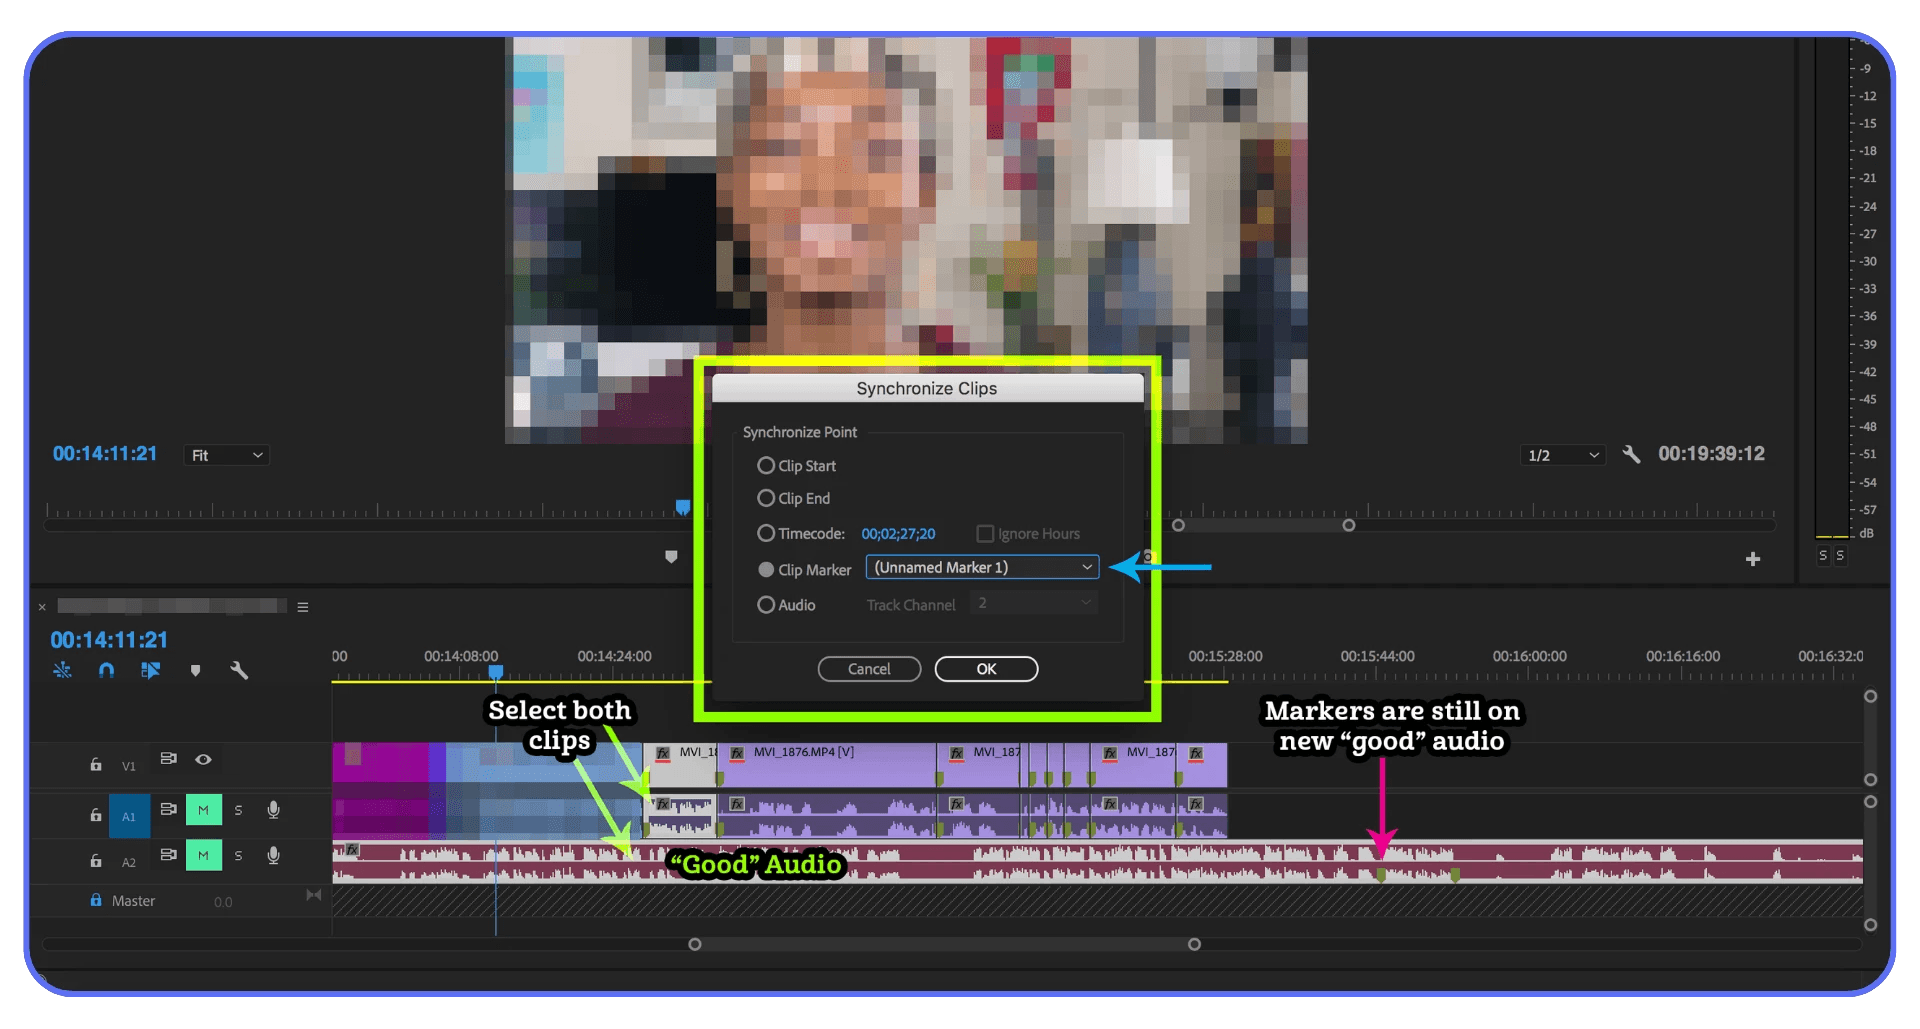
Replacing Clips Without Losing Your Work
There’s a built-in replace function that keeps timing, effects, and edits intact while swapping the underlying clip. This is huge when you’re:
Replacing proxies with high-res footage
Updating b-roll after client feedback
Fixing a bad take without rebuilding the edit
A lot of editors still delete the old clip and drag in the new one manually. I’ve done it too. It works. It’s also a waste of time and focus.
Once you get used to replacing instead of rebuilding, revisions stop feeling scary.
When These Tricks Actually Matter
If you’re cutting a 30-second meme once a week, sure, none of this is life-changing.
But if you’re editing long interviews, YouTube videos, social cuts, or client projects with revisions, these small workflow boosters stack up fast. Ten seconds saved here. Twenty there. Multiply that across a week. Or a year.
That’s the real secret with Premiere. Speed doesn’t come from working faster. It comes from removing friction you didn’t realize you were tolerating.
This pairs especially well with proxies. If you’re not already using them, here’s a full walkthrough on how to create video proxies in Premiere Pro.
Productivity Features That Don’t Look Powerful
Some Premiere features suffer from a branding problem. They don’t look exciting. They don’t promise cinematic results. So people ignore them. Big mistake.
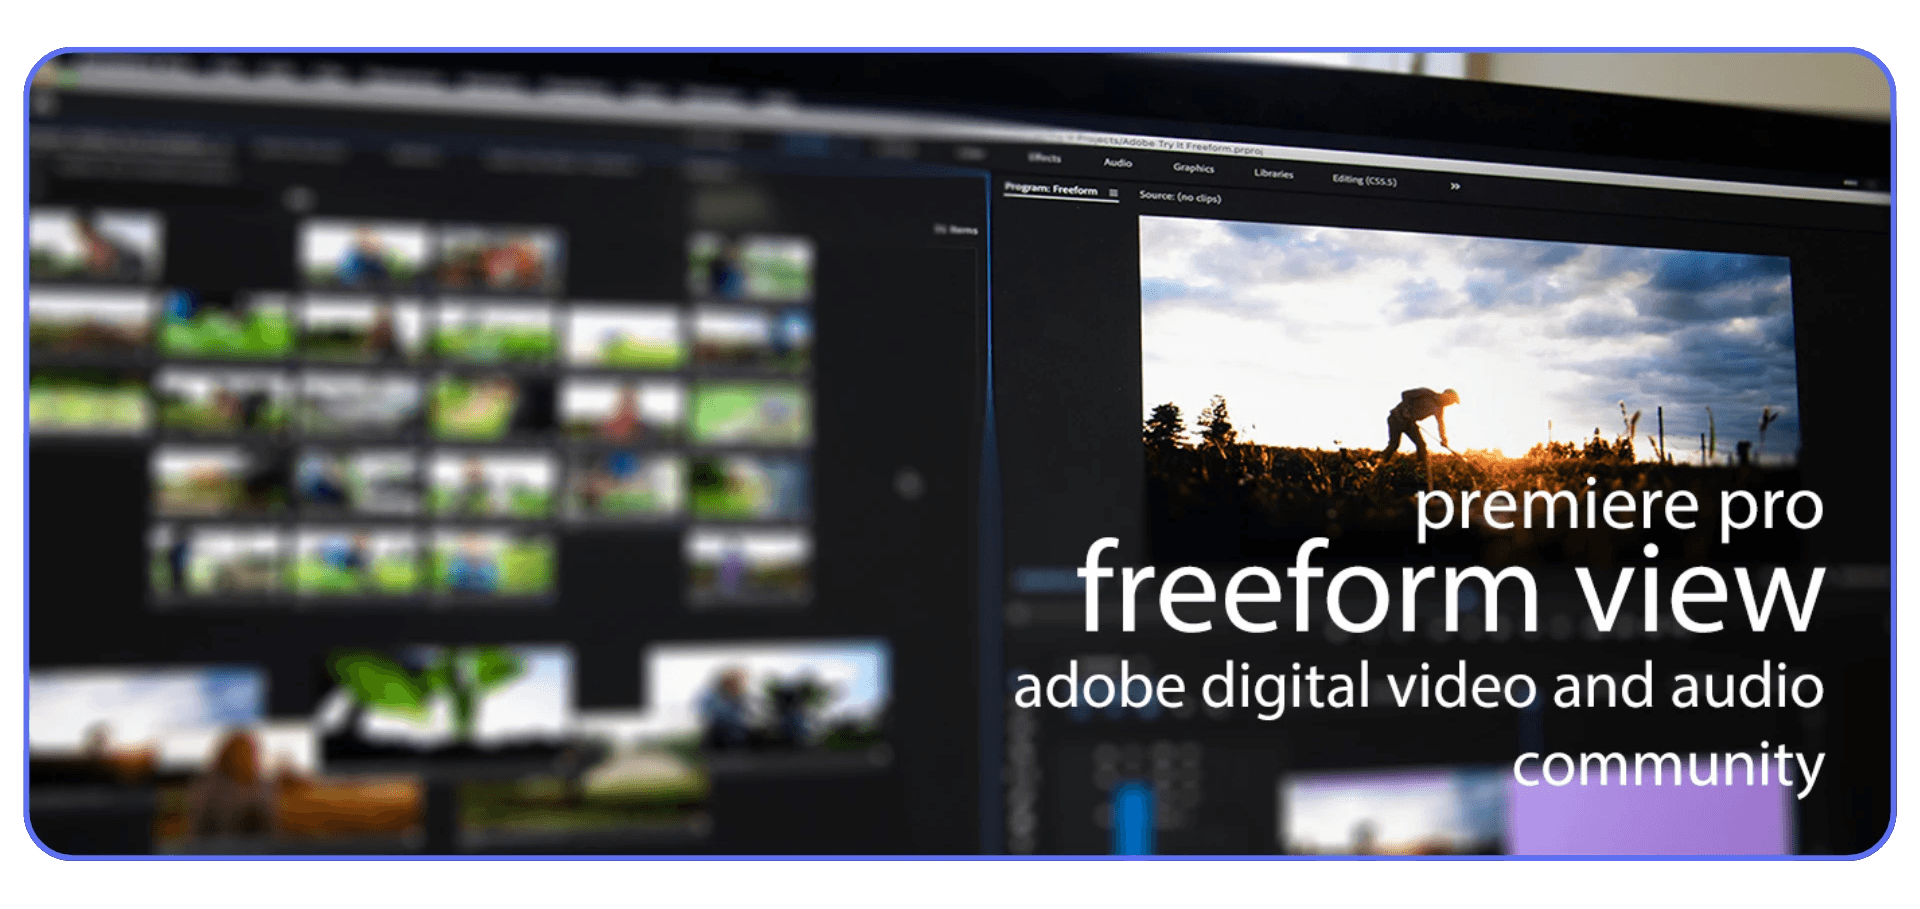
Freeform View Is Not Just For Organizing Clips
The first time I saw Freeform View, I thought, okay, neat. Then I went back to list view and forgot about it for months.
That was dumb.
Freeform View lets you spread clips out visually inside the Project panel. You can group shots by vibe, scene, or energy. Wide shots over here. Closeups over there. Sketchy b-roll in a messy corner you promise to clean up later.
If you’re a visual thinker, this clicks immediately. It feels closer to storyboarding than file management. And when you’re building structure before cutting, it’s shockingly useful.
I’ve noticed it’s especially helpful on documentary or interview-heavy projects where the story isn’t locked yet. You’re not hunting filenames. You’re recognizing shots.
Scene Edit Detection Saves You From Other People’s Timelines
Ever get handed a single exported video and asked to “make some changes”?
Scene Edit Detection is Premiere quietly saying, fine, I’ll help.
It analyzes the clip and automatically cuts it at edit points. Is it perfect? No. Is it fast enough to save you an hour of manual slicing? Absolutely.
This feature shines when you’re repurposing content. Podcasts. Webinars. Old brand videos. Anything that already went through an edit once and now needs a second life.
If you work with agencies or clients who love sending flattened files, this tool pays for itself in one afternoon.
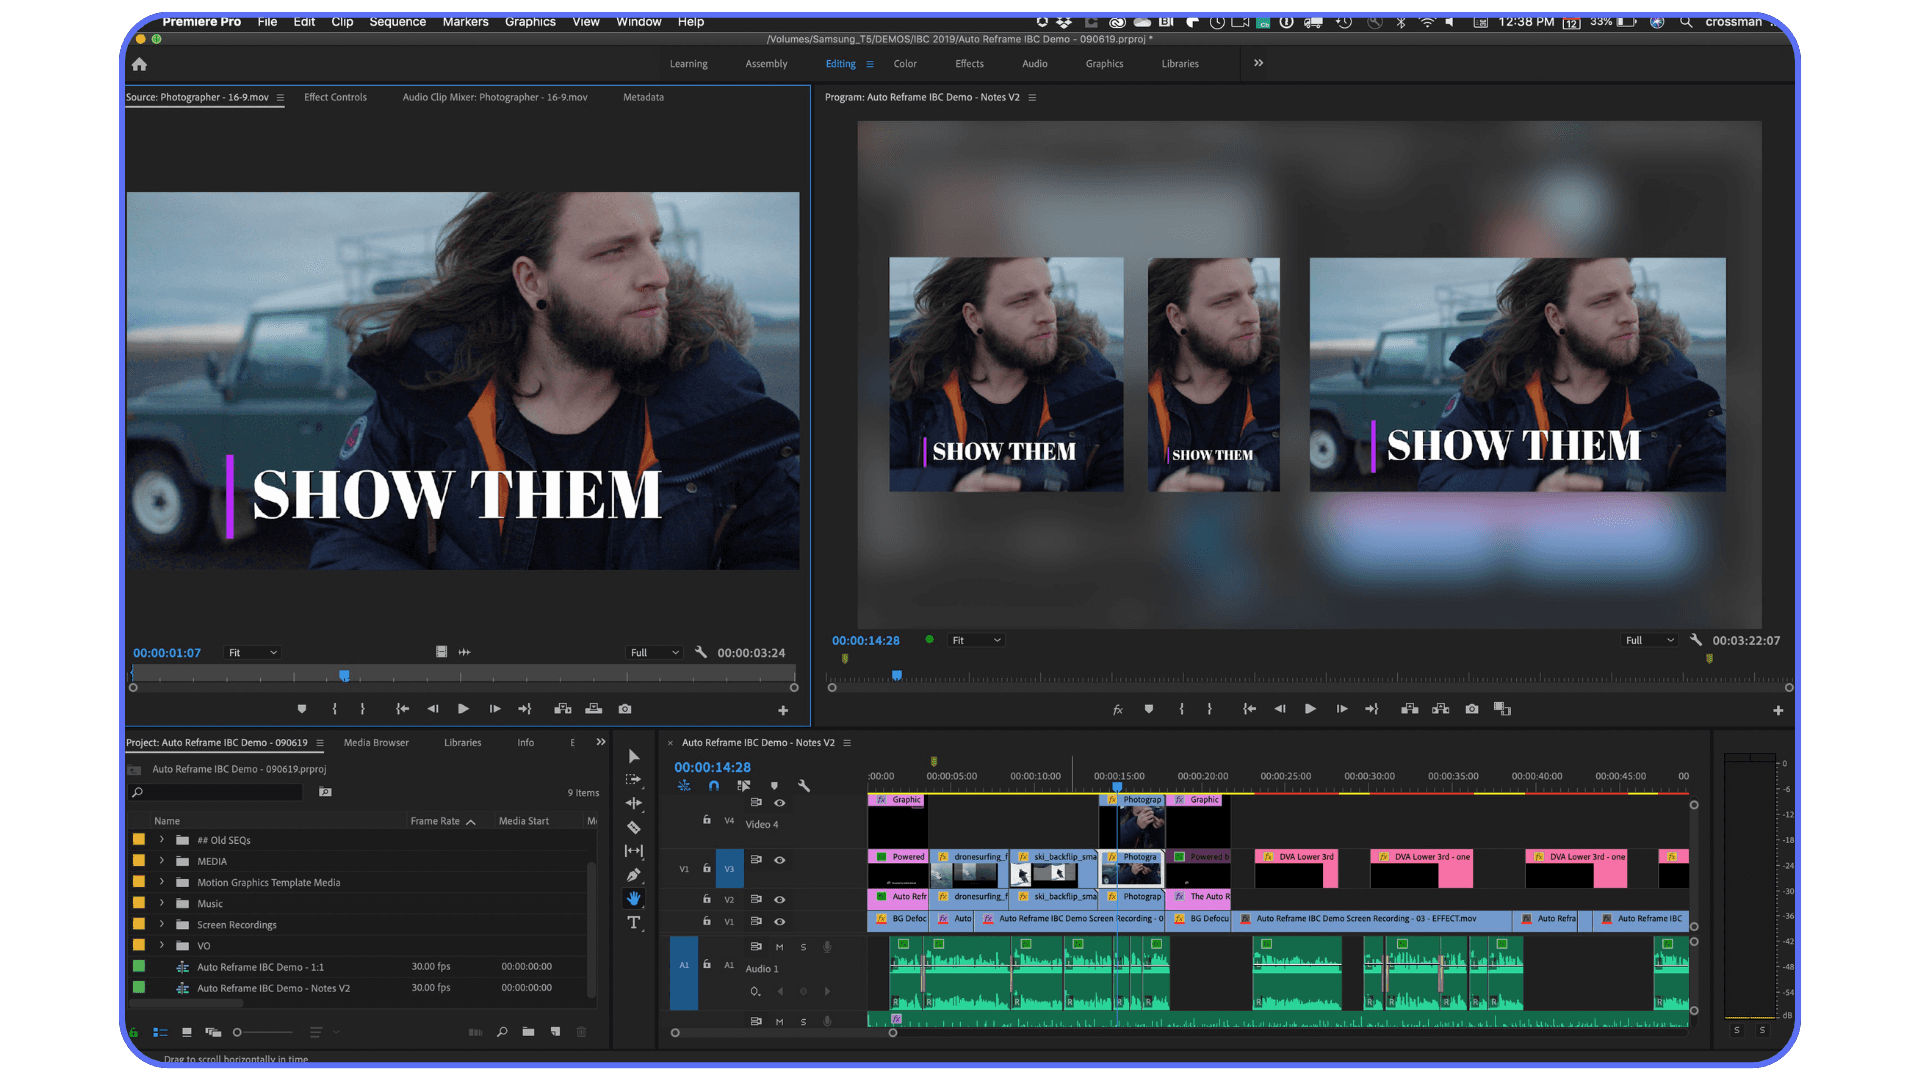
Auto Reframe Is Better Than It Gets Credit For
Auto Reframe gets dismissed a lot. Some editors try it once, see an awkward crop, and write it off.
That’s fair. It’s not magic.
But if you’re adapting horizontal footage for vertical or square formats, it’s still one of the fastest starting points you have. Especially for talking heads, interviews, and basic movement.
The trick is not to treat it as final. Treat it as a rough pass that gets you 80 percent there. Tweak the framing where it misses. You’ll still finish way faster than starting from scratch.
For social-heavy workflows, this saves real time. Not theoretical time. Actual deadline-saving time.
The Quiet Advantage Of These Tools
None of these features scream power user. That’s why they get skipped.
But they all do the same thing. They reduce cognitive load. Less searching. Less rebuilding. Fewer tiny decisions that drain energy over a long edit.
Premiere gets easier when you stop forcing everything through the timeline and let the software help you organize, detect, and adapt.
Panels Most Editors Open Once and Forget
Premiere has a habit of hiding serious power behind panels that look… boring. Flat UI. Sliders. Buttons that don’t scream “this will save you hours.” So people click them once, shrug, and go back to doing things manually.
I’ve been there.
Essential Graphics Is Way More Than Titles
Most editors treat Essential Graphics as the place where titles live. Add text. Change font. Done.
That’s barely scratching the surface.
You can build reusable motion graphics templates here. Lower thirds, animated callouts, branded transitions. Stuff you’d normally think requires After Effects. And once you build them, you can reuse them across projects without rebuilding anything.
This matters a lot if you work with clients or recurring formats. You stop redesigning. You start dropping in assets that already behave.
Is it as powerful as After Effects? No. And that’s fine. The point is speed, not perfection.
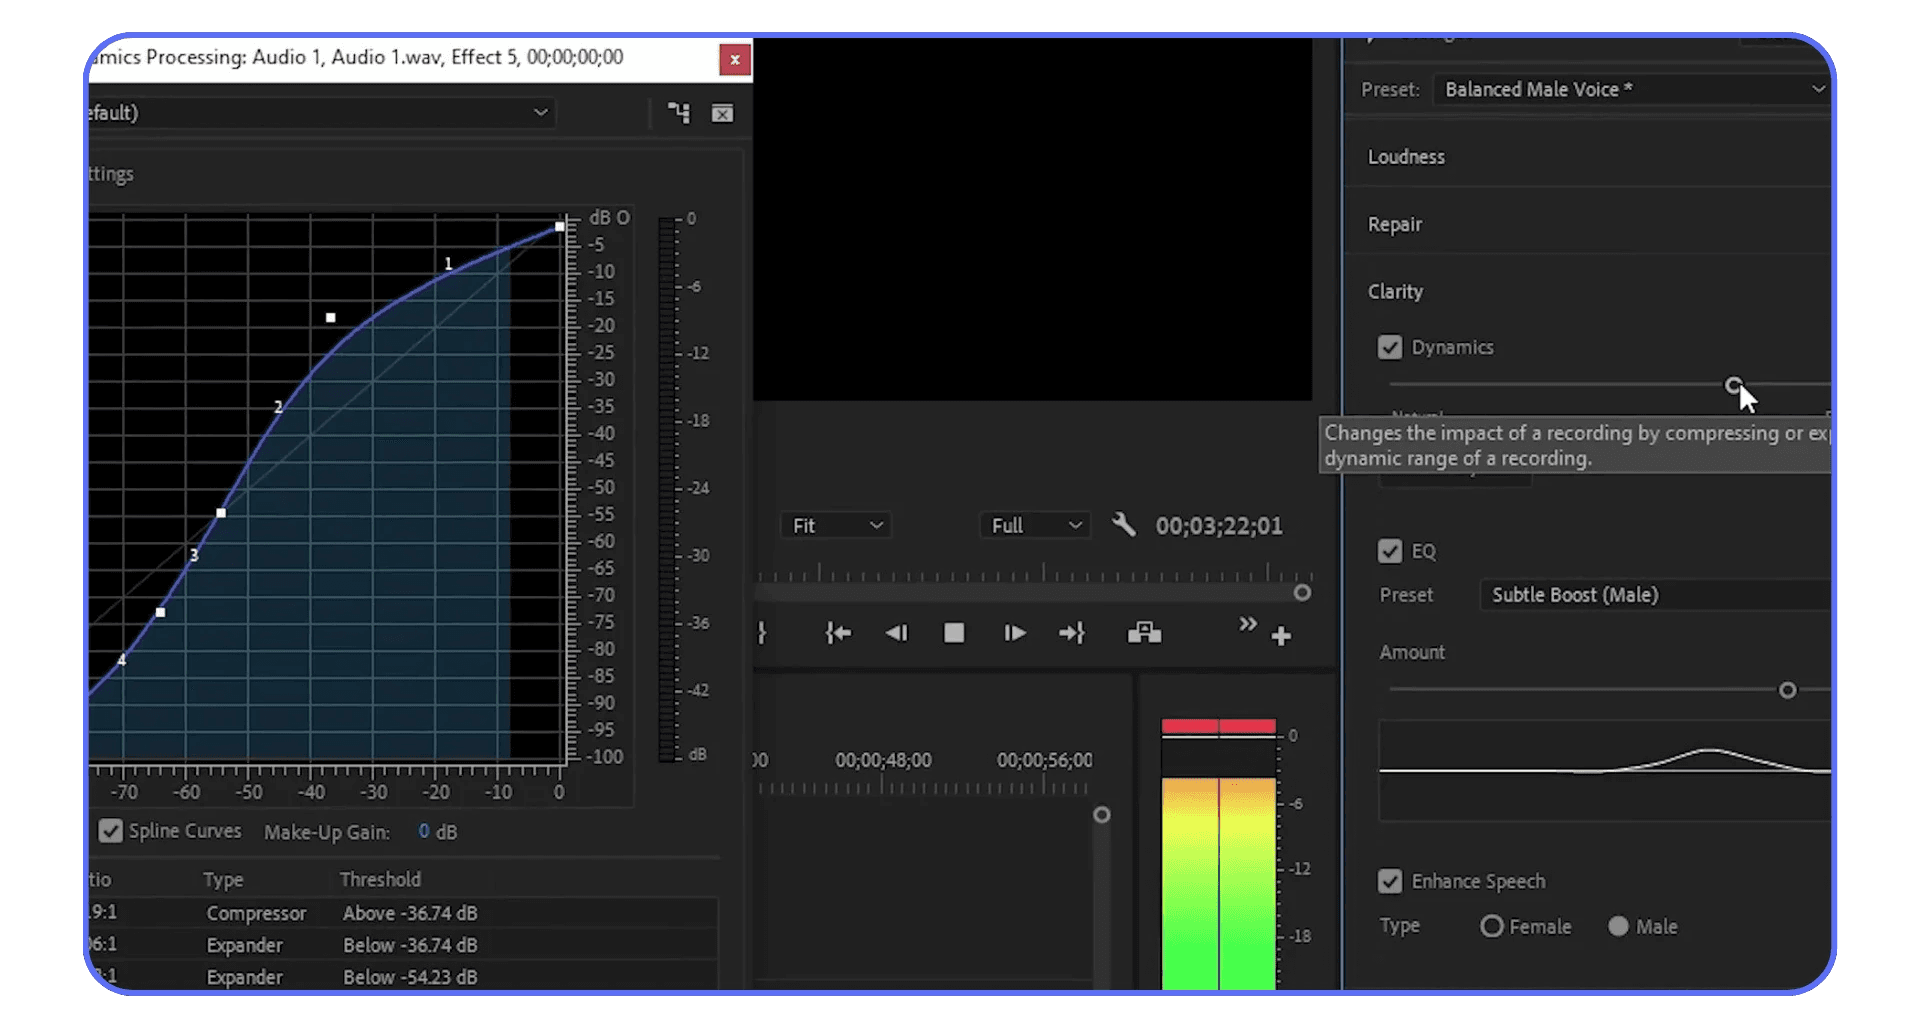
Essential Sound Fixes Audio Earlier Than You Think You Should
I used to leave audio for the end. Big mistake. That habit alone made edits feel heavier than they needed to be.
Essential Sound lets you tag clips as Dialogue, Music, or Ambience and apply smart presets instantly. Noise reduction. Ducking. Loudness balancing. All without touching keyframes.
Is it perfect? No. You’ll still hear artifacts if you push it too far. But for 80 percent of projects, it gets you clean, usable audio fast.
And here’s the underrated part. When audio sounds decent early, editing feels easier. You make better pacing decisions. You stop second-guessing cuts because the sound isn’t fighting you.
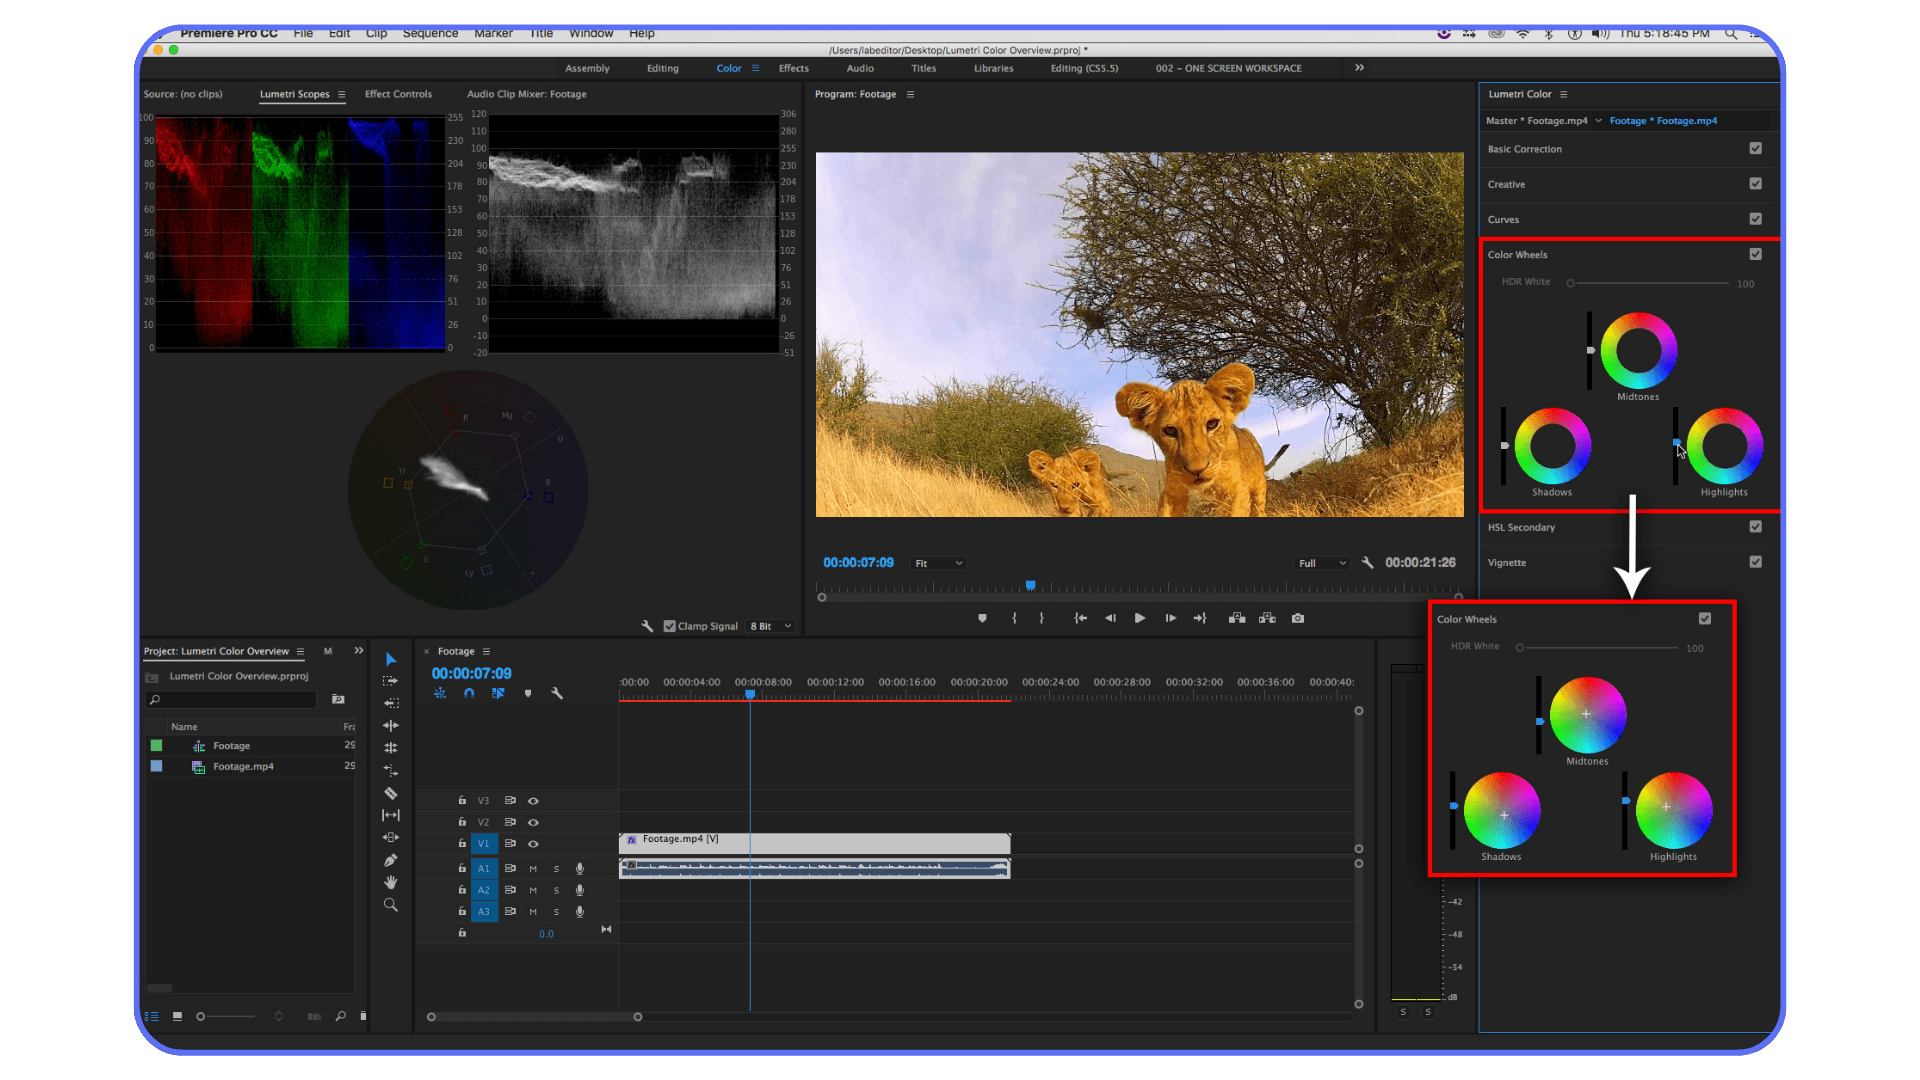
Lumetri Color Works Best When You Stop Grading Clip By Clip
A lot of editors use Lumetri like a filter panel. Adjust exposure. Fix white balance. Move on.
Where it actually shines is consistency.
Using adjustment layers, presets, and scopes lets you apply one look across dozens of clips without repeating yourself. It’s not about making things flashy. It’s about avoiding that slow drift where shots start to feel mismatched and you can’t quite tell why.
Once you stop grading each clip in isolation, color becomes faster and less emotional. Which is exactly what you want at the end of a long edit.
The Common Thread
These panels don’t replace skill. They replace repetition.
If you find yourself doing the same fix over and over, Premiere probably already has a panel designed to handle it in one place. The trick is trusting those tools early instead of saving them for cleanup.
Performance issues don’t just show up during editing. Exports are often where things really slow down, which is why we also put together a guide on reducing rendering times in Premiere Pro.
Keyboard Shortcuts That Actually Matter
Let’s get this out of the way. You do not need to memorize every shortcut in Premiere. That’s a great way to feel productive and change nothing.
What actually matters are the shortcuts that remove friction from decisions you make constantly.
Select Everything Under The Playhead
This one is criminally underrated.
With a single key, you can select all clips under the playhead across tracks. No lassoing. No shift-click gymnastics. Just instant control.
This is perfect for moving sections, deleting moments, or applying quick changes without breaking your flow. Once you use it a few times, reaching for the mouse starts to feel silly.
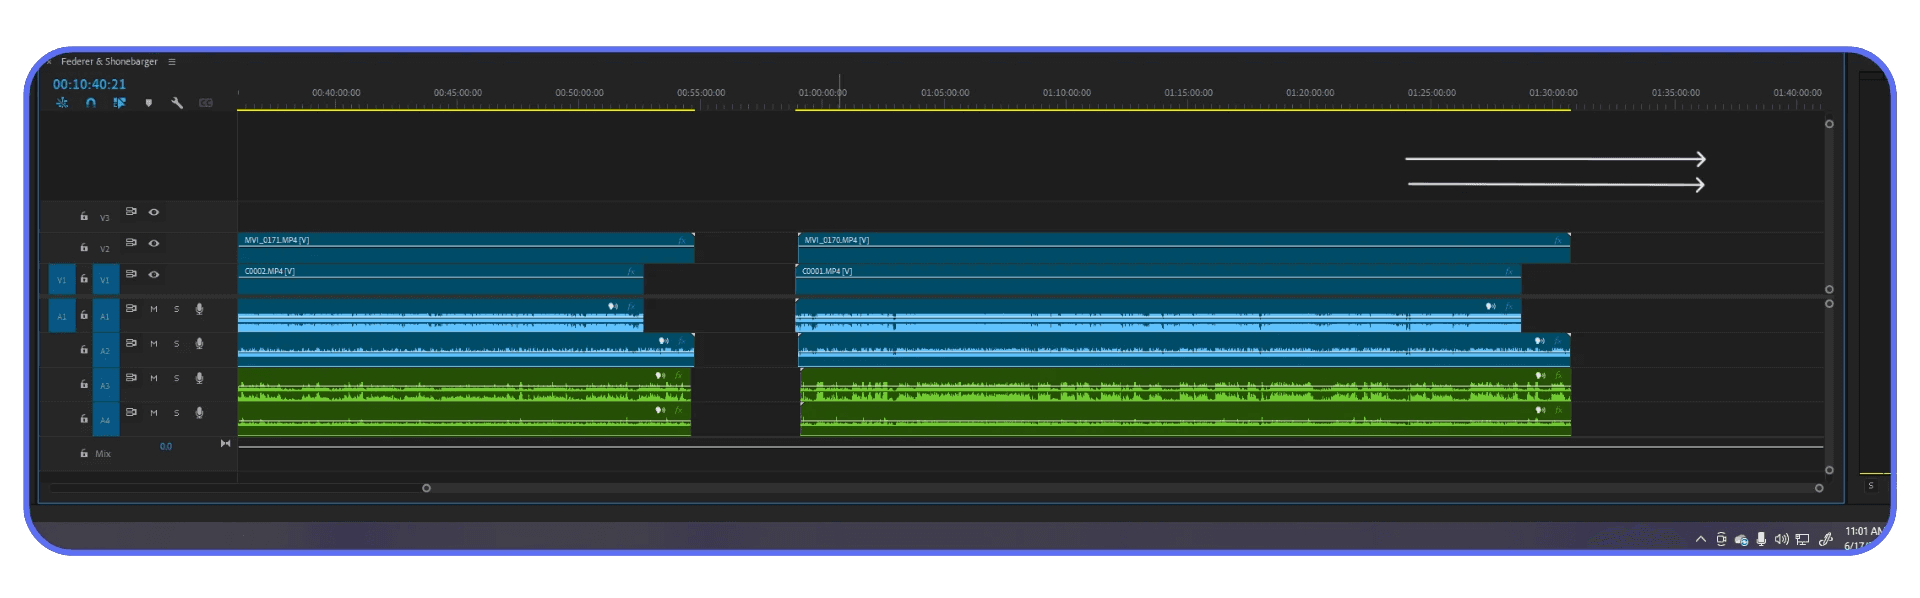
Ripple Trims That Clean Up After You
Ripple trimming forward and backward is one of those things that sounds technical until you try it.
Instead of cutting, deleting, and closing gaps manually, you trim and everything shifts automatically. Your timeline stays tight. Your focus stays on the edit.
If you do dialogue-heavy work, this alone can cut your editing time dramatically. It keeps momentum alive, which is half the battle.
One Key To Rule Your Panels
There’s a shortcut that maximizes whatever panel your cursor is over. Timeline. Program monitor. Project panel. Full screen, instantly.
This doesn’t sound like a big deal until you realize how often you’re resizing panels manually or squinting at tiny waveforms. One key. Full focus. Then back again.
It’s a small quality-of-life improvement that adds up over long sessions.
Why Fewer Shortcuts Win
I think five shortcuts used constantly beat fifty used rarely.
The goal isn’t to become a keyboard wizard. It’s to stop interrupting your thinking. Every time you pause to search for a tool, your edit slows down.
Shortcuts aren’t about speed. They’re about staying in the zone.
Advanced Editing Tools Hiding in Plain Sight
These are the features people nod at in tutorials and then quietly never touch again. Usually because they feel “advanced.” Or risky. Or like something you’ll figure out later.
Later rarely comes.
Time Remapping Is More Than Speed Ramps
Most editors use speed changes in one of two ways. Slow motion or fast forward. End of story.
Time remapping lets you control speed inside a clip with actual intention. Gradual slowdowns. Sudden punches. Holding a moment for emphasis without cutting away.
Used sparingly, this adds energy without screaming effect. Used badly, it looks like a YouTube montage from 2014. Taste matters here.
Where it shines is storytelling. Emphasizing reactions. Letting a beat breathe. Creating rhythm without adding more cuts.
Audio Ducking That Doesn’t Fight You
Manually keyframing music under dialogue is one of those tasks that feels productive but drains your soul.
Premiere’s audio ducking does this automatically. It listens for dialogue and lowers music where needed. You can adjust sensitivity, fade length, and overall balance without touching a single keyframe.
Is it perfect? No. But it’s consistent. And consistency beats precision when you’re on a deadline.
For podcasts, interviews, and talking-head videos, this feature alone can save you an hour per project.
Adjustment Layers Save You From Yourself
If you’re applying the same color correction, blur, or effect to multiple clips one by one, stop.
Adjustment layers let you apply effects once and affect everything underneath. Change your mind later? One tweak updates the entire section.
This isn’t just faster. It’s safer. You avoid tiny inconsistencies that creep in when edits get long and fatigue sets in.
When These Tools Are Too Much
Not every project needs this level of control. Simple cuts are still valid. Overusing advanced tools can slow you down if you’re not careful.
The trick is knowing they exist so you can reach for them when the edit asks for it. Not forcing them into everything.
AI Features That Are Genuinely Useful
Adobe has been talking about AI for years now. Some of it felt like future-speak. Some of it felt half baked. Lately though, a few tools have crossed the line from “interesting demo” to “yeah, I’d actually use this.”
Still, not all of them deserve your trust. Yet.
Generative Extend Is Shockingly Practical
The idea sounds wild. Extend a clip beyond its original length using AI. Extra frames. Extra ambient audio. No reshoot.
I was skeptical. Then I tried it on a shot that ended just a second too early. And it worked. Not perfectly. But clean enough that no one noticed.
This is not a tool for creating new moments. It’s a tool for saving edits that are almost right. Holding a reaction a beat longer. Letting a wide shot breathe before a cut. Fixing timing without rebuilding structure.
If you rely on it constantly, something’s wrong upstream. But as a safety net, it’s genuinely useful.
Visual Search Feels Like Cheating When It Works
Being able to search your footage by describing what’s in it sounds like marketing fluff. Until you’re deep in a project with hundreds of clips and you vaguely remember “that shot with the laptop and the coffee.”
When it works, it feels unreal. Type a description. Get usable results. No scrubbing. No guessing filenames.
It’s not flawless. Complex scenes can confuse it. But for broad searches, especially in b-roll heavy projects, it saves real time.
This is one of those features that gets better as Adobe keeps training it. Worth using now. Worth trusting more later.
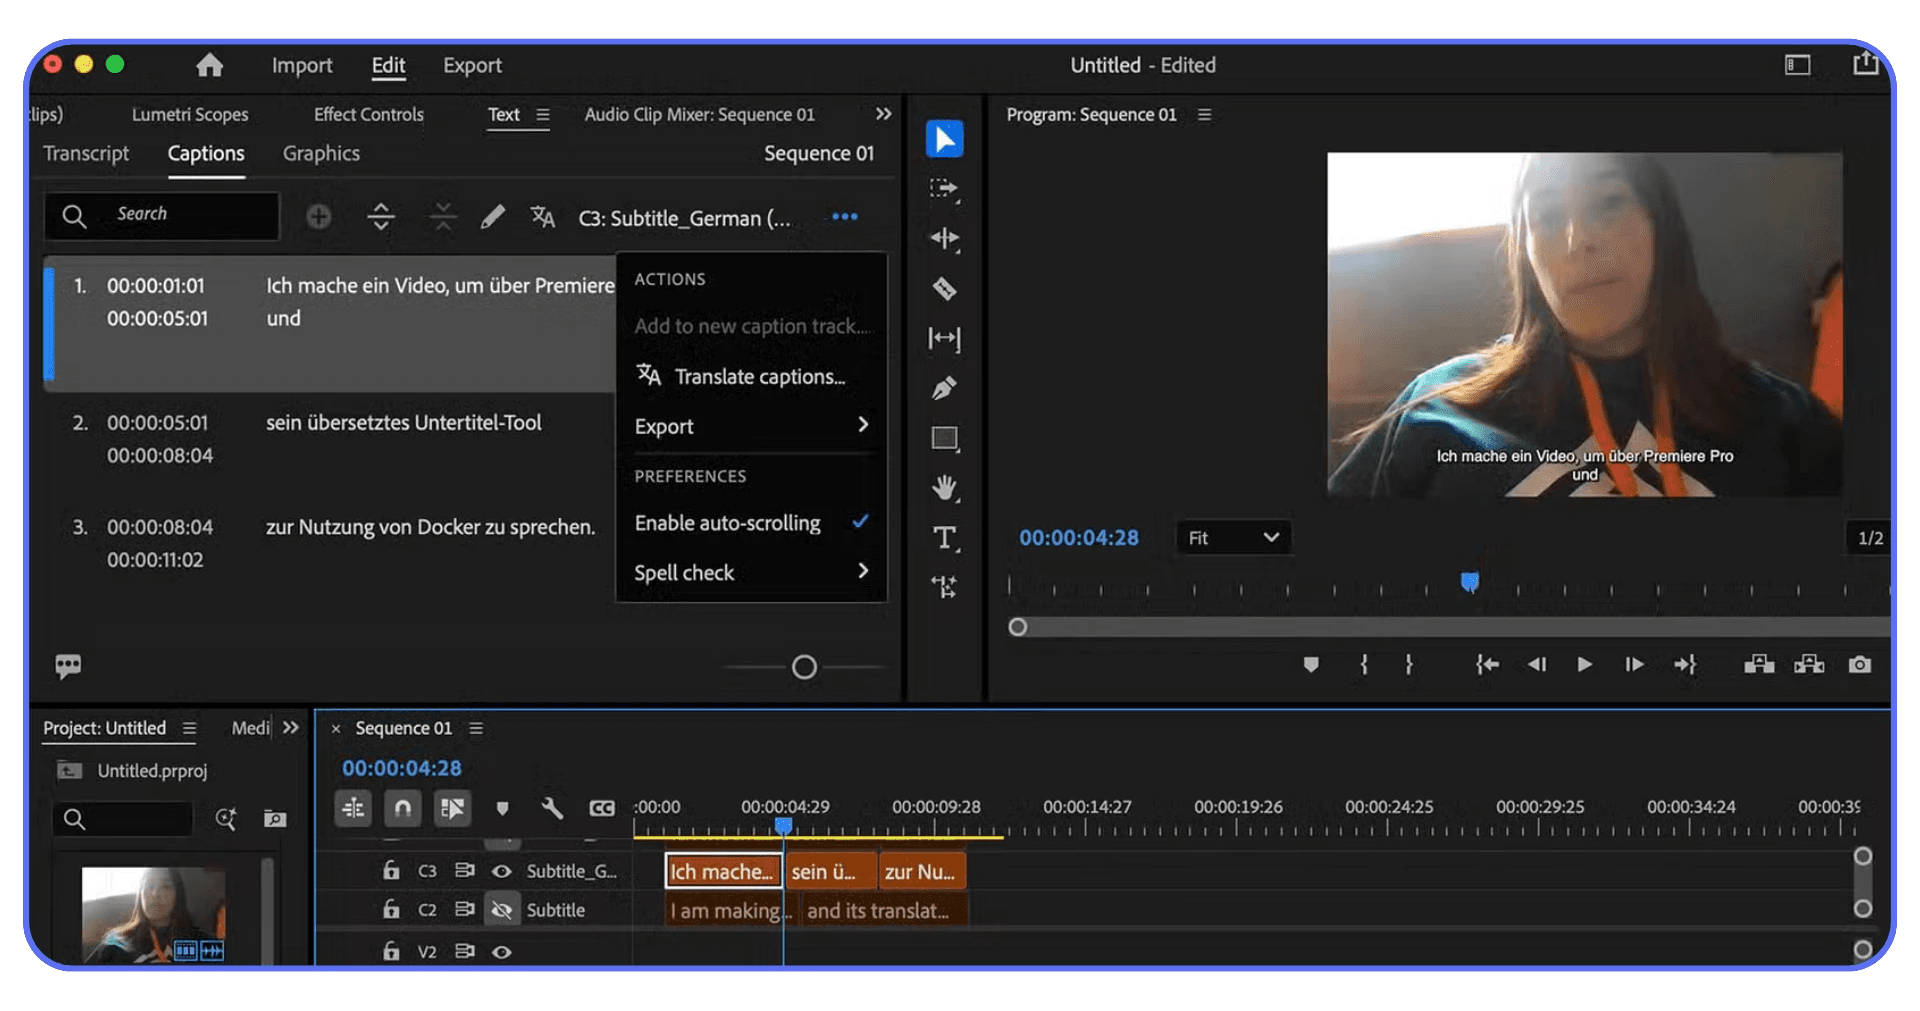
AI Captions And Translation Are Good Enough To Stop Procrastinating
Auto captions used to be something you avoided until the very end. Now they’re fast, accurate enough, and easy to tweak.
Are they perfect? No. Names get messed up. Industry terms still need review. But they’re good enough to remove the mental block that stops people from adding captions at all.
For social content, that matters. A lot.
Where The Hype Still Outpaces Reality
Some AI tools still feel like experiments. They work great in controlled demos and fall apart in messy real projects.
That’s okay. The key is not treating AI as a replacement for editing. It’s an assistant. A time saver. A way to remove boring steps so you can focus on decisions that matter.
Used that way, these tools actually help. Used blindly, they just add frustration.
Common Editing Mistakes These Features Fix
A lot of Premiere frustration isn’t about bugs or crashes. It’s about habits. Small ones, repeated until everything feels heavier than it should.
One big mistake is doing everything manually because it feels safer. Dragging clips, deleting gaps by hand, rebuilding edits after revisions. It gives the illusion of control, but it quietly slows you down. Tools like Replace Clip, ripple trims, and adjustment layers exist to protect structure while you experiment. If revisions feel stressful, it’s usually a workflow problem, not a creative one.
Another common issue is leaving audio until the very end. I used to do this. It made pacing feel off even when the visuals were fine. Bad audio throws off your sense of timing and makes you second-guess good cuts. Features like Essential Sound and automatic ducking let you get audio to “good enough” early, which makes the whole edit feel smoother.
There’s also the habit of fighting the timeline instead of configuring it. Default settings aren’t sacred. Timeline behavior, selection tools, and panel layouts are just starting points. A few small changes can make Premiere feel completely different.
And finally, overcorrecting instead of batching. Fixing color or volume clip by clip is where fatigue and inconsistency creep in. Adjustment layers and presets exist so you can make one decision and apply it broadly, then refine if needed.
Most editing pain comes from repeating yourself without realizing it. Premiere’s so-called secret features aren’t flashy. They’re quiet fixes for problems you’ve probably accepted as normal.
Real-World Use Cases
This is where all of this stops being theoretical.
On real projects, you’re not trying to be clever. You’re trying to finish on time without hating the process.
Long-form interviews and podcasts get heavy fast. Lots of dialogue, constant trimming, tiny pacing changes that add up. Scene Edit Detection helps when you’re handed flattened files. Essential Sound makes dialogue usable early so pacing decisions actually make sense. Ripple trims keep timelines tight while you cut filler and dead air. Together, they turn long edits into something manageable.
Social media work benefits even more. Auto Reframe gets horizontal footage into vertical formats quickly, not perfectly, but close enough that you’re adjusting instead of rebuilding. Add adjustment layers and reusable graphics, and making multiple versions stops feeling like punishment.
Client revisions are where good workflows really show their value. Swapping clips without breaking timing, replacing b-roll while keeping effects, updating color or audio globally. Revisions become boring. And boring is good. It means the timeline isn’t fragile anymore.
Tight deadlines bring it all together. When a shot ends a beat too early or pacing is just off, tools like time remapping and Generative Extend help polish what’s already working instead of forcing a rebuild.
Across all of these scenarios, the pattern is the same. The more complex the project, the more these features matter. Not because they’re flashy, but because they remove friction when things get messy.
If you’re deciding between upgrading your local machine or going cloud-based, our PC build and computer buying guide for Premiere Pro breaks down what actually matters for editing performance.
When Your Hardware Becomes the Limiting Factor
Here’s the part most Premiere tutorials skip. At a certain point, Premiere isn’t slow because you’re doing something wrong. It’s slow because your machine is done negotiating.
Once you start using these features consistently, the load adds up. AI tools need headroom. Long timelines eat RAM. Color scopes, adjustment layers, and stacked effects pile on. Playback stutters, scrubbing lags, and turning on one more feature feels risky. That’s usually when people blame Premiere, and I think that’s misplaced.
This is where Vagon Cloud Computer actually makes sense in a very practical way. You’re running Premiere on a high-performance remote machine instead of whatever hardware is on your desk. More GPU headroom, more memory, fewer compromises.
The real benefit isn’t just faster exports. It’s that you stop editing defensively. You don’t avoid features because they might crash your system, flatten timelines early, or simplify edits just to keep things responsive. You just work.
It also changes where you can work from. Older laptops and lightweight setups suddenly feel capable again because the heavy lifting isn’t happening locally. This isn’t mandatory for everyone, but if you’ve ever thought, “I’d use this feature, but my computer can’t handle it,” that’s when this kind of setup earns its place.
Knowing Premiere’s hidden features matters. Having the performance to actually use them without friction matters just as much.
A lot of this slowdown comes down to GPU limitations, especially once you start stacking effects and using AI tools. If you want a deeper breakdown, we’ve already covered how to choose the best GPU for Premiere Pro in detail.
This also opens up more flexible workflows, including setups where Premiere Pro is accessed from devices like tablets. We’ve explored how editors use Premiere Pro on an iPad when local hardware isn’t enough.
Final Thoughts
I think a lot of people misunderstand why Premiere Pro feels hard sometimes. It’s not missing tools. Most editors just never get far enough into their workflow to see what’s already there. They stick to the obvious features, hit friction, and assume that’s normal.
Once you start using Premiere the way it was designed to be used, something shifts. You stop dragging everything manually, stop rebuilding edits, and revisions stop feeling risky. Speed comes from reducing friction, not rushing.
The same goes for performance. When hardware limits your choices, you edit conservatively. When those limits disappear, you experiment more, push timing, and try features you would have skipped before. That’s where real improvement happens.
Premiere’s so-called secret features aren’t secrets. They’re just quiet and easy to miss. But once you find them, they change how editing feels day to day. And that’s the point. Not knowing more buttons, but knowing how to work in a way that lets you stay creative longer without burning out.
And if Premiere still doesn’t fit your workflow, that’s okay too. We’ve also compared the best Premiere Pro alternatives for editors who want a different approach.
FAQs
1. Are these features only useful for advanced editors?
Not really. Some of them sound advanced, but most are about removing friction, not adding complexity. Even beginners benefit from things like ripple trims, Essential Sound, or adjustment layers. In fact, learning these early can save you from building bad habits that are hard to unlearn later.
2. Will using these features slow down my system?
Some of them can, yes. AI tools, color scopes, and long timelines put real pressure on your hardware. That’s not a Premiere flaw, it’s just the cost of more powerful features. If your machine is already struggling, you might notice lag. That’s usually a performance issue, not a workflow one.
3. Do I need plugins to get this kind of speed in Premiere Pro?
In my experience, no. Plugins can help in specific cases, but most day-to-day speed gains come from using Premiere’s built-in tools properly. A lot of people buy plugins to fix problems the software already solved, just quietly.
4. Is Auto Reframe or AI editing “cheating”?
I don’t think so. These tools don’t make creative decisions for you. They handle repetitive or technical steps so you can focus on timing, story, and feel. You still have to review and adjust the results. Think of them as assistants, not replacements.
5. When does a cloud computer setup actually make sense?
Usually when you start avoiding features because your hardware can’t handle them. If you’re flattening timelines early, skipping AI tools, or dreading exports, that’s a sign. If your current setup feels smooth and responsive, you’re probably fine where you are.
6. Do these features apply to short-form content too?
Absolutely. Social and short-form edits often benefit the most. Auto Reframe, captions, reusable graphics, and fast revisions matter more when you’re producing a lot of content quickly. Small time savings add up fast in those workflows.
Get Beyond Your Computer Performance
Run applications on your cloud computer with the latest generation hardware. No more crashes or lags.

Trial includes 1 hour usage + 7 days of storage.
Summarize with AI

Ready to focus on your creativity?
Vagon gives you the ability to create & render projects, collaborate, and stream applications with the power of the best hardware.

Vagon Blog


Run heavy applications on any device with
your personal computer on the cloud.
San Francisco, California
Solutions
Vagon Teams
Vagon Streams
Use Cases
Resources
Vagon Blog
What Slows Down After Effects Projects?
The First 30 Minutes in Blender 3D: A Practical Workflow Guide
What’s New in Godot 4.7? Key Features, Upgrades, and Workflow Improvements
What Slows Down Blender 3D Projects?
What Slows Down Adobe Photoshop Projects?
The First 30 Minutes in Adobe Photoshop: A Practical Workflow Guide
Before You Start in Adobe Photoshop: A Practical Setup Checklist
What’s New in Unreal Engine 5.8? Key Features and Upgrade Advice
How to Run Windows on an iPad: 4 Best Ways (2026)
Vagon Blog
Run heavy applications on any device with
your personal computer on the cloud.
San Francisco, California
Solutions
Vagon Teams
Vagon Streams
Use Cases
Resources
Vagon Blog