Instant Connection for Pixel Streaming
— New Feature Automated Setup

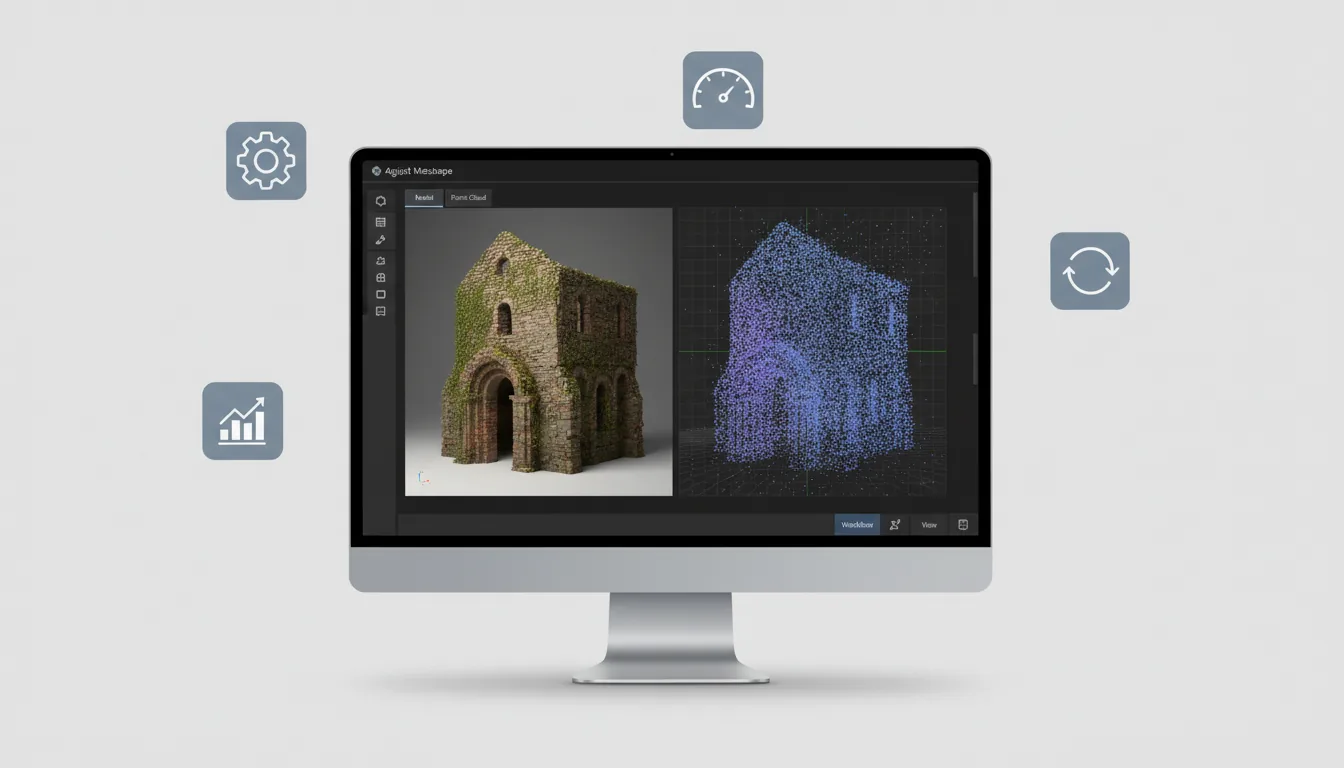
How to Stop Agisoft Metashape from Crashing on Large Datasets
How to Stop Agisoft Metashape from Crashing on Large Datasets
Streams
How to Stop Agisoft Metashape from Crashing on Large Datasets
Table of Contents
Last week I tried to process 1,200 aerial images at 45 megapixels each, and Metashape crashed twice mid-dense cloud build. Not once. Twice.
If you’ve ever sat there watching the progress bar crawl for hours, only to see the program vanish into thin air, you know the kind of frustration I’m talking about. It’s not just wasted time, it’s wasted electricity, overheated GPUs, and the sinking feeling that you might need to start all over again.
The thing is, Metashape isn’t bad software. In fact, it’s brilliant at turning massive piles of photos into accurate 3D reconstructions. But when you push it with datasets that are a little too ambitious, or try to run it on hardware that’s a bit underpowered, it can bring even a beefy workstation to its knees.
So the real question is: how do you keep it from crashing when you’re dealing with thousands of high-res images? And better yet, how do you make it through the workflow without sacrificing quality or your sanity?
That’s what this guide is about.

What “Large Dataset” Really Means in Metashape
People throw around “large dataset” all the time, but in Metashape, it has teeth. Large doesn’t just mean “a lot of photos.” It’s the combination of photo count, resolution, and overlap that makes or breaks a project.
Take this: 500 drone images at 12 MP might run smoothly on a mid-range laptop. But swap those for 1,200 shots at 45 MP and suddenly you’re chewing through hundreds of gigabytes of RAM in the dense cloud step alone.
Agisoft themselves publish memory requirement tables, and they’re not exaggerating. For example, building depth maps at ultra-high quality with 1,000+ 20 MP images can easily spike over 128 GB of RAM. Push it harder and you’ll see people on the forums talking about 256 GB or more just to keep things stable.
And it’s not just memory. Terrain type matters too. A flat desert processes very differently from a dense forest, where every tree canopy adds thousands of tiny points to track. Same with urban datasets, glass, shadows, repeating textures all add complexity.

So when someone says “large dataset,” in my experience it’s usually one of two scenarios:
Aerial surveys: thousands of overlapping images from drones, often 20–50 MP each.
Close-range scans: high-resolution DSLR or mirrorless cameras shooting hundreds of frames around an object or structure.
In both cases, the math is brutal: the bigger the pixels and the higher the overlap, the more Metashape has to hold in memory at once. That’s where crashes sneak in.
Why Metashape Crashes (or Crawls to a Halt)
If Metashape were a person, it wouldn’t quit because it’s lazy. It quits because you’ve asked it to juggle way too many balls in the air at once. Here are the main culprits I’ve run into (and seen others run into) over the years:
#1. RAM limits getting slammed
Dense cloud generation and depth maps are memory monsters. You might think, “I’ve got 32 GB, that should be fine.” Nope. For big datasets, 32 GB isn’t even close. When Metashape hits your RAM ceiling, it doesn’t politely ask for more, it just folds.
#2. GPU or driver issues
Metashape leans on your GPU for certain steps, especially depth map generation. But if you’re running outdated drivers, or if your system insists on using the integrated Intel graphics instead of your NVIDIA/AMD card, you’re in crash territory. I’ve even seen some users have better luck disabling GPU entirely when drivers are unstable.
#3. Disk bottlenecks
Slow HDDs or almost-full SSDs will choke during temporary file writes. Metashape is constantly reading and writing massive chunks of data. If your scratch disk doesn’t have the space (or speed), you’re in for freezes or corrupted runs.
#4. Overkill settings
It’s tempting to set everything to “Ultra High” because hey, more detail, right? The problem is that those settings scale exponentially. Going from “High” to “Ultra High” isn’t a little step, it can mean five times more computation. Just like with rendering in Twinmotion, picking the right visual quality settings is often about balance, not excess. Same with tie points and key points. Unlimited points sound nice, until your computer melts down.
#5. Hardware instability
Overclocked CPU or GPU, overheating during long processing runs, flaky RAM sticks, Metashape will expose any weakness in your setup. It’s like a stress test you didn’t know you signed up for.
That’s usually the recipe: too much data, not enough resources, or something in the hardware/software chain that can’t handle the load.

How to Keep Metashape from Crashing on Large Datasets
Metashape will happily chew through huge projects if you treat it right. Here’s what’s worked for me (and what I’ve seen others swear by):
#1. Be smart about capture
Just because your drone can shoot 50 MP images doesn’t mean you need to use them all. Ask yourself: do you really need sub-centimeter accuracy? For many jobs, downsampling or shooting at lower resolution delivers results that look identical but save hundreds of gigabytes in processing.
#2. Clean your photos before importing
Metashape isn’t great at deciding which blurry or redundant shots to ignore. If you dump everything in, you’re forcing it to waste resources. I always cull: remove duplicates, reject over-exposed shots, and keep only what contributes to coverage.
#3. Use chunks like a pro
This is probably the single best trick. Don’t throw 2,000 images into one block and hope for the best. Split them into chunks, by flight line, area, or logical section. Align all first, then process dense clouds and meshes per chunk. You can merge them later. Overlap is key here so the merge is clean.
#4. Dial back the settings
Ultra High sounds sexy, but I’ve rarely seen a client notice the difference compared to High. Same with key point limits, set a max (like 40,000 per image) instead of leaving it unlimited. For dense clouds, test Medium first. You’ll be surprised how much faster things run with almost no visible drop in quality.
#5. Optimize your hardware use
RAM: Metashape is RAM-hungry. If you’re serious about big datasets, think 128 GB as a baseline. Here’s what to look for when choosing a PC that can handle reality capture workloads.
GPU: Keep drivers updated. If crashes persist, test runs with GPU disabled, it’s counterintuitive, but sometimes CPU-only is more stable.
Storage: Always process on SSD or NVMe. HDDs will make you cry. Also, free up at least 2–3× the dataset size in scratch space.
Thermals: Long processing means long stress. Keep your rig cool. Overclocking is fun until Metashape crashes 12 hours into a run.
#6. Test small before going big
Don’t run the full dataset blind. Take 100–200 images, process them with your intended settings, and see what happens. If it runs clean, scale up. If it crashes, you just saved yourself an entire wasted night.

What to Do When Metashape Crashes Anyway
Even with the best prep, sometimes Metashape just says “nope” and drops out. It happens. The good news? You can usually recover without starting from absolute zero.
#1. Grab the logs
Metashape can write a log file (Preferences → Advanced → Write Log to File). Turn that on. When a crash happens, the log is your detective. You’ll see whether it was a memory spike, GPU fault, or something else entirely. Without it, you’re just guessing.
#2. Check your GPU setup
Half the crash reports I’ve seen come back to GPU weirdness. If you’ve ever dealt with Twinmotion instability, you’ll feel right at home with this guide to fixing Twinmotion crashes. Outdated drivers, unstable CUDA, or the system trying to run on Intel’s integrated graphics instead of your NVIDIA/AMD card. If in doubt, update drivers, or run a test with GPU disabled. Sometimes stability beats speed.
#3. Lower the workload and retry
If it died on Ultra High, try High. If tie points were unlimited, cap them. If you’re building a dense cloud from 2,000 photos, split it into chunks of 400–500 and process those separately. Small changes like that can mean the difference between crash and success.
#4. Watch your disk space
Metashape writes enormous temporary files. If your SSD is down to its last 20 GB, it’s going to choke. Free up space, or better yet, assign a dedicated SSD as the cache/scratch disk.
#5. Don’t ignore hardware stability
If your CPU/GPU is overclocked, or if your PC runs hot, Metashape will find the weak point. I’ve seen people chase software bugs for weeks before realizing their rig was just thermal-throttling under load.
The key is to treat each crash as a clue. With logs, careful testing, and scaled-down parameters, you can almost always get the project across the finish line without scrapping everything.

A Real-World Example: 920 Images, 40 MP Each
Let me give you something concrete. A couple of months ago, I worked on an aerial survey: 920 drone images at 40 MP each, shot with 80% overlap. On paper, it didn’t sound too crazy, I’ve processed bigger. But the dense cloud step turned my 128 GB RAM workstation into a furnace.
Here’s how it played out:
Image alignment (sparse cloud): Smooth. Took about 3 hours with High accuracy, 40,000 key points per photo. Nothing unusual.
Depth maps (High quality): This is where it got hairy. Memory usage spiked to around 115 GB. The first attempt actually crashed halfway.
Adjustment: I split the dataset into two chunks of ~460 images each, re-ran depth maps at Medium quality, and suddenly RAM sat around 60–70 GB instead. Stable.
Dense cloud build: With chunks, each section took ~8 hours. When merged, the combined cloud looked nearly identical to the full dataset attempt, just without the crash headache.
Final mesh + DEM: Smooth sailing once the dense cloud was under control.
If I’d insisted on Ultra High or tried to force all 920 photos into one run, I’d probably still be waiting for results. Splitting, lowering depth map quality one notch, and capping tie points saved me days.
It’s a good reminder that in Metashape, perfectionist settings don’t always deliver visibly better models, but they absolutely deliver crashes.
Sharing the Results Without the Headaches
After all that work, alignments, depth maps, dense clouds, merges, you finally have a beautiful model sitting on your machine. Great. But now comes the next challenge: how do you actually share it?
Sending someone a 50 GB project file isn’t realistic. Most clients don’t have Metashape installed, and even if they do, their hardware probably isn’t ready for datasets that chew through 128 GB of RAM. Screenshots are fine for reports, but they don’t capture the value of walking around a model, zooming into details, or exploring a reconstruction interactively.
That’s where streaming makes sense. Instead of exporting a dumbed-down version or mailing hard drives, you can host the experience and let others view it in their browser. No installs. No setup. Just click and explore.
Which can be just as painful in rendering tools like Twinmotion if you’re not optimizing properly — these workflow speed tips will help.
This is exactly the problem Vagon Streams solves. Once you’ve built your dataset, you can push it into a cloud workspace and share it with your client, your team, or even the public. They get the interactive experience; you don’t have to worry about whether their laptop can handle billions of points.
In other words: Metashape handles the heavy lifting of reconstruction. Vagon Streams handles the heavy lifting of delivery. Together, it means you can actually show off the massive datasets you’ve worked so hard to process, instead of compressing them into oblivion.
The Limits You Can’t Ignore
I wish I could say there’s a magic workflow that makes Metashape crash-proof. There isn’t. Even with all the tricks, chunking, culling, lowering settings, you’ll eventually hit walls.
RAM isn’t infinite. You can throw 256 GB at a project, and Metashape will happily find a way to use it. At some scale, hardware just won’t keep up.
Detail vs. practicality. Ultra High looks tempting, but the law of diminishing returns is brutal. I’ve compared High vs. Ultra High meshes on a forest survey, and the only real difference was an extra 12 hours of processing. My client didn’t notice.
Nature is messy. Vegetation, water, and glass cause reconstruction headaches no matter how powerful your machine is. You can minimize artifacts, but you can’t eliminate them completely. Here’s a look at how Twinmotion compares to Unreal Engine if you’re weighing your options.
Bigger isn’t always better. More photos and higher resolution don’t always equal more accuracy. Sometimes they just equal more crashes.
In short: some crashes are avoidable with smarter workflows, but some are just the reality of pushing photogrammetry to its limits. Knowing where that line sits for your hardware, and your project’s goals, is part of the job.
Final Thoughts
Processing huge datasets in Metashape is equal parts art and science. You’ve got the science, the math of megapixels, RAM limits, GPU acceleration. And you’ve got the art, the judgment calls about when “High” is good enough, when to split into chunks, and when to admit that 2,000 ultra-high-res photos are overkill.
In my experience, the projects that succeed aren’t the ones with the beefiest workstation or the most expensive GPU. They’re the ones where the workflow is planned with the end in mind. If you're just stepping into 3D environments, these beginner optimization tips can save you from early frustrations. Do you actually need Ultra High? Do you really need every single image? Or do you need a model that runs smoothly, delivers on accuracy, and doesn’t crash three times before finishing?
The more you use Metashape, the better you get at balancing those decisions. And when you finally land a clean, stable build of a massive dataset, it’s worth every tweak, every test run, every hour of waiting.
And remember: building is only half the battle. Being able to share it, easily, without asking your client to install Metashape or upgrade their machine, is what actually gets your work seen and appreciated. That’s where tools like Vagon Streams step in to make sure your hard-won results don’t just live on your workstation but out in the world where they belong.
So don’t just think about how to avoid crashes. Think about how to set yourself up for success from capture to delivery. That’s when Metashape goes from a headache to a powerhouse.
FAQs
How much RAM do I really need for big projects?
It depends on your dataset. For under 500 images at ~20 MP, 32 GB might scrape by. But once you cross 1,000+ images at 30–50 MP, you’re realistically looking at 128 GB minimum. Some power users even run 256 GB to avoid memory crashes during dense cloud building.Is GPU more important than CPU in Metashape?
Both matter, but in different ways. CPU cores handle alignment and many calculation-heavy steps. GPU accelerates depth map generation and speeds up dense cloud creation. If you have to prioritize, get lots of RAM first, then a solid GPU (NVIDIA with CUDA tends to be the safest choice).Can I process 50 MP images straight out of the camera?
You can, but you probably shouldn’t unless you really need that level of detail. Downsampling to 20–24 MP often cuts processing time in half with little to no visible quality loss.Should I always split my project into chunks?
Not always. For small to medium jobs, a single chunk is fine. But once you’re over ~1,000 high-res images, chunking becomes your safety net. It’s the easiest way to keep Metashape from hitting hardware ceilings.What’s the number one beginner mistake?
Setting everything to Ultra High and unlimited points. It sounds like you’re getting the “best” results, but really you’re just asking your machine to suffer. High quality with capped tie points is usually more than enough.Do SSDs really make a difference?
Absolutely. A fast NVMe SSD for cache and scratch files can mean the difference between hours-long I/O bottlenecks and smooth processing. HDDs are basically a recipe for frustration.
Last week I tried to process 1,200 aerial images at 45 megapixels each, and Metashape crashed twice mid-dense cloud build. Not once. Twice.
If you’ve ever sat there watching the progress bar crawl for hours, only to see the program vanish into thin air, you know the kind of frustration I’m talking about. It’s not just wasted time, it’s wasted electricity, overheated GPUs, and the sinking feeling that you might need to start all over again.
The thing is, Metashape isn’t bad software. In fact, it’s brilliant at turning massive piles of photos into accurate 3D reconstructions. But when you push it with datasets that are a little too ambitious, or try to run it on hardware that’s a bit underpowered, it can bring even a beefy workstation to its knees.
So the real question is: how do you keep it from crashing when you’re dealing with thousands of high-res images? And better yet, how do you make it through the workflow without sacrificing quality or your sanity?
That’s what this guide is about.
What “Large Dataset” Really Means in Metashape
People throw around “large dataset” all the time, but in Metashape, it has teeth. Large doesn’t just mean “a lot of photos.” It’s the combination of photo count, resolution, and overlap that makes or breaks a project.
Take this: 500 drone images at 12 MP might run smoothly on a mid-range laptop. But swap those for 1,200 shots at 45 MP and suddenly you’re chewing through hundreds of gigabytes of RAM in the dense cloud step alone.
Agisoft themselves publish memory requirement tables, and they’re not exaggerating. For example, building depth maps at ultra-high quality with 1,000+ 20 MP images can easily spike over 128 GB of RAM. Push it harder and you’ll see people on the forums talking about 256 GB or more just to keep things stable.
And it’s not just memory. Terrain type matters too. A flat desert processes very differently from a dense forest, where every tree canopy adds thousands of tiny points to track. Same with urban datasets, glass, shadows, repeating textures all add complexity.
So when someone says “large dataset,” in my experience it’s usually one of two scenarios:
Aerial surveys: thousands of overlapping images from drones, often 20–50 MP each.
Close-range scans: high-resolution DSLR or mirrorless cameras shooting hundreds of frames around an object or structure.
In both cases, the math is brutal: the bigger the pixels and the higher the overlap, the more Metashape has to hold in memory at once. That’s where crashes sneak in.
Why Metashape Crashes (or Crawls to a Halt)
If Metashape were a person, it wouldn’t quit because it’s lazy. It quits because you’ve asked it to juggle way too many balls in the air at once. Here are the main culprits I’ve run into (and seen others run into) over the years:
#1. RAM limits getting slammed
Dense cloud generation and depth maps are memory monsters. You might think, “I’ve got 32 GB, that should be fine.” Nope. For big datasets, 32 GB isn’t even close. When Metashape hits your RAM ceiling, it doesn’t politely ask for more, it just folds.
#2. GPU or driver issues
Metashape leans on your GPU for certain steps, especially depth map generation. But if you’re running outdated drivers, or if your system insists on using the integrated Intel graphics instead of your NVIDIA/AMD card, you’re in crash territory. I’ve even seen some users have better luck disabling GPU entirely when drivers are unstable.
#3. Disk bottlenecks
Slow HDDs or almost-full SSDs will choke during temporary file writes. Metashape is constantly reading and writing massive chunks of data. If your scratch disk doesn’t have the space (or speed), you’re in for freezes or corrupted runs.
#4. Overkill settings
It’s tempting to set everything to “Ultra High” because hey, more detail, right? The problem is that those settings scale exponentially. Going from “High” to “Ultra High” isn’t a little step, it can mean five times more computation. Just like with rendering in Twinmotion, picking the right visual quality settings is often about balance, not excess. Same with tie points and key points. Unlimited points sound nice, until your computer melts down.
#5. Hardware instability
Overclocked CPU or GPU, overheating during long processing runs, flaky RAM sticks, Metashape will expose any weakness in your setup. It’s like a stress test you didn’t know you signed up for.
That’s usually the recipe: too much data, not enough resources, or something in the hardware/software chain that can’t handle the load.
How to Keep Metashape from Crashing on Large Datasets
Metashape will happily chew through huge projects if you treat it right. Here’s what’s worked for me (and what I’ve seen others swear by):
#1. Be smart about capture
Just because your drone can shoot 50 MP images doesn’t mean you need to use them all. Ask yourself: do you really need sub-centimeter accuracy? For many jobs, downsampling or shooting at lower resolution delivers results that look identical but save hundreds of gigabytes in processing.
#2. Clean your photos before importing
Metashape isn’t great at deciding which blurry or redundant shots to ignore. If you dump everything in, you’re forcing it to waste resources. I always cull: remove duplicates, reject over-exposed shots, and keep only what contributes to coverage.
#3. Use chunks like a pro
This is probably the single best trick. Don’t throw 2,000 images into one block and hope for the best. Split them into chunks, by flight line, area, or logical section. Align all first, then process dense clouds and meshes per chunk. You can merge them later. Overlap is key here so the merge is clean.
#4. Dial back the settings
Ultra High sounds sexy, but I’ve rarely seen a client notice the difference compared to High. Same with key point limits, set a max (like 40,000 per image) instead of leaving it unlimited. For dense clouds, test Medium first. You’ll be surprised how much faster things run with almost no visible drop in quality.
#5. Optimize your hardware use
RAM: Metashape is RAM-hungry. If you’re serious about big datasets, think 128 GB as a baseline. Here’s what to look for when choosing a PC that can handle reality capture workloads.
GPU: Keep drivers updated. If crashes persist, test runs with GPU disabled, it’s counterintuitive, but sometimes CPU-only is more stable.
Storage: Always process on SSD or NVMe. HDDs will make you cry. Also, free up at least 2–3× the dataset size in scratch space.
Thermals: Long processing means long stress. Keep your rig cool. Overclocking is fun until Metashape crashes 12 hours into a run.
#6. Test small before going big
Don’t run the full dataset blind. Take 100–200 images, process them with your intended settings, and see what happens. If it runs clean, scale up. If it crashes, you just saved yourself an entire wasted night.
What to Do When Metashape Crashes Anyway
Even with the best prep, sometimes Metashape just says “nope” and drops out. It happens. The good news? You can usually recover without starting from absolute zero.
#1. Grab the logs
Metashape can write a log file (Preferences → Advanced → Write Log to File). Turn that on. When a crash happens, the log is your detective. You’ll see whether it was a memory spike, GPU fault, or something else entirely. Without it, you’re just guessing.
#2. Check your GPU setup
Half the crash reports I’ve seen come back to GPU weirdness. If you’ve ever dealt with Twinmotion instability, you’ll feel right at home with this guide to fixing Twinmotion crashes. Outdated drivers, unstable CUDA, or the system trying to run on Intel’s integrated graphics instead of your NVIDIA/AMD card. If in doubt, update drivers, or run a test with GPU disabled. Sometimes stability beats speed.
#3. Lower the workload and retry
If it died on Ultra High, try High. If tie points were unlimited, cap them. If you’re building a dense cloud from 2,000 photos, split it into chunks of 400–500 and process those separately. Small changes like that can mean the difference between crash and success.
#4. Watch your disk space
Metashape writes enormous temporary files. If your SSD is down to its last 20 GB, it’s going to choke. Free up space, or better yet, assign a dedicated SSD as the cache/scratch disk.
#5. Don’t ignore hardware stability
If your CPU/GPU is overclocked, or if your PC runs hot, Metashape will find the weak point. I’ve seen people chase software bugs for weeks before realizing their rig was just thermal-throttling under load.
The key is to treat each crash as a clue. With logs, careful testing, and scaled-down parameters, you can almost always get the project across the finish line without scrapping everything.
A Real-World Example: 920 Images, 40 MP Each
Let me give you something concrete. A couple of months ago, I worked on an aerial survey: 920 drone images at 40 MP each, shot with 80% overlap. On paper, it didn’t sound too crazy, I’ve processed bigger. But the dense cloud step turned my 128 GB RAM workstation into a furnace.
Here’s how it played out:
Image alignment (sparse cloud): Smooth. Took about 3 hours with High accuracy, 40,000 key points per photo. Nothing unusual.
Depth maps (High quality): This is where it got hairy. Memory usage spiked to around 115 GB. The first attempt actually crashed halfway.
Adjustment: I split the dataset into two chunks of ~460 images each, re-ran depth maps at Medium quality, and suddenly RAM sat around 60–70 GB instead. Stable.
Dense cloud build: With chunks, each section took ~8 hours. When merged, the combined cloud looked nearly identical to the full dataset attempt, just without the crash headache.
Final mesh + DEM: Smooth sailing once the dense cloud was under control.
If I’d insisted on Ultra High or tried to force all 920 photos into one run, I’d probably still be waiting for results. Splitting, lowering depth map quality one notch, and capping tie points saved me days.
It’s a good reminder that in Metashape, perfectionist settings don’t always deliver visibly better models, but they absolutely deliver crashes.
Sharing the Results Without the Headaches
After all that work, alignments, depth maps, dense clouds, merges, you finally have a beautiful model sitting on your machine. Great. But now comes the next challenge: how do you actually share it?
Sending someone a 50 GB project file isn’t realistic. Most clients don’t have Metashape installed, and even if they do, their hardware probably isn’t ready for datasets that chew through 128 GB of RAM. Screenshots are fine for reports, but they don’t capture the value of walking around a model, zooming into details, or exploring a reconstruction interactively.
That’s where streaming makes sense. Instead of exporting a dumbed-down version or mailing hard drives, you can host the experience and let others view it in their browser. No installs. No setup. Just click and explore.
Which can be just as painful in rendering tools like Twinmotion if you’re not optimizing properly — these workflow speed tips will help.
This is exactly the problem Vagon Streams solves. Once you’ve built your dataset, you can push it into a cloud workspace and share it with your client, your team, or even the public. They get the interactive experience; you don’t have to worry about whether their laptop can handle billions of points.
In other words: Metashape handles the heavy lifting of reconstruction. Vagon Streams handles the heavy lifting of delivery. Together, it means you can actually show off the massive datasets you’ve worked so hard to process, instead of compressing them into oblivion.
The Limits You Can’t Ignore
I wish I could say there’s a magic workflow that makes Metashape crash-proof. There isn’t. Even with all the tricks, chunking, culling, lowering settings, you’ll eventually hit walls.
RAM isn’t infinite. You can throw 256 GB at a project, and Metashape will happily find a way to use it. At some scale, hardware just won’t keep up.
Detail vs. practicality. Ultra High looks tempting, but the law of diminishing returns is brutal. I’ve compared High vs. Ultra High meshes on a forest survey, and the only real difference was an extra 12 hours of processing. My client didn’t notice.
Nature is messy. Vegetation, water, and glass cause reconstruction headaches no matter how powerful your machine is. You can minimize artifacts, but you can’t eliminate them completely. Here’s a look at how Twinmotion compares to Unreal Engine if you’re weighing your options.
Bigger isn’t always better. More photos and higher resolution don’t always equal more accuracy. Sometimes they just equal more crashes.
In short: some crashes are avoidable with smarter workflows, but some are just the reality of pushing photogrammetry to its limits. Knowing where that line sits for your hardware, and your project’s goals, is part of the job.
Final Thoughts
Processing huge datasets in Metashape is equal parts art and science. You’ve got the science, the math of megapixels, RAM limits, GPU acceleration. And you’ve got the art, the judgment calls about when “High” is good enough, when to split into chunks, and when to admit that 2,000 ultra-high-res photos are overkill.
In my experience, the projects that succeed aren’t the ones with the beefiest workstation or the most expensive GPU. They’re the ones where the workflow is planned with the end in mind. If you're just stepping into 3D environments, these beginner optimization tips can save you from early frustrations. Do you actually need Ultra High? Do you really need every single image? Or do you need a model that runs smoothly, delivers on accuracy, and doesn’t crash three times before finishing?
The more you use Metashape, the better you get at balancing those decisions. And when you finally land a clean, stable build of a massive dataset, it’s worth every tweak, every test run, every hour of waiting.
And remember: building is only half the battle. Being able to share it, easily, without asking your client to install Metashape or upgrade their machine, is what actually gets your work seen and appreciated. That’s where tools like Vagon Streams step in to make sure your hard-won results don’t just live on your workstation but out in the world where they belong.
So don’t just think about how to avoid crashes. Think about how to set yourself up for success from capture to delivery. That’s when Metashape goes from a headache to a powerhouse.
FAQs
How much RAM do I really need for big projects?
It depends on your dataset. For under 500 images at ~20 MP, 32 GB might scrape by. But once you cross 1,000+ images at 30–50 MP, you’re realistically looking at 128 GB minimum. Some power users even run 256 GB to avoid memory crashes during dense cloud building.Is GPU more important than CPU in Metashape?
Both matter, but in different ways. CPU cores handle alignment and many calculation-heavy steps. GPU accelerates depth map generation and speeds up dense cloud creation. If you have to prioritize, get lots of RAM first, then a solid GPU (NVIDIA with CUDA tends to be the safest choice).Can I process 50 MP images straight out of the camera?
You can, but you probably shouldn’t unless you really need that level of detail. Downsampling to 20–24 MP often cuts processing time in half with little to no visible quality loss.Should I always split my project into chunks?
Not always. For small to medium jobs, a single chunk is fine. But once you’re over ~1,000 high-res images, chunking becomes your safety net. It’s the easiest way to keep Metashape from hitting hardware ceilings.What’s the number one beginner mistake?
Setting everything to Ultra High and unlimited points. It sounds like you’re getting the “best” results, but really you’re just asking your machine to suffer. High quality with capped tie points is usually more than enough.Do SSDs really make a difference?
Absolutely. A fast NVMe SSD for cache and scratch files can mean the difference between hours-long I/O bottlenecks and smooth processing. HDDs are basically a recipe for frustration.
Scalable Pixel and Application Streaming
Run your Unity or Unreal Engine application on any device, share with your clients in minutes, with no coding.

Summarize with AI

Ready to focus on your creativity?
Vagon gives you the ability to create & render projects, collaborate, and stream applications with the power of the best hardware.

Vagon Blog


Run heavy applications on any device with
your personal computer on the cloud.
San Francisco, California
Solutions
Vagon Teams
Vagon Streams
Use Cases
Resources
Vagon Blog
How to Run Inkscape on a Cloud Ubuntu Desktop (2026 Guide)
How to Run Krita on a Cloud Ubuntu Desktop for Digital Painting (2026 Guide)
How to Run GIMP on a Cloud Ubuntu Desktop (2026 Guide)
How to Run Jupyter on a Cloud GPU Linux Desktop (2026 Guide)
Vagon vs GitHub Codespaces: Cloud Dev Environments Compared (2026)
Vagon vs RunPod: Which Cloud GPU Is Right for You? (2026 Comparison)
How to Watch Your AI Agent Work on a Cloud Ubuntu Desktop (2026 Guide)
How to Run a Local LLM on Ubuntu in the Cloud (2026 Guide)
How to Run Blender on a Cloud GPU (Ubuntu): The Complete 2026 Guide
Vagon Blog
Run heavy applications on any device with
your personal computer on the cloud.
San Francisco, California
Solutions
Vagon Teams
Vagon Streams
Use Cases
Resources
Vagon Blog