Instant Connection for Pixel Streaming
— New Feature Automated Setup

What’s New in Blender 5.0: Real Improvements That Actually Change Your Workflow
What’s New in Blender 5.0: Real Improvements That Actually Change Your Workflow
DigitalArt
What’s New in Blender 5.0: Real Improvements That Actually Change Your Workflow
Table of Contents
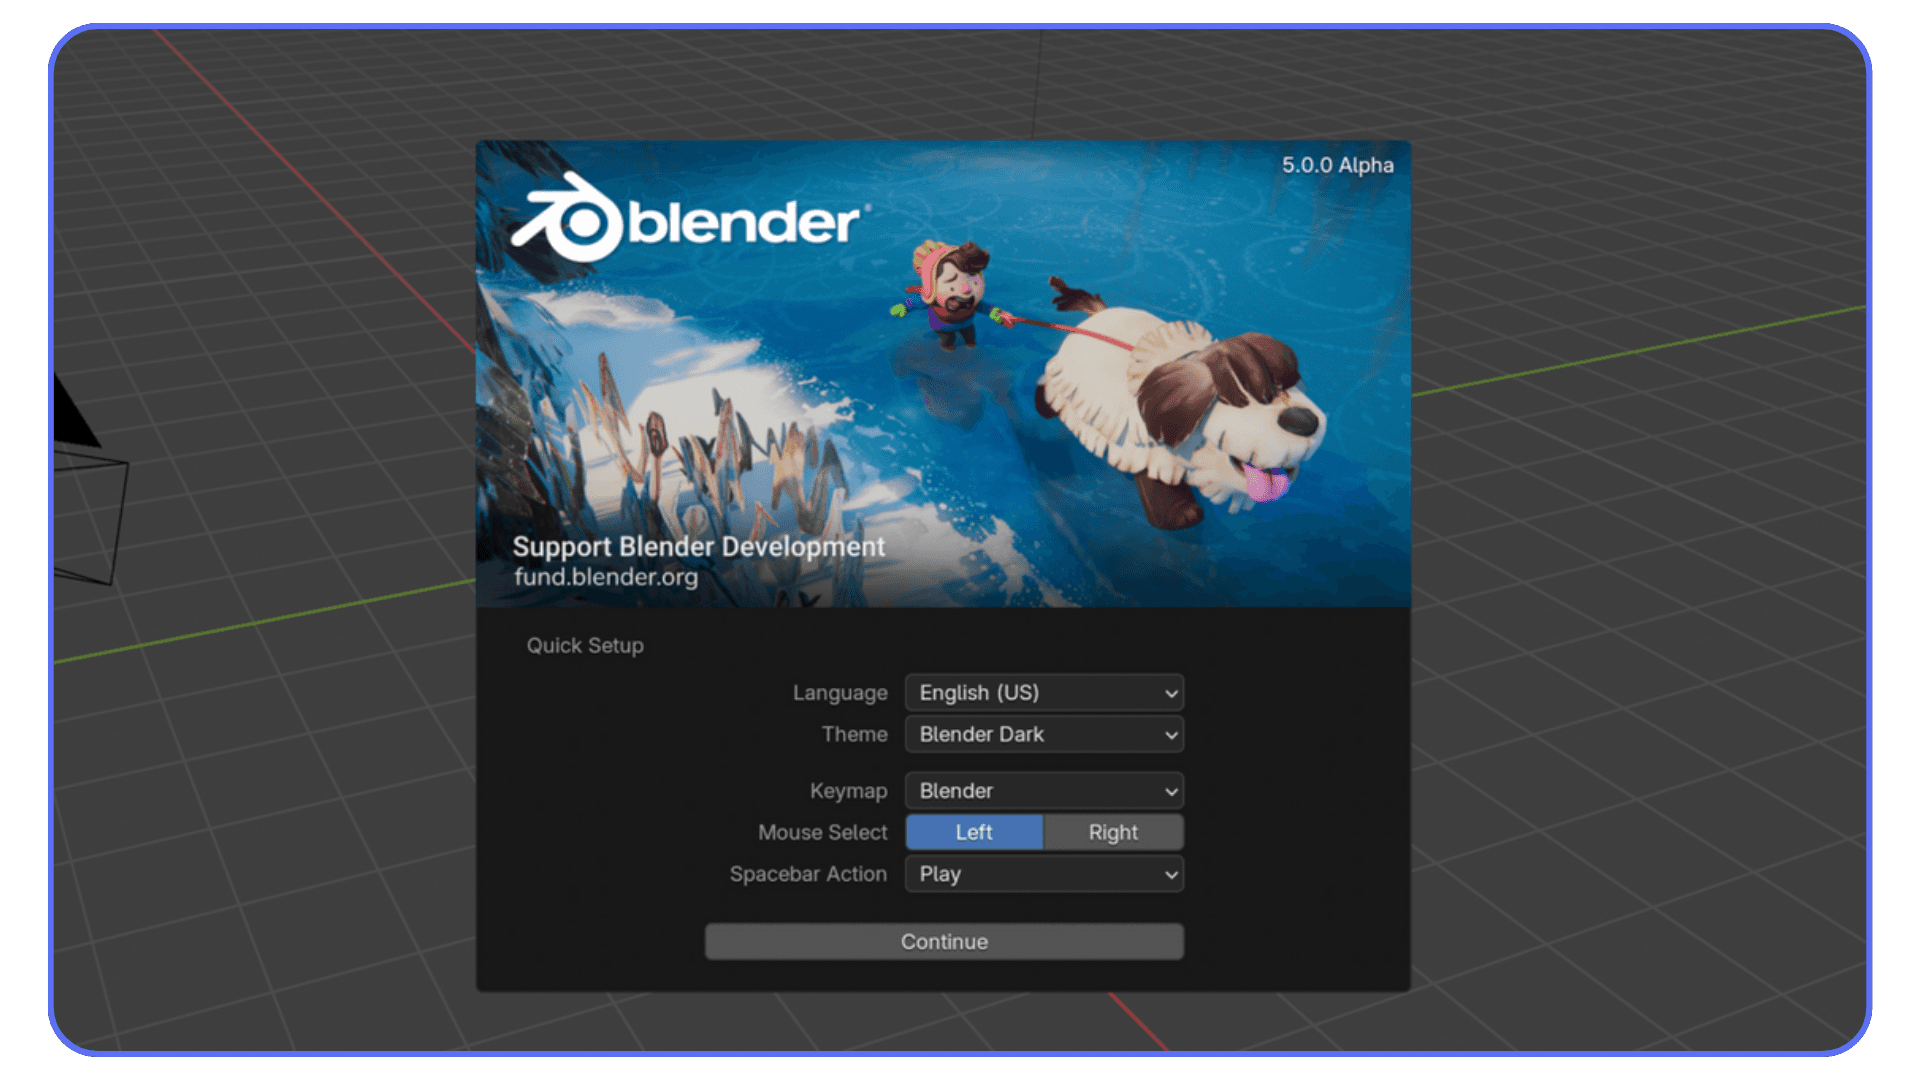
I opened Blender after a week away, fully expecting the same old startup routine, and suddenly there it was on the splash screen, Blender 5.0. For a second I just stared at it, wondering if I’d accidentally downloaded something experimental. But no, this is the real thing. And it doesn’t feel like a normal point-update at all. It feels heavier, louder, and a little bolder than Blender usually allows itself to be.
So here’s what actually matters in Blender 5.0, the things you notice when you’re actually creating, not the pieces buried in the patch notes.
Why Blender 5.0 Matters Right Now
Blender doesn’t roll out big version numbers casually. When it jumps from a 4.x to a clean 5.0, it usually means something underneath has shifted, not just a handful of shiny tools, but a new baseline for how Blender expects you to work.
The release landed on November 18, 2025, and the timing fits where the 3D world is heading. Scenes are getting heavier. Procedural everything is becoming normal. HDR workflows are no longer “for studios only.” And artists are mixing 3D, 2D, CAD imports, animation, and video editing inside one tool way more often than even two years ago.

Blender basically responded with: “Alright then. Let’s grow.”
You feel that the moment you open an old project in 5.0. Certain nodes behave differently. Color looks more honest. Big meshes load without Blender throwing a fit. Even Cycles feels like it’s been working out while you were away.
It’s the kind of release that quietly suggests your workflow might need to level up a bit, but in a way that actually feels exciting instead of intimidating.
#1. Geometry Nodes Grows Up (Volumes, SDFs, New Modifiers)
Geometry Nodes has been powerful for a while, but in Blender 5.0 it finally crosses into a different category. It doesn’t just scatter objects or automate repetitive tasks anymore, it starts behaving like a real procedural system, the kind you normally associate with Houdini or game-engine tools.
The biggest jump is volume support. You can now work directly with OpenVDB grids inside Geometry Nodes. That means smoke-like shapes, fog shells, density fields, stylized volume objects, and all those “soft-body but not really soft-body” things that used to require hacks. It also means you can mix meshes and volumes in ways that simply weren’t possible before.
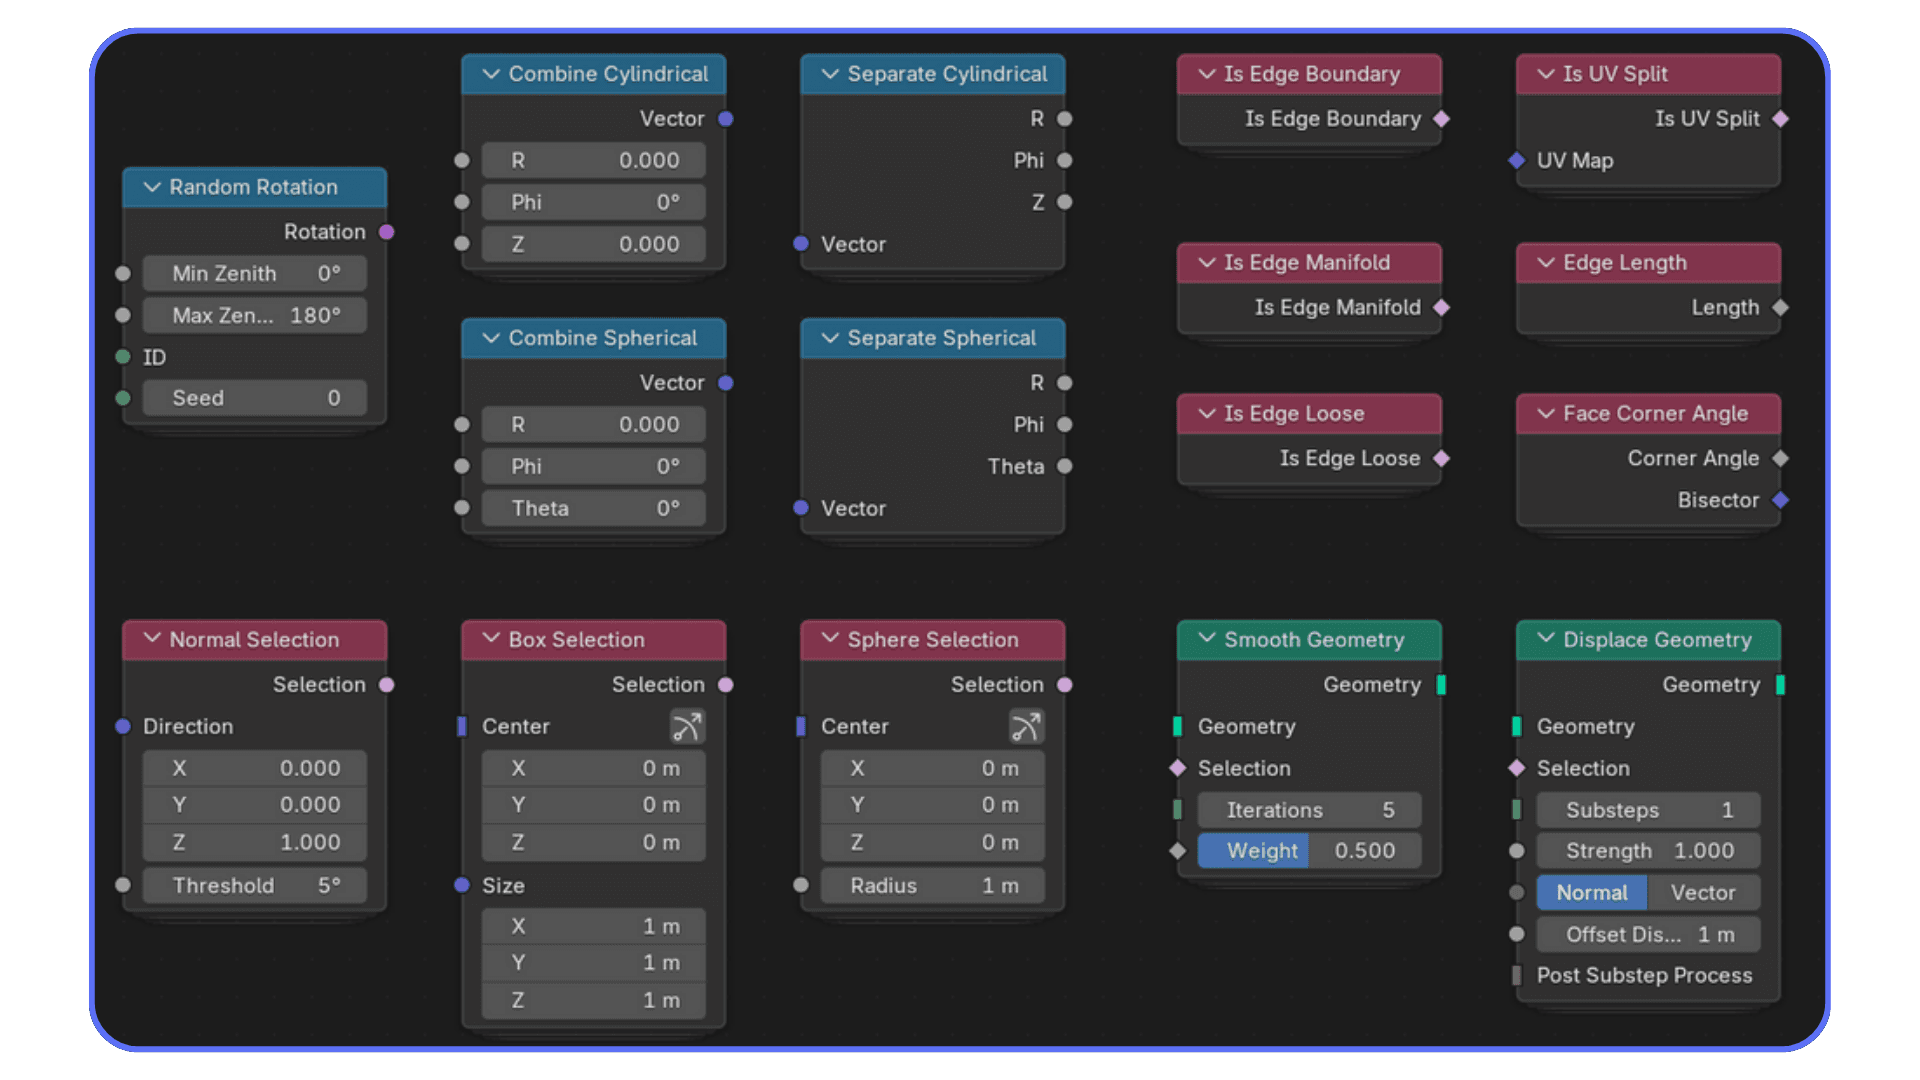
Right next to that is the new Signed Distance Field (SDF) support. If you haven’t used SDF modeling before, think of it as sculpting with invisible math clay. It lets you blend, carve, smooth, or reshape objects using distance data instead of polygons. The practical result? Cleaner boolean workflows, more forgiving hard-surface modeling, and procedural shapes that don’t explode when you least expect it.
And then Blender adds a set of new, actually useful GN-based modifiers, Scatter on Surface, Instance on Elements, and a few others that immediately remove some old manual steps. For environment artists, this alone is a productivity boost. For people importing CAD models, it helps you rebuild certain repetitive components without doing it one piece at a time.
My honest reaction: Geometry Nodes is now powerful enough to be dangerous. You can build things you would’ve called “overkill” in 4.x. But it also means more complexity, more ways to break a node tree, and more responsibility to stay organized. Worth it? Absolutely. Just don’t underestimate how deep this rabbit hole goes.
#2. Cycles Has New Tricks (And They’re Not Subtle)
Cycles didn’t get a small polish pass in Blender 5.0, it got smarter. And a bit sharper. The kind of upgrade where you notice the difference even if you weren’t looking for it.
The biggest change is the new null-scattering volume algorithm, which Blender now uses by default. If you’ve ever tried lighting fog, smoke, clouds, fire, or anything “thick,” you’ve probably watched Cycles chew through your GPU like it was trying to escape the room. The new algorithm is cleaner, faster, and gives you more believable results with fewer sampling headaches. It feels like volume rendering finally graduated.
Then there’s the extended thin-film iridescence, which now works in the Metallic BSDF. If you render anything coated, glossy, soapy, pearlescent, automotive, or sci-fi, this matters. Before, you had to fake a lot of those looks. Now they behave much closer to real materials, and in complex lighting, the difference isn’t subtle.
Subsurface scattering (SSS) also gets a quiet upgrade, better detail retention, better weighting, fewer “mushy plastic” results. It’s the kind of thing you don’t appreciate until you put skin, wax, or clay under a light and think, “Oh, this actually looks right.”
And because this is Cycles, the usual rule applies: if you’re on a weaker GPU or an older laptop, you’re going to feel these improvements… but you’re also going to feel the load. Better algorithms don’t magically make your machine stronger. Blender 5.0 definitely expects more from your hardware.
But if you have the power for it, Cycles in 5.0 feels like a renderer that’s finally catching up with the modern lighting world instead of just surviving in it.
If you ever need to take Blender mobile, we also put together a guide on using Blender on an iPad that actually shows what’s possible and what isn’t on tablet hardware.
#3. Huge Scenes Are Finally Truly Supported
One of the most underrated upgrades in Blender 5.0 is something you don’t notice until you load a monster project: Blender can finally handle truly massive scene data.
The technical change is simple on the surface, .blend files now support blocks larger than 2 GB, but the impact is huge. It means you can push “a few hundred million” vertices through a single file without Blender panicking, freezing, or pretending your mesh doesn’t exist. For anyone working in CAD-heavy workflows, this is a quiet blessing.
Importing huge assemblies from SolidWorks or Rhino?
Massive kitbash collections for environments?
Architectural scenes that feel closer to small cities than rooms?
Blender 5.0 just handles them better. Significantly better.
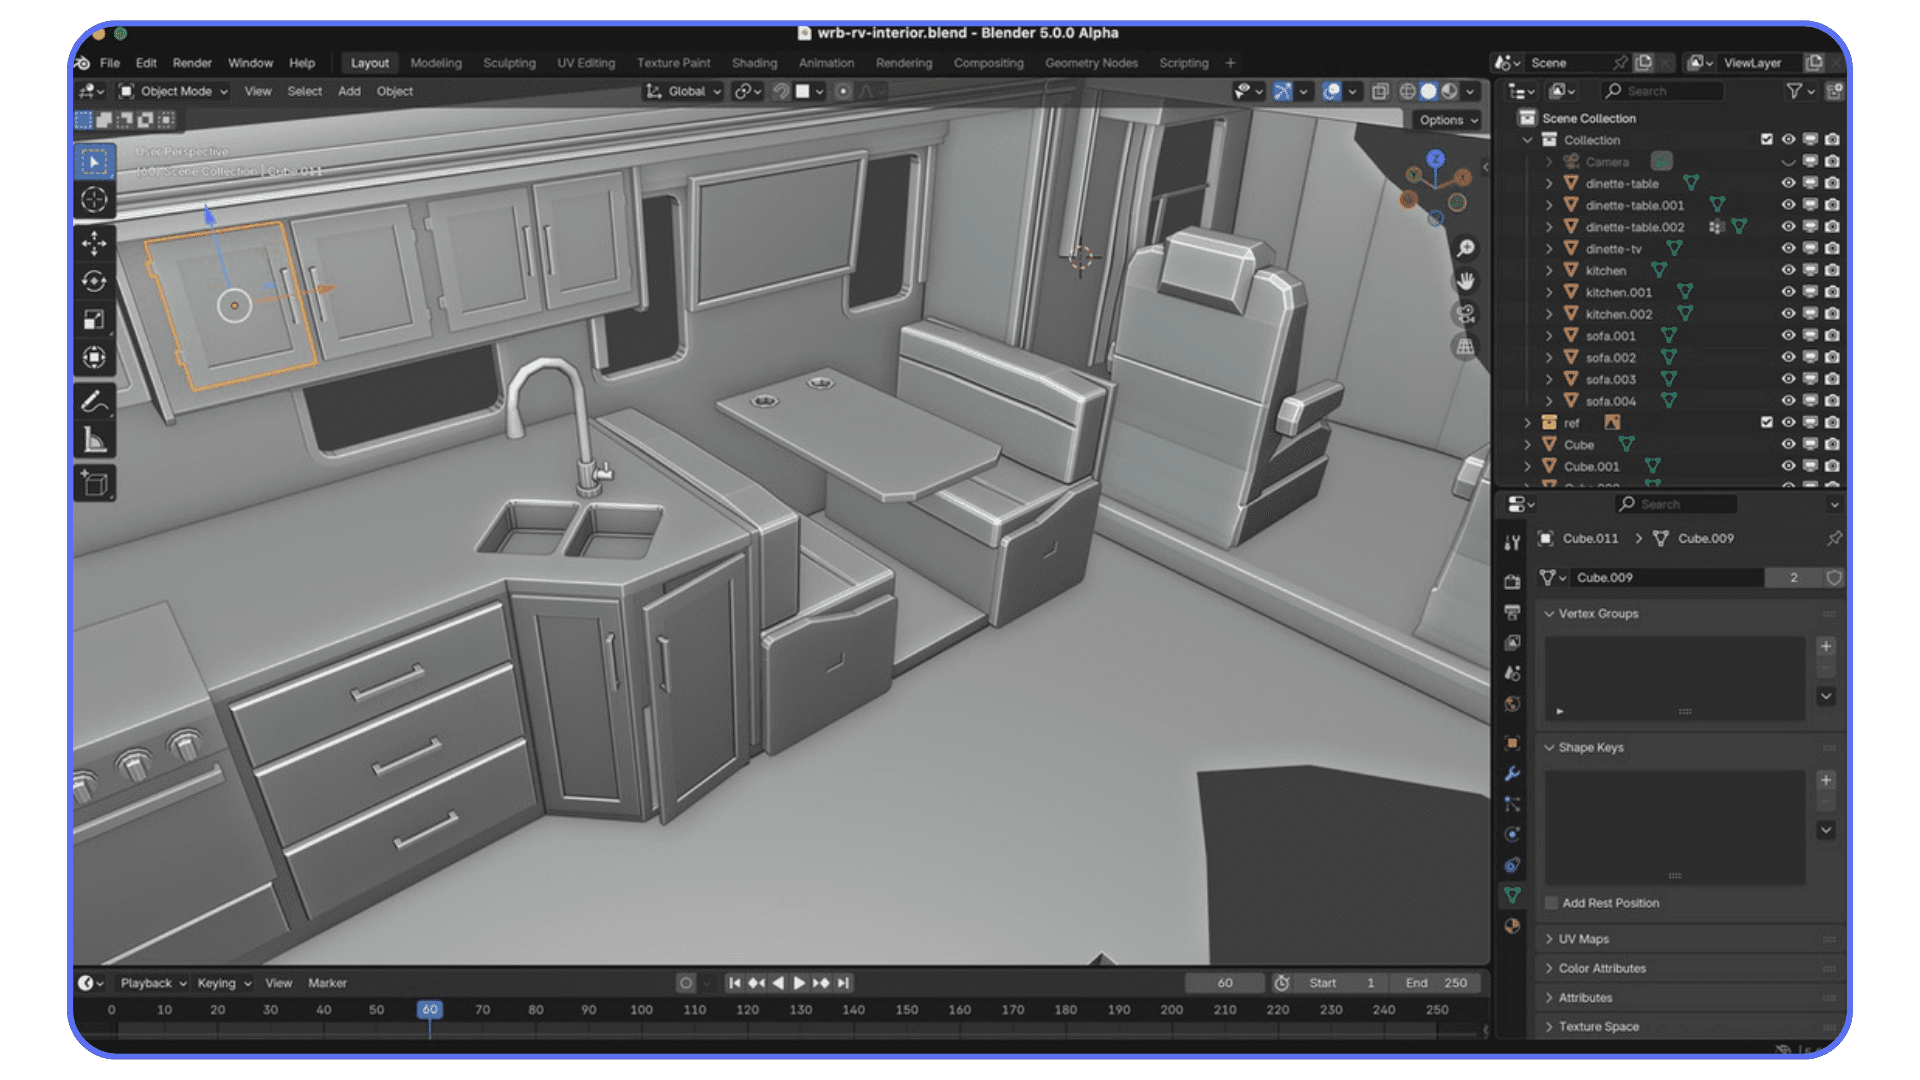
It’s not magic, of course. Your hardware still matters, and you’ll still feel the weight if you’re on a small GPU. But the software itself is no longer the bottleneck in the same way it was before.
What I personally noticed is how much smoother navigation becomes in these giant scenes. You still shouldn’t try to orbit around a 300-million-polygon mesh with a potato laptop, but the point is, Blender doesn’t crash the moment you try. The ceiling is higher, which means your ideas can be bigger.
And honestly, this alone makes 5.0 feel like a more professional tool. Blender always prided itself on flexibility, but now it can finally stand next to commercial 3D packages when it comes to raw scene size.
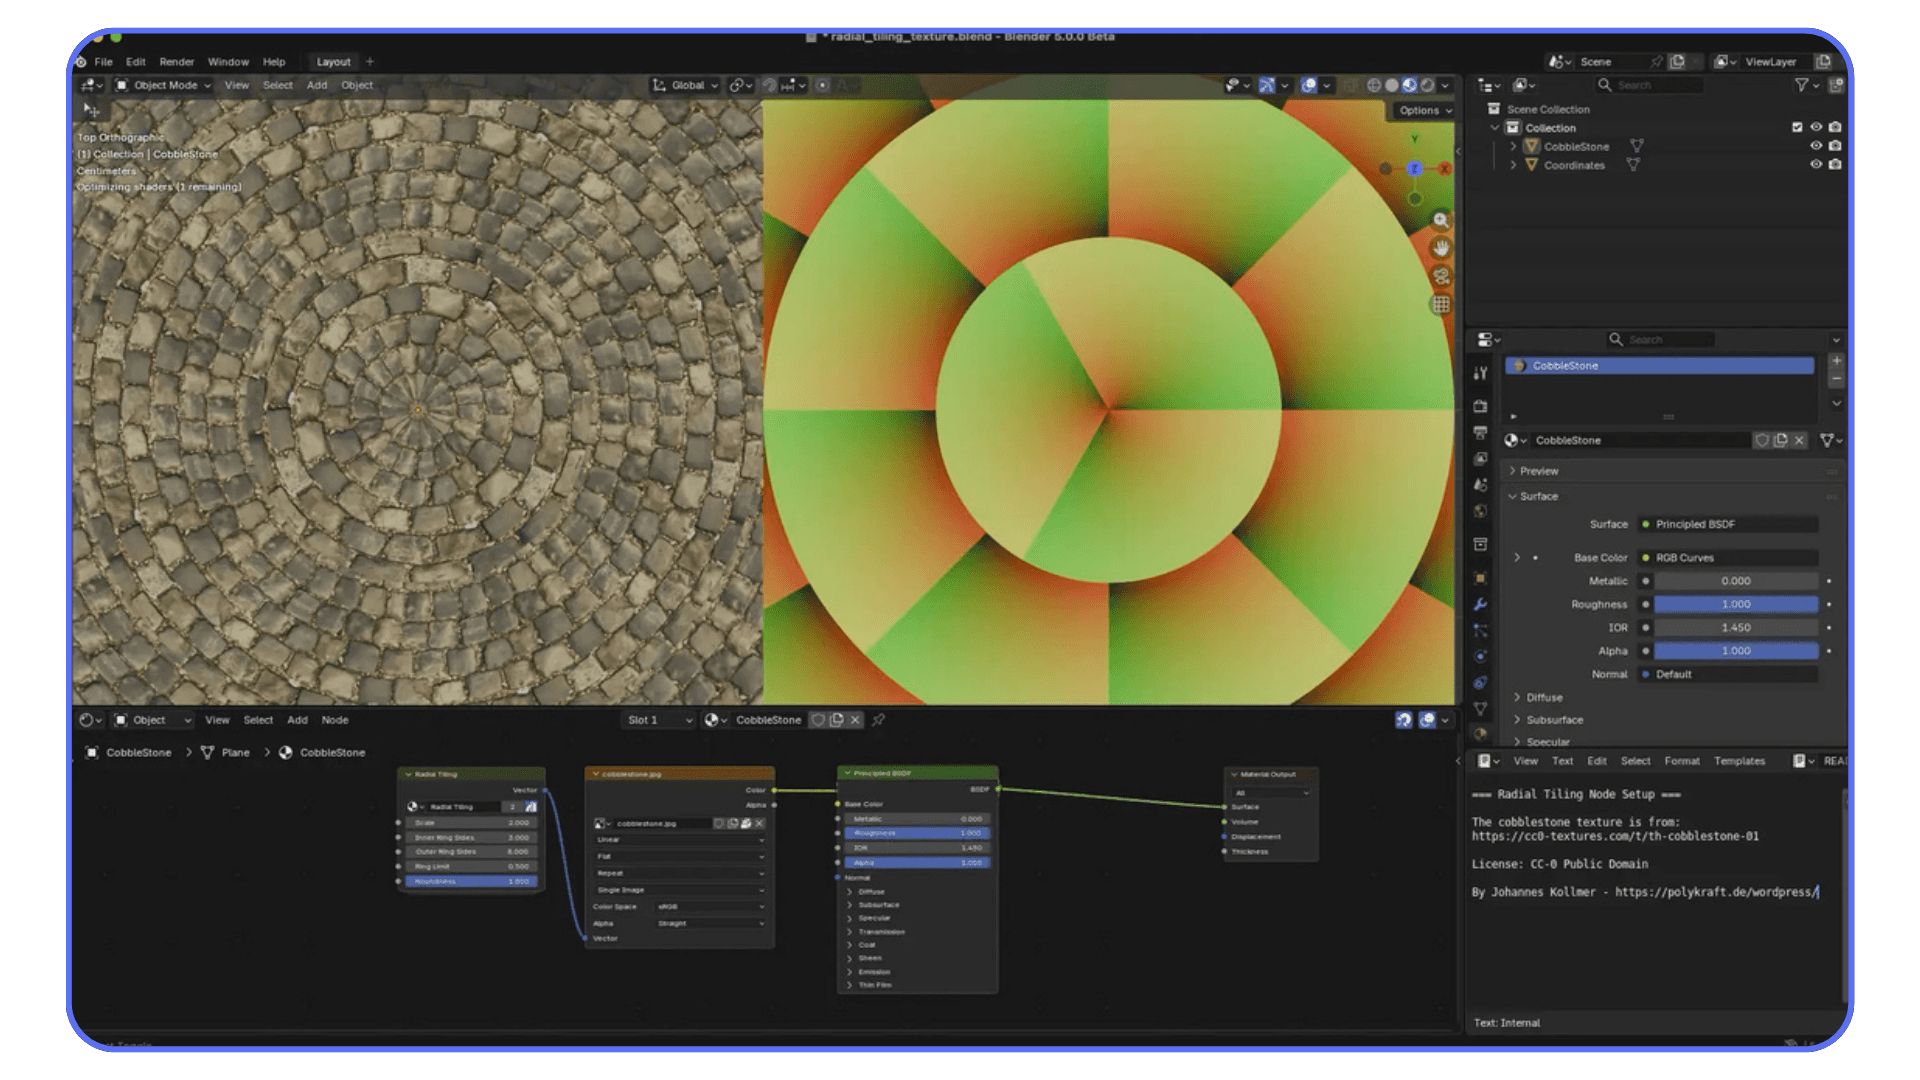
#4. Color Management Finally Matches the Industry
Blender’s color management has always been “fine”, good enough for a lot of work, but never fully aligned with modern pipelines. In 5.0, that changes. Blender finally steps into the same color world used by film studios, Unreal Engine workflows, and high-end HDR monitors.
The big news is full support for ACES 1.3 and ACES 2.0. If you’ve ever tried matching Blender renders with Unreal, Nuke, Resolve, or any HDR display pipeline, you probably know how frustrating it was to get consistent results. Now the math lines up. The color transforms line up. The final output feels like what you intended instead of a weird approximation.
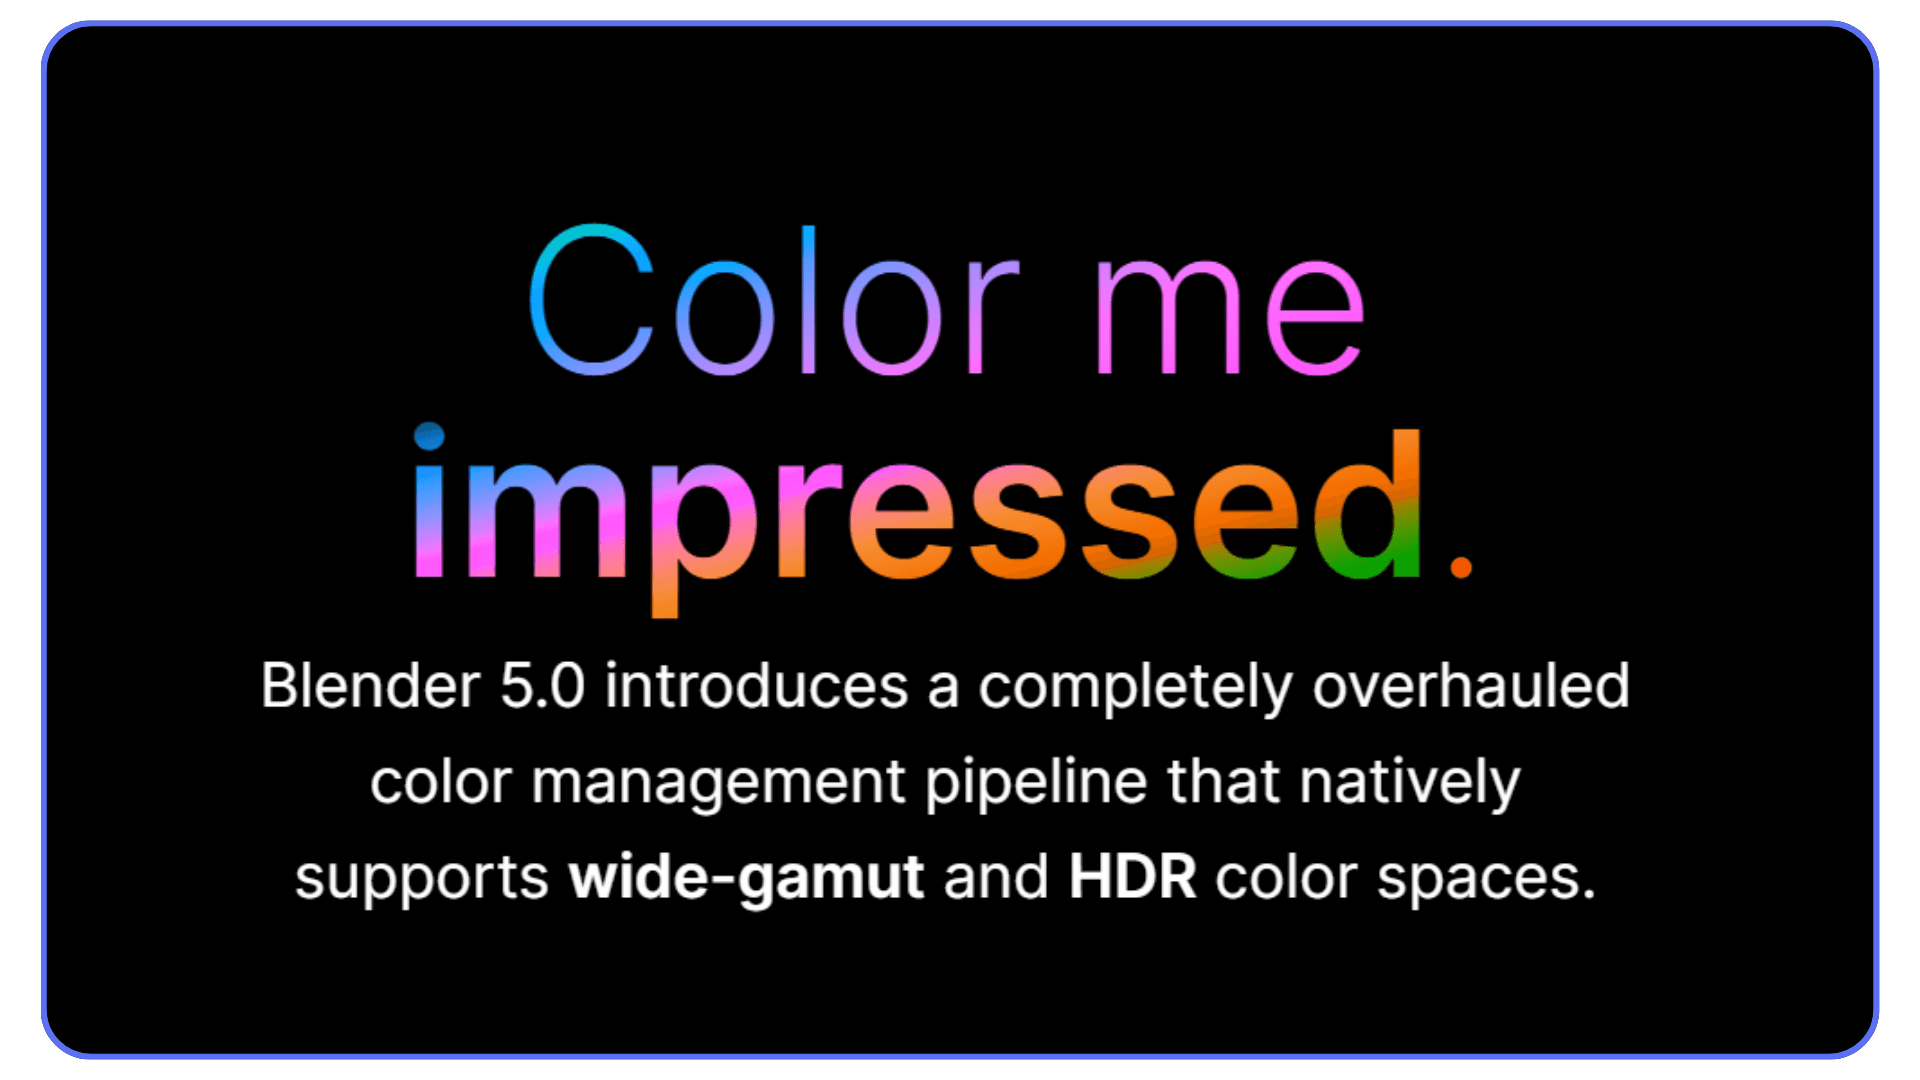
And then there’s the wide-gamut and HDR support: Display-P3, Rec.2020, and Rec.2100 PQ. These are not tiny improvements. They let you actually see the lighting you’re creating, especially if you’re doing bright specular work, neon, metals, or photoreal rendering. If you’ve been using an HDR monitor and always felt Blender undersold your highlights, the difference here is obvious.
Does everyone need this? No.
If you’re rendering for Instagram, TikTok, or basic SDR monitors, you won’t suddenly produce magic just because your color space expanded. But if you’re building real-time pipelines, film assets, or high-dynamic-range renders, Blender finally behaves like it belongs in that ecosystem.
For the first time, Blender’s color feels professional out of the box, not patched together with add-ons or custom configs.
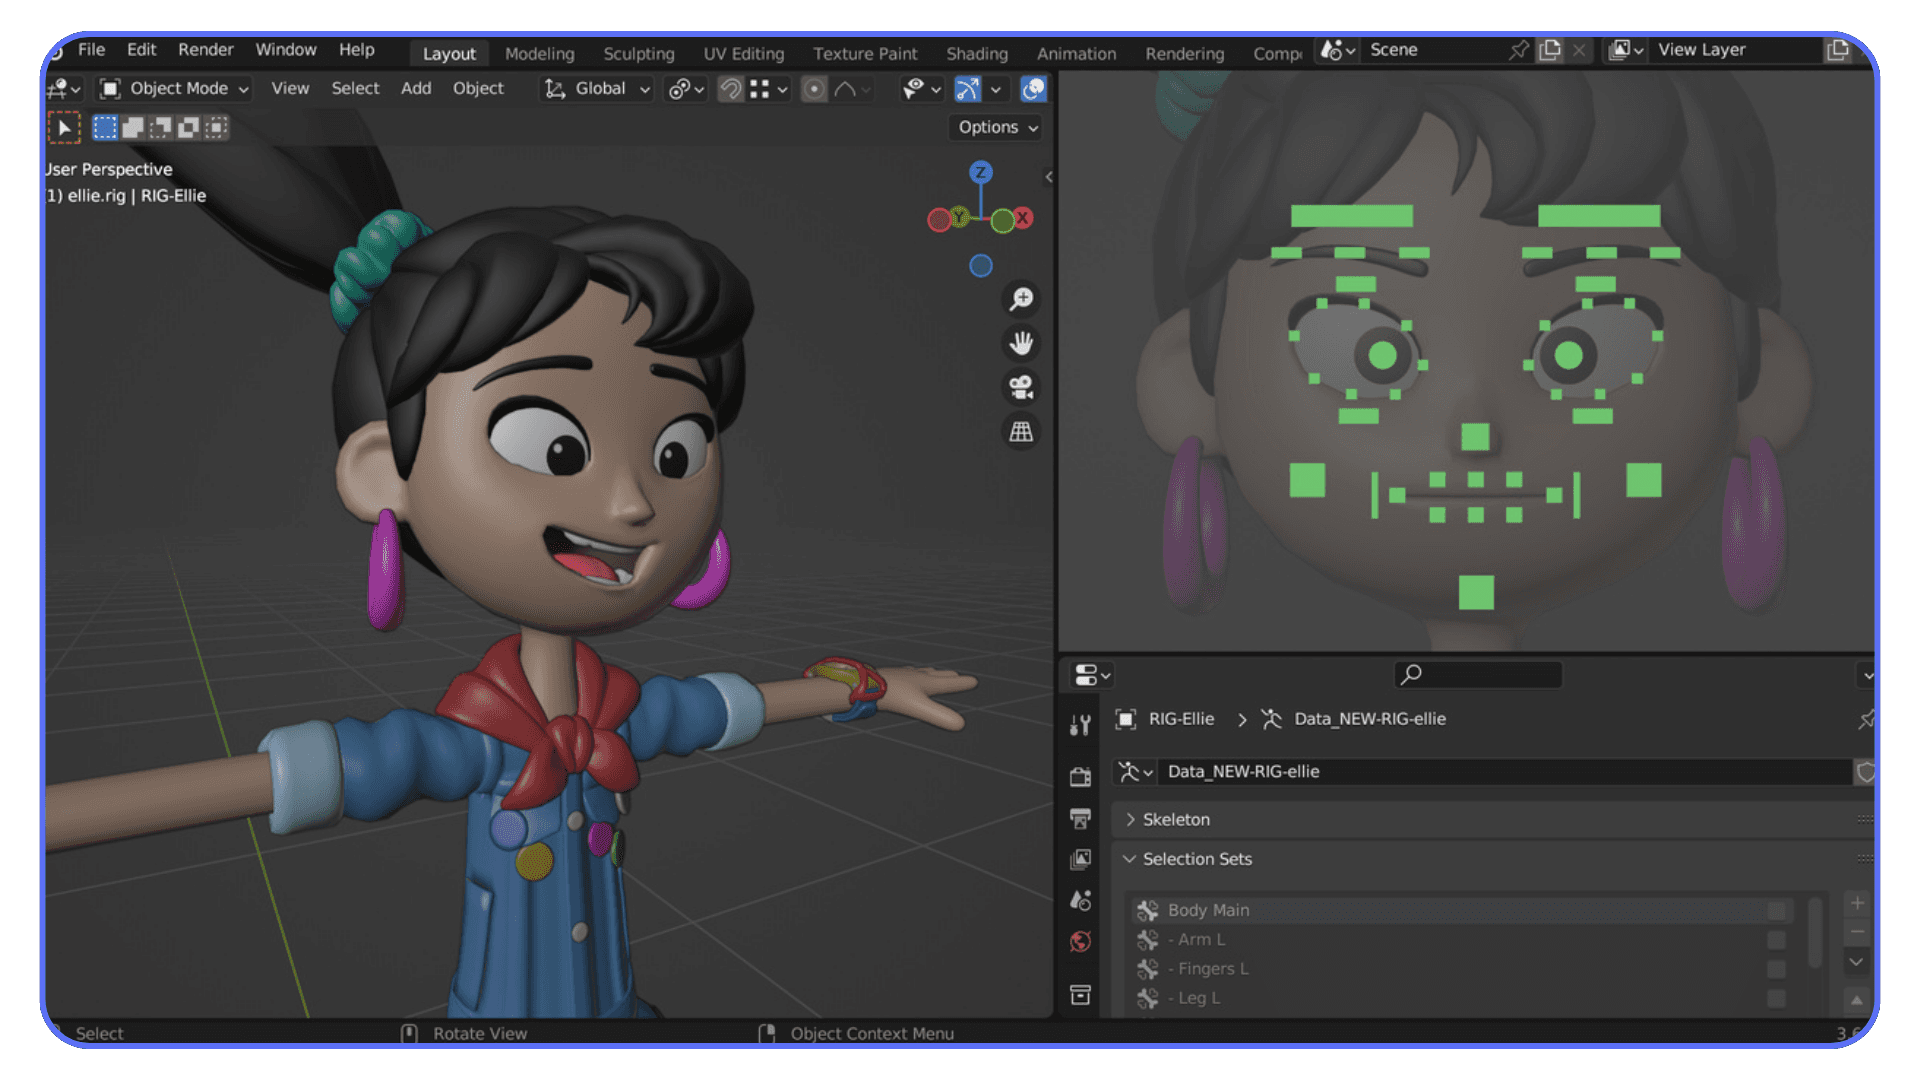
#5. Grease Pencil & Animation Polish
Grease Pencil doesn’t always get the spotlight, but in Blender 5.0 it gets a couple of upgrades that make a real difference if you do 2D or hybrid work.
The standout change is motion blur for Grease Pencil strokes. This has been one of those long-requested features that always sat just outside the roadmap. Now it’s finally here, and it changes the feel of 2D animation inside Blender. Fast strokes look faster. Action shots feel smoother. You no longer have to fake motion blur frame-by-frame or rely on external compositing tricks.
Blender also cleaned up how corners behave in Grease Pencil. Strokes can now toggle between sharp and flat corners more predictably, which makes line art react more like you expect. It sounds small, but if you’re animating on a tablet and trying to control the flow of a character’s outline, this matters more than you think.
Outside of Grease Pencil, the animation system gets a few thoughtful refinements, mostly quality-of-life improvements that make rigging and motion feel a little less stiff. Not game-changing, but noticeable if you animate often.
The bigger picture: Blender is clearly positioning Grease Pencil as a proper 2D/3D hybrid tool. These changes nudge it closer to something that can compete with dedicated 2D apps, without losing the advantages of being embedded in a full 3D environment.
If you want to go deeper into 2D workflows, we already published a full guide to 2D animation in Blender that pairs perfectly with the new Grease Pencil upgrades in 5.0.
#6. Video Sequencer Gets a Cheat Code
The Video Sequencer has always been one of those Blender features people either love for its simplicity or avoid entirely because it felt too limited. Blender 5.0 gives it something it’s been missing for years: real compositing power.
The new Compositor Modifier lets you apply a full compositing node tree directly inside the Sequencer. That means color grading, glow passes, blur, masks, LUT-style adjustments, stylized looks, basically all the quick fixes you used to jump into the Compositor or an external editor for.
Now it’s just… a modifier.
No round-trips. No rebuilding effects in a different panel. No exporting halfway just to check a look.
If you edit videos or animatics directly in Blender, this is a huge time-saver. Even for 3D artists who only use the Sequencer to assemble preview renders, it removes a bunch of friction.
Is it ready to replace Resolve, Premiere, or Final Cut? Not quite. You won’t run a full documentary or client-grade commercial through it. But for YouTube content, previz, motion-graphics rough cuts, and project assembly, it’s far more capable than before.
It feels like the feature people always assumed Blender had, but it finally does.
#7. UI Cleanup & Workflow Refinements
Blender’s interface didn’t get a flashy redesign in 5.0, but it did get a much-needed cleanup. The kind of cleanup you only appreciate after a few hours of actual work.
For starters, Blender removed or merged over 300 theme settings. If you’ve ever tried customizing a theme, or downloaded one that looked great in screenshots but broke half the icons, you know how messy things had become. Now the theme system is tighter, more predictable, and a lot harder to accidentally ruin.
The Outliner also feels smoother. Icons are more consistent, hierarchy is clearer, and little interactions, renaming, dragging, toggling visibility, are less finicky. Nothing dramatic, just the type of polish that makes long sessions feel easier.
UV editing gets a couple of long-overdue upgrades too. Sync Selection is now on by default, and the packing/alignment tools behave more like the ones artists expect in 2025. It’s still Blender, don’t expect a full RizomUV competitor, but the daily workflow definitely feels faster.
Together, these changes don’t scream for attention, but they add up. Blender 5.0 feels less cluttered, more focused, and more intentional. You can tell a lot of old quirks were sanded down quietly in the background.
And if you’re the kind of artist who loves speeding things up, our Blender shortcuts and hotkeys guide is a lifesaver, especially with the cleaner UI in 5.0.
What These Changes Mean for Real Workflows
Blender 5.0 isn’t just a list of features, it genuinely shifts how different types of artists work day-to-day. Some upgrades hit hard for environment artists, others change things for animators, and some completely reshape CAD or arch-viz workflows. Here’s how the update lands in actual production scenarios.
For Modeling & CAD Users
If your world involves importing heavy assemblies from SolidWorks, Rhino, Fusion, or any CAD tool, Blender 5.0 finally stops feeling “fragile” around huge files.
The expanded file-block limit means you can throw hundreds of millions of vertices into a .blend without Blender instantly collapsing.
On top of that, SDF workflows open up new cleanup tricks, smooth blends, clean booleans, and procedural reshaping that works surprisingly well on messy CAD meshes. It makes the software feel sturdier when dealing with industrial models.
The takeaway: CAD-to-Blender pipelines don’t feel like a compromise anymore.

For Game Developers (Unreal, Unity, Godot)
Game devs get a handful of wins.
HDR and ACES support means lighting and color match real-time engines far more accurately. Geometry Nodes getting volume and SDF support also makes procedural world-building easier, scatter systems, terrain details, foliage distributions all behave more predictably.
And since Blender can now support giant scenes without choking, level-blockout and kitbash workflows feel smoother too.
In short: Blender 5.0 fits into a modern game pipeline without extra color fixes or “almost-right” exports.
For Arch-Viz Artists
Arch-viz artists probably feel this update more than anyone else.
Cycles’ new volume system means better fog, sunlight scattering, and interior ambience without insane render times. HDR color management makes materials look more accurate on high-end displays.
And the large-scene support is a small miracle when you’re working with furnished apartments, full houses, or multi-building models.
It’s the first time Blender genuinely feels comfortable with the scale arch-viz demands.

For Motion Graphics & Animators
Grease Pencil motion blur, improved corner handling, and the new Sequencer compositor changes make Blender a much friendlier tool for fast-paced motion graphics.
You can create stylized 2D/3D mixed shots, then apply finishing touches directly in the Sequencer without jumping to external apps. It’s not replacing your whole pipeline yet, but it’s creeping closer.
Animation feels slightly snappier too, small improvements, but noticeable.
For 2D/Hybrid Artists
If you live in that sweet spot between 2D and 3D, Blender 5.0 gives you a smoother drawing environment with fewer visual artifacts and more realistic motion.
Grease Pencil’s polish updates mean lines behave like you expect, and the new blur makes action scenes look much more fluid. Combined with Blender’s 3D tools, the hybrid workflow keeps getting more interesting.

Mistakes to Avoid (And When You Shouldn’t Upgrade Yet)
Blender 5.0 is a big step forward, but like any major release, it comes with a few traps. Nothing catastrophic, just the kind of things that can ruin your week if you don’t think ahead.
Upgrading in the middle of a project is the number one mistake.
If your add-ons are crucial to your workflow, rigging tools, exporters, custom shaders, CAD importers, chances are at least one of them will misbehave, or outright break. The Python API saw changes, and that always sends a small shockwave through the add-on ecosystem. Test first, commit later.
Another early pitfall is hardware expectations. Cycles’ new volume rendering is amazing, but it asks more from your GPU. If you’re running Blender on a thin laptop or an older dedicated card, don’t expect miracles. The software is moving forward, but your hardware might be stuck in 2019.
Intel Macs? Out of luck.
Blender officially dropped support in 5.0. If you’re still on one, 4.x is your safe zone.
Also, keep in mind that .blend files saved in 5.0 won’t open cleanly, or at all, in earlier versions. If you work with a team, or across multiple machines, don’t be the person who updates a shared project before everyone else is ready.
And a small but important habit: keep a second Blender install.
Production artists do this all the time. One stable version for ongoing work, one bleeding-edge version for exploration. It’s a simple way to avoid disasters without losing access to new features.
Blender 5.0 is worth upgrading to, just don’t do it blindly.
If you rely on custom tools, you might want to brush up on scripting again, our guide to using Python in Blender is a solid starting point before rewriting anything for 5.0.
How to Transition Smoothly Into 5.0
Upgrading to a big Blender release doesn’t need to be chaotic. A little prep goes a long way, and it keeps you from discovering problems halfway through a deadline.
Start with the simple stuff: test your old projects. Open a few heavy scenes, a few animation files, maybe a CAD import or two. You’ll see immediately if anything feels off, missing nodes, broken shaders, sluggish performance. It’s better to find out now than three hours before a client call.
Next, take a good look at your add-on list. Anything essential should be checked for 5.0 updates. Rigging tools, UV plugins, exporters, render add-ons, those tend to be the most sensitive to Python API changes. Most developers are quick to patch, but not all of them.
If you do a lot of lighting or VFX work, benchmark a few Cycles scenes. Heavy volumes, subsurface materials, and HDR lighting may behave differently. Some scenes will render faster; others might need new settings to look the same.
Then there’s the color pipeline. If you’re jumping into HDR or ACES workflows for the first time, make sure your monitor, export formats, and delivery targets match what you’re working in. HDR highlights look incredible in Blender 5.0, but only if the rest of your setup is actually HDR-ready.
A small pro tip: start a tiny project in 5.0, something you don’t mind experimenting with. Try the new Geometry Nodes features, test the Sequencer’s compositor, throw in a few volume lights. It’s the fastest way to get comfortable without risking anything important.
And if your hardware starts wheezing under the new features? That’s normal. Blender 5.0 expects more from your machine. This is one of the moments where working on a cloud setup can help you transition without upgrading your laptop immediately.
Blender 5.0 is exciting, but moving into it methodically makes the experience much smoother.
And if you’re on lightweight hardware like a Chromebook, we already explained your options in our Blender-on-Chromebook guide, including when cloud computing becomes the smarter choice.
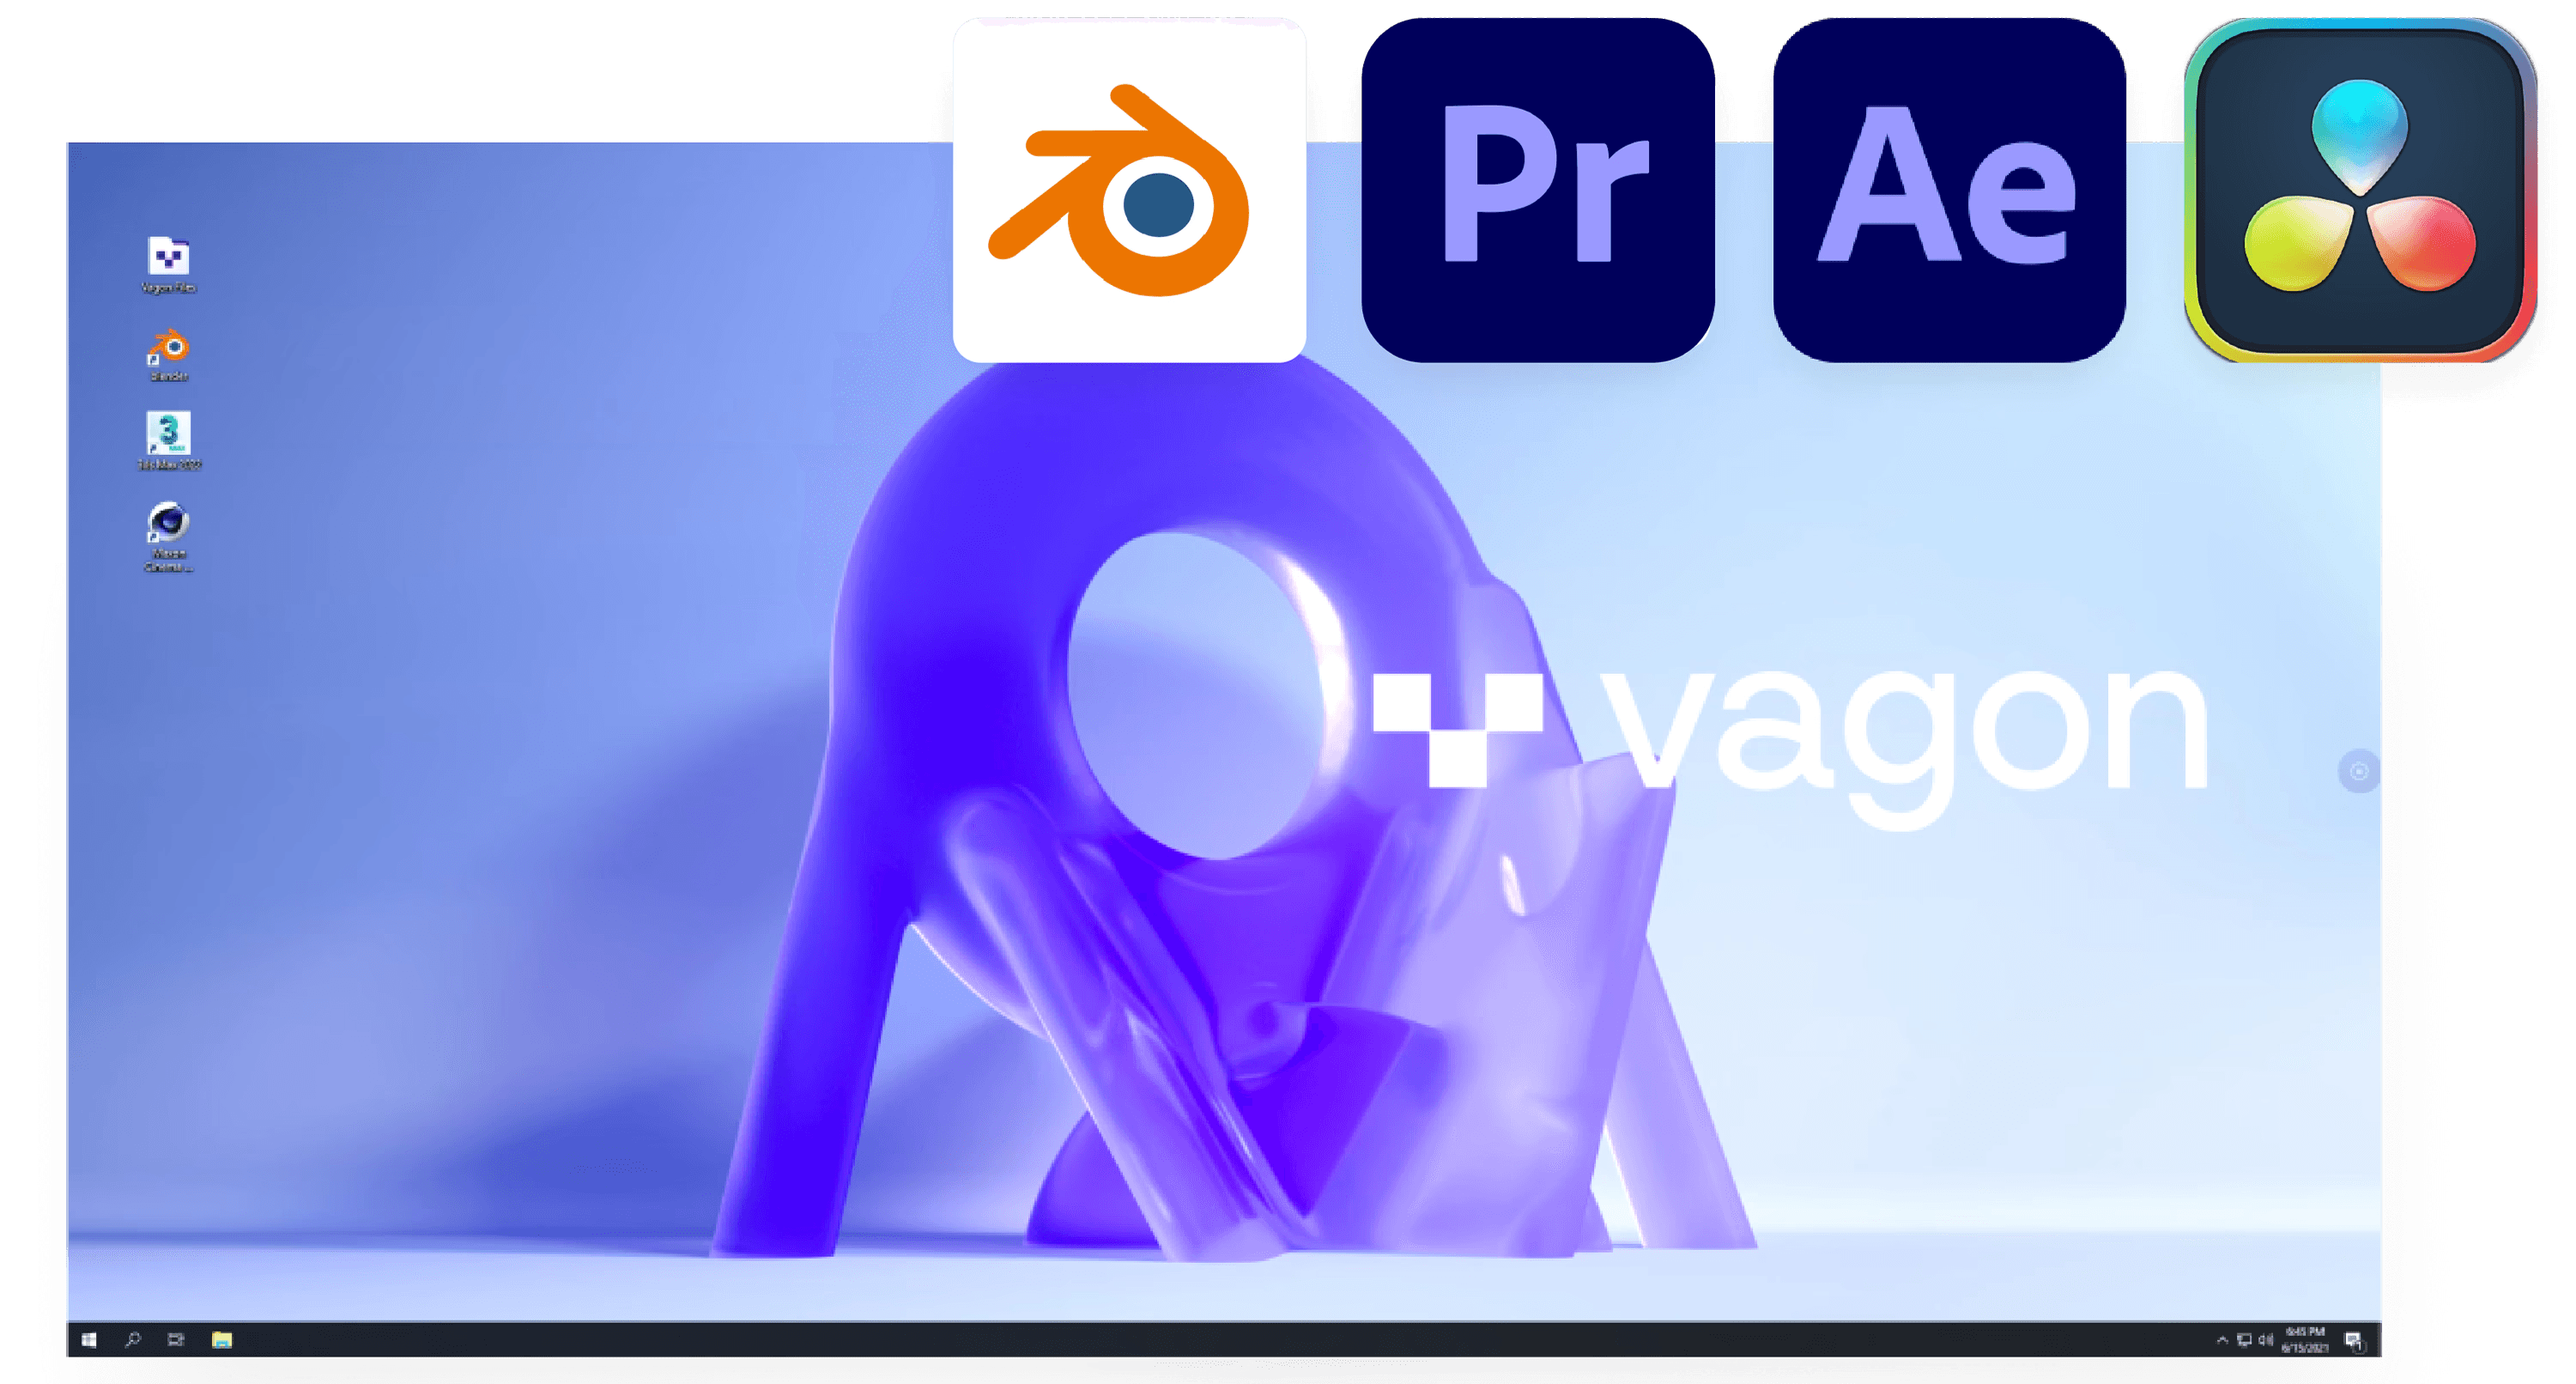
Why Blender 5.0 Feels Better on Vagon Cloud Computer
Blender 5.0 brings a lot of exciting upgrades, but let’s be honest: almost every major improvement adds more pressure on your hardware. Bigger scenes. Heavier shaders. Higher color ranges. More complex geometry nodes. It’s great for creativity… not so great for laptop fans.
That’s exactly where Vagon Cloud Computer steps in.
When Blender asks for more power, Vagon simply gives it to you. No drama, no new workstation required. You just switch to a stronger virtual machine and keep building, whether you’re pushing massive SDF workflows, rendering dense volume lighting, or testing HDR scenes that would normally melt a mid-range GPU.
What surprised many of our users is how natural Blender 5.0 feels on Vagon.
The update expects modern hardware. Vagon is modern hardware.
So the features don’t feel “heavy”, they just feel like part of your normal workflow.
Working on a huge CAD import? Jump to a beefier GPU.
Rendering a foggy nighttime arch-viz scene? Switch to more VRAM.
Experimenting with 5.0’s new volume tools? Scale up when you need to, scale down when you don’t.
The only thing you really need is a decent connection and the right GPU tier for your scene. After that, Blender behaves the way it should: responsive in the viewport, faster in Cycles, and free from the constant fear of running out of resources.
Blender keeps evolving. Vagon just makes sure your hardware doesn’t hold you back.
Final Thoughts
Blender 5.0 doesn’t feel like a routine update. It feels like the start of a new phase, one where Blender expects more from its users and, in return, gives you tools that genuinely expand what you can create. Volumes behave better. Geometry Nodes grows into something far more ambitious. Cycles feels more modern. Color finally matches the standards of high-end pipelines. Even the quieter UI and workflow changes make long sessions smoother.
Not everything is perfect, and that’s fine. Some add-ons will need time to catch up. Some machines will groan under the extra workload. And yes, a few old habits might need to change. But once you spend a little time in 5.0, it’s hard to imagine going back.
If you’re curious where Blender is heading, this release makes it pretty clear: larger scenes, smarter workflows, richer lighting, and deeper integration across 2D, 3D, and video.
My suggestion? Open one of your favorite projects in Blender 5.0 and just look around. You’ll feel the difference pretty quickly. And if your hardware starts complaining, well… there are easy ways around that now.
If you’re exploring other lookdev options beyond Cycles, our guide to the best Blender render engines breaks down the strengths of each one.
FAQs
1. Is Blender 5.0 worth upgrading to right now?
Mostly yes. If you’re starting a new project or want access to the new Geometry Nodes, volume tools, ACES pipeline, or updated Cycles behavior, 5.0 is absolutely worth it. If you’re mid-project and rely on older add-ons, test first, some things may need updates.
2. Will Blender 5.0 break my existing projects?
Not “break” exactly, but scenes may render differently, especially if you use volumes, SSS, or unusual lighting setups. Color management is also more accurate now, so older scenes may look slightly off until you adjust them. Always keep a backup in the older version.
3. Are my add-ons compatible with 5.0?
Many popular add-ons are already updated, but not all of them. The Python API had changes, so anything complex, rigging tools, exporters, simulation helpers, could need a patch. If your workflow depends on add-ons, check compatibility before upgrading.
4. Does Blender 5.0 require a stronger GPU?
It doesn’t require one, but it definitely benefits from one. Volume rendering, SDF workflows, and HDR pipelines all ask for more VRAM and faster cores. If your machine already struggles with 4.x, expect it to feel even tighter in 5.0.
5. Can I open Blender 5.0 files in older versions?
Usually no. Files saved in 5.0 aren’t guaranteed to open cleanly in older builds. Some might open with missing features, others may fail entirely. Stick to 5.0 once you save a project in it.
6. Did Blender really drop support for Intel Macs?
Yes. Blender 5.0 officially ends support for Intel Macs. If you’re still using one, Blender 4.x will be your ceiling unless you switch hardware.
7. Is Blender 5.0 good for beginners?
Surprisingly, yes. The UI cleanup, unified theme settings, and more intuitive behavior make the software easier to learn. You don’t need the advanced features to benefit from the update.
8. Will Blender 5.0 run well on a laptop?
It depends on the laptop. Lightweight scenes will be fine. Heavy geometry, volumes, and HDR rendering will push mobile GPUs harder than before. If you hit performance limits often, cloud compute is a smarter option than forcing your laptop to suffer.
9. Is the new ACES/HDR pipeline mandatory?
Not at all. You can still work in SDR just like before. But if you’re doing film, real-time engine work, or high-end rendering, ACES is a huge upgrade in consistency.
10. What’s the biggest improvement in 5.0 for most people?
Honestly? It depends on your workflow. Modelers will say SDF + huge-scene support. Animators might say Grease Pencil blur. Render artists will pick Cycles improvements. My personal answer: Blender finally feels like it belongs in modern color and lighting pipelines.
I opened Blender after a week away, fully expecting the same old startup routine, and suddenly there it was on the splash screen, Blender 5.0. For a second I just stared at it, wondering if I’d accidentally downloaded something experimental. But no, this is the real thing. And it doesn’t feel like a normal point-update at all. It feels heavier, louder, and a little bolder than Blender usually allows itself to be.
So here’s what actually matters in Blender 5.0, the things you notice when you’re actually creating, not the pieces buried in the patch notes.
Why Blender 5.0 Matters Right Now
Blender doesn’t roll out big version numbers casually. When it jumps from a 4.x to a clean 5.0, it usually means something underneath has shifted, not just a handful of shiny tools, but a new baseline for how Blender expects you to work.
The release landed on November 18, 2025, and the timing fits where the 3D world is heading. Scenes are getting heavier. Procedural everything is becoming normal. HDR workflows are no longer “for studios only.” And artists are mixing 3D, 2D, CAD imports, animation, and video editing inside one tool way more often than even two years ago.
Blender basically responded with: “Alright then. Let’s grow.”
You feel that the moment you open an old project in 5.0. Certain nodes behave differently. Color looks more honest. Big meshes load without Blender throwing a fit. Even Cycles feels like it’s been working out while you were away.
It’s the kind of release that quietly suggests your workflow might need to level up a bit, but in a way that actually feels exciting instead of intimidating.
#1. Geometry Nodes Grows Up (Volumes, SDFs, New Modifiers)
Geometry Nodes has been powerful for a while, but in Blender 5.0 it finally crosses into a different category. It doesn’t just scatter objects or automate repetitive tasks anymore, it starts behaving like a real procedural system, the kind you normally associate with Houdini or game-engine tools.
The biggest jump is volume support. You can now work directly with OpenVDB grids inside Geometry Nodes. That means smoke-like shapes, fog shells, density fields, stylized volume objects, and all those “soft-body but not really soft-body” things that used to require hacks. It also means you can mix meshes and volumes in ways that simply weren’t possible before.
Right next to that is the new Signed Distance Field (SDF) support. If you haven’t used SDF modeling before, think of it as sculpting with invisible math clay. It lets you blend, carve, smooth, or reshape objects using distance data instead of polygons. The practical result? Cleaner boolean workflows, more forgiving hard-surface modeling, and procedural shapes that don’t explode when you least expect it.
And then Blender adds a set of new, actually useful GN-based modifiers, Scatter on Surface, Instance on Elements, and a few others that immediately remove some old manual steps. For environment artists, this alone is a productivity boost. For people importing CAD models, it helps you rebuild certain repetitive components without doing it one piece at a time.
My honest reaction: Geometry Nodes is now powerful enough to be dangerous. You can build things you would’ve called “overkill” in 4.x. But it also means more complexity, more ways to break a node tree, and more responsibility to stay organized. Worth it? Absolutely. Just don’t underestimate how deep this rabbit hole goes.
#2. Cycles Has New Tricks (And They’re Not Subtle)
Cycles didn’t get a small polish pass in Blender 5.0, it got smarter. And a bit sharper. The kind of upgrade where you notice the difference even if you weren’t looking for it.
The biggest change is the new null-scattering volume algorithm, which Blender now uses by default. If you’ve ever tried lighting fog, smoke, clouds, fire, or anything “thick,” you’ve probably watched Cycles chew through your GPU like it was trying to escape the room. The new algorithm is cleaner, faster, and gives you more believable results with fewer sampling headaches. It feels like volume rendering finally graduated.
Then there’s the extended thin-film iridescence, which now works in the Metallic BSDF. If you render anything coated, glossy, soapy, pearlescent, automotive, or sci-fi, this matters. Before, you had to fake a lot of those looks. Now they behave much closer to real materials, and in complex lighting, the difference isn’t subtle.
Subsurface scattering (SSS) also gets a quiet upgrade, better detail retention, better weighting, fewer “mushy plastic” results. It’s the kind of thing you don’t appreciate until you put skin, wax, or clay under a light and think, “Oh, this actually looks right.”
And because this is Cycles, the usual rule applies: if you’re on a weaker GPU or an older laptop, you’re going to feel these improvements… but you’re also going to feel the load. Better algorithms don’t magically make your machine stronger. Blender 5.0 definitely expects more from your hardware.
But if you have the power for it, Cycles in 5.0 feels like a renderer that’s finally catching up with the modern lighting world instead of just surviving in it.
If you ever need to take Blender mobile, we also put together a guide on using Blender on an iPad that actually shows what’s possible and what isn’t on tablet hardware.
#3. Huge Scenes Are Finally Truly Supported
One of the most underrated upgrades in Blender 5.0 is something you don’t notice until you load a monster project: Blender can finally handle truly massive scene data.
The technical change is simple on the surface, .blend files now support blocks larger than 2 GB, but the impact is huge. It means you can push “a few hundred million” vertices through a single file without Blender panicking, freezing, or pretending your mesh doesn’t exist. For anyone working in CAD-heavy workflows, this is a quiet blessing.
Importing huge assemblies from SolidWorks or Rhino?
Massive kitbash collections for environments?
Architectural scenes that feel closer to small cities than rooms?
Blender 5.0 just handles them better. Significantly better.
It’s not magic, of course. Your hardware still matters, and you’ll still feel the weight if you’re on a small GPU. But the software itself is no longer the bottleneck in the same way it was before.
What I personally noticed is how much smoother navigation becomes in these giant scenes. You still shouldn’t try to orbit around a 300-million-polygon mesh with a potato laptop, but the point is, Blender doesn’t crash the moment you try. The ceiling is higher, which means your ideas can be bigger.
And honestly, this alone makes 5.0 feel like a more professional tool. Blender always prided itself on flexibility, but now it can finally stand next to commercial 3D packages when it comes to raw scene size.
#4. Color Management Finally Matches the Industry
Blender’s color management has always been “fine”, good enough for a lot of work, but never fully aligned with modern pipelines. In 5.0, that changes. Blender finally steps into the same color world used by film studios, Unreal Engine workflows, and high-end HDR monitors.
The big news is full support for ACES 1.3 and ACES 2.0. If you’ve ever tried matching Blender renders with Unreal, Nuke, Resolve, or any HDR display pipeline, you probably know how frustrating it was to get consistent results. Now the math lines up. The color transforms line up. The final output feels like what you intended instead of a weird approximation.
And then there’s the wide-gamut and HDR support: Display-P3, Rec.2020, and Rec.2100 PQ. These are not tiny improvements. They let you actually see the lighting you’re creating, especially if you’re doing bright specular work, neon, metals, or photoreal rendering. If you’ve been using an HDR monitor and always felt Blender undersold your highlights, the difference here is obvious.
Does everyone need this? No.
If you’re rendering for Instagram, TikTok, or basic SDR monitors, you won’t suddenly produce magic just because your color space expanded. But if you’re building real-time pipelines, film assets, or high-dynamic-range renders, Blender finally behaves like it belongs in that ecosystem.
For the first time, Blender’s color feels professional out of the box, not patched together with add-ons or custom configs.
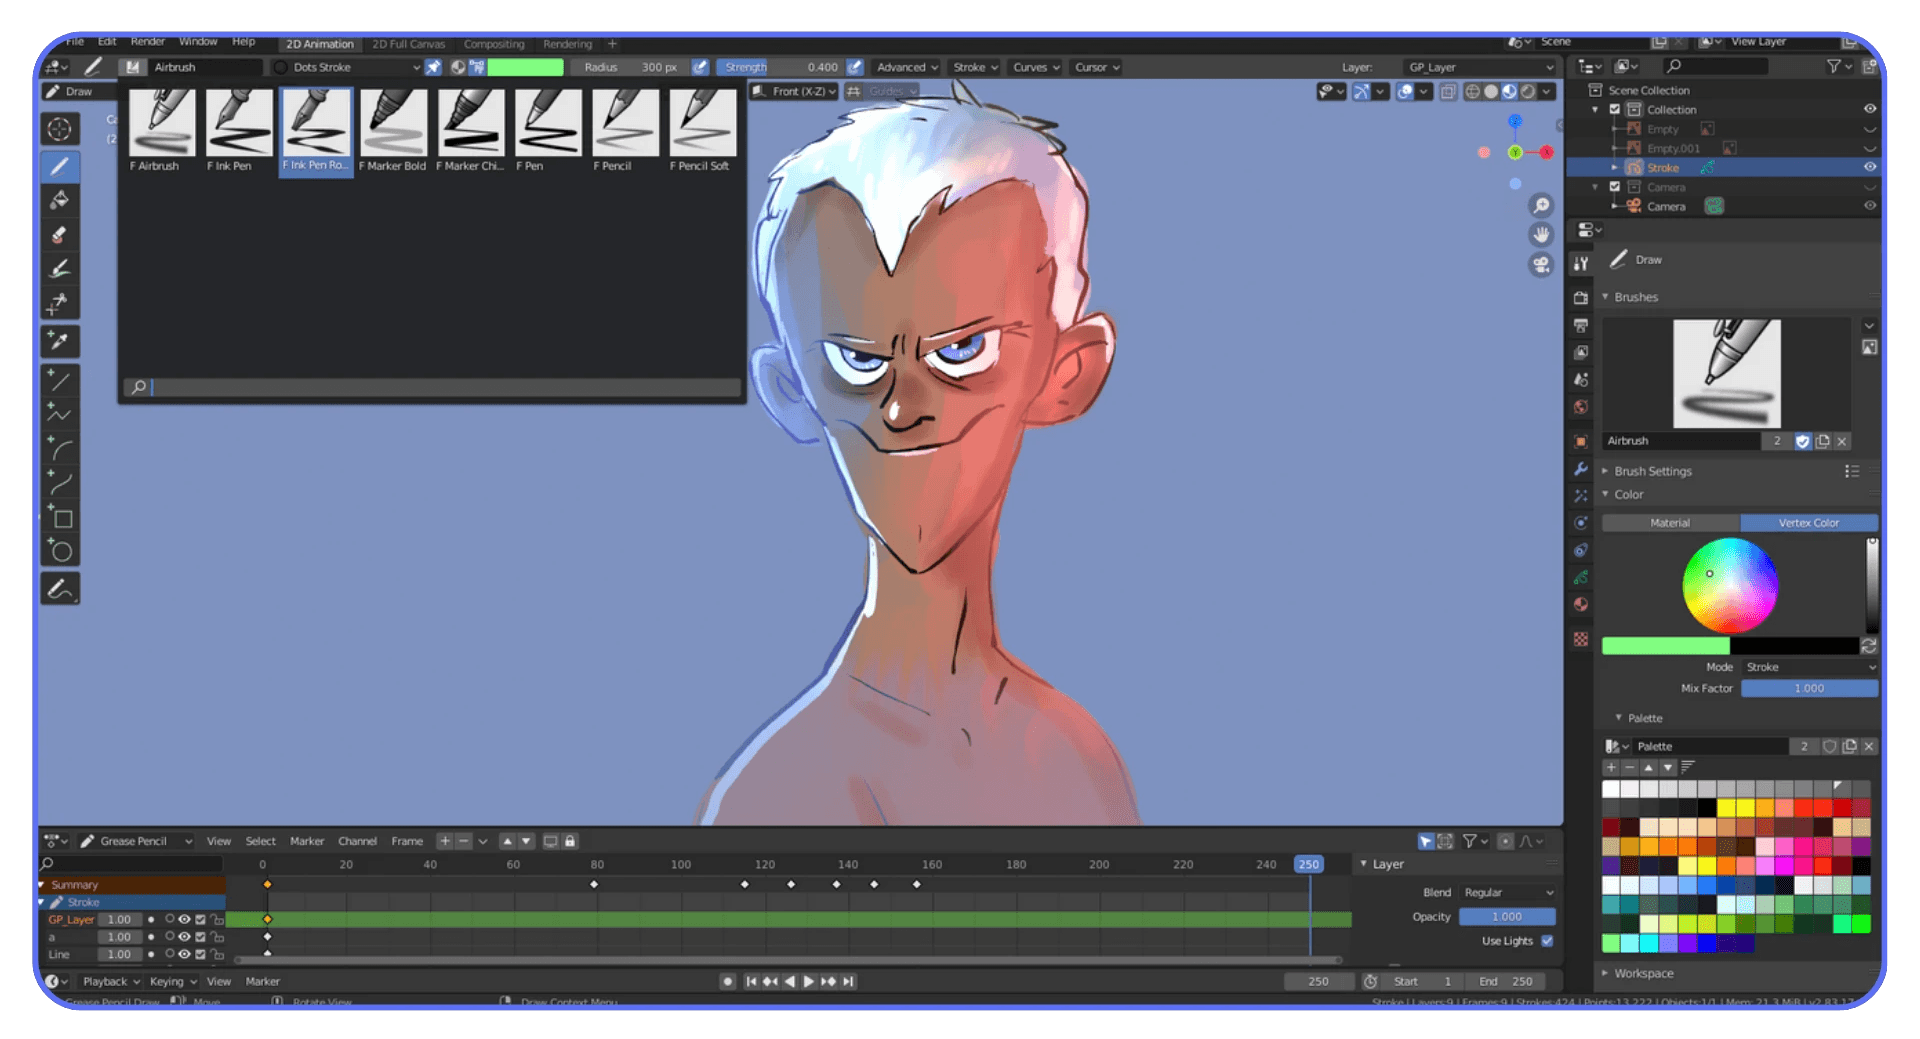
#5. Grease Pencil & Animation Polish
Grease Pencil doesn’t always get the spotlight, but in Blender 5.0 it gets a couple of upgrades that make a real difference if you do 2D or hybrid work.
The standout change is motion blur for Grease Pencil strokes. This has been one of those long-requested features that always sat just outside the roadmap. Now it’s finally here, and it changes the feel of 2D animation inside Blender. Fast strokes look faster. Action shots feel smoother. You no longer have to fake motion blur frame-by-frame or rely on external compositing tricks.
Blender also cleaned up how corners behave in Grease Pencil. Strokes can now toggle between sharp and flat corners more predictably, which makes line art react more like you expect. It sounds small, but if you’re animating on a tablet and trying to control the flow of a character’s outline, this matters more than you think.
Outside of Grease Pencil, the animation system gets a few thoughtful refinements, mostly quality-of-life improvements that make rigging and motion feel a little less stiff. Not game-changing, but noticeable if you animate often.
The bigger picture: Blender is clearly positioning Grease Pencil as a proper 2D/3D hybrid tool. These changes nudge it closer to something that can compete with dedicated 2D apps, without losing the advantages of being embedded in a full 3D environment.
If you want to go deeper into 2D workflows, we already published a full guide to 2D animation in Blender that pairs perfectly with the new Grease Pencil upgrades in 5.0.
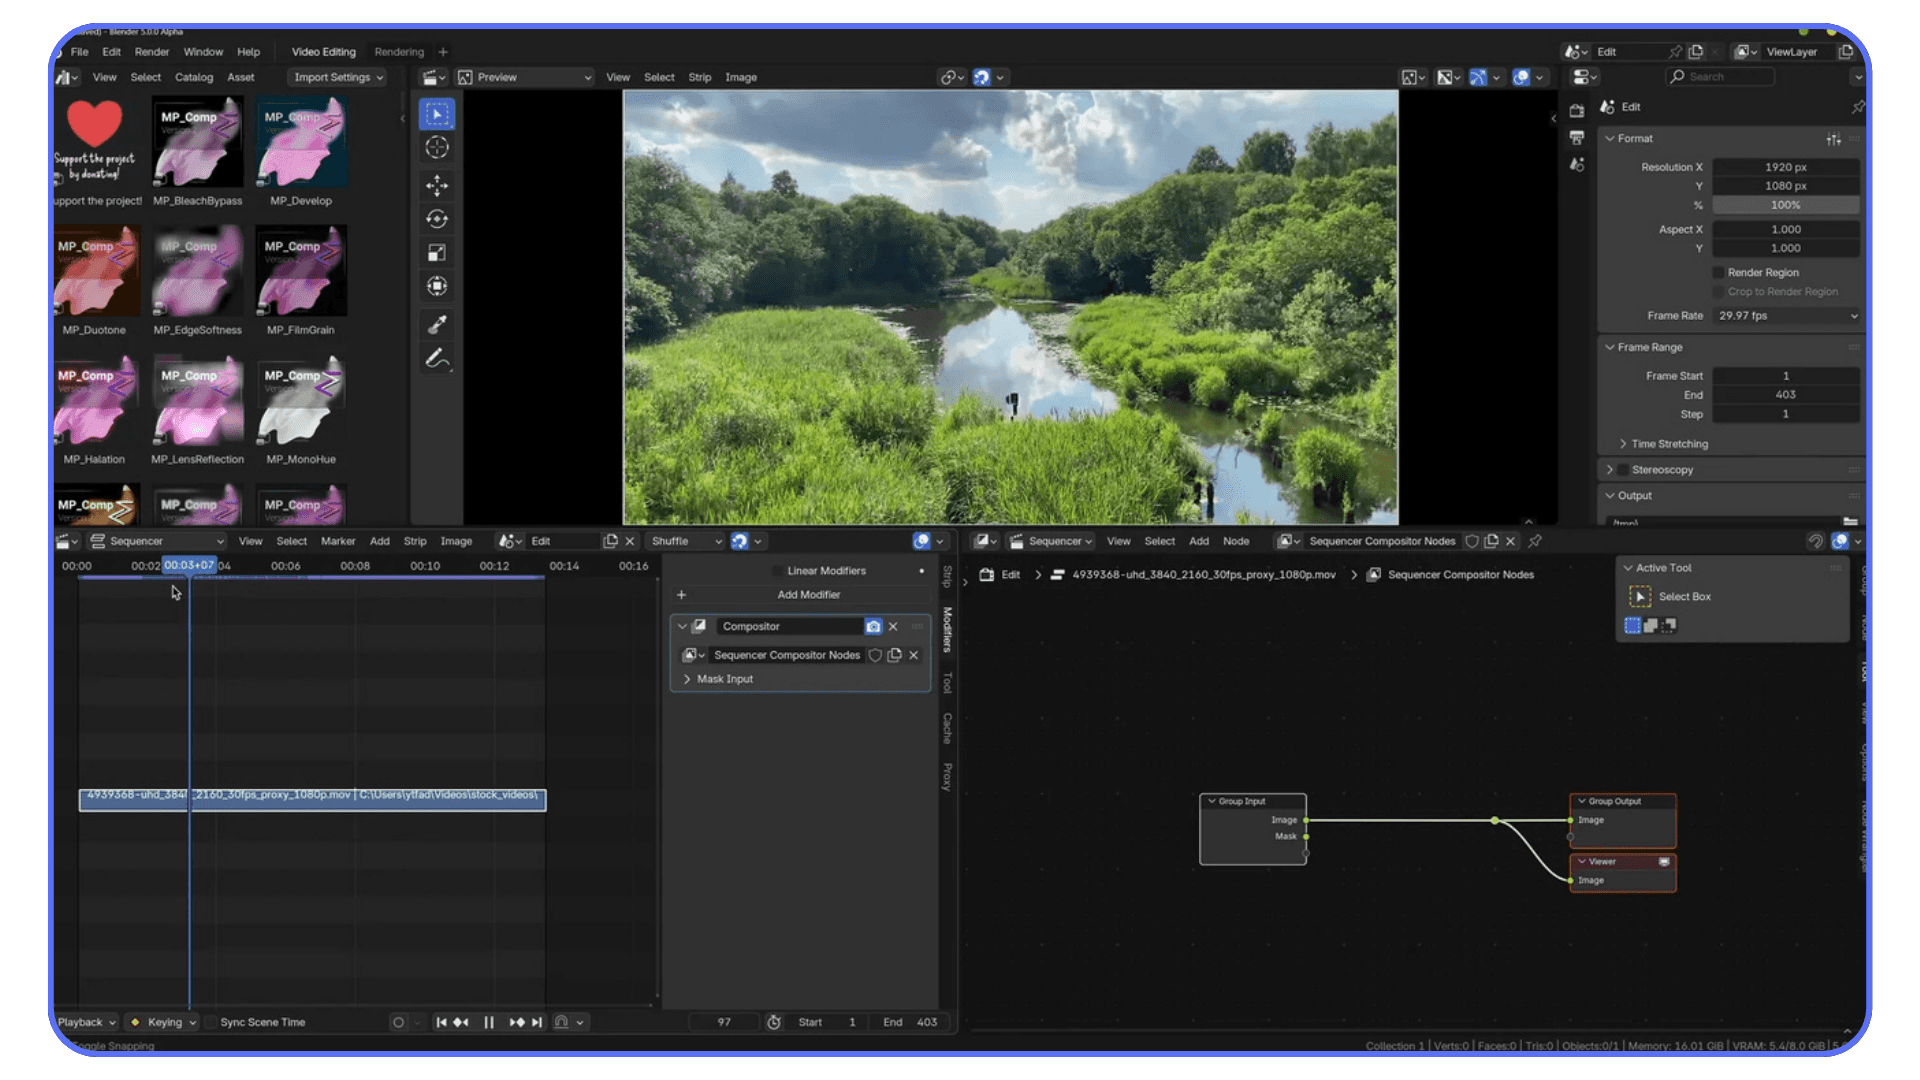
#6. Video Sequencer Gets a Cheat Code
The Video Sequencer has always been one of those Blender features people either love for its simplicity or avoid entirely because it felt too limited. Blender 5.0 gives it something it’s been missing for years: real compositing power.
The new Compositor Modifier lets you apply a full compositing node tree directly inside the Sequencer. That means color grading, glow passes, blur, masks, LUT-style adjustments, stylized looks, basically all the quick fixes you used to jump into the Compositor or an external editor for.
Now it’s just… a modifier.
No round-trips. No rebuilding effects in a different panel. No exporting halfway just to check a look.
If you edit videos or animatics directly in Blender, this is a huge time-saver. Even for 3D artists who only use the Sequencer to assemble preview renders, it removes a bunch of friction.
Is it ready to replace Resolve, Premiere, or Final Cut? Not quite. You won’t run a full documentary or client-grade commercial through it. But for YouTube content, previz, motion-graphics rough cuts, and project assembly, it’s far more capable than before.
It feels like the feature people always assumed Blender had, but it finally does.
#7. UI Cleanup & Workflow Refinements
Blender’s interface didn’t get a flashy redesign in 5.0, but it did get a much-needed cleanup. The kind of cleanup you only appreciate after a few hours of actual work.
For starters, Blender removed or merged over 300 theme settings. If you’ve ever tried customizing a theme, or downloaded one that looked great in screenshots but broke half the icons, you know how messy things had become. Now the theme system is tighter, more predictable, and a lot harder to accidentally ruin.
The Outliner also feels smoother. Icons are more consistent, hierarchy is clearer, and little interactions, renaming, dragging, toggling visibility, are less finicky. Nothing dramatic, just the type of polish that makes long sessions feel easier.
UV editing gets a couple of long-overdue upgrades too. Sync Selection is now on by default, and the packing/alignment tools behave more like the ones artists expect in 2025. It’s still Blender, don’t expect a full RizomUV competitor, but the daily workflow definitely feels faster.
Together, these changes don’t scream for attention, but they add up. Blender 5.0 feels less cluttered, more focused, and more intentional. You can tell a lot of old quirks were sanded down quietly in the background.
And if you’re the kind of artist who loves speeding things up, our Blender shortcuts and hotkeys guide is a lifesaver, especially with the cleaner UI in 5.0.
What These Changes Mean for Real Workflows
Blender 5.0 isn’t just a list of features, it genuinely shifts how different types of artists work day-to-day. Some upgrades hit hard for environment artists, others change things for animators, and some completely reshape CAD or arch-viz workflows. Here’s how the update lands in actual production scenarios.
For Modeling & CAD Users
If your world involves importing heavy assemblies from SolidWorks, Rhino, Fusion, or any CAD tool, Blender 5.0 finally stops feeling “fragile” around huge files.
The expanded file-block limit means you can throw hundreds of millions of vertices into a .blend without Blender instantly collapsing.
On top of that, SDF workflows open up new cleanup tricks, smooth blends, clean booleans, and procedural reshaping that works surprisingly well on messy CAD meshes. It makes the software feel sturdier when dealing with industrial models.
The takeaway: CAD-to-Blender pipelines don’t feel like a compromise anymore.
For Game Developers (Unreal, Unity, Godot)
Game devs get a handful of wins.
HDR and ACES support means lighting and color match real-time engines far more accurately. Geometry Nodes getting volume and SDF support also makes procedural world-building easier, scatter systems, terrain details, foliage distributions all behave more predictably.
And since Blender can now support giant scenes without choking, level-blockout and kitbash workflows feel smoother too.
In short: Blender 5.0 fits into a modern game pipeline without extra color fixes or “almost-right” exports.
For Arch-Viz Artists
Arch-viz artists probably feel this update more than anyone else.
Cycles’ new volume system means better fog, sunlight scattering, and interior ambience without insane render times. HDR color management makes materials look more accurate on high-end displays.
And the large-scene support is a small miracle when you’re working with furnished apartments, full houses, or multi-building models.
It’s the first time Blender genuinely feels comfortable with the scale arch-viz demands.
For Motion Graphics & Animators
Grease Pencil motion blur, improved corner handling, and the new Sequencer compositor changes make Blender a much friendlier tool for fast-paced motion graphics.
You can create stylized 2D/3D mixed shots, then apply finishing touches directly in the Sequencer without jumping to external apps. It’s not replacing your whole pipeline yet, but it’s creeping closer.
Animation feels slightly snappier too, small improvements, but noticeable.
For 2D/Hybrid Artists
If you live in that sweet spot between 2D and 3D, Blender 5.0 gives you a smoother drawing environment with fewer visual artifacts and more realistic motion.
Grease Pencil’s polish updates mean lines behave like you expect, and the new blur makes action scenes look much more fluid. Combined with Blender’s 3D tools, the hybrid workflow keeps getting more interesting.
Mistakes to Avoid (And When You Shouldn’t Upgrade Yet)
Blender 5.0 is a big step forward, but like any major release, it comes with a few traps. Nothing catastrophic, just the kind of things that can ruin your week if you don’t think ahead.
Upgrading in the middle of a project is the number one mistake.
If your add-ons are crucial to your workflow, rigging tools, exporters, custom shaders, CAD importers, chances are at least one of them will misbehave, or outright break. The Python API saw changes, and that always sends a small shockwave through the add-on ecosystem. Test first, commit later.
Another early pitfall is hardware expectations. Cycles’ new volume rendering is amazing, but it asks more from your GPU. If you’re running Blender on a thin laptop or an older dedicated card, don’t expect miracles. The software is moving forward, but your hardware might be stuck in 2019.
Intel Macs? Out of luck.
Blender officially dropped support in 5.0. If you’re still on one, 4.x is your safe zone.
Also, keep in mind that .blend files saved in 5.0 won’t open cleanly, or at all, in earlier versions. If you work with a team, or across multiple machines, don’t be the person who updates a shared project before everyone else is ready.
And a small but important habit: keep a second Blender install.
Production artists do this all the time. One stable version for ongoing work, one bleeding-edge version for exploration. It’s a simple way to avoid disasters without losing access to new features.
Blender 5.0 is worth upgrading to, just don’t do it blindly.
If you rely on custom tools, you might want to brush up on scripting again, our guide to using Python in Blender is a solid starting point before rewriting anything for 5.0.
How to Transition Smoothly Into 5.0
Upgrading to a big Blender release doesn’t need to be chaotic. A little prep goes a long way, and it keeps you from discovering problems halfway through a deadline.
Start with the simple stuff: test your old projects. Open a few heavy scenes, a few animation files, maybe a CAD import or two. You’ll see immediately if anything feels off, missing nodes, broken shaders, sluggish performance. It’s better to find out now than three hours before a client call.
Next, take a good look at your add-on list. Anything essential should be checked for 5.0 updates. Rigging tools, UV plugins, exporters, render add-ons, those tend to be the most sensitive to Python API changes. Most developers are quick to patch, but not all of them.
If you do a lot of lighting or VFX work, benchmark a few Cycles scenes. Heavy volumes, subsurface materials, and HDR lighting may behave differently. Some scenes will render faster; others might need new settings to look the same.
Then there’s the color pipeline. If you’re jumping into HDR or ACES workflows for the first time, make sure your monitor, export formats, and delivery targets match what you’re working in. HDR highlights look incredible in Blender 5.0, but only if the rest of your setup is actually HDR-ready.
A small pro tip: start a tiny project in 5.0, something you don’t mind experimenting with. Try the new Geometry Nodes features, test the Sequencer’s compositor, throw in a few volume lights. It’s the fastest way to get comfortable without risking anything important.
And if your hardware starts wheezing under the new features? That’s normal. Blender 5.0 expects more from your machine. This is one of the moments where working on a cloud setup can help you transition without upgrading your laptop immediately.
Blender 5.0 is exciting, but moving into it methodically makes the experience much smoother.
And if you’re on lightweight hardware like a Chromebook, we already explained your options in our Blender-on-Chromebook guide, including when cloud computing becomes the smarter choice.
Why Blender 5.0 Feels Better on Vagon Cloud Computer
Blender 5.0 brings a lot of exciting upgrades, but let’s be honest: almost every major improvement adds more pressure on your hardware. Bigger scenes. Heavier shaders. Higher color ranges. More complex geometry nodes. It’s great for creativity… not so great for laptop fans.
That’s exactly where Vagon Cloud Computer steps in.
When Blender asks for more power, Vagon simply gives it to you. No drama, no new workstation required. You just switch to a stronger virtual machine and keep building, whether you’re pushing massive SDF workflows, rendering dense volume lighting, or testing HDR scenes that would normally melt a mid-range GPU.
What surprised many of our users is how natural Blender 5.0 feels on Vagon.
The update expects modern hardware. Vagon is modern hardware.
So the features don’t feel “heavy”, they just feel like part of your normal workflow.
Working on a huge CAD import? Jump to a beefier GPU.
Rendering a foggy nighttime arch-viz scene? Switch to more VRAM.
Experimenting with 5.0’s new volume tools? Scale up when you need to, scale down when you don’t.
The only thing you really need is a decent connection and the right GPU tier for your scene. After that, Blender behaves the way it should: responsive in the viewport, faster in Cycles, and free from the constant fear of running out of resources.
Blender keeps evolving. Vagon just makes sure your hardware doesn’t hold you back.
Final Thoughts
Blender 5.0 doesn’t feel like a routine update. It feels like the start of a new phase, one where Blender expects more from its users and, in return, gives you tools that genuinely expand what you can create. Volumes behave better. Geometry Nodes grows into something far more ambitious. Cycles feels more modern. Color finally matches the standards of high-end pipelines. Even the quieter UI and workflow changes make long sessions smoother.
Not everything is perfect, and that’s fine. Some add-ons will need time to catch up. Some machines will groan under the extra workload. And yes, a few old habits might need to change. But once you spend a little time in 5.0, it’s hard to imagine going back.
If you’re curious where Blender is heading, this release makes it pretty clear: larger scenes, smarter workflows, richer lighting, and deeper integration across 2D, 3D, and video.
My suggestion? Open one of your favorite projects in Blender 5.0 and just look around. You’ll feel the difference pretty quickly. And if your hardware starts complaining, well… there are easy ways around that now.
If you’re exploring other lookdev options beyond Cycles, our guide to the best Blender render engines breaks down the strengths of each one.
FAQs
1. Is Blender 5.0 worth upgrading to right now?
Mostly yes. If you’re starting a new project or want access to the new Geometry Nodes, volume tools, ACES pipeline, or updated Cycles behavior, 5.0 is absolutely worth it. If you’re mid-project and rely on older add-ons, test first, some things may need updates.
2. Will Blender 5.0 break my existing projects?
Not “break” exactly, but scenes may render differently, especially if you use volumes, SSS, or unusual lighting setups. Color management is also more accurate now, so older scenes may look slightly off until you adjust them. Always keep a backup in the older version.
3. Are my add-ons compatible with 5.0?
Many popular add-ons are already updated, but not all of them. The Python API had changes, so anything complex, rigging tools, exporters, simulation helpers, could need a patch. If your workflow depends on add-ons, check compatibility before upgrading.
4. Does Blender 5.0 require a stronger GPU?
It doesn’t require one, but it definitely benefits from one. Volume rendering, SDF workflows, and HDR pipelines all ask for more VRAM and faster cores. If your machine already struggles with 4.x, expect it to feel even tighter in 5.0.
5. Can I open Blender 5.0 files in older versions?
Usually no. Files saved in 5.0 aren’t guaranteed to open cleanly in older builds. Some might open with missing features, others may fail entirely. Stick to 5.0 once you save a project in it.
6. Did Blender really drop support for Intel Macs?
Yes. Blender 5.0 officially ends support for Intel Macs. If you’re still using one, Blender 4.x will be your ceiling unless you switch hardware.
7. Is Blender 5.0 good for beginners?
Surprisingly, yes. The UI cleanup, unified theme settings, and more intuitive behavior make the software easier to learn. You don’t need the advanced features to benefit from the update.
8. Will Blender 5.0 run well on a laptop?
It depends on the laptop. Lightweight scenes will be fine. Heavy geometry, volumes, and HDR rendering will push mobile GPUs harder than before. If you hit performance limits often, cloud compute is a smarter option than forcing your laptop to suffer.
9. Is the new ACES/HDR pipeline mandatory?
Not at all. You can still work in SDR just like before. But if you’re doing film, real-time engine work, or high-end rendering, ACES is a huge upgrade in consistency.
10. What’s the biggest improvement in 5.0 for most people?
Honestly? It depends on your workflow. Modelers will say SDF + huge-scene support. Animators might say Grease Pencil blur. Render artists will pick Cycles improvements. My personal answer: Blender finally feels like it belongs in modern color and lighting pipelines.
Get Beyond Your Computer Performance
Run applications on your cloud computer with the latest generation hardware. No more crashes or lags.

Trial includes 1 hour usage + 7 days of storage.
Summarize with AI

Ready to focus on your creativity?
Vagon gives you the ability to create & render projects, collaborate, and stream applications with the power of the best hardware.

Vagon Blog


Run heavy applications on any device with
your personal computer on the cloud.
San Francisco, California
Solutions
Vagon Teams
Vagon Streams
Use Cases
Resources
Vagon Blog
What Slows Down After Effects Projects?
The First 30 Minutes in Blender 3D: A Practical Workflow Guide
What’s New in Godot 4.7? Key Features, Upgrades, and Workflow Improvements
What Slows Down Blender 3D Projects?
What Slows Down Adobe Photoshop Projects?
The First 30 Minutes in Adobe Photoshop: A Practical Workflow Guide
Before You Start in Adobe Photoshop: A Practical Setup Checklist
What’s New in Unreal Engine 5.8? Key Features and Upgrade Advice
How to Run Windows on an iPad: 4 Best Ways (2026)
Vagon Blog
Run heavy applications on any device with
your personal computer on the cloud.
San Francisco, California
Solutions
Vagon Teams
Vagon Streams
Use Cases
Resources
Vagon Blog