Instant Connection for Pixel Streaming
— New Feature Automated Setup
Best PCs & Workstations for Reality Capture
Best PCs & Workstations for Reality Capture
Streams
Best PCs & Workstations for Reality Capture
Table of Contents
I still remember the first time I ran a dataset of over 8,000 drone images through RealityCapture. On my old setup, that kind of job would lock up the machine for two days straight, fans screaming, progress bar inching forward like it had better things to do. Then I rebuilt my workstation with a balanced trio: a high-core CPU, an NVIDIA GPU with plenty of CUDA cores, and a fast NVMe drive for the scratch data. Same dataset, same software, but this time it chewed through the reconstruction in under four hours. I didn’t even finish my second coffee. That’s when it clicked for me: in reality capture, raw specs don’t win alone. The right mix of CPU, GPU, and storage does. So let’s skip the fluff and talk about what to actually buy, and why.
Pick Your Software Before Your Hardware
Here’s a mistake I see all the time: people go hunting for “the best PC for reality capture” like there’s one magic build that covers everything. It doesn’t work that way. The right machine depends on which software you actually live in.
If you’re working in RealityScan 2.0 (the rebranded RealityCapture), your GPU isn’t optional. You must have an NVIDIA card with CUDA cores. Without it, you can align photos, but you can’t generate meshes or textures. RealityScan is ruthless about CUDA, so even the beefiest AMD card won’t help you here.
Agisoft Metashape plays it differently. It’ll use NVIDIA CUDA, yes, but it also supports AMD through OpenCL. In my experience, RAM becomes the real limiter here, Metashape will happily eat everything you give it, especially if you’re throwing 40-megapixel aerials at it.
Pix4Dmapper sits somewhere in the middle. It’s lighter on GPU demands, but still wants a solid CPU and plenty of fast storage. The GPU doesn’t have to be top-tier; stability matters more than squeezing the last 5% of speed.
And then there’s ContextCapture (now iTwin Capture Modeler). That one’s built for city-scale projects. It’s less about one monster workstation and more about grid setups — multiple machines crunching in parallel. If you’re a small studio, it’ll still run on a single PC, but you’ll really feel the difference when you scale out.
So before you blow the budget on shiny parts, stop and ask yourself a boring question: which app do I actually spend 80% of my time in? Because that one answer changes what “best PC” even means.
What Speeds It Up
Let’s cut through the noise. Every hardware guide will tell you everything matters. True, but not everything matters equally. Here’s the honest breakdown from years of testing, benchmarking, and just plain waiting on progress bars.
CPU sits at the top of the food chain. Most reality capture apps lean hard on the processor, especially during alignment and reconstruction. More cores help, but only up to a point, after 32 or so, the gains taper unless you’re on something like Threadripper running massive datasets. Clock speed still matters, too. A 16-core chip with fast single-thread performance often feels snappier than a slower 64-core monster on mid-sized jobs.
GPU comes second, and sometimes feels like first. In RealityScan, the GPU isn’t just a helper, it’s the gatekeeper. No CUDA card? No textured mesh, period. For Metashape and Pix4D, the GPU speeds up depth maps and dense cloud steps, but the difference between an RTX 4070 and an RTX 4090 isn’t night and day unless you’re pushing huge image counts or very high-res textures. Multiple GPUs? Don’t bother, the scaling is minimal.
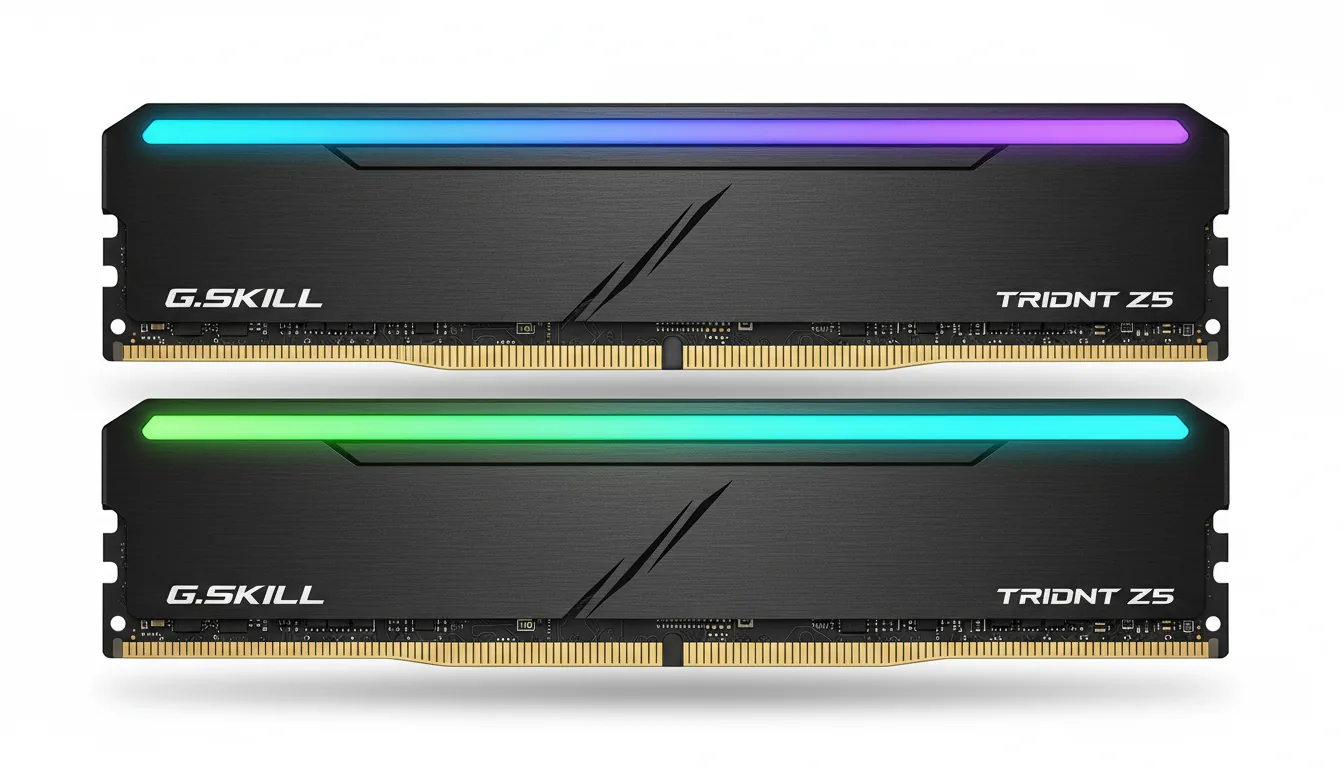
RAM is the silent bottleneck. You don’t notice it until you run out, then the whole machine crawls. RealityScan is pretty efficient thanks to out-of-core processing, but Metashape can chew through 64 GB without blinking if you throw large aerials at it. If your project involves 500+ images at 20+ megapixels, you’ll be much happier with 128 GB.
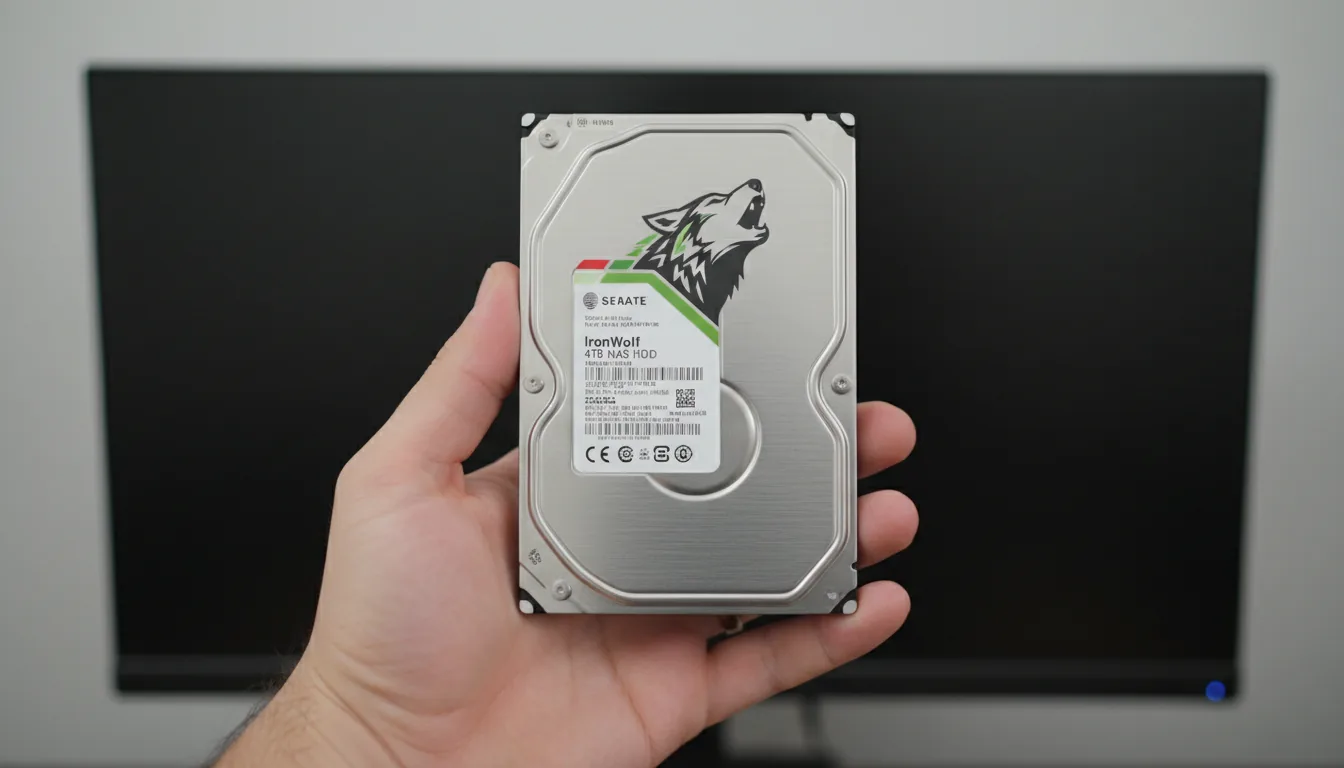
Storage is the underrated hero. Every single step is read/write heavy, gigabytes of images in, tens of gigabytes of intermediate files out. A SATA SSD will work, but an NVMe SSD feels like swapping a garden hose for a fire hydrant. Ideally, run a three-drive setup: one for Windows and apps, one NVMe dedicated to active projects, and one big HDD or NAS for archiving.
So if you’re wondering where to put your money, here’s the order that usually pays off: CPU first, GPU second, RAM third, storage right behind. That’s the reality of reality capture.
CPU by Dataset
If there’s one part of your workstation that decides whether you’re sipping coffee while the job finishes or pulling an all-nighter, it’s the CPU. Reality capture is brutal on processors, but not in the same way for every project size.
Small to mid-sized datasets (a few hundred images): You don’t need a Threadripper to chew through 300 DSLR shots of a building façade. A high-end desktop CPU like the Ryzen 9 9950X or Intel Core Ultra 9 285K is perfect here. Both give you 16–24 fast cores with excellent single-thread performance, which makes alignment snappy and avoids wasting cycles. In my experience, these chips hit the sweet spot, powerful enough for pro work, without costing more than the drone you shot the images on.
Large aerial or high-megapixel projects (1,000+ images): This is where core count starts to flex. RealityScan and Metashape both scale well up to 32 cores, so a Threadripper 7980X or similar workstation CPU pays off big. The extra threads really shine when building dense clouds or meshes from aerial surveys, cutting what used to be overnight jobs down to a few hours.
Massive, city-scale, or LiDAR-heavy workflows: If you’re in ContextCapture/iTwin or mixing LiDAR with thousands of photos, you’re in another league. These engines can tap 64 cores and beyond. Think Threadripper 9980X or Xeon W9 territory. I’ve seen setups like this finish in half the time compared to “prosumer” CPUs, but only when the dataset truly demands it. Otherwise, you’re just burning budget on idle threads.
The trap people fall into? Buying more cores than their projects can feed. A 64-core monster looks impressive on paper, but if your daily work is sub-1,000 image projects, you’ll barely touch half of it. In those cases, a fast 16-core chip will actually feel quicker, and save you thousands you could put toward GPU or storage instead.
GPU: CUDA & VRAM
The GPU is where a lot of people overspend. Don’t get me wrong, it matters. But the way it matters depends heavily on which software you’re using.
RealityScan (formerly RealityCapture) is the most unforgiving. No NVIDIA CUDA card? You’re dead in the water. You can align images, sure, but you won’t be generating textured meshes. Period. That makes the GPU less of a performance booster and more of a gatekeeper. I’ve run RealityScan on everything from an RTX 3060 up to a 4090, and here’s the truth: the jump from mid-range to high-end isn’t as dramatic as you’d think, unless you’re working with massive datasets.
Metashape is more forgiving. It’ll run on NVIDIA (CUDA) and AMD (OpenCL). GPU acceleration speeds up dense cloud generation, but beyond a certain point, your CPU and RAM set the pace. And those dual-GPU dreams? Don’t bother. Adding a second RTX barely nets you 5–10% overall improvement, and it’s usually swallowed by the hit to your wallet and power bill.
Pix4Dmapper and ContextCapture/iTwin lean more on CPU throughput and storage bandwidth. As long as your GPU meets modern OpenGL standards and has enough VRAM, you’ll be fine. Stability is more valuable here than raw horsepower.
So what’s the smart play? For most workflows, aim for a modern RTX with at least 12 GB VRAM. That covers RealityScan, Metashape, and Pix4D comfortably. Step up to a 24 GB card (RTX 4090 or RTX 6000 Ada) only if you’re regularly handling giant aerial or city-scale projects. Otherwise, your money’s better spent on CPU cores, RAM, or NVMe space.
The short version? A solid single GPU beats chasing more GPUs. And unless you’re pushing RealityScan to its absolute limits, you don’t need to remortgage your house for the flagship card.
RAM: How Much
RAM is the part nobody brags about, but it’s the one that quietly decides if your workflow feels smooth or painful. Reality capture is hungry, but not always in obvious ways. The trick is matching your memory to the size of the projects you actually run.
RealityScan (formerly RealityCapture) is surprisingly efficient. Thanks to out-of-core processing, it doesn’t try to cram everything into RAM at once. I’ve seen big projects run fine on 32 GB. That said, going with 64 GB gives you breathing room for Windows, your cache, and any other apps you keep open while processing.
Metashape is a different beast. It will eat as much memory as you give it, and then ask for dessert. Here’s a simple rule of thumb I’ve learned (based on both Agisoft’s own charts and hard-earned pain):
~200 images @ ~12 MP → 16 GB is okay.
200–800 images @ ~20 MP → 32–64 GB.
1,000+ images, or big orthophotos/city surveys → 64–128 GB+.
Pix4Dmapper lands closer to RealityScan than Metashape. For small projects, 16–32 GB works fine. Once you cross into aerial sets with hundreds of images, though, 64 GB is a safer floor.
ContextCapture/iTwin technically runs with 8–16 GB, but that’s bare minimum. If you’re running serious datasets, think 64 GB+ — or, better yet, spread the load across multiple nodes instead of forcing one box to shoulder it all.
So here’s the simple matrix:
32 GB → entry projects, safe starter build.
64 GB → sweet spot for most professionals.
128 GB+ → only if you’re constantly working with massive aerials or city-scale jobs.
Anything beyond that? You’re either running LiDAR-heavy, enterprise-grade workflows, or you’re wasting budget on RAM sticks that sit half-empty while your CPU and GPU do the real work.
Storage: NVMe Plan
Storage doesn’t get the spotlight, but it can make or break your workflow. Reality capture isn’t just CPU crunching, it’s non-stop reading and writing of gigantic image sets, dense point clouds, and temporary files that balloon into hundreds of gigabytes. If you cheap out here, your whole system feels like it’s dragging an anchor.
Rule number one: go NVMe. A SATA SSD will work, but once you’ve seen a modern NVMe drive feed data to your CPU and GPU at 6–7 GB/s, there’s no going back. I’ve watched reconstructions that took 12 hours on SATA finish in 8 with nothing else changed except moving the project folder to an NVMe drive.
Rule number two: separate your drives. The best setup is three tiers:
OS & apps → 1 TB NVMe. Keep it clean, keep it fast.
Active project drive → 2–4 TB NVMe. This is where your photos, cache, and temp files live. It takes the beating.
Archive drive → Big HDD or a NAS. Once a project’s done, move it off the fast storage so your active drive stays lean.
RealityScan & Metashape especially love this setup, because they’re constantly reading hundreds of high-res photos while writing intermediate reconstructions. If all that’s competing on the same drive as Windows, you’ll feel it in every laggy click.
For field work, I always recommend external NVMe SSDs (USB-C 10 or 20 Gbps). They’re lifesavers when you need to offload 128 GB of drone footage on-site without babysitting a slow card reader.
The takeaway: don’t treat storage like an afterthought. A balanced workstation isn’t just cores and CUDA, it’s a fast disk subsystem that keeps the pipeline fed.
And if you’re using reality capture data in Twinmotion afterward, having a fast pipeline between NVMe drives and your visualization tools can massively speed up your Twinmotion workflow, especially when you’re juggling large textured scenes.
Motherboard, Lanes & I/O
You can buy the best CPU, the fastest NVMe drives, and the beefiest GPU on the shelf, and still strangle your system if the motherboard can’t feed them. It’s not glamorous, but lane count and I/O bandwidth are the hidden arteries of a reality capture rig.
PCIe lanes are the big one. A mainstream platform like Intel Z790 or AMD X870 can run a single GPU and a couple of NVMe drives at full speed. That’s enough for most people. But if you’re stepping up to Threadripper, you’re not just buying cores, you’re buying lanes. A TRX50 board gives you the bandwidth to run multiple NVMe drives, GPUs, and 10GbE networking without juggling which slot steals bandwidth from which.
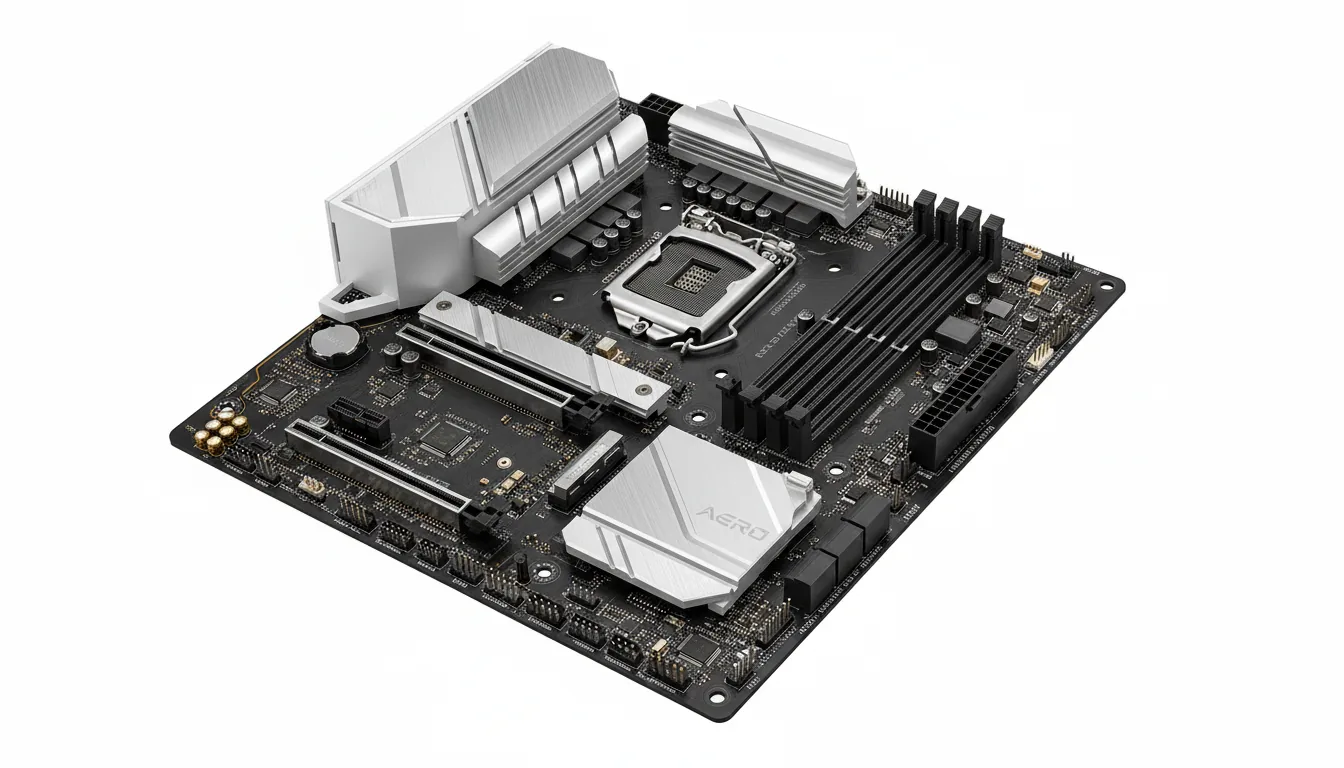
M.2 slots matter more than you think. Look for boards with at least two PCIe 4.0/5.0 NVMe slots wired directly to the CPU. It’s the difference between your active project drive screaming along at 7 GB/s or quietly crawling because it’s sharing lanes with your GPU.
Networking is another overlooked piece. If you’re part of a team, pulling terabytes of images from a central server over 1GbE will make you want to throw your switch out the window. A board with built-in 10GbE (or at least an open PCIe slot for an add-in card) pays for itself the first time you transfer an aerial survey in minutes instead of hours.
USB4/Thunderbolt support can also be handy if you’re moving data from external NVMe drives in the field. It’s not mandatory, but once you’ve copied a 256 GB project in ten minutes instead of forty, you won’t want to go back.
So while the motherboard rarely makes headlines, think of it as the pit crew. If it can’t deliver fuel to the engine fast enough, the car doesn’t win the race, no matter how powerful the engine is.
Cooling, PSU & Acoustics
Reality capture workloads aren’t quick sprints, they’re marathons. That means your hardware isn’t just tested on performance, it’s tested on endurance. The wrong cooling setup or undersized power supply can turn a powerhouse build into a flaky, noisy nightmare.
Power supply first. Don’t gamble here. A system with a high-core CPU and an RTX 4090 can spike power far above its rated TDP. I always recommend a quality 850–1200 W PSU (80+ Gold or better). That gives you headroom for peak loads, future GPU upgrades, and the peace of mind that your workstation won’t brown-out mid-reconstruction.

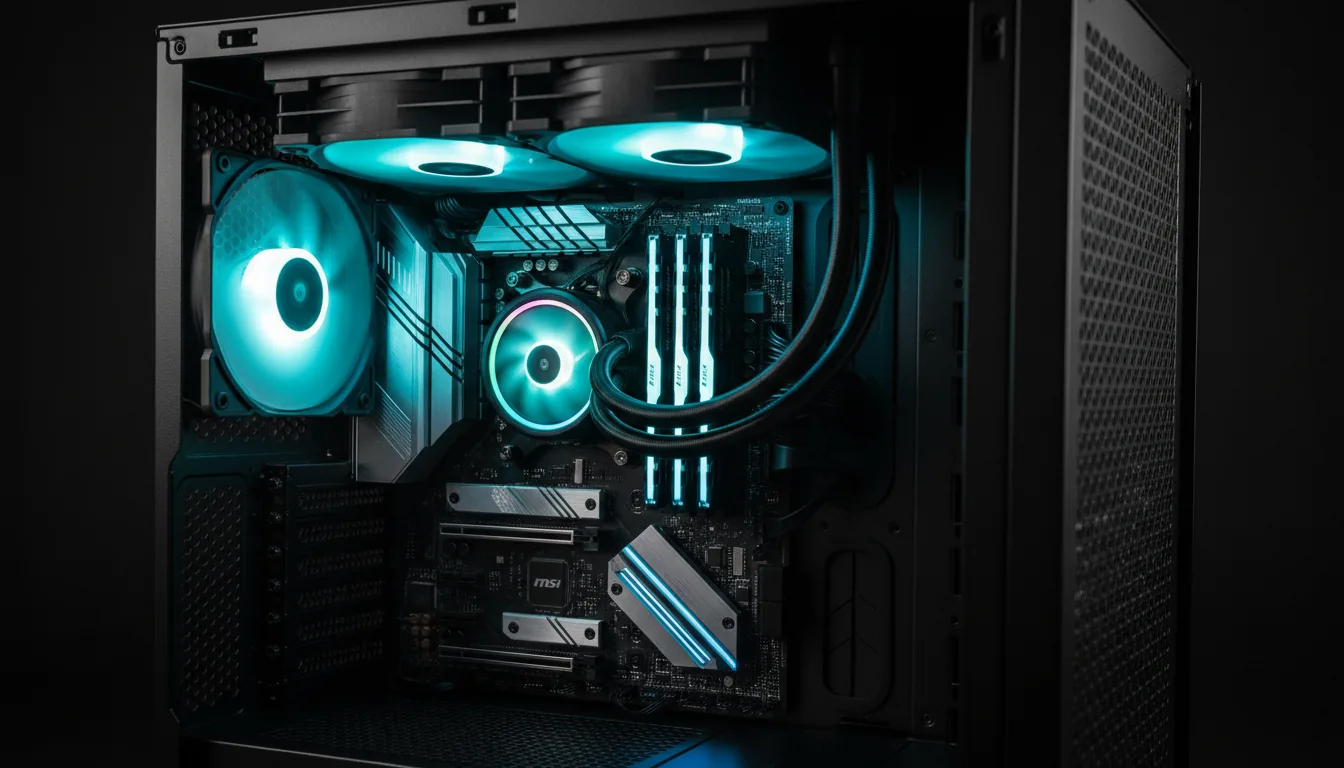
Cooling is where stability lives or dies. A 16-core Ryzen with a good tower cooler is fine. But once you’re in Threadripper or dual-GPU territory, you’re talking serious heat. That’s where liquid AIO coolers and well-ventilated cases pay off. The difference isn’t just temperature, it’s whether your CPU quietly boosts at 100% for hours, or throttles itself into a crawl halfway through.
Acoustics matter more than people admit. If you’ve ever left a machine grinding overnight in the same room you sleep, you know what I mean. A case with sound-dampening panels, larger fans spinning slowly, and good airflow can turn a screaming jet engine into a quiet hum. It won’t make your reconstructions faster, but it’ll definitely make you happier.
And don’t forget dust management. A $2 mesh filter on your intake fans will save you from thermal throttling six months down the line. Trust me, it’s a lot easier to wipe a filter than to scrub a heatsink caked in dust.
The short version: power it right, cool it well, and keep it quiet. Your hardware, and your sanity, will thank you.
Verified Build Tiers (2025)
Let’s put the theory into something you can actually spec out. These aren’t fantasy “money-is-no-object” builds, they’re grounded setups that reflect real-world budgets and the kinds of projects people actually run. Think of them as three rungs on the same ladder: starter, pro, and beast.
A) Starter / Solo Mapper (~$1,800–$2,400)
CPU: Ryzen 9 9900X or Intel Core i7-14700K — solid 12–16 core chips with strong single-thread performance.
GPU: RTX 4070 / 4070 Ti (12 GB VRAM). Meets RealityScan’s CUDA requirement, enough for small to medium projects.
RAM: 32 GB DDR5 (expandable to 64).
Storage: 1 TB NVMe (OS), 2 TB NVMe (active projects), plus an external SSD for field offloads.
Use case: Great for architects, students, or freelancers working with a few hundred DSLR shots or small drone flights. You’ll hit limits with giant aerial sets, but it’s the most affordable way to get professional results.
B) Sweet-Spot Pro (~$3,000–$4,500)
CPU: AMD Ryzen 9 9950X or Intel Core Ultra 9 285K, 16–24 cores, enough horsepower for 1,000+ image sets.
GPU: RTX 4080 Super (16 GB VRAM). Balanced performance without the 4090’s power draw and price tag.
RAM: 64–128 GB DDR5. Pick 64 if you’re mostly mid-sized projects, 128 if you know you’ll push it.
Storage: 2 TB NVMe (OS), 2–4 TB NVMe (projects), big HDD or NAS for archives.
Use case: This is the “pro sweet spot.” Fast enough for large aerials, city blocks, and LiDAR-photo combos without tipping into workstation-class pricing. Most serious reality capture users will live happily here for years.
C) Beast-Mode / Studio Rig (~$6,000–$10,000+)
CPU: Threadripper 7980X / 9980X, or Xeon W9 if you’re team Intel. High-core counts shine here.
GPU: RTX 4090 (24 GB) or RTX 6000 Ada (48 GB) if you need ECC and pro drivers. Single GPU first; add a second only if your app actually scales.
RAM: 128–256 GB DDR5 ECC. Overkill for small jobs, essential for city-scale or hybrid LiDAR + photogrammetry.
Storage: 2 TB NVMe (OS), 4–8 TB NVMe (projects), RAID/NAS backend for archiving.
Use case: Designed for studios, survey firms, or government projects handling thousands of 40+ MP images. Expensive, yes, but it can cut processing times from days to hours, which pays for itself fast when deadlines matter.
The takeaway: Don’t chase the most expensive tier just because it looks impressive on paper. Pick the one that matches your typical workload, not the one project you might get once a year. For most professionals, the Sweet-Spot Pro build is the golden balance of speed, cost, and longevity.
Laptops: Use & Limits
Let’s be real: nobody wants to crunch a 2,000-image aerial survey on a laptop. But sometimes you’re on the road, or a client wants results on-site, and a portable machine is the only option. The good news? Modern laptops can handle reality capture surprisingly well, if you spec them right.
The floor for comfort:
CPU: Intel i7/i9 H-series or AMD Ryzen 9 HX. You need the multi-core grunt, not a low-power chip.
GPU: RTX 4070 Laptop or better (CUDA is non-negotiable for RealityScan).
RAM: 32 GB minimum, ideally expandable to 64.
Storage: At least 2 TB NVMe. You’ll burn through space faster than you expect once temp files and cache stack up.
Where laptops shine: alignment checks, small-to-medium projects, or quick field reconstructions to validate data before you pack up the drone. I’ve used them to spot gaps in aerial coverage on-site, which saved me from having to go back the next day. That alone makes them worth carrying.
Where they struggle: sustained loads. Long reconstructions will push thermals to the edge. Fans scream, CPUs throttle, and suddenly that “8-hour” run drags into 12 or more. Even high-end workstation laptops can’t match the sustained cooling and power delivery of a tower.
So, can a laptop be your only machine? Not if you’re serious about regular, large-scale projects. But as a mobile companion to a desktop workstation, it’s fantastic. Think of it as the scout — quick to deploy, great at catching problems early — while the big rig back at the office does the heavy lifting.
If you’re previewing models in Twinmotion while on-site, especially on a laptop, these beginner tips for mastering Twinmotion can help you avoid common mistakes and present smoother visuals on the fly.
Best Laptop Picks
Not all laptops are created equal, and in reality capture, the wrong choice can leave you waiting twice as long for results. Here are a few standout options in 2025, with their strengths and caveats:
#1. Dell XPS 17 (2025)
If you want something that balances performance with portability, the XPS 17 is a safe bet. With Intel i9 H-series chips and RTX 4070/4080 Laptop GPUs, it handles small to medium projects comfortably. The 17” 4K display also makes on-site previews easier. Just don’t expect workstation-level cooling, long reconstructions can throttle a bit.
#2. ASUS ROG Strix G18 (2025)
This one’s built like a gaming monster, which makes it surprisingly great for reality capture. The G18 can be configured with high-wattage RTX 4080 or even 4090 Laptop GPUs, plus strong cooling that outpaces most slim “creator” machines. Downsides? It’s heavy, loud under load, and battery life is a joke. But as a mobile cruncher, it gets the job done.
#3. Lenovo ThinkPad P1 Gen 7
If stability and support matter more than RGB lighting, the ThinkPad P1 is the workstation-grade choice. Options for ECC RAM and pro RTX GPUs (A-series or 5000 Ada Laptop) make it attractive for enterprise teams where reliability trumps raw performance. It’s pricier, but IT departments love it for a reason.
#4. MSI Creator Z17 HX Studio
MSI’s Creator line has become a favorite for 3D and video pros. The Z17 HX Studio packs desktop-class Intel HX CPUs and RTX 4080 Laptop GPUs in a surprisingly sleek chassis. It’s tuned for sustained creative workloads, though cooling can still bottleneck if you push aerial mega-datasets. A good middle ground between gaming muscle and workstation polish.
Mini PCs: Beware
On paper, mini PCs look like a dream: tiny footprint, clean desk setup, and enough horsepower to rival some desktops. In practice? Reality capture chews through them faster than you’d expect.
The problem isn’t that these boxes are weak, some of them ship with Ryzen 9 CPUs and even decent GPUs. The problem is sustained performance. Reality capture workloads don’t just spike the CPU for 30 seconds; they hammer every component for hours. And that’s where small form factors fold. Limited cooling means thermal throttling kicks in early, and suddenly your “powerful” mini is crawling along at half speed.
I’ve tested a few high-end minis (Geekom’s A8 Max, for example). They’re fantastic for Adobe or AI workflows, but once I pushed a 600-image photogrammetry set through it, the fans screamed like a jet engine and the processing time doubled compared to a mid-tier tower. That’s not a win.
There are workstation-grade small form factor PCs, some even pack dual GPUs, but they come with their own headaches: price, driver stability, and the very real chance that your shiny box throttles itself when you need it most.
Bottom line? Mini PCs are great for capture teams who just need quick previews or on-site alignment checks. But if you’re thinking about using one as your main reconstruction rig, you’ll spend more time waiting than working. For production-grade reality capture, size still matters.
Field Ingest & Data Hygiene
Most people obsess over GPUs and CPUs but lose hours, sometimes days, because their ingest workflow is a mess. Reality capture lives or dies on data discipline. You can have the best workstation in the world, but if you spend all night copying drone cards or hunting for missing files, you’ve already lost.
Fast ingest is step one. Invest in a proper USB-C 10/20 Gbps card reader and external NVMe SSDs for the field. Offloading 128 GB of drone footage to a spinning HDD can take an hour; to a modern NVMe, it’s done before you finish packing up your drone. That difference adds up project after project.
Structure saves you headaches. I’ve seen entire jobs delayed because photos were named DCIM_001, DCIM_002 across multiple cards with no consistent foldering. A simple, consistent scheme, project name, date, flight number, means you know exactly what’s missing before you even start processing.
Verify before you leave the site. It sounds boring, but the five minutes it takes to skim your dataset on a laptop or external monitor is insurance against spending another day flying because a card failed or a flight didn’t cover the area.
Centralize early. If you’re part of a team, get the data into a NAS or shared workspace immediately. A single authoritative dataset beats five different USB drives floating around the office, each with slightly different versions of the same files.
The irony? People will happily spend $6,000 on a Threadripper rig, then waste half that performance advantage waiting on slow copies and sloppy folder structures. Data hygiene isn’t sexy, but it’s one of the fastest ROI upgrades you’ll ever make.
App Tweaks (Quick Wins)
You can spend thousands on hardware, but if your software isn’t tuned, you’re leaving performance on the table. Each reality capture app has its own quirks, and a few simple habits can shave hours off processing times.
RealityScan (formerly RealityCapture)
Keep your NVIDIA drivers fresh, CUDA updates can make a measurable difference. Put your cache and temp files on the fastest NVMe drive you own, not the same disk that’s juggling Windows. And take advantage of RealityScan 2.0’s new alignment and masking tools: the AI-assisted pre-processing not only reduces errors, it can cut alignment time in half.
Metashape
RAM is king here. If you’re working with hundreds of high-megapixel images, scale your build quality to fit your memory. I’ve seen people push “Ultra High” on 64 GB RAM only to watch Windows choke and crawl. Use “High” where it makes sense, and your results will still look great without the multi-day wait. Also, keep an eye on texture blending, it spikes memory usage more than almost any other step.

Pix4Dmapper
Stability beats raw speed. Make sure your GPU drivers and OpenGL runtime are solid before a critical job. Crashes mid-process waste way more time than a slightly slower run. Use the preview options to spot issues before you commit to a full reconstruction.

ContextCapture / iTwin Capture Modeler
This one loves distributed processing. If you have access to multiple PCs, spin up a grid. Instead of choking one workstation, split the job and watch your throughput scale almost linearly. Even a couple of mid-tier machines working in tandem can outperform one monster rig here.

The pattern across all apps? Don’t just throw hardware at the problem. Know the bottlenecks in the software, and tune your workflow accordingly. A little awareness goes further than another $500 in parts.
And if Twinmotion is part of your pipeline, make sure you're not losing time to errors — here’s how to fix common Twinmotion crashes before they ruin a long render or live client review.
Benchmark Your Rig
The fastest way to figure out if your workstation is actually performing the way it should? Don’t guess, benchmark it. Reality capture workloads are too heavy and too varied to judge by “it feels fast.” You need hard numbers.
Start with a known dataset. Puget Systems and other labs publish benchmark projects for RealityScan/RealityCapture and Metashape. Run the same dataset on your machine and compare your times against their published results. If you’re way off, it’s a red flag, something in your build (drivers, cooling, storage) is holding you back.
Look at step-level times, not just totals. Maybe your alignment matches other machines, but dense cloud generation is 2× slower. That points straight to your GPU or VRAM. Or maybe texture building drags, usually that’s RAM or storage thrashing. Treat benchmarks as a map of where the bottleneck really is.
Repeat after major changes. New GPU driver? Fresh BIOS update? Swapped your project drive to a faster NVMe? Run the same benchmark dataset again. It’s the only way to know if that “update” helped or hurt.
Don’t skip stability checks. A workstation that benchmarks fast but crashes once a week is worse than one that runs slightly slower but never fails. I always run a few extended stress tests (Prime95, MemTest, GPU load tools) after a new build just to make sure it can survive a 12-hour reconstruction without choking.
Bottom line: benchmarking isn’t about bragging rights. It’s about making sure every dollar you spent is pulling its weight, and spotting the weak link before it costs you a deadline.
Share with Vagon
Let’s say you’ve done the grind: thousands of drone shots aligned, meshes stitched, textures baked. The workstation roared for hours, and now the dataset’s ready. Great. But here comes the part nobody likes talking about, what do you do with it now?
A reality capture model isn’t exactly “portable.” We’re not talking a neat little 200 MB PDF. We’re talking tens or hundreds of gigabytes of dense geometry and high-res textures. You can’t just email it. Dropbox links crawl, clients groan about downloads, and asking them to install specialized software? That’s usually a dead end.
This is where Vagon Streams makes life easier. Instead of fighting with file transfers, you stream the result straight from the cloud, just a browser link. Clients, stakeholders, or teammates click, and instantly they’re inside the model. No downloads, no installs, no “does this run on my laptop?” excuses.
And if you don’t have a workstation beefy enough to generate these results in the first place? That’s where Vagon Cloud Computer comes in. Spin up a high-performance cloud machine in your browser, load your dataset, and let it crunch. When the job’s done, push it over to Streams and share it instantly. I’ve used this combo myself when traveling with only a thin laptop, the heavy lifting happened in the cloud, and I never skipped a beat.
So here’s the reality: you still need horsepower, whether it’s local or cloud-based. But once you’ve built the model, the real win is how easily you can get it in front of others. Local workstation or Vagon Cloud Computer to generate, Vagon Streams to share. That’s the workflow that actually closes the loop.
Common Mistakes to Avoid
Even with the right budget and good intentions, I see people trip over the same pitfalls again and again. If you can dodge these, you’re already ahead of the curve.
#1. Buying more GPU than your workflow needs.
Yes, the RTX 4090 is a monster. No, you don’t need it for every job. RealityScan requires CUDA, but the jump from a 4070 Ti to a 4090 won’t feel night-and-day unless you’re crunching massive datasets. That extra money is usually better spent on CPU cores, RAM, or storage.
#2. Assuming more RAM is always faster.
Metashape loves memory, but RealityScan doesn’t need 256 GB to perform. In fact, once you’re past 64 GB (128 GB for very large aerials), extra sticks often sit half-idle. Match RAM to your project sizes instead of blindly maxing out slots.
#3. Underestimating storage speed.
Nothing kills a “powerful” build faster than putting all your data on a single, cheap SATA SSD. Project drives need NVMe, period. And ideally, a dedicated NVMe just for active datasets.
#4. Dual GPU dreams.
I get it, it feels like doubling GPUs should halve your processing time. In practice? Most photogrammetry apps barely scale beyond one card. Two GPUs = double the heat and cost for maybe 5–10% gain.
#5. Forgetting cooling and power.
A Threadripper paired with an RTX 4090 can spike well past 800 watts. If your PSU can’t keep up, or your case airflow is poor, your “high-end” machine will just throttle itself into mediocrity. Stability is performance.
#6. Ignoring the software’s quirks.
RealityScan punishes non-CUDA cards. Metashape will happily crash if you push Ultra High on too little RAM. Pix4D slows down more from storage bottlenecks than raw GPU grunt. Knowing your app’s quirks saves more time than throwing money blindly at hardware.
#7. No plan for sharing.
Building the model is only half the battle. If you can’t deliver it easily, you’ll spend days troubleshooting file transfers. This is where Vagon Streams (and, if needed, Vagon Cloud Computer) closes the gap.
The truth is, most mistakes aren’t about not spending enough money. They’re about spending in the wrong places. A balanced build, tuned to your software and dataset size, will always beat a lopsided rig with bragging rights specs.
Once you’ve got your capture complete, don’t let your visuals fall flat, dialing in the best render settings in Twinmotion can turn raw meshes into polished presentations that impress clients and stakeholders alike.
Final Thoughts
Reality capture is one of those fields that will happily eat every ounce of compute you throw at it, but that doesn’t mean you need to bankrupt yourself chasing the “biggest” workstation. The sweet spot is always the same: a balanced machine, tuned to the software you actually use, and matched to the size of projects you actually run.
For me, the lesson has always been that the right combination matters more than raw bragging rights. A fast CPU, a CUDA-capable GPU, enough RAM to stay comfortable, and NVMe storage that keeps the pipeline flowing, that’s where the magic happens. Build smart, and suddenly the jobs that used to take days finish before your coffee cools.
And once you’ve got your results? That’s where the cloud takes over. Whether it’s spinning up horsepower with Vagon Cloud Computer when you’re traveling light, or sharing massive datasets effortlessly through Vagon Streams, you’ve now got options that extend your workflow beyond the limits of your desk.
So if there’s one takeaway here, it’s this: don’t chase specs for the sake of specs. Build (or rent) the machine that fits your reality capture reality. The rest — speed, stability, and sanity — will follow.
FAQs
Do I really need an NVIDIA GPU for reality capture?
If you’re using RealityScan/RealityCapture, yes — CUDA is mandatory for meshing and texturing. For Metashape or Pix4D, AMD cards can work (via OpenCL), but NVIDIA still tends to be the safer, faster choice.How much RAM is “enough”?
It depends on your project size. Small jobs can squeak by with 32 GB, but 64 GB is the practical sweet spot for most pros. If you’re tackling aerials with 1,000+ high-megapixel images, 128 GB is where you’ll be happiest. Beyond that, only specialized LiDAR-heavy or enterprise projects really need more.Is a Threadripper worth it, or should I stick with a desktop CPU?
For mid-sized datasets, a high-end desktop CPU like the Ryzen 9 9950X or Intel Ultra 9 will often feel faster (thanks to higher single-thread performance). Threadripper shines when you’re dealing with city-scale jobs or running multiple reconstructions in parallel. Don’t overbuy cores you won’t use.What’s the biggest bottleneck people overlook?
Storage. Too many builds cheap out with a single SATA SSD, and then wonder why everything crawls. A dedicated NVMe project drive is one of the highest ROI upgrades you can make.Can I use a laptop for serious reality capture work?
Yes, with caveats. A laptop with an H-series i7/i9 or Ryzen 9, RTX 4070 or better, and 32 GB RAM can handle small to medium projects and on-site checks. But for sustained heavy reconstructions, desktops or cloud machines are far more reliable.How do I share huge datasets with clients?
Forget giant zip files and painful downloads. Use Vagon Streams to stream your model straight in a browser, no installs, no downloads, just a link. If you don’t have a beefy workstation handy, you can also generate the model on Vagon Cloud Computer, then hand it off seamlessly to Streams.Do I need ECC memory and pro GPUs like RTX A6000 or RTX 6000 Ada?
Only if you’re in a mission-critical, enterprise environment where absolute stability is worth the premium. For most professionals, consumer RTX cards and non-ECC RAM deliver nearly identical performance at a fraction of the cost.
I still remember the first time I ran a dataset of over 8,000 drone images through RealityCapture. On my old setup, that kind of job would lock up the machine for two days straight, fans screaming, progress bar inching forward like it had better things to do. Then I rebuilt my workstation with a balanced trio: a high-core CPU, an NVIDIA GPU with plenty of CUDA cores, and a fast NVMe drive for the scratch data. Same dataset, same software, but this time it chewed through the reconstruction in under four hours. I didn’t even finish my second coffee. That’s when it clicked for me: in reality capture, raw specs don’t win alone. The right mix of CPU, GPU, and storage does. So let’s skip the fluff and talk about what to actually buy, and why.
Pick Your Software Before Your Hardware
Here’s a mistake I see all the time: people go hunting for “the best PC for reality capture” like there’s one magic build that covers everything. It doesn’t work that way. The right machine depends on which software you actually live in.
If you’re working in RealityScan 2.0 (the rebranded RealityCapture), your GPU isn’t optional. You must have an NVIDIA card with CUDA cores. Without it, you can align photos, but you can’t generate meshes or textures. RealityScan is ruthless about CUDA, so even the beefiest AMD card won’t help you here.
Agisoft Metashape plays it differently. It’ll use NVIDIA CUDA, yes, but it also supports AMD through OpenCL. In my experience, RAM becomes the real limiter here, Metashape will happily eat everything you give it, especially if you’re throwing 40-megapixel aerials at it.
Pix4Dmapper sits somewhere in the middle. It’s lighter on GPU demands, but still wants a solid CPU and plenty of fast storage. The GPU doesn’t have to be top-tier; stability matters more than squeezing the last 5% of speed.
And then there’s ContextCapture (now iTwin Capture Modeler). That one’s built for city-scale projects. It’s less about one monster workstation and more about grid setups — multiple machines crunching in parallel. If you’re a small studio, it’ll still run on a single PC, but you’ll really feel the difference when you scale out.
So before you blow the budget on shiny parts, stop and ask yourself a boring question: which app do I actually spend 80% of my time in? Because that one answer changes what “best PC” even means.
What Speeds It Up
Let’s cut through the noise. Every hardware guide will tell you everything matters. True, but not everything matters equally. Here’s the honest breakdown from years of testing, benchmarking, and just plain waiting on progress bars.
CPU sits at the top of the food chain. Most reality capture apps lean hard on the processor, especially during alignment and reconstruction. More cores help, but only up to a point, after 32 or so, the gains taper unless you’re on something like Threadripper running massive datasets. Clock speed still matters, too. A 16-core chip with fast single-thread performance often feels snappier than a slower 64-core monster on mid-sized jobs.
GPU comes second, and sometimes feels like first. In RealityScan, the GPU isn’t just a helper, it’s the gatekeeper. No CUDA card? No textured mesh, period. For Metashape and Pix4D, the GPU speeds up depth maps and dense cloud steps, but the difference between an RTX 4070 and an RTX 4090 isn’t night and day unless you’re pushing huge image counts or very high-res textures. Multiple GPUs? Don’t bother, the scaling is minimal.
RAM is the silent bottleneck. You don’t notice it until you run out, then the whole machine crawls. RealityScan is pretty efficient thanks to out-of-core processing, but Metashape can chew through 64 GB without blinking if you throw large aerials at it. If your project involves 500+ images at 20+ megapixels, you’ll be much happier with 128 GB.
Storage is the underrated hero. Every single step is read/write heavy, gigabytes of images in, tens of gigabytes of intermediate files out. A SATA SSD will work, but an NVMe SSD feels like swapping a garden hose for a fire hydrant. Ideally, run a three-drive setup: one for Windows and apps, one NVMe dedicated to active projects, and one big HDD or NAS for archiving.
So if you’re wondering where to put your money, here’s the order that usually pays off: CPU first, GPU second, RAM third, storage right behind. That’s the reality of reality capture.
CPU by Dataset
If there’s one part of your workstation that decides whether you’re sipping coffee while the job finishes or pulling an all-nighter, it’s the CPU. Reality capture is brutal on processors, but not in the same way for every project size.
Small to mid-sized datasets (a few hundred images): You don’t need a Threadripper to chew through 300 DSLR shots of a building façade. A high-end desktop CPU like the Ryzen 9 9950X or Intel Core Ultra 9 285K is perfect here. Both give you 16–24 fast cores with excellent single-thread performance, which makes alignment snappy and avoids wasting cycles. In my experience, these chips hit the sweet spot, powerful enough for pro work, without costing more than the drone you shot the images on.
Large aerial or high-megapixel projects (1,000+ images): This is where core count starts to flex. RealityScan and Metashape both scale well up to 32 cores, so a Threadripper 7980X or similar workstation CPU pays off big. The extra threads really shine when building dense clouds or meshes from aerial surveys, cutting what used to be overnight jobs down to a few hours.
Massive, city-scale, or LiDAR-heavy workflows: If you’re in ContextCapture/iTwin or mixing LiDAR with thousands of photos, you’re in another league. These engines can tap 64 cores and beyond. Think Threadripper 9980X or Xeon W9 territory. I’ve seen setups like this finish in half the time compared to “prosumer” CPUs, but only when the dataset truly demands it. Otherwise, you’re just burning budget on idle threads.
The trap people fall into? Buying more cores than their projects can feed. A 64-core monster looks impressive on paper, but if your daily work is sub-1,000 image projects, you’ll barely touch half of it. In those cases, a fast 16-core chip will actually feel quicker, and save you thousands you could put toward GPU or storage instead.
GPU: CUDA & VRAM
The GPU is where a lot of people overspend. Don’t get me wrong, it matters. But the way it matters depends heavily on which software you’re using.
RealityScan (formerly RealityCapture) is the most unforgiving. No NVIDIA CUDA card? You’re dead in the water. You can align images, sure, but you won’t be generating textured meshes. Period. That makes the GPU less of a performance booster and more of a gatekeeper. I’ve run RealityScan on everything from an RTX 3060 up to a 4090, and here’s the truth: the jump from mid-range to high-end isn’t as dramatic as you’d think, unless you’re working with massive datasets.
Metashape is more forgiving. It’ll run on NVIDIA (CUDA) and AMD (OpenCL). GPU acceleration speeds up dense cloud generation, but beyond a certain point, your CPU and RAM set the pace. And those dual-GPU dreams? Don’t bother. Adding a second RTX barely nets you 5–10% overall improvement, and it’s usually swallowed by the hit to your wallet and power bill.
Pix4Dmapper and ContextCapture/iTwin lean more on CPU throughput and storage bandwidth. As long as your GPU meets modern OpenGL standards and has enough VRAM, you’ll be fine. Stability is more valuable here than raw horsepower.
So what’s the smart play? For most workflows, aim for a modern RTX with at least 12 GB VRAM. That covers RealityScan, Metashape, and Pix4D comfortably. Step up to a 24 GB card (RTX 4090 or RTX 6000 Ada) only if you’re regularly handling giant aerial or city-scale projects. Otherwise, your money’s better spent on CPU cores, RAM, or NVMe space.
The short version? A solid single GPU beats chasing more GPUs. And unless you’re pushing RealityScan to its absolute limits, you don’t need to remortgage your house for the flagship card.
RAM: How Much
RAM is the part nobody brags about, but it’s the one that quietly decides if your workflow feels smooth or painful. Reality capture is hungry, but not always in obvious ways. The trick is matching your memory to the size of the projects you actually run.
RealityScan (formerly RealityCapture) is surprisingly efficient. Thanks to out-of-core processing, it doesn’t try to cram everything into RAM at once. I’ve seen big projects run fine on 32 GB. That said, going with 64 GB gives you breathing room for Windows, your cache, and any other apps you keep open while processing.
Metashape is a different beast. It will eat as much memory as you give it, and then ask for dessert. Here’s a simple rule of thumb I’ve learned (based on both Agisoft’s own charts and hard-earned pain):
~200 images @ ~12 MP → 16 GB is okay.
200–800 images @ ~20 MP → 32–64 GB.
1,000+ images, or big orthophotos/city surveys → 64–128 GB+.
Pix4Dmapper lands closer to RealityScan than Metashape. For small projects, 16–32 GB works fine. Once you cross into aerial sets with hundreds of images, though, 64 GB is a safer floor.
ContextCapture/iTwin technically runs with 8–16 GB, but that’s bare minimum. If you’re running serious datasets, think 64 GB+ — or, better yet, spread the load across multiple nodes instead of forcing one box to shoulder it all.
So here’s the simple matrix:
32 GB → entry projects, safe starter build.
64 GB → sweet spot for most professionals.
128 GB+ → only if you’re constantly working with massive aerials or city-scale jobs.
Anything beyond that? You’re either running LiDAR-heavy, enterprise-grade workflows, or you’re wasting budget on RAM sticks that sit half-empty while your CPU and GPU do the real work.
Storage: NVMe Plan
Storage doesn’t get the spotlight, but it can make or break your workflow. Reality capture isn’t just CPU crunching, it’s non-stop reading and writing of gigantic image sets, dense point clouds, and temporary files that balloon into hundreds of gigabytes. If you cheap out here, your whole system feels like it’s dragging an anchor.
Rule number one: go NVMe. A SATA SSD will work, but once you’ve seen a modern NVMe drive feed data to your CPU and GPU at 6–7 GB/s, there’s no going back. I’ve watched reconstructions that took 12 hours on SATA finish in 8 with nothing else changed except moving the project folder to an NVMe drive.
Rule number two: separate your drives. The best setup is three tiers:
OS & apps → 1 TB NVMe. Keep it clean, keep it fast.
Active project drive → 2–4 TB NVMe. This is where your photos, cache, and temp files live. It takes the beating.
Archive drive → Big HDD or a NAS. Once a project’s done, move it off the fast storage so your active drive stays lean.
RealityScan & Metashape especially love this setup, because they’re constantly reading hundreds of high-res photos while writing intermediate reconstructions. If all that’s competing on the same drive as Windows, you’ll feel it in every laggy click.
For field work, I always recommend external NVMe SSDs (USB-C 10 or 20 Gbps). They’re lifesavers when you need to offload 128 GB of drone footage on-site without babysitting a slow card reader.
The takeaway: don’t treat storage like an afterthought. A balanced workstation isn’t just cores and CUDA, it’s a fast disk subsystem that keeps the pipeline fed.
And if you’re using reality capture data in Twinmotion afterward, having a fast pipeline between NVMe drives and your visualization tools can massively speed up your Twinmotion workflow, especially when you’re juggling large textured scenes.
Motherboard, Lanes & I/O
You can buy the best CPU, the fastest NVMe drives, and the beefiest GPU on the shelf, and still strangle your system if the motherboard can’t feed them. It’s not glamorous, but lane count and I/O bandwidth are the hidden arteries of a reality capture rig.
PCIe lanes are the big one. A mainstream platform like Intel Z790 or AMD X870 can run a single GPU and a couple of NVMe drives at full speed. That’s enough for most people. But if you’re stepping up to Threadripper, you’re not just buying cores, you’re buying lanes. A TRX50 board gives you the bandwidth to run multiple NVMe drives, GPUs, and 10GbE networking without juggling which slot steals bandwidth from which.
M.2 slots matter more than you think. Look for boards with at least two PCIe 4.0/5.0 NVMe slots wired directly to the CPU. It’s the difference between your active project drive screaming along at 7 GB/s or quietly crawling because it’s sharing lanes with your GPU.
Networking is another overlooked piece. If you’re part of a team, pulling terabytes of images from a central server over 1GbE will make you want to throw your switch out the window. A board with built-in 10GbE (or at least an open PCIe slot for an add-in card) pays for itself the first time you transfer an aerial survey in minutes instead of hours.
USB4/Thunderbolt support can also be handy if you’re moving data from external NVMe drives in the field. It’s not mandatory, but once you’ve copied a 256 GB project in ten minutes instead of forty, you won’t want to go back.
So while the motherboard rarely makes headlines, think of it as the pit crew. If it can’t deliver fuel to the engine fast enough, the car doesn’t win the race, no matter how powerful the engine is.
Cooling, PSU & Acoustics
Reality capture workloads aren’t quick sprints, they’re marathons. That means your hardware isn’t just tested on performance, it’s tested on endurance. The wrong cooling setup or undersized power supply can turn a powerhouse build into a flaky, noisy nightmare.
Power supply first. Don’t gamble here. A system with a high-core CPU and an RTX 4090 can spike power far above its rated TDP. I always recommend a quality 850–1200 W PSU (80+ Gold or better). That gives you headroom for peak loads, future GPU upgrades, and the peace of mind that your workstation won’t brown-out mid-reconstruction.
Cooling is where stability lives or dies. A 16-core Ryzen with a good tower cooler is fine. But once you’re in Threadripper or dual-GPU territory, you’re talking serious heat. That’s where liquid AIO coolers and well-ventilated cases pay off. The difference isn’t just temperature, it’s whether your CPU quietly boosts at 100% for hours, or throttles itself into a crawl halfway through.
Acoustics matter more than people admit. If you’ve ever left a machine grinding overnight in the same room you sleep, you know what I mean. A case with sound-dampening panels, larger fans spinning slowly, and good airflow can turn a screaming jet engine into a quiet hum. It won’t make your reconstructions faster, but it’ll definitely make you happier.
And don’t forget dust management. A $2 mesh filter on your intake fans will save you from thermal throttling six months down the line. Trust me, it’s a lot easier to wipe a filter than to scrub a heatsink caked in dust.
The short version: power it right, cool it well, and keep it quiet. Your hardware, and your sanity, will thank you.
Verified Build Tiers (2025)
Let’s put the theory into something you can actually spec out. These aren’t fantasy “money-is-no-object” builds, they’re grounded setups that reflect real-world budgets and the kinds of projects people actually run. Think of them as three rungs on the same ladder: starter, pro, and beast.
A) Starter / Solo Mapper (~$1,800–$2,400)
CPU: Ryzen 9 9900X or Intel Core i7-14700K — solid 12–16 core chips with strong single-thread performance.
GPU: RTX 4070 / 4070 Ti (12 GB VRAM). Meets RealityScan’s CUDA requirement, enough for small to medium projects.
RAM: 32 GB DDR5 (expandable to 64).
Storage: 1 TB NVMe (OS), 2 TB NVMe (active projects), plus an external SSD for field offloads.
Use case: Great for architects, students, or freelancers working with a few hundred DSLR shots or small drone flights. You’ll hit limits with giant aerial sets, but it’s the most affordable way to get professional results.
B) Sweet-Spot Pro (~$3,000–$4,500)
CPU: AMD Ryzen 9 9950X or Intel Core Ultra 9 285K, 16–24 cores, enough horsepower for 1,000+ image sets.
GPU: RTX 4080 Super (16 GB VRAM). Balanced performance without the 4090’s power draw and price tag.
RAM: 64–128 GB DDR5. Pick 64 if you’re mostly mid-sized projects, 128 if you know you’ll push it.
Storage: 2 TB NVMe (OS), 2–4 TB NVMe (projects), big HDD or NAS for archives.
Use case: This is the “pro sweet spot.” Fast enough for large aerials, city blocks, and LiDAR-photo combos without tipping into workstation-class pricing. Most serious reality capture users will live happily here for years.
C) Beast-Mode / Studio Rig (~$6,000–$10,000+)
CPU: Threadripper 7980X / 9980X, or Xeon W9 if you’re team Intel. High-core counts shine here.
GPU: RTX 4090 (24 GB) or RTX 6000 Ada (48 GB) if you need ECC and pro drivers. Single GPU first; add a second only if your app actually scales.
RAM: 128–256 GB DDR5 ECC. Overkill for small jobs, essential for city-scale or hybrid LiDAR + photogrammetry.
Storage: 2 TB NVMe (OS), 4–8 TB NVMe (projects), RAID/NAS backend for archiving.
Use case: Designed for studios, survey firms, or government projects handling thousands of 40+ MP images. Expensive, yes, but it can cut processing times from days to hours, which pays for itself fast when deadlines matter.
The takeaway: Don’t chase the most expensive tier just because it looks impressive on paper. Pick the one that matches your typical workload, not the one project you might get once a year. For most professionals, the Sweet-Spot Pro build is the golden balance of speed, cost, and longevity.
Laptops: Use & Limits
Let’s be real: nobody wants to crunch a 2,000-image aerial survey on a laptop. But sometimes you’re on the road, or a client wants results on-site, and a portable machine is the only option. The good news? Modern laptops can handle reality capture surprisingly well, if you spec them right.
The floor for comfort:
CPU: Intel i7/i9 H-series or AMD Ryzen 9 HX. You need the multi-core grunt, not a low-power chip.
GPU: RTX 4070 Laptop or better (CUDA is non-negotiable for RealityScan).
RAM: 32 GB minimum, ideally expandable to 64.
Storage: At least 2 TB NVMe. You’ll burn through space faster than you expect once temp files and cache stack up.
Where laptops shine: alignment checks, small-to-medium projects, or quick field reconstructions to validate data before you pack up the drone. I’ve used them to spot gaps in aerial coverage on-site, which saved me from having to go back the next day. That alone makes them worth carrying.
Where they struggle: sustained loads. Long reconstructions will push thermals to the edge. Fans scream, CPUs throttle, and suddenly that “8-hour” run drags into 12 or more. Even high-end workstation laptops can’t match the sustained cooling and power delivery of a tower.
So, can a laptop be your only machine? Not if you’re serious about regular, large-scale projects. But as a mobile companion to a desktop workstation, it’s fantastic. Think of it as the scout — quick to deploy, great at catching problems early — while the big rig back at the office does the heavy lifting.
If you’re previewing models in Twinmotion while on-site, especially on a laptop, these beginner tips for mastering Twinmotion can help you avoid common mistakes and present smoother visuals on the fly.
Best Laptop Picks
Not all laptops are created equal, and in reality capture, the wrong choice can leave you waiting twice as long for results. Here are a few standout options in 2025, with their strengths and caveats:
#1. Dell XPS 17 (2025)
If you want something that balances performance with portability, the XPS 17 is a safe bet. With Intel i9 H-series chips and RTX 4070/4080 Laptop GPUs, it handles small to medium projects comfortably. The 17” 4K display also makes on-site previews easier. Just don’t expect workstation-level cooling, long reconstructions can throttle a bit.
#2. ASUS ROG Strix G18 (2025)
This one’s built like a gaming monster, which makes it surprisingly great for reality capture. The G18 can be configured with high-wattage RTX 4080 or even 4090 Laptop GPUs, plus strong cooling that outpaces most slim “creator” machines. Downsides? It’s heavy, loud under load, and battery life is a joke. But as a mobile cruncher, it gets the job done.
#3. Lenovo ThinkPad P1 Gen 7
If stability and support matter more than RGB lighting, the ThinkPad P1 is the workstation-grade choice. Options for ECC RAM and pro RTX GPUs (A-series or 5000 Ada Laptop) make it attractive for enterprise teams where reliability trumps raw performance. It’s pricier, but IT departments love it for a reason.
#4. MSI Creator Z17 HX Studio
MSI’s Creator line has become a favorite for 3D and video pros. The Z17 HX Studio packs desktop-class Intel HX CPUs and RTX 4080 Laptop GPUs in a surprisingly sleek chassis. It’s tuned for sustained creative workloads, though cooling can still bottleneck if you push aerial mega-datasets. A good middle ground between gaming muscle and workstation polish.
Mini PCs: Beware
On paper, mini PCs look like a dream: tiny footprint, clean desk setup, and enough horsepower to rival some desktops. In practice? Reality capture chews through them faster than you’d expect.
The problem isn’t that these boxes are weak, some of them ship with Ryzen 9 CPUs and even decent GPUs. The problem is sustained performance. Reality capture workloads don’t just spike the CPU for 30 seconds; they hammer every component for hours. And that’s where small form factors fold. Limited cooling means thermal throttling kicks in early, and suddenly your “powerful” mini is crawling along at half speed.
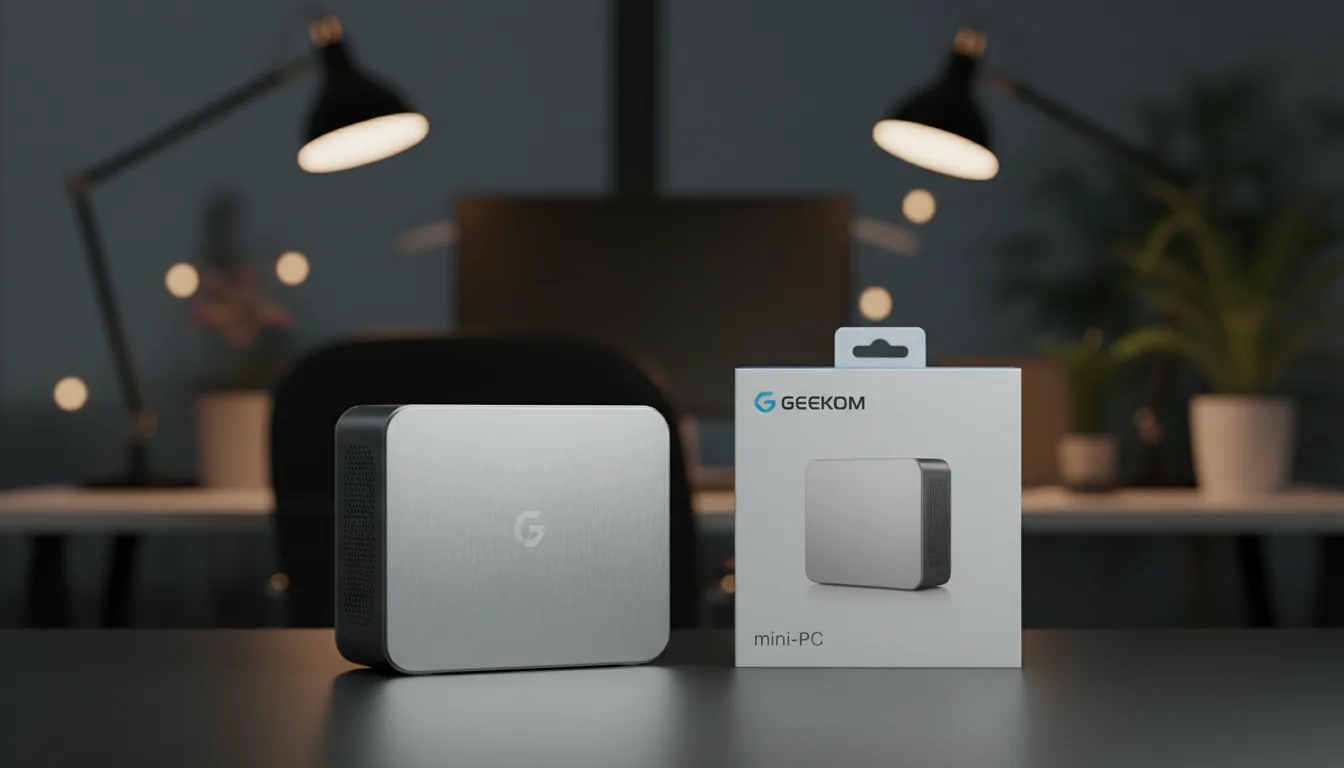
I’ve tested a few high-end minis (Geekom’s A8 Max, for example). They’re fantastic for Adobe or AI workflows, but once I pushed a 600-image photogrammetry set through it, the fans screamed like a jet engine and the processing time doubled compared to a mid-tier tower. That’s not a win.
There are workstation-grade small form factor PCs, some even pack dual GPUs, but they come with their own headaches: price, driver stability, and the very real chance that your shiny box throttles itself when you need it most.
Bottom line? Mini PCs are great for capture teams who just need quick previews or on-site alignment checks. But if you’re thinking about using one as your main reconstruction rig, you’ll spend more time waiting than working. For production-grade reality capture, size still matters.
Field Ingest & Data Hygiene
Most people obsess over GPUs and CPUs but lose hours, sometimes days, because their ingest workflow is a mess. Reality capture lives or dies on data discipline. You can have the best workstation in the world, but if you spend all night copying drone cards or hunting for missing files, you’ve already lost.
Fast ingest is step one. Invest in a proper USB-C 10/20 Gbps card reader and external NVMe SSDs for the field. Offloading 128 GB of drone footage to a spinning HDD can take an hour; to a modern NVMe, it’s done before you finish packing up your drone. That difference adds up project after project.
Structure saves you headaches. I’ve seen entire jobs delayed because photos were named DCIM_001, DCIM_002 across multiple cards with no consistent foldering. A simple, consistent scheme, project name, date, flight number, means you know exactly what’s missing before you even start processing.
Verify before you leave the site. It sounds boring, but the five minutes it takes to skim your dataset on a laptop or external monitor is insurance against spending another day flying because a card failed or a flight didn’t cover the area.
Centralize early. If you’re part of a team, get the data into a NAS or shared workspace immediately. A single authoritative dataset beats five different USB drives floating around the office, each with slightly different versions of the same files.
The irony? People will happily spend $6,000 on a Threadripper rig, then waste half that performance advantage waiting on slow copies and sloppy folder structures. Data hygiene isn’t sexy, but it’s one of the fastest ROI upgrades you’ll ever make.
App Tweaks (Quick Wins)
You can spend thousands on hardware, but if your software isn’t tuned, you’re leaving performance on the table. Each reality capture app has its own quirks, and a few simple habits can shave hours off processing times.
RealityScan (formerly RealityCapture)
Keep your NVIDIA drivers fresh, CUDA updates can make a measurable difference. Put your cache and temp files on the fastest NVMe drive you own, not the same disk that’s juggling Windows. And take advantage of RealityScan 2.0’s new alignment and masking tools: the AI-assisted pre-processing not only reduces errors, it can cut alignment time in half.
Metashape
RAM is king here. If you’re working with hundreds of high-megapixel images, scale your build quality to fit your memory. I’ve seen people push “Ultra High” on 64 GB RAM only to watch Windows choke and crawl. Use “High” where it makes sense, and your results will still look great without the multi-day wait. Also, keep an eye on texture blending, it spikes memory usage more than almost any other step.
Pix4Dmapper
Stability beats raw speed. Make sure your GPU drivers and OpenGL runtime are solid before a critical job. Crashes mid-process waste way more time than a slightly slower run. Use the preview options to spot issues before you commit to a full reconstruction.
ContextCapture / iTwin Capture Modeler
This one loves distributed processing. If you have access to multiple PCs, spin up a grid. Instead of choking one workstation, split the job and watch your throughput scale almost linearly. Even a couple of mid-tier machines working in tandem can outperform one monster rig here.
The pattern across all apps? Don’t just throw hardware at the problem. Know the bottlenecks in the software, and tune your workflow accordingly. A little awareness goes further than another $500 in parts.
And if Twinmotion is part of your pipeline, make sure you're not losing time to errors — here’s how to fix common Twinmotion crashes before they ruin a long render or live client review.
Benchmark Your Rig
The fastest way to figure out if your workstation is actually performing the way it should? Don’t guess, benchmark it. Reality capture workloads are too heavy and too varied to judge by “it feels fast.” You need hard numbers.
Start with a known dataset. Puget Systems and other labs publish benchmark projects for RealityScan/RealityCapture and Metashape. Run the same dataset on your machine and compare your times against their published results. If you’re way off, it’s a red flag, something in your build (drivers, cooling, storage) is holding you back.
Look at step-level times, not just totals. Maybe your alignment matches other machines, but dense cloud generation is 2× slower. That points straight to your GPU or VRAM. Or maybe texture building drags, usually that’s RAM or storage thrashing. Treat benchmarks as a map of where the bottleneck really is.
Repeat after major changes. New GPU driver? Fresh BIOS update? Swapped your project drive to a faster NVMe? Run the same benchmark dataset again. It’s the only way to know if that “update” helped or hurt.
Don’t skip stability checks. A workstation that benchmarks fast but crashes once a week is worse than one that runs slightly slower but never fails. I always run a few extended stress tests (Prime95, MemTest, GPU load tools) after a new build just to make sure it can survive a 12-hour reconstruction without choking.
Bottom line: benchmarking isn’t about bragging rights. It’s about making sure every dollar you spent is pulling its weight, and spotting the weak link before it costs you a deadline.
Share with Vagon
Let’s say you’ve done the grind: thousands of drone shots aligned, meshes stitched, textures baked. The workstation roared for hours, and now the dataset’s ready. Great. But here comes the part nobody likes talking about, what do you do with it now?
A reality capture model isn’t exactly “portable.” We’re not talking a neat little 200 MB PDF. We’re talking tens or hundreds of gigabytes of dense geometry and high-res textures. You can’t just email it. Dropbox links crawl, clients groan about downloads, and asking them to install specialized software? That’s usually a dead end.
This is where Vagon Streams makes life easier. Instead of fighting with file transfers, you stream the result straight from the cloud, just a browser link. Clients, stakeholders, or teammates click, and instantly they’re inside the model. No downloads, no installs, no “does this run on my laptop?” excuses.
And if you don’t have a workstation beefy enough to generate these results in the first place? That’s where Vagon Cloud Computer comes in. Spin up a high-performance cloud machine in your browser, load your dataset, and let it crunch. When the job’s done, push it over to Streams and share it instantly. I’ve used this combo myself when traveling with only a thin laptop, the heavy lifting happened in the cloud, and I never skipped a beat.
So here’s the reality: you still need horsepower, whether it’s local or cloud-based. But once you’ve built the model, the real win is how easily you can get it in front of others. Local workstation or Vagon Cloud Computer to generate, Vagon Streams to share. That’s the workflow that actually closes the loop.
Common Mistakes to Avoid
Even with the right budget and good intentions, I see people trip over the same pitfalls again and again. If you can dodge these, you’re already ahead of the curve.
#1. Buying more GPU than your workflow needs.
Yes, the RTX 4090 is a monster. No, you don’t need it for every job. RealityScan requires CUDA, but the jump from a 4070 Ti to a 4090 won’t feel night-and-day unless you’re crunching massive datasets. That extra money is usually better spent on CPU cores, RAM, or storage.
#2. Assuming more RAM is always faster.
Metashape loves memory, but RealityScan doesn’t need 256 GB to perform. In fact, once you’re past 64 GB (128 GB for very large aerials), extra sticks often sit half-idle. Match RAM to your project sizes instead of blindly maxing out slots.
#3. Underestimating storage speed.
Nothing kills a “powerful” build faster than putting all your data on a single, cheap SATA SSD. Project drives need NVMe, period. And ideally, a dedicated NVMe just for active datasets.
#4. Dual GPU dreams.
I get it, it feels like doubling GPUs should halve your processing time. In practice? Most photogrammetry apps barely scale beyond one card. Two GPUs = double the heat and cost for maybe 5–10% gain.
#5. Forgetting cooling and power.
A Threadripper paired with an RTX 4090 can spike well past 800 watts. If your PSU can’t keep up, or your case airflow is poor, your “high-end” machine will just throttle itself into mediocrity. Stability is performance.
#6. Ignoring the software’s quirks.
RealityScan punishes non-CUDA cards. Metashape will happily crash if you push Ultra High on too little RAM. Pix4D slows down more from storage bottlenecks than raw GPU grunt. Knowing your app’s quirks saves more time than throwing money blindly at hardware.
#7. No plan for sharing.
Building the model is only half the battle. If you can’t deliver it easily, you’ll spend days troubleshooting file transfers. This is where Vagon Streams (and, if needed, Vagon Cloud Computer) closes the gap.
The truth is, most mistakes aren’t about not spending enough money. They’re about spending in the wrong places. A balanced build, tuned to your software and dataset size, will always beat a lopsided rig with bragging rights specs.
Once you’ve got your capture complete, don’t let your visuals fall flat, dialing in the best render settings in Twinmotion can turn raw meshes into polished presentations that impress clients and stakeholders alike.
Final Thoughts
Reality capture is one of those fields that will happily eat every ounce of compute you throw at it, but that doesn’t mean you need to bankrupt yourself chasing the “biggest” workstation. The sweet spot is always the same: a balanced machine, tuned to the software you actually use, and matched to the size of projects you actually run.
For me, the lesson has always been that the right combination matters more than raw bragging rights. A fast CPU, a CUDA-capable GPU, enough RAM to stay comfortable, and NVMe storage that keeps the pipeline flowing, that’s where the magic happens. Build smart, and suddenly the jobs that used to take days finish before your coffee cools.
And once you’ve got your results? That’s where the cloud takes over. Whether it’s spinning up horsepower with Vagon Cloud Computer when you’re traveling light, or sharing massive datasets effortlessly through Vagon Streams, you’ve now got options that extend your workflow beyond the limits of your desk.
So if there’s one takeaway here, it’s this: don’t chase specs for the sake of specs. Build (or rent) the machine that fits your reality capture reality. The rest — speed, stability, and sanity — will follow.
FAQs
Do I really need an NVIDIA GPU for reality capture?
If you’re using RealityScan/RealityCapture, yes — CUDA is mandatory for meshing and texturing. For Metashape or Pix4D, AMD cards can work (via OpenCL), but NVIDIA still tends to be the safer, faster choice.How much RAM is “enough”?
It depends on your project size. Small jobs can squeak by with 32 GB, but 64 GB is the practical sweet spot for most pros. If you’re tackling aerials with 1,000+ high-megapixel images, 128 GB is where you’ll be happiest. Beyond that, only specialized LiDAR-heavy or enterprise projects really need more.Is a Threadripper worth it, or should I stick with a desktop CPU?
For mid-sized datasets, a high-end desktop CPU like the Ryzen 9 9950X or Intel Ultra 9 will often feel faster (thanks to higher single-thread performance). Threadripper shines when you’re dealing with city-scale jobs or running multiple reconstructions in parallel. Don’t overbuy cores you won’t use.What’s the biggest bottleneck people overlook?
Storage. Too many builds cheap out with a single SATA SSD, and then wonder why everything crawls. A dedicated NVMe project drive is one of the highest ROI upgrades you can make.Can I use a laptop for serious reality capture work?
Yes, with caveats. A laptop with an H-series i7/i9 or Ryzen 9, RTX 4070 or better, and 32 GB RAM can handle small to medium projects and on-site checks. But for sustained heavy reconstructions, desktops or cloud machines are far more reliable.How do I share huge datasets with clients?
Forget giant zip files and painful downloads. Use Vagon Streams to stream your model straight in a browser, no installs, no downloads, just a link. If you don’t have a beefy workstation handy, you can also generate the model on Vagon Cloud Computer, then hand it off seamlessly to Streams.Do I need ECC memory and pro GPUs like RTX A6000 or RTX 6000 Ada?
Only if you’re in a mission-critical, enterprise environment where absolute stability is worth the premium. For most professionals, consumer RTX cards and non-ECC RAM deliver nearly identical performance at a fraction of the cost.
Scalable Pixel and Application Streaming
Run your Unity or Unreal Engine application on any device, share with your clients in minutes, with no coding.

Summarize with AI

Ready to focus on your creativity?
Vagon gives you the ability to create & render projects, collaborate, and stream applications with the power of the best hardware.

Vagon Blog


Run heavy applications on any device with
your personal computer on the cloud.
San Francisco, California
Solutions
Vagon Teams
Vagon Streams
Use Cases
Resources
Vagon Blog
How to Run Ollama in the Cloud on a GPU Ubuntu Desktop (2026 Guide)
How to Run Ubuntu on an iPad (That Actually Works in 2026)
How to Get an Ubuntu Desktop in the Cloud (GPU Optional): The Complete 2026 Guide
What Slows Down After Effects Projects?
The First 30 Minutes in Blender 3D: A Practical Workflow Guide
What’s New in Godot 4.7? Key Features, Upgrades, and Workflow Improvements
What Slows Down Blender 3D Projects?
What Slows Down Adobe Photoshop Projects?
The First 30 Minutes in Adobe Photoshop: A Practical Workflow Guide
Vagon Blog
Run heavy applications on any device with
your personal computer on the cloud.
San Francisco, California
Solutions
Vagon Teams
Vagon Streams
Use Cases
Resources
Vagon Blog