Instant Connection for Pixel Streaming
— New Feature Automated Setup

Best Render Settings in Twinmotion for High-Quality Visuals
Best Render Settings in Twinmotion for High-Quality Visuals
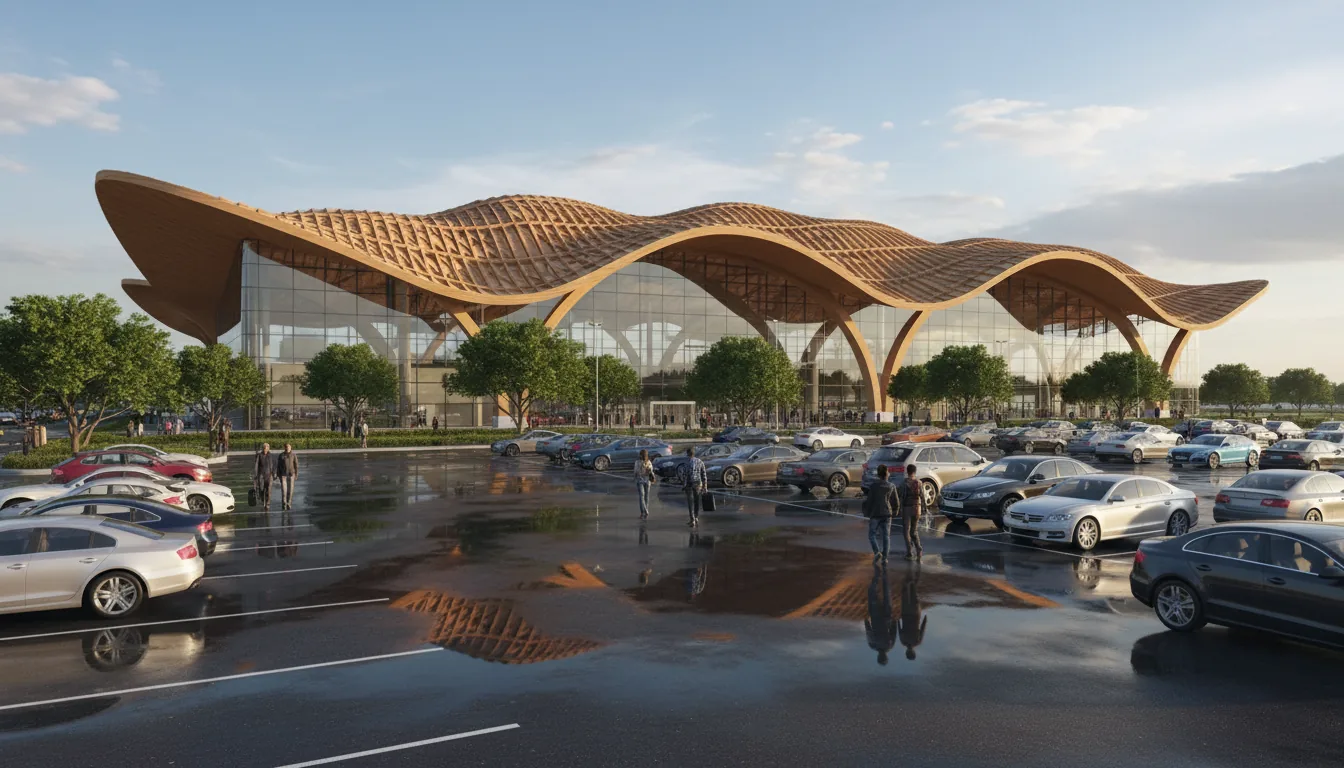
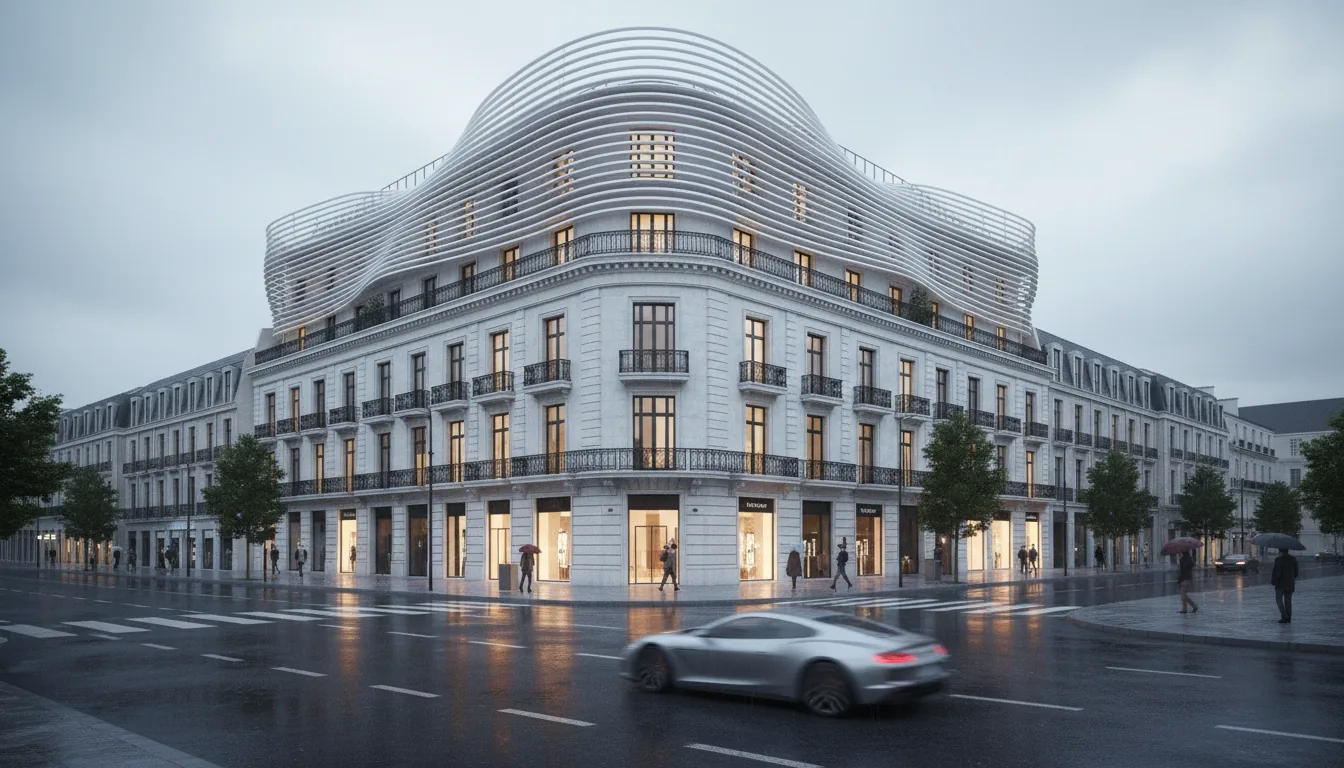
Architecture
Best Render Settings in Twinmotion for High-Quality Visuals
Table of Contents
We’ve all been there. You’ve spent hours fine-tuning your scene in Twinmotion. The lighting is perfect, the textures are looking sharp, and the models are crisp. You hit render, eagerly awaiting the final result. But then… the render pops up, and it’s not quite what you expected. The colors are off. The shadows look flat. The overall quality just doesn’t match what you saw in the viewport.
Sound familiar?
It’s frustrating, right? The time you spent crafting your scene, only for the final output to fall short. But here’s the thing: it’s not your skills or creativity that’s the problem, it’s the settings.
In this post, I’m going to show you how to master Twinmotion’s render settings, so your final renders always look as stunning and professional as what you saw while building your scene. Let’s dive into the key settings that will help you achieve optimal quality in no time.
Rendering Modes to Consider
Before you start diving into the finer settings, it's crucial to understand the different rendering modes available in Twinmotion. Each mode offers a unique set of features that can impact your final output, depending on your project's needs. Here's a breakdown of the three main modes you'll be working with:
#1. Real-Time Rendering
This mode is perfect for quick previews and presentations. If you need to rapidly evaluate your scene or showcase a design to a client, real-time rendering gives you the flexibility to make adjustments on the fly. The trade-off? You won’t get the level of realism that you would from more intensive rendering modes. But for quick and engaging visuals, it’s a solid choice.
For a deeper dive into the different modes of rendering in Twinmotion, including detailed render settings, have a look at Your Guide to Best Render Settings on Twinmotion.
#2. Lumen
Lumen is Twinmotion's answer to dynamic global illumination, and it can significantly enhance the realism of your scene. Unlike traditional baking methods, Lumen recalculates lighting in real-time, giving you a more accurate reflection of light and shadow interactions. This is particularly useful for outdoor scenes or when you need to capture lighting changes throughout the day. While it’s more resource-intensive than real-time rendering, it’s still a great middle ground for quality and speed.

#3. Path Tracer
If you’re after photorealism, the path tracer is your best friend. By simulating real-world lighting behavior through ray tracing, the path tracer delivers some of the most realistic renders you’ll get from Twinmotion. It’s perfect for high-end visualizations where every detail matters, but be prepared for longer render times. This mode is ideal for final outputs, especially when you need every surface, light, and shadow to look flawless.

Want to further optimize your workflow with Twinmotion? Explore Mastering the SketchUp to Twinmotion Workflow for Stunning Visualizations to improve your efficiency.
So, how do you choose?
It depends on what you’re after. Need something quick for a client meeting? Go with Real-Time Rendering. Want something more polished with realistic lighting? Lumen is your go-to. Looking for ultimate realism for a final render? Path Tracer is where you’ll want to land.
Each mode has its pros and cons, but knowing when to use each one can make a huge difference in your workflow.
Essential Render Settings for Optimal Quality
Now that you have a clear understanding of the different rendering modes, it’s time to dive into the settings that will elevate your final render. These settings can make or break the quality of your project, so let’s look at the key adjustments you’ll want to make to ensure the highest possible quality:
#1. Resolution & Output
It’s tempting to stick with default settings, but adjusting your resolution is one of the easiest ways to instantly boost the quality of your render. For professional projects, you’ll want to go for higher resolutions, such as 4K or even 8K, depending on your needs.
Tip: For presentations, go for 4K to ensure crisp, clear details. For web or social media, 1080p will often do the trick. Don’t forget to also adjust your output format (JPEG, PNG, TIFF, etc.) based on how you plan to use the render.

#2. Lighting Settings
Lighting can make or break your render. Twinmotion offers a variety of options to enhance lighting, from HDRI maps to sunlight adjustments. Pay close attention to:
Sun Position: Ensure your sun positioning reflects the desired time of day. Adjusting this in combination with your scene’s environment settings can dramatically alter the mood of your render.
HDRI Maps: High-Dynamic-Range Imaging maps are key for adding rich, realistic lighting to your scene. These maps reflect the light naturally, so your scene feels more lifelike.
Artificial Lights: In addition to the sun, consider adding artificial lights where needed (like interior lights or street lamps). Be mindful of intensity and fall-off to prevent unnatural lighting spots.

#3. Material & Texture Adjustments
Materials are one of the most important aspects of realism in any 3D render. Take the time to adjust the material properties to get the most out of your scene:
Textures: High-resolution textures can take your scene from looking “good” to “great.” Always use the highest quality textures you can find, especially for key surfaces like walls, floors, and glass.
Reflectivity & Roughness: Adjusting these settings gives your materials a more natural look. Glossy materials like glass or water need a higher reflectivity value, while rough surfaces like concrete or stone should have lower reflectivity.

If you’re struggling with render crashes in Twinmotion, visit How to Fix Twinmotion Crashes for troubleshooting tips that can save you time and frustration.
#4. Post-Processing Effects
Post-processing is like the cherry on top of your render. These effects can subtly enhance your final output, making it feel polished and professional without overdoing it. Here are a few effects to play with:
Bloom: Adds a soft glow to bright areas of your scene, creating a dreamy or cinematic look.
Depth of Field: This is a great way to simulate camera focus. Use it to blur out background elements, drawing attention to key areas in the scene.
Motion Blur: If you’re rendering animations, motion blur can add a realistic sense of movement. Just be cautious not to overuse it, too much blur can make the scene feel unnatural.

These settings form the foundation for a stunning render. Getting them right will take your work from “good enough” to something that stands out in the crowd.
Advanced Techniques for Photorealism
If you're aiming for that next level of realism, something that looks like it could jump off the screen—there are a few advanced techniques that can make your Twinmotion renders stand out. These adjustments might take a bit more time and attention, but the payoff is huge. Here’s how to push your render quality to the absolute limit:
#1. Global Illumination with Lumen
Lumen in Twinmotion is a game-changer for creating realistic lighting. By simulating how light interacts with your scene in real-time, Lumen allows you to achieve stunningly accurate lighting effects. Here's how to fine-tune it:
Adjust the Intensity: You can tweak the intensity of Lumen to get just the right amount of light reflection without overexposing certain areas.
Enable Reflections: Enable real-time reflections to enhance the realism of your glass, water, and shiny surfaces.
Use Lightmass for Baking: If you’re using static lighting, you can bake your lightmaps for better performance, while still keeping that Lumen-powered lighting detail in dynamic elements.

If you’re new to Twinmotion, check out Exporting from Revit to Twinmotion: A Complete Guide for more tips on handling various file types.
#2. Fine-Tuning Material Properties
For photorealism, material properties need to be spot on. Reflections, roughness, and transparency all play a huge role in how realistic a surface looks. Pay close attention to:
Reflectivity & Roughness: To make surfaces look like real-world materials, adjust their roughness and reflectivity values carefully. For example, glossy surfaces like polished wood or water need a high reflectivity, while matte surfaces like concrete should have a lower reflectivity.
Transparency & Refraction: For materials like glass, water, and other transparent objects, playing with the refraction and transparency settings can make a significant difference in realism. The way light bends through glass or water needs to be physically accurate to capture a lifelike appearance.

#3. Camera Effects
Just like in photography, camera effects can add a cinematic touch to your renders. Here’s how you can use them effectively:
Depth of Field (DoF): DoF is one of the most powerful tools for making your scene feel more like a real-world photograph. Use it to focus on key objects and blur out background or foreground elements. This helps draw the viewer’s eye to the most important parts of the scene.
Lens Effects: Play with settings like lens flare, chromatic aberration, and vignetting to add more atmosphere to your shot. Just don’t go overboard, subtlety is key.

#4. Environment Control
The environment in which your scene is placed plays a huge role in the overall look. Whether you’re creating a sunlit beach, a rainy cityscape, or an interior at dusk, these adjustments will give you more control over the mood:
Time of Day: Adjusting the time of day allows you to create different lighting scenarios. Early morning or late afternoon light tends to be softer and warmer, while midday sun is harsher and more direct. This can dramatically change the feel of your scene.
Weather & Seasons: Twinmotion lets you manipulate the weather to suit your project. Want to add a dramatic storm? Or a soft, misty morning? Adjusting these settings can create the perfect backdrop for your scene.
Sky and Horizon Settings: The sky’s color, cloud density, and horizon line are all customizable. Tuning these elements lets you create the ideal environment, whether you need a bright, clear sky or a moody, overcast look.

Mastering these advanced techniques will take your renders from good to truly breathtaking. While they can be more time-consuming to set up, the results are worth the effort when you're looking to impress clients or elevate your portfolio.
Performance Optimization Without Sacrificing Quality
Achieving high-quality renders doesn’t always mean you have to sacrifice performance. In fact, with a few adjustments, you can optimize your workflow, so your renders look amazing without taking forever to process. Here are some tips to help you strike the perfect balance:
#1. Hardware Considerations
While Twinmotion does an excellent job of running on a wide range of systems, you’ll get the best results with the right hardware. If you’re regularly working with complex scenes or aiming for high-resolution renders, investing in solid hardware can save you a lot of time:
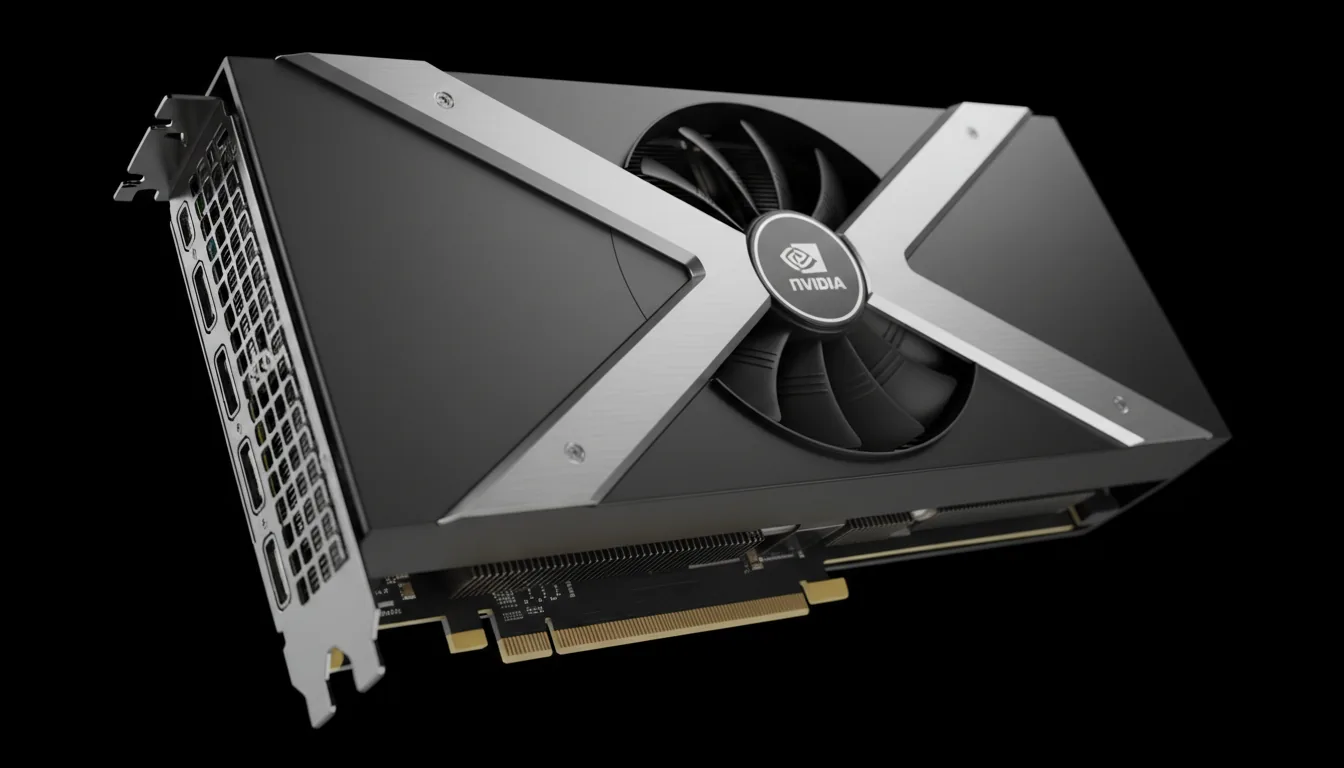
GPU: A powerful graphics card is key. Aim for something with a good balance of VRAM and CUDA cores, like an NVIDIA RTX 3070 or 3080, to ensure smooth rendering, especially for higher-quality outputs like Path Tracer renders.
CPU: While Twinmotion relies heavily on GPU, having a fast multi-core CPU can also help speed up rendering times, especially when handling complex calculations.
RAM: You’ll want a minimum of 16GB of RAM for optimal performance, though 32GB is ideal for larger projects.
For high-end architectural visualizations, you may also find value in Lumion vs. Twinmotion: Which Real-Time Rendering Software is Right for You to help you decide which tool best fits your needs.
#2. Level of Detail (LOD) Settings
When dealing with large-scale scenes, Level of Detail (LOD) settings can help improve performance without losing quality. LOD adjusts the complexity of objects depending on their distance from the camera. Here’s how to optimize:
Use Lower LOD for Distant Objects: For objects far from the camera, lower LOD can reduce polygon count, speeding up the rendering process.
Increase LOD for Close Objects: Keep higher detail on objects in the foreground to maintain sharpness and clarity.
Tip: Regularly test your LOD settings to ensure that there’s no noticeable loss of detail where it matters most.

#3. Efficient Asset Management
It’s easy to load up your scene with assets, but too many heavy files can slow things down. Here’s how to optimize:
Optimize Models: Always use simplified models when possible. For instance, low-poly trees or furniture will still look good but won’t bog down your system.
Texture Optimization: Large texture files can also slow things down. Aim for high-quality textures but avoid unnecessarily large files that aren’t visible up close in your scene. Keep textures in manageable sizes (2K or 4K are typically enough).
#4. Viewport Resolution Scaling
Sometimes, your viewport resolution can affect how smoothly Twinmotion runs while you’re working. While the final render quality is key, you don’t need to max out the viewport resolution during editing:
Lower Viewport Resolutions: While working on your scene, lower the resolution of the viewport to get smoother performance while making adjustments.
Preview Renders: Before committing to a full render, use preview renders to ensure everything is looking how it should. This helps you catch any potential issues early without waiting for a full render to process.
By fine-tuning your hardware, asset management, and settings, you can drastically improve rendering performance while maintaining impressive visual quality. And when you’re working on high-quality renders, efficiency can make a huge difference in your workflow.

Common Pitfalls and How to Avoid Them
Even seasoned Twinmotion users can fall into the trap of overlooking a few key details that can sabotage their render quality. To help you avoid the frustration of subpar results, here are some common mistakes and how to steer clear of them:
#1. Overlooking Lighting
Lighting is arguably the most critical element in achieving a realistic render. But it’s easy to overlook small adjustments. Here’s the deal: without proper lighting, even the best models and textures can look flat.
Mistake: Using overly simple lighting setups or not adjusting the sun position properly.
Solution: Pay attention to your scene’s lighting, especially when working with outdoor environments. Try to replicate natural lighting as much as possible by adjusting the sun’s position throughout the day, or use HDRI maps to add depth and realism. A subtle lighting change can make your scene feel entirely different.
#2. Ignoring Material Details
High-quality models are great, but the materials you apply to them can either make or break the realism. It’s tempting to use default settings for materials, but that’s where things can go wrong.
Mistake: Default or low-res textures, which often result in unrealistic surfaces.
Solution: Use high-resolution textures, and adjust material properties like reflectivity, roughness, and transparency. When done correctly, these tweaks will give your materials a more lifelike appearance. Don’t underestimate how much these subtle adjustments contribute to the overall realism of your render.
#3. Neglecting Post-Processing
Post-processing can significantly enhance the final render, but it’s often an afterthought. While Twinmotion provides basic post-processing options, they can elevate your renders to professional quality if used thoughtfully.
Mistake: Skipping or overusing post-processing effects like bloom, motion blur, or depth of field.
Solution: Use post-processing effects to enhance the realism without overwhelming the image. A slight bloom effect can add a soft glow to bright areas, while a shallow depth of field can help focus attention on key areas of the scene. Just be careful not to overdo it, less is more when it comes to these effects.
#4. Skipping Test Renders
Test renders may seem like a waste of time, especially when you're eager to see the final output, but skipping this step can lead to major issues.
Mistake: Not conducting a test render before committing to a full render.
Solution: Always do a quick test render to check the overall look of the scene. It’s better to spot issues early on, like bad lighting, incorrect materials, or composition errors, than to spend hours rendering and then realizing something’s off.
By being mindful of these common pitfalls, you’ll save yourself time, frustration, and a lot of rework. Paying attention to these details early on in the process ensures that your final render is as polished as it can be.
The Role of Vagon Cloud Computer in Enhancing Your Workflow
Once you’ve mastered the settings and techniques to produce stunning, photorealistic renders, there’s still the question of how to share and experience those renders with your team or clients. That’s where Vagon Cloud Computer comes into play.
If you’re working on large, complex scenes or rendering at ultra-high resolutions, you know how demanding these tasks can be on your local hardware. But with Vagon Cloud Computer, you don’t need to worry about overloading your machine or waiting for hours for your render to complete. Here’s how Vagon can enhance your workflow:
#1. High-Performance Rendering Power
Vagon Cloud Computer provides access to powerful cloud-based GPUs that can handle even the most demanding Twinmotion renders. Whether you’re rendering in Path Tracer mode or creating 4K visuals, Vagon’s cloud infrastructure gives you the horsepower you need, without being restricted by your local hardware.
#2. Instant Scalability
When you’re working on tight deadlines or need to scale up your rendering efforts, Vagon lets you quickly adjust your computing resources. You can access powerful instances that are optimized for rendering and switch between configurations to match your needs, whether that’s a high-performance setup for ultra-realistic renders or a lighter setup for quick previews.

#3. Collaborative Features
Sharing large files or renders can be a pain when you're using local machines. With Vagon, you can easily share your high-quality renders in real-time with your team or clients. No more cumbersome file transfers or waiting for email attachments. Simply share a link, and your collaborators can view and comment on the render, all from the convenience of their browser.
#3. Cost-Effective Flexibility
Instead of investing in expensive hardware upgrades, Vagon offers a pay-as-you-go model that allows you to access the computing power you need only when you need it. This means you can scale up during heavy render times and scale down when you’re working on smaller projects, keeping your costs efficient and manageable.

#4. Access from Anywhere
One of the key advantages of using Vagon Cloud Computer is the ability to work from anywhere. Whether you're in the office, at home, or on the go, you can access your rendering environment seamlessly through the cloud. This flexibility is perfect for remote teams or for designers who prefer to work across multiple devices.
By leveraging Vagon Cloud Computer, you can take your Twinmotion workflow to the next level, ensuring faster rendering, enhanced collaboration, and the freedom to focus on creativity, rather than technical limitations.
Conclusion
By now, you should have a solid understanding of how to optimize your Twinmotion render settings for stunning, high-quality results. From choosing the right rendering mode to fine-tuning lighting, materials, and post-processing effects, these techniques will help you create professional-grade visualizations that impress clients and stakeholders alike.
Remember, the key to achieving photorealism lies in the details, whether that’s adjusting global illumination with Lumen, perfecting material properties, or using camera effects to add a cinematic touch. The time you invest in getting these settings right will pay off in the final render, ensuring that your scenes look every bit as incredible as you envisioned.
And when you’re ready to take things a step further, consider Vagon Cloud Computer to supercharge your workflow. With its powerful cloud infrastructure, scalability, and ease of collaboration, Vagon makes it easier than ever to achieve fast, high-quality renders without the hardware limitations. Plus, you’ll be able to share your work seamlessly, making collaboration and feedback faster and more efficient.
So go ahead, experiment with these settings, fine-tune your approach, and watch as your Twinmotion renders reach new heights. The quality you can achieve is just a few adjustments away.
FAQs
1. What’s the best rendering mode for architectural visualizations in Twinmotion?
For architectural visualizations, Lumen is often the best choice. It provides realistic global illumination, which makes outdoor scenes and interior lighting look natural. If you need a final high-quality render, Path Tracer is the way to go, but keep in mind it takes longer to process.
2. How do I improve render times without sacrificing quality?
Start by optimizing your hardware setup. A powerful GPU will drastically reduce render times. You can also adjust the Level of Detail (LOD) settings, use simplified models where possible, and lower the viewport resolution while working. Finally, make use of Vagon Cloud Computer for powerful remote rendering that doesn’t rely on your local machine.
3. Can I use Twinmotion for animation renders, or is it best for still images only?
Twinmotion is excellent for both still images and animations. For animation renders, using settings like motion blur and depth of field can really add cinematic quality. Just remember, animations require more computational power, so you may want to scale up your hardware or consider using Vagon Cloud Computer to handle large renders efficiently.
4. How can I avoid unrealistic lighting in my renders?
Pay careful attention to the sun position and HDRI maps for more accurate lighting. Artificial lights should also be used sparingly, with proper intensity and fall-off. Make sure to adjust your lighting settings regularly, as even small tweaks can drastically improve the realism of your scene.
5. Is there a way to collaborate on renders with my team?
Yes! Vagon Cloud Computer allows you to share your renders easily with your team. By storing and sharing your renders in the cloud, you can access and review them from anywhere and collaborate in real time, making feedback faster and smoother.
6. What are the best hardware specs for rendering in Twinmotion?
For the best results, you’ll need a strong GPU, like the NVIDIA RTX 3070 or 3080, with sufficient VRAM (at least 8GB). A multi-core CPU with fast processing power and 16-32GB of RAM will ensure smooth performance, especially when rendering complex scenes.
We’ve all been there. You’ve spent hours fine-tuning your scene in Twinmotion. The lighting is perfect, the textures are looking sharp, and the models are crisp. You hit render, eagerly awaiting the final result. But then… the render pops up, and it’s not quite what you expected. The colors are off. The shadows look flat. The overall quality just doesn’t match what you saw in the viewport.
Sound familiar?
It’s frustrating, right? The time you spent crafting your scene, only for the final output to fall short. But here’s the thing: it’s not your skills or creativity that’s the problem, it’s the settings.
In this post, I’m going to show you how to master Twinmotion’s render settings, so your final renders always look as stunning and professional as what you saw while building your scene. Let’s dive into the key settings that will help you achieve optimal quality in no time.
Rendering Modes to Consider
Before you start diving into the finer settings, it's crucial to understand the different rendering modes available in Twinmotion. Each mode offers a unique set of features that can impact your final output, depending on your project's needs. Here's a breakdown of the three main modes you'll be working with:
#1. Real-Time Rendering
This mode is perfect for quick previews and presentations. If you need to rapidly evaluate your scene or showcase a design to a client, real-time rendering gives you the flexibility to make adjustments on the fly. The trade-off? You won’t get the level of realism that you would from more intensive rendering modes. But for quick and engaging visuals, it’s a solid choice.
For a deeper dive into the different modes of rendering in Twinmotion, including detailed render settings, have a look at Your Guide to Best Render Settings on Twinmotion.
#2. Lumen
Lumen is Twinmotion's answer to dynamic global illumination, and it can significantly enhance the realism of your scene. Unlike traditional baking methods, Lumen recalculates lighting in real-time, giving you a more accurate reflection of light and shadow interactions. This is particularly useful for outdoor scenes or when you need to capture lighting changes throughout the day. While it’s more resource-intensive than real-time rendering, it’s still a great middle ground for quality and speed.
#3. Path Tracer
If you’re after photorealism, the path tracer is your best friend. By simulating real-world lighting behavior through ray tracing, the path tracer delivers some of the most realistic renders you’ll get from Twinmotion. It’s perfect for high-end visualizations where every detail matters, but be prepared for longer render times. This mode is ideal for final outputs, especially when you need every surface, light, and shadow to look flawless.
Want to further optimize your workflow with Twinmotion? Explore Mastering the SketchUp to Twinmotion Workflow for Stunning Visualizations to improve your efficiency.
So, how do you choose?
It depends on what you’re after. Need something quick for a client meeting? Go with Real-Time Rendering. Want something more polished with realistic lighting? Lumen is your go-to. Looking for ultimate realism for a final render? Path Tracer is where you’ll want to land.
Each mode has its pros and cons, but knowing when to use each one can make a huge difference in your workflow.
Essential Render Settings for Optimal Quality
Now that you have a clear understanding of the different rendering modes, it’s time to dive into the settings that will elevate your final render. These settings can make or break the quality of your project, so let’s look at the key adjustments you’ll want to make to ensure the highest possible quality:
#1. Resolution & Output
It’s tempting to stick with default settings, but adjusting your resolution is one of the easiest ways to instantly boost the quality of your render. For professional projects, you’ll want to go for higher resolutions, such as 4K or even 8K, depending on your needs.
Tip: For presentations, go for 4K to ensure crisp, clear details. For web or social media, 1080p will often do the trick. Don’t forget to also adjust your output format (JPEG, PNG, TIFF, etc.) based on how you plan to use the render.
#2. Lighting Settings
Lighting can make or break your render. Twinmotion offers a variety of options to enhance lighting, from HDRI maps to sunlight adjustments. Pay close attention to:
Sun Position: Ensure your sun positioning reflects the desired time of day. Adjusting this in combination with your scene’s environment settings can dramatically alter the mood of your render.
HDRI Maps: High-Dynamic-Range Imaging maps are key for adding rich, realistic lighting to your scene. These maps reflect the light naturally, so your scene feels more lifelike.
Artificial Lights: In addition to the sun, consider adding artificial lights where needed (like interior lights or street lamps). Be mindful of intensity and fall-off to prevent unnatural lighting spots.
#3. Material & Texture Adjustments
Materials are one of the most important aspects of realism in any 3D render. Take the time to adjust the material properties to get the most out of your scene:
Textures: High-resolution textures can take your scene from looking “good” to “great.” Always use the highest quality textures you can find, especially for key surfaces like walls, floors, and glass.
Reflectivity & Roughness: Adjusting these settings gives your materials a more natural look. Glossy materials like glass or water need a higher reflectivity value, while rough surfaces like concrete or stone should have lower reflectivity.
If you’re struggling with render crashes in Twinmotion, visit How to Fix Twinmotion Crashes for troubleshooting tips that can save you time and frustration.
#4. Post-Processing Effects
Post-processing is like the cherry on top of your render. These effects can subtly enhance your final output, making it feel polished and professional without overdoing it. Here are a few effects to play with:
Bloom: Adds a soft glow to bright areas of your scene, creating a dreamy or cinematic look.
Depth of Field: This is a great way to simulate camera focus. Use it to blur out background elements, drawing attention to key areas in the scene.
Motion Blur: If you’re rendering animations, motion blur can add a realistic sense of movement. Just be cautious not to overuse it, too much blur can make the scene feel unnatural.
These settings form the foundation for a stunning render. Getting them right will take your work from “good enough” to something that stands out in the crowd.
Advanced Techniques for Photorealism
If you're aiming for that next level of realism, something that looks like it could jump off the screen—there are a few advanced techniques that can make your Twinmotion renders stand out. These adjustments might take a bit more time and attention, but the payoff is huge. Here’s how to push your render quality to the absolute limit:
#1. Global Illumination with Lumen
Lumen in Twinmotion is a game-changer for creating realistic lighting. By simulating how light interacts with your scene in real-time, Lumen allows you to achieve stunningly accurate lighting effects. Here's how to fine-tune it:
Adjust the Intensity: You can tweak the intensity of Lumen to get just the right amount of light reflection without overexposing certain areas.
Enable Reflections: Enable real-time reflections to enhance the realism of your glass, water, and shiny surfaces.
Use Lightmass for Baking: If you’re using static lighting, you can bake your lightmaps for better performance, while still keeping that Lumen-powered lighting detail in dynamic elements.
If you’re new to Twinmotion, check out Exporting from Revit to Twinmotion: A Complete Guide for more tips on handling various file types.
#2. Fine-Tuning Material Properties
For photorealism, material properties need to be spot on. Reflections, roughness, and transparency all play a huge role in how realistic a surface looks. Pay close attention to:
Reflectivity & Roughness: To make surfaces look like real-world materials, adjust their roughness and reflectivity values carefully. For example, glossy surfaces like polished wood or water need a high reflectivity, while matte surfaces like concrete should have a lower reflectivity.
Transparency & Refraction: For materials like glass, water, and other transparent objects, playing with the refraction and transparency settings can make a significant difference in realism. The way light bends through glass or water needs to be physically accurate to capture a lifelike appearance.
#3. Camera Effects
Just like in photography, camera effects can add a cinematic touch to your renders. Here’s how you can use them effectively:
Depth of Field (DoF): DoF is one of the most powerful tools for making your scene feel more like a real-world photograph. Use it to focus on key objects and blur out background or foreground elements. This helps draw the viewer’s eye to the most important parts of the scene.
Lens Effects: Play with settings like lens flare, chromatic aberration, and vignetting to add more atmosphere to your shot. Just don’t go overboard, subtlety is key.
#4. Environment Control
The environment in which your scene is placed plays a huge role in the overall look. Whether you’re creating a sunlit beach, a rainy cityscape, or an interior at dusk, these adjustments will give you more control over the mood:
Time of Day: Adjusting the time of day allows you to create different lighting scenarios. Early morning or late afternoon light tends to be softer and warmer, while midday sun is harsher and more direct. This can dramatically change the feel of your scene.
Weather & Seasons: Twinmotion lets you manipulate the weather to suit your project. Want to add a dramatic storm? Or a soft, misty morning? Adjusting these settings can create the perfect backdrop for your scene.
Sky and Horizon Settings: The sky’s color, cloud density, and horizon line are all customizable. Tuning these elements lets you create the ideal environment, whether you need a bright, clear sky or a moody, overcast look.
Mastering these advanced techniques will take your renders from good to truly breathtaking. While they can be more time-consuming to set up, the results are worth the effort when you're looking to impress clients or elevate your portfolio.
Performance Optimization Without Sacrificing Quality
Achieving high-quality renders doesn’t always mean you have to sacrifice performance. In fact, with a few adjustments, you can optimize your workflow, so your renders look amazing without taking forever to process. Here are some tips to help you strike the perfect balance:
#1. Hardware Considerations
While Twinmotion does an excellent job of running on a wide range of systems, you’ll get the best results with the right hardware. If you’re regularly working with complex scenes or aiming for high-resolution renders, investing in solid hardware can save you a lot of time:
GPU: A powerful graphics card is key. Aim for something with a good balance of VRAM and CUDA cores, like an NVIDIA RTX 3070 or 3080, to ensure smooth rendering, especially for higher-quality outputs like Path Tracer renders.
CPU: While Twinmotion relies heavily on GPU, having a fast multi-core CPU can also help speed up rendering times, especially when handling complex calculations.
RAM: You’ll want a minimum of 16GB of RAM for optimal performance, though 32GB is ideal for larger projects.
For high-end architectural visualizations, you may also find value in Lumion vs. Twinmotion: Which Real-Time Rendering Software is Right for You to help you decide which tool best fits your needs.
#2. Level of Detail (LOD) Settings
When dealing with large-scale scenes, Level of Detail (LOD) settings can help improve performance without losing quality. LOD adjusts the complexity of objects depending on their distance from the camera. Here’s how to optimize:
Use Lower LOD for Distant Objects: For objects far from the camera, lower LOD can reduce polygon count, speeding up the rendering process.
Increase LOD for Close Objects: Keep higher detail on objects in the foreground to maintain sharpness and clarity.
Tip: Regularly test your LOD settings to ensure that there’s no noticeable loss of detail where it matters most.
#3. Efficient Asset Management
It’s easy to load up your scene with assets, but too many heavy files can slow things down. Here’s how to optimize:
Optimize Models: Always use simplified models when possible. For instance, low-poly trees or furniture will still look good but won’t bog down your system.
Texture Optimization: Large texture files can also slow things down. Aim for high-quality textures but avoid unnecessarily large files that aren’t visible up close in your scene. Keep textures in manageable sizes (2K or 4K are typically enough).
#4. Viewport Resolution Scaling
Sometimes, your viewport resolution can affect how smoothly Twinmotion runs while you’re working. While the final render quality is key, you don’t need to max out the viewport resolution during editing:
Lower Viewport Resolutions: While working on your scene, lower the resolution of the viewport to get smoother performance while making adjustments.
Preview Renders: Before committing to a full render, use preview renders to ensure everything is looking how it should. This helps you catch any potential issues early without waiting for a full render to process.
By fine-tuning your hardware, asset management, and settings, you can drastically improve rendering performance while maintaining impressive visual quality. And when you’re working on high-quality renders, efficiency can make a huge difference in your workflow.
Common Pitfalls and How to Avoid Them
Even seasoned Twinmotion users can fall into the trap of overlooking a few key details that can sabotage their render quality. To help you avoid the frustration of subpar results, here are some common mistakes and how to steer clear of them:
#1. Overlooking Lighting
Lighting is arguably the most critical element in achieving a realistic render. But it’s easy to overlook small adjustments. Here’s the deal: without proper lighting, even the best models and textures can look flat.
Mistake: Using overly simple lighting setups or not adjusting the sun position properly.
Solution: Pay attention to your scene’s lighting, especially when working with outdoor environments. Try to replicate natural lighting as much as possible by adjusting the sun’s position throughout the day, or use HDRI maps to add depth and realism. A subtle lighting change can make your scene feel entirely different.
#2. Ignoring Material Details
High-quality models are great, but the materials you apply to them can either make or break the realism. It’s tempting to use default settings for materials, but that’s where things can go wrong.
Mistake: Default or low-res textures, which often result in unrealistic surfaces.
Solution: Use high-resolution textures, and adjust material properties like reflectivity, roughness, and transparency. When done correctly, these tweaks will give your materials a more lifelike appearance. Don’t underestimate how much these subtle adjustments contribute to the overall realism of your render.
#3. Neglecting Post-Processing
Post-processing can significantly enhance the final render, but it’s often an afterthought. While Twinmotion provides basic post-processing options, they can elevate your renders to professional quality if used thoughtfully.
Mistake: Skipping or overusing post-processing effects like bloom, motion blur, or depth of field.
Solution: Use post-processing effects to enhance the realism without overwhelming the image. A slight bloom effect can add a soft glow to bright areas, while a shallow depth of field can help focus attention on key areas of the scene. Just be careful not to overdo it, less is more when it comes to these effects.
#4. Skipping Test Renders
Test renders may seem like a waste of time, especially when you're eager to see the final output, but skipping this step can lead to major issues.
Mistake: Not conducting a test render before committing to a full render.
Solution: Always do a quick test render to check the overall look of the scene. It’s better to spot issues early on, like bad lighting, incorrect materials, or composition errors, than to spend hours rendering and then realizing something’s off.
By being mindful of these common pitfalls, you’ll save yourself time, frustration, and a lot of rework. Paying attention to these details early on in the process ensures that your final render is as polished as it can be.
The Role of Vagon Cloud Computer in Enhancing Your Workflow
Once you’ve mastered the settings and techniques to produce stunning, photorealistic renders, there’s still the question of how to share and experience those renders with your team or clients. That’s where Vagon Cloud Computer comes into play.
If you’re working on large, complex scenes or rendering at ultra-high resolutions, you know how demanding these tasks can be on your local hardware. But with Vagon Cloud Computer, you don’t need to worry about overloading your machine or waiting for hours for your render to complete. Here’s how Vagon can enhance your workflow:
#1. High-Performance Rendering Power
Vagon Cloud Computer provides access to powerful cloud-based GPUs that can handle even the most demanding Twinmotion renders. Whether you’re rendering in Path Tracer mode or creating 4K visuals, Vagon’s cloud infrastructure gives you the horsepower you need, without being restricted by your local hardware.
#2. Instant Scalability
When you’re working on tight deadlines or need to scale up your rendering efforts, Vagon lets you quickly adjust your computing resources. You can access powerful instances that are optimized for rendering and switch between configurations to match your needs, whether that’s a high-performance setup for ultra-realistic renders or a lighter setup for quick previews.
#3. Collaborative Features
Sharing large files or renders can be a pain when you're using local machines. With Vagon, you can easily share your high-quality renders in real-time with your team or clients. No more cumbersome file transfers or waiting for email attachments. Simply share a link, and your collaborators can view and comment on the render, all from the convenience of their browser.
#3. Cost-Effective Flexibility
Instead of investing in expensive hardware upgrades, Vagon offers a pay-as-you-go model that allows you to access the computing power you need only when you need it. This means you can scale up during heavy render times and scale down when you’re working on smaller projects, keeping your costs efficient and manageable.
#4. Access from Anywhere
One of the key advantages of using Vagon Cloud Computer is the ability to work from anywhere. Whether you're in the office, at home, or on the go, you can access your rendering environment seamlessly through the cloud. This flexibility is perfect for remote teams or for designers who prefer to work across multiple devices.
By leveraging Vagon Cloud Computer, you can take your Twinmotion workflow to the next level, ensuring faster rendering, enhanced collaboration, and the freedom to focus on creativity, rather than technical limitations.
Conclusion
By now, you should have a solid understanding of how to optimize your Twinmotion render settings for stunning, high-quality results. From choosing the right rendering mode to fine-tuning lighting, materials, and post-processing effects, these techniques will help you create professional-grade visualizations that impress clients and stakeholders alike.
Remember, the key to achieving photorealism lies in the details, whether that’s adjusting global illumination with Lumen, perfecting material properties, or using camera effects to add a cinematic touch. The time you invest in getting these settings right will pay off in the final render, ensuring that your scenes look every bit as incredible as you envisioned.
And when you’re ready to take things a step further, consider Vagon Cloud Computer to supercharge your workflow. With its powerful cloud infrastructure, scalability, and ease of collaboration, Vagon makes it easier than ever to achieve fast, high-quality renders without the hardware limitations. Plus, you’ll be able to share your work seamlessly, making collaboration and feedback faster and more efficient.
So go ahead, experiment with these settings, fine-tune your approach, and watch as your Twinmotion renders reach new heights. The quality you can achieve is just a few adjustments away.
FAQs
1. What’s the best rendering mode for architectural visualizations in Twinmotion?
For architectural visualizations, Lumen is often the best choice. It provides realistic global illumination, which makes outdoor scenes and interior lighting look natural. If you need a final high-quality render, Path Tracer is the way to go, but keep in mind it takes longer to process.
2. How do I improve render times without sacrificing quality?
Start by optimizing your hardware setup. A powerful GPU will drastically reduce render times. You can also adjust the Level of Detail (LOD) settings, use simplified models where possible, and lower the viewport resolution while working. Finally, make use of Vagon Cloud Computer for powerful remote rendering that doesn’t rely on your local machine.
3. Can I use Twinmotion for animation renders, or is it best for still images only?
Twinmotion is excellent for both still images and animations. For animation renders, using settings like motion blur and depth of field can really add cinematic quality. Just remember, animations require more computational power, so you may want to scale up your hardware or consider using Vagon Cloud Computer to handle large renders efficiently.
4. How can I avoid unrealistic lighting in my renders?
Pay careful attention to the sun position and HDRI maps for more accurate lighting. Artificial lights should also be used sparingly, with proper intensity and fall-off. Make sure to adjust your lighting settings regularly, as even small tweaks can drastically improve the realism of your scene.
5. Is there a way to collaborate on renders with my team?
Yes! Vagon Cloud Computer allows you to share your renders easily with your team. By storing and sharing your renders in the cloud, you can access and review them from anywhere and collaborate in real time, making feedback faster and smoother.
6. What are the best hardware specs for rendering in Twinmotion?
For the best results, you’ll need a strong GPU, like the NVIDIA RTX 3070 or 3080, with sufficient VRAM (at least 8GB). A multi-core CPU with fast processing power and 16-32GB of RAM will ensure smooth performance, especially when rendering complex scenes.
Get Beyond Your Computer Performance
Run applications on your cloud computer with the latest generation hardware. No more crashes or lags.

Trial includes 1 hour usage + 7 days of storage.
Summarize with AI

Ready to focus on your creativity?
Vagon gives you the ability to create & render projects, collaborate, and stream applications with the power of the best hardware.

Vagon Blog


Run heavy applications on any device with
your personal computer on the cloud.
San Francisco, California
Solutions
Vagon Teams
Vagon Streams
Use Cases
Resources
Vagon Blog
How to Run Audacity on a Cloud Ubuntu Desktop (2026 Guide)
How to Run Darktable on a Cloud Ubuntu Desktop for RAW Photo Editing (2026 Guide)
How to Run Kdenlive on a Cloud Ubuntu Desktop (2026 Guide)
How to Run DaVinci Resolve on Linux in the Cloud (2026 Guide)
How to Run Inkscape on a Cloud Ubuntu Desktop (2026 Guide)
How to Run Krita on a Cloud Ubuntu Desktop for Digital Painting (2026 Guide)
How to Run GIMP on a Cloud Ubuntu Desktop (2026 Guide)
How to Run Jupyter on a Cloud GPU Linux Desktop (2026 Guide)
Vagon vs GitHub Codespaces: Cloud Dev Environments Compared (2026)
Vagon Blog
Run heavy applications on any device with
your personal computer on the cloud.
San Francisco, California
Solutions
Vagon Teams
Vagon Streams
Use Cases
Resources
Vagon Blog