Instant Connection for Pixel Streaming
— New Feature Automated Setup

How To Set Up eGPU for Macbooks?
How To Set Up eGPU for Macbooks?
ComputerPerformance
How To Set Up eGPU for Macbooks?
Table of Contents
Macs are known for their sleek design, stable operating system, and seamless ecosystem. But when it comes to raw graphical performance, especially for demanding creative tasks, even the most powerful MacBook or iMac can hit a wall. Many creatives are also optimizing GPU use in Blender to speed up their 3D rendering workflows. Whether you’re editing 8K video in Final Cut Pro, rendering 3D scenes in Blender, or training machine learning models, internal GPUs often fall short, especially on older Intel-based Macs.
That’s where external GPUs (eGPUs) come in.
An eGPU gives your Mac the muscle it needs to handle high-performance tasks by connecting a desktop-grade graphics card through a Thunderbolt port. With the right setup, you can significantly speed up rendering times, boost frame rates, and unlock smoother real-time previews without needing to buy a new computer. eGPUs are especially useful for content creators handling high-res video, developers running simulations or AI models, and gamers seeking better performance on macOS or via Boot Camp.
Although Apple’s newer M-series chips no longer support eGPUs natively, many Intel Mac users still rely on them for a performance boost. And for those using Apple Silicon, cloud-based alternatives like Vagon Computer are quickly emerging as the next-gen solution.
Here’s what we’ll cover:
What Is an eGPU and How It Works on a Mac
Which Macs Support eGPUs in 2025
How to Pick the Right GPU and Enclosure for Your Mac
How to Set Up an eGPU on macOS (Step-by-Step)
Top eGPU Enclosures and AMD GPUs for Mac Users
Why Vagon Is a Better Option for Apple Silicon Macs
Let’s dive in.
What Is an eGPU and How Does It Work?
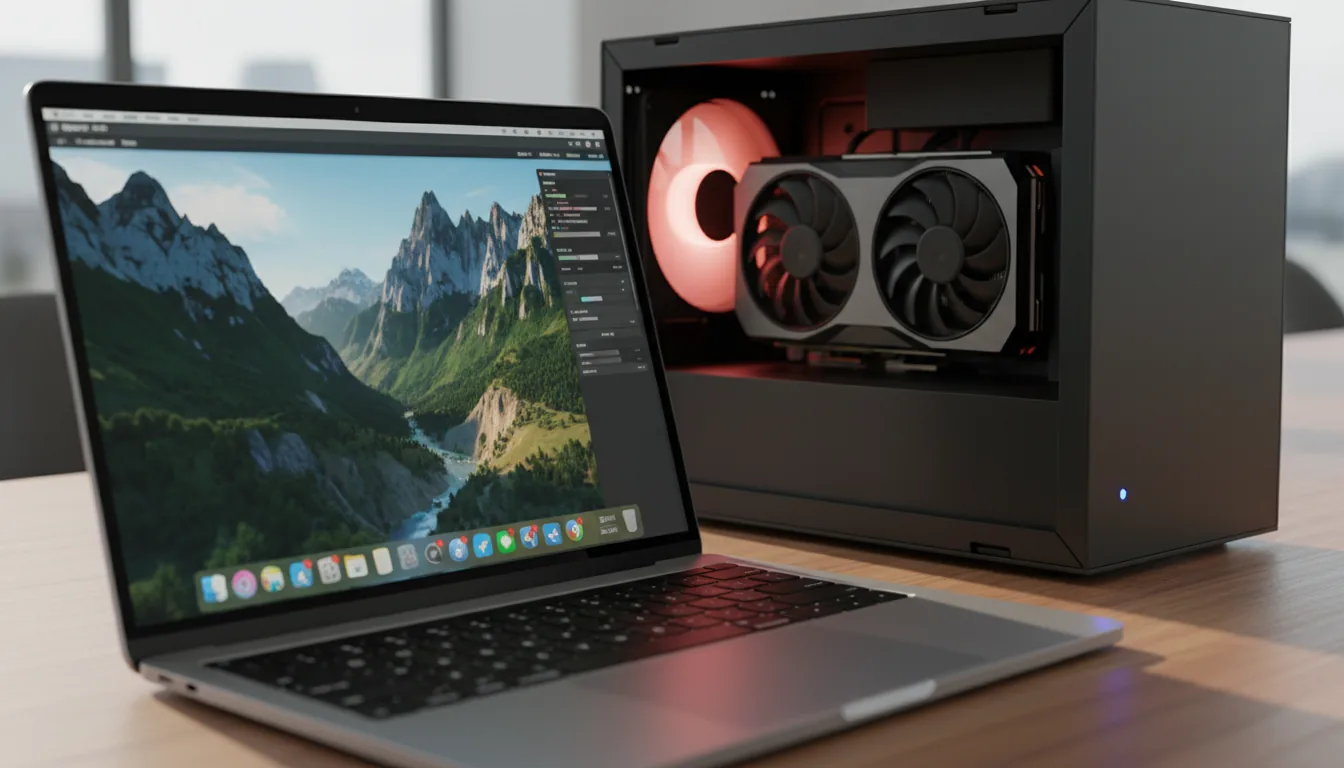
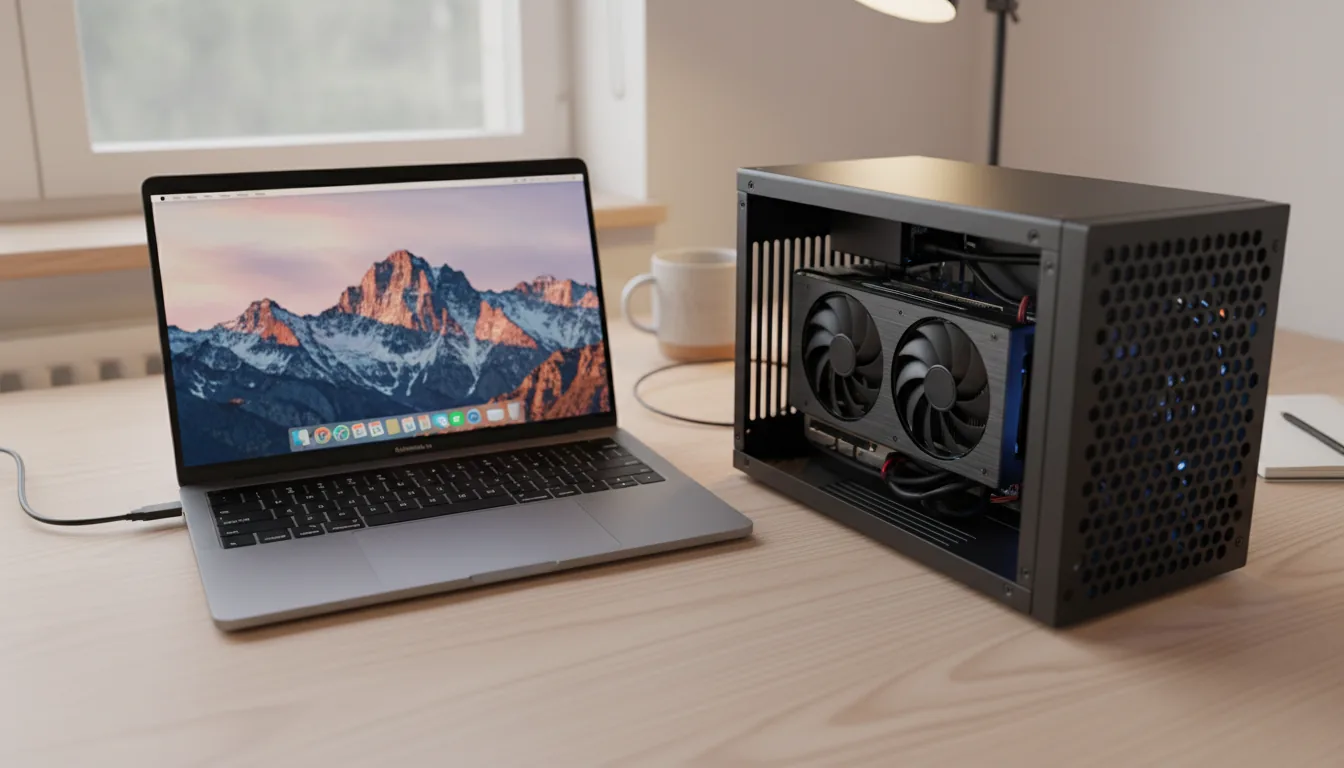
An external GPU (eGPU) is exactly what it sounds like: a full-sized graphics card housed in a separate enclosure that connects to your Mac via a high-speed Thunderbolt 3 or 4 cable. Instead of relying on your Mac’s built-in GPU, which is often limited in power or thermals, especially in slim laptops, an eGPU brings desktop-class graphics performance to your portable setup.
How It Works
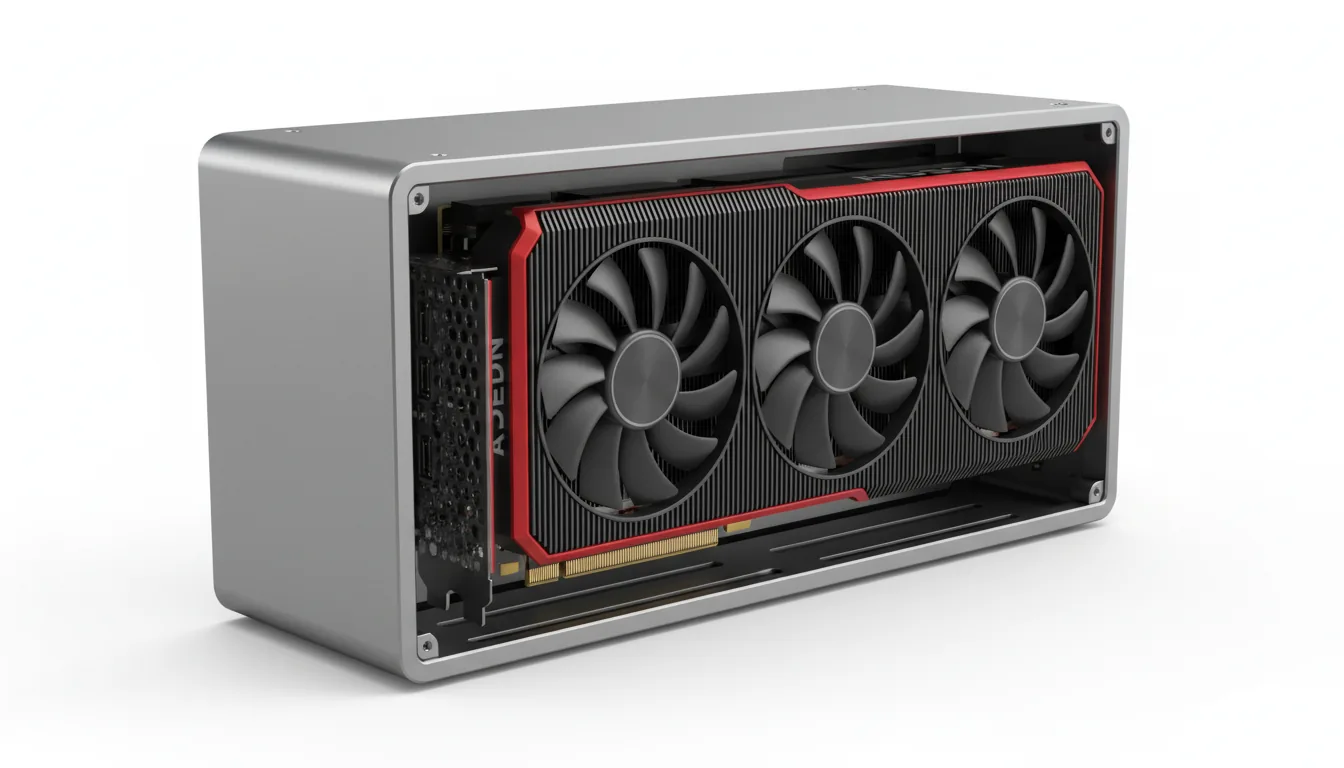
Inside an eGPU enclosure, you’ll find a regular desktop graphics card (usually AMD for macOS compatibility), a power supply unit, and cooling fans. Once connected, your Mac routes graphics-intensive tasks, like rendering, video effects, 3D modeling, or gaming, through the external GPU instead of its internal one.
This setup frees up your system’s resources, reduces rendering time, and improves playback smoothness in creative softwares.
Why Mac Users Use eGPUs
The biggest reason? Performance without replacing your device. If you’re on an older Intel MacBook Pro or Mac mini, you can supercharge your workflow by simply adding an eGPU instead of buying a brand-new machine.
Even Mac desktops like the iMac and Mac mini benefit, especially those with limited internal graphics power. eGPUs are also helpful when using external displays, as they can drive higher resolutions (like 4K or 5K) with less lag and better color grading performance.
But What About Apple Silicon Macs?
Here’s the catch: Apple’s M1, M2, and M3 chips do not officially support eGPUs. If you’re using an Apple Silicon Mac, you won’t be able to plug in an external GPU and expect native support. That’s why many users are turning to cloud-powered alternatives, more on that later in the guide.
For now, if you’re using an Intel-based Mac, an eGPU is still one of the best ways to upgrade your performance without upgrading your entire machine.
eGPU Compatibility with Mac
Before you rush to buy an external GPU setup, it’s crucial to know if your Mac actually supports it. Not all Macs are eGPU-ready, and with Apple’s transition to its own Silicon chips, compatibility has become a bit more complicated.
Which Macs Support eGPUs?
eGPUs work only with Intel-based Macs that have Thunderbolt 3 or Thunderbolt 4 ports. These include:
MacBook Pro (2016–2020, Intel)
MacBook Air (2018–2019, Intel)
iMac (2017–2020, Intel)
Mac mini (2018, Intel)
Mac Pro (2019)
If your Mac is powered by M1, M2, or M3, it does not support eGPUs. Apple Silicon chips have integrated graphics and do not recognize external GPUs, even when connected via Thunderbolt. There’s no workaround or official support, and Apple hasn’t announced any plans to change that.
macOS Version Matters
Your macOS version also plays a role. Apple began supporting eGPUs natively in macOS High Sierra 10.13.4 and later. For the smoothest experience and best compatibility with modern software, we recommend using macOS Big Sur, Catalina, or Monterey on Intel Macs. macOS Ventura and Sonoma still support eGPUs—but only for Intel-based Macs.
Supported GPUs: AMD Only
macOS supports only AMD Radeon cards in official eGPU configurations. NVIDIA cards are not natively supported on Mac, and driver workarounds are unreliable or outdated.
That’s why most eGPU setups for Mac use AMD GPUs like the Radeon RX 6800 XT, RX 5700 XT, or Radeon Pro W6600, which we’ll cover in detail later.
How to Choose the Right eGPU Setup
Choosing the right external GPU setup isn’t just about picking the most expensive graphics card. It’s about finding the right balance between performance, compatibility, and cost, based on how you actually use your Mac.
A. Understand Your Workflow
Start with your needs. The kind of work you do directly shapes what kind of GPU and enclosure will serve you best. If you’re a video editor working with 4K or 8K footage, you’ll need a GPU with high memory bandwidth and real-time playback capabilities to avoid lag and dropped frames. For 3D artists and animators, compute-heavy tasks require strong GPU cores and consistent thermal performance to keep render times down and system stability up. Gamers may prioritize high frame rates and GPU headroom, though it’s important to note that many games still run better on Windows via Boot Camp or through cloud gaming solutions. Meanwhile, developers and researchers working with AI models, simulations, or code compilation benefit from GPUs that offer strong OpenCL support and reliable compute performance. In short, the more GPU-intensive your work is, the more it makes sense to invest in a powerful, future-proof setup.
B. Pick a Compatible GPU
Not all GPUs work with macOS. In fact, macOS supports only AMD Radeon cards for eGPU setups. You’ll want to focus on models that are officially supported and have a good reputation in the macOS community.
High-end: Radeon RX 6800 XT, RX 6900 XT
Mid-range: Radeon RX 5700 XT, Radeon Pro W6600
Entry-level: Radeon RX 580, RX 5500 XT
Avoid NVIDIA cards, they are not natively supported and require unsupported workarounds.
C. Choose a Reliable eGPU Enclosure
Your enclosure houses the GPU, powers it, and handles thermal management. A solid enclosure makes a massive difference in performance and reliability.
Look for enclosures with:
500W+ power supply to support modern GPUs
Good thermal design (fans, vents, low noise)
Extra ports (USB, Ethernet) if you want docking functionality
Thunderbolt 3 or 4 for maximum speed and bandwidth
Trusted brands include Razer, Sonnet, Mantiz, and OWC, all of which we’ll explore in the next section.
D. Set a Realistic Budget
You don’t need to spend thousands to see real performance improvements. A balanced setup often outperforms a mismatched high-end build. For lighter tasks, a combo like the RX 580 with a basic enclosure can cost under $600. Mid-range setups with an RX 5700 XT or Pro W6600 fall around $700–$1000, while high-end builds with an RX 6800 XT and a premium enclosure go beyond $1000. The key is to match your GPU and enclosure wisely for smooth, efficient results.
Best eGPU Enclosures for Mac in 2025
Once you’ve selected a compatible GPU, the next key component of your setup is the enclosure. This is what powers your card, keeps it cool, and connects it to your Mac via Thunderbolt. A quality enclosure can make or break your eGPU experience, affecting everything from stability to noise levels.
Below are the top eGPU enclosures on the market in 2025, chosen for their macOS compatibility, build quality, and overall value.
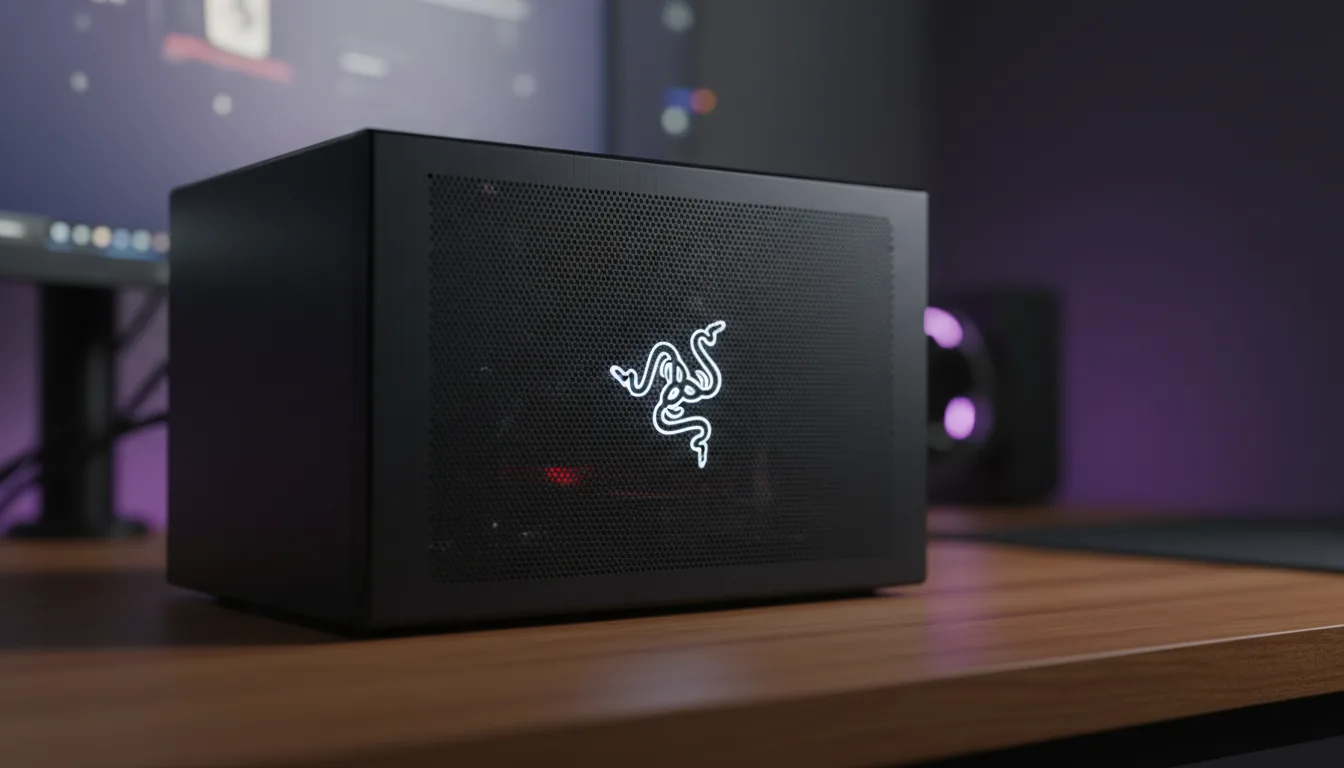
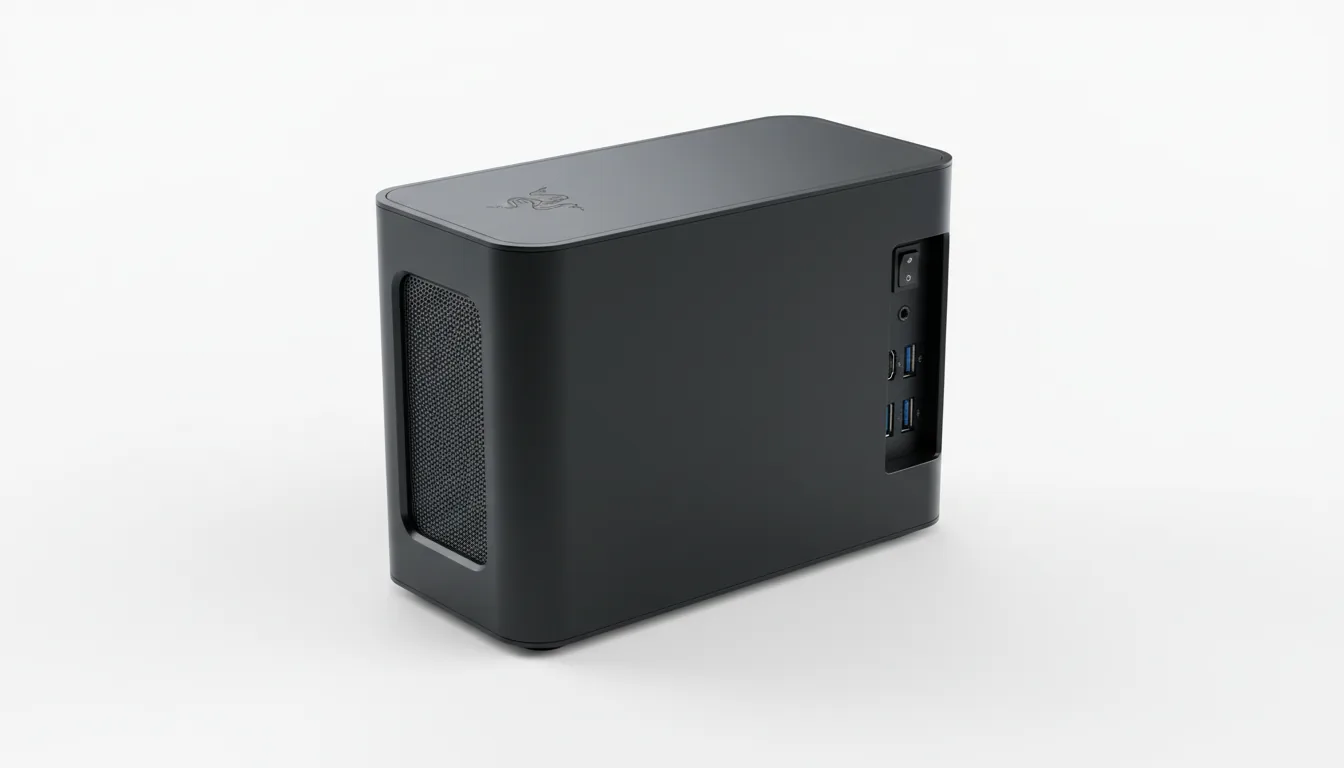
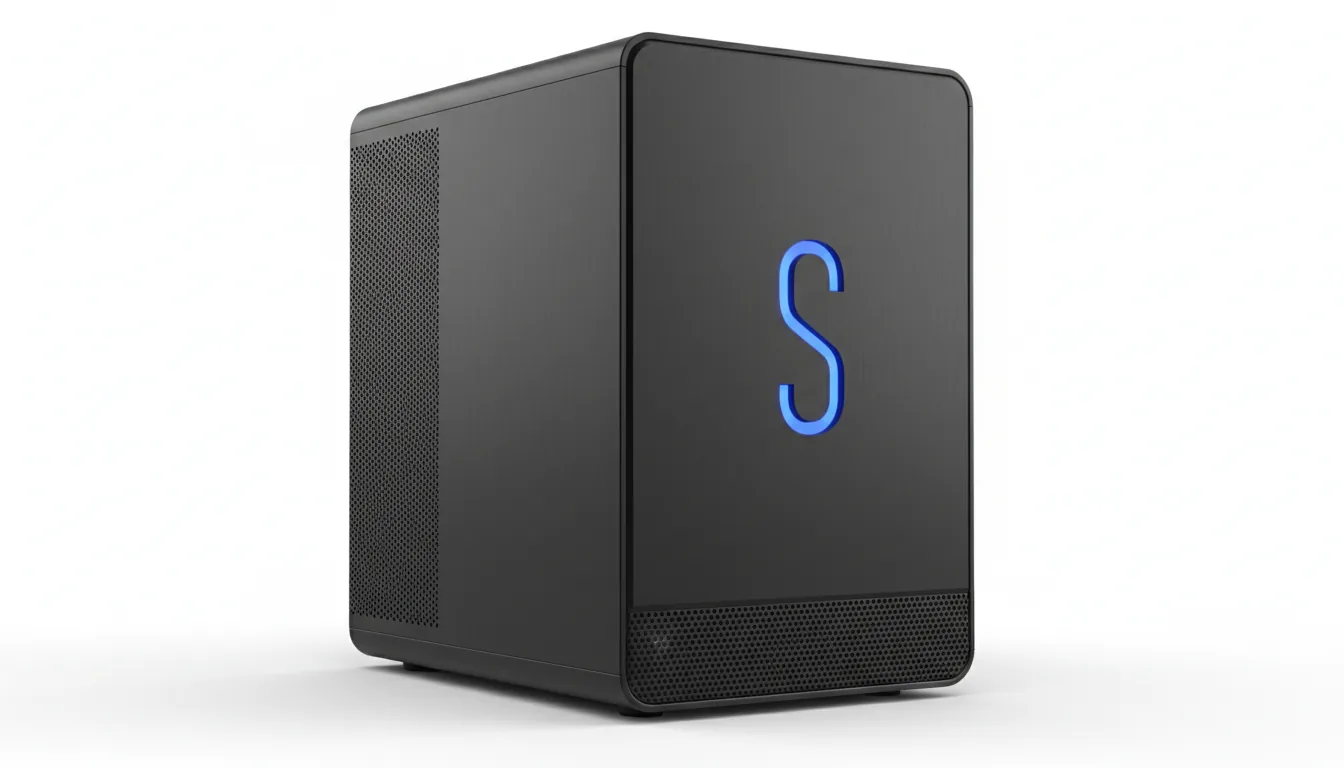
#1. Razer Core X
One of the most popular enclosures for Mac users, the Razer Core X offers a great mix of power and simplicity. It supports full-length, triple-slot GPUs and includes a 650W power supply, making it compatible with almost any AMD card. The build quality is solid and the plug-and-play experience on Intel Macs is smooth. While it doesn’t include additional ports like USB or Ethernet, it makes up for it with reliability and space for high-performance GPUs. This enclosure is ideal for users who want maximum GPU flexibility without extra features getting in the way.
#2. Sonnet eGFX Breakaway Box 750ex
The Sonnet Breakaway Box 750ex is a macOS-optimized enclosure designed with creative professionals in mind. It comes with a powerful 750W power supply and includes extra USB-A and Ethernet ports, allowing it to double as a lightweight docking station. It runs quietly even under load and integrates seamlessly with most Intel-based Macs. While slightly more expensive than some alternatives, it’s worth the investment if you’re looking to build a central workstation around your eGPU.
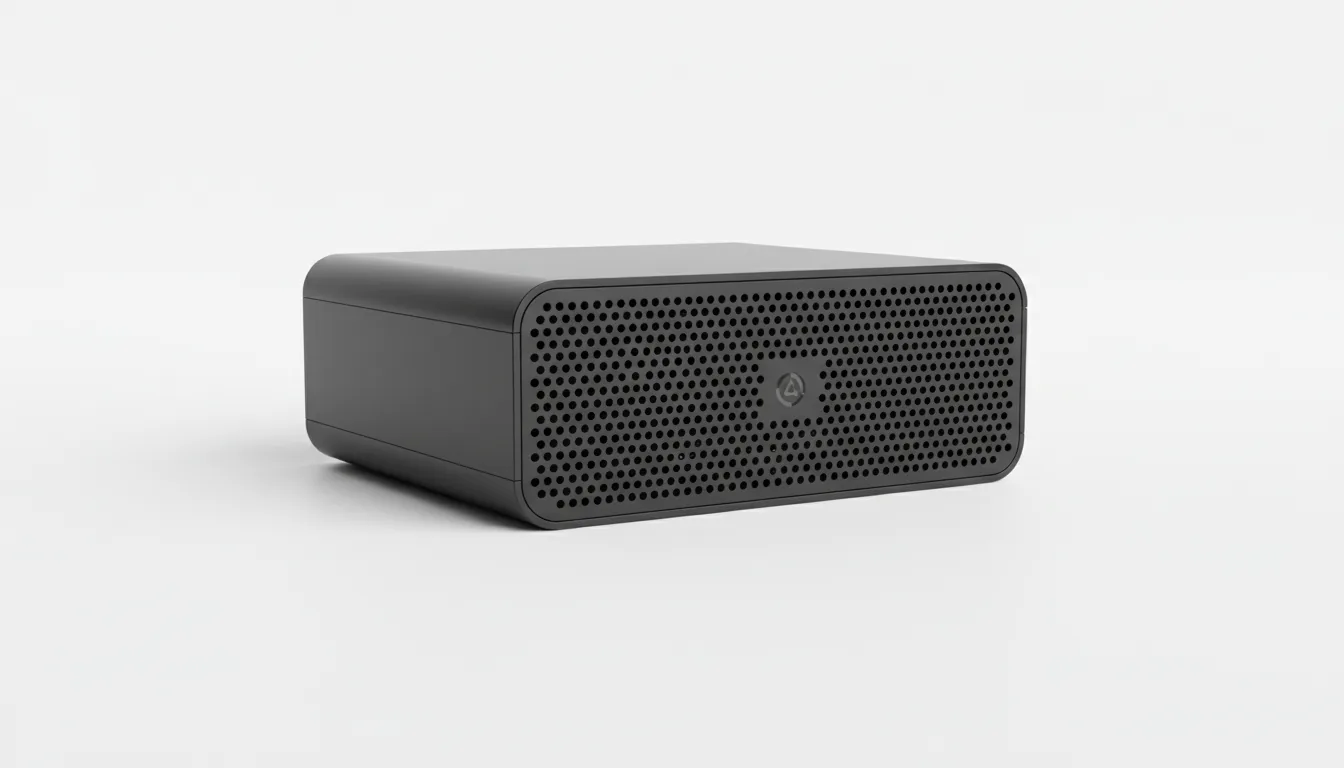
#3. Akitio Node Titan
The Akitio Node Titan is compact and portable, offering 650W of power and macOS certification in a smaller form factor. It’s equipped with a carry handle, which makes it easy to move between workstations or studios. The enclosure is a good match for users with limited desk space or those who prioritize portability. However, it has fewer expansion ports and may not accommodate the largest GPUs on the market. Still, it delivers excellent performance for its size.

#4. Mantiz Saturn Pro V2
The Saturn Pro V2 stands out as a feature-rich enclosure that offers both power and connectivity. In addition to strong GPU support, it includes multiple USB-A and USB-C ports, as well as Ethernet, making it one of the few enclosures that doubles as a fully functional dock. Its airflow system is efficient, helping to keep internal temperatures down even with high-end GPUs. Although it’s larger and heavier than most, it’s an excellent choice for MacBook Pro users who want to reduce cable clutter and build a unified workspace.
#5. OWC Mercury Helios 3S
The OWC Mercury Helios 3S is engineered for versatility. It supports a wide range of PCIe cards, not just GPUs, which makes it especially appealing for developers and engineers. Its rugged aluminum shell and thermal design give it a professional edge, although the enclosure is less suited to large or triple-slot GPUs. If you’re using a more compact graphics card, or want an enclosure that can adapt to different PCIe needs, this is a smart and durable option.
Each of these enclosures offers unique strengths, whether that’s raw power, docking functionality, portability, or versatility. The best choice for you depends on your GPU, your Mac’s ports and specs, and how you plan to use your setup, whether you’re editing 8K video, training AI models, or building a compact, travel-ready workstation.
Best GPUs for macOS eGPU Setups
Once you’ve selected a compatible enclosure, the next big decision is the GPU itself. macOS only supports AMD graphics cards for eGPU setups, so your options are focused, but still flexible enough to cover a range of needs, from entry-level performance boosts to pro-grade power for rendering, editing, and computation.
Let’s take a closer look at the most reliable GPU choices for Mac users in 2025.
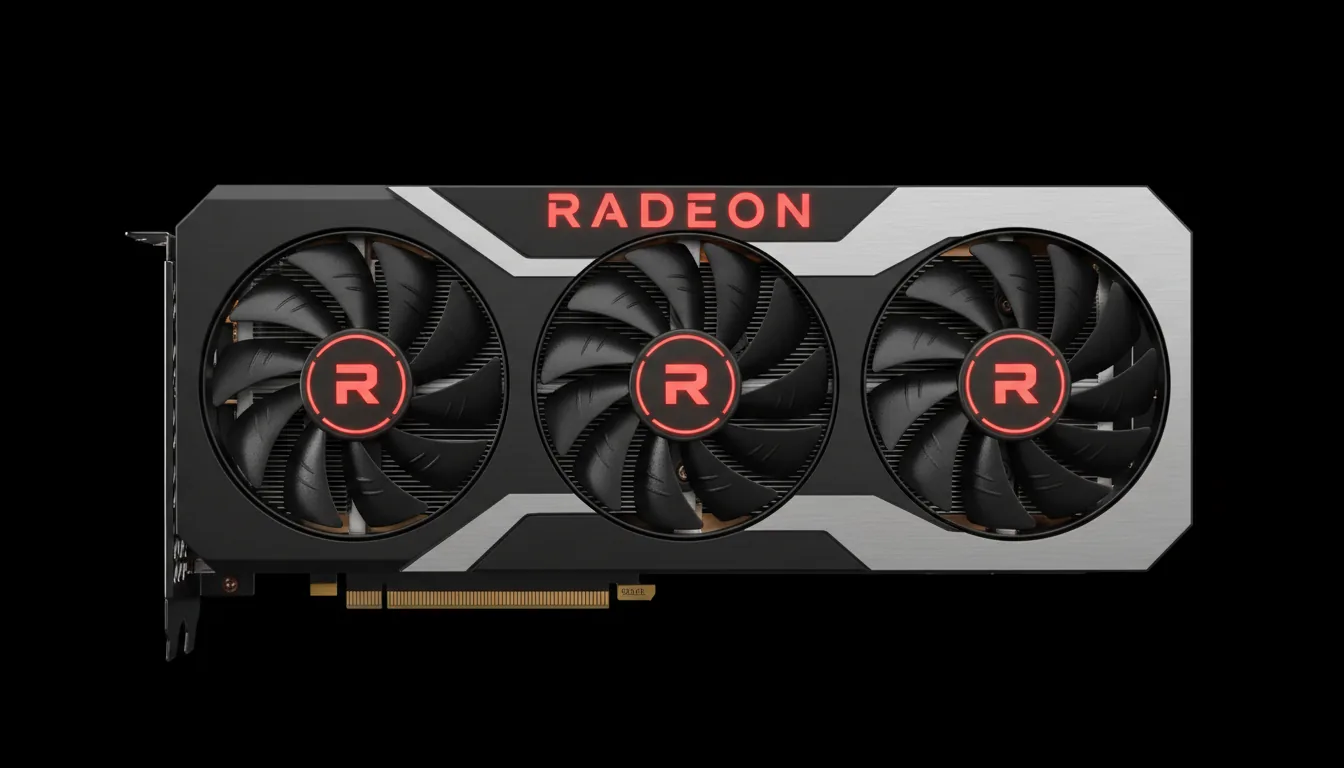
#1. Radeon RX 6800 XT
The RX 6800 XT is a top-tier GPU that delivers excellent performance across creative and technical workloads. With 16GB of GDDR6 memory, it can handle high-resolution video editing, real-time effects in Final Cut Pro, and intensive 3D rendering in Blender. It’s a future-proof card for professionals who work with large media files or high-resolution timelines on a regular basis. While power-hungry, it’s fully supported in macOS when paired with a compatible enclosure.
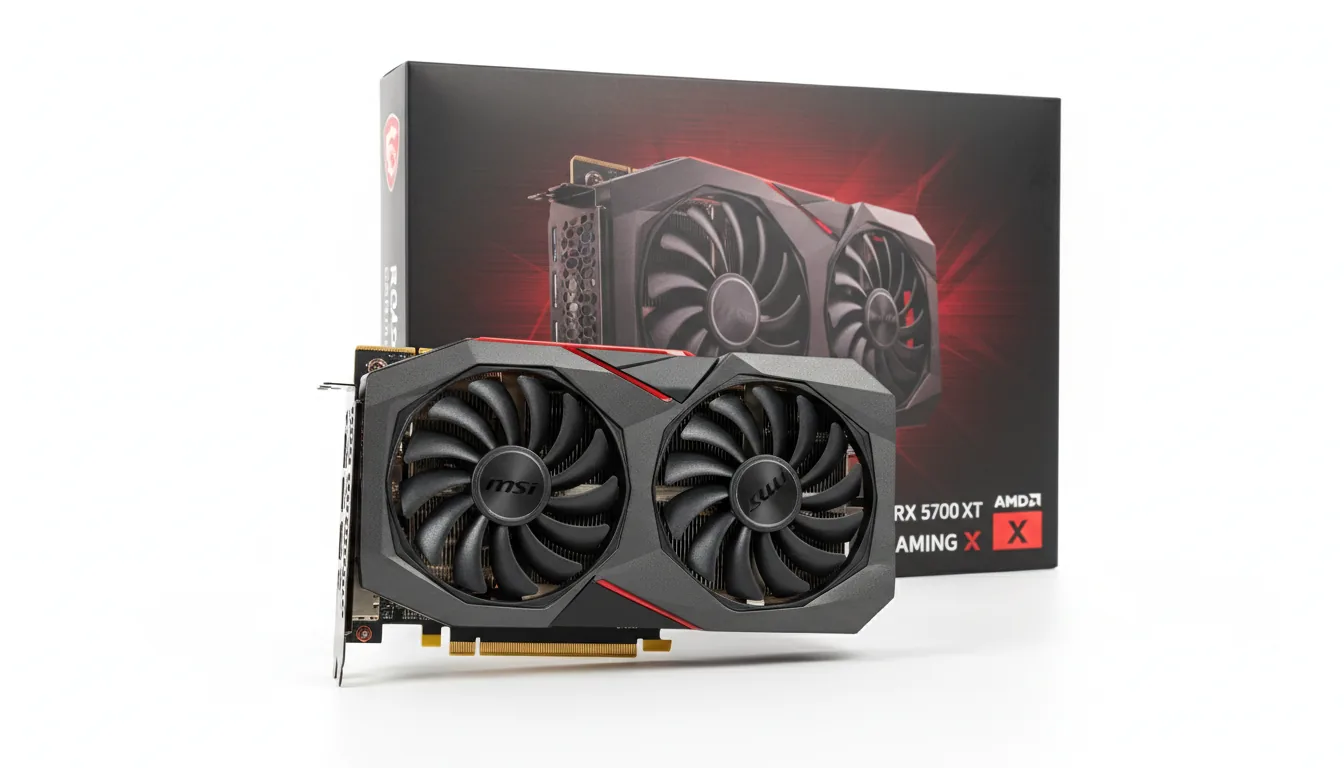
#2. Radeon RX 5700 XT
A popular mid-range option, the RX 5700 XT strikes a strong balance between performance and affordability. It offers smooth playback and rendering for 4K video editing and performs well in GPU-accelerated apps like DaVinci Resolve, Adobe Premiere Pro, and even some 3D workflows. This card has become a go-to for creative professionals who want reliable acceleration without overspending on high-end hardware.
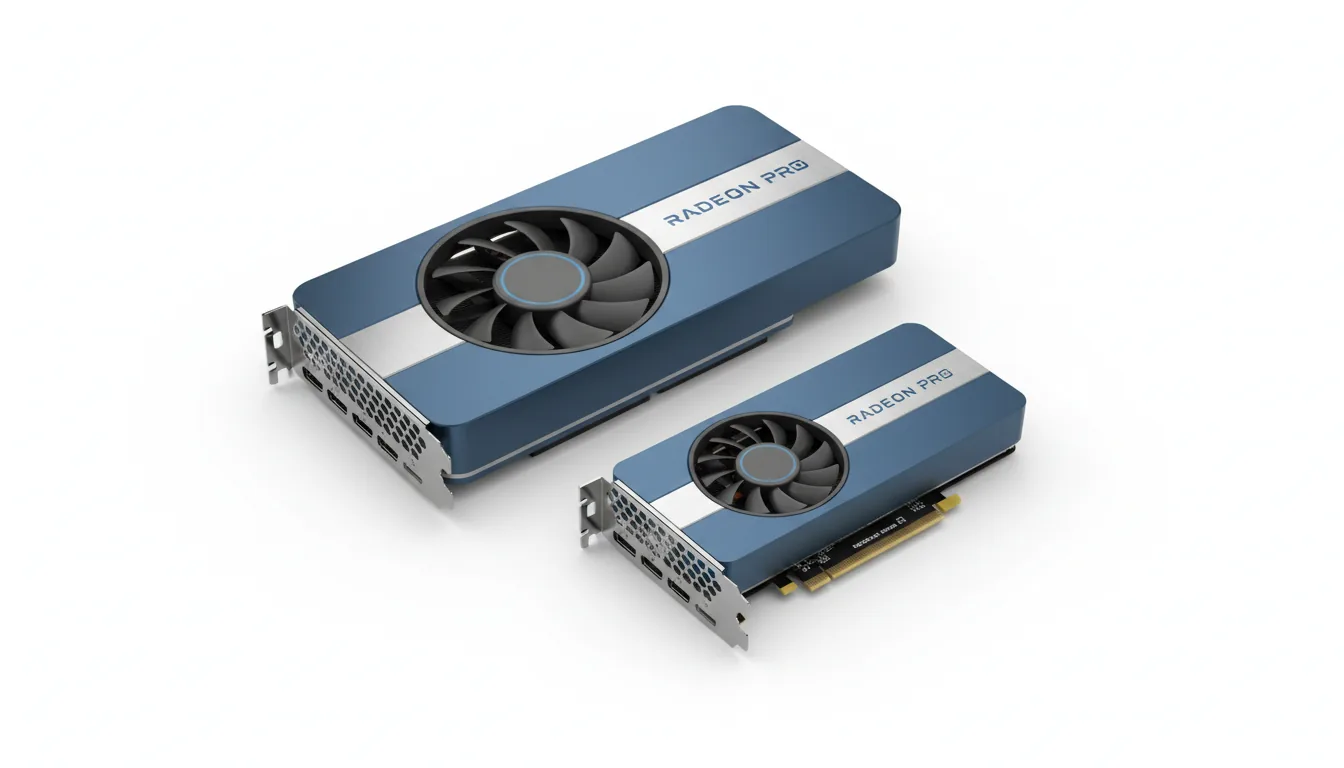
#3. Radeon Pro W6600
The W6600 is part of AMD’s professional lineup and is optimized for stability and efficiency in workstation tasks. It features ECC memory and ISV certifications for software like SolidWorks, Maya, and other professional tools. While its raw performance is slightly behind the RX 6800 XT, it offers a more stable experience and better thermals for long working sessions. It’s also widely praised for its compatibility with macOS.
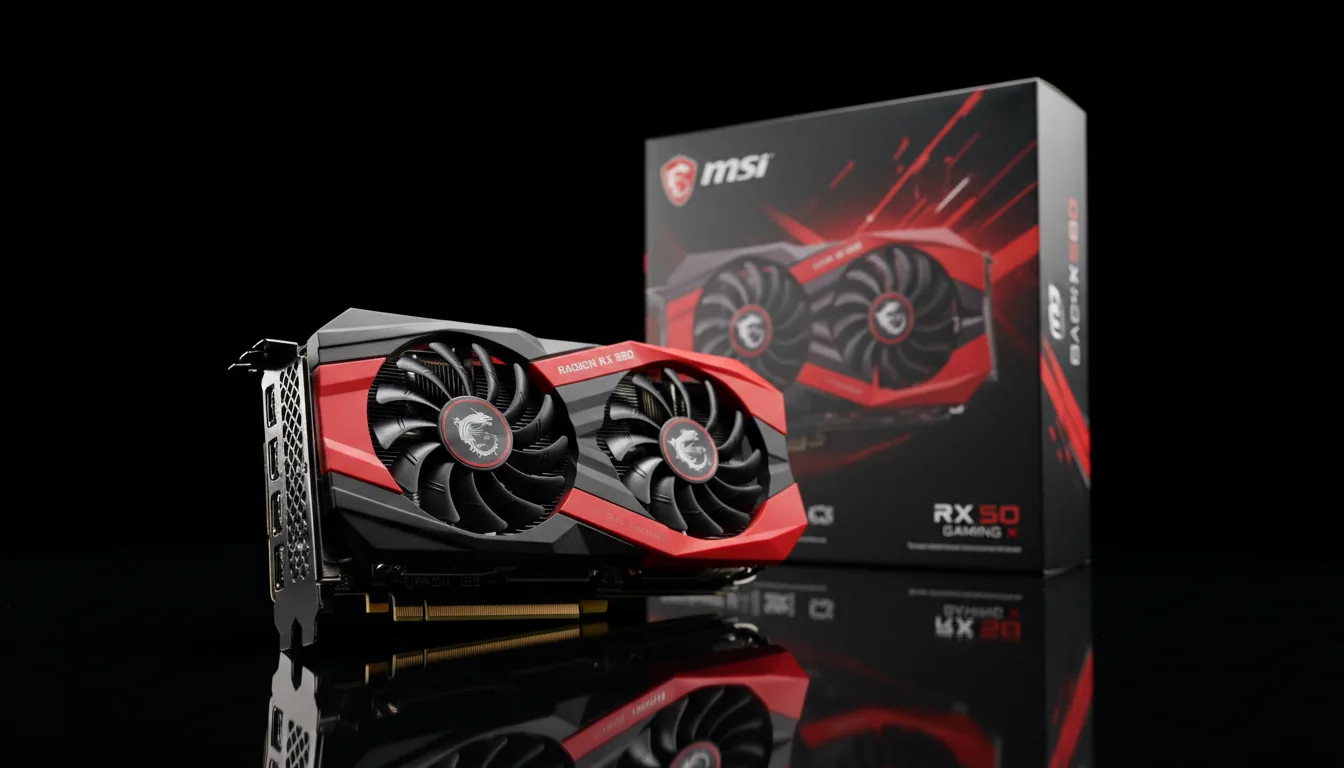
#4. Radeon RX 580
If you’re building an entry-level setup, the RX 580 remains one of the most affordable and reliable choices. It won’t compete with newer cards in terms of speed or memory, but for basic 1080p video editing, timeline scrubbing, and some light 3D rendering, it gets the job done. It’s also a good fit for older Intel Macs that don’t need cutting-edge performance but still benefit from GPU acceleration.
A Note on NVIDIA Cards
NVIDIA GPUs are not natively supported by macOS for eGPU setups. Even older models like the GTX 1080 or RTX 2080 may work under Windows via Boot Camp, but not on macOS without complex and unofficial driver workarounds. For a smooth, stable, and Apple-supported experience, it’s best to stick with AMD cards.
Whether you’re editing multi-cam 6K footage or running simulations, choosing the right GPU can drastically improve your workflow. Your enclosure and Mac may set the limits, but the GPU is what ultimately powers your creative process.
Understanding the difference between CPU vs GPU rendering can help you choose the right hardware for your workload.
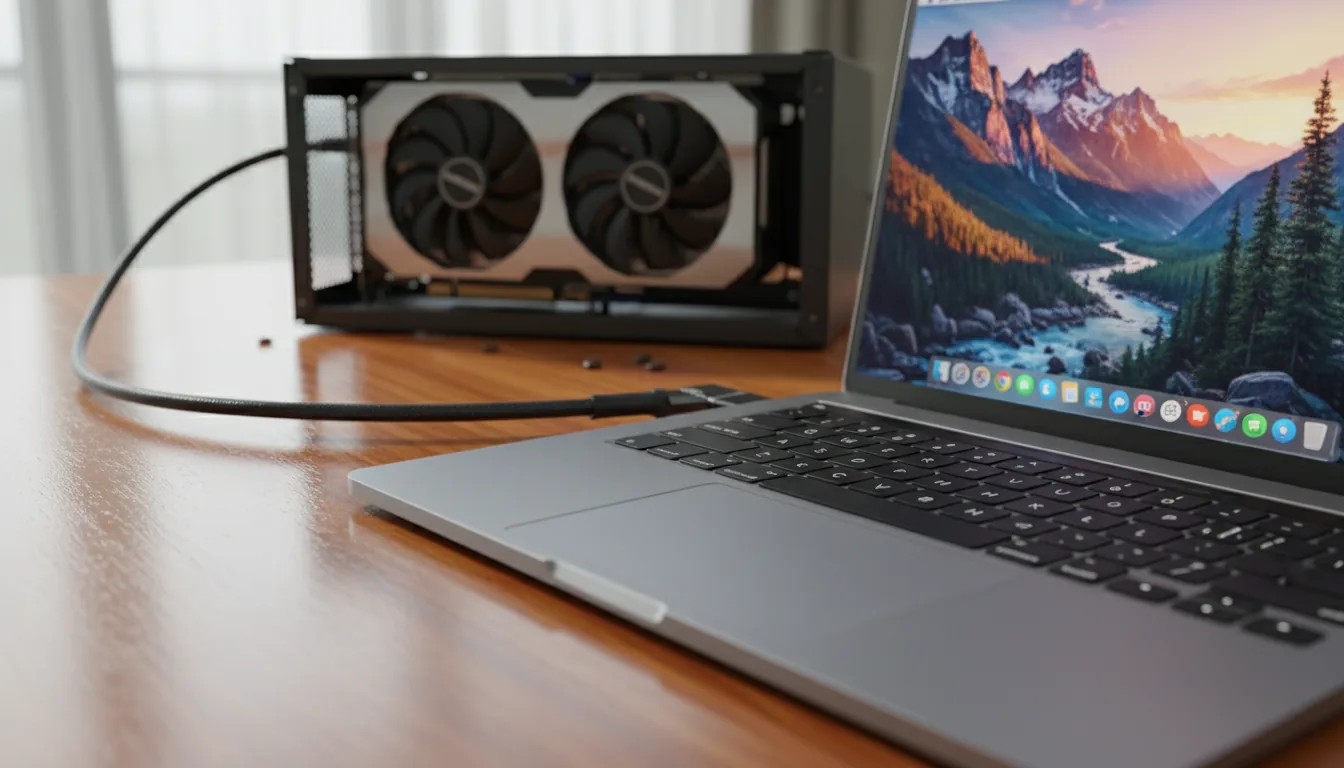
How to Set Up an eGPU with macOS
Setting up an external GPU on macOS is easier than it used to be, especially if you’re using an Intel-based Mac with a supported AMD GPU and a Thunderbolt 3 or 4 enclosure.
Step-by-Step Setup Guide
Install the GPU into the enclosure
Open the eGPU enclosure and insert your AMD GPU into the PCIe slot. Make sure it’s properly seated and secured with screws or brackets.Connect power cables inside the enclosure
If your GPU requires extra power (most mid to high-end cards do), plug in the power connectors from the enclosure’s PSU.Plug the enclosure into power and connect it to your Mac
Use a Thunderbolt 3 or 4 cable to connect the enclosure to your Mac. Most enclosures will power on automatically when connected.Recommended: shut down your Mac before first connection
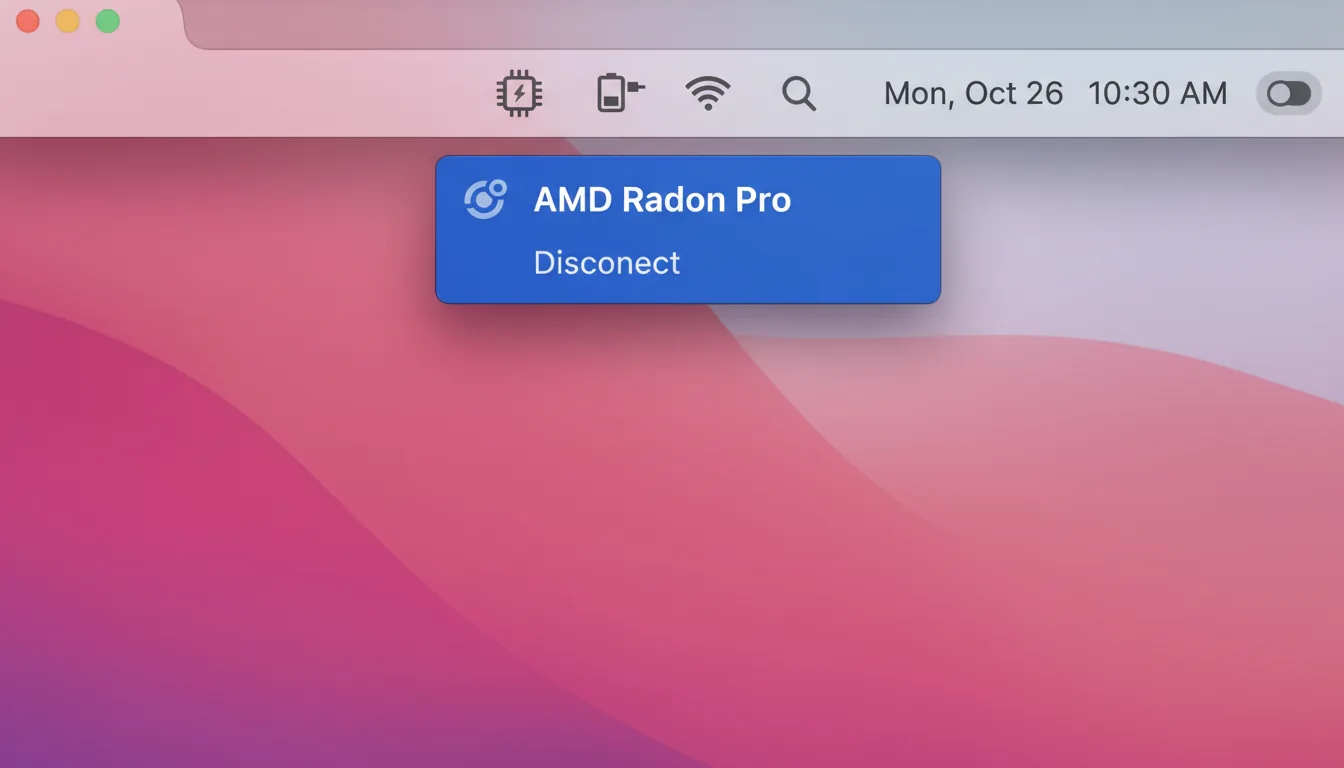
While macOS can detect eGPUs hot-plugged, powering everything on at the same time helps avoid initial detection issues.Boot up your Mac and verify recognition
Go to Apple Menu > About This Mac > System Report > Graphics/Displays. You should see the external GPU listed next to the internal one.
How to Assign Apps to Use the eGPU
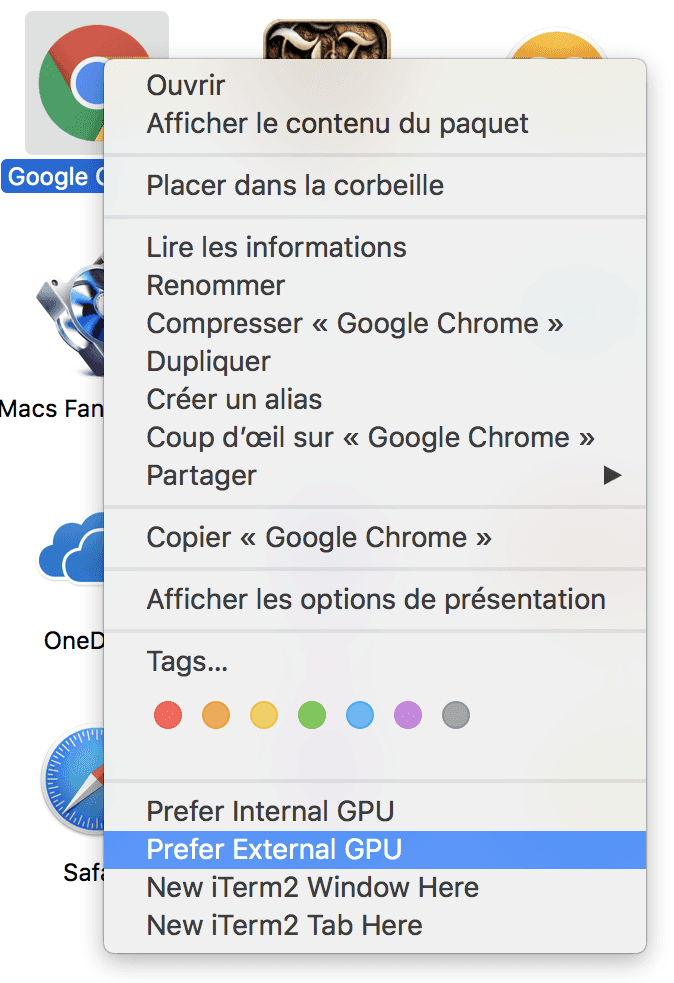
Some macOS apps (like Final Cut Pro or DaVinci Resolve) will automatically use the eGPU if it’s available. For example, you can find detailed guides on how to use GPU acceleration in DaVinci Resolve, Adobe After Effects, and Photoshop to get the most out of your eGPU setup. For others, you can manually assign the eGPU like this:
Open Finder and locate the app.
Right-click the app icon and choose Get Info (or press Command + I).
Check the box labeled “Prefer External GPU.”
Close the window and launch the app as usual.
Designers working in vector graphics can also boost their workflow by using GPU acceleration
Optimize with an External Display
To fully benefit from the eGPU:
Connect your monitor directly to the GPU’s HDMI or DisplayPort output on the enclosure.
This forces macOS to route all graphical output through the eGPU, improving rendering and playback speeds.
Troubleshooting Common Issues
If your Mac doesn’t detect the eGPU or defaults back to the internal GPU:
Restart your Mac with the eGPU connected.
Reset the SMC (System Management Controller) to refresh hardware settings.
Boot into Safe Mode once, then reboot normally to clear GPU-related cache issues.
Unplug and reconnect the Thunderbolt cable or try a different port.
With the right setup, macOS and your eGPU will work together seamlessly. You’ll gain noticeable improvements in rendering times, playback, and performance across creative and compute-heavy tasks, without upgrading your entire machine.
Your Computer, Just Better: Vagon Computer
As powerful as eGPUs can be, they’re not always the ideal solution, especially if you’re using an Apple Silicon Mac, working on the go, or simply want to avoid dealing with external hardware. That’s where cloud-based platforms like Vagon Computer come in. Vagon provides instant access to a high-performance machine in the cloud, designed specifically for tasks like video editing, 3D modeling, and rendering. Instead of buying and managing new hardware, you can launch a powerful remote computer straight from your browser, using any device you already own.
This approach is especially valuable for users with newer Apple Silicon Macs that no longer support eGPUs, lightweight laptops that are limited by power or thermals, or teams that need shared access to a high-end setup without dealing with file transfers or physical workstations. Once connected to your Vagon Computer, you can run professional software like Final Cut Pro, DaVinci Resolve, or Blender just as if it were installed locally, except all the heavy lifting happens in the cloud.
You don’t have to worry about installing drivers, troubleshooting compatibility, or upgrading hardware every few years. You simply log in, launch your session, and get to work with the speed of a high-end desktop, no cables or clutter required. For many creators, Vagon isn’t just a workaround; it’s a smarter, more flexible way to stay productive. Try Vagon Computer and experience what a GPU-accelerated workflow can feel like, without the upgrade.
Final Thoughts & Conclusion
External GPUs can breathe new life into Intel-based Macs, especially for users who need more power but don’t want to invest in an entirely new system. Whether you’re editing high-resolution video, working with complex 3D models, or simply trying to reduce render times, an eGPU is still one of the most effective ways to upgrade your workflow without replacing your Mac.
That said, eGPUs aren’t for everyone. If you’re using a Mac with Apple Silicon, or you need a more portable or scalable setup, a cloud-based solution like Vagon Computer might be a better fit. It gives you instant access to high-performance hardware without the upfront cost or physical complexity.
If you have a compatible Intel Mac and a clear performance need, an eGPU can make a massive difference in how you work. But if you’re moving into the Apple Silicon ecosystem, or just want ultimate flexibility, Vagon offers a powerful, future-proof alternative that’s ready when you are.
In the end, the right solution depends on your hardware, your software, and how you create. Either way, the good news is this: your Mac doesn’t have to limit your performance anymore.
Frequently Asked Questions
1. Do eGPUs work with Apple Silicon Macs (M1, M2, M3)?
No. Apple Silicon Macs do not support eGPUs. While Intel-based Macs could take advantage of external GPUs through Thunderbolt, Apple’s new chips integrate their own GPU architecture and block external GPU access at the system level. There are currently no official or unofficial workarounds that reliably enable eGPU support on Apple Silicon.
2. Can I use an NVIDIA card in a macOS eGPU setup?
Not natively. macOS only provides driver support for AMD Radeon GPUs in eGPU configurations. NVIDIA cards are unsupported and require complicated workarounds that are unstable or outdated. For best performance and full compatibility, always choose an AMD card.
3. Will Final Cut Pro benefit from an eGPU?
Yes, on Intel Macs. Final Cut Pro automatically takes advantage of eGPUs to accelerate effects rendering, playback, and export. Connecting an external GPU can dramatically reduce render times and allow smoother timeline performance, especially when working with 4K or higher-resolution footage.
4. Can I play games with an eGPU on macOS?
Technically yes, but with limitations. macOS doesn’t support as many AAA games as Windows, and performance can vary depending on the game engine and optimization. For the best gaming experience with an eGPU, many users run Windows on their Mac through Boot Camp (on Intel Macs only). Alternatively, cloud gaming or using a remote Vagon Computer can provide smoother results without booting into Windows.
5. How much performance gain should I expect from an eGPU?
That depends on your internal GPU and your workload. In most creative applications, like Final Cut Pro, DaVinci Resolve, and Blender, you can expect a 2x to 5x improvement in rendering speed, preview smoothness, and overall responsiveness. For less GPU-heavy tasks, gains may be more modest. Connecting your display directly to the eGPU often unlocks the best possible performance.
Macs are known for their sleek design, stable operating system, and seamless ecosystem. But when it comes to raw graphical performance, especially for demanding creative tasks, even the most powerful MacBook or iMac can hit a wall. Many creatives are also optimizing GPU use in Blender to speed up their 3D rendering workflows. Whether you’re editing 8K video in Final Cut Pro, rendering 3D scenes in Blender, or training machine learning models, internal GPUs often fall short, especially on older Intel-based Macs.
That’s where external GPUs (eGPUs) come in.
An eGPU gives your Mac the muscle it needs to handle high-performance tasks by connecting a desktop-grade graphics card through a Thunderbolt port. With the right setup, you can significantly speed up rendering times, boost frame rates, and unlock smoother real-time previews without needing to buy a new computer. eGPUs are especially useful for content creators handling high-res video, developers running simulations or AI models, and gamers seeking better performance on macOS or via Boot Camp.
Although Apple’s newer M-series chips no longer support eGPUs natively, many Intel Mac users still rely on them for a performance boost. And for those using Apple Silicon, cloud-based alternatives like Vagon Computer are quickly emerging as the next-gen solution.
Here’s what we’ll cover:
What Is an eGPU and How It Works on a Mac
Which Macs Support eGPUs in 2025
How to Pick the Right GPU and Enclosure for Your Mac
How to Set Up an eGPU on macOS (Step-by-Step)
Top eGPU Enclosures and AMD GPUs for Mac Users
Why Vagon Is a Better Option for Apple Silicon Macs
Let’s dive in.
What Is an eGPU and How Does It Work?
An external GPU (eGPU) is exactly what it sounds like: a full-sized graphics card housed in a separate enclosure that connects to your Mac via a high-speed Thunderbolt 3 or 4 cable. Instead of relying on your Mac’s built-in GPU, which is often limited in power or thermals, especially in slim laptops, an eGPU brings desktop-class graphics performance to your portable setup.
How It Works
Inside an eGPU enclosure, you’ll find a regular desktop graphics card (usually AMD for macOS compatibility), a power supply unit, and cooling fans. Once connected, your Mac routes graphics-intensive tasks, like rendering, video effects, 3D modeling, or gaming, through the external GPU instead of its internal one.
This setup frees up your system’s resources, reduces rendering time, and improves playback smoothness in creative softwares.
Why Mac Users Use eGPUs
The biggest reason? Performance without replacing your device. If you’re on an older Intel MacBook Pro or Mac mini, you can supercharge your workflow by simply adding an eGPU instead of buying a brand-new machine.
Even Mac desktops like the iMac and Mac mini benefit, especially those with limited internal graphics power. eGPUs are also helpful when using external displays, as they can drive higher resolutions (like 4K or 5K) with less lag and better color grading performance.
But What About Apple Silicon Macs?
Here’s the catch: Apple’s M1, M2, and M3 chips do not officially support eGPUs. If you’re using an Apple Silicon Mac, you won’t be able to plug in an external GPU and expect native support. That’s why many users are turning to cloud-powered alternatives, more on that later in the guide.
For now, if you’re using an Intel-based Mac, an eGPU is still one of the best ways to upgrade your performance without upgrading your entire machine.
eGPU Compatibility with Mac
Before you rush to buy an external GPU setup, it’s crucial to know if your Mac actually supports it. Not all Macs are eGPU-ready, and with Apple’s transition to its own Silicon chips, compatibility has become a bit more complicated.
Which Macs Support eGPUs?
eGPUs work only with Intel-based Macs that have Thunderbolt 3 or Thunderbolt 4 ports. These include:
MacBook Pro (2016–2020, Intel)
MacBook Air (2018–2019, Intel)
iMac (2017–2020, Intel)
Mac mini (2018, Intel)
Mac Pro (2019)
If your Mac is powered by M1, M2, or M3, it does not support eGPUs. Apple Silicon chips have integrated graphics and do not recognize external GPUs, even when connected via Thunderbolt. There’s no workaround or official support, and Apple hasn’t announced any plans to change that.
macOS Version Matters
Your macOS version also plays a role. Apple began supporting eGPUs natively in macOS High Sierra 10.13.4 and later. For the smoothest experience and best compatibility with modern software, we recommend using macOS Big Sur, Catalina, or Monterey on Intel Macs. macOS Ventura and Sonoma still support eGPUs—but only for Intel-based Macs.
Supported GPUs: AMD Only
macOS supports only AMD Radeon cards in official eGPU configurations. NVIDIA cards are not natively supported on Mac, and driver workarounds are unreliable or outdated.
That’s why most eGPU setups for Mac use AMD GPUs like the Radeon RX 6800 XT, RX 5700 XT, or Radeon Pro W6600, which we’ll cover in detail later.
How to Choose the Right eGPU Setup
Choosing the right external GPU setup isn’t just about picking the most expensive graphics card. It’s about finding the right balance between performance, compatibility, and cost, based on how you actually use your Mac.
A. Understand Your Workflow
Start with your needs. The kind of work you do directly shapes what kind of GPU and enclosure will serve you best. If you’re a video editor working with 4K or 8K footage, you’ll need a GPU with high memory bandwidth and real-time playback capabilities to avoid lag and dropped frames. For 3D artists and animators, compute-heavy tasks require strong GPU cores and consistent thermal performance to keep render times down and system stability up. Gamers may prioritize high frame rates and GPU headroom, though it’s important to note that many games still run better on Windows via Boot Camp or through cloud gaming solutions. Meanwhile, developers and researchers working with AI models, simulations, or code compilation benefit from GPUs that offer strong OpenCL support and reliable compute performance. In short, the more GPU-intensive your work is, the more it makes sense to invest in a powerful, future-proof setup.
B. Pick a Compatible GPU
Not all GPUs work with macOS. In fact, macOS supports only AMD Radeon cards for eGPU setups. You’ll want to focus on models that are officially supported and have a good reputation in the macOS community.
High-end: Radeon RX 6800 XT, RX 6900 XT
Mid-range: Radeon RX 5700 XT, Radeon Pro W6600
Entry-level: Radeon RX 580, RX 5500 XT
Avoid NVIDIA cards, they are not natively supported and require unsupported workarounds.
C. Choose a Reliable eGPU Enclosure
Your enclosure houses the GPU, powers it, and handles thermal management. A solid enclosure makes a massive difference in performance and reliability.
Look for enclosures with:
500W+ power supply to support modern GPUs
Good thermal design (fans, vents, low noise)
Extra ports (USB, Ethernet) if you want docking functionality
Thunderbolt 3 or 4 for maximum speed and bandwidth
Trusted brands include Razer, Sonnet, Mantiz, and OWC, all of which we’ll explore in the next section.
D. Set a Realistic Budget
You don’t need to spend thousands to see real performance improvements. A balanced setup often outperforms a mismatched high-end build. For lighter tasks, a combo like the RX 580 with a basic enclosure can cost under $600. Mid-range setups with an RX 5700 XT or Pro W6600 fall around $700–$1000, while high-end builds with an RX 6800 XT and a premium enclosure go beyond $1000. The key is to match your GPU and enclosure wisely for smooth, efficient results.
Best eGPU Enclosures for Mac in 2025
Once you’ve selected a compatible GPU, the next key component of your setup is the enclosure. This is what powers your card, keeps it cool, and connects it to your Mac via Thunderbolt. A quality enclosure can make or break your eGPU experience, affecting everything from stability to noise levels.
Below are the top eGPU enclosures on the market in 2025, chosen for their macOS compatibility, build quality, and overall value.
#1. Razer Core X
One of the most popular enclosures for Mac users, the Razer Core X offers a great mix of power and simplicity. It supports full-length, triple-slot GPUs and includes a 650W power supply, making it compatible with almost any AMD card. The build quality is solid and the plug-and-play experience on Intel Macs is smooth. While it doesn’t include additional ports like USB or Ethernet, it makes up for it with reliability and space for high-performance GPUs. This enclosure is ideal for users who want maximum GPU flexibility without extra features getting in the way.
#2. Sonnet eGFX Breakaway Box 750ex
The Sonnet Breakaway Box 750ex is a macOS-optimized enclosure designed with creative professionals in mind. It comes with a powerful 750W power supply and includes extra USB-A and Ethernet ports, allowing it to double as a lightweight docking station. It runs quietly even under load and integrates seamlessly with most Intel-based Macs. While slightly more expensive than some alternatives, it’s worth the investment if you’re looking to build a central workstation around your eGPU.
#3. Akitio Node Titan
The Akitio Node Titan is compact and portable, offering 650W of power and macOS certification in a smaller form factor. It’s equipped with a carry handle, which makes it easy to move between workstations or studios. The enclosure is a good match for users with limited desk space or those who prioritize portability. However, it has fewer expansion ports and may not accommodate the largest GPUs on the market. Still, it delivers excellent performance for its size.
#4. Mantiz Saturn Pro V2
The Saturn Pro V2 stands out as a feature-rich enclosure that offers both power and connectivity. In addition to strong GPU support, it includes multiple USB-A and USB-C ports, as well as Ethernet, making it one of the few enclosures that doubles as a fully functional dock. Its airflow system is efficient, helping to keep internal temperatures down even with high-end GPUs. Although it’s larger and heavier than most, it’s an excellent choice for MacBook Pro users who want to reduce cable clutter and build a unified workspace.
#5. OWC Mercury Helios 3S
The OWC Mercury Helios 3S is engineered for versatility. It supports a wide range of PCIe cards, not just GPUs, which makes it especially appealing for developers and engineers. Its rugged aluminum shell and thermal design give it a professional edge, although the enclosure is less suited to large or triple-slot GPUs. If you’re using a more compact graphics card, or want an enclosure that can adapt to different PCIe needs, this is a smart and durable option.
Each of these enclosures offers unique strengths, whether that’s raw power, docking functionality, portability, or versatility. The best choice for you depends on your GPU, your Mac’s ports and specs, and how you plan to use your setup, whether you’re editing 8K video, training AI models, or building a compact, travel-ready workstation.
Best GPUs for macOS eGPU Setups
Once you’ve selected a compatible enclosure, the next big decision is the GPU itself. macOS only supports AMD graphics cards for eGPU setups, so your options are focused, but still flexible enough to cover a range of needs, from entry-level performance boosts to pro-grade power for rendering, editing, and computation.
Let’s take a closer look at the most reliable GPU choices for Mac users in 2025.
#1. Radeon RX 6800 XT
The RX 6800 XT is a top-tier GPU that delivers excellent performance across creative and technical workloads. With 16GB of GDDR6 memory, it can handle high-resolution video editing, real-time effects in Final Cut Pro, and intensive 3D rendering in Blender. It’s a future-proof card for professionals who work with large media files or high-resolution timelines on a regular basis. While power-hungry, it’s fully supported in macOS when paired with a compatible enclosure.
#2. Radeon RX 5700 XT
A popular mid-range option, the RX 5700 XT strikes a strong balance between performance and affordability. It offers smooth playback and rendering for 4K video editing and performs well in GPU-accelerated apps like DaVinci Resolve, Adobe Premiere Pro, and even some 3D workflows. This card has become a go-to for creative professionals who want reliable acceleration without overspending on high-end hardware.
#3. Radeon Pro W6600
The W6600 is part of AMD’s professional lineup and is optimized for stability and efficiency in workstation tasks. It features ECC memory and ISV certifications for software like SolidWorks, Maya, and other professional tools. While its raw performance is slightly behind the RX 6800 XT, it offers a more stable experience and better thermals for long working sessions. It’s also widely praised for its compatibility with macOS.
#4. Radeon RX 580
If you’re building an entry-level setup, the RX 580 remains one of the most affordable and reliable choices. It won’t compete with newer cards in terms of speed or memory, but for basic 1080p video editing, timeline scrubbing, and some light 3D rendering, it gets the job done. It’s also a good fit for older Intel Macs that don’t need cutting-edge performance but still benefit from GPU acceleration.
A Note on NVIDIA Cards
NVIDIA GPUs are not natively supported by macOS for eGPU setups. Even older models like the GTX 1080 or RTX 2080 may work under Windows via Boot Camp, but not on macOS without complex and unofficial driver workarounds. For a smooth, stable, and Apple-supported experience, it’s best to stick with AMD cards.
Whether you’re editing multi-cam 6K footage or running simulations, choosing the right GPU can drastically improve your workflow. Your enclosure and Mac may set the limits, but the GPU is what ultimately powers your creative process.
Understanding the difference between CPU vs GPU rendering can help you choose the right hardware for your workload.
How to Set Up an eGPU with macOS
Setting up an external GPU on macOS is easier than it used to be, especially if you’re using an Intel-based Mac with a supported AMD GPU and a Thunderbolt 3 or 4 enclosure.
Step-by-Step Setup Guide
Install the GPU into the enclosure
Open the eGPU enclosure and insert your AMD GPU into the PCIe slot. Make sure it’s properly seated and secured with screws or brackets.Connect power cables inside the enclosure
If your GPU requires extra power (most mid to high-end cards do), plug in the power connectors from the enclosure’s PSU.Plug the enclosure into power and connect it to your Mac
Use a Thunderbolt 3 or 4 cable to connect the enclosure to your Mac. Most enclosures will power on automatically when connected.Recommended: shut down your Mac before first connection
While macOS can detect eGPUs hot-plugged, powering everything on at the same time helps avoid initial detection issues.Boot up your Mac and verify recognition
Go to Apple Menu > About This Mac > System Report > Graphics/Displays. You should see the external GPU listed next to the internal one.
How to Assign Apps to Use the eGPU
Some macOS apps (like Final Cut Pro or DaVinci Resolve) will automatically use the eGPU if it’s available. For example, you can find detailed guides on how to use GPU acceleration in DaVinci Resolve, Adobe After Effects, and Photoshop to get the most out of your eGPU setup. For others, you can manually assign the eGPU like this:
Open Finder and locate the app.
Right-click the app icon and choose Get Info (or press Command + I).
Check the box labeled “Prefer External GPU.”
Close the window and launch the app as usual.
Designers working in vector graphics can also boost their workflow by using GPU acceleration
Optimize with an External Display
To fully benefit from the eGPU:
Connect your monitor directly to the GPU’s HDMI or DisplayPort output on the enclosure.
This forces macOS to route all graphical output through the eGPU, improving rendering and playback speeds.
Troubleshooting Common Issues
If your Mac doesn’t detect the eGPU or defaults back to the internal GPU:
Restart your Mac with the eGPU connected.
Reset the SMC (System Management Controller) to refresh hardware settings.
Boot into Safe Mode once, then reboot normally to clear GPU-related cache issues.
Unplug and reconnect the Thunderbolt cable or try a different port.
With the right setup, macOS and your eGPU will work together seamlessly. You’ll gain noticeable improvements in rendering times, playback, and performance across creative and compute-heavy tasks, without upgrading your entire machine.
Your Computer, Just Better: Vagon Computer
As powerful as eGPUs can be, they’re not always the ideal solution, especially if you’re using an Apple Silicon Mac, working on the go, or simply want to avoid dealing with external hardware. That’s where cloud-based platforms like Vagon Computer come in. Vagon provides instant access to a high-performance machine in the cloud, designed specifically for tasks like video editing, 3D modeling, and rendering. Instead of buying and managing new hardware, you can launch a powerful remote computer straight from your browser, using any device you already own.
This approach is especially valuable for users with newer Apple Silicon Macs that no longer support eGPUs, lightweight laptops that are limited by power or thermals, or teams that need shared access to a high-end setup without dealing with file transfers or physical workstations. Once connected to your Vagon Computer, you can run professional software like Final Cut Pro, DaVinci Resolve, or Blender just as if it were installed locally, except all the heavy lifting happens in the cloud.
You don’t have to worry about installing drivers, troubleshooting compatibility, or upgrading hardware every few years. You simply log in, launch your session, and get to work with the speed of a high-end desktop, no cables or clutter required. For many creators, Vagon isn’t just a workaround; it’s a smarter, more flexible way to stay productive. Try Vagon Computer and experience what a GPU-accelerated workflow can feel like, without the upgrade.
Final Thoughts & Conclusion
External GPUs can breathe new life into Intel-based Macs, especially for users who need more power but don’t want to invest in an entirely new system. Whether you’re editing high-resolution video, working with complex 3D models, or simply trying to reduce render times, an eGPU is still one of the most effective ways to upgrade your workflow without replacing your Mac.
That said, eGPUs aren’t for everyone. If you’re using a Mac with Apple Silicon, or you need a more portable or scalable setup, a cloud-based solution like Vagon Computer might be a better fit. It gives you instant access to high-performance hardware without the upfront cost or physical complexity.
If you have a compatible Intel Mac and a clear performance need, an eGPU can make a massive difference in how you work. But if you’re moving into the Apple Silicon ecosystem, or just want ultimate flexibility, Vagon offers a powerful, future-proof alternative that’s ready when you are.
In the end, the right solution depends on your hardware, your software, and how you create. Either way, the good news is this: your Mac doesn’t have to limit your performance anymore.
Frequently Asked Questions
1. Do eGPUs work with Apple Silicon Macs (M1, M2, M3)?
No. Apple Silicon Macs do not support eGPUs. While Intel-based Macs could take advantage of external GPUs through Thunderbolt, Apple’s new chips integrate their own GPU architecture and block external GPU access at the system level. There are currently no official or unofficial workarounds that reliably enable eGPU support on Apple Silicon.
2. Can I use an NVIDIA card in a macOS eGPU setup?
Not natively. macOS only provides driver support for AMD Radeon GPUs in eGPU configurations. NVIDIA cards are unsupported and require complicated workarounds that are unstable or outdated. For best performance and full compatibility, always choose an AMD card.
3. Will Final Cut Pro benefit from an eGPU?
Yes, on Intel Macs. Final Cut Pro automatically takes advantage of eGPUs to accelerate effects rendering, playback, and export. Connecting an external GPU can dramatically reduce render times and allow smoother timeline performance, especially when working with 4K or higher-resolution footage.
4. Can I play games with an eGPU on macOS?
Technically yes, but with limitations. macOS doesn’t support as many AAA games as Windows, and performance can vary depending on the game engine and optimization. For the best gaming experience with an eGPU, many users run Windows on their Mac through Boot Camp (on Intel Macs only). Alternatively, cloud gaming or using a remote Vagon Computer can provide smoother results without booting into Windows.
5. How much performance gain should I expect from an eGPU?
That depends on your internal GPU and your workload. In most creative applications, like Final Cut Pro, DaVinci Resolve, and Blender, you can expect a 2x to 5x improvement in rendering speed, preview smoothness, and overall responsiveness. For less GPU-heavy tasks, gains may be more modest. Connecting your display directly to the eGPU often unlocks the best possible performance.
Get Beyond Your Computer Performance
Run applications on your cloud computer with the latest generation hardware. No more crashes or lags.

Trial includes 1 hour usage + 7 days of storage.
Summarize with AI

Ready to focus on your creativity?
Vagon gives you the ability to create & render projects, collaborate, and stream applications with the power of the best hardware.

Vagon Blog


Run heavy applications on any device with
your personal computer on the cloud.
San Francisco, California
Solutions
Vagon Teams
Vagon Streams
Use Cases
Resources
Vagon Blog
How to Run Audacity on a Cloud Ubuntu Desktop (2026 Guide)
How to Run Darktable on a Cloud Ubuntu Desktop for RAW Photo Editing (2026 Guide)
How to Run Kdenlive on a Cloud Ubuntu Desktop (2026 Guide)
How to Run DaVinci Resolve on Linux in the Cloud (2026 Guide)
How to Run Inkscape on a Cloud Ubuntu Desktop (2026 Guide)
How to Run Krita on a Cloud Ubuntu Desktop for Digital Painting (2026 Guide)
How to Run GIMP on a Cloud Ubuntu Desktop (2026 Guide)
How to Run Jupyter on a Cloud GPU Linux Desktop (2026 Guide)
Vagon vs GitHub Codespaces: Cloud Dev Environments Compared (2026)
Vagon Blog
Run heavy applications on any device with
your personal computer on the cloud.
San Francisco, California
Solutions
Vagon Teams
Vagon Streams
Use Cases
Resources
Vagon Blog