Instant Connection for Pixel Streaming
— New Feature Automated Setup

Lumion Shortcuts: The Practical Guide to Faster Scene Building
Lumion Shortcuts: The Practical Guide to Faster Scene Building
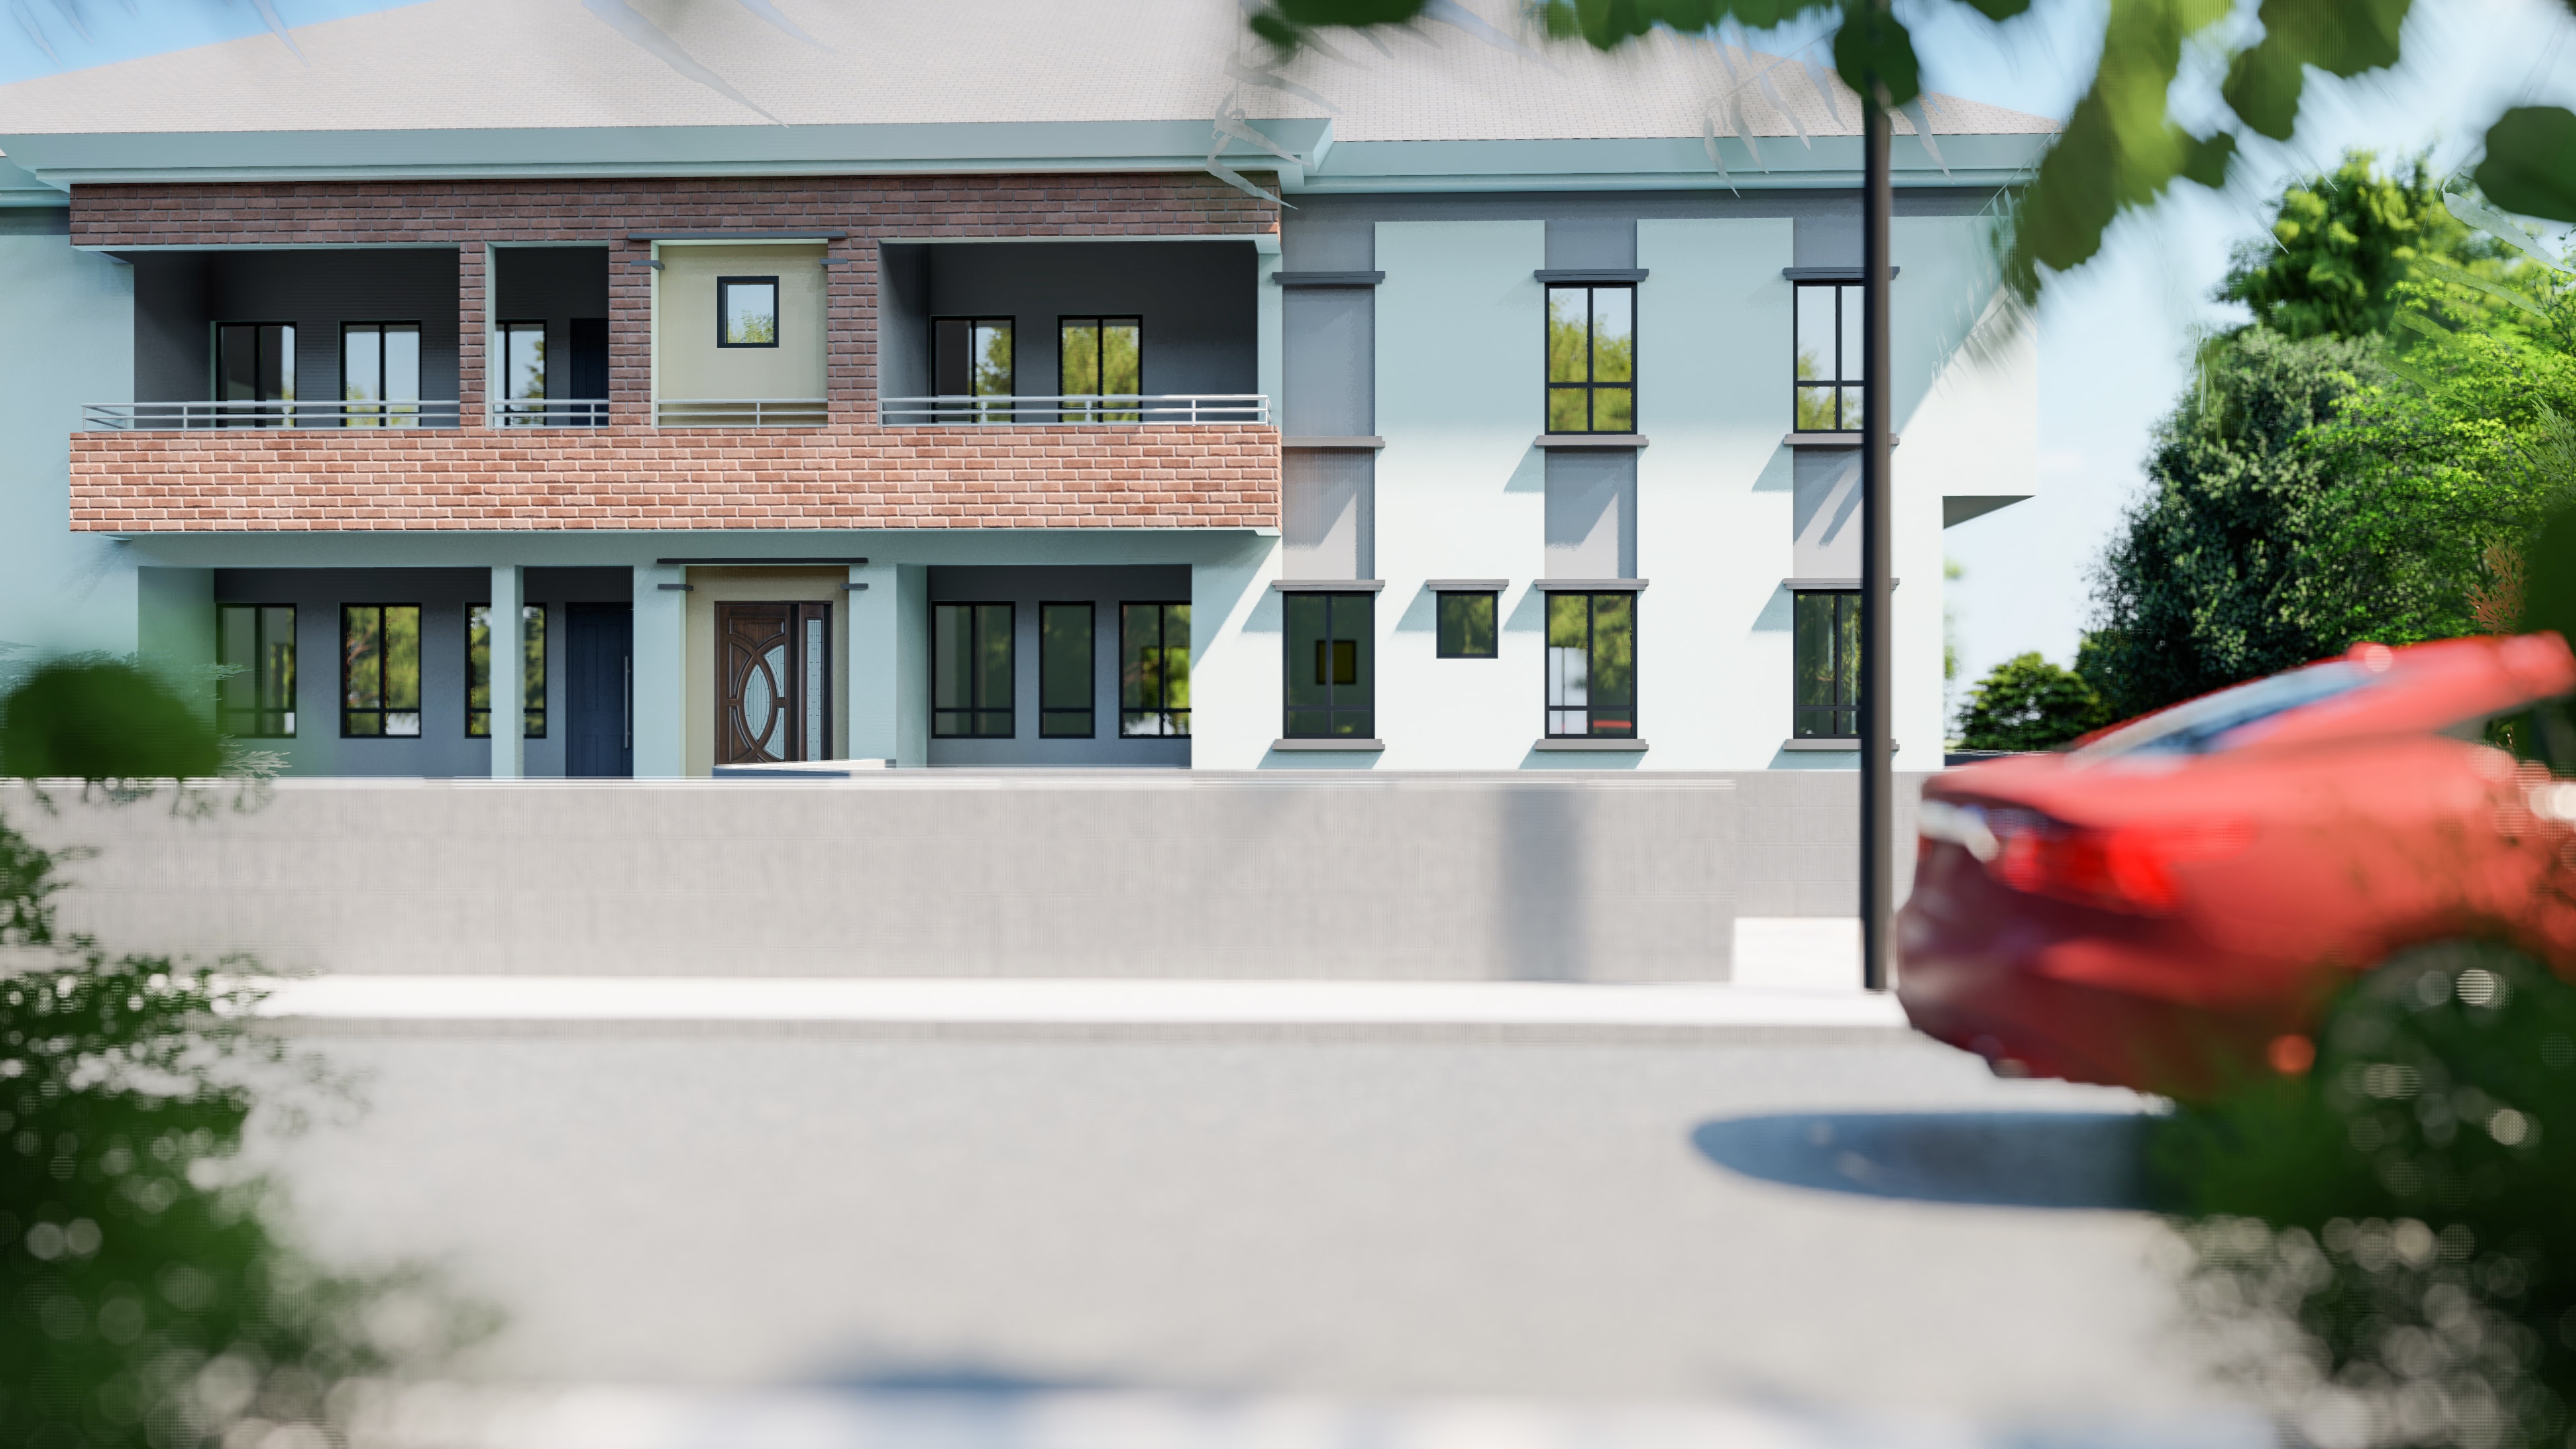
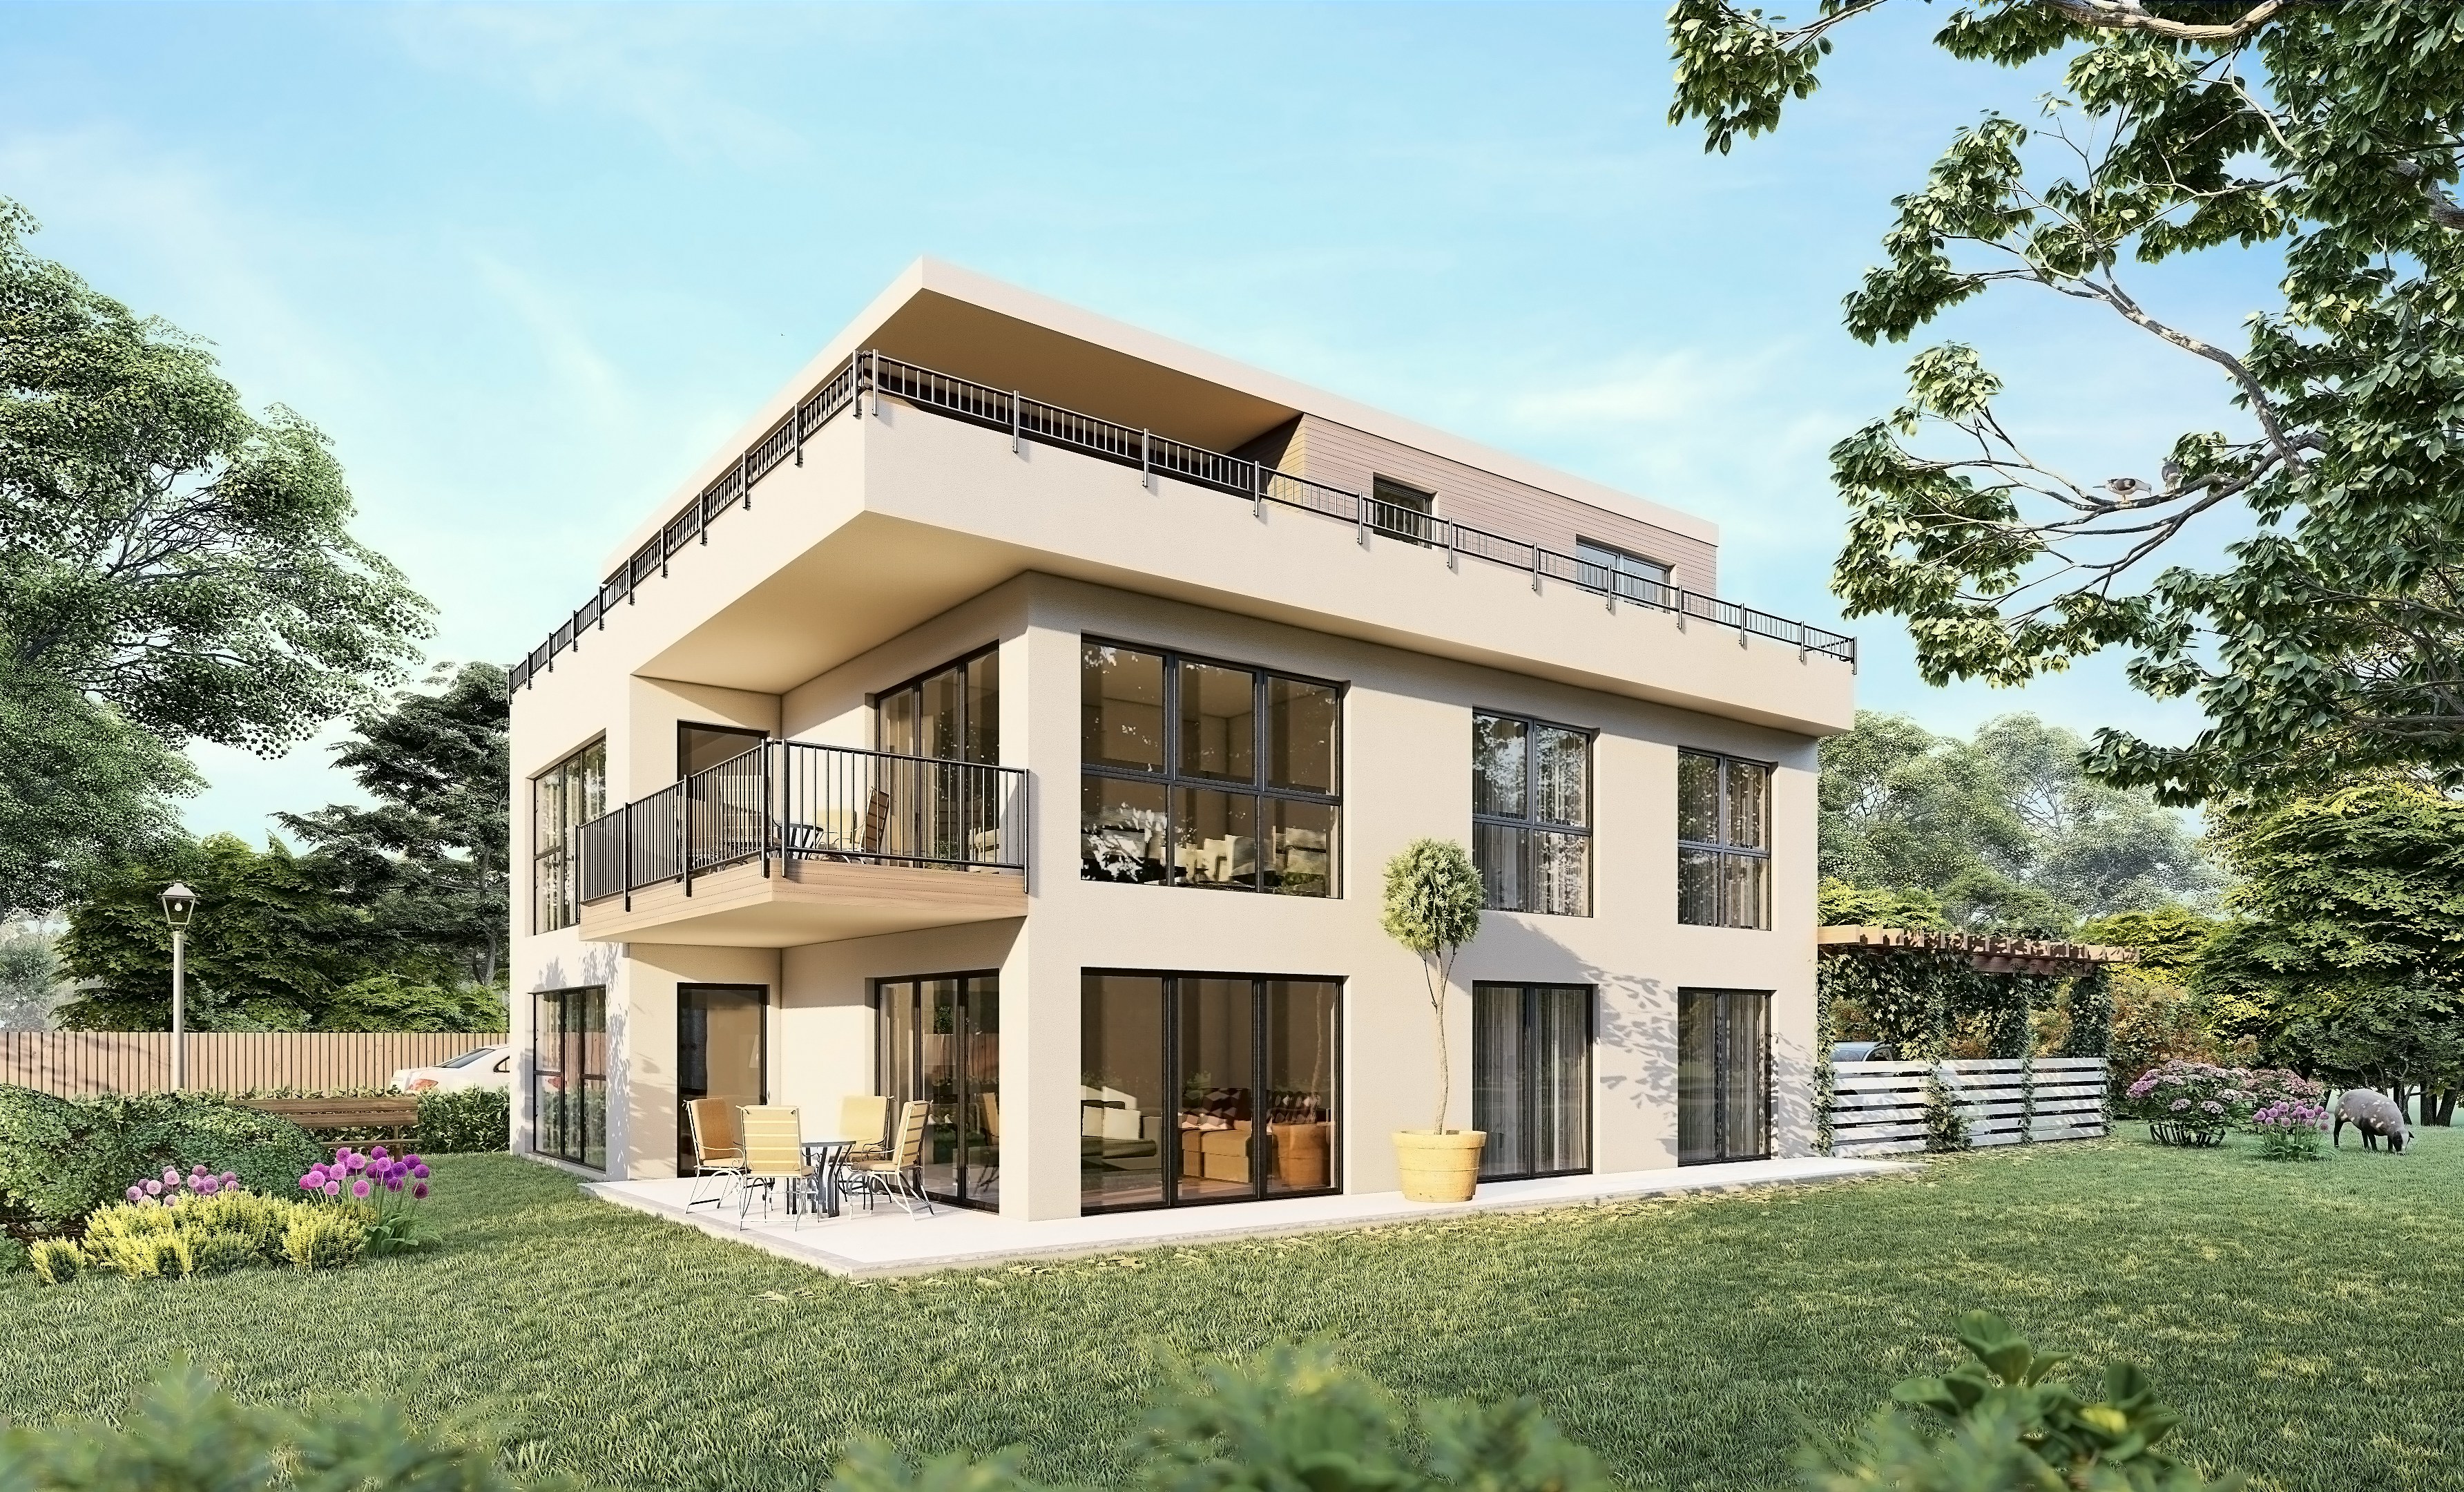
Architecture
Lumion Shortcuts: The Practical Guide to Faster Scene Building
Table of Contents
Most Lumion users don’t lose time because they don’t know every feature. They lose time because their workflow keeps getting interrupted.
You move through the scene, place an object, adjust the camera, fix the scale, change the preview quality, then try to get back to the same view again. One extra click doesn’t feel like much. Fifty of them do.
That’s where shortcuts actually help.
Not by turning you into someone who memorizes every key combination in Lumion, but by removing the small pauses that break your rhythm. The useful shortcuts are the ones you use while navigating, placing objects, saving views, rotating assets, checking preview quality, and preparing renders.
So this guide is not a full shortcut dictionary. It focuses on the Lumion shortcuts that matter most in real projects, especially when scenes get heavier, deadlines get tighter, and you need to stay focused on the image instead of the interface.
Start with navigation, because every scene depends on it
Before object placement, materials, lighting, effects, or render settings, there’s one thing you do constantly in Lumion: move.
And if movement feels clumsy, everything else feels slower too.
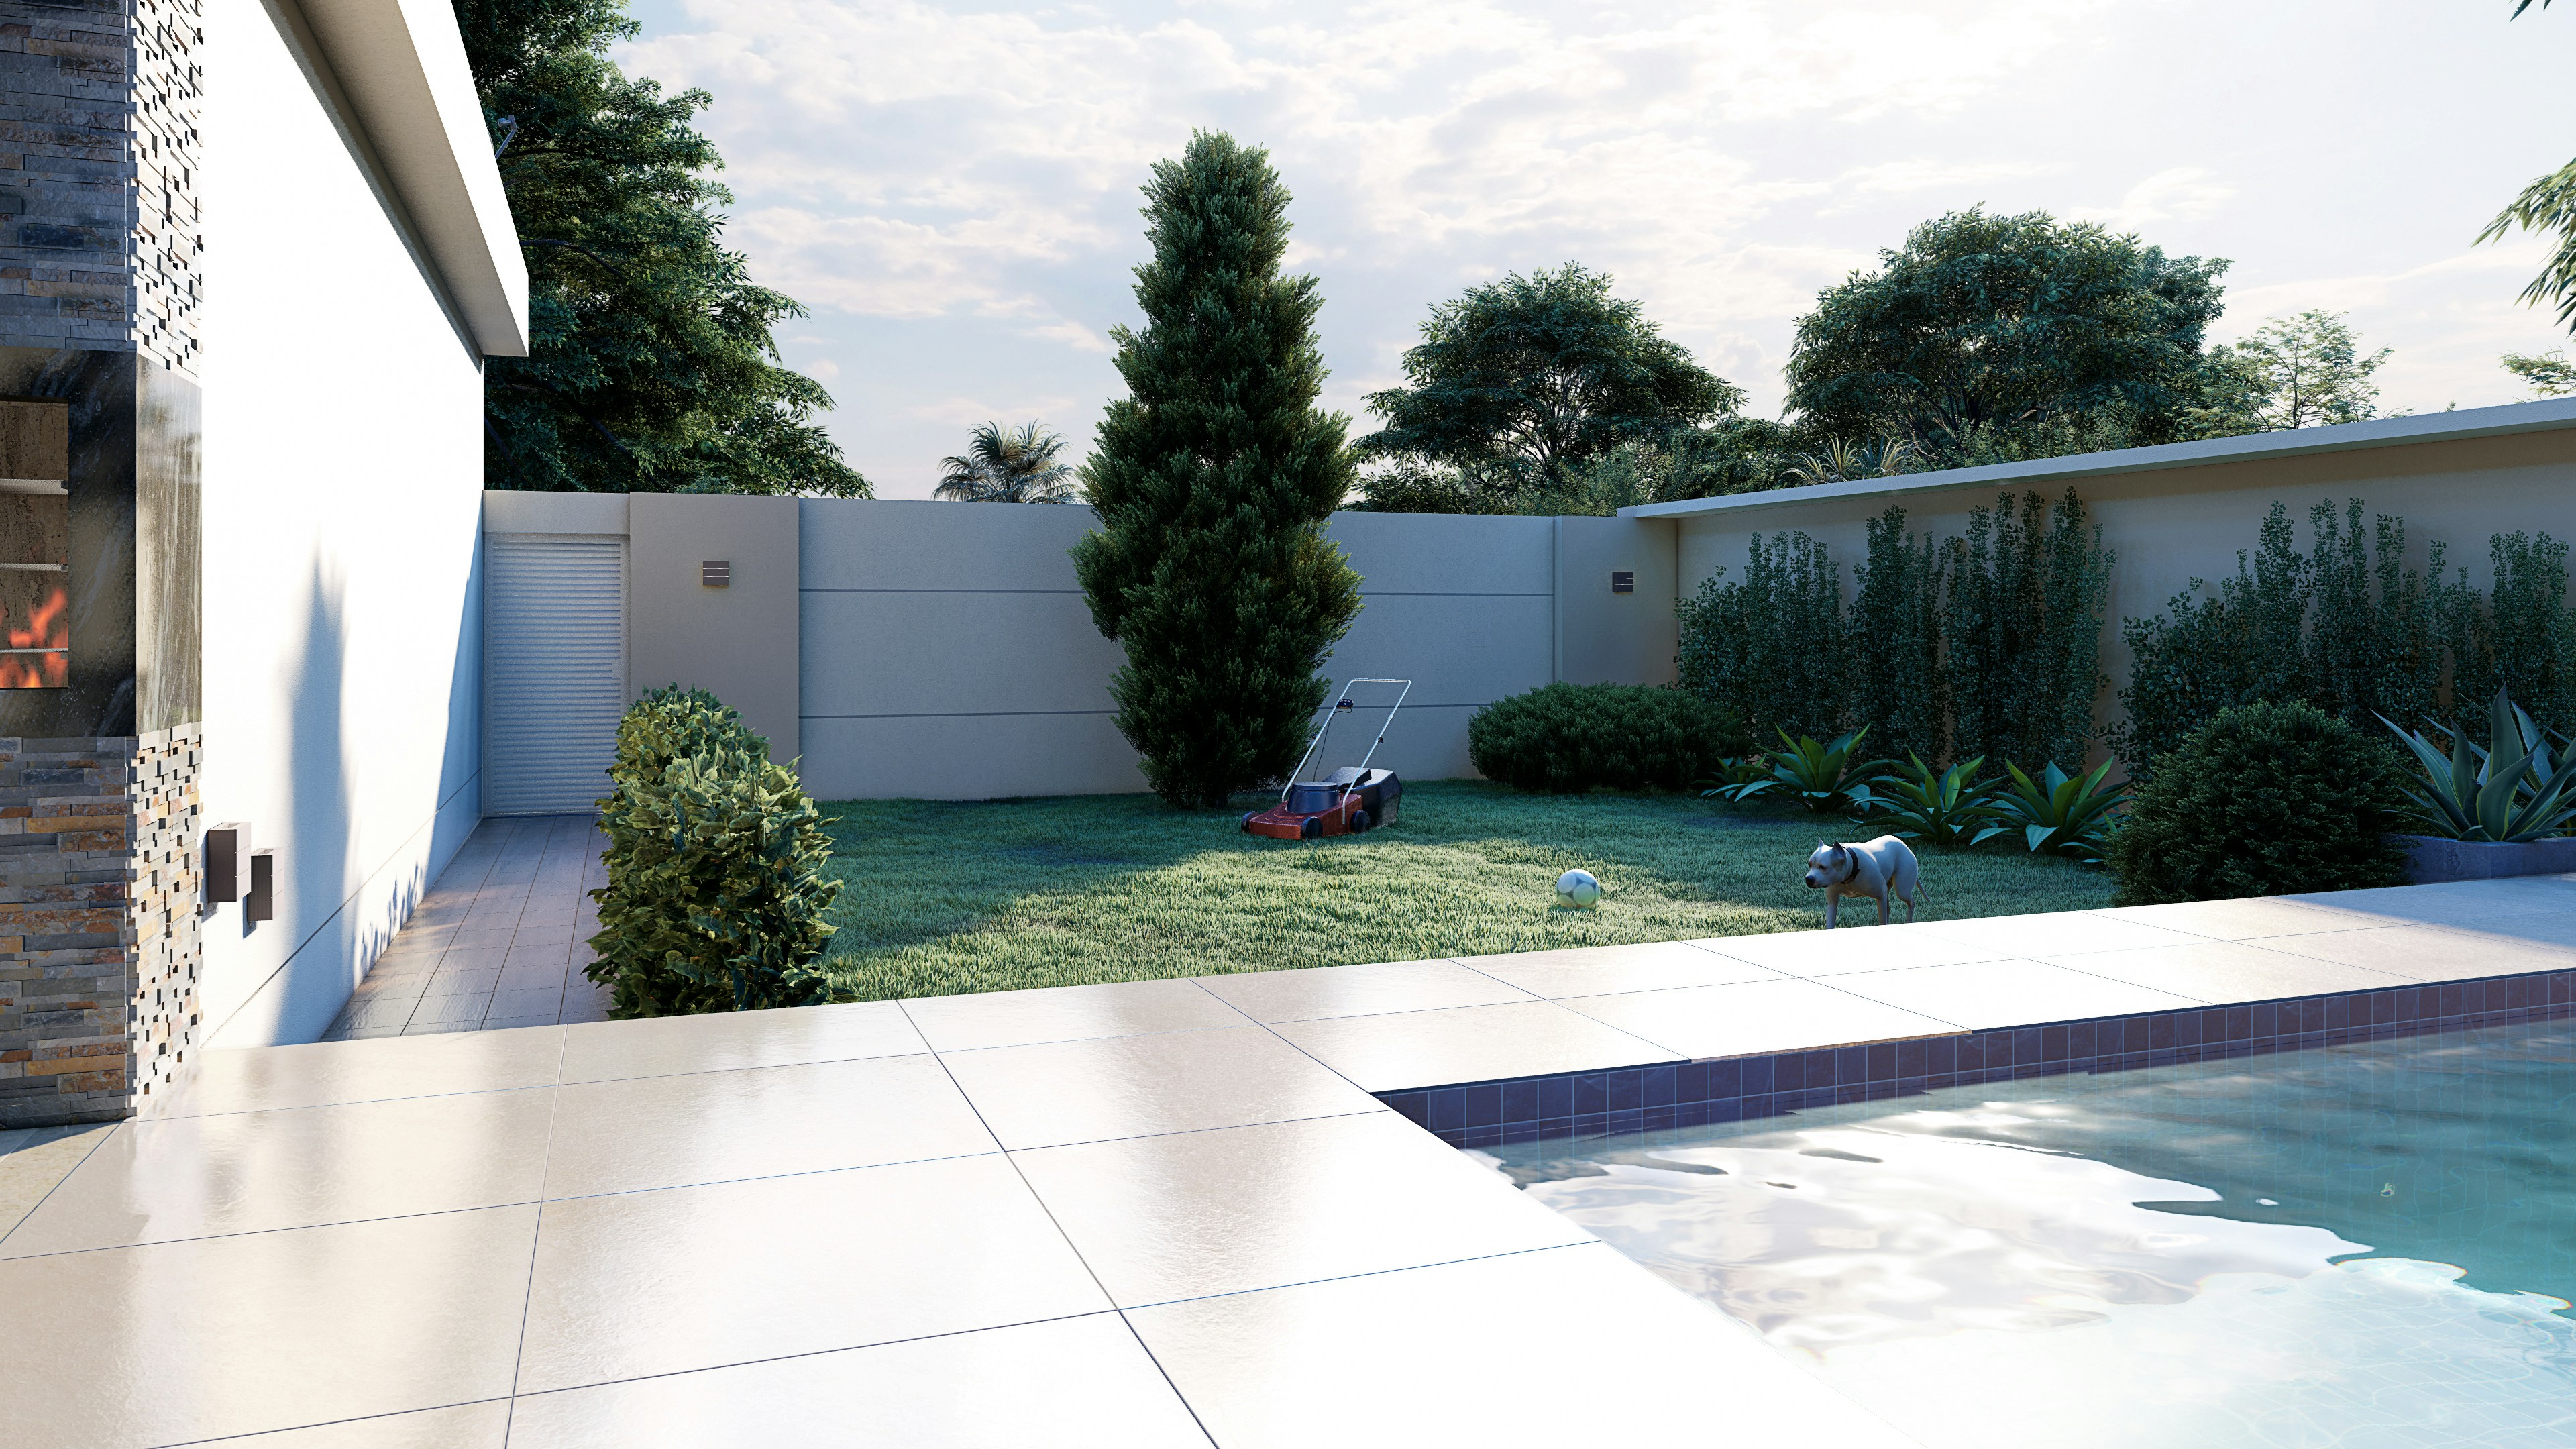
Navigation shortcuts are usually the first ones worth learning because they sit underneath the entire workflow. You use them when checking a façade, walking through an interior, finding a clean camera angle, adjusting landscaping, or inspecting whether a chair is weirdly half-sunk into the floor.
The basics are simple:
W / S / A / D or Arrow Keys to move around
Q / E to move the camera down or up
Right Mouse Button to look around
Middle Mouse Button to pan
Mouse Wheel to move forward and backward
Spacebar for slow camera movement
Shift for faster movement
Shift + Spacebar for very fast movement
Movement shortcuts you’ll use every five seconds
WASD movement is probably the most familiar shortcut set, especially if you’ve used games or 3D tools before. In Lumion, it becomes second nature quickly. Right mouse button controls where you’re looking, while W, A, S, and D move the camera through the scene.
Q and E are the ones beginners often ignore at first, but they’re essential. They let you move vertically without awkwardly tilting the camera and pushing forward. When you’re working on multi-level buildings, roof gardens, staircases, balconies, or tall landscape scenes, Q and E save a lot of fiddling.
The mouse wheel is useful too, but I wouldn’t rely on it for everything. It’s great for quick forward and backward movement, but WASD gives you better control when you’re framing a view or moving through tighter areas.
If you’re still deciding whether Lumion is the right real-time renderer for your workflow, you may also want to compare Enscape vs Lumion before going too far into shortcut habits.
Speed control is what makes navigation feel professional
The real trick is not just knowing how to move. It’s knowing how fast to move.
Use Spacebar when you need precision. Interior scenes, furniture adjustments, close-up material checks, lighting tweaks. Slow movement keeps you from overshooting the view every two seconds.
Use Shift when you’re moving across a larger exterior, city block, landscape, or site plan. You don’t need delicate camera movement when you’re crossing from one side of the project to the other.
And Shift + Spacebar? That’s for when the model is huge and you just need to get somewhere fast.
This sounds basic, but it changes how Lumion feels. Once navigation becomes automatic, you stop thinking about the camera and start thinking about the scene. That’s the point.
Camera viewpoints are your safety net
One of the easiest ways to waste time in Lumion is to find a good camera angle, lose it, then spend five minutes trying to recreate it.
We’ve all done it.
You get the perfect view of a villa entrance, a lobby, a terrace, or a street corner. Then you zoom in to fix a material, move around to place assets, check another side of the model, and suddenly the original angle is gone. Maybe you can rebuild it. Maybe not exactly.
That’s why saved viewpoints are so useful.
The shortcuts are simple:
Ctrl + 1 to 0 to save up to 10 camera viewpoints
Shift + 1 to 0 to load saved camera viewpoints
Ctrl + H to reset the camera pitch to a horizontal viewpoint
Double right-click on a model to teleport the camera to that position
Double left-click on an object icon to move the camera to that model
I’d treat saved viewpoints as a habit, not a final-step feature. Before you start changing materials, adding people, placing trees, testing lighting, or experimenting with effects, save the views that matter.
For example, if you’re working on a residential exterior, save the front view, driveway view, garden view, pool view, and one close-up detail shot. If you’re working on an interior, save the main entrance angle, a seating area, a kitchen or reception view, and any client-approved camera positions.
This does two things.
First, it protects your best angles. You can explore freely without worrying that you’ll lose the shot. Second, it makes comparison easier. When you change lighting, materials, weather, or entourage, you can jump back to the exact same view and judge the result properly.
That’s the real value. Saved viewpoints don’t just save time. They make your decisions cleaner.
If you’re coming from BIM or architectural modeling tools, especially Revit, it also helps to understand the hardware side of that pipeline, since Revit and Lumion often sit in the same project workflow. Here’s a useful guide on the best PC for Autodesk Revit.
Object placement shortcuts: where Lumion starts feeling fast
Once navigation feels natural, object placement is the next big speed gain.
This is where Lumion can either feel smooth and creative, or weirdly repetitive. You’re placing trees, cars, people, lights, furniture, plants, rocks, street elements, and small details that make the scene feel alive. If every object requires too much clicking, moving, rotating, and fixing, the whole process becomes tiring fast.
Here are the placement shortcuts worth knowing:
Left Mouse Button to place the selected model
Left Mouse Button + V to place a model with random scale
H + Left Mouse Button + move mouse to move selected objects up or down while placing
Ctrl + drag with Left Mouse Button to create a rectangular selection
Ctrl + click an object icon to add or remove objects from a selection
Ctrl + click anywhere to deselect all objects
Alt + Left Mouse Button + move mouse to duplicate selected objects
G + Left Mouse Button + move mouse to snap objects to the Lumion Landscape
F + Left Mouse Button + move mouse to adapt object orientation to the surface below

Random scale is small, but it saves scenes from looking copied
The V shortcut is one of those tiny details that makes a scene look less artificial.
When you place several trees, bushes, rocks, or decorative objects at the exact same size, the repetition becomes obvious. The viewer may not consciously notice it, but the scene starts to feel fake. Like someone stamped the same object across the project.
Using V while placing objects gives you random scale variation. It’s especially useful for vegetation, landscape details, outdoor furniture, stones, and background assets. You still need to check the result, of course, because random does not always mean good. But it gives you a better starting point than identical copies everywhere.
If preview quality is constantly dragging your scene down, the issue may not be your shortcut habits at all. It may be your GPU, which is why this guide to the best GPU for Lumion is worth checking before blaming the software.
Duplicate first, polish later
For repeated objects, Alt + Left Mouse Button + move mouse is one of the fastest shortcuts in Lumion.
Use it for chairs around a table, lights along a path, cars in a parking area, trees along a road, or people in a plaza. Instead of placing every object from the library again, duplicate what already works, then adjust the position, rotation, and scale after.
This keeps you moving. And in scene-building, momentum matters.
The mistake is duplicating too perfectly. If every chair, plant, person, or tree has the same angle and spacing, it feels staged in the wrong way. Duplicate to save time, then break the pattern.
Snapping matters when the scene gets crowded
The G and F shortcuts are easy to overlook, but they help prevent one of the most annoying Lumion problems: objects that almost look placed correctly.
Almost.
A plant floats slightly above the grass. A car doesn’t sit right on a sloped driveway. A person is tilted weirdly on uneven ground. A bench looks like it’s fighting the pavement.
Use G when you want objects to snap to the Lumion Landscape. Use F when the object needs to adapt to the surface orientation below it. These shortcuts become especially useful in scenes with hills, ramps, terrain, curbs, stairs, and layered site elements.
Good placement is not just about filling a scene. It’s about making objects feel like they belong there. Shortcuts help you get there faster, but the eye still has to judge the final result.
If you’re comparing similar real-time rendering workflows, this Lumion vs Twinmotion guide can help you understand where Lumion’s scene-building style feels different.
Rotation and scale shortcuts for cleaner asset control
Placement gets objects into the scene. Rotation and scale make them look intentional.
This is where a lot of Lumion scenes quietly fall apart. Not because the assets are bad, but because everything looks too repeated, too aligned, or too obviously dropped into place. Trees face the same direction. Cars sit at awkward angles. People look like they were placed by a grid instead of by someone thinking about how the space is used.
These are the rotation and scale shortcuts worth using:
R + Left Mouse Button + move mouse to rotate selected objects
Shift while rotating to temporarily disable angle snapping
F + rotate + move cursor to match the surface orientation below
K + rotate to make selected objects face the mouse cursor
L + Left Mouse Button + move mouse to scale an object
Perfect alignment is not always realistic
There’s a difference between clean and fake.
For architectural elements, alignment matters. Chairs around a table, pendant lights, repeated façade elements, street lamps, parking spaces. Those should feel controlled. But for trees, plants, rocks, people, cars, outdoor furniture, and decorative objects, too much alignment makes the scene feel artificial.
That’s where R becomes one of the most useful shortcuts in the whole placement workflow. After duplicating an object, rotate it slightly. Not dramatically. Just enough to break the copy-paste effect.
A row of trees should not all face the same way. People in a plaza should not all stand at the same angle. Cars in a parking lot can be slightly imperfect, especially if the scene is trying to feel lived-in rather than showroom-clean.
The Shift modifier helps when angle snapping gets in your way. If Lumion is snapping rotation in fixed increments and you need a more natural angle, hold Shift while rotating to get freer control.
If your work sits between architectural visualization and fast concept presentation, this Twinmotion vs Lumion comparison gives a clearer look at how both tools handle speed, realism, and project scale.
Use rotation shortcuts to remove the “copy-paste” look
The K shortcut is especially helpful when you want objects to face a certain direction. For example, people looking toward an entrance, chairs facing a view, or decorative objects oriented toward a path.
And then there’s L for scale.
Scaling is one of those things that should be used carefully. A slightly larger plant or smaller rock can make a scene feel more organic. But oversized people, giant cars, or furniture that doesn’t match the room can ruin the sense of proportion immediately.
My rule is simple: use scale variation for natural objects and background detail, but be more careful with anything that has a known real-world size. Trees can vary. Rocks can vary. Shrubs can vary. A dining chair should not suddenly feel like it belongs in a children’s museum.
Rotation and scale shortcuts are not flashy, but they make a big difference. They turn a scene from “assets placed in Lumion” into something that feels arranged, reviewed, and actually designed.
If you’re trying to run Lumion on a Mac or a lighter device, the hardware conversation gets even more important. This guide explains how to run Lumion on macOS when your local setup is not built for native Lumion performance.
Quality preview shortcuts: move faster without lying to yourself
One of the worst habits in Lumion is working at full quality all the time.
I get why people do it. You want the scene to look good while you’re building it. You want shadows, trees, materials, reflections, and lighting to feel close to the final result. But if the project is already heavy, max preview quality can turn every small adjustment into a wait.
That’s not a better workflow. It’s just slower.
These are the preview shortcuts that help you control how much quality Lumion shows while you work:
F1 for lowest editor quality
F2 for low editor quality
F3 for medium editor quality
F4 for high editor quality
F6 to toggle automatic or manual High-Quality Preview updates
F7 to cycle through editor resolution levels
F8 to temporarily show spotlight shadows
F9 to toggle low-quality and high-quality trees and plants
F11 for Theater Mode
Don’t preview everything at full quality
High-quality preview is useful. But it should be a decision, not your default setting for every single task.
If you’re placing furniture, adjusting asset positions, scattering trees, moving people, or building out a landscape, you probably don’t need the editor running at the highest quality. Lower preview settings help keep the scene responsive, especially on large projects with lots of vegetation, lights, detailed materials, or imported geometry.
Use F1 to F4 depending on what you’re doing. When the task is about layout and placement, lower quality is usually enough. When the task is about light, mood, reflections, material response, or final composition, move up to higher quality.
That little switch in mindset matters. You stop treating preview quality like a badge of honor and start treating it like a tool.
Use high quality only when the decision needs it
The shortcuts around preview quality are especially useful when you’re working through visual decisions.
Use F8 when you need to quickly check spotlight shadows without permanently slowing down the whole workflow. Use F9 when vegetation quality is affecting performance and you need to move through the scene more easily. Use F7 when the editor resolution itself feels heavier than it needs to be.
And F11 can be helpful when you want to look at the scene without the interface getting in the way. Not for editing every detail, but for judging composition, mood, and how the image feels as a whole.

The point is not to make everything ugly while you work. The point is to spend performance where it actually helps. Work light when you’re building. Check quality when you’re judging. That’s a much smarter rhythm.
Photo and movie mode shortcuts that save client-facing work
Photo and Movie Mode are where Lumion starts feeling less like a scene-building tool and more like a presentation tool.
This is also where small workflow mistakes become annoying. You find a good angle, add effects, adjust lighting, test a different mood, change the camera slightly, then realize you’ve damaged the cleaner version you actually liked better.
So the shortcut mindset here is simple: protect the good version before you experiment.
For Photo Mode, these shortcuts are especially useful:
Ctrl + 1 to 0 to save camera shots
Shift + 1 to 0 to load saved camera shots
Ctrl + C to copy a photo
Ctrl + V to paste a photo into another slot
Shift in Photo Matching to drag points more accurately
F in Orthographic View to align the camera perpendicular to a surface
Save the approved views before you experiment
If a client, manager, or teammate has already approved a view, save it. Immediately.
Don’t trust yourself to “just find it again later.” In Lumion, a camera angle is not only position. It’s height, lens feel, pitch, framing, distance, and mood. A tiny change can make the same scene feel completely different.
This is why Ctrl + number and Shift + number are so useful. Save the important views, then jump back to them whenever you need to compare lighting, weather, materials, people, vegetation, or render effects.
For architectural stills, I like saving views before doing any serious effect work. One clean front view. One stronger perspective angle. One detail shot. One human-level view. Then you can build the visual style around those angles instead of constantly hunting for the scene again.
Copy slots instead of rebuilding the same setup
Ctrl + C and Ctrl + V in Photo Mode are not exciting shortcuts, but they save real time.
Let’s say you have one polished image with the right camera angle, lens, exposure, shadows, and effect stack. Instead of rebuilding another version from scratch, copy the photo to another slot and test from there.
One slot can be a sunny version. Another can be overcast. Another can push dusk lighting. Another can test heavier reflections or a different material mood.
Movie Mode has a similar logic:
Ctrl + 1 to 0 to save viewpoints while editing a camera animation
Shift + 1 to 0 to load viewpoints
Spacebar over the timeline slider to play or stop the preview
Ctrl + C to copy a clip
Ctrl + V to paste a clip
Ctrl while rendering to show FPS
For animations, copying clips is especially useful when you want to test pacing. Maybe one version has a slow approach to the building. Another cuts tighter. Another holds longer on the entrance.
You don’t need to rebuild the structure every time. Copy the clip, adjust the timing, preview it, and compare.
That’s the real benefit of these shortcuts. They make experimentation safer. You can try new looks without losing the version that already worked.
A practical Lumion shortcut workflow for a real project
The easiest way to learn Lumion shortcuts is not to memorize them in a list. It’s to attach them to a real workflow.
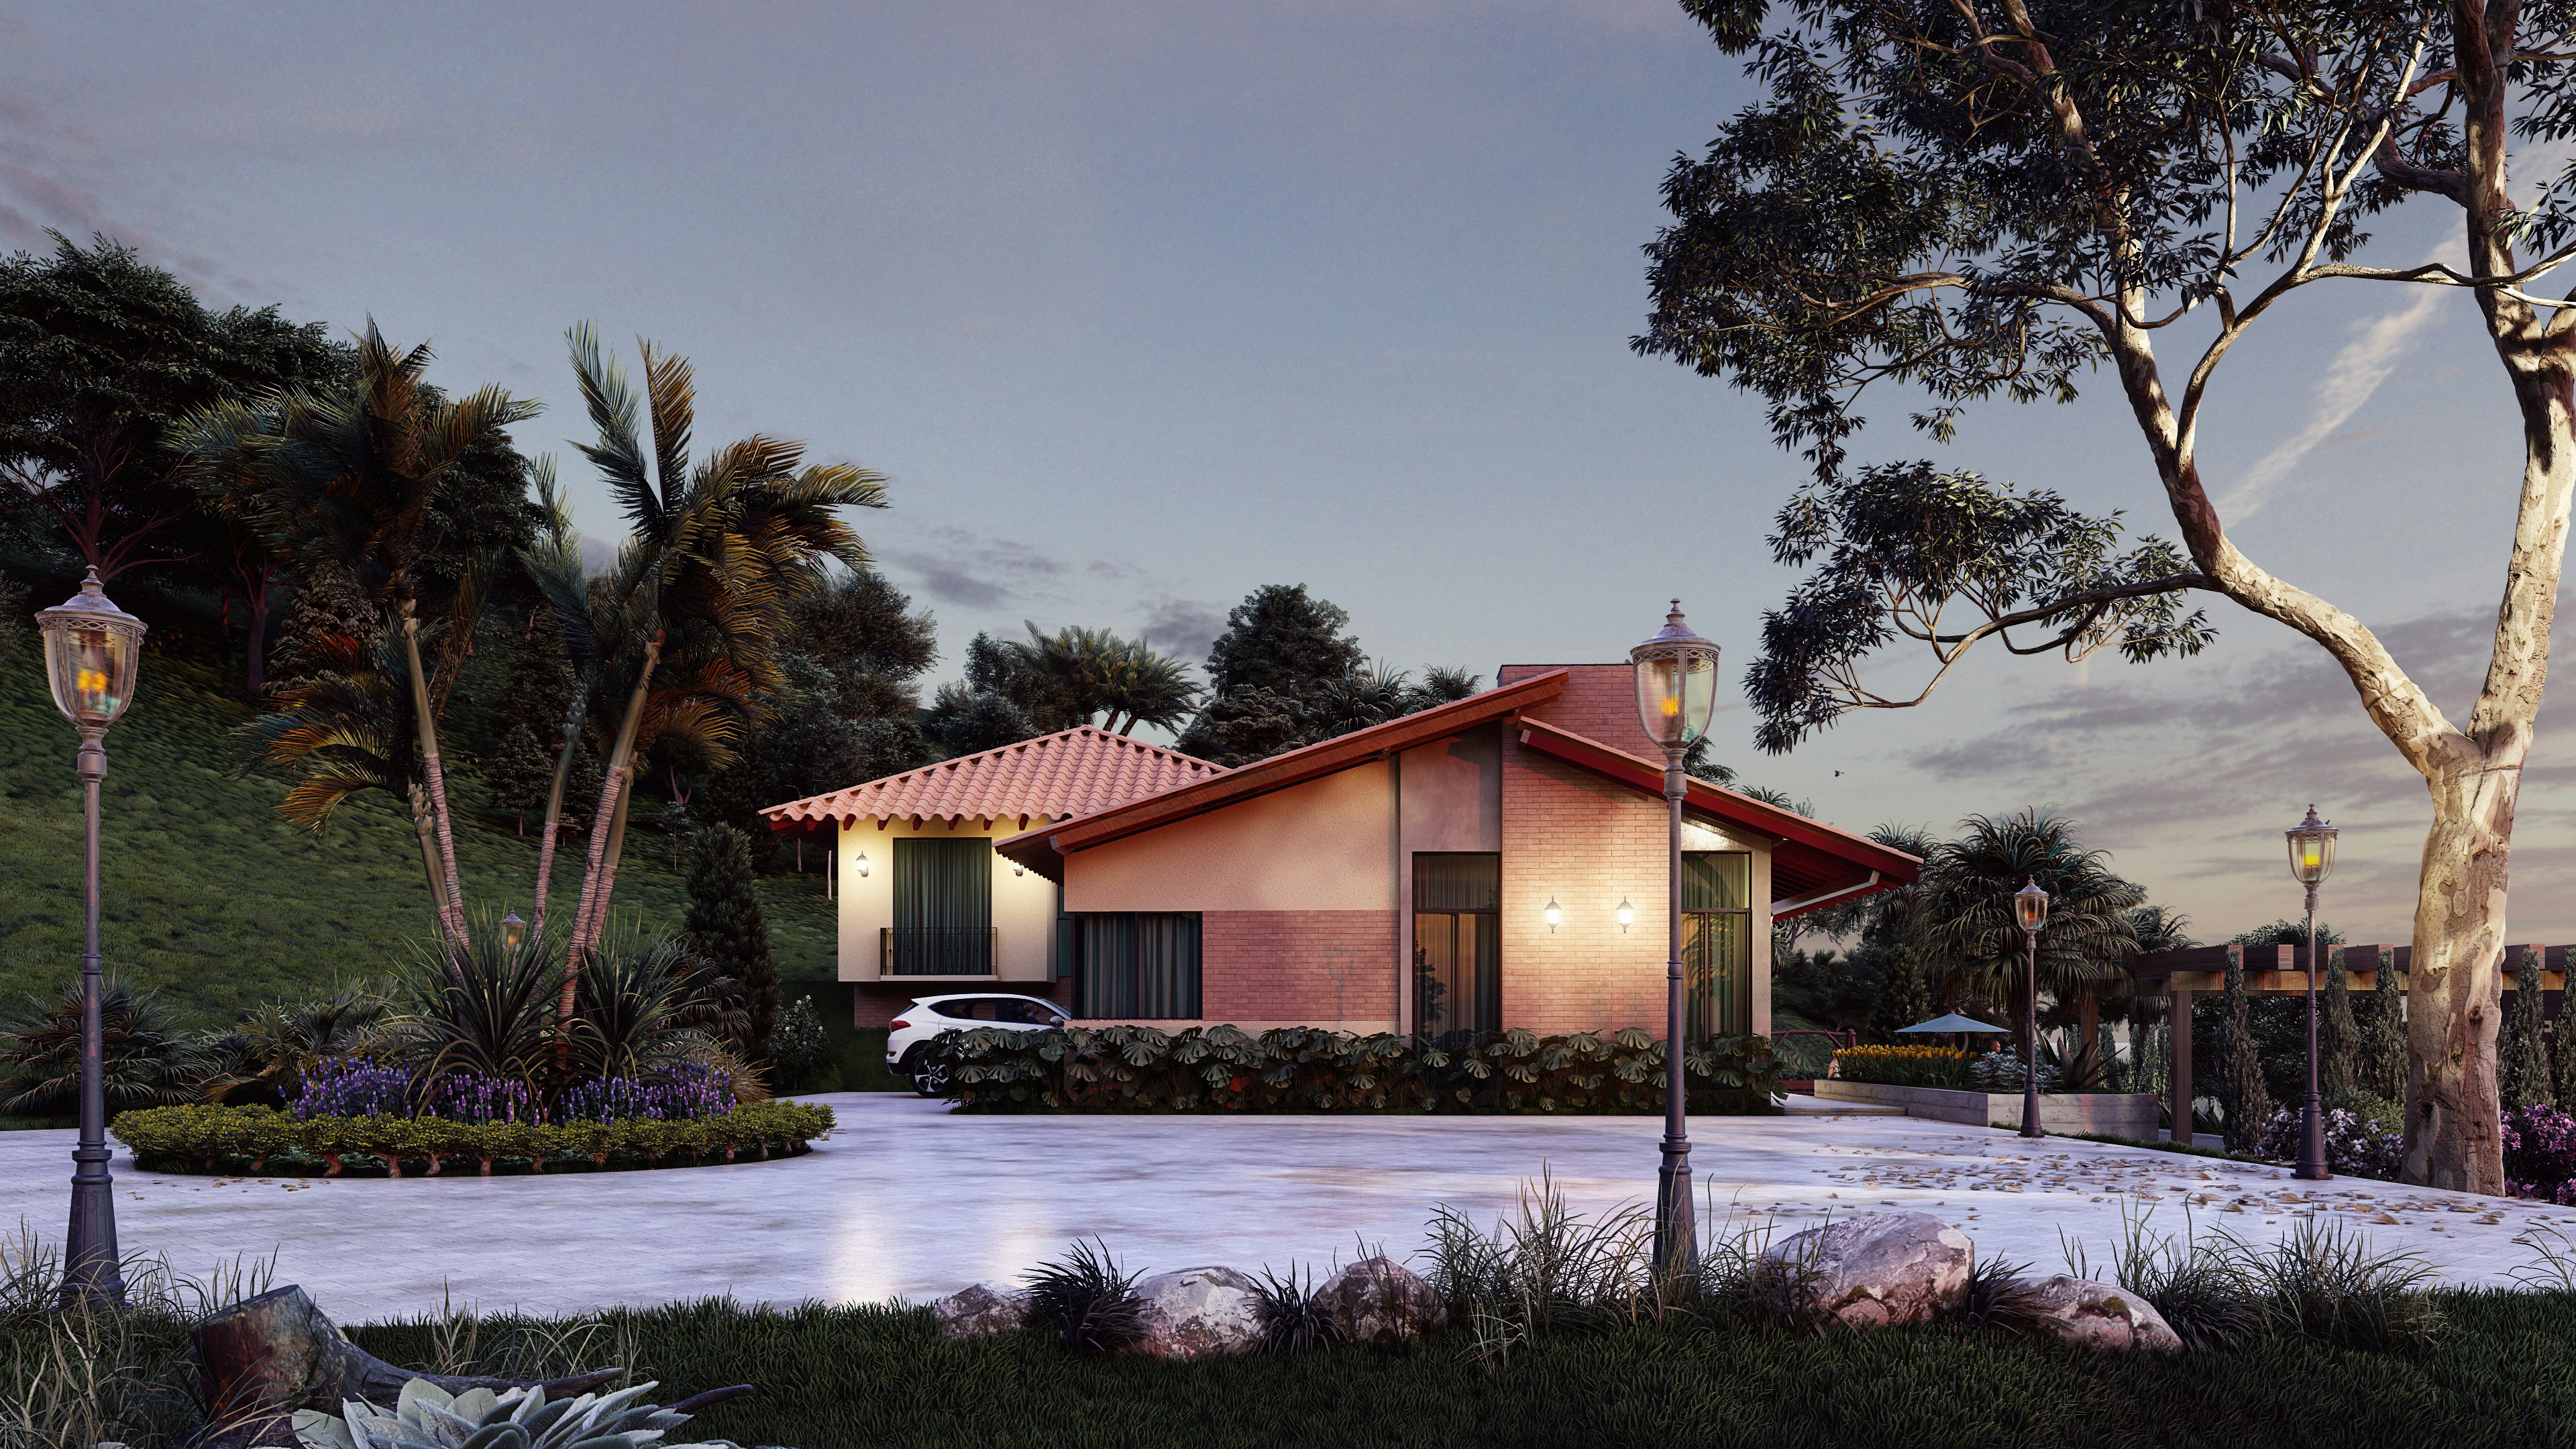
Let’s say you’re preparing an exterior scene for a client review. Maybe it’s a villa, a small commercial building, or a residential block with landscaping. You don’t need every shortcut in Lumion. You need the ones that help you move from rough scene to polished presentation without constantly breaking your flow.
Start with navigation. Use WASD, Q/E, Shift, and Spacebar until moving through the scene feels automatic. Don’t rush this part. If you’re constantly fighting the camera, every other task becomes slower.
Then save your main views early with Ctrl + 1 to 0. I’d do this before serious decoration, before effect testing, and definitely before client-facing renders. Save the front view, side view, entrance view, landscape view, and one or two detail shots. Now you can move around freely without losing the angles that matter.
After that, place your major assets. Use Left Mouse Button for basic placement, V when placing objects that benefit from scale variation, and Alt + drag when duplicating repeated items. Trees, plants, lights, chairs, cars, people, rocks. Get them into the scene first. Don’t obsess over every angle immediately.

Once the scene is filled out, clean it up. Use R to rotate objects, L to scale carefully, G to snap objects to the Lumion Landscape, and F when objects need to adapt to the surface below. This is the pass where the scene starts looking less like a library dump and more like an actual environment.
Then manage preview quality. Work lighter with F1 to F3 when you’re placing and adjusting assets. Use F4, F8, or F9 when you need to judge shadows, vegetation, lighting, or detail. Don’t force Lumion to show you the most expensive preview every second of the day.
Finally, move into Photo or Movie Mode. Copy good views with Ctrl + C and Ctrl + V before testing different moods. Keep one safe version. Experiment on another.
That’s the shortcut workflow I’d actually recommend: navigate, save, place, clean up, preview, then present. Simple. But it keeps the whole project moving.
And if you want to make sure Lumion is actually using the right graphics resources, this guide on how to use GPU on Lumion is a good companion to the shortcut workflow.
Where shortcuts stop helping: heavy scenes, AI upscaling, and hardware limits
Shortcuts can make Lumion feel much faster. They help you move better, place objects faster, protect camera views, preview smarter, and avoid repeating the same tiny actions all day.
But they don’t change the weight of the project.
At some point, the scene itself starts pushing back. Too much vegetation. Too many high-detail models. Large imported geometry. Heavy materials. Ray tracing. Complex lighting. Bigger output expectations. Maybe you’re also using AI upscaling to produce sharper, higher-resolution images, which can help reduce render pressure in some workflows, but still doesn’t make your whole workstation immune to heavy scenes.
This is where the shortcut conversation becomes a hardware conversation.
You can work smart, lower preview quality, save camera positions, copy photo slots, and avoid wasting time. All good habits. But if your machine is already struggling to orbit the scene, load assets, update previews, or finish renders without turning into a fan-powered space heater, shortcuts only go so far.
That’s where Vagon Cloud Computer fits naturally into the Lumion workflow.
Instead of forcing every heavy Lumion scene through the same local laptop or office workstation, Vagon Cloud Computer gives you access to a high-performance cloud computer with scalable GPU and CPU options. You can connect from your browser, choose a machine that matches the project, and run demanding Lumion work on stronger remote hardware rather than being locked to the device on your desk.
For Lumion users, that matters most when the project grows beyond the comfortable stage. The early scene may run fine locally. Then the landscaping comes in. Then the materials. Then the lighting. Then the client wants more views, sharper stills, and a smoother animation preview.
Shortcuts keep your hands fast. Better hardware keeps the scene responsive.
You need both. Because a good workflow is not only about knowing which key to press. It’s also about having enough performance behind the scene so those shortcuts actually feel instant.
Final thoughts: learn the shortcuts that protect your flow
You don’t need to memorize every Lumion shortcut in one sitting.
Honestly, that’s probably the worst way to learn them. You’ll scan a huge list, remember three keys, forget the rest, and go back to clicking through the interface like before.
Start with the shortcuts that protect your flow.
Learn the navigation keys first, because movement affects everything. Then get comfortable saving and loading camera viewpoints, because losing a good angle is one of the most annoying ways to waste time in Lumion. After that, focus on placement, duplication, rotation, scaling, and preview quality. Those are the shortcuts you’ll actually use while building real scenes.
The goal is not to look like a “power user.” The goal is to stay focused on the image.
When your hands know what to do, your brain can stay on the bigger decisions: Does this angle sell the project? Does the lighting feel right? Is the landscaping too repetitive? Does the render feel believable? Is this the version you’d actually show a client?
That’s where shortcuts pay off.
And when shortcuts are no longer enough, the next bottleneck is usually performance. Heavy Lumion scenes need more than good habits. They need enough hardware behind them to keep the workflow responsive. That’s where tools like Vagon Cloud Computer can make sense, especially when your local machine starts slowing down before the project is finished.
Learn the shortcuts that matter. Build cleaner habits. Then make sure your setup can keep up with the work.
FAQs
1. What are the most useful Lumion shortcuts for beginners?
The most useful Lumion shortcuts for beginners are the ones tied to navigation, camera views, and object placement. Start with WASD for movement, Q and E for moving down and up, Shift for faster movement, and Spacebar for slower movement. After that, learn Ctrl + 1 to 0 to save camera viewpoints and Shift + 1 to 0 to load them again. Those shortcuts alone make Lumion feel much easier to control.
2. Can you customize Lumion keyboard shortcuts?
Lumion does not let you fully customize its default keyboard shortcuts. You can choose different camera control styles based on tools like SketchUp, Revit, or Rhino, which helps if you’re coming from another 3D workflow, but the main shortcut keys themselves are not fully editable. That’s why it makes sense to learn the shortcuts that Lumion already supports instead of trying to rebuild the whole control system.
3. How do I save camera views in Lumion?
You can save camera viewpoints in Lumion by pressing Ctrl + 1 to 0. Each number stores a different camera position. To return to one of those saved views, press Shift + 1 to 0. This is especially useful when you’re working on client-approved angles, final render views, or before-and-after lighting comparisons.
4. Which Lumion shortcuts help with object placement?
For object placement, the most helpful shortcuts are Alt + Left Mouse Button + move mouse to duplicate objects, V + Left Mouse Button to place objects with random scale, G + Left Mouse Button + move mouse to snap objects to the Lumion Landscape, and F + Left Mouse Button + move mouse to adapt object orientation to the surface below. These shortcuts are especially useful for trees, plants, furniture, people, cars, rocks, and repeated scene details.
5. Which Lumion shortcuts help improve performance while working?
The main performance-related shortcuts are F1 to F4 for changing editor quality, F7 for cycling editor resolution, F9 for switching between low-quality and high-quality trees and plants, and F11 for Theater Mode. These don’t make your hardware stronger, but they help you work more smoothly by reducing how much visual detail Lumion needs to show while you’re editing.
6. Do Lumion shortcuts make renders faster?
Lumion shortcuts do not directly make final renders faster. Render speed still depends on your GPU, CPU, scene complexity, render settings, resolution, lighting, ray tracing, vegetation, and materials. Shortcuts help you build and prepare scenes faster, but once you hit the render button, performance depends mostly on the machine behind the project.
7. Why should I learn Lumion shortcuts if I can already use the interface?
You can absolutely use Lumion without memorizing shortcuts, but the interface gets slower once projects become more detailed. Shortcuts reduce the small interruptions that happen all day: moving around, saving views, duplicating objects, rotating assets, changing preview quality, and copying photo slots. The benefit is not just speed. It’s staying focused while you work.
8. When should I consider using Vagon Cloud Computer for Lumion?
You should consider using Vagon Cloud Computer when your Lumion scene starts feeling too heavy for your local machine. If navigation gets laggy, preview quality has to stay low all the time, render tests take too long, or your laptop struggles with large scenes, cloud performance can help. Shortcuts improve the way you work, but Vagon Cloud Computer can give that workflow more power behind it.
Most Lumion users don’t lose time because they don’t know every feature. They lose time because their workflow keeps getting interrupted.
You move through the scene, place an object, adjust the camera, fix the scale, change the preview quality, then try to get back to the same view again. One extra click doesn’t feel like much. Fifty of them do.
That’s where shortcuts actually help.
Not by turning you into someone who memorizes every key combination in Lumion, but by removing the small pauses that break your rhythm. The useful shortcuts are the ones you use while navigating, placing objects, saving views, rotating assets, checking preview quality, and preparing renders.
So this guide is not a full shortcut dictionary. It focuses on the Lumion shortcuts that matter most in real projects, especially when scenes get heavier, deadlines get tighter, and you need to stay focused on the image instead of the interface.
Start with navigation, because every scene depends on it
Before object placement, materials, lighting, effects, or render settings, there’s one thing you do constantly in Lumion: move.
And if movement feels clumsy, everything else feels slower too.
Navigation shortcuts are usually the first ones worth learning because they sit underneath the entire workflow. You use them when checking a façade, walking through an interior, finding a clean camera angle, adjusting landscaping, or inspecting whether a chair is weirdly half-sunk into the floor.
The basics are simple:
W / S / A / D or Arrow Keys to move around
Q / E to move the camera down or up
Right Mouse Button to look around
Middle Mouse Button to pan
Mouse Wheel to move forward and backward
Spacebar for slow camera movement
Shift for faster movement
Shift + Spacebar for very fast movement
Movement shortcuts you’ll use every five seconds
WASD movement is probably the most familiar shortcut set, especially if you’ve used games or 3D tools before. In Lumion, it becomes second nature quickly. Right mouse button controls where you’re looking, while W, A, S, and D move the camera through the scene.
Q and E are the ones beginners often ignore at first, but they’re essential. They let you move vertically without awkwardly tilting the camera and pushing forward. When you’re working on multi-level buildings, roof gardens, staircases, balconies, or tall landscape scenes, Q and E save a lot of fiddling.
The mouse wheel is useful too, but I wouldn’t rely on it for everything. It’s great for quick forward and backward movement, but WASD gives you better control when you’re framing a view or moving through tighter areas.
If you’re still deciding whether Lumion is the right real-time renderer for your workflow, you may also want to compare Enscape vs Lumion before going too far into shortcut habits.
Speed control is what makes navigation feel professional
The real trick is not just knowing how to move. It’s knowing how fast to move.
Use Spacebar when you need precision. Interior scenes, furniture adjustments, close-up material checks, lighting tweaks. Slow movement keeps you from overshooting the view every two seconds.
Use Shift when you’re moving across a larger exterior, city block, landscape, or site plan. You don’t need delicate camera movement when you’re crossing from one side of the project to the other.
And Shift + Spacebar? That’s for when the model is huge and you just need to get somewhere fast.
This sounds basic, but it changes how Lumion feels. Once navigation becomes automatic, you stop thinking about the camera and start thinking about the scene. That’s the point.
Camera viewpoints are your safety net
One of the easiest ways to waste time in Lumion is to find a good camera angle, lose it, then spend five minutes trying to recreate it.
We’ve all done it.
You get the perfect view of a villa entrance, a lobby, a terrace, or a street corner. Then you zoom in to fix a material, move around to place assets, check another side of the model, and suddenly the original angle is gone. Maybe you can rebuild it. Maybe not exactly.
That’s why saved viewpoints are so useful.
The shortcuts are simple:
Ctrl + 1 to 0 to save up to 10 camera viewpoints
Shift + 1 to 0 to load saved camera viewpoints
Ctrl + H to reset the camera pitch to a horizontal viewpoint
Double right-click on a model to teleport the camera to that position
Double left-click on an object icon to move the camera to that model
I’d treat saved viewpoints as a habit, not a final-step feature. Before you start changing materials, adding people, placing trees, testing lighting, or experimenting with effects, save the views that matter.
For example, if you’re working on a residential exterior, save the front view, driveway view, garden view, pool view, and one close-up detail shot. If you’re working on an interior, save the main entrance angle, a seating area, a kitchen or reception view, and any client-approved camera positions.
This does two things.
First, it protects your best angles. You can explore freely without worrying that you’ll lose the shot. Second, it makes comparison easier. When you change lighting, materials, weather, or entourage, you can jump back to the exact same view and judge the result properly.
That’s the real value. Saved viewpoints don’t just save time. They make your decisions cleaner.
If you’re coming from BIM or architectural modeling tools, especially Revit, it also helps to understand the hardware side of that pipeline, since Revit and Lumion often sit in the same project workflow. Here’s a useful guide on the best PC for Autodesk Revit.
Object placement shortcuts: where Lumion starts feeling fast
Once navigation feels natural, object placement is the next big speed gain.
This is where Lumion can either feel smooth and creative, or weirdly repetitive. You’re placing trees, cars, people, lights, furniture, plants, rocks, street elements, and small details that make the scene feel alive. If every object requires too much clicking, moving, rotating, and fixing, the whole process becomes tiring fast.
Here are the placement shortcuts worth knowing:
Left Mouse Button to place the selected model
Left Mouse Button + V to place a model with random scale
H + Left Mouse Button + move mouse to move selected objects up or down while placing
Ctrl + drag with Left Mouse Button to create a rectangular selection
Ctrl + click an object icon to add or remove objects from a selection
Ctrl + click anywhere to deselect all objects
Alt + Left Mouse Button + move mouse to duplicate selected objects
G + Left Mouse Button + move mouse to snap objects to the Lumion Landscape
F + Left Mouse Button + move mouse to adapt object orientation to the surface below
Random scale is small, but it saves scenes from looking copied
The V shortcut is one of those tiny details that makes a scene look less artificial.
When you place several trees, bushes, rocks, or decorative objects at the exact same size, the repetition becomes obvious. The viewer may not consciously notice it, but the scene starts to feel fake. Like someone stamped the same object across the project.
Using V while placing objects gives you random scale variation. It’s especially useful for vegetation, landscape details, outdoor furniture, stones, and background assets. You still need to check the result, of course, because random does not always mean good. But it gives you a better starting point than identical copies everywhere.
If preview quality is constantly dragging your scene down, the issue may not be your shortcut habits at all. It may be your GPU, which is why this guide to the best GPU for Lumion is worth checking before blaming the software.
Duplicate first, polish later
For repeated objects, Alt + Left Mouse Button + move mouse is one of the fastest shortcuts in Lumion.
Use it for chairs around a table, lights along a path, cars in a parking area, trees along a road, or people in a plaza. Instead of placing every object from the library again, duplicate what already works, then adjust the position, rotation, and scale after.
This keeps you moving. And in scene-building, momentum matters.
The mistake is duplicating too perfectly. If every chair, plant, person, or tree has the same angle and spacing, it feels staged in the wrong way. Duplicate to save time, then break the pattern.
Snapping matters when the scene gets crowded
The G and F shortcuts are easy to overlook, but they help prevent one of the most annoying Lumion problems: objects that almost look placed correctly.
Almost.
A plant floats slightly above the grass. A car doesn’t sit right on a sloped driveway. A person is tilted weirdly on uneven ground. A bench looks like it’s fighting the pavement.
Use G when you want objects to snap to the Lumion Landscape. Use F when the object needs to adapt to the surface orientation below it. These shortcuts become especially useful in scenes with hills, ramps, terrain, curbs, stairs, and layered site elements.
Good placement is not just about filling a scene. It’s about making objects feel like they belong there. Shortcuts help you get there faster, but the eye still has to judge the final result.
If you’re comparing similar real-time rendering workflows, this Lumion vs Twinmotion guide can help you understand where Lumion’s scene-building style feels different.
Rotation and scale shortcuts for cleaner asset control
Placement gets objects into the scene. Rotation and scale make them look intentional.
This is where a lot of Lumion scenes quietly fall apart. Not because the assets are bad, but because everything looks too repeated, too aligned, or too obviously dropped into place. Trees face the same direction. Cars sit at awkward angles. People look like they were placed by a grid instead of by someone thinking about how the space is used.
These are the rotation and scale shortcuts worth using:
R + Left Mouse Button + move mouse to rotate selected objects
Shift while rotating to temporarily disable angle snapping
F + rotate + move cursor to match the surface orientation below
K + rotate to make selected objects face the mouse cursor
L + Left Mouse Button + move mouse to scale an object
Perfect alignment is not always realistic
There’s a difference between clean and fake.
For architectural elements, alignment matters. Chairs around a table, pendant lights, repeated façade elements, street lamps, parking spaces. Those should feel controlled. But for trees, plants, rocks, people, cars, outdoor furniture, and decorative objects, too much alignment makes the scene feel artificial.
That’s where R becomes one of the most useful shortcuts in the whole placement workflow. After duplicating an object, rotate it slightly. Not dramatically. Just enough to break the copy-paste effect.
A row of trees should not all face the same way. People in a plaza should not all stand at the same angle. Cars in a parking lot can be slightly imperfect, especially if the scene is trying to feel lived-in rather than showroom-clean.
The Shift modifier helps when angle snapping gets in your way. If Lumion is snapping rotation in fixed increments and you need a more natural angle, hold Shift while rotating to get freer control.
If your work sits between architectural visualization and fast concept presentation, this Twinmotion vs Lumion comparison gives a clearer look at how both tools handle speed, realism, and project scale.
Use rotation shortcuts to remove the “copy-paste” look
The K shortcut is especially helpful when you want objects to face a certain direction. For example, people looking toward an entrance, chairs facing a view, or decorative objects oriented toward a path.
And then there’s L for scale.
Scaling is one of those things that should be used carefully. A slightly larger plant or smaller rock can make a scene feel more organic. But oversized people, giant cars, or furniture that doesn’t match the room can ruin the sense of proportion immediately.
My rule is simple: use scale variation for natural objects and background detail, but be more careful with anything that has a known real-world size. Trees can vary. Rocks can vary. Shrubs can vary. A dining chair should not suddenly feel like it belongs in a children’s museum.
Rotation and scale shortcuts are not flashy, but they make a big difference. They turn a scene from “assets placed in Lumion” into something that feels arranged, reviewed, and actually designed.
If you’re trying to run Lumion on a Mac or a lighter device, the hardware conversation gets even more important. This guide explains how to run Lumion on macOS when your local setup is not built for native Lumion performance.
Quality preview shortcuts: move faster without lying to yourself
One of the worst habits in Lumion is working at full quality all the time.
I get why people do it. You want the scene to look good while you’re building it. You want shadows, trees, materials, reflections, and lighting to feel close to the final result. But if the project is already heavy, max preview quality can turn every small adjustment into a wait.
That’s not a better workflow. It’s just slower.
These are the preview shortcuts that help you control how much quality Lumion shows while you work:
F1 for lowest editor quality
F2 for low editor quality
F3 for medium editor quality
F4 for high editor quality
F6 to toggle automatic or manual High-Quality Preview updates
F7 to cycle through editor resolution levels
F8 to temporarily show spotlight shadows
F9 to toggle low-quality and high-quality trees and plants
F11 for Theater Mode
Don’t preview everything at full quality
High-quality preview is useful. But it should be a decision, not your default setting for every single task.
If you’re placing furniture, adjusting asset positions, scattering trees, moving people, or building out a landscape, you probably don’t need the editor running at the highest quality. Lower preview settings help keep the scene responsive, especially on large projects with lots of vegetation, lights, detailed materials, or imported geometry.
Use F1 to F4 depending on what you’re doing. When the task is about layout and placement, lower quality is usually enough. When the task is about light, mood, reflections, material response, or final composition, move up to higher quality.
That little switch in mindset matters. You stop treating preview quality like a badge of honor and start treating it like a tool.
Use high quality only when the decision needs it
The shortcuts around preview quality are especially useful when you’re working through visual decisions.
Use F8 when you need to quickly check spotlight shadows without permanently slowing down the whole workflow. Use F9 when vegetation quality is affecting performance and you need to move through the scene more easily. Use F7 when the editor resolution itself feels heavier than it needs to be.
And F11 can be helpful when you want to look at the scene without the interface getting in the way. Not for editing every detail, but for judging composition, mood, and how the image feels as a whole.
The point is not to make everything ugly while you work. The point is to spend performance where it actually helps. Work light when you’re building. Check quality when you’re judging. That’s a much smarter rhythm.
Photo and movie mode shortcuts that save client-facing work
Photo and Movie Mode are where Lumion starts feeling less like a scene-building tool and more like a presentation tool.
This is also where small workflow mistakes become annoying. You find a good angle, add effects, adjust lighting, test a different mood, change the camera slightly, then realize you’ve damaged the cleaner version you actually liked better.
So the shortcut mindset here is simple: protect the good version before you experiment.
For Photo Mode, these shortcuts are especially useful:
Ctrl + 1 to 0 to save camera shots
Shift + 1 to 0 to load saved camera shots
Ctrl + C to copy a photo
Ctrl + V to paste a photo into another slot
Shift in Photo Matching to drag points more accurately
F in Orthographic View to align the camera perpendicular to a surface
Save the approved views before you experiment
If a client, manager, or teammate has already approved a view, save it. Immediately.
Don’t trust yourself to “just find it again later.” In Lumion, a camera angle is not only position. It’s height, lens feel, pitch, framing, distance, and mood. A tiny change can make the same scene feel completely different.
This is why Ctrl + number and Shift + number are so useful. Save the important views, then jump back to them whenever you need to compare lighting, weather, materials, people, vegetation, or render effects.
For architectural stills, I like saving views before doing any serious effect work. One clean front view. One stronger perspective angle. One detail shot. One human-level view. Then you can build the visual style around those angles instead of constantly hunting for the scene again.
Copy slots instead of rebuilding the same setup
Ctrl + C and Ctrl + V in Photo Mode are not exciting shortcuts, but they save real time.
Let’s say you have one polished image with the right camera angle, lens, exposure, shadows, and effect stack. Instead of rebuilding another version from scratch, copy the photo to another slot and test from there.
One slot can be a sunny version. Another can be overcast. Another can push dusk lighting. Another can test heavier reflections or a different material mood.
Movie Mode has a similar logic:
Ctrl + 1 to 0 to save viewpoints while editing a camera animation
Shift + 1 to 0 to load viewpoints
Spacebar over the timeline slider to play or stop the preview
Ctrl + C to copy a clip
Ctrl + V to paste a clip
Ctrl while rendering to show FPS
For animations, copying clips is especially useful when you want to test pacing. Maybe one version has a slow approach to the building. Another cuts tighter. Another holds longer on the entrance.
You don’t need to rebuild the structure every time. Copy the clip, adjust the timing, preview it, and compare.
That’s the real benefit of these shortcuts. They make experimentation safer. You can try new looks without losing the version that already worked.
A practical Lumion shortcut workflow for a real project
The easiest way to learn Lumion shortcuts is not to memorize them in a list. It’s to attach them to a real workflow.
Let’s say you’re preparing an exterior scene for a client review. Maybe it’s a villa, a small commercial building, or a residential block with landscaping. You don’t need every shortcut in Lumion. You need the ones that help you move from rough scene to polished presentation without constantly breaking your flow.
Start with navigation. Use WASD, Q/E, Shift, and Spacebar until moving through the scene feels automatic. Don’t rush this part. If you’re constantly fighting the camera, every other task becomes slower.
Then save your main views early with Ctrl + 1 to 0. I’d do this before serious decoration, before effect testing, and definitely before client-facing renders. Save the front view, side view, entrance view, landscape view, and one or two detail shots. Now you can move around freely without losing the angles that matter.
After that, place your major assets. Use Left Mouse Button for basic placement, V when placing objects that benefit from scale variation, and Alt + drag when duplicating repeated items. Trees, plants, lights, chairs, cars, people, rocks. Get them into the scene first. Don’t obsess over every angle immediately.
Once the scene is filled out, clean it up. Use R to rotate objects, L to scale carefully, G to snap objects to the Lumion Landscape, and F when objects need to adapt to the surface below. This is the pass where the scene starts looking less like a library dump and more like an actual environment.
Then manage preview quality. Work lighter with F1 to F3 when you’re placing and adjusting assets. Use F4, F8, or F9 when you need to judge shadows, vegetation, lighting, or detail. Don’t force Lumion to show you the most expensive preview every second of the day.
Finally, move into Photo or Movie Mode. Copy good views with Ctrl + C and Ctrl + V before testing different moods. Keep one safe version. Experiment on another.
That’s the shortcut workflow I’d actually recommend: navigate, save, place, clean up, preview, then present. Simple. But it keeps the whole project moving.
And if you want to make sure Lumion is actually using the right graphics resources, this guide on how to use GPU on Lumion is a good companion to the shortcut workflow.
Where shortcuts stop helping: heavy scenes, AI upscaling, and hardware limits
Shortcuts can make Lumion feel much faster. They help you move better, place objects faster, protect camera views, preview smarter, and avoid repeating the same tiny actions all day.
But they don’t change the weight of the project.
At some point, the scene itself starts pushing back. Too much vegetation. Too many high-detail models. Large imported geometry. Heavy materials. Ray tracing. Complex lighting. Bigger output expectations. Maybe you’re also using AI upscaling to produce sharper, higher-resolution images, which can help reduce render pressure in some workflows, but still doesn’t make your whole workstation immune to heavy scenes.
This is where the shortcut conversation becomes a hardware conversation.
You can work smart, lower preview quality, save camera positions, copy photo slots, and avoid wasting time. All good habits. But if your machine is already struggling to orbit the scene, load assets, update previews, or finish renders without turning into a fan-powered space heater, shortcuts only go so far.
That’s where Vagon Cloud Computer fits naturally into the Lumion workflow.
Instead of forcing every heavy Lumion scene through the same local laptop or office workstation, Vagon Cloud Computer gives you access to a high-performance cloud computer with scalable GPU and CPU options. You can connect from your browser, choose a machine that matches the project, and run demanding Lumion work on stronger remote hardware rather than being locked to the device on your desk.
For Lumion users, that matters most when the project grows beyond the comfortable stage. The early scene may run fine locally. Then the landscaping comes in. Then the materials. Then the lighting. Then the client wants more views, sharper stills, and a smoother animation preview.
Shortcuts keep your hands fast. Better hardware keeps the scene responsive.
You need both. Because a good workflow is not only about knowing which key to press. It’s also about having enough performance behind the scene so those shortcuts actually feel instant.
Final thoughts: learn the shortcuts that protect your flow
You don’t need to memorize every Lumion shortcut in one sitting.
Honestly, that’s probably the worst way to learn them. You’ll scan a huge list, remember three keys, forget the rest, and go back to clicking through the interface like before.
Start with the shortcuts that protect your flow.
Learn the navigation keys first, because movement affects everything. Then get comfortable saving and loading camera viewpoints, because losing a good angle is one of the most annoying ways to waste time in Lumion. After that, focus on placement, duplication, rotation, scaling, and preview quality. Those are the shortcuts you’ll actually use while building real scenes.
The goal is not to look like a “power user.” The goal is to stay focused on the image.
When your hands know what to do, your brain can stay on the bigger decisions: Does this angle sell the project? Does the lighting feel right? Is the landscaping too repetitive? Does the render feel believable? Is this the version you’d actually show a client?
That’s where shortcuts pay off.
And when shortcuts are no longer enough, the next bottleneck is usually performance. Heavy Lumion scenes need more than good habits. They need enough hardware behind them to keep the workflow responsive. That’s where tools like Vagon Cloud Computer can make sense, especially when your local machine starts slowing down before the project is finished.
Learn the shortcuts that matter. Build cleaner habits. Then make sure your setup can keep up with the work.
FAQs
1. What are the most useful Lumion shortcuts for beginners?
The most useful Lumion shortcuts for beginners are the ones tied to navigation, camera views, and object placement. Start with WASD for movement, Q and E for moving down and up, Shift for faster movement, and Spacebar for slower movement. After that, learn Ctrl + 1 to 0 to save camera viewpoints and Shift + 1 to 0 to load them again. Those shortcuts alone make Lumion feel much easier to control.
2. Can you customize Lumion keyboard shortcuts?
Lumion does not let you fully customize its default keyboard shortcuts. You can choose different camera control styles based on tools like SketchUp, Revit, or Rhino, which helps if you’re coming from another 3D workflow, but the main shortcut keys themselves are not fully editable. That’s why it makes sense to learn the shortcuts that Lumion already supports instead of trying to rebuild the whole control system.
3. How do I save camera views in Lumion?
You can save camera viewpoints in Lumion by pressing Ctrl + 1 to 0. Each number stores a different camera position. To return to one of those saved views, press Shift + 1 to 0. This is especially useful when you’re working on client-approved angles, final render views, or before-and-after lighting comparisons.
4. Which Lumion shortcuts help with object placement?
For object placement, the most helpful shortcuts are Alt + Left Mouse Button + move mouse to duplicate objects, V + Left Mouse Button to place objects with random scale, G + Left Mouse Button + move mouse to snap objects to the Lumion Landscape, and F + Left Mouse Button + move mouse to adapt object orientation to the surface below. These shortcuts are especially useful for trees, plants, furniture, people, cars, rocks, and repeated scene details.
5. Which Lumion shortcuts help improve performance while working?
The main performance-related shortcuts are F1 to F4 for changing editor quality, F7 for cycling editor resolution, F9 for switching between low-quality and high-quality trees and plants, and F11 for Theater Mode. These don’t make your hardware stronger, but they help you work more smoothly by reducing how much visual detail Lumion needs to show while you’re editing.
6. Do Lumion shortcuts make renders faster?
Lumion shortcuts do not directly make final renders faster. Render speed still depends on your GPU, CPU, scene complexity, render settings, resolution, lighting, ray tracing, vegetation, and materials. Shortcuts help you build and prepare scenes faster, but once you hit the render button, performance depends mostly on the machine behind the project.
7. Why should I learn Lumion shortcuts if I can already use the interface?
You can absolutely use Lumion without memorizing shortcuts, but the interface gets slower once projects become more detailed. Shortcuts reduce the small interruptions that happen all day: moving around, saving views, duplicating objects, rotating assets, changing preview quality, and copying photo slots. The benefit is not just speed. It’s staying focused while you work.
8. When should I consider using Vagon Cloud Computer for Lumion?
You should consider using Vagon Cloud Computer when your Lumion scene starts feeling too heavy for your local machine. If navigation gets laggy, preview quality has to stay low all the time, render tests take too long, or your laptop struggles with large scenes, cloud performance can help. Shortcuts improve the way you work, but Vagon Cloud Computer can give that workflow more power behind it.
Get Beyond Your Computer Performance
Run applications on your cloud computer with the latest generation hardware. No more crashes or lags.

Trial includes 1 hour usage + 7 days of storage.
Summarize with AI

Ready to focus on your creativity?
Vagon gives you the ability to create & render projects, collaborate, and stream applications with the power of the best hardware.

Vagon Blog


Run heavy applications on any device with
your personal computer on the cloud.
San Francisco, California
Solutions
Vagon Teams
Vagon Streams
Use Cases
Resources
Vagon Blog
What Slows Down After Effects Projects?
The First 30 Minutes in Blender 3D: A Practical Workflow Guide
What’s New in Godot 4.7? Key Features, Upgrades, and Workflow Improvements
What Slows Down Blender 3D Projects?
What Slows Down Adobe Photoshop Projects?
The First 30 Minutes in Adobe Photoshop: A Practical Workflow Guide
Before You Start in Adobe Photoshop: A Practical Setup Checklist
What’s New in Unreal Engine 5.8? Key Features and Upgrade Advice
How to Run Windows on an iPad: 4 Best Ways (2026)
Vagon Blog
Run heavy applications on any device with
your personal computer on the cloud.
San Francisco, California
Solutions
Vagon Teams
Vagon Streams
Use Cases
Resources
Vagon Blog