Instant Connection for Pixel Streaming
— New Feature Automated Setup

How To Run Lumion On macOS
How To Run Lumion On macOS
Architecture
How To Run Lumion On macOS
Table of Contents
You buy a MacBook Pro thinking it’ll handle anything.
And honestly, for most things, it does. It breezes through SketchUp models, handles Rhino with grace, and even renders smaller Enscape scenes without breaking a sweat. Then one day, you decide to try Lumion.
That’s when reality hits.
You head to the official Lumion site, download the installer… and it simply refuses to open. Turns out, Lumion doesn’t officially support macOS, not even on the most expensive M3 Max MacBook Pro. I learned that the hard way.
I’ve spent hours trying every workaround: Boot Camp, Parallels, Windows VMs, even external GPUs. Some of them technically work, sure. But most feel like trying to run a marathon in flip-flops, possible, but far from ideal.

So here’s the deal:
In this guide, I’ll walk you through every real way to get Lumion running on a Mac, what actually works, what’s a total waste of time, and how Vagon Cloud Computer can make Lumion run smoothly on any Mac, from a MacBook Air to a Mac Studio, without all the frustrating setup.
Let’s get straight into it.
Why Mac + Lumion Is a Tough Combination
If you’re an architect, designer, or 3D artist, there’s a good chance you love your Mac. I get it, I do too. They’re reliable, beautifully built, and the screens make every render or concept look better than it probably should. For modeling, sketching, and presentation work, macOS feels seamless.
But here’s the uncomfortable truth: Lumion and macOS were never meant for each other.
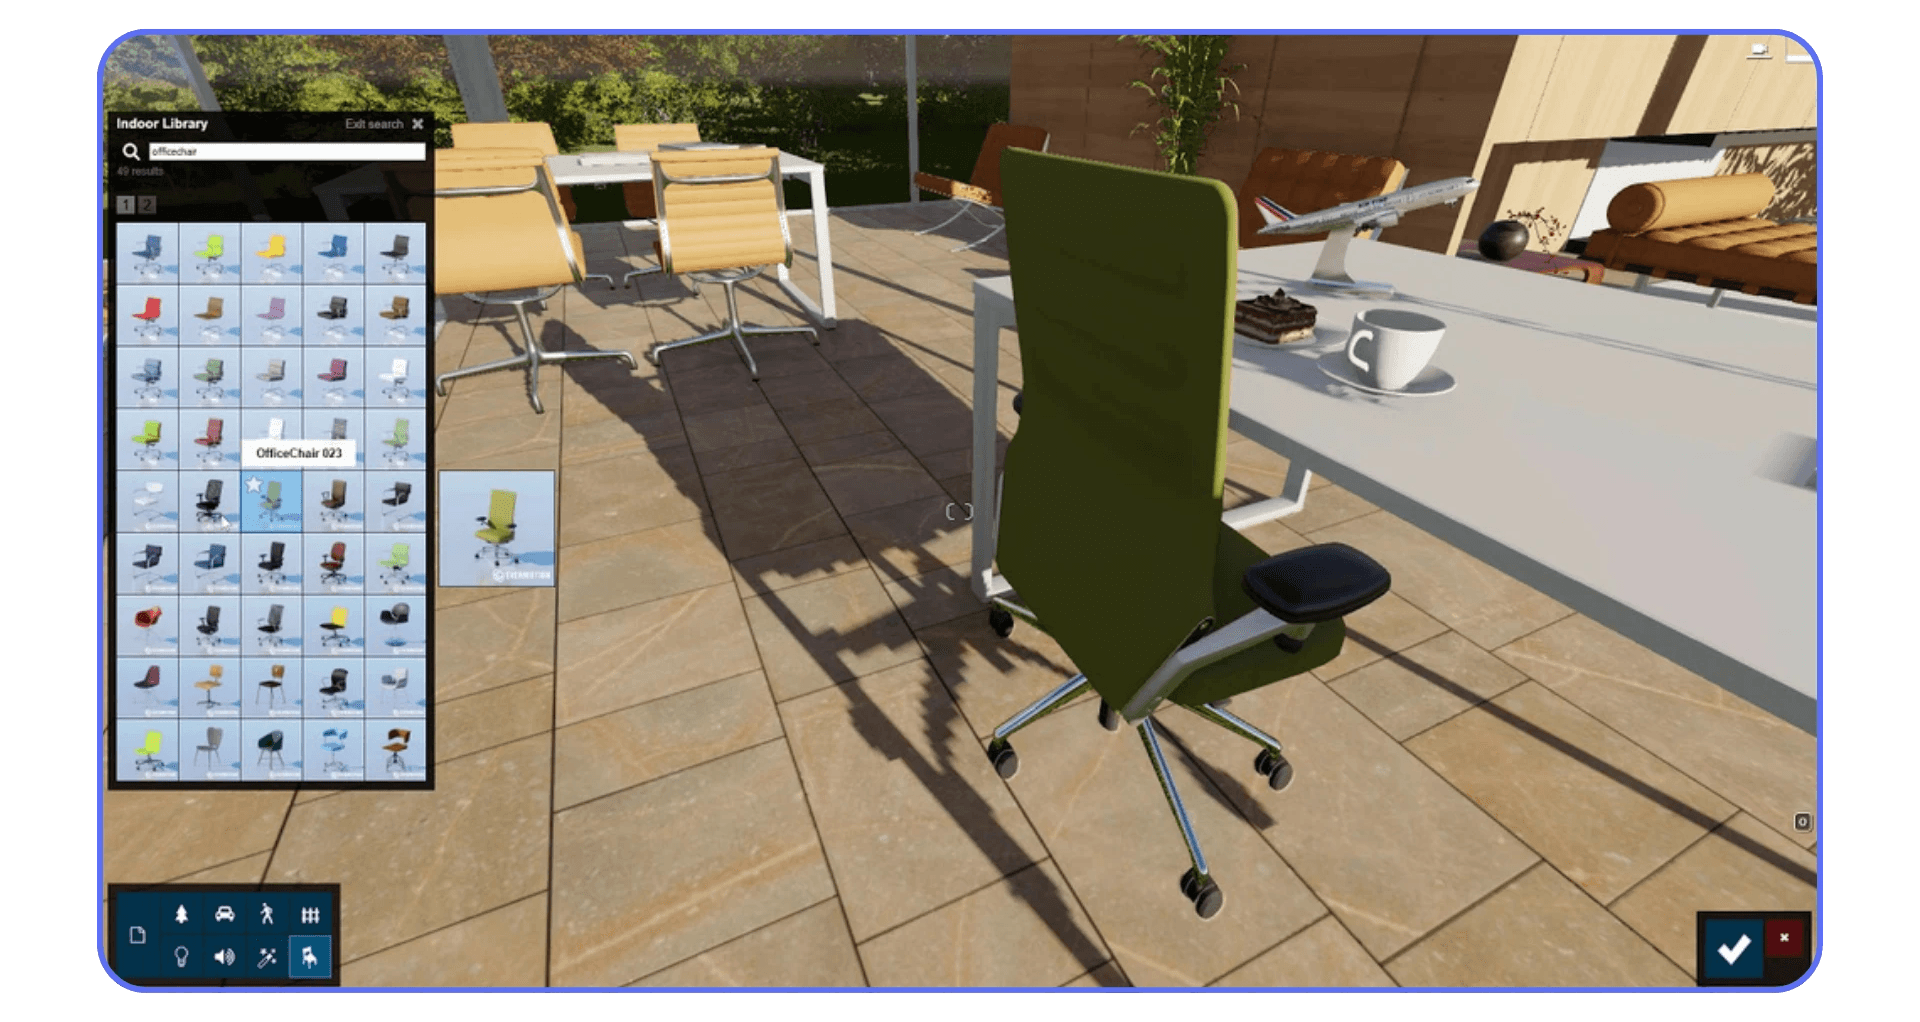
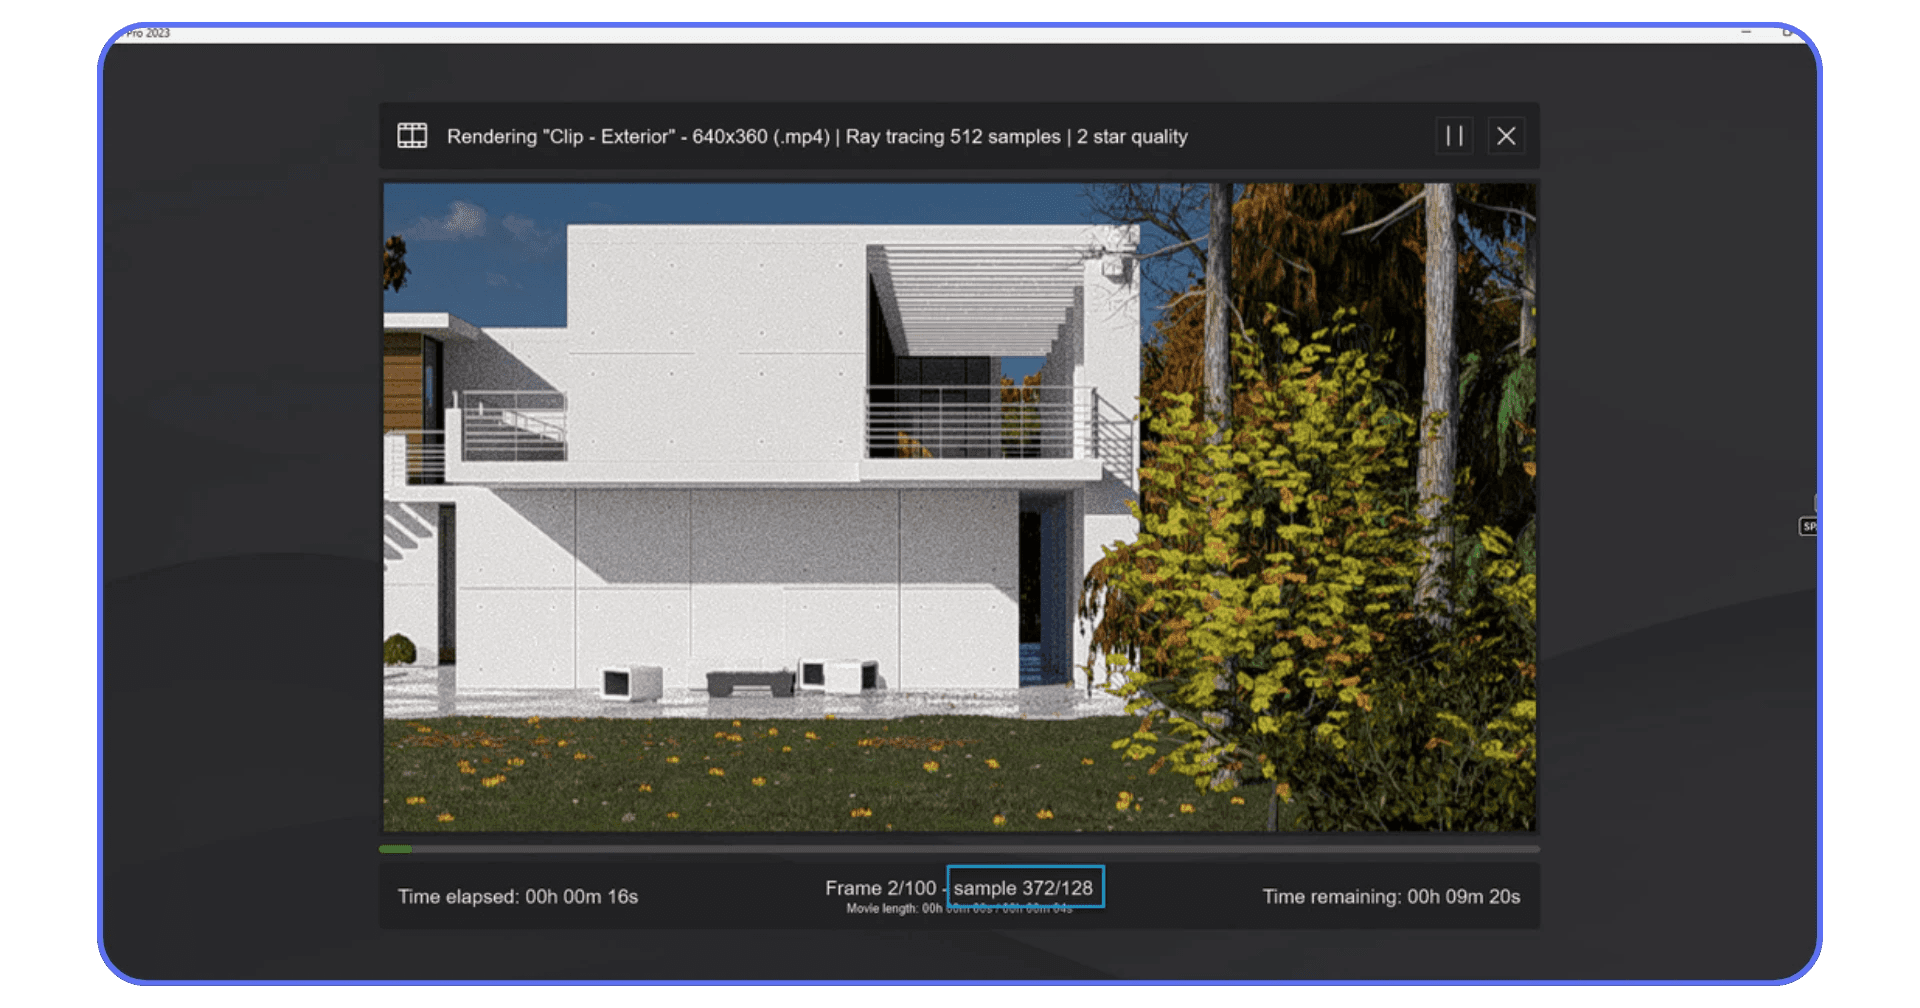
Lumion was built around Windows and DirectX, two technologies that Apple doesn’t natively support. It’s a real-time rendering engine that leans heavily on dedicated NVIDIA or AMD GPUs, not the integrated or unified memory chips found in most Macs. The software’s magic, smooth walkthroughs, instant lighting previews, ultra-fast video exports, depends on that GPU muscle.
Even on Apple’s latest M-series chips, which crush tasks like video editing or AI upscaling, Lumion simply won’t run. Not because your Mac isn’t powerful enough in theory, it’s because Lumion requires a Windows environment with specific GPU drivers and APIs that macOS just doesn’t have.
The result?
You can have a $4,000 MacBook Pro and still hit a wall trying to open a basic Lumion scene. It’s not about raw specs, it’s about compatibility.
Many professionals I know (myself included) have gone down the same rabbit hole: trying Parallels, external GPUs, virtual machines… all with limited success. Parallels might get Windows running, but Lumion either crashes on startup or refuses to detect the GPU. eGPUs add more complexity, and even then, you’re looking at inconsistent frame rates and driver headaches.
So yes, while Macs are perfect for SketchUp, Rhino, or even Unreal Engine with Apple’s Metal API, Lumion belongs to a different world, one that speaks fluent DirectX and expects a Windows GPU driver underneath.
Don’t get me wrong, I’m not anti-Mac. But if you want real-time architectural rendering that feels smooth and production-ready, you’re going to need to either use Boot Camp on an Intel Mac or, as I’ll explain later, jump into Vagon Cloud Computer, where Lumion runs exactly as it should, no hacks required.
Lumion’s demand for a dedicated GPU isn’t just a suggestion, it’s essential. If you're wondering what kind of hardware actually delivers, here's a complete guide on the best GPUs for Lumion to help you understand what makes a difference in smooth real-time performance.
What Lumion Officially Says
The first time I tried to figure out how to get Lumion working on my Mac, I did what everyone does, I went straight to Lumion’s official support page. And right there, in bold text, it basically says:
“Lumion is not officially supported on macOS.”
That’s the line that crushes every Mac user’s dream of running Lumion natively.
According to Lumion’s documentation, the only possible scenario is if you’re using an Intel-based Mac, not the newer M1, M2, or M3 machines, and even then, you need to install Windows through Boot Camp. Once you do that, your Mac stops being a Mac for a moment and becomes a Windows PC. Only then can Lumion actually install and run.
And if you were thinking, “I’ll just use Parallels or VMware and save myself the trouble,” here’s the bad news: Lumion’s team specifically discourages that. Virtual machines don’t provide the kind of GPU access Lumion needs for real-time rendering, so even if you somehow manage to open it, it’ll be painfully slow, or crash instantly.
Here’s a quick rundown straight from Lumion’s own recommendations:
✅ Intel Mac with Boot Camp and Windows 10 → technically possible.
❌ Apple Silicon Macs (M1, M2, M3, M4) → not compatible.
❌ Parallels / VMware Fusion → unsupported, unreliable.
And that’s not them being overly cautious, it’s reality. Lumion relies on DirectX 11 and 12, technologies exclusive to Windows. macOS uses Metal instead, and there’s no translation layer between the two that can handle Lumion’s real-time rendering pipeline.
So if you’re using a MacBook Air with an M-series chip, you can’t just “tweak” your way into running Lumion. It’s not a matter of power, those chips are monsters, it’s about software compatibility.
I remember hitting that wall myself. I had an M1 Pro MacBook Pro and genuinely thought virtualization had come far enough to trick Lumion into running. Nope. Instant crash every time.
That’s when it clicked for me: Lumion isn’t a casual app you can patch or emulate. It’s a Windows powerhouse that wants full access to the GPU, something macOS simply won’t allow.
Step-by-Step: How to Run Lumion on an Intel Mac
Alright, so you’ve got an Intel-based Mac, not one of the new M-series models, and you’re determined to make Lumion work. Good news: it’s possible. Bad news: it’s not as straightforward as clicking “Download.”
Let’s go step-by-step through what actually works.
#1. Check Your Hardware First
Before you touch anything, confirm what you’re working with.
CPU: Must be an Intel processor. Lumion simply won’t run on Apple Silicon (M1, M2, M3, etc.).
GPU: Ideally a dedicated AMD Radeon Pro or Vega GPU. Integrated Intel graphics? Forget it. Lumion won’t even start.
RAM & Storage: At least 16 GB of RAM and around 100 GB free space on your drive, Boot Camp + Windows + Lumion + scene files eat space fast.
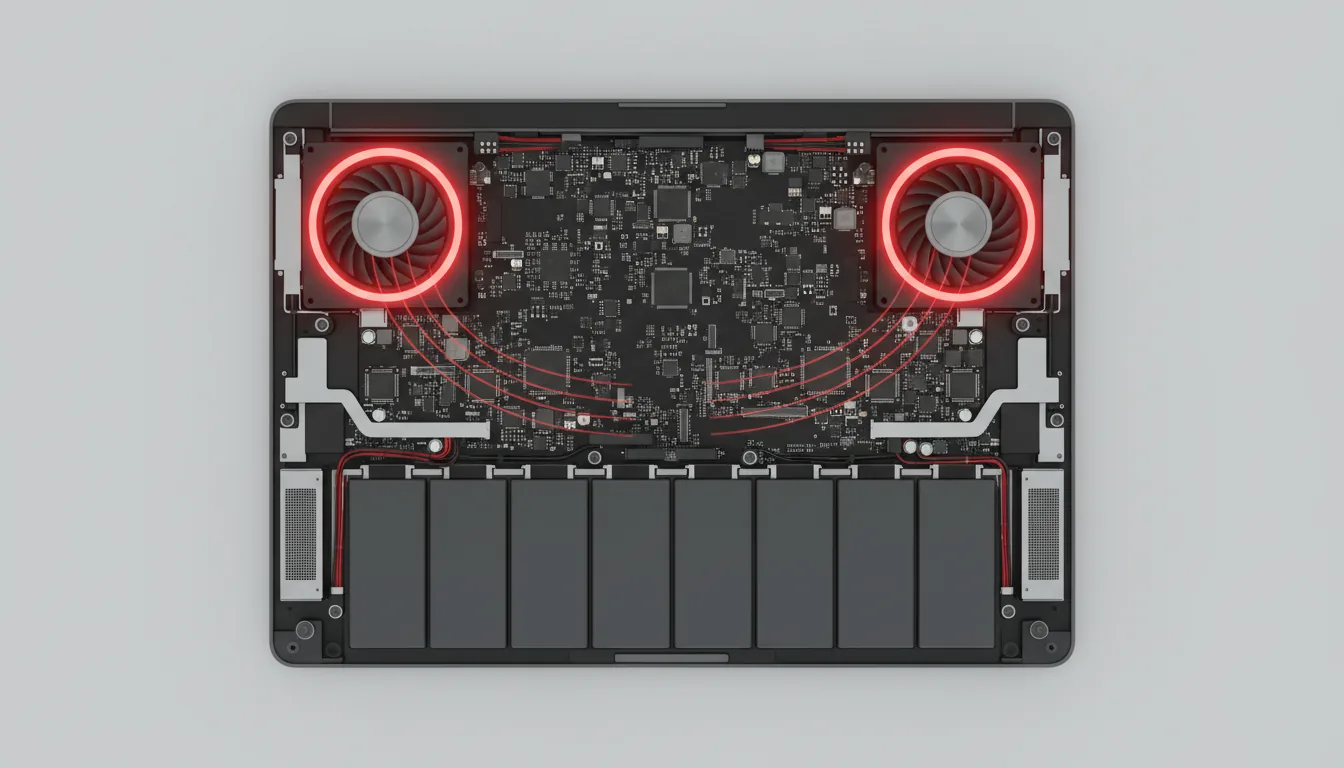
Thermals: Expect your fans to sound like a small jet during renders. That’s normal, MacBooks weren’t built for 3D real-time workloads.
If your Mac checks those boxes, you can move on to installing Windows.
Choosing the right GPU is the foundation of any stable Lumion setup. For a more in-depth breakdown, this comprehensive GPU guide for Lumion is a must-read before you commit to any upgrade or cloud config.
#2. Install Windows via Boot Camp
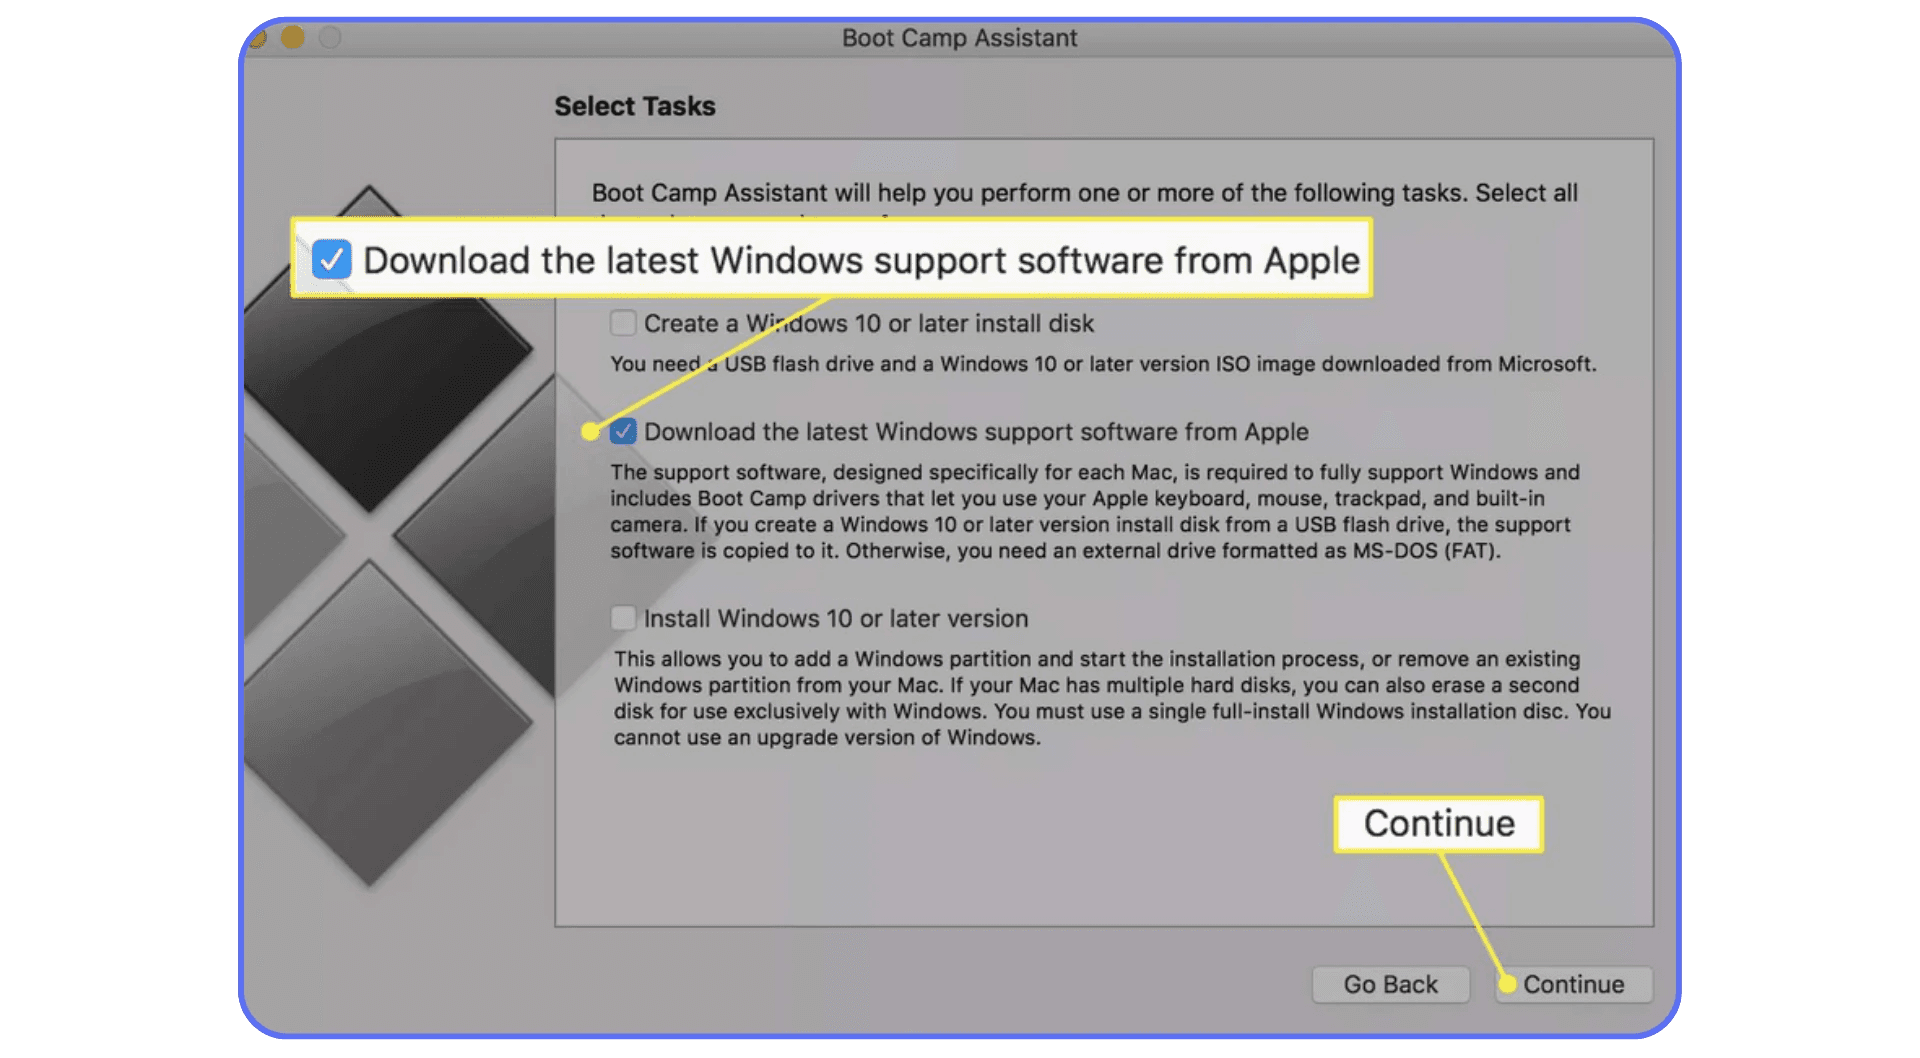
This is the only officially supported way to run Lumion on a Mac.
Open Boot Camp Assistant (you’ll find it in Applications → Utilities).
Download a Windows 10 ISO from Microsoft’s official site.
Allocate storage — 100 GB is the bare minimum; I’d go for 150 GB if you can.
Let Boot Camp partition your drive and install Windows.
Once Windows boots, install all Apple drivers (Boot Camp will prompt you).
Immediately update your GPU drivers from AMD or NVIDIA, the Boot Camp ones are usually outdated.
This setup basically turns your Mac into a Windows machine at the hardware level, which is the only reason Lumion will actually launch.
#3. Install Lumion and Optimize
Now you’re on Windows. Time to make Lumion behave.
Download Lumion from your account or trial page.
Run the built-in benchmark test before opening any projects. If it fails, your GPU likely isn’t powerful enough.
Inside Lumion, set “Editor Quality” to Medium or Low at first, Macs tend to throttle when temperatures rise.
Keep your scenes light: fewer 4K textures, simpler vegetation assets, and avoid dynamic reflections everywhere. It’ll save you hours of lag.
If your Mac supports it, you can plug in an eGPU (external GPU) via Thunderbolt for extra horsepower, though it’s not officially supported by Apple anymore, and performance varies wildly.
When everything’s ready, test with a small scene. If it loads smoothly and doesn’t freeze, congrats, you’ve successfully made Lumion run on macOS hardware.
But let’s be honest: it’s not the smoothest experience. Between driver updates, partition juggling, and temperature spikes, you’ll start wondering if it’s worth the effort, especially when there’s an easier option that doesn’t involve any of this setup.
Common Problems & Fixes
Even if you manage to get Lumion running on an Intel Mac, you’ll probably hit a few walls. Sometimes literal ones, like when the viewport suddenly freezes mid-orbit. Here are the most common problems I’ve run into (and seen others struggle with), plus what you can realistically do about them.
Problem #1: Laggy Performance or Low FPS
This is by far the biggest issue. Lumion relies heavily on your GPU, and most MacBook or iMac GPUs just aren’t built for that kind of constant real-time rendering load.
Fix:
Drop Editor Quality to Medium or Low.
Disable Real-Time Shadows while editing.
Avoid adding high-poly assets until the end.
Render stills before tackling videos, it’s less demanding.
I’ve seen people push through lag for hours only to realize the scene was overloaded with ultra-high-res textures. Keep it lean.
A lot of that performance drag comes down to how Lumion leverages your GPU, this guide explains how GPU usage actually works in Lumion, and why it’s such a crucial factor.
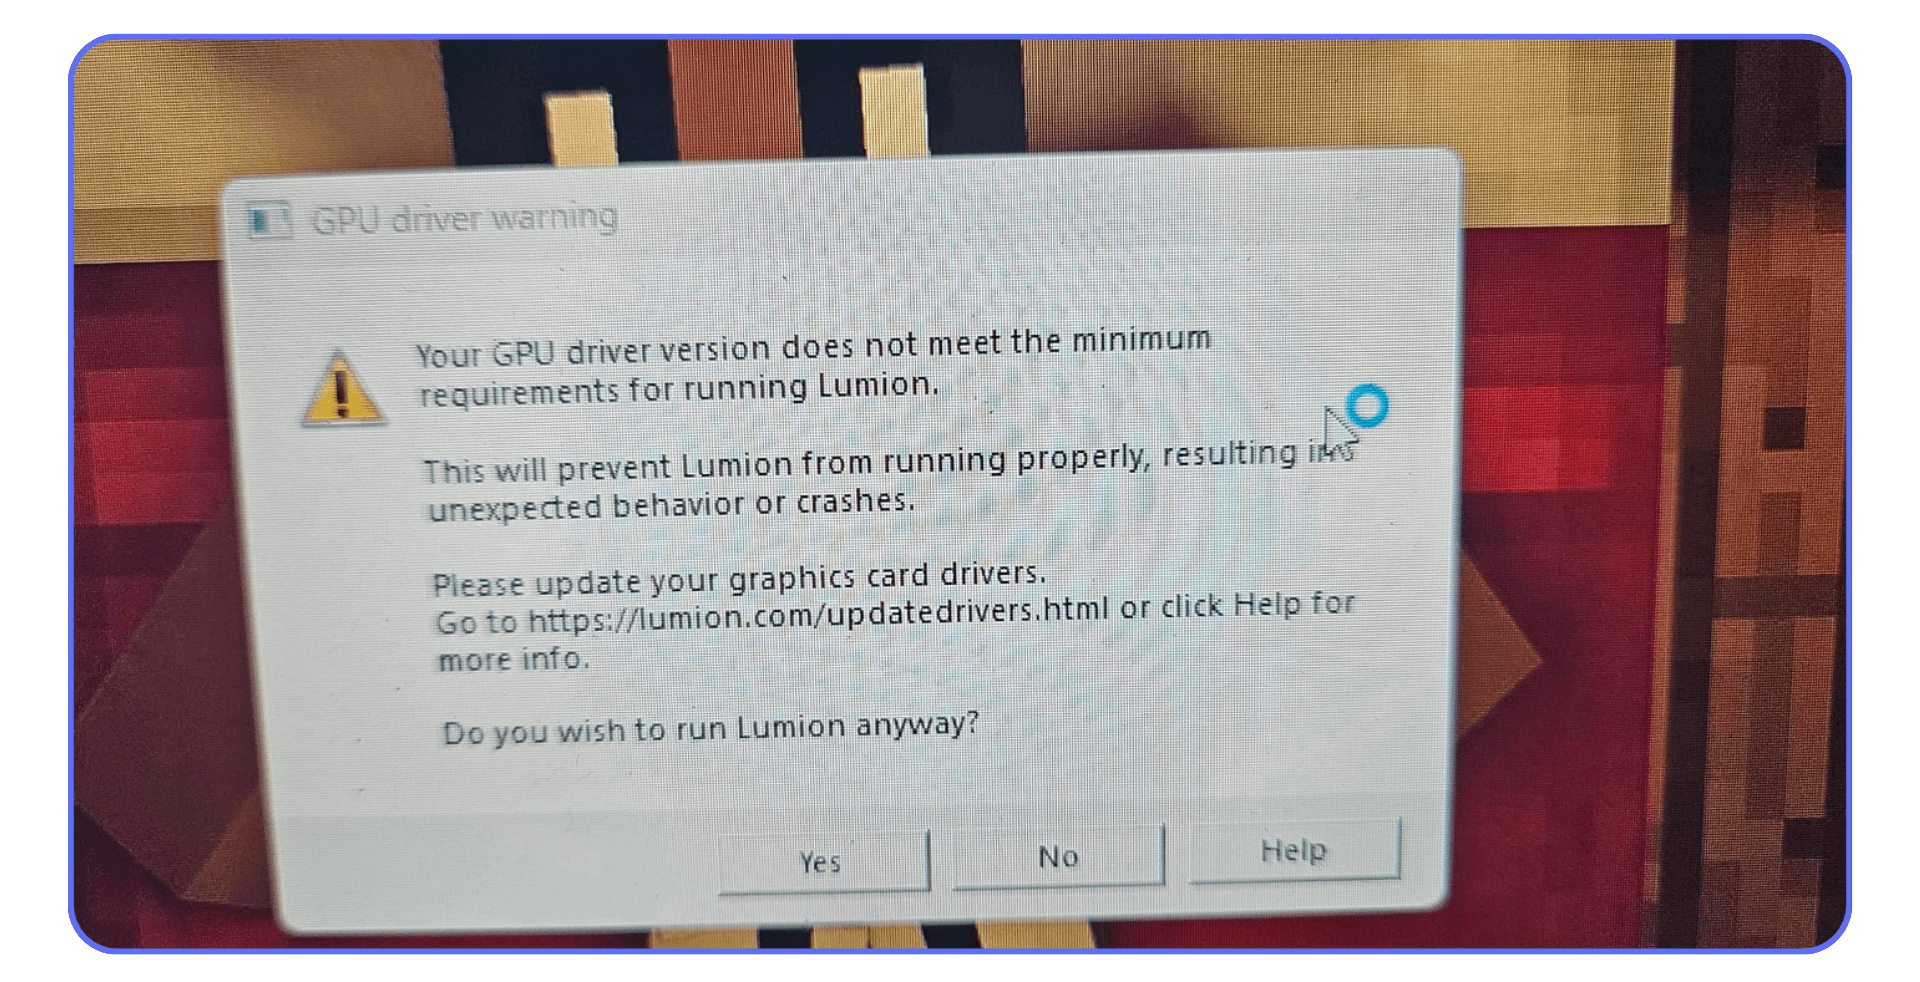
Problem #2: Crashes or Random Freezes
You finish your scene, hit render… and boom, Lumion vanishes. Usually this happens when the GPU overheats or drivers glitch out.
Fix:
Make sure you’ve updated your AMD/NVIDIA drivers directly (not the ones Boot Camp installs).
Don’t run other heavy apps in the background.
Let your Mac breathe, literally. Use a cooling pad or external fan.
I once rendered a 90-second animation on a 16-inch MacBook Pro. It started fine but crashed halfway through because the GPU hit 90 °C. Lesson learned.
Editor settings can only take you so far, though. If you’re curious how different cards stack up, this Twinmotion vs Lumion GPU breakdown offers a nice snapshot of rendering demands.
Problem #3: Parallels or VMware Don’t Work
This one’s simple, they’re not supposed to. Lumion needs DirectX 11/12, and virtual machines can’t pass that through properly to the GPU.
Fix:
Don’t waste time trying. Stick with Boot Camp or skip straight to Vagon Cloud Computer (which I’ll explain in a second).
It’s also worth noting that Lumion isn’t your only option in the real-time rendering world. If you’re weighing alternatives, this side-by-side breakdown of Enscape vs Lumion might help you decide what fits your workflow better.
Problem #4: Apple Silicon Incompatibility
If you’ve got an M1, M2, M3, or M4 Mac, Lumion just won’t launch, it’s a Windows-only executable, and the ARM-based chips don’t play nice with Boot Camp.
Fix:
There is no fix, at least not yet. Apple Silicon can’t run Lumion locally. Your only viable path is Vagon Cloud Computer if you want real performance without giving up your Mac.
Problem #5: Thermal Throttling
After ten minutes of rendering, your laptop sounds like a hairdryer and your frame rate tanks. That’s throttling, macOS hardware trying to cool itself down.
Fix:
Use external cooling.
Keep power plugged in at all times.
Limit long render sessions; break them into shorter chunks.
At some point, all these little fixes start feeling like duct tape. You can make Lumion run on a Mac, but keeping it stable and fast is a constant balancing act. And that’s exactly why most professionals I know eventually take a different route, one that doesn’t involve fans screaming at full blast.
That’s where Vagon Cloud Computer comes in.
The Smarter Alternative — Vagon Cloud Computer
After spending hours tweaking Boot Camp partitions and fighting with thermal throttling, I eventually hit a point where I asked myself a simple question:
“Why am I doing all this when I could just run Lumion on a proper Windows machine, without giving up my Mac?”
That’s exactly what Vagon Cloud Computer makes possible.
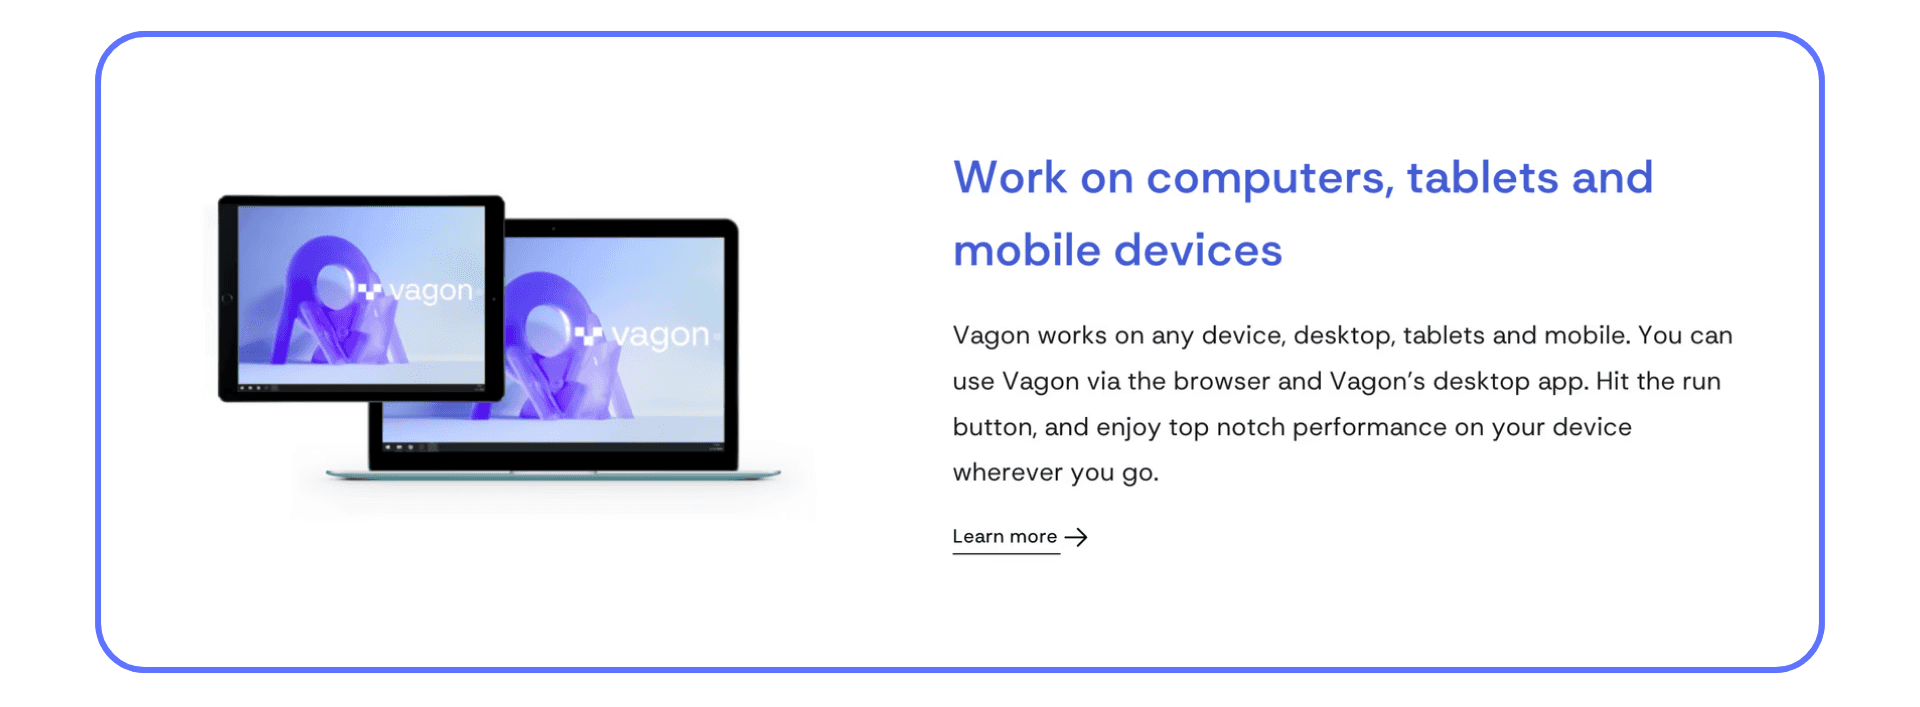
With Vagon, you don’t install Windows locally. You simply log in from your browser or desktop app, and you get a high-performance Windows workspace that’s ready for demanding tools like Lumion, Unreal Engine, or Blender. Your Mac acts as a window, streaming what’s happening on that powerful machine running in the cloud.
And here’s the best part: it actually works.
No laggy virtualization, no driver issues, no weird GPU errors. Just smooth, real-time performance, even for complex Lumion scenes.
How It Works
Here’s the part I love about Vagon Cloud Computer, it doesn’t just make Lumion possible on Mac, it makes the whole setup effortless. You’re not installing Windows, tweaking settings, or managing partitions. You’re simply picking your machine and getting to work.
Here’s how it goes:
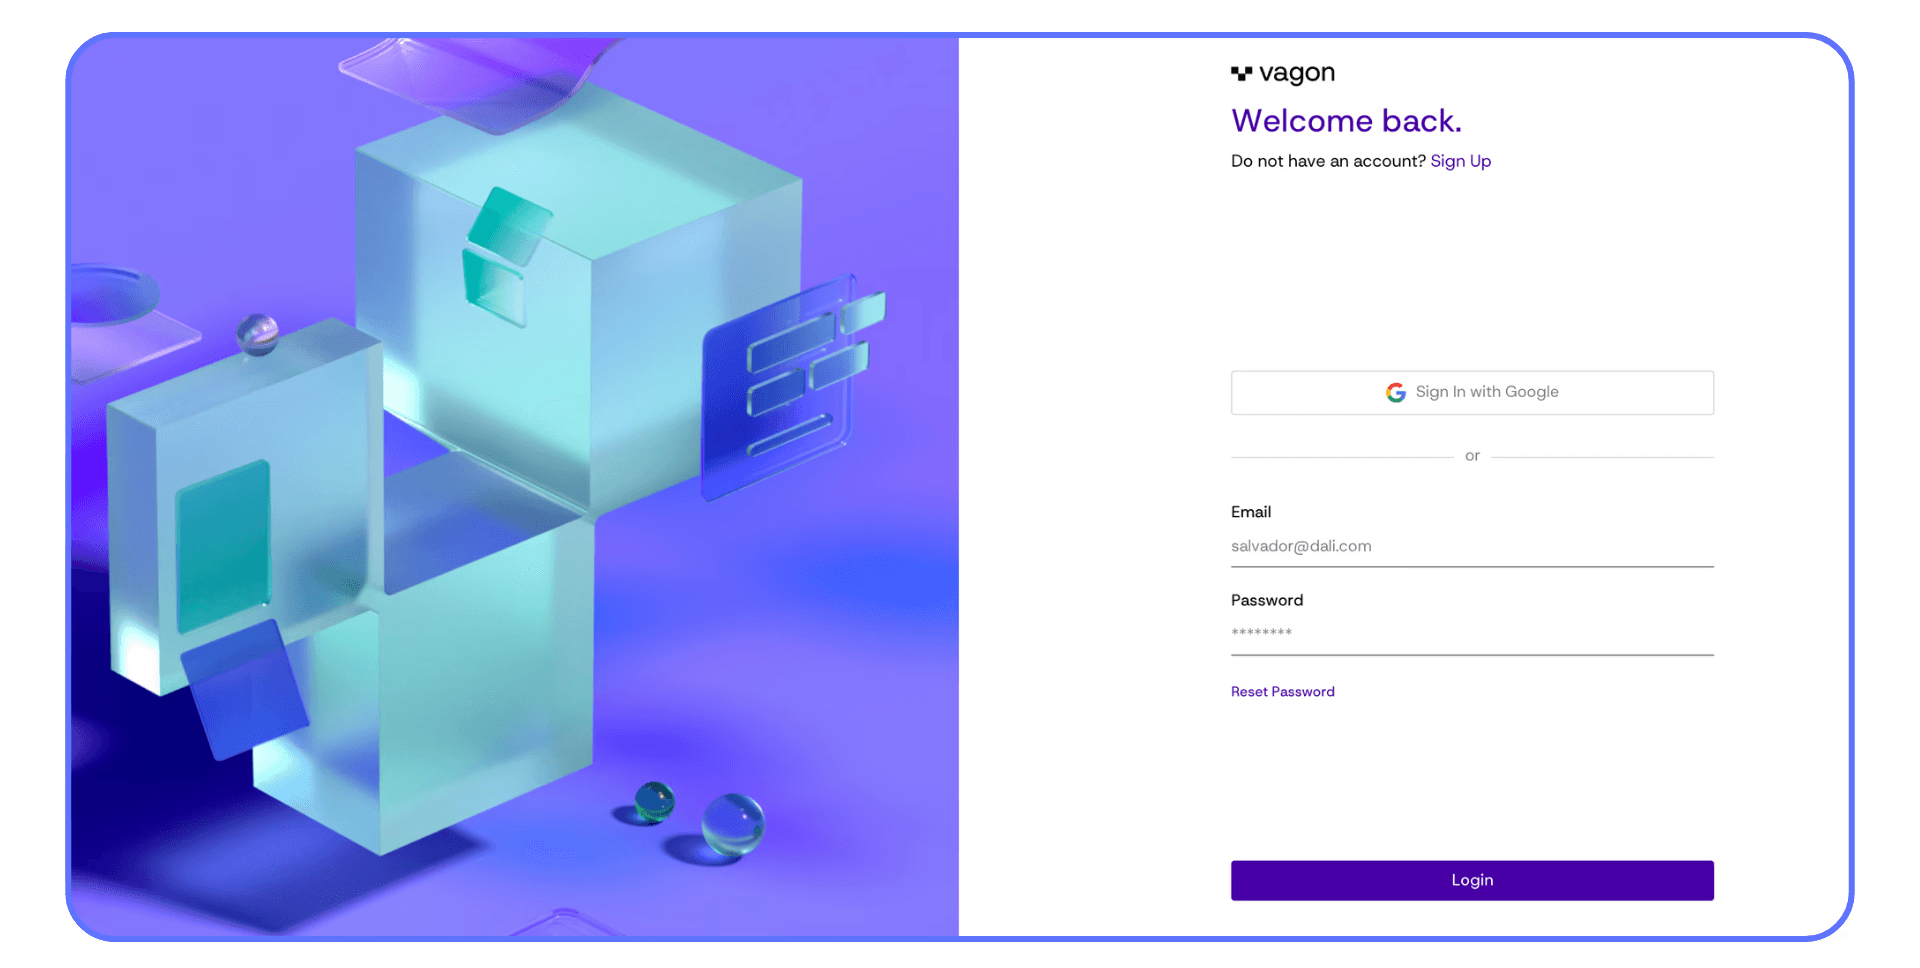
Step 1. Create your account.
Head to vagon.io and sign up for free. In less than a minute, you’ll have your personal dashboard, your control center for launching cloud computers, managing storage, and switching between setups.
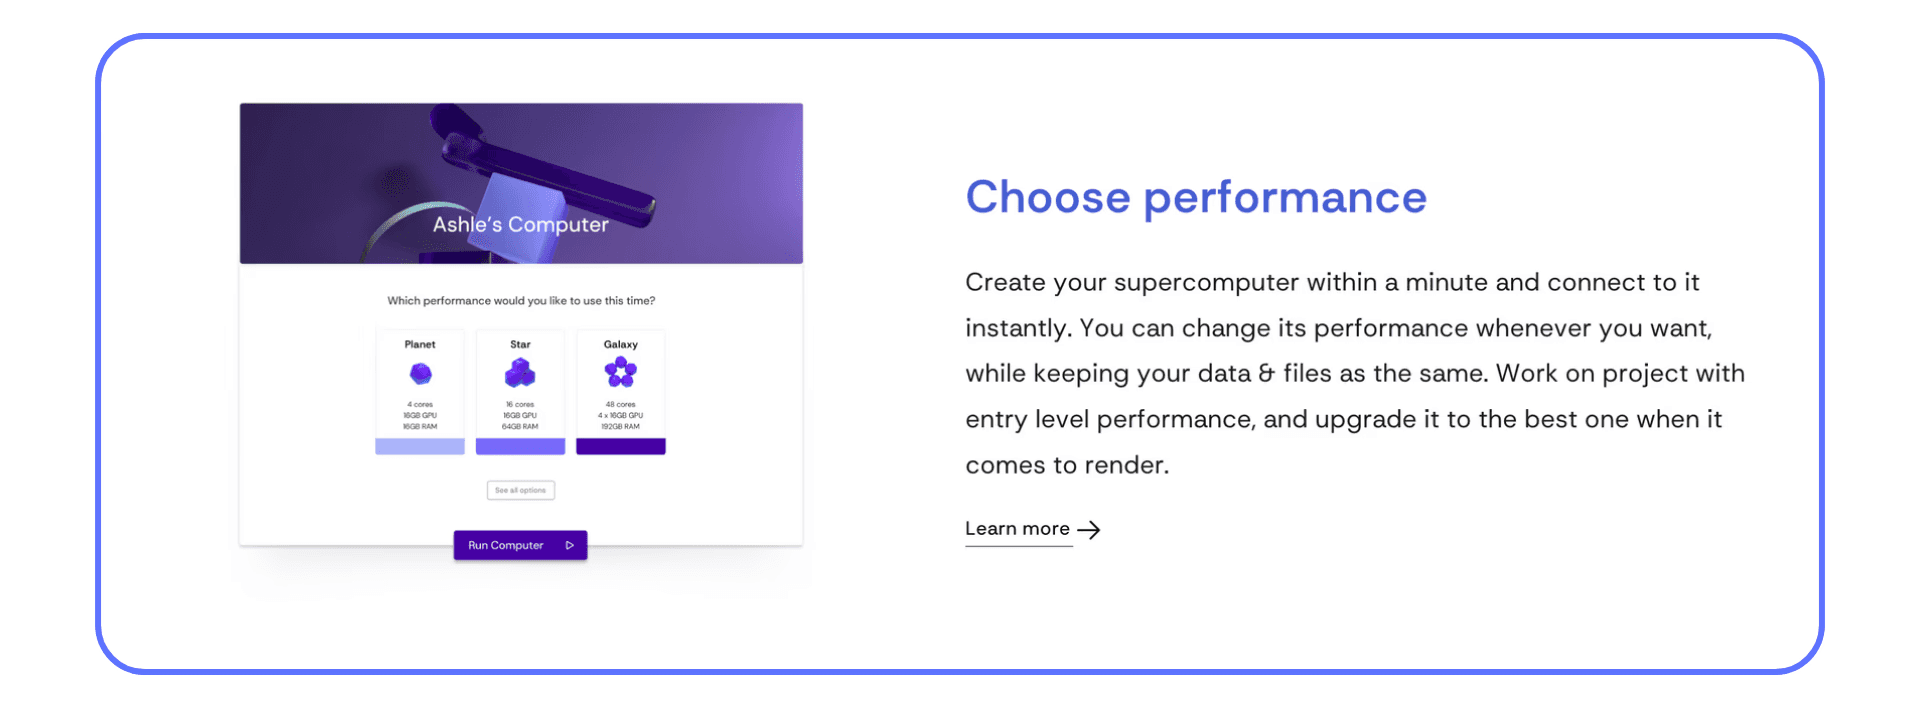
Step 2. Choose your machine.
Vagon offers several power levels, each designed for a different workload.
Spark / Flame / Blaze / Lava – RTX-enabled A10G Tensor Core GPUs for professionals who need serious performance. Perfect for heavy Lumion renders, large environments, and cinematic animations.
Planet / Star / Galaxy – NVIDIA T4 GPU tiers that balance performance and cost, ideal for medium-sized projects or early-stage visualizations.
Sand / Lake / Sea / Ocean – CPU-focused setups for lightweight computing tasks or file preparation before rendering.
You can scale your performance up or down anytime, whether you’re testing small assets or exporting a full 4K video.
Step 3. Launch your workspace.
From your Mac, open your workspace in seconds, either through the browser or the Vagon desktop app. Behind the scenes, a powerful Windows machine boots up on Vagon’s servers, equipped with dedicated GPUs and high-speed storage.
Your Mac doesn’t do the heavy lifting, it just streams the live session, keeping everything smooth and responsive.
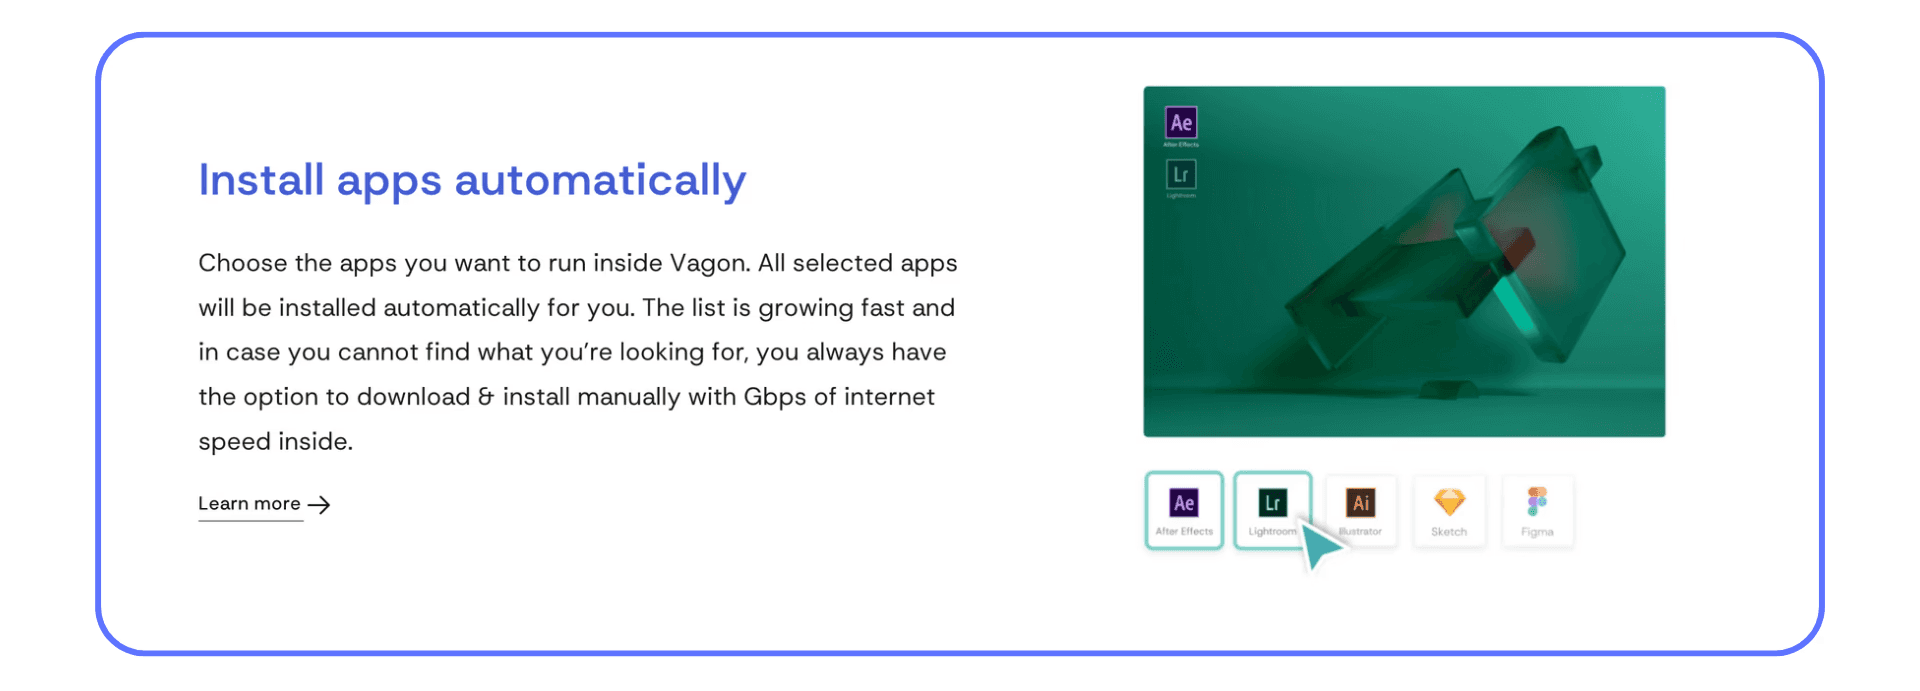
Step 4. Install Lumion and start creating.
Inside your Windows environment, download and install Lumion just like on any PC. No compatibility issues, no workarounds. Lumion runs natively inside that environment with full GPU acceleration, giving you real-time feedback, smooth navigation, and fast renders.
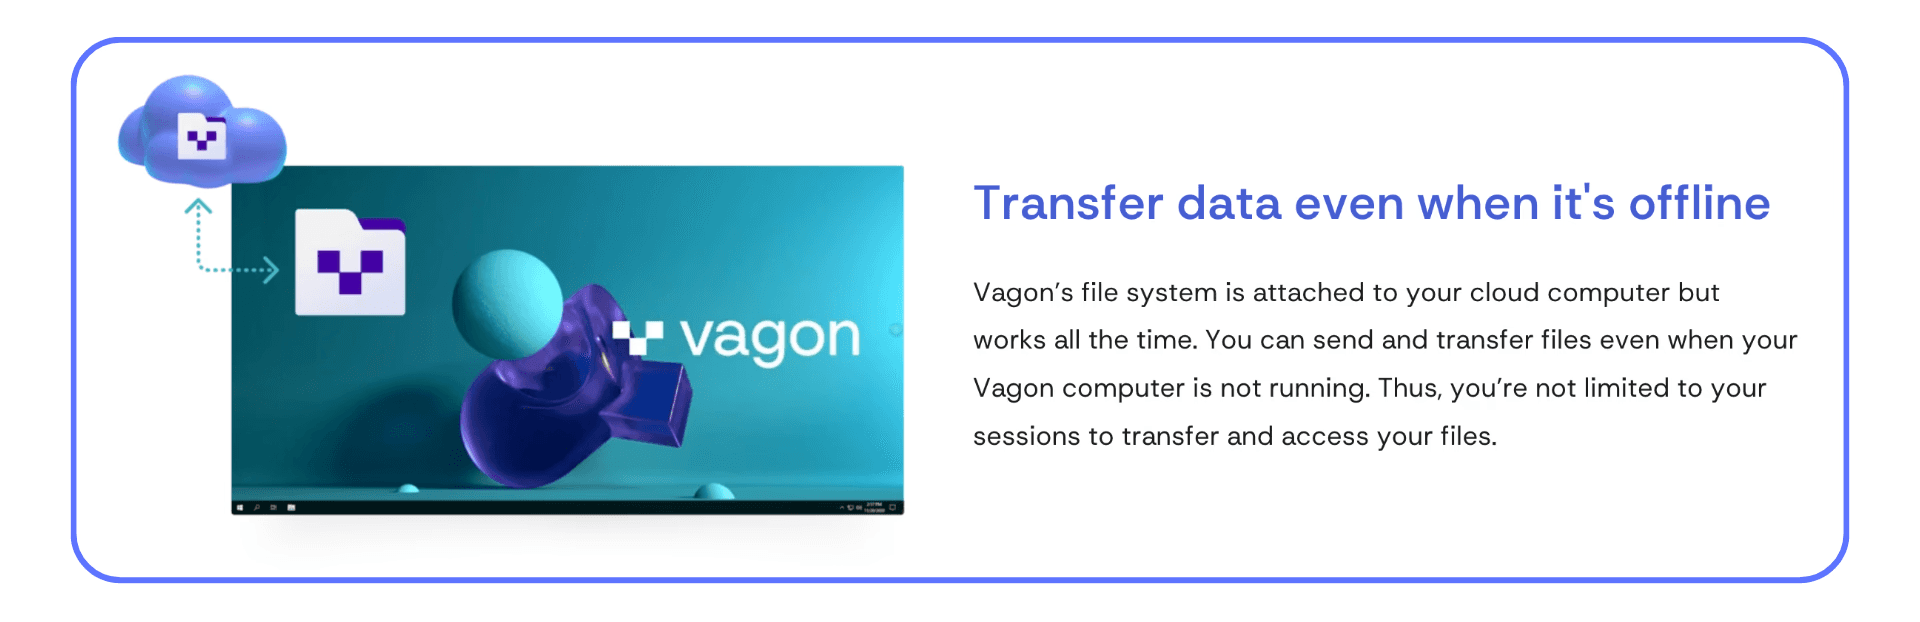
Step 5. Work seamlessly across sessions.
Your projects, textures, and renders stay stored in Vagon Files, built-in cloud storage that keeps everything synced between sessions. You can close your workspace anytime and pick up right where you left off later, even from a different device.
Everything happens remotely, so your Mac stays cool, quiet, and fast, even when you’re rendering massive Lumion scenes.
Why It’s a Game-Changer for Mac Users
Works with M1, M2, M3 Macs — no Boot Camp needed.
Zero setup stress — skip Windows installation entirely.
GPU performance on demand — scale up when rendering, scale down afterward.
Vagon Files integration — upload your project files once, access them anytime across sessions.
No long-term commitment — pay for performance only when you need it.
I’ve seen architects render large, photorealistic Lumion walkthroughs from a MacBook Air using Vagon Cloud Computer, something that would’ve been unthinkable a few years ago.
If your workflow involves modeling on your Mac (SketchUp, Rhino, Revit via Parallels, etc.) and rendering in Lumion, this setup gives you the best of both worlds. You keep your Mac workflow and access true Windows GPU power whenever you need it.
At this point, the real question isn’t “Can you run Lumion on a Mac?”, it’s “Do you still want to go through Boot Camp and overheating fans when there’s a smoother way?”
Realistic Expectations & Which Option to Pick
Let’s be real, both methods technically let you run Lumion on a Mac, but they’re not created equal. One involves hours of setup, constant temperature management, and limited GPU power. The other takes about ten minutes to set up and gives you the kind of performance most desktop PCs can’t match.
Here’s a quick breakdown based on what you actually plan to do with Lumion:
Use Case | Recommended Option | Setup Time | Performance Level |
Small student projects or testing Lumion | Boot Camp (Intel Mac only) | 4–6 hours | Basic |
Heavy rendering, large scenes, frequent animations | Vagon Cloud Computer | 10–15 minutes | High |
Apple Silicon (M1, M2, M3, M4) Macs | Vagon Cloud Computer | 10 minutes | High |
You just want to preview models occasionally | Boot Camp if Intel / Vagon for convenience | Depends | Medium |
Professional architectural visualization | Vagon Cloud Computer | Instant access | Highest |
If you’re still deciding between platforms, check out this head-to-head comparison of Lumion vs Twinmotion, it breaks down performance, ease of use, and output quality in real-world scenarios.
Boot Camp: The Hands-On Route
Boot Camp is for people who like to tinker. You’ll spend a few hours setting things up, partitioning disks, installing drivers, and hoping nothing breaks mid-way. Once it’s running, Lumion can perform decently on higher-end Intel Macs (like the 16-inch MacBook Pro with Radeon Pro 5600M).
But you’ll deal with heat, noise, and slower rendering compared to dedicated Windows workstations. And remember: Boot Camp doesn’t even exist for Apple Silicon Macs, so this path is basically legacy support now.
If you just want to test a few Lumion scenes, it’s fine. If you’re doing client work, it’s not sustainable.
Vagon Cloud Computer: The Practical Route
This is the option that feels like a shortcut, except it’s not cutting corners. It’s smarter resource management.
You log in, pick your performance tier, and you’re inside a powerful Windows workspace in minutes. No partitions, no installations, no troubleshooting.
Your Mac stays quiet. Lumion runs like it’s on a top-tier desktop with an RTX GPU. You can even scale your computer up for high-end renders, then downgrade to save costs when you’re done.
And the convenience factor is hard to overstate, switching from a MacBook at home to an iMac at the office or even an iPad for quick access feels seamless. Everything stays synced through Vagon Files, so you’re never chasing project folders again.

The Honest Take
If you’re using a Mac because you love the ecosystem, the UI, the design, the stability, then Boot Camp will always feel like you’re bending the rules. It works, but it’s a compromise.
Vagon Cloud Computer, on the other hand, feels like it was designed for people exactly like us, Mac users who love their machines but need the Windows horsepower that Lumion demands.
So if your question is, “Which one should I pick?”
Here’s my answer:
If you’re experimenting or learning Lumion casually, Boot Camp might do the trick.
But if you’re serious about your renders, deadlines, or performance, go with Vagon Cloud Computer and don’t look back.
Final Thoughts
I’ve always loved Macs. They’re quiet, reliable, and honestly, just feel good to work on. But when it comes to real-time 3D rendering, there’s no way around it, Lumion lives in the Windows world. It’s not about brand loyalty or specs. It’s about architecture, software design, and GPU compatibility.
I’ve tried almost everything over the years, Boot Camp, Parallels, external GPUs, remote streaming from a friend’s PC. Some of those setups worked for a while. Most didn’t. Every fix created a new problem: driver issues, throttling, or just that sinking feeling that I was forcing my Mac to be something it wasn’t meant to be.
Then I tried Vagon Cloud Computer, and it was the first time I could actually focus on designing again instead of troubleshooting. I opened Lumion, loaded a large residential project, and it ran as smoothly as on a dedicated RTX workstation, except I was sitting on my couch with a MacBook Air. No heat, no noise, no compromises.
That’s the thing: I don’t think every Mac user needs Vagon Cloud Computer. But I do think every Lumion user on Mac eventually ends up there. Because once you’ve spent days wrestling with Boot Camp setups or watching your fan scream during a render, you realize your time is worth more.
So here’s how I see it:
If you’re a student experimenting, go ahead and tinker with Boot Camp. It’s a great learning experience.
If you’re a professional who values your workflow, your deadlines, and your sanity, just skip the pain and launch Lumion through Vagon Cloud Computer.
Macs are incredible machines. Lumion is an incredible renderer. They just speak different languages.
Vagon translates between them perfectly.
FAQs
Can Lumion run natively on macOS?
No, Lumion doesn’t run natively on macOS. It’s a Windows-only application that relies on DirectX 11/12, which macOS doesn’t support. Even Apple’s most powerful M3 Max or M4 chips can’t run Lumion directly because there’s no macOS version available.Can I run Lumion on Apple Silicon Macs (M1, M2, M3, M4)?
Unfortunately, no. Apple Silicon Macs can’t use Boot Camp, and virtualization software like Parallels or VMware doesn’t provide full GPU access for Lumion’s rendering engine. If you’re on Apple Silicon and want to use Lumion, Vagon Cloud Computer is currently the only smooth and realistic option.What about using Boot Camp on an Intel Mac?
That’s the only semi-official method Lumion acknowledges. Boot Camp lets you install Windows on an Intel-based Mac, and Lumion can run there if your GPU meets the requirements. But it comes with trade-offs: loud fans, overheating, limited performance, and lots of setup time.Can I use Parallels or VMware Fusion to run Lumion?
Technically, you can install Windows with Parallels or VMware, but Lumion won’t work properly. Virtual machines can’t give Lumion direct GPU access, which it needs for real-time rendering. The result is constant lag, graphical glitches, or total crashes.Does Vagon Cloud Computer really work with Lumion?
Yes, and it works well. With Vagon Cloud Computer, you’re running Lumion on a high-end Windows machine equipped with an RTX-class GPU. You simply connect through your Mac, and everything streams seamlessly. It’s fast, stable, and compatible with both Intel and Apple Silicon Macs.Is Lumion planning to release a macOS version?
There’s no sign of an official macOS version on the horizon. Lumion continues to develop for Windows only, focusing on real-time rendering performance tied to DirectX. Unless Apple adopts full DirectX compatibility (which is highly unlikely), Lumion for macOS isn’t coming anytime soon.Can I render large projects from my MacBook Air or MacBook Pro?
Not locally, Lumion will either refuse to start or perform poorly due to GPU limitations. However, through Vagon Cloud Computer, you can render complex Lumion scenes from any Mac model, even a MacBook Air, since all the processing happens on a remote GPU workstation.Is using Vagon Cloud Computer secure?
Yes. Vagon runs sessions in isolated environments, and all connections are encrypted end-to-end. You can also store projects inside Vagon Files, making it easy to pick up your work across sessions without moving files manually.What’s the easiest way to get started?
Head to vagon.io, create an account, pick your performance tier, and launch your Windows workspace. From there, install Lumion like you would on a normal PC, and start rendering within minutes.
You buy a MacBook Pro thinking it’ll handle anything.
And honestly, for most things, it does. It breezes through SketchUp models, handles Rhino with grace, and even renders smaller Enscape scenes without breaking a sweat. Then one day, you decide to try Lumion.
That’s when reality hits.
You head to the official Lumion site, download the installer… and it simply refuses to open. Turns out, Lumion doesn’t officially support macOS, not even on the most expensive M3 Max MacBook Pro. I learned that the hard way.
I’ve spent hours trying every workaround: Boot Camp, Parallels, Windows VMs, even external GPUs. Some of them technically work, sure. But most feel like trying to run a marathon in flip-flops, possible, but far from ideal.
So here’s the deal:
In this guide, I’ll walk you through every real way to get Lumion running on a Mac, what actually works, what’s a total waste of time, and how Vagon Cloud Computer can make Lumion run smoothly on any Mac, from a MacBook Air to a Mac Studio, without all the frustrating setup.
Let’s get straight into it.
Why Mac + Lumion Is a Tough Combination
If you’re an architect, designer, or 3D artist, there’s a good chance you love your Mac. I get it, I do too. They’re reliable, beautifully built, and the screens make every render or concept look better than it probably should. For modeling, sketching, and presentation work, macOS feels seamless.
But here’s the uncomfortable truth: Lumion and macOS were never meant for each other.
Lumion was built around Windows and DirectX, two technologies that Apple doesn’t natively support. It’s a real-time rendering engine that leans heavily on dedicated NVIDIA or AMD GPUs, not the integrated or unified memory chips found in most Macs. The software’s magic, smooth walkthroughs, instant lighting previews, ultra-fast video exports, depends on that GPU muscle.
Even on Apple’s latest M-series chips, which crush tasks like video editing or AI upscaling, Lumion simply won’t run. Not because your Mac isn’t powerful enough in theory, it’s because Lumion requires a Windows environment with specific GPU drivers and APIs that macOS just doesn’t have.
The result?
You can have a $4,000 MacBook Pro and still hit a wall trying to open a basic Lumion scene. It’s not about raw specs, it’s about compatibility.
Many professionals I know (myself included) have gone down the same rabbit hole: trying Parallels, external GPUs, virtual machines… all with limited success. Parallels might get Windows running, but Lumion either crashes on startup or refuses to detect the GPU. eGPUs add more complexity, and even then, you’re looking at inconsistent frame rates and driver headaches.
So yes, while Macs are perfect for SketchUp, Rhino, or even Unreal Engine with Apple’s Metal API, Lumion belongs to a different world, one that speaks fluent DirectX and expects a Windows GPU driver underneath.
Don’t get me wrong, I’m not anti-Mac. But if you want real-time architectural rendering that feels smooth and production-ready, you’re going to need to either use Boot Camp on an Intel Mac or, as I’ll explain later, jump into Vagon Cloud Computer, where Lumion runs exactly as it should, no hacks required.
Lumion’s demand for a dedicated GPU isn’t just a suggestion, it’s essential. If you're wondering what kind of hardware actually delivers, here's a complete guide on the best GPUs for Lumion to help you understand what makes a difference in smooth real-time performance.
What Lumion Officially Says
The first time I tried to figure out how to get Lumion working on my Mac, I did what everyone does, I went straight to Lumion’s official support page. And right there, in bold text, it basically says:
“Lumion is not officially supported on macOS.”
That’s the line that crushes every Mac user’s dream of running Lumion natively.
According to Lumion’s documentation, the only possible scenario is if you’re using an Intel-based Mac, not the newer M1, M2, or M3 machines, and even then, you need to install Windows through Boot Camp. Once you do that, your Mac stops being a Mac for a moment and becomes a Windows PC. Only then can Lumion actually install and run.
And if you were thinking, “I’ll just use Parallels or VMware and save myself the trouble,” here’s the bad news: Lumion’s team specifically discourages that. Virtual machines don’t provide the kind of GPU access Lumion needs for real-time rendering, so even if you somehow manage to open it, it’ll be painfully slow, or crash instantly.
Here’s a quick rundown straight from Lumion’s own recommendations:
✅ Intel Mac with Boot Camp and Windows 10 → technically possible.
❌ Apple Silicon Macs (M1, M2, M3, M4) → not compatible.
❌ Parallels / VMware Fusion → unsupported, unreliable.
And that’s not them being overly cautious, it’s reality. Lumion relies on DirectX 11 and 12, technologies exclusive to Windows. macOS uses Metal instead, and there’s no translation layer between the two that can handle Lumion’s real-time rendering pipeline.
So if you’re using a MacBook Air with an M-series chip, you can’t just “tweak” your way into running Lumion. It’s not a matter of power, those chips are monsters, it’s about software compatibility.
I remember hitting that wall myself. I had an M1 Pro MacBook Pro and genuinely thought virtualization had come far enough to trick Lumion into running. Nope. Instant crash every time.
That’s when it clicked for me: Lumion isn’t a casual app you can patch or emulate. It’s a Windows powerhouse that wants full access to the GPU, something macOS simply won’t allow.
Step-by-Step: How to Run Lumion on an Intel Mac
Alright, so you’ve got an Intel-based Mac, not one of the new M-series models, and you’re determined to make Lumion work. Good news: it’s possible. Bad news: it’s not as straightforward as clicking “Download.”
Let’s go step-by-step through what actually works.
#1. Check Your Hardware First
Before you touch anything, confirm what you’re working with.
CPU: Must be an Intel processor. Lumion simply won’t run on Apple Silicon (M1, M2, M3, etc.).
GPU: Ideally a dedicated AMD Radeon Pro or Vega GPU. Integrated Intel graphics? Forget it. Lumion won’t even start.
RAM & Storage: At least 16 GB of RAM and around 100 GB free space on your drive, Boot Camp + Windows + Lumion + scene files eat space fast.
Thermals: Expect your fans to sound like a small jet during renders. That’s normal, MacBooks weren’t built for 3D real-time workloads.
If your Mac checks those boxes, you can move on to installing Windows.
Choosing the right GPU is the foundation of any stable Lumion setup. For a more in-depth breakdown, this comprehensive GPU guide for Lumion is a must-read before you commit to any upgrade or cloud config.
#2. Install Windows via Boot Camp
This is the only officially supported way to run Lumion on a Mac.
Open Boot Camp Assistant (you’ll find it in Applications → Utilities).
Download a Windows 10 ISO from Microsoft’s official site.
Allocate storage — 100 GB is the bare minimum; I’d go for 150 GB if you can.
Let Boot Camp partition your drive and install Windows.
Once Windows boots, install all Apple drivers (Boot Camp will prompt you).
Immediately update your GPU drivers from AMD or NVIDIA, the Boot Camp ones are usually outdated.
This setup basically turns your Mac into a Windows machine at the hardware level, which is the only reason Lumion will actually launch.
#3. Install Lumion and Optimize
Now you’re on Windows. Time to make Lumion behave.
Download Lumion from your account or trial page.
Run the built-in benchmark test before opening any projects. If it fails, your GPU likely isn’t powerful enough.
Inside Lumion, set “Editor Quality” to Medium or Low at first, Macs tend to throttle when temperatures rise.
Keep your scenes light: fewer 4K textures, simpler vegetation assets, and avoid dynamic reflections everywhere. It’ll save you hours of lag.
If your Mac supports it, you can plug in an eGPU (external GPU) via Thunderbolt for extra horsepower, though it’s not officially supported by Apple anymore, and performance varies wildly.
When everything’s ready, test with a small scene. If it loads smoothly and doesn’t freeze, congrats, you’ve successfully made Lumion run on macOS hardware.
But let’s be honest: it’s not the smoothest experience. Between driver updates, partition juggling, and temperature spikes, you’ll start wondering if it’s worth the effort, especially when there’s an easier option that doesn’t involve any of this setup.
Common Problems & Fixes
Even if you manage to get Lumion running on an Intel Mac, you’ll probably hit a few walls. Sometimes literal ones, like when the viewport suddenly freezes mid-orbit. Here are the most common problems I’ve run into (and seen others struggle with), plus what you can realistically do about them.
Problem #1: Laggy Performance or Low FPS
This is by far the biggest issue. Lumion relies heavily on your GPU, and most MacBook or iMac GPUs just aren’t built for that kind of constant real-time rendering load.
Fix:
Drop Editor Quality to Medium or Low.
Disable Real-Time Shadows while editing.
Avoid adding high-poly assets until the end.
Render stills before tackling videos, it’s less demanding.
I’ve seen people push through lag for hours only to realize the scene was overloaded with ultra-high-res textures. Keep it lean.
A lot of that performance drag comes down to how Lumion leverages your GPU, this guide explains how GPU usage actually works in Lumion, and why it’s such a crucial factor.
Problem #2: Crashes or Random Freezes
You finish your scene, hit render… and boom, Lumion vanishes. Usually this happens when the GPU overheats or drivers glitch out.
Fix:
Make sure you’ve updated your AMD/NVIDIA drivers directly (not the ones Boot Camp installs).
Don’t run other heavy apps in the background.
Let your Mac breathe, literally. Use a cooling pad or external fan.
I once rendered a 90-second animation on a 16-inch MacBook Pro. It started fine but crashed halfway through because the GPU hit 90 °C. Lesson learned.
Editor settings can only take you so far, though. If you’re curious how different cards stack up, this Twinmotion vs Lumion GPU breakdown offers a nice snapshot of rendering demands.
Problem #3: Parallels or VMware Don’t Work
This one’s simple, they’re not supposed to. Lumion needs DirectX 11/12, and virtual machines can’t pass that through properly to the GPU.
Fix:
Don’t waste time trying. Stick with Boot Camp or skip straight to Vagon Cloud Computer (which I’ll explain in a second).
It’s also worth noting that Lumion isn’t your only option in the real-time rendering world. If you’re weighing alternatives, this side-by-side breakdown of Enscape vs Lumion might help you decide what fits your workflow better.
Problem #4: Apple Silicon Incompatibility
If you’ve got an M1, M2, M3, or M4 Mac, Lumion just won’t launch, it’s a Windows-only executable, and the ARM-based chips don’t play nice with Boot Camp.
Fix:
There is no fix, at least not yet. Apple Silicon can’t run Lumion locally. Your only viable path is Vagon Cloud Computer if you want real performance without giving up your Mac.
Problem #5: Thermal Throttling
After ten minutes of rendering, your laptop sounds like a hairdryer and your frame rate tanks. That’s throttling, macOS hardware trying to cool itself down.
Fix:
Use external cooling.
Keep power plugged in at all times.
Limit long render sessions; break them into shorter chunks.
At some point, all these little fixes start feeling like duct tape. You can make Lumion run on a Mac, but keeping it stable and fast is a constant balancing act. And that’s exactly why most professionals I know eventually take a different route, one that doesn’t involve fans screaming at full blast.
That’s where Vagon Cloud Computer comes in.
The Smarter Alternative — Vagon Cloud Computer
After spending hours tweaking Boot Camp partitions and fighting with thermal throttling, I eventually hit a point where I asked myself a simple question:
“Why am I doing all this when I could just run Lumion on a proper Windows machine, without giving up my Mac?”
That’s exactly what Vagon Cloud Computer makes possible.
With Vagon, you don’t install Windows locally. You simply log in from your browser or desktop app, and you get a high-performance Windows workspace that’s ready for demanding tools like Lumion, Unreal Engine, or Blender. Your Mac acts as a window, streaming what’s happening on that powerful machine running in the cloud.
And here’s the best part: it actually works.
No laggy virtualization, no driver issues, no weird GPU errors. Just smooth, real-time performance, even for complex Lumion scenes.
How It Works
Here’s the part I love about Vagon Cloud Computer, it doesn’t just make Lumion possible on Mac, it makes the whole setup effortless. You’re not installing Windows, tweaking settings, or managing partitions. You’re simply picking your machine and getting to work.
Here’s how it goes:
Step 1. Create your account.
Head to vagon.io and sign up for free. In less than a minute, you’ll have your personal dashboard, your control center for launching cloud computers, managing storage, and switching between setups.
Step 2. Choose your machine.
Vagon offers several power levels, each designed for a different workload.
Spark / Flame / Blaze / Lava – RTX-enabled A10G Tensor Core GPUs for professionals who need serious performance. Perfect for heavy Lumion renders, large environments, and cinematic animations.
Planet / Star / Galaxy – NVIDIA T4 GPU tiers that balance performance and cost, ideal for medium-sized projects or early-stage visualizations.
Sand / Lake / Sea / Ocean – CPU-focused setups for lightweight computing tasks or file preparation before rendering.
You can scale your performance up or down anytime, whether you’re testing small assets or exporting a full 4K video.
Step 3. Launch your workspace.
From your Mac, open your workspace in seconds, either through the browser or the Vagon desktop app. Behind the scenes, a powerful Windows machine boots up on Vagon’s servers, equipped with dedicated GPUs and high-speed storage.
Your Mac doesn’t do the heavy lifting, it just streams the live session, keeping everything smooth and responsive.
Step 4. Install Lumion and start creating.
Inside your Windows environment, download and install Lumion just like on any PC. No compatibility issues, no workarounds. Lumion runs natively inside that environment with full GPU acceleration, giving you real-time feedback, smooth navigation, and fast renders.
Step 5. Work seamlessly across sessions.
Your projects, textures, and renders stay stored in Vagon Files, built-in cloud storage that keeps everything synced between sessions. You can close your workspace anytime and pick up right where you left off later, even from a different device.
Everything happens remotely, so your Mac stays cool, quiet, and fast, even when you’re rendering massive Lumion scenes.
Why It’s a Game-Changer for Mac Users
Works with M1, M2, M3 Macs — no Boot Camp needed.
Zero setup stress — skip Windows installation entirely.
GPU performance on demand — scale up when rendering, scale down afterward.
Vagon Files integration — upload your project files once, access them anytime across sessions.
No long-term commitment — pay for performance only when you need it.
I’ve seen architects render large, photorealistic Lumion walkthroughs from a MacBook Air using Vagon Cloud Computer, something that would’ve been unthinkable a few years ago.
If your workflow involves modeling on your Mac (SketchUp, Rhino, Revit via Parallels, etc.) and rendering in Lumion, this setup gives you the best of both worlds. You keep your Mac workflow and access true Windows GPU power whenever you need it.
At this point, the real question isn’t “Can you run Lumion on a Mac?”, it’s “Do you still want to go through Boot Camp and overheating fans when there’s a smoother way?”
Realistic Expectations & Which Option to Pick
Let’s be real, both methods technically let you run Lumion on a Mac, but they’re not created equal. One involves hours of setup, constant temperature management, and limited GPU power. The other takes about ten minutes to set up and gives you the kind of performance most desktop PCs can’t match.
Here’s a quick breakdown based on what you actually plan to do with Lumion:
Use Case | Recommended Option | Setup Time | Performance Level |
Small student projects or testing Lumion | Boot Camp (Intel Mac only) | 4–6 hours | Basic |
Heavy rendering, large scenes, frequent animations | Vagon Cloud Computer | 10–15 minutes | High |
Apple Silicon (M1, M2, M3, M4) Macs | Vagon Cloud Computer | 10 minutes | High |
You just want to preview models occasionally | Boot Camp if Intel / Vagon for convenience | Depends | Medium |
Professional architectural visualization | Vagon Cloud Computer | Instant access | Highest |
If you’re still deciding between platforms, check out this head-to-head comparison of Lumion vs Twinmotion, it breaks down performance, ease of use, and output quality in real-world scenarios.
Boot Camp: The Hands-On Route
Boot Camp is for people who like to tinker. You’ll spend a few hours setting things up, partitioning disks, installing drivers, and hoping nothing breaks mid-way. Once it’s running, Lumion can perform decently on higher-end Intel Macs (like the 16-inch MacBook Pro with Radeon Pro 5600M).
But you’ll deal with heat, noise, and slower rendering compared to dedicated Windows workstations. And remember: Boot Camp doesn’t even exist for Apple Silicon Macs, so this path is basically legacy support now.
If you just want to test a few Lumion scenes, it’s fine. If you’re doing client work, it’s not sustainable.
Vagon Cloud Computer: The Practical Route
This is the option that feels like a shortcut, except it’s not cutting corners. It’s smarter resource management.
You log in, pick your performance tier, and you’re inside a powerful Windows workspace in minutes. No partitions, no installations, no troubleshooting.
Your Mac stays quiet. Lumion runs like it’s on a top-tier desktop with an RTX GPU. You can even scale your computer up for high-end renders, then downgrade to save costs when you’re done.
And the convenience factor is hard to overstate, switching from a MacBook at home to an iMac at the office or even an iPad for quick access feels seamless. Everything stays synced through Vagon Files, so you’re never chasing project folders again.
The Honest Take
If you’re using a Mac because you love the ecosystem, the UI, the design, the stability, then Boot Camp will always feel like you’re bending the rules. It works, but it’s a compromise.
Vagon Cloud Computer, on the other hand, feels like it was designed for people exactly like us, Mac users who love their machines but need the Windows horsepower that Lumion demands.
So if your question is, “Which one should I pick?”
Here’s my answer:
If you’re experimenting or learning Lumion casually, Boot Camp might do the trick.
But if you’re serious about your renders, deadlines, or performance, go with Vagon Cloud Computer and don’t look back.
Final Thoughts
I’ve always loved Macs. They’re quiet, reliable, and honestly, just feel good to work on. But when it comes to real-time 3D rendering, there’s no way around it, Lumion lives in the Windows world. It’s not about brand loyalty or specs. It’s about architecture, software design, and GPU compatibility.
I’ve tried almost everything over the years, Boot Camp, Parallels, external GPUs, remote streaming from a friend’s PC. Some of those setups worked for a while. Most didn’t. Every fix created a new problem: driver issues, throttling, or just that sinking feeling that I was forcing my Mac to be something it wasn’t meant to be.
Then I tried Vagon Cloud Computer, and it was the first time I could actually focus on designing again instead of troubleshooting. I opened Lumion, loaded a large residential project, and it ran as smoothly as on a dedicated RTX workstation, except I was sitting on my couch with a MacBook Air. No heat, no noise, no compromises.
That’s the thing: I don’t think every Mac user needs Vagon Cloud Computer. But I do think every Lumion user on Mac eventually ends up there. Because once you’ve spent days wrestling with Boot Camp setups or watching your fan scream during a render, you realize your time is worth more.
So here’s how I see it:
If you’re a student experimenting, go ahead and tinker with Boot Camp. It’s a great learning experience.
If you’re a professional who values your workflow, your deadlines, and your sanity, just skip the pain and launch Lumion through Vagon Cloud Computer.
Macs are incredible machines. Lumion is an incredible renderer. They just speak different languages.
Vagon translates between them perfectly.
FAQs
Can Lumion run natively on macOS?
No, Lumion doesn’t run natively on macOS. It’s a Windows-only application that relies on DirectX 11/12, which macOS doesn’t support. Even Apple’s most powerful M3 Max or M4 chips can’t run Lumion directly because there’s no macOS version available.Can I run Lumion on Apple Silicon Macs (M1, M2, M3, M4)?
Unfortunately, no. Apple Silicon Macs can’t use Boot Camp, and virtualization software like Parallels or VMware doesn’t provide full GPU access for Lumion’s rendering engine. If you’re on Apple Silicon and want to use Lumion, Vagon Cloud Computer is currently the only smooth and realistic option.What about using Boot Camp on an Intel Mac?
That’s the only semi-official method Lumion acknowledges. Boot Camp lets you install Windows on an Intel-based Mac, and Lumion can run there if your GPU meets the requirements. But it comes with trade-offs: loud fans, overheating, limited performance, and lots of setup time.Can I use Parallels or VMware Fusion to run Lumion?
Technically, you can install Windows with Parallels or VMware, but Lumion won’t work properly. Virtual machines can’t give Lumion direct GPU access, which it needs for real-time rendering. The result is constant lag, graphical glitches, or total crashes.Does Vagon Cloud Computer really work with Lumion?
Yes, and it works well. With Vagon Cloud Computer, you’re running Lumion on a high-end Windows machine equipped with an RTX-class GPU. You simply connect through your Mac, and everything streams seamlessly. It’s fast, stable, and compatible with both Intel and Apple Silicon Macs.Is Lumion planning to release a macOS version?
There’s no sign of an official macOS version on the horizon. Lumion continues to develop for Windows only, focusing on real-time rendering performance tied to DirectX. Unless Apple adopts full DirectX compatibility (which is highly unlikely), Lumion for macOS isn’t coming anytime soon.Can I render large projects from my MacBook Air or MacBook Pro?
Not locally, Lumion will either refuse to start or perform poorly due to GPU limitations. However, through Vagon Cloud Computer, you can render complex Lumion scenes from any Mac model, even a MacBook Air, since all the processing happens on a remote GPU workstation.Is using Vagon Cloud Computer secure?
Yes. Vagon runs sessions in isolated environments, and all connections are encrypted end-to-end. You can also store projects inside Vagon Files, making it easy to pick up your work across sessions without moving files manually.What’s the easiest way to get started?
Head to vagon.io, create an account, pick your performance tier, and launch your Windows workspace. From there, install Lumion like you would on a normal PC, and start rendering within minutes.
Get Beyond Your Computer Performance
Run applications on your cloud computer with the latest generation hardware. No more crashes or lags.

Trial includes 1 hour usage + 7 days of storage.
Summarize with AI

Ready to focus on your creativity?
Vagon gives you the ability to create & render projects, collaborate, and stream applications with the power of the best hardware.

Vagon Blog


Run heavy applications on any device with
your personal computer on the cloud.
San Francisco, California
Solutions
Vagon Teams
Vagon Streams
Use Cases
Resources
Vagon Blog
What Slows Down After Effects Projects?
The First 30 Minutes in Blender 3D: A Practical Workflow Guide
What’s New in Godot 4.7? Key Features, Upgrades, and Workflow Improvements
What Slows Down Blender 3D Projects?
What Slows Down Adobe Photoshop Projects?
The First 30 Minutes in Adobe Photoshop: A Practical Workflow Guide
Before You Start in Adobe Photoshop: A Practical Setup Checklist
What’s New in Unreal Engine 5.8? Key Features and Upgrade Advice
How to Run Windows on an iPad: 4 Best Ways (2026)
Vagon Blog
Run heavy applications on any device with
your personal computer on the cloud.
San Francisco, California
Solutions
Vagon Teams
Vagon Streams
Use Cases
Resources
Vagon Blog