Instant Connection for Pixel Streaming
— New Feature Automated Setup

How To Run DaVinci Resolve On iPad
How To Run DaVinci Resolve On iPad
VideoProduction
How To Run DaVinci Resolve On iPad
Table of Contents
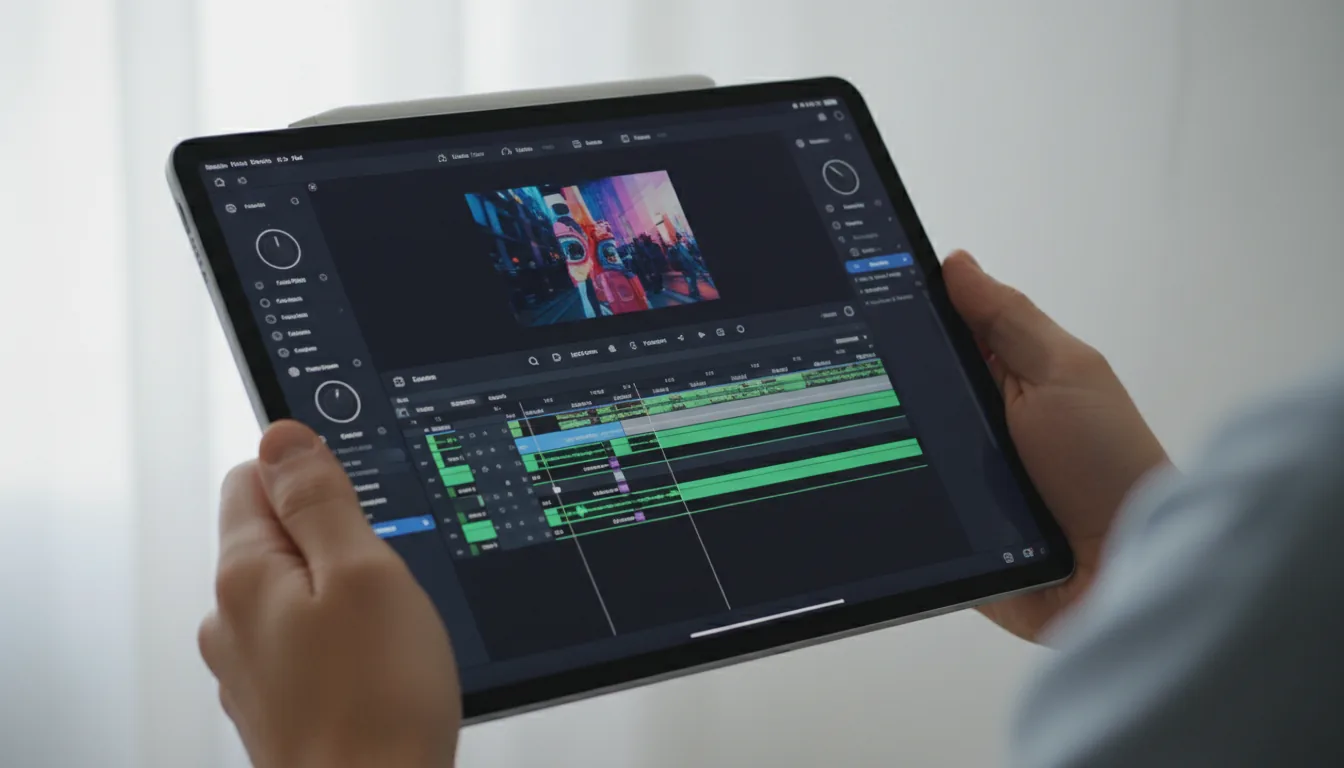
I’ll be honest, the first time I opened DaVinci Resolve on my iPad, I didn’t expect much. I figured it would crash, lag, or maybe just stare back at me like, “You really thought this would work?” After years of editing on full desktops with beefy GPUs and external drives, the idea of doing it all on a tablet felt like a stretch.
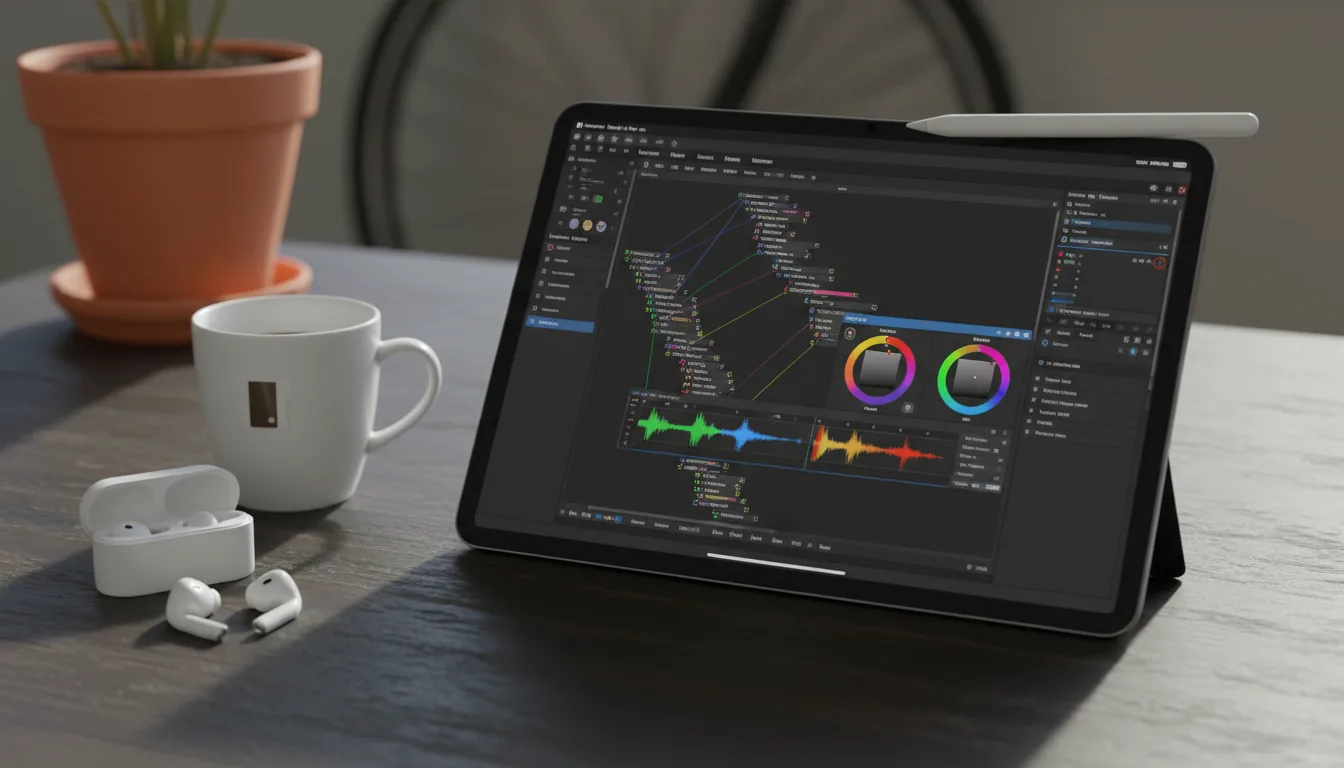
But here’s the thing, it actually ran. Not perfectly, not with every feature I’d use on desktop, but… surprisingly well. Within minutes, I was trimming clips, adjusting exposure, and color grading with my finger. It felt oddly futuristic, like editing a film on a glass sheet.
Still, the excitement came with questions. Where are the Fairlight and Fusion tabs? Why does playback stutter when I throw in a few nodes? Can this thing actually handle a full 4K project, or am I living on borrowed frames?
That’s when I realized Resolve on iPad isn’t just “Resolve Lite.” It’s a portable version that mostly keeps the soul of the original, fast cutting, intuitive grading, clean design, but with realistic limits.
In this post, I’ll break down exactly how far DaVinci Resolve on iPad can take you. What works beautifully, what doesn’t, and how you can turn your iPad into a legit editing station, especially when paired with cloud tools that unlock desktop-level power when you need it.
What’s Possible (and What Isn’t)
When Blackmagic Design dropped DaVinci Resolve for iPad back in December 2022, the internet kind of lost it. A full professional editor, on a tablet? It sounded like marketing magic. But Resolve for iPad isn’t just a shrunken version of the desktop app. It’s a re-engineered one.
Right now, the iPad version includes the Cut and Color pages, the two most-used parts of Resolve’s workflow. You can import clips, trim, add transitions, adjust grades, use LUTs, and export to YouTube, Dropbox, or local storage. It even supports HDR grading, Blackmagic Cloud, and external drives. On paper, that’s wild.
But it’s not the full Resolve experience. No Fusion. No Fairlight. No third-party plug-ins. And some effects that you might take for granted on desktop, like advanced noise reduction or motion blur, are either limited or missing entirely unless you buy the Studio upgrade ($95 one-time). And while it’s not quite a motion graphics powerhouse like After Effects (here’s how After Effects compares to DaVinci Resolve), Resolve on iPad still handles basic visual polish with ease.
In my experience, Resolve runs best on the M1 or M2 iPad Pro. It technically installs on anything with an A12 chip or later, but let’s be real, on older iPads, playback lags once you hit a few color nodes. Users on Reddit echo the same: “It’s great for rough cuts and basic color, but you’re not finishing a Netflix series on it.”
Still, for a lot of editors, that’s enough. If your workflow is lightweight, travel vlogs, short content, YouTube edits, you’ll be surprised how much ground you can cover. The interface feels familiar, the performance is snappy, and the learning curve is refreshingly short if you already know Resolve.
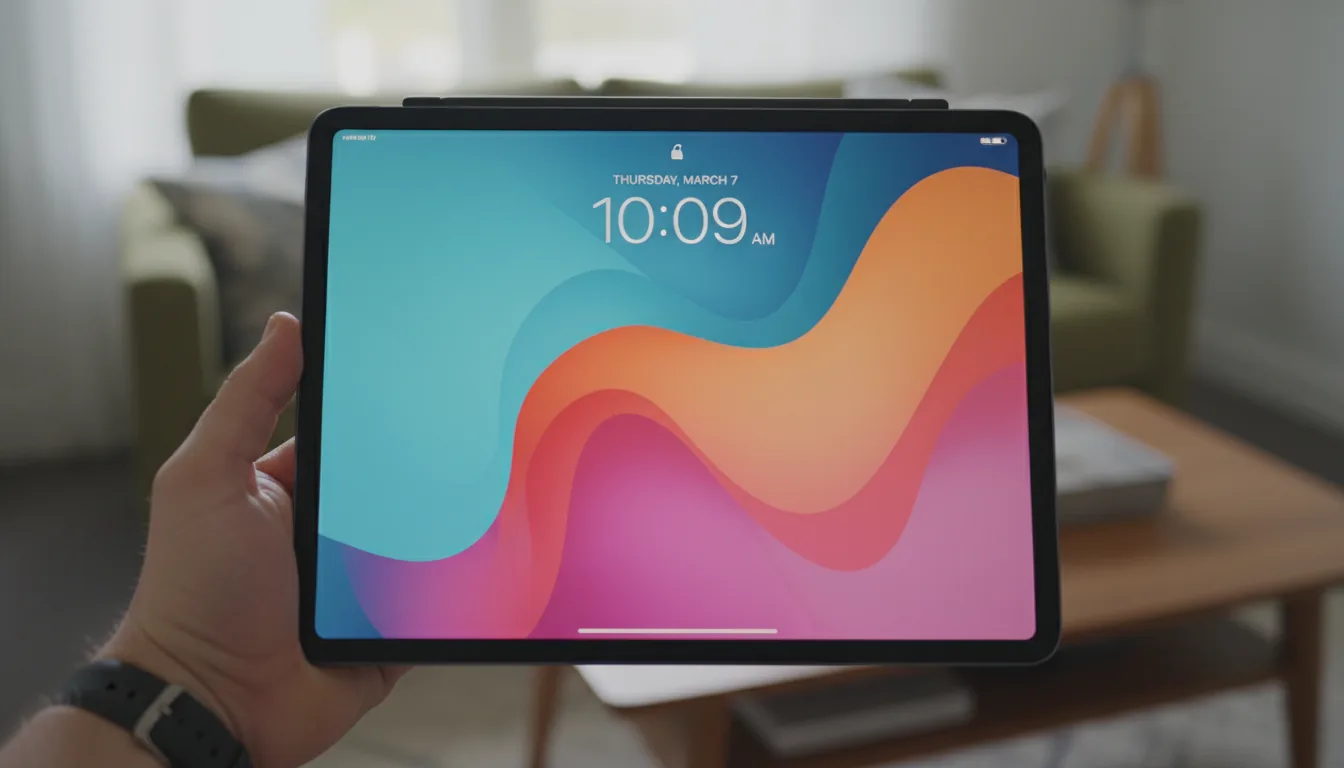
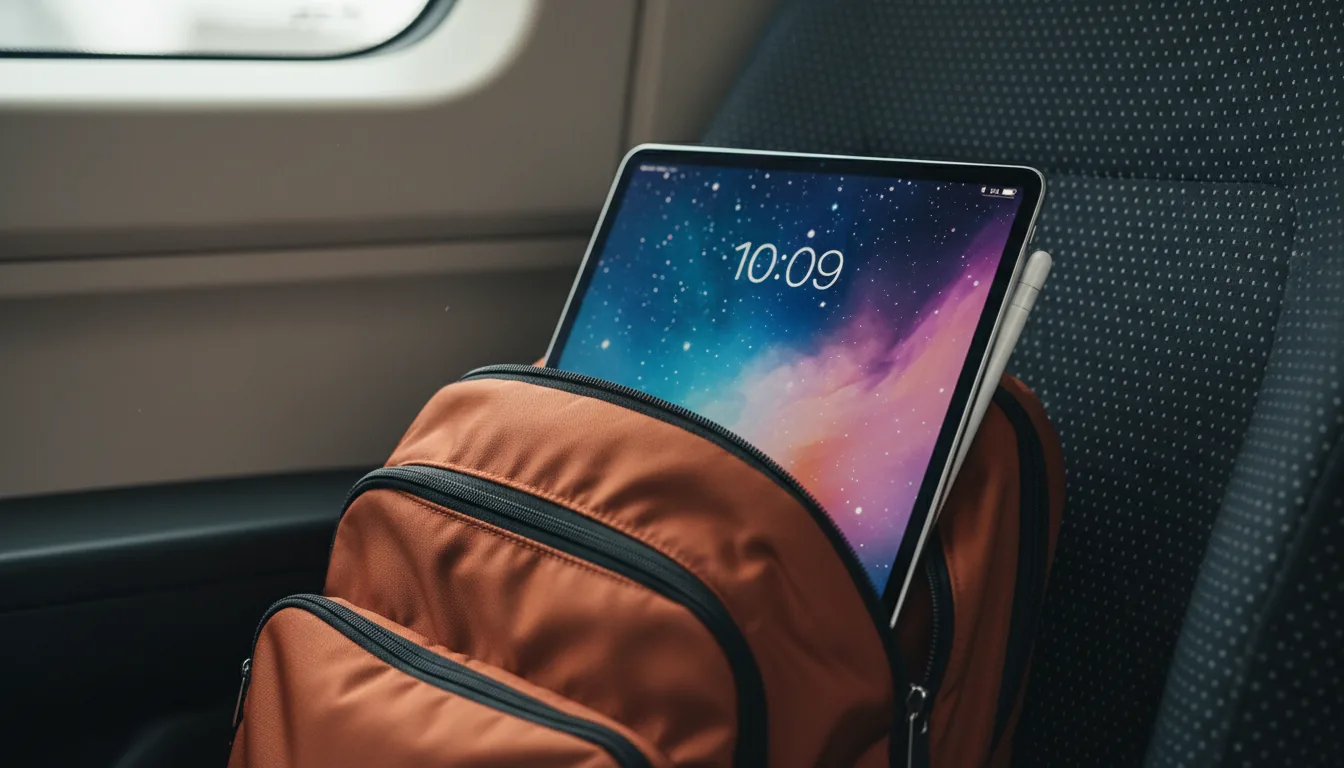
So yes, it’s possible to do real editing work on an iPad. Just don’t expect it to replace your main workstation yet. Think of it as a portable version of your studio, one that fits in your backpack and wakes up instantly when inspiration hits.
Users on Reddit echo the same: “It’s great for rough cuts and basic color, but you’re not finishing a Netflix series on it.” Still, you’d be surprised how much you can squeeze out of low-end devices running DaVinci Resolve with the right approach.
What You Need Before You Start
Before you jump into editing on the iPad, there’s one hard truth to accept, hardware still matters. Even though DaVinci Resolve has been beautifully optimized for touch, the iPad you’re using will determine whether your timeline flies or freezes.
If you’ve got an M1 or M2 iPad Pro, you’re golden. Those models have enough GPU power to handle 4K editing and color grading without breaking a sweat. The M4 iPad Pro, when paired with the latest iPadOS, feels shockingly close to desktop-level smoothness. But if you’re on an older iPad Air or base iPad with an A12 chip, it’ll still run, just expect slower playback and longer render times.
You’ll also want iPadOS 16 or later, since Resolve uses the system’s advanced file management and external drive support. Speaking of drives: get one. External SSDs like the Samsung T7 or SanDisk Extreme are essential, because high-resolution footage will fill your internal storage faster than you can say “media offline.”
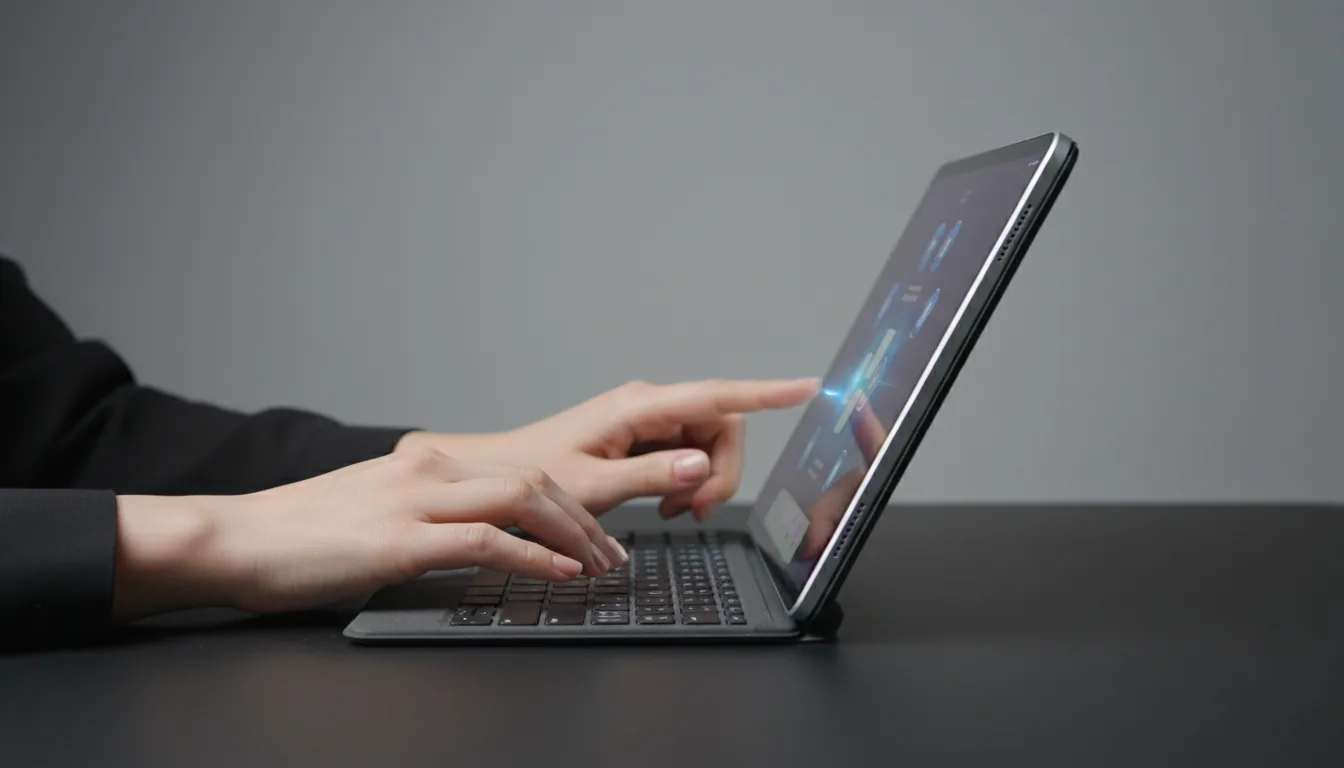
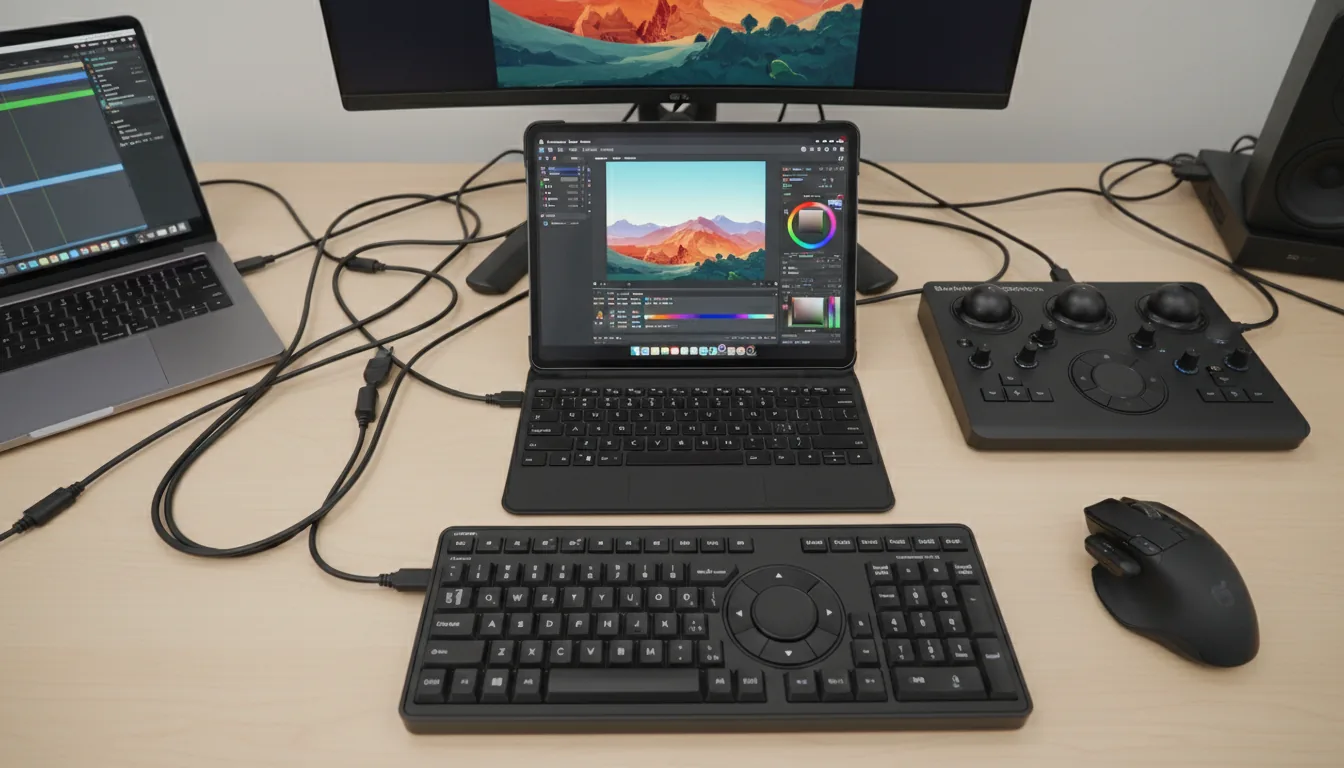
Accessories help a ton. A Magic Keyboard or any Bluetooth keyboard gives you shortcuts, which make Resolve feel instantly more professional. A trackpad or mouse adds precision, especially when scrubbing or keyframing. The Apple Pencil isn’t necessary, but if you color grade often, it’s genuinely fun, dragging color wheels with a stylus feels surprisingly natural.
Finally, be realistic about your project scale. If you’re cutting short-form videos, YouTube intros, or B-roll-heavy travel pieces, you’ll have a smooth ride. But if you’re stacking multiple 6K RAW clips and Fusion effects… well, the iPad will remind you it’s still a tablet.
The setup isn’t complicated, just a few smart gear choices turn the iPad into a serious editing platform. And once you’ve got those in place, Resolve starts to feel less like a novelty, and more like a real part of your creative workflow.
Of course, if you’re looking for a laptop that performs more like a mobile workstation, here are some of the best laptops to smoothly run DaVinci Resolve without breaking a sweat.
Getting Started Step-by-Step
Alright, let’s get practical. If you’ve got your iPad ready and a few clips waiting to be edited, here’s how to actually get rolling with DaVinci Resolve for iPad, no fluff, just the stuff that works.
Step 1: Download and install
Head to the App Store and grab DaVinci Resolve for iPad. It’s free to install, with the option to upgrade to Resolve Studio (a one-time $95 purchase) if you want extra color tools, noise reduction, and HDR support. Installation is quick, and the app takes up roughly 2–3 GB of space.

Step 2: Set up your first project
When you open Resolve, you’ll see the familiar Project Manager window. Tap “New Project,” name it, and choose your resolution and frame rate, 1080p at 24 or 30 fps works great for starters. If you’re editing 4K, just make sure your storage can handle it.

Step 3: Import your media
You can import from the Files app, external SSDs, or even your iCloud Drive. Resolve for iPad also supports Blackmagic Cloud, so you can sync your projects across devices or share timelines. I’ve found that plugging in an external SSD through a USB-C hub is the fastest, most reliable method.

Step 4: Learn your pages
Here’s the twist: you only get the Cut and Color pages on iPad, not Edit, Fusion, or Fairlight (yet).
Cut page: for trimming, rearranging, adding transitions, and basic titles. It’s built for speed and simplicity.
Color page: for all things grading, primary wheels, contrast, saturation, LUTs, and nodes.

Step 5: Make your first edit
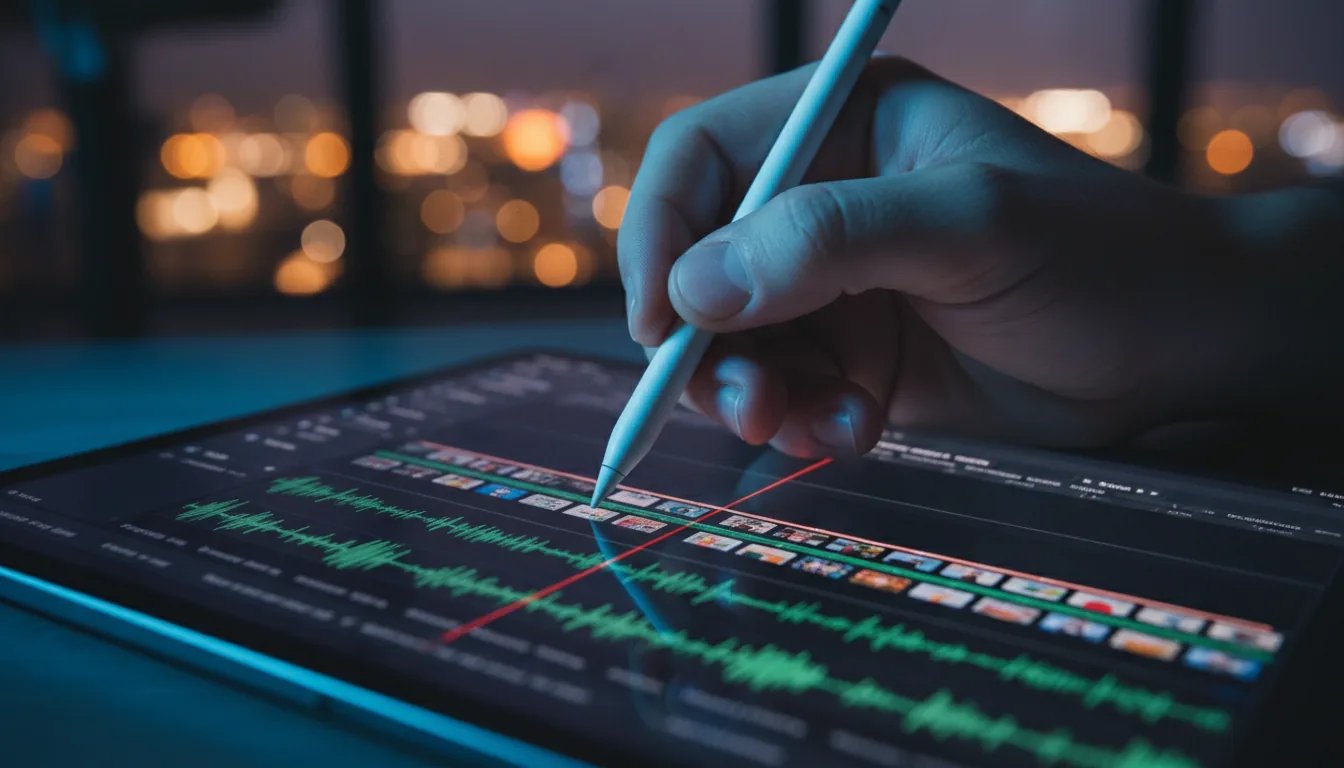
Drag clips to your timeline, trim with gestures, pinch to zoom. Add transitions using the menu at the bottom, tweak audio levels, and try a quick grade. Play around, you’ll be surprised how tactile editing feels.
Step 6: Export like a pro
Tap Deliver (top-right corner) and pick your output settings: resolution, codec, and target platform. You can export directly to YouTube, Dropbox, or local storage.
That’s it, in a few minutes, you’re editing with pro software on a tablet. It’s surprisingly liberating, even with limitations. Once you get used to the layout, you start forgetting this isn’t a desktop… until your battery hits 15%, anyway.

Tips & Tricks That Actually Help
Once you’ve spent a few hours inside DaVinci Resolve on iPad, you start to realize, the difference between a fun editing session and a frustrating one usually comes down to workflow. A few tweaks make all the difference.
First: work off an external SSD. Internal iPad storage might be fast, but it’s also limited and can choke on large media caches. I use a 1TB Samsung T7 connected through a small USB-C hub, keeps things snappy and frees up the iPad for performance. You can even set the SSD as your default cache location from the Project Settings menu.
Second: edit in proxy or optimized media. If your footage is heavy (4K, 10-bit, or RAW), Resolve for iPad lets you generate proxy files automatically. It’s the same trick editors have used for years, lighter files for smoother playback, then relink to full-quality clips for export.
Third: shortcuts are your secret weapon. The Magic Keyboard or any Bluetooth keyboard unlocks familiar desktop Resolve commands. J-K-L for playback, Cmd+Z for undo, Shift+Z to fit the timeline. Suddenly, you’re editing at full speed again.

Fourth: get comfortable with gestures. Pinch to zoom the timeline, double-tap to reset zoom, swipe up for clip inspector. It feels awkward at first, but after a while, you’ll notice your hands moving instinctively, it’s surprisingly satisfying.
Fifth: back up often. Resolve for iPad is stable, but it’s still version 1.x software. Crashes happen. Save your project manually after major edits, or better, connect to Blackmagic Cloud for automatic syncing.
And finally, know when to stop pushing it. I once tried to grade a 4K ProRes file with four nodes and multiple masks, and watched the playback crawl into single digits. Lesson learned. Keep grades clean and efficient; your iPad will thank you.
These small adjustments can turn Resolve on iPad from a “nice experiment” into something you actually enjoy using, a pocket-sized studio that’s more powerful than most laptops from a few years ago.
Rendering taking longer than your coffee break? There are some solid ways to speed up rendering in DaVinci Resolve that go beyond just lowering your export settings.
When You Hit a Wall
At some point, every editor reaches the same moment of truth, the iPad just can’t keep up. Maybe your playback stutters the second you add a third color node. Maybe your timeline freezes while scrubbing. Or maybe Resolve simply closes mid-edit, leaving you staring at the home screen, wondering what you just did to deserve it.
That’s when reality sets in: as powerful as iPads have become, they’re still tablets, not full editing rigs. The app’s missing pieces, Fusion, Fairlight, and third-party plugins, mean you can’t finish a complex project entirely on the iPad. Even rendering long 4K timelines can take ages, and multitasking between big clips eats RAM like popcorn.
In my experience, this isn’t a flaw, it’s a design choice. Blackmagic didn’t want to cram the entire desktop beast into iPadOS. They built something lighter, something portable. The trick is knowing when to stop pushing it and when to switch gears.
That’s usually the moment I hand things off to a cloud workstation. Instead of forcing the iPad to behave like a full PC, I connect to one that already is. You can still use the iPad as your controller, touchscreen, keyboard, and all, but the heavy lifting happens elsewhere.
In the next section, I’ll show how I use Vagon Cloud Computer for exactly that, when Resolve projects get too heavy for the iPad alone, but I still want to stay mobile.
And if you’re still considering building a powerhouse of your own, here’s a roundup of the top graphics cards to maximize DaVinci Resolve efficiency before you commit to the specs.
How Vagon Cloud Computer Fits In
Here’s where things get interesting. When DaVinci Resolve on iPad starts showing its limits, big timelines, heavy grades, complex masks, you don’t have to ditch the iPad altogether. You can keep using it as your editing interface while letting something far stronger do the hard work behind the scenes. That’s where Vagon Cloud Computer comes in.
Think of Vagon as your high-performance remote workstation in the cloud. Instead of buying a $3,000 desktop or dragging a bulky laptop everywhere, you spin up a powerful computer instantly, complete with a dedicated GPU, massive RAM, and storage that’s built for 3D, rendering, and post-production tasks. And yes, it runs the full desktop version of DaVinci Resolve.
Here’s how it works:
You launch Vagon on your iPad through your browser or the dedicated app. In a few seconds, you’re connected to your cloud desktop. From there, you install (or open) your usual Resolve project and continue exactly where you left off. No extra cables. No setup headaches. Just performance that feels like you’re sitting in front of a high-end PC, even if you’re working from a café or a train seat.
The real win? You can seamlessly switch between your local iPad and cloud workflow. Do your rough cuts, selects, or first-pass color on the iPad version of Resolve while you’re on the go. Then, when it’s time for final grading or heavy compositing, upload your media to Vagon and finish the project remotely.
I’ve used this setup for several projects, and it’s genuinely freeing. There’s no performance anxiety, no hardware envy, just flexibility. You decide where and how your editing happens.
Sure, you’ll need a decent internet connection, and there’s a small learning curve in syncing files efficiently. But once you’ve tried it, it’s hard to go back to lugging around a workstation. The iPad stays your creative control center, and Vagon Cloud Computer becomes the engine powering it all.

If you're curious how Resolve leverages GPU acceleration under the hood, especially in heavier projects, this breakdown on how to use GPU on DaVinci Resolve 17 is worth checking out.
Real Workflow Examples
Let’s make it real.
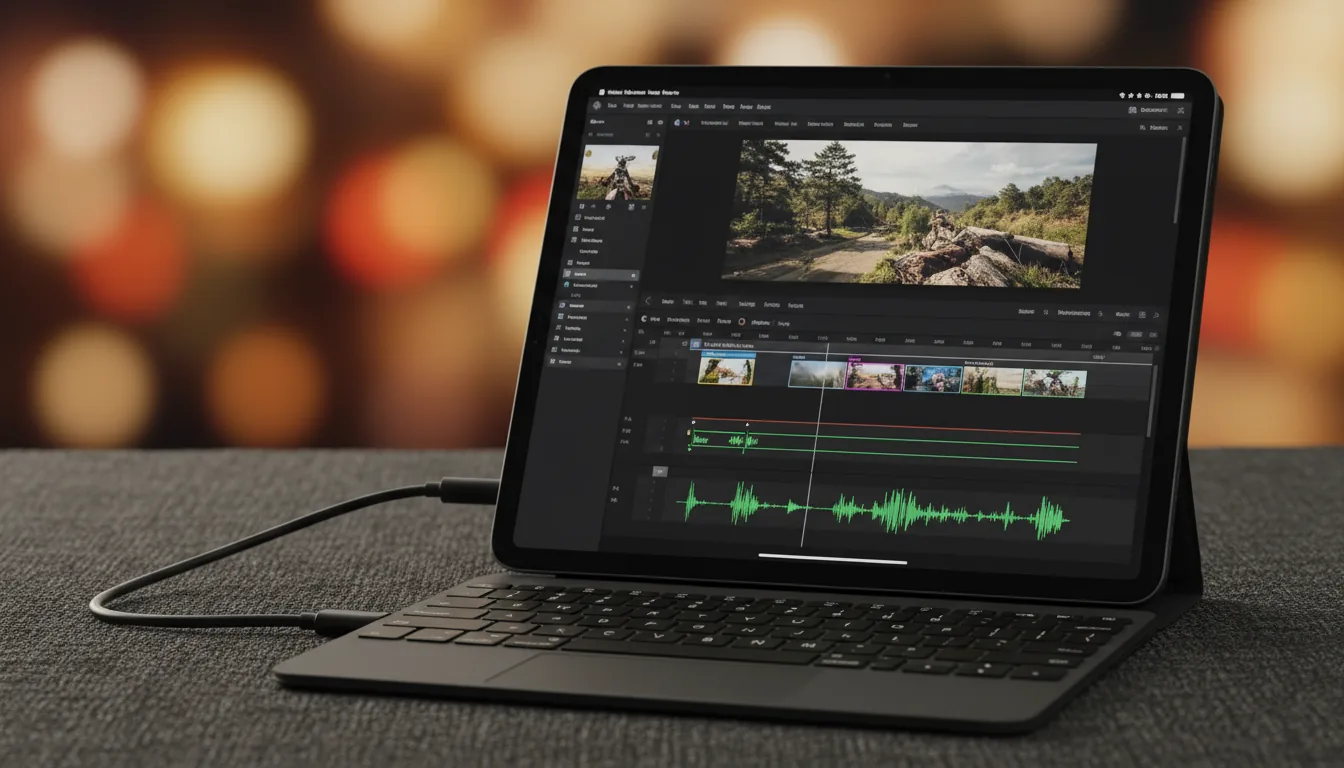
A few months ago, I cut a short travel vlog entirely on the iPad version of Resolve while I was in Cappadocia. Just clips from my camera, an external SSD, and a Magic Keyboard. The editing part was smooth, trimming, transitions, quick color tweaks, all felt effortless. But once I started layering LUTs and minor noise reduction, the playback tanked.
So I uploaded the same project folder to Vagon Cloud Computer, fired up a full desktop Resolve session remotely, and finished grading in about half the time it would’ve taken locally. The iPad became my control panel, fluid gestures, quick scrubbing, while Vagon’s GPU handled the heavy lifting.
Another case: a YouTuber I follow edits short-form videos on his iPad Pro during flights, then logs into his Vagon account once he’s home to render everything in 4K with proper effects. His reasoning was simple, “The iPad lets me stay creative anywhere; Vagon lets me finish like a pro.”
That’s exactly the balance this combo offers. You don’t have to choose between portability and power anymore. You just decide which device does what, and let the workflow adapt to you, not the other way around.
Common Mistakes to Avoid
Here’s the part that’ll save you hours of frustration, the classic pitfalls most people fall into when trying to run Resolve on iPad.
First, don’t rely solely on internal storage. iPad footage stacks up fast, and Resolve’s cache can balloon without warning. Always use an external SSD or at least clean your cache between projects.
Second, avoid overloading your grades. Three or four nodes are fine; ten with masks and blurs? You’ll be watching a slideshow.
Third, never assume autosave has your back. It’s there, but it’s not magic. Manually save often or sync to Blackmagic Cloud.
Fourth, skip huge codecs like ProRes RAW or RED footage unless you’re using Vagon or another high-powered setup.
And finally, don’t expect desktop perfection. Resolve on iPad is brilliant for what it is, but it’s still a compact version. Learn its limits, and it’ll reward you. Fight them, and it’ll remind you you’re editing on a tablet.
Before you pull your hair out during export, it’s worth reading this complete optimization guide to render faster in DaVinci Resolve — it covers both quick fixes and deeper settings you might overlook.
Final Thoughts
If there’s one takeaway from using DaVinci Resolve on iPad, it’s this, you can absolutely edit seriously on it, but you have to understand what it’s built for. It’s not meant to replace your desktop setup. It’s meant to extend it, to give you the freedom to cut, grade, and experiment wherever inspiration hits.
The first time I exported a finished video straight from my iPad, it felt surreal. A few years ago, this kind of power in a tablet would’ve sounded impossible. Now, I can literally color-grade a project on a train. That’s not just cool, it’s creative freedom in its purest form.
Still, when projects grow bigger, heavier, or more demanding, that’s where Vagon Cloud Computer takes over. It bridges the gap between portability and raw power, letting you finish what you start without limits.
So go ahead. Download Resolve, plug in your SSD, try editing something real. You’ll find out quickly where the iPad shines, and where a cloud computer makes all the difference.
The tools are finally flexible enough to move with you. The question now isn’t “Can you edit on iPad?”
It’s “Why aren’t you already doing it?”
FAQ
1. Can you run the full version of DaVinci Resolve on iPad?
Not exactly. The iPad version includes the Cut and Color pages but skips Fusion and Fairlight for now. You can do real editing and grading work, but it’s not feature-complete compared to desktop Resolve.
2. Which iPads support DaVinci Resolve?
You’ll need at least an A12 Bionic chip (iPad Air 3rd gen or newer). For smooth performance, the M1, M2, or M4 iPad Pro models are ideal, they handle 4K footage and color correction easily.
3. Does it support external drives?
Yes. Resolve on iPad works great with external SSDs through USB-C. It’s the best way to manage big media files and avoid storage bottlenecks.
4. Can I use a keyboard or mouse?
Absolutely. The Magic Keyboard or any Bluetooth keyboard gives you shortcuts, and a mouse or trackpad makes editing faster. Touch works well too, especially for quick trims or color wheels.
5. Can I collaborate using Blackmagic Cloud?
Yes. Blackmagic Cloud lets you sync projects between devices and share them with collaborators. It’s perfect for switching between your iPad and another workstation (or even your Vagon setup).
6. Is the free version enough?
For most people, yes. The free version supports editing, color correction, and exporting up to UHD. The Studio upgrade ($95) adds advanced noise reduction, HDR tools, and extra codecs, worth it if you’re doing professional color work.
7. How does Vagon Cloud Computer help with DaVinci Resolve?
When your iPad hits its performance ceiling, Vagon Cloud Computer gives you instant access to a high-power remote machine. You can run the full desktop Resolve, render complex grades, and finish projects without buying expensive hardware. Your iPad becomes your control surface, lightweight, portable, and connected to serious GPU power in the cloud.
8. Can I really edit full 4K projects this way?
Yes, but expect some trade-offs. You’ll need a stable, fast internet connection for smooth streaming on Vagon. The experience is near-desktop level once connected, and your renders will be lightning fast compared to local iPad hardware.
9. So, should I switch completely to iPad editing?
Not yet, but you can integrate it into your workflow. Use the iPad for rough cuts, mobile edits, or on-the-go grading. Then fire up Vagon when you need horsepower. Together, they make a surprisingly powerful combo for modern editors.
I’ll be honest, the first time I opened DaVinci Resolve on my iPad, I didn’t expect much. I figured it would crash, lag, or maybe just stare back at me like, “You really thought this would work?” After years of editing on full desktops with beefy GPUs and external drives, the idea of doing it all on a tablet felt like a stretch.
But here’s the thing, it actually ran. Not perfectly, not with every feature I’d use on desktop, but… surprisingly well. Within minutes, I was trimming clips, adjusting exposure, and color grading with my finger. It felt oddly futuristic, like editing a film on a glass sheet.
Still, the excitement came with questions. Where are the Fairlight and Fusion tabs? Why does playback stutter when I throw in a few nodes? Can this thing actually handle a full 4K project, or am I living on borrowed frames?
That’s when I realized Resolve on iPad isn’t just “Resolve Lite.” It’s a portable version that mostly keeps the soul of the original, fast cutting, intuitive grading, clean design, but with realistic limits.
In this post, I’ll break down exactly how far DaVinci Resolve on iPad can take you. What works beautifully, what doesn’t, and how you can turn your iPad into a legit editing station, especially when paired with cloud tools that unlock desktop-level power when you need it.
What’s Possible (and What Isn’t)
When Blackmagic Design dropped DaVinci Resolve for iPad back in December 2022, the internet kind of lost it. A full professional editor, on a tablet? It sounded like marketing magic. But Resolve for iPad isn’t just a shrunken version of the desktop app. It’s a re-engineered one.
Right now, the iPad version includes the Cut and Color pages, the two most-used parts of Resolve’s workflow. You can import clips, trim, add transitions, adjust grades, use LUTs, and export to YouTube, Dropbox, or local storage. It even supports HDR grading, Blackmagic Cloud, and external drives. On paper, that’s wild.
But it’s not the full Resolve experience. No Fusion. No Fairlight. No third-party plug-ins. And some effects that you might take for granted on desktop, like advanced noise reduction or motion blur, are either limited or missing entirely unless you buy the Studio upgrade ($95 one-time). And while it’s not quite a motion graphics powerhouse like After Effects (here’s how After Effects compares to DaVinci Resolve), Resolve on iPad still handles basic visual polish with ease.
In my experience, Resolve runs best on the M1 or M2 iPad Pro. It technically installs on anything with an A12 chip or later, but let’s be real, on older iPads, playback lags once you hit a few color nodes. Users on Reddit echo the same: “It’s great for rough cuts and basic color, but you’re not finishing a Netflix series on it.”
Still, for a lot of editors, that’s enough. If your workflow is lightweight, travel vlogs, short content, YouTube edits, you’ll be surprised how much ground you can cover. The interface feels familiar, the performance is snappy, and the learning curve is refreshingly short if you already know Resolve.
So yes, it’s possible to do real editing work on an iPad. Just don’t expect it to replace your main workstation yet. Think of it as a portable version of your studio, one that fits in your backpack and wakes up instantly when inspiration hits.
Users on Reddit echo the same: “It’s great for rough cuts and basic color, but you’re not finishing a Netflix series on it.” Still, you’d be surprised how much you can squeeze out of low-end devices running DaVinci Resolve with the right approach.
What You Need Before You Start
Before you jump into editing on the iPad, there’s one hard truth to accept, hardware still matters. Even though DaVinci Resolve has been beautifully optimized for touch, the iPad you’re using will determine whether your timeline flies or freezes.
If you’ve got an M1 or M2 iPad Pro, you’re golden. Those models have enough GPU power to handle 4K editing and color grading without breaking a sweat. The M4 iPad Pro, when paired with the latest iPadOS, feels shockingly close to desktop-level smoothness. But if you’re on an older iPad Air or base iPad with an A12 chip, it’ll still run, just expect slower playback and longer render times.
You’ll also want iPadOS 16 or later, since Resolve uses the system’s advanced file management and external drive support. Speaking of drives: get one. External SSDs like the Samsung T7 or SanDisk Extreme are essential, because high-resolution footage will fill your internal storage faster than you can say “media offline.”
Accessories help a ton. A Magic Keyboard or any Bluetooth keyboard gives you shortcuts, which make Resolve feel instantly more professional. A trackpad or mouse adds precision, especially when scrubbing or keyframing. The Apple Pencil isn’t necessary, but if you color grade often, it’s genuinely fun, dragging color wheels with a stylus feels surprisingly natural.
Finally, be realistic about your project scale. If you’re cutting short-form videos, YouTube intros, or B-roll-heavy travel pieces, you’ll have a smooth ride. But if you’re stacking multiple 6K RAW clips and Fusion effects… well, the iPad will remind you it’s still a tablet.
The setup isn’t complicated, just a few smart gear choices turn the iPad into a serious editing platform. And once you’ve got those in place, Resolve starts to feel less like a novelty, and more like a real part of your creative workflow.
Of course, if you’re looking for a laptop that performs more like a mobile workstation, here are some of the best laptops to smoothly run DaVinci Resolve without breaking a sweat.
Getting Started Step-by-Step
Alright, let’s get practical. If you’ve got your iPad ready and a few clips waiting to be edited, here’s how to actually get rolling with DaVinci Resolve for iPad, no fluff, just the stuff that works.
Step 1: Download and install
Head to the App Store and grab DaVinci Resolve for iPad. It’s free to install, with the option to upgrade to Resolve Studio (a one-time $95 purchase) if you want extra color tools, noise reduction, and HDR support. Installation is quick, and the app takes up roughly 2–3 GB of space.
Step 2: Set up your first project
When you open Resolve, you’ll see the familiar Project Manager window. Tap “New Project,” name it, and choose your resolution and frame rate, 1080p at 24 or 30 fps works great for starters. If you’re editing 4K, just make sure your storage can handle it.
Step 3: Import your media
You can import from the Files app, external SSDs, or even your iCloud Drive. Resolve for iPad also supports Blackmagic Cloud, so you can sync your projects across devices or share timelines. I’ve found that plugging in an external SSD through a USB-C hub is the fastest, most reliable method.
Step 4: Learn your pages
Here’s the twist: you only get the Cut and Color pages on iPad, not Edit, Fusion, or Fairlight (yet).
Cut page: for trimming, rearranging, adding transitions, and basic titles. It’s built for speed and simplicity.
Color page: for all things grading, primary wheels, contrast, saturation, LUTs, and nodes.
Step 5: Make your first edit
Drag clips to your timeline, trim with gestures, pinch to zoom. Add transitions using the menu at the bottom, tweak audio levels, and try a quick grade. Play around, you’ll be surprised how tactile editing feels.
Step 6: Export like a pro
Tap Deliver (top-right corner) and pick your output settings: resolution, codec, and target platform. You can export directly to YouTube, Dropbox, or local storage.
That’s it, in a few minutes, you’re editing with pro software on a tablet. It’s surprisingly liberating, even with limitations. Once you get used to the layout, you start forgetting this isn’t a desktop… until your battery hits 15%, anyway.
Tips & Tricks That Actually Help
Once you’ve spent a few hours inside DaVinci Resolve on iPad, you start to realize, the difference between a fun editing session and a frustrating one usually comes down to workflow. A few tweaks make all the difference.
First: work off an external SSD. Internal iPad storage might be fast, but it’s also limited and can choke on large media caches. I use a 1TB Samsung T7 connected through a small USB-C hub, keeps things snappy and frees up the iPad for performance. You can even set the SSD as your default cache location from the Project Settings menu.
Second: edit in proxy or optimized media. If your footage is heavy (4K, 10-bit, or RAW), Resolve for iPad lets you generate proxy files automatically. It’s the same trick editors have used for years, lighter files for smoother playback, then relink to full-quality clips for export.
Third: shortcuts are your secret weapon. The Magic Keyboard or any Bluetooth keyboard unlocks familiar desktop Resolve commands. J-K-L for playback, Cmd+Z for undo, Shift+Z to fit the timeline. Suddenly, you’re editing at full speed again.
Fourth: get comfortable with gestures. Pinch to zoom the timeline, double-tap to reset zoom, swipe up for clip inspector. It feels awkward at first, but after a while, you’ll notice your hands moving instinctively, it’s surprisingly satisfying.
Fifth: back up often. Resolve for iPad is stable, but it’s still version 1.x software. Crashes happen. Save your project manually after major edits, or better, connect to Blackmagic Cloud for automatic syncing.
And finally, know when to stop pushing it. I once tried to grade a 4K ProRes file with four nodes and multiple masks, and watched the playback crawl into single digits. Lesson learned. Keep grades clean and efficient; your iPad will thank you.
These small adjustments can turn Resolve on iPad from a “nice experiment” into something you actually enjoy using, a pocket-sized studio that’s more powerful than most laptops from a few years ago.
Rendering taking longer than your coffee break? There are some solid ways to speed up rendering in DaVinci Resolve that go beyond just lowering your export settings.
When You Hit a Wall
At some point, every editor reaches the same moment of truth, the iPad just can’t keep up. Maybe your playback stutters the second you add a third color node. Maybe your timeline freezes while scrubbing. Or maybe Resolve simply closes mid-edit, leaving you staring at the home screen, wondering what you just did to deserve it.
That’s when reality sets in: as powerful as iPads have become, they’re still tablets, not full editing rigs. The app’s missing pieces, Fusion, Fairlight, and third-party plugins, mean you can’t finish a complex project entirely on the iPad. Even rendering long 4K timelines can take ages, and multitasking between big clips eats RAM like popcorn.
In my experience, this isn’t a flaw, it’s a design choice. Blackmagic didn’t want to cram the entire desktop beast into iPadOS. They built something lighter, something portable. The trick is knowing when to stop pushing it and when to switch gears.
That’s usually the moment I hand things off to a cloud workstation. Instead of forcing the iPad to behave like a full PC, I connect to one that already is. You can still use the iPad as your controller, touchscreen, keyboard, and all, but the heavy lifting happens elsewhere.
In the next section, I’ll show how I use Vagon Cloud Computer for exactly that, when Resolve projects get too heavy for the iPad alone, but I still want to stay mobile.
And if you’re still considering building a powerhouse of your own, here’s a roundup of the top graphics cards to maximize DaVinci Resolve efficiency before you commit to the specs.
How Vagon Cloud Computer Fits In
Here’s where things get interesting. When DaVinci Resolve on iPad starts showing its limits, big timelines, heavy grades, complex masks, you don’t have to ditch the iPad altogether. You can keep using it as your editing interface while letting something far stronger do the hard work behind the scenes. That’s where Vagon Cloud Computer comes in.
Think of Vagon as your high-performance remote workstation in the cloud. Instead of buying a $3,000 desktop or dragging a bulky laptop everywhere, you spin up a powerful computer instantly, complete with a dedicated GPU, massive RAM, and storage that’s built for 3D, rendering, and post-production tasks. And yes, it runs the full desktop version of DaVinci Resolve.
Here’s how it works:
You launch Vagon on your iPad through your browser or the dedicated app. In a few seconds, you’re connected to your cloud desktop. From there, you install (or open) your usual Resolve project and continue exactly where you left off. No extra cables. No setup headaches. Just performance that feels like you’re sitting in front of a high-end PC, even if you’re working from a café or a train seat.
The real win? You can seamlessly switch between your local iPad and cloud workflow. Do your rough cuts, selects, or first-pass color on the iPad version of Resolve while you’re on the go. Then, when it’s time for final grading or heavy compositing, upload your media to Vagon and finish the project remotely.
I’ve used this setup for several projects, and it’s genuinely freeing. There’s no performance anxiety, no hardware envy, just flexibility. You decide where and how your editing happens.
Sure, you’ll need a decent internet connection, and there’s a small learning curve in syncing files efficiently. But once you’ve tried it, it’s hard to go back to lugging around a workstation. The iPad stays your creative control center, and Vagon Cloud Computer becomes the engine powering it all.
If you're curious how Resolve leverages GPU acceleration under the hood, especially in heavier projects, this breakdown on how to use GPU on DaVinci Resolve 17 is worth checking out.
Real Workflow Examples
Let’s make it real.
A few months ago, I cut a short travel vlog entirely on the iPad version of Resolve while I was in Cappadocia. Just clips from my camera, an external SSD, and a Magic Keyboard. The editing part was smooth, trimming, transitions, quick color tweaks, all felt effortless. But once I started layering LUTs and minor noise reduction, the playback tanked.
So I uploaded the same project folder to Vagon Cloud Computer, fired up a full desktop Resolve session remotely, and finished grading in about half the time it would’ve taken locally. The iPad became my control panel, fluid gestures, quick scrubbing, while Vagon’s GPU handled the heavy lifting.
Another case: a YouTuber I follow edits short-form videos on his iPad Pro during flights, then logs into his Vagon account once he’s home to render everything in 4K with proper effects. His reasoning was simple, “The iPad lets me stay creative anywhere; Vagon lets me finish like a pro.”
That’s exactly the balance this combo offers. You don’t have to choose between portability and power anymore. You just decide which device does what, and let the workflow adapt to you, not the other way around.
Common Mistakes to Avoid
Here’s the part that’ll save you hours of frustration, the classic pitfalls most people fall into when trying to run Resolve on iPad.
First, don’t rely solely on internal storage. iPad footage stacks up fast, and Resolve’s cache can balloon without warning. Always use an external SSD or at least clean your cache between projects.
Second, avoid overloading your grades. Three or four nodes are fine; ten with masks and blurs? You’ll be watching a slideshow.
Third, never assume autosave has your back. It’s there, but it’s not magic. Manually save often or sync to Blackmagic Cloud.
Fourth, skip huge codecs like ProRes RAW or RED footage unless you’re using Vagon or another high-powered setup.
And finally, don’t expect desktop perfection. Resolve on iPad is brilliant for what it is, but it’s still a compact version. Learn its limits, and it’ll reward you. Fight them, and it’ll remind you you’re editing on a tablet.
Before you pull your hair out during export, it’s worth reading this complete optimization guide to render faster in DaVinci Resolve — it covers both quick fixes and deeper settings you might overlook.
Final Thoughts
If there’s one takeaway from using DaVinci Resolve on iPad, it’s this, you can absolutely edit seriously on it, but you have to understand what it’s built for. It’s not meant to replace your desktop setup. It’s meant to extend it, to give you the freedom to cut, grade, and experiment wherever inspiration hits.
The first time I exported a finished video straight from my iPad, it felt surreal. A few years ago, this kind of power in a tablet would’ve sounded impossible. Now, I can literally color-grade a project on a train. That’s not just cool, it’s creative freedom in its purest form.
Still, when projects grow bigger, heavier, or more demanding, that’s where Vagon Cloud Computer takes over. It bridges the gap between portability and raw power, letting you finish what you start without limits.
So go ahead. Download Resolve, plug in your SSD, try editing something real. You’ll find out quickly where the iPad shines, and where a cloud computer makes all the difference.
The tools are finally flexible enough to move with you. The question now isn’t “Can you edit on iPad?”
It’s “Why aren’t you already doing it?”
FAQ
1. Can you run the full version of DaVinci Resolve on iPad?
Not exactly. The iPad version includes the Cut and Color pages but skips Fusion and Fairlight for now. You can do real editing and grading work, but it’s not feature-complete compared to desktop Resolve.
2. Which iPads support DaVinci Resolve?
You’ll need at least an A12 Bionic chip (iPad Air 3rd gen or newer). For smooth performance, the M1, M2, or M4 iPad Pro models are ideal, they handle 4K footage and color correction easily.
3. Does it support external drives?
Yes. Resolve on iPad works great with external SSDs through USB-C. It’s the best way to manage big media files and avoid storage bottlenecks.
4. Can I use a keyboard or mouse?
Absolutely. The Magic Keyboard or any Bluetooth keyboard gives you shortcuts, and a mouse or trackpad makes editing faster. Touch works well too, especially for quick trims or color wheels.
5. Can I collaborate using Blackmagic Cloud?
Yes. Blackmagic Cloud lets you sync projects between devices and share them with collaborators. It’s perfect for switching between your iPad and another workstation (or even your Vagon setup).
6. Is the free version enough?
For most people, yes. The free version supports editing, color correction, and exporting up to UHD. The Studio upgrade ($95) adds advanced noise reduction, HDR tools, and extra codecs, worth it if you’re doing professional color work.
7. How does Vagon Cloud Computer help with DaVinci Resolve?
When your iPad hits its performance ceiling, Vagon Cloud Computer gives you instant access to a high-power remote machine. You can run the full desktop Resolve, render complex grades, and finish projects without buying expensive hardware. Your iPad becomes your control surface, lightweight, portable, and connected to serious GPU power in the cloud.
8. Can I really edit full 4K projects this way?
Yes, but expect some trade-offs. You’ll need a stable, fast internet connection for smooth streaming on Vagon. The experience is near-desktop level once connected, and your renders will be lightning fast compared to local iPad hardware.
9. So, should I switch completely to iPad editing?
Not yet, but you can integrate it into your workflow. Use the iPad for rough cuts, mobile edits, or on-the-go grading. Then fire up Vagon when you need horsepower. Together, they make a surprisingly powerful combo for modern editors.
Get Beyond Your Computer Performance
Run applications on your cloud computer with the latest generation hardware. No more crashes or lags.

Trial includes 1 hour usage + 7 days of storage.
Summarize with AI

Ready to focus on your creativity?
Vagon gives you the ability to create & render projects, collaborate, and stream applications with the power of the best hardware.

Vagon Blog


Run heavy applications on any device with
your personal computer on the cloud.
San Francisco, California
Solutions
Vagon Teams
Vagon Streams
Use Cases
Resources
Vagon Blog
How to Run Audacity on a Cloud Ubuntu Desktop (2026 Guide)
How to Run Darktable on a Cloud Ubuntu Desktop for RAW Photo Editing (2026 Guide)
How to Run Kdenlive on a Cloud Ubuntu Desktop (2026 Guide)
How to Run DaVinci Resolve on Linux in the Cloud (2026 Guide)
How to Run Inkscape on a Cloud Ubuntu Desktop (2026 Guide)
How to Run Krita on a Cloud Ubuntu Desktop for Digital Painting (2026 Guide)
How to Run GIMP on a Cloud Ubuntu Desktop (2026 Guide)
How to Run Jupyter on a Cloud GPU Linux Desktop (2026 Guide)
Vagon vs GitHub Codespaces: Cloud Dev Environments Compared (2026)
Vagon Blog
Run heavy applications on any device with
your personal computer on the cloud.
San Francisco, California
Solutions
Vagon Teams
Vagon Streams
Use Cases
Resources
Vagon Blog