Instant Connection for Pixel Streaming
— New Feature Automated Setup
How To Run SketchUp On iPad
How To Run SketchUp On iPad
Architecture
How To Run SketchUp On iPad
Table of Contents
I’ll never forget the first time I tried using SketchUp on an iPad. I was sitting in a cafe, sketching out ideas for a new project. My laptop was too bulky to carry, but my iPad was right there, so I thought, “Why not give SketchUp a shot?” After all, the app was available, and I’d seen others rave about its potential. Fifteen minutes later, I was frustrated. The touchscreen felt clunky, precision was a struggle, and every swipe felt like I was fighting the software instead of creating. But I didn’t give up. Slowly, I began to realize that with the right mindset, SketchUp on the iPad could actually work wonders, once I figured out how to make it work for me.
Fast forward to today, and SketchUp on the iPad is no longer the frustrating experience I once thought it was. With the iPad’s portability, touch functionality, and growing power, it's become a valuable tool for designers, architects, and creatives who need to sketch and model on the go. Whether you're in the field, at a meeting, or just want to take advantage of a lightweight device, SketchUp for iPad is transforming workflows and giving users the freedom to create anywhere.

In this guide, I’ll walk you through how to use SketchUp on your iPad effectively. You’ll learn tips and tricks that will help you make the most of this powerful tool, and by the end, you'll understand why it's such a game-changer for on-the-go design work. Ready to level up your mobile design workflow? Let’s dive in!
What You Need to Get Started
The Basic Setup
Before you dive into creating 3D models on your iPad, let’s make sure you’ve got the essentials in place. The setup process is simple, and here’s what you’ll need:
An iPad Running iOS 15.0 or Newer: Most modern iPads should work fine, but make sure you’re up to date to avoid compatibility issues. You'll get smoother performance with more recent models, but even older ones can handle SketchUp if you're not working with overly complex models.
Download SketchUp for iPad from the App Store: Just head to the App Store, search for SketchUp, and hit "Install." The app is free to download, but for additional features like cloud storage, you may need a subscription to SketchUp for Web or SketchUp Pro.
Trimble Account: If you don’t already have a Trimble account, you’ll need one to sync your projects across devices and use the cloud features. Signing up is easy and can be done within the app itself.
Once you’ve got everything set up, you’ll be ready to jump into creating models and exploring the app’s features.

Key Features Available
Now that you've installed SketchUp on your iPad, let’s talk about the features you’ll be working with:
Drawing Tools: The essentials like Line, Rectangle, and Push/Pull are all available, making it easy to create the basic geometry for your models.
Materials and Components: You can access materials, apply textures, and create components, giving your models more depth and detail.
Trimble Connect Integration: SketchUp for iPad integrates with Trimble Connect, allowing you to store and access your models in the cloud, making it easier to collaborate and access your work from anywhere.
It’s also worth mentioning that while the iPad version of SketchUp doesn’t offer all the advanced features of the desktop version, it covers the basics and more, making it great for mobile design. So, whether you're creating quick drafts or detailed 3D models, the tools are there to make it happen.

Navigating SketchUp for iPad: Getting to Grips with the Interface
When you first launch SketchUp on your iPad, it can be a bit overwhelming. The interface is sleek, but you’ll want to get comfortable with it quickly to streamline your workflow. Here’s how to make sense of the layout and get started.
User Interface Overview
The SketchUp for iPad interface is designed to keep things as intuitive as possible, but there are still some key elements you'll want to be aware of:
Toolbars: At the top, you’ll find the primary toolbar with tools like Line, Rectangle, Push/Pull, and Eraser. You can customize your toolbar by tapping the three dots (…) to reveal more options. This is where you'll spend most of your time selecting tools.
Navigation Bar: The bar at the bottom of your screen gives you quick access to important actions like saving your model, undoing your last action, or switching to different views. It's also where you'll find the View options for changing perspective, zooming, or accessing your model’s settings.
Panels: On the left, you’ll see various panels for materials, components, and other model elements. This is your toolbox for applying textures, adjusting settings, and managing components.

Touch Gestures: Getting Around Quickly
Since you’re working with a touchscreen device, navigation relies heavily on gestures. Here’s how to get around smoothly:
Zooming: Pinch with two fingers to zoom in and out. Simple but crucial for adjusting the view as you work.
Orbiting: Swipe with two fingers to rotate the model. This is a great way to inspect your design from every angle.
Panning: Move the model around by dragging with two fingers. Perfect for adjusting your view without changing the zoom level.
You’ll probably need to adjust your zoom and orbit often, so practicing these gestures will make your workflow smoother.
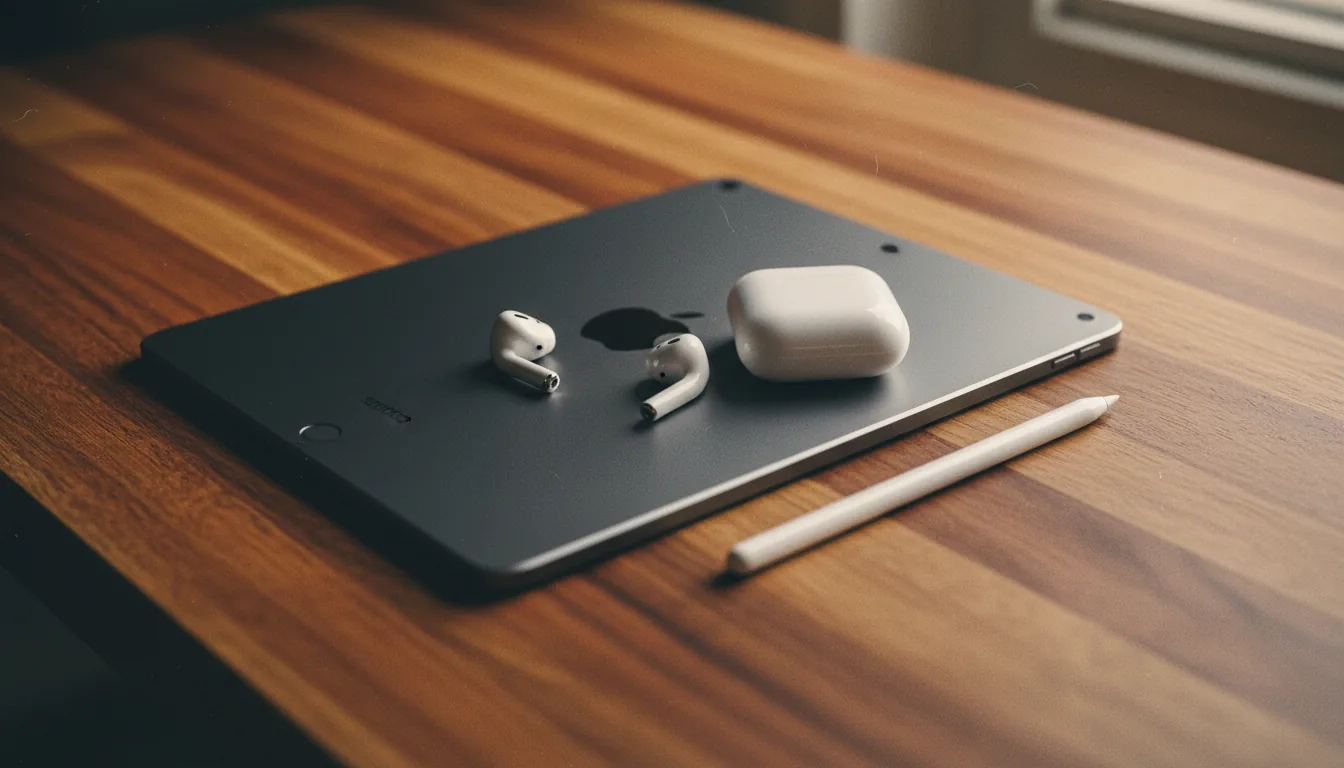
Apple Pencil and Other Input Methods
If you have an Apple Pencil, it’s worth using it for extra precision. Here’s how it can enhance your experience:
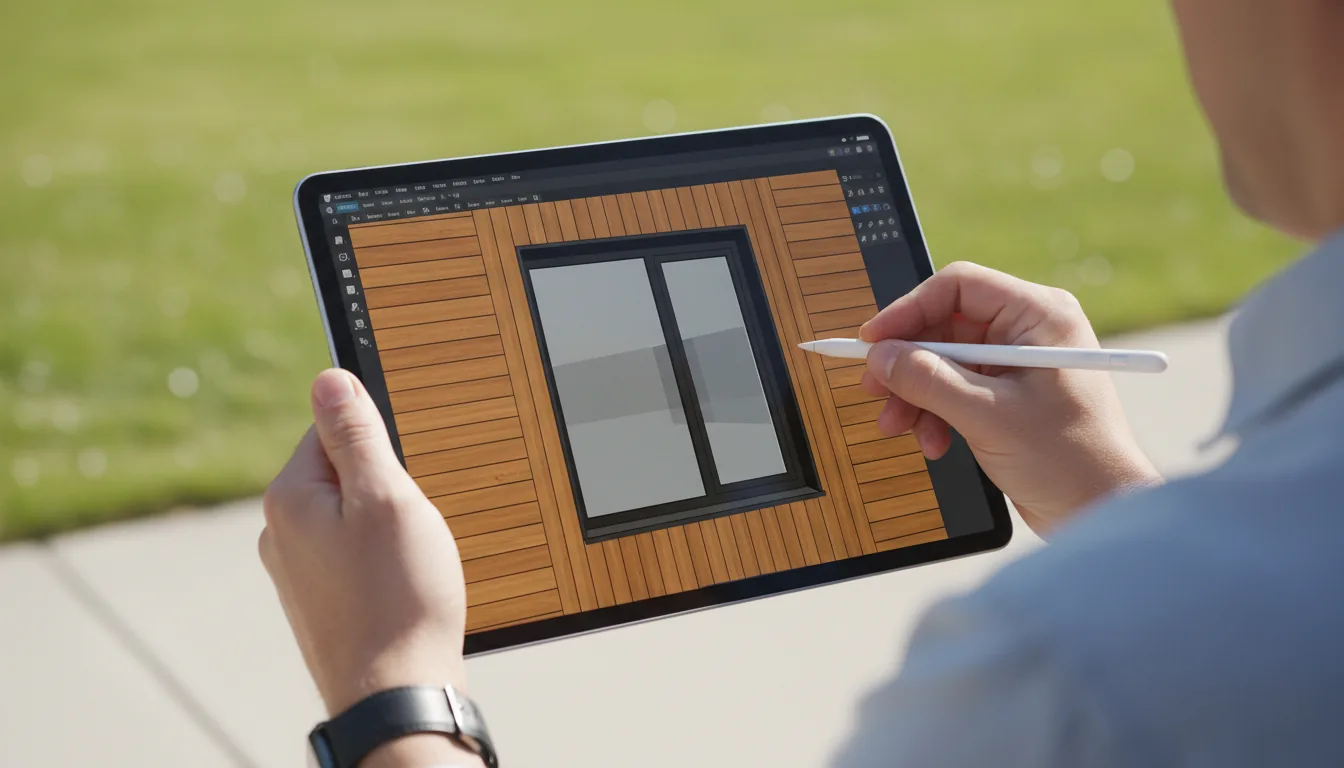
Drawing with Precision: The Apple Pencil allows for finer control when drawing lines and shapes, especially when working on detailed areas of your model. It's perfect for creating sharp edges and small details without the clunkiness of finger input.
Two Modes for Pencil:
Just Draw: With this mode, you can simply draw as you would on paper. It’s great for quick sketches.
Click-Move-Click: This mode lets you click to start your line, move to your next point, and click again to finish. This can be useful when you want more structured control over your lines and measurements.
Alternatively, if you’re used to a more traditional desktop experience, you can also use a mouse or keyboard by connecting them via Bluetooth. This will give you the same navigation controls you’d use on a computer, making the transition easier for some users.
How to Model Efficiently on the iPad
Once you're familiar with the basics of navigating SketchUp for iPad, it's time to dive into actual modeling. Whether you're creating simple shapes or complex 3D objects, there are some key strategies that can help you work efficiently and avoid frustration.
Starting Simple
If you're new to 3D modeling, it’s always a good idea to start with the basics. SketchUp’s powerful yet straightforward tools make this easy:
Drawing Basic Shapes: Begin by creating the basic building blocks of your model, lines, rectangles, and circles. To create a rectangle, just tap the rectangle tool, then drag to set your dimensions.
Using the Push/Pull Tool: This is arguably SketchUp’s most iconic tool, allowing you to extrude shapes into 3D forms. Simply click on the shape you’ve drawn and pull it into the third dimension.
Best Practices
As you start building more complex models, there are a few best practices to follow:
Use Axes for Alignment: It's tempting to freehand things, but aligning your model to the red, green, and blue axes from the beginning will keep things organized. You’ll avoid skewed geometry and have a much easier time making precise adjustments.
Grouping Geometry: One of the biggest challenges in 3D modeling is ensuring that your geometry doesn’t accidentally merge together. To prevent this, make sure to group your shapes. Simply select the objects you want to group, right-tap, and choose "Make Group." This keeps your models tidy and prevents unexpected changes.
Work in Layers: For larger models, it helps to break your design into different layers or components. This way, you can focus on specific parts of your design without getting distracted by the entire model.

Advanced Techniques
As you get more comfortable, you can dive into some of SketchUp’s more advanced features:
Importing Reference Images: If you’re working from a floor plan or need a reference, you can import images directly into your project. This is great for tracing over existing designs or using scaled images as a guide for your model.
Using Components: Components are reusable groups of geometry. If you're designing something like a door or window that will appear multiple times in your model, create a component once, then copy it throughout your design. This way, any changes to one instance will apply to all instances of that component, saving you time.
Materials and Textures: Giving your model a realistic look is one of the most fun parts of the process. SketchUp for iPad allows you to apply materials like wood, metal, or glass to your models. You can also upload your own textures if you have specific ones in mind.
Measurements and Precision: For those who need to be precise (and let’s face it, most designers do), the app allows you to input exact measurements for lines, angles, and areas. Tap on any shape to get exact dimensions, and use the measurement toolbar to enter values directly.
If you work across platforms or engines, knowing how to export assets between Blender, SketchUp, and game engines can be a huge time-saver for cross-tool workflows.
Tools and Features You’ll Use Most
As you progress, these are the tools that will become second nature in your daily workflow:
Push/Pull Tool: Extrude your 2D shapes into 3D models with ease.
Move Tool: Move parts of your design without affecting the rest of the model.
Rotate Tool: Perfect for turning objects to fit into place.
Scale Tool: Adjust the size of individual parts of your model without distorting others.
The more you practice, the more you’ll find yourself relying on these basic tools. They’re the building blocks for creating complex models, and once you get the hang of them, you'll move faster and with more confidence.

Limitations & Workarounds: What Doesn’t Work Like the Desktop Version
As much as SketchUp for iPad brings powerful tools to the table, there are still a few limitations when compared to the full desktop version. However, these aren’t necessarily dealbreakers. With the right workarounds and expectations, you can still create impressive models. Here’s what you need to know.
Missing Features
While SketchUp on the iPad is surprisingly capable, it doesn’t yet offer all of the advanced features that the desktop version does. Some of the key differences include:
Advanced Rendering and Extensions: If you rely heavily on high-end rendering or specific extensions, you may find the iPad version lacking. For example, the desktop version supports a variety of rendering plugins (like V-Ray or Enscape), which aren’t available on the iPad. You’ll also miss out on many of the third-party extensions that can make the desktop experience so versatile.
Complex Modeling Capabilities: While you can model almost anything on the iPad, extremely complex or highly detailed models with many components might feel sluggish or limited. Large-scale projects can be harder to manage, and performance can degrade as the model size increases.
Limited Viewport Customization: The desktop version allows for much more control over the viewport and camera settings. If you need a specific view angle or detailed rendering options, the iPad version doesn’t offer the same depth of customization.
While extensions aren’t supported on the iPad version, if you’re switching to desktop, you’ll definitely want to explore some essential SketchUp plugins that can streamline your workflow and enhance your modeling power.
Performance Issues
It’s important to note that the iPad isn’t as powerful as a dedicated desktop machine. Here are a few performance-related things to keep in mind:
Lag on Larger Models: When dealing with complex models, especially ones with a lot of textures or components, the iPad can sometimes struggle to keep up. This can result in slower load times or laggy performance when zooming, orbiting, or modifying your model. If you experience this, try reducing the model's complexity or working in smaller sections.
Memory and Storage Constraints: Since iPads don’t have the same storage capacity or memory as a high-end workstation, you'll want to keep an eye on file sizes. Larger models might cause the app to slow down or even crash, particularly if your iPad’s storage is nearing full capacity. Regularly saving and clearing old files can help alleviate this.
Workarounds to Consider
Thankfully, there are several ways to overcome or work around these limitations:
Use the Desktop for Heavy Lifting: If you run into a performance issue with a particularly complex model, consider switching to the desktop version for those specific tasks. SketchUp on the iPad is perfect for quick edits, mobile sketches, and on-the-go adjustments, but the desktop version remains your best bet for large, detailed designs.
Simplify Models When Necessary: When designing on the iPad, it’s helpful to keep things simple. Use lower-resolution textures, avoid overly intricate components, and keep your models modular. Breaking larger designs into smaller components or layers will also help speed things up.
Cloud Storage and Syncing: To overcome storage limitations, you can store your models on Trimble Connect and sync your work across devices. This helps you keep your iPad’s storage free for other tasks and makes it easy to switch between devices when needed.
If your final output includes high-quality visuals, you might also consider exporting your models and following a SketchUp to Twinmotion workflow for immersive rendering and animation.
Real-World Example: A User’s Experience
To make things even clearer, let’s look at how SketchUp for iPad works in the real world. The key to understanding how well it performs on mobile lies in seeing how others have used it in practical scenarios. Here’s one designer’s experience using SketchUp for iPad on a project.
Example Case Study: A Residential Design
Meet Tom, an architect who often finds himself on the go. A few months ago, he had to design a small residential building while traveling for client meetings. He didn’t have his desktop with him, but he did have his iPad, and it was the perfect solution for quick drafting and modeling.
Initially, Tom wasn’t sure if the iPad would be powerful enough for his needs. He had heard that SketchUp on mobile was more of a convenience tool than a serious design platform. But as soon as he opened SketchUp for iPad, he was pleasantly surprised by its ease of use. With the Apple Pencil in hand, he started drafting the basic layout of the house, focusing on walls, windows, and doors. The tools were intuitive, and the ability to quickly rotate and zoom in on his design made him feel confident and in control.

However, as he added more detail, Tom began running into a few challenges. When he tried to add complex geometry, like intricate window frames and custom furniture, his iPad started to lag. He also found that certain tools he was used to on the desktop weren’t available on the mobile version. But, as he mentioned, “The convenience of being able to model directly on-site outweighed the few limitations. I didn’t have to lug around my laptop, and I was able to make quick tweaks during meetings.”
Struggles and Successes
Tom’s journey wasn’t without its hurdles. When adding multiple textures to surfaces, he noticed his iPad became slower, and occasionally, the app would crash if the model became too large. But these issues weren’t showstoppers, just bumps in the road that he worked around by simplifying textures or transferring larger models to the desktop for rendering. The cloud integration with Trimble Connect also came in handy, as it allowed him to easily transfer his files between the iPad and his desktop computer, keeping everything in sync without missing a beat.
By the time the project was completed, Tom had designed the entire building using just the iPad. “I never thought I could do this much on an iPad,” he said. “It was a great tool for the early design phases and client discussions. For detailed rendering and larger models, though, I switched to my desktop.”
Takeaways from Tom’s Experience
Quick Drafting and Sketching: The iPad’s touch functionality and Apple Pencil are great for sketching, quick modeling, and client presentations.
Performance Limits: While the iPad excels in the early stages of a project, larger, more complex designs still benefit from the power of a desktop.
Cloud Integration: SketchUp’s integration with Trimble Connect made it easy for Tom to move between devices and access files from anywhere.
On-the-Go Flexibility: Tom could work from virtually anywhere, which was a huge advantage during client meetings and site visits.
This real-world example shows that while there are a few limitations, SketchUp on the iPad is definitely capable of handling a variety of tasks, from initial drafts to client-ready concepts. It’s all about knowing when to use the iPad for convenience and when to switch to the desktop for heavy lifting.
When to Use SketchUp on iPad vs. Desktop Version
Now that you’ve learned the ins and outs of SketchUp for iPad, it’s time to decide when it’s best to use it over the desktop version, and vice versa. While the iPad version offers great flexibility, it’s important to know its strengths and limitations compared to the full desktop experience. Here’s how to make the most of both.
Ideal Use Cases for iPad
SketchUp for iPad is perfect for scenarios where portability and quick access are key. Here are some situations where it really shines:
On-Site Sketching and Drafting: Whether you're on a construction site, in a client meeting, or brainstorming in a cafe, the iPad’s portability allows you to quickly sketch out ideas. The touch interface and Apple Pencil give you a tactile feel that’s perfect for freehand drawing and rough drafts.
Client Presentations and Feedback: Showing your clients 3D models directly on your iPad is a great way to get instant feedback. You can quickly zoom in, rotate, and make adjustments right in front of them. Plus, it's a lot more mobile and flexible than carrying around a laptop or relying on a projector.
Quick Edits on the Go: If you're traveling and need to make a quick change to a design, the iPad is a great tool for those on-the-fly tweaks. You don’t need to wait until you’re back in the office to adjust your model, it can be done anywhere.
Collaborating in Real Time: With Trimble Connect, you can easily collaborate with team members. Upload your model and share it with others to view and comment on, even while you're working remotely.

When to Switch to the Desktop
While the iPad version of SketchUp is versatile, the desktop version is still the go-to for larger, more detailed projects. Here’s when you should consider switching:
Heavy Rendering and Detailed Models: If your model is large, has many components, or requires high-quality rendering, you’re better off switching to a desktop. The iPad simply doesn’t have the processing power needed for rendering high-poly models or running complex extensions like V-Ray. The desktop version, on the other hand, can handle these tasks without breaking a sweat.
Advanced Features and Extensions: SketchUp’s desktop version supports numerous extensions and plugins that add functionality beyond what’s available on iPad. Whether you need custom modeling tools, advanced analysis features, or rendering tools, the desktop is the place to go.
Working with Large Files: If your project involves intricate designs or large files, you may encounter lag or crashing on the iPad. The desktop version can handle these files much more efficiently, allowing for smoother performance and faster processing times.
Precision and Control: While the iPad gives you a lot of freedom, the desktop version offers more precise control with a mouse and keyboard, making it ideal for highly detailed and accurate work.

Balancing Both: The Best of Both Worlds
For most users, the key is finding a balance between the iPad and desktop versions. Use the iPad for quick sketches, client meetings, and editing while you’re away from your main workstation. When it’s time to dive into more serious work, switch over to your desktop for the extra power, precision, and advanced features you need.
In fact, one of the best aspects of SketchUp for iPad is its integration with Trimble Connect, which makes it easy to transition between devices. You can start a project on the iPad, and when you’re back at the office, you can pick up where you left off on the desktop.
If you’re exploring other tools to expand your modeling toolkit beyond what SketchUp offers on iPad or desktop, check out these alternatives to SketchUp for different workflows and project types.
Enhancing Your Workflow with Vagon Cloud Computer
While SketchUp for iPad offers flexibility and convenience, there are times when you might need more power, especially for rendering complex models or running advanced features that the iPad can’t quite handle. This is where Vagon Cloud Computer comes in.
Introduction to Vagon Cloud Computer
Vagon Cloud Computer is a cloud-based platform that allows you to run powerful desktop applications on any device, including your iPad. By using Vagon, you can access the full desktop version of SketchUp (or any other high-performance application) without worrying about your device's limitations.
Instead of being tethered to a powerful desktop workstation, Vagon allows you to run the full version of SketchUp remotely from the cloud, ensuring you have all the performance and features you need, even on an iPad.
How Vagon Helps
With Vagon, you can run SketchUp’s desktop version on your iPad, unlocking a more powerful and seamless experience. Here’s how it enhances your workflow:
Powerful Rendering: Vagon gives you the ability to render complex models with high-quality visuals, something the iPad alone can’t quite match. No more waiting for the app to catch up with your design; Vagon takes care of the heavy lifting.
Advanced Features and Extensions: Since you’re running SketchUp's full desktop version through Vagon, you can use all the extensions, plugins, and tools that are available on a traditional desktop setup. This means you won’t be restricted by the limited features of the iPad app.
Seamless Experience Across Devices: Whether you’re working on your iPad, desktop, or even a laptop, Vagon ensures that your workflow is consistent. Since everything is cloud-based, you can pick up right where you left off, no matter what device you’re using.
Collaboration Made Easy: When you’re working on a team project, Vagon allows you to easily share and collaborate on your SketchUp models without the need for expensive hardware. Anyone can join the project from anywhere, which makes remote work and client presentations a breeze.
For those curious about hardware specs and what’s ideal for demanding modeling tasks, we’ve also covered a guide on choosing the right PC for SketchUp.
Real Benefits
By using Vagon Cloud Computer, you're no longer limited by the hardware of your iPad. Here’s why it can be a game-changer for SketchUp users:
Flexibility: Access your SketchUp models anytime, anywhere, on any device, with zero compromise on performance.
Cost-Effective: Instead of investing in a high-powered desktop or workstation, you can run SketchUp’s full desktop version in the cloud for a fraction of the cost.
Better Collaboration: Share your models with clients or team members seamlessly, without worrying about device compatibility or file sizes.
Pairing Vagon with proven techniques to render faster in SketchUp can give you a major speed boost without upgrading your local hardware.
Vagon Cloud Computer lets you run SketchUp at its full potential without being tied down to a physical machine, giving you the freedom to design, edit, and render from anywhere. Whether you're working on a detailed design or need the power for complex rendering, Vagon ensures you get the job done without hassle.

Conclusion
SketchUp on the iPad is a fantastic tool for quick sketches, mobile design, and client presentations. It’s a versatile, portable way to work on the go, but as we’ve seen, it does have some limitations. For larger projects or more advanced features, the desktop version still reigns supreme. However, with tools like Vagon Cloud Computer, you can seamlessly bridge the gap between mobile flexibility and desktop power.
Now that you know how to use SketchUp on your iPad, and how to enhance your workflow with Vagon, you’re ready to start designing without any of the usual barriers. Whether you’re on-site, traveling, or working from home, your creative possibilities are endless.
Want to see how Vagon can help you bring your designs to life? Plan a demo session with us today. Let's take your design process to the next level!
FAQs
Can I use SketchUp on any iPad?
Yes, SketchUp for iPad works on iPads running iOS 15.0 or newer. However, the performance will be best on newer models with more processing power, especially when working with larger models or detailed designs.
What features are missing in the iPad version of SketchUp compared to the desktop version?
The iPad version of SketchUp lacks some advanced features, such as complex rendering options, certain third-party extensions, and detailed viewport customization. It’s great for basic modeling, quick sketches, and client presentations, but for high-end rendering or large, intricate designs, the desktop version is recommended.
Can I use my Apple Pencil with SketchUp for iPad?
Yes! The Apple Pencil works seamlessly with SketchUp on iPad, offering you precision when drawing and editing. You can switch between "Just Draw" mode for freehand sketches or "Click-Move-Click" mode for more structured, controlled lines.
How can I avoid performance issues when using SketchUp on my iPad?
To avoid lag or crashes, keep your models simple. Use lower-resolution textures, limit the number of components, and avoid creating overly complex models on the iPad. If you hit performance limits, consider transitioning to the desktop version or using Vagon Cloud Computer for added power.
Can I share my SketchUp models between my iPad and desktop?
Yes! SketchUp for iPad integrates with Trimble Connect, which allows you to sync your models across devices. You can start a project on the iPad, and when you’re ready, switch to the desktop version for more advanced work.
What is Vagon Cloud Computer and how does it help with SketchUp?
Vagon Cloud Computer allows you to run the full desktop version of SketchUp on your iPad by connecting to cloud-based computing power. It provides additional performance for rendering, running extensions, and handling complex models, all while maintaining the flexibility of your iPad.
Is Vagon Cloud Computer cost-effective?
Yes, Vagon Cloud Computer provides access to powerful desktop tools for a fraction of the cost of a high-end workstation. It allows you to work from any device without needing to invest in expensive hardware, making it an affordable solution for designers who need extra performance.
I’ll never forget the first time I tried using SketchUp on an iPad. I was sitting in a cafe, sketching out ideas for a new project. My laptop was too bulky to carry, but my iPad was right there, so I thought, “Why not give SketchUp a shot?” After all, the app was available, and I’d seen others rave about its potential. Fifteen minutes later, I was frustrated. The touchscreen felt clunky, precision was a struggle, and every swipe felt like I was fighting the software instead of creating. But I didn’t give up. Slowly, I began to realize that with the right mindset, SketchUp on the iPad could actually work wonders, once I figured out how to make it work for me.
Fast forward to today, and SketchUp on the iPad is no longer the frustrating experience I once thought it was. With the iPad’s portability, touch functionality, and growing power, it's become a valuable tool for designers, architects, and creatives who need to sketch and model on the go. Whether you're in the field, at a meeting, or just want to take advantage of a lightweight device, SketchUp for iPad is transforming workflows and giving users the freedom to create anywhere.
In this guide, I’ll walk you through how to use SketchUp on your iPad effectively. You’ll learn tips and tricks that will help you make the most of this powerful tool, and by the end, you'll understand why it's such a game-changer for on-the-go design work. Ready to level up your mobile design workflow? Let’s dive in!
What You Need to Get Started
The Basic Setup
Before you dive into creating 3D models on your iPad, let’s make sure you’ve got the essentials in place. The setup process is simple, and here’s what you’ll need:
An iPad Running iOS 15.0 or Newer: Most modern iPads should work fine, but make sure you’re up to date to avoid compatibility issues. You'll get smoother performance with more recent models, but even older ones can handle SketchUp if you're not working with overly complex models.
Download SketchUp for iPad from the App Store: Just head to the App Store, search for SketchUp, and hit "Install." The app is free to download, but for additional features like cloud storage, you may need a subscription to SketchUp for Web or SketchUp Pro.
Trimble Account: If you don’t already have a Trimble account, you’ll need one to sync your projects across devices and use the cloud features. Signing up is easy and can be done within the app itself.
Once you’ve got everything set up, you’ll be ready to jump into creating models and exploring the app’s features.
Key Features Available
Now that you've installed SketchUp on your iPad, let’s talk about the features you’ll be working with:
Drawing Tools: The essentials like Line, Rectangle, and Push/Pull are all available, making it easy to create the basic geometry for your models.
Materials and Components: You can access materials, apply textures, and create components, giving your models more depth and detail.
Trimble Connect Integration: SketchUp for iPad integrates with Trimble Connect, allowing you to store and access your models in the cloud, making it easier to collaborate and access your work from anywhere.
It’s also worth mentioning that while the iPad version of SketchUp doesn’t offer all the advanced features of the desktop version, it covers the basics and more, making it great for mobile design. So, whether you're creating quick drafts or detailed 3D models, the tools are there to make it happen.
Navigating SketchUp for iPad: Getting to Grips with the Interface
When you first launch SketchUp on your iPad, it can be a bit overwhelming. The interface is sleek, but you’ll want to get comfortable with it quickly to streamline your workflow. Here’s how to make sense of the layout and get started.
User Interface Overview
The SketchUp for iPad interface is designed to keep things as intuitive as possible, but there are still some key elements you'll want to be aware of:
Toolbars: At the top, you’ll find the primary toolbar with tools like Line, Rectangle, Push/Pull, and Eraser. You can customize your toolbar by tapping the three dots (…) to reveal more options. This is where you'll spend most of your time selecting tools.
Navigation Bar: The bar at the bottom of your screen gives you quick access to important actions like saving your model, undoing your last action, or switching to different views. It's also where you'll find the View options for changing perspective, zooming, or accessing your model’s settings.
Panels: On the left, you’ll see various panels for materials, components, and other model elements. This is your toolbox for applying textures, adjusting settings, and managing components.
Touch Gestures: Getting Around Quickly
Since you’re working with a touchscreen device, navigation relies heavily on gestures. Here’s how to get around smoothly:
Zooming: Pinch with two fingers to zoom in and out. Simple but crucial for adjusting the view as you work.
Orbiting: Swipe with two fingers to rotate the model. This is a great way to inspect your design from every angle.
Panning: Move the model around by dragging with two fingers. Perfect for adjusting your view without changing the zoom level.
You’ll probably need to adjust your zoom and orbit often, so practicing these gestures will make your workflow smoother.
Apple Pencil and Other Input Methods
If you have an Apple Pencil, it’s worth using it for extra precision. Here’s how it can enhance your experience:
Drawing with Precision: The Apple Pencil allows for finer control when drawing lines and shapes, especially when working on detailed areas of your model. It's perfect for creating sharp edges and small details without the clunkiness of finger input.
Two Modes for Pencil:
Just Draw: With this mode, you can simply draw as you would on paper. It’s great for quick sketches.
Click-Move-Click: This mode lets you click to start your line, move to your next point, and click again to finish. This can be useful when you want more structured control over your lines and measurements.
Alternatively, if you’re used to a more traditional desktop experience, you can also use a mouse or keyboard by connecting them via Bluetooth. This will give you the same navigation controls you’d use on a computer, making the transition easier for some users.
How to Model Efficiently on the iPad
Once you're familiar with the basics of navigating SketchUp for iPad, it's time to dive into actual modeling. Whether you're creating simple shapes or complex 3D objects, there are some key strategies that can help you work efficiently and avoid frustration.
Starting Simple
If you're new to 3D modeling, it’s always a good idea to start with the basics. SketchUp’s powerful yet straightforward tools make this easy:
Drawing Basic Shapes: Begin by creating the basic building blocks of your model, lines, rectangles, and circles. To create a rectangle, just tap the rectangle tool, then drag to set your dimensions.
Using the Push/Pull Tool: This is arguably SketchUp’s most iconic tool, allowing you to extrude shapes into 3D forms. Simply click on the shape you’ve drawn and pull it into the third dimension.
Best Practices
As you start building more complex models, there are a few best practices to follow:
Use Axes for Alignment: It's tempting to freehand things, but aligning your model to the red, green, and blue axes from the beginning will keep things organized. You’ll avoid skewed geometry and have a much easier time making precise adjustments.
Grouping Geometry: One of the biggest challenges in 3D modeling is ensuring that your geometry doesn’t accidentally merge together. To prevent this, make sure to group your shapes. Simply select the objects you want to group, right-tap, and choose "Make Group." This keeps your models tidy and prevents unexpected changes.
Work in Layers: For larger models, it helps to break your design into different layers or components. This way, you can focus on specific parts of your design without getting distracted by the entire model.
Advanced Techniques
As you get more comfortable, you can dive into some of SketchUp’s more advanced features:
Importing Reference Images: If you’re working from a floor plan or need a reference, you can import images directly into your project. This is great for tracing over existing designs or using scaled images as a guide for your model.
Using Components: Components are reusable groups of geometry. If you're designing something like a door or window that will appear multiple times in your model, create a component once, then copy it throughout your design. This way, any changes to one instance will apply to all instances of that component, saving you time.
Materials and Textures: Giving your model a realistic look is one of the most fun parts of the process. SketchUp for iPad allows you to apply materials like wood, metal, or glass to your models. You can also upload your own textures if you have specific ones in mind.
Measurements and Precision: For those who need to be precise (and let’s face it, most designers do), the app allows you to input exact measurements for lines, angles, and areas. Tap on any shape to get exact dimensions, and use the measurement toolbar to enter values directly.
If you work across platforms or engines, knowing how to export assets between Blender, SketchUp, and game engines can be a huge time-saver for cross-tool workflows.
Tools and Features You’ll Use Most
As you progress, these are the tools that will become second nature in your daily workflow:
Push/Pull Tool: Extrude your 2D shapes into 3D models with ease.
Move Tool: Move parts of your design without affecting the rest of the model.
Rotate Tool: Perfect for turning objects to fit into place.
Scale Tool: Adjust the size of individual parts of your model without distorting others.
The more you practice, the more you’ll find yourself relying on these basic tools. They’re the building blocks for creating complex models, and once you get the hang of them, you'll move faster and with more confidence.
Limitations & Workarounds: What Doesn’t Work Like the Desktop Version
As much as SketchUp for iPad brings powerful tools to the table, there are still a few limitations when compared to the full desktop version. However, these aren’t necessarily dealbreakers. With the right workarounds and expectations, you can still create impressive models. Here’s what you need to know.
Missing Features
While SketchUp on the iPad is surprisingly capable, it doesn’t yet offer all of the advanced features that the desktop version does. Some of the key differences include:
Advanced Rendering and Extensions: If you rely heavily on high-end rendering or specific extensions, you may find the iPad version lacking. For example, the desktop version supports a variety of rendering plugins (like V-Ray or Enscape), which aren’t available on the iPad. You’ll also miss out on many of the third-party extensions that can make the desktop experience so versatile.
Complex Modeling Capabilities: While you can model almost anything on the iPad, extremely complex or highly detailed models with many components might feel sluggish or limited. Large-scale projects can be harder to manage, and performance can degrade as the model size increases.
Limited Viewport Customization: The desktop version allows for much more control over the viewport and camera settings. If you need a specific view angle or detailed rendering options, the iPad version doesn’t offer the same depth of customization.
While extensions aren’t supported on the iPad version, if you’re switching to desktop, you’ll definitely want to explore some essential SketchUp plugins that can streamline your workflow and enhance your modeling power.
Performance Issues
It’s important to note that the iPad isn’t as powerful as a dedicated desktop machine. Here are a few performance-related things to keep in mind:
Lag on Larger Models: When dealing with complex models, especially ones with a lot of textures or components, the iPad can sometimes struggle to keep up. This can result in slower load times or laggy performance when zooming, orbiting, or modifying your model. If you experience this, try reducing the model's complexity or working in smaller sections.
Memory and Storage Constraints: Since iPads don’t have the same storage capacity or memory as a high-end workstation, you'll want to keep an eye on file sizes. Larger models might cause the app to slow down or even crash, particularly if your iPad’s storage is nearing full capacity. Regularly saving and clearing old files can help alleviate this.
Workarounds to Consider
Thankfully, there are several ways to overcome or work around these limitations:
Use the Desktop for Heavy Lifting: If you run into a performance issue with a particularly complex model, consider switching to the desktop version for those specific tasks. SketchUp on the iPad is perfect for quick edits, mobile sketches, and on-the-go adjustments, but the desktop version remains your best bet for large, detailed designs.
Simplify Models When Necessary: When designing on the iPad, it’s helpful to keep things simple. Use lower-resolution textures, avoid overly intricate components, and keep your models modular. Breaking larger designs into smaller components or layers will also help speed things up.
Cloud Storage and Syncing: To overcome storage limitations, you can store your models on Trimble Connect and sync your work across devices. This helps you keep your iPad’s storage free for other tasks and makes it easy to switch between devices when needed.
If your final output includes high-quality visuals, you might also consider exporting your models and following a SketchUp to Twinmotion workflow for immersive rendering and animation.
Real-World Example: A User’s Experience
To make things even clearer, let’s look at how SketchUp for iPad works in the real world. The key to understanding how well it performs on mobile lies in seeing how others have used it in practical scenarios. Here’s one designer’s experience using SketchUp for iPad on a project.
Example Case Study: A Residential Design
Meet Tom, an architect who often finds himself on the go. A few months ago, he had to design a small residential building while traveling for client meetings. He didn’t have his desktop with him, but he did have his iPad, and it was the perfect solution for quick drafting and modeling.
Initially, Tom wasn’t sure if the iPad would be powerful enough for his needs. He had heard that SketchUp on mobile was more of a convenience tool than a serious design platform. But as soon as he opened SketchUp for iPad, he was pleasantly surprised by its ease of use. With the Apple Pencil in hand, he started drafting the basic layout of the house, focusing on walls, windows, and doors. The tools were intuitive, and the ability to quickly rotate and zoom in on his design made him feel confident and in control.
However, as he added more detail, Tom began running into a few challenges. When he tried to add complex geometry, like intricate window frames and custom furniture, his iPad started to lag. He also found that certain tools he was used to on the desktop weren’t available on the mobile version. But, as he mentioned, “The convenience of being able to model directly on-site outweighed the few limitations. I didn’t have to lug around my laptop, and I was able to make quick tweaks during meetings.”
Struggles and Successes
Tom’s journey wasn’t without its hurdles. When adding multiple textures to surfaces, he noticed his iPad became slower, and occasionally, the app would crash if the model became too large. But these issues weren’t showstoppers, just bumps in the road that he worked around by simplifying textures or transferring larger models to the desktop for rendering. The cloud integration with Trimble Connect also came in handy, as it allowed him to easily transfer his files between the iPad and his desktop computer, keeping everything in sync without missing a beat.
By the time the project was completed, Tom had designed the entire building using just the iPad. “I never thought I could do this much on an iPad,” he said. “It was a great tool for the early design phases and client discussions. For detailed rendering and larger models, though, I switched to my desktop.”
Takeaways from Tom’s Experience
Quick Drafting and Sketching: The iPad’s touch functionality and Apple Pencil are great for sketching, quick modeling, and client presentations.
Performance Limits: While the iPad excels in the early stages of a project, larger, more complex designs still benefit from the power of a desktop.
Cloud Integration: SketchUp’s integration with Trimble Connect made it easy for Tom to move between devices and access files from anywhere.
On-the-Go Flexibility: Tom could work from virtually anywhere, which was a huge advantage during client meetings and site visits.
This real-world example shows that while there are a few limitations, SketchUp on the iPad is definitely capable of handling a variety of tasks, from initial drafts to client-ready concepts. It’s all about knowing when to use the iPad for convenience and when to switch to the desktop for heavy lifting.
When to Use SketchUp on iPad vs. Desktop Version
Now that you’ve learned the ins and outs of SketchUp for iPad, it’s time to decide when it’s best to use it over the desktop version, and vice versa. While the iPad version offers great flexibility, it’s important to know its strengths and limitations compared to the full desktop experience. Here’s how to make the most of both.
Ideal Use Cases for iPad
SketchUp for iPad is perfect for scenarios where portability and quick access are key. Here are some situations where it really shines:
On-Site Sketching and Drafting: Whether you're on a construction site, in a client meeting, or brainstorming in a cafe, the iPad’s portability allows you to quickly sketch out ideas. The touch interface and Apple Pencil give you a tactile feel that’s perfect for freehand drawing and rough drafts.
Client Presentations and Feedback: Showing your clients 3D models directly on your iPad is a great way to get instant feedback. You can quickly zoom in, rotate, and make adjustments right in front of them. Plus, it's a lot more mobile and flexible than carrying around a laptop or relying on a projector.
Quick Edits on the Go: If you're traveling and need to make a quick change to a design, the iPad is a great tool for those on-the-fly tweaks. You don’t need to wait until you’re back in the office to adjust your model, it can be done anywhere.
Collaborating in Real Time: With Trimble Connect, you can easily collaborate with team members. Upload your model and share it with others to view and comment on, even while you're working remotely.
When to Switch to the Desktop
While the iPad version of SketchUp is versatile, the desktop version is still the go-to for larger, more detailed projects. Here’s when you should consider switching:
Heavy Rendering and Detailed Models: If your model is large, has many components, or requires high-quality rendering, you’re better off switching to a desktop. The iPad simply doesn’t have the processing power needed for rendering high-poly models or running complex extensions like V-Ray. The desktop version, on the other hand, can handle these tasks without breaking a sweat.
Advanced Features and Extensions: SketchUp’s desktop version supports numerous extensions and plugins that add functionality beyond what’s available on iPad. Whether you need custom modeling tools, advanced analysis features, or rendering tools, the desktop is the place to go.
Working with Large Files: If your project involves intricate designs or large files, you may encounter lag or crashing on the iPad. The desktop version can handle these files much more efficiently, allowing for smoother performance and faster processing times.
Precision and Control: While the iPad gives you a lot of freedom, the desktop version offers more precise control with a mouse and keyboard, making it ideal for highly detailed and accurate work.
Balancing Both: The Best of Both Worlds
For most users, the key is finding a balance between the iPad and desktop versions. Use the iPad for quick sketches, client meetings, and editing while you’re away from your main workstation. When it’s time to dive into more serious work, switch over to your desktop for the extra power, precision, and advanced features you need.
In fact, one of the best aspects of SketchUp for iPad is its integration with Trimble Connect, which makes it easy to transition between devices. You can start a project on the iPad, and when you’re back at the office, you can pick up where you left off on the desktop.
If you’re exploring other tools to expand your modeling toolkit beyond what SketchUp offers on iPad or desktop, check out these alternatives to SketchUp for different workflows and project types.
Enhancing Your Workflow with Vagon Cloud Computer
While SketchUp for iPad offers flexibility and convenience, there are times when you might need more power, especially for rendering complex models or running advanced features that the iPad can’t quite handle. This is where Vagon Cloud Computer comes in.
Introduction to Vagon Cloud Computer
Vagon Cloud Computer is a cloud-based platform that allows you to run powerful desktop applications on any device, including your iPad. By using Vagon, you can access the full desktop version of SketchUp (or any other high-performance application) without worrying about your device's limitations.
Instead of being tethered to a powerful desktop workstation, Vagon allows you to run the full version of SketchUp remotely from the cloud, ensuring you have all the performance and features you need, even on an iPad.
How Vagon Helps
With Vagon, you can run SketchUp’s desktop version on your iPad, unlocking a more powerful and seamless experience. Here’s how it enhances your workflow:
Powerful Rendering: Vagon gives you the ability to render complex models with high-quality visuals, something the iPad alone can’t quite match. No more waiting for the app to catch up with your design; Vagon takes care of the heavy lifting.
Advanced Features and Extensions: Since you’re running SketchUp's full desktop version through Vagon, you can use all the extensions, plugins, and tools that are available on a traditional desktop setup. This means you won’t be restricted by the limited features of the iPad app.
Seamless Experience Across Devices: Whether you’re working on your iPad, desktop, or even a laptop, Vagon ensures that your workflow is consistent. Since everything is cloud-based, you can pick up right where you left off, no matter what device you’re using.
Collaboration Made Easy: When you’re working on a team project, Vagon allows you to easily share and collaborate on your SketchUp models without the need for expensive hardware. Anyone can join the project from anywhere, which makes remote work and client presentations a breeze.
For those curious about hardware specs and what’s ideal for demanding modeling tasks, we’ve also covered a guide on choosing the right PC for SketchUp.
Real Benefits
By using Vagon Cloud Computer, you're no longer limited by the hardware of your iPad. Here’s why it can be a game-changer for SketchUp users:
Flexibility: Access your SketchUp models anytime, anywhere, on any device, with zero compromise on performance.
Cost-Effective: Instead of investing in a high-powered desktop or workstation, you can run SketchUp’s full desktop version in the cloud for a fraction of the cost.
Better Collaboration: Share your models with clients or team members seamlessly, without worrying about device compatibility or file sizes.
Pairing Vagon with proven techniques to render faster in SketchUp can give you a major speed boost without upgrading your local hardware.
Vagon Cloud Computer lets you run SketchUp at its full potential without being tied down to a physical machine, giving you the freedom to design, edit, and render from anywhere. Whether you're working on a detailed design or need the power for complex rendering, Vagon ensures you get the job done without hassle.
Conclusion
SketchUp on the iPad is a fantastic tool for quick sketches, mobile design, and client presentations. It’s a versatile, portable way to work on the go, but as we’ve seen, it does have some limitations. For larger projects or more advanced features, the desktop version still reigns supreme. However, with tools like Vagon Cloud Computer, you can seamlessly bridge the gap between mobile flexibility and desktop power.
Now that you know how to use SketchUp on your iPad, and how to enhance your workflow with Vagon, you’re ready to start designing without any of the usual barriers. Whether you’re on-site, traveling, or working from home, your creative possibilities are endless.
Want to see how Vagon can help you bring your designs to life? Plan a demo session with us today. Let's take your design process to the next level!
FAQs
Can I use SketchUp on any iPad?
Yes, SketchUp for iPad works on iPads running iOS 15.0 or newer. However, the performance will be best on newer models with more processing power, especially when working with larger models or detailed designs.
What features are missing in the iPad version of SketchUp compared to the desktop version?
The iPad version of SketchUp lacks some advanced features, such as complex rendering options, certain third-party extensions, and detailed viewport customization. It’s great for basic modeling, quick sketches, and client presentations, but for high-end rendering or large, intricate designs, the desktop version is recommended.
Can I use my Apple Pencil with SketchUp for iPad?
Yes! The Apple Pencil works seamlessly with SketchUp on iPad, offering you precision when drawing and editing. You can switch between "Just Draw" mode for freehand sketches or "Click-Move-Click" mode for more structured, controlled lines.
How can I avoid performance issues when using SketchUp on my iPad?
To avoid lag or crashes, keep your models simple. Use lower-resolution textures, limit the number of components, and avoid creating overly complex models on the iPad. If you hit performance limits, consider transitioning to the desktop version or using Vagon Cloud Computer for added power.
Can I share my SketchUp models between my iPad and desktop?
Yes! SketchUp for iPad integrates with Trimble Connect, which allows you to sync your models across devices. You can start a project on the iPad, and when you’re ready, switch to the desktop version for more advanced work.
What is Vagon Cloud Computer and how does it help with SketchUp?
Vagon Cloud Computer allows you to run the full desktop version of SketchUp on your iPad by connecting to cloud-based computing power. It provides additional performance for rendering, running extensions, and handling complex models, all while maintaining the flexibility of your iPad.
Is Vagon Cloud Computer cost-effective?
Yes, Vagon Cloud Computer provides access to powerful desktop tools for a fraction of the cost of a high-end workstation. It allows you to work from any device without needing to invest in expensive hardware, making it an affordable solution for designers who need extra performance.
Get Beyond Your Computer Performance
Run applications on your cloud computer with the latest generation hardware. No more crashes or lags.

Trial includes 1 hour usage + 7 days of storage.
Summarize with AI

Ready to focus on your creativity?
Vagon gives you the ability to create & render projects, collaborate, and stream applications with the power of the best hardware.

Vagon Blog


Run heavy applications on any device with
your personal computer on the cloud.
San Francisco, California
Solutions
Vagon Teams
Vagon Streams
Use Cases
Resources
Vagon Blog
What Slows Down After Effects Projects?
The First 30 Minutes in Blender 3D: A Practical Workflow Guide
What’s New in Godot 4.7? Key Features, Upgrades, and Workflow Improvements
What Slows Down Blender 3D Projects?
What Slows Down Adobe Photoshop Projects?
The First 30 Minutes in Adobe Photoshop: A Practical Workflow Guide
Before You Start in Adobe Photoshop: A Practical Setup Checklist
What’s New in Unreal Engine 5.8? Key Features and Upgrade Advice
How to Run Windows on an iPad: 4 Best Ways (2026)
Vagon Blog
Run heavy applications on any device with
your personal computer on the cloud.
San Francisco, California
Solutions
Vagon Teams
Vagon Streams
Use Cases
Resources
Vagon Blog