Instant Connection for Pixel Streaming
— New Feature Automated Setup

How to Export from SolidWorks to Twinmotion
How to Export from SolidWorks to Twinmotion
Architecture
How to Export from SolidWorks to Twinmotion
Table of Contents
Did you know you can take a full mechanical CAD assembly and turn it into a real-time visualization in just a few minutes? Most people don’t believe it until they actually see it. Honestly, I didn’t either.
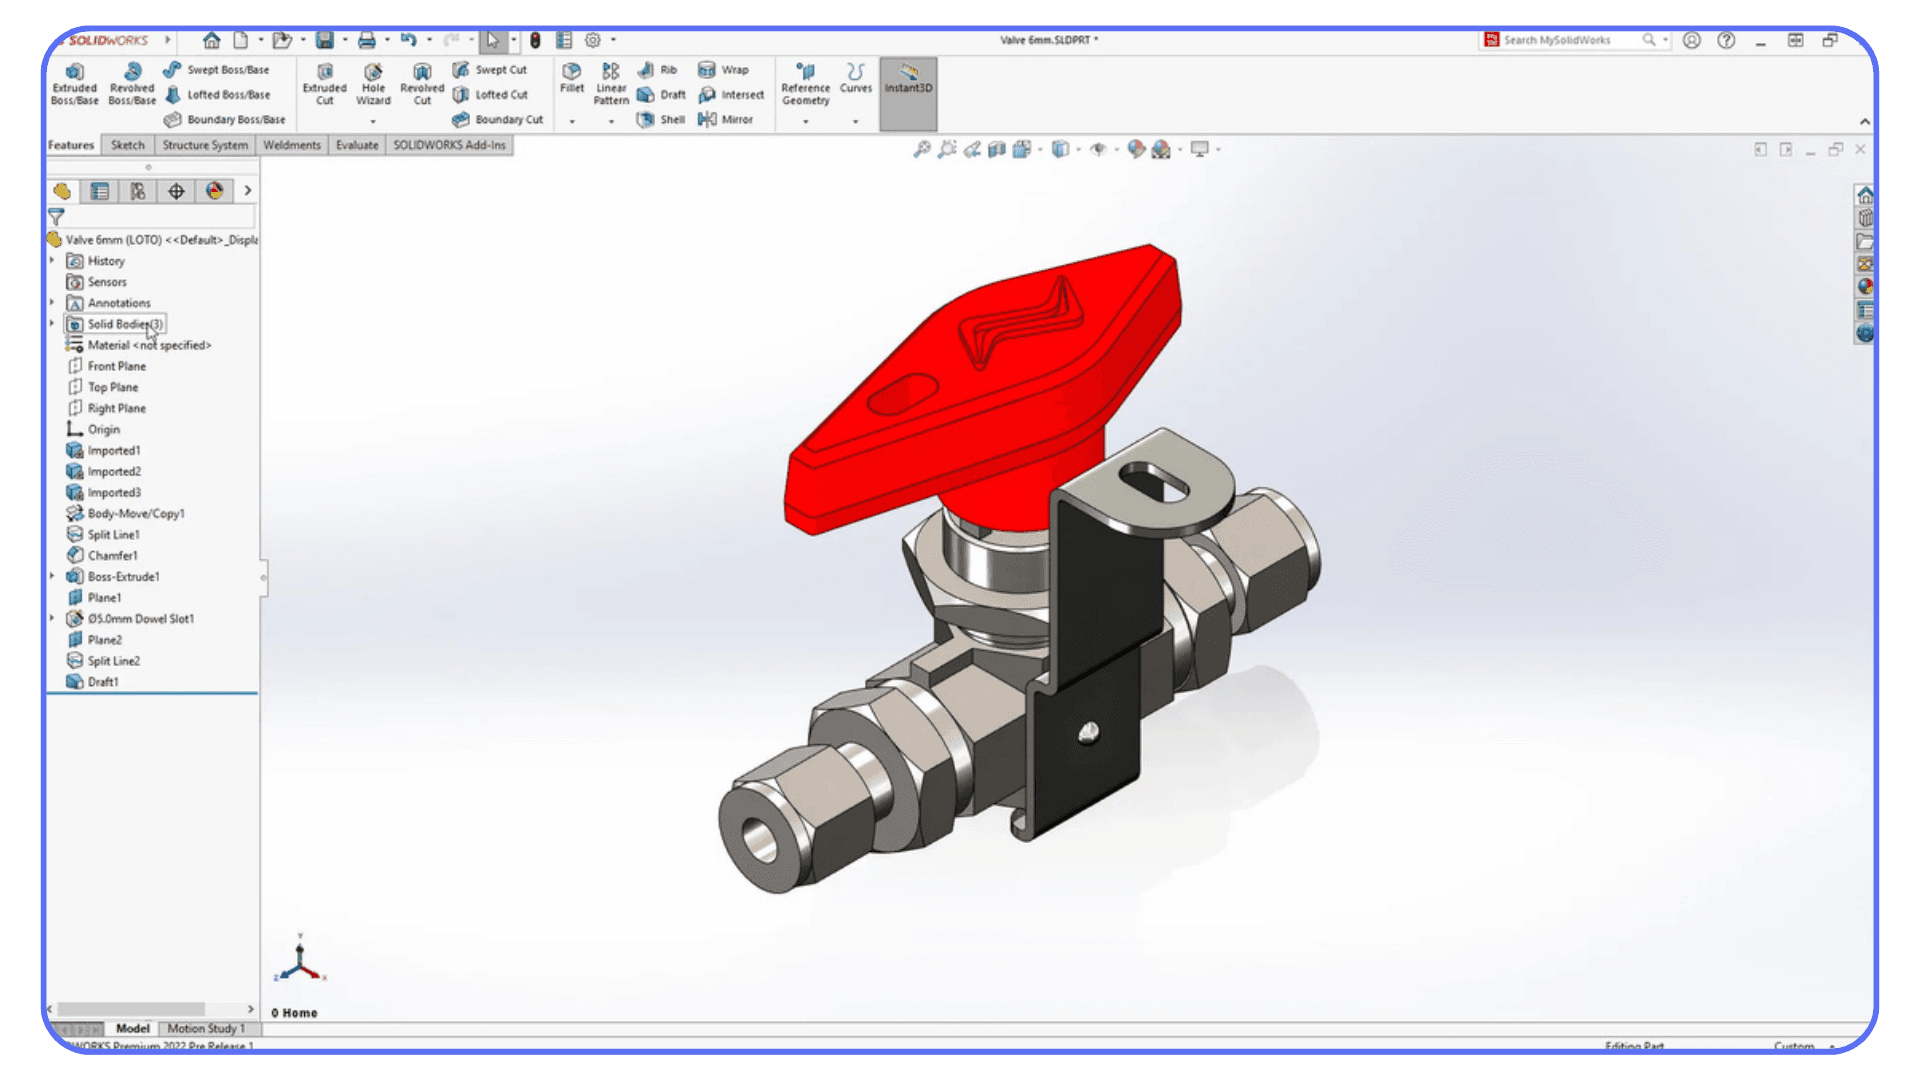
A few months ago, I was deep in a SolidWorks project packed with tiny fillets, bolts, hidden components, basically a small mechanical jungle. I needed proper lighting, reflections, and a scene that felt real, not another flat CAD viewport. So I tried sending the model into Twinmotion, half expecting something to break.
But when it opened, everything suddenly made sense. The parts had depth. The materials reacted to light. The whole assembly looked like a physical object instead of a technical sketch. It was one of those moments where you wonder why you hadn’t been doing this the whole time.
That’s why this guide exists. Anyone who has ever tried moving a SolidWorks model into a real-time environment knows how messy it can get, wrong orientation, missing materials, exploded hierarchies, and file sizes that make your system groan. This guide is the practical roadmap that avoids all of that. You’ll see exactly how to prep, export, import, and polish your SolidWorks model in Twinmotion without wasting hours on problems that shouldn’t exist in the first place.
If you want to push your scene a bit further, especially for final images or client visuals, this guide on the best render settings on Twinmotion breaks down which sliders actually matter and which ones only slow you down.
Setup and Prerequisites
Before exporting anything, you need a few pieces in place. Most issues people face later, broken materials, weird scale, missing parts, start right here, during the setup. A clean beginning saves a lot of frustration down the line.
Make Sure You’re Using the Right Tools
Twinmotion has an official Datasmith Exporter plugin specifically for SolidWorks. It’s the smoothest path between the two programs because it preserves hierarchy, materials, part names, and overall structure far better than generic formats like STEP or FBX.
If you’re using SolidWorks 2020 or newer, you’re in good shape, the plugin supports all modern versions. Older versions can still export, but they make you work harder than necessary.
Install the Datasmith Exporter Plugin
Once installed, you’ll get a new tab in SolidWorks that lets you:
Export a .udatasmith file
Or use Direct Link to sync your model with Twinmotion in real time
Most users stick to file export, but Direct Link is incredibly useful if you’re iterating on a design and want instant updates in Twinmotion without repeated exporting.

Check Your Hardware Reality
Twinmotion is fast, but it still relies heavily on your GPU. Even a moderately complex SolidWorks assembly can be heavy in a real-time environment, so expect:
Mid-range GPUs to run fine with medium settings
Older or low-power GPUs to struggle
Laptop GPUs to occasionally fall behind on large assemblies
You don’t need workstation hardware to follow this workflow, but understanding your limitations helps set the right expectations once you begin working inside Twinmotion.
And if you ever feel like Twinmotion isn’t using your hardware properly, this walkthrough on how to use GPU on Twinmotion shows exactly how to get smoother performance without touching your model.
Start with a Clean, Organized SolidWorks File
A chaotic SolidWorks model becomes a chaotic Twinmotion import. Before exporting, make sure:
Your assembly tree is organized
Unused parts are hidden or suppressed
Tiny internal details you don’t need are removed
Materials or appearance colors are assigned logically
Twinmotion can handle a lot, but it’s still real-time rendering. The cleaner your model, the smoother things will go.
Preparing Your SolidWorks Model for Export
This is the part most people rush through, and it’s exactly why their Twinmotion imports look messy or perform poorly. SolidWorks models are built for engineering precision, not real-time rendering, so a little preparation here saves a lot of cleanup later.
Clean Up the Geometry
Ask yourself a simple question: “Will anyone actually see this detail?”
If the answer is no, simplify it.
Things worth removing or suppressing:
Microscopic fillets that won’t be visible
Internal components hidden inside housings
Excessively detailed fasteners
Decorative features that don’t show up in the final view
Threads, engravings, fine text, vents, internal ribs
Real-time engines don’t need engineering-level accuracy. They need visual clarity.
Organize Your Assembly Structure
Twinmotion will show your hierarchy exactly as it is. If your SolidWorks FeatureManager is a tangled forest of unnamed parts, expect that same chaos in Twinmotion.
Make sure:
Subassemblies are grouped logically
Part names are readable
Hidden parts are actually hidden
Suppressed components are removed from the export
A clean structure makes it much easier to replace materials, animate components, or isolate parts once you’re inside Twinmotion.
Assign Basic Appearance Materials in SolidWorks
Twinmotion won’t recreate SolidWorks materials perfectly, but it will use them as material IDs. That means you can speed up your Twinmotion workflow by assigning simple placeholder colors or materials in SolidWorks.
For example:
All metal parts → one color
All plastic parts → another color
Glass → its own appearance
Rubber or soft components → their own category
These placeholders help Twinmotion understand what belongs together, so you can quickly swap them for high-quality materials later.
Check Units and Scale
Even though both programs use real-world units, scale mismatch still happens. Before exporting:
Confirm your SolidWorks document units
Make sure the model is at 1:1 scale
Verify the export settings use the same units
Few things are more annoying than an import that shows up the size of a toy car or a building.

Simplify Using Defeature
SolidWorks includes a tool called Defeature that removes internal features and simplifies complex assemblies into lighter, render-friendly versions. It’s incredibly useful for large enclosures, machine bodies, or assemblies with hundreds of repetitive internals.
Use it when the original model is too heavy or when you know only the outer surfaces will be visible in Twinmotion.
If you’re comparing engines or trying to decide long-term, this Lumion vs Twinmotion breakdown does a great job of showing where each tool shines and where they fall short.
Exporting from SolidWorks to Twinmotion
This is where everything you prepared finally leaves SolidWorks and enters a format Twinmotion understands. The export process isn’t hard, but your choices here determine whether your model arrives smooth and workable… or as a single fused blob you can’t edit at all.
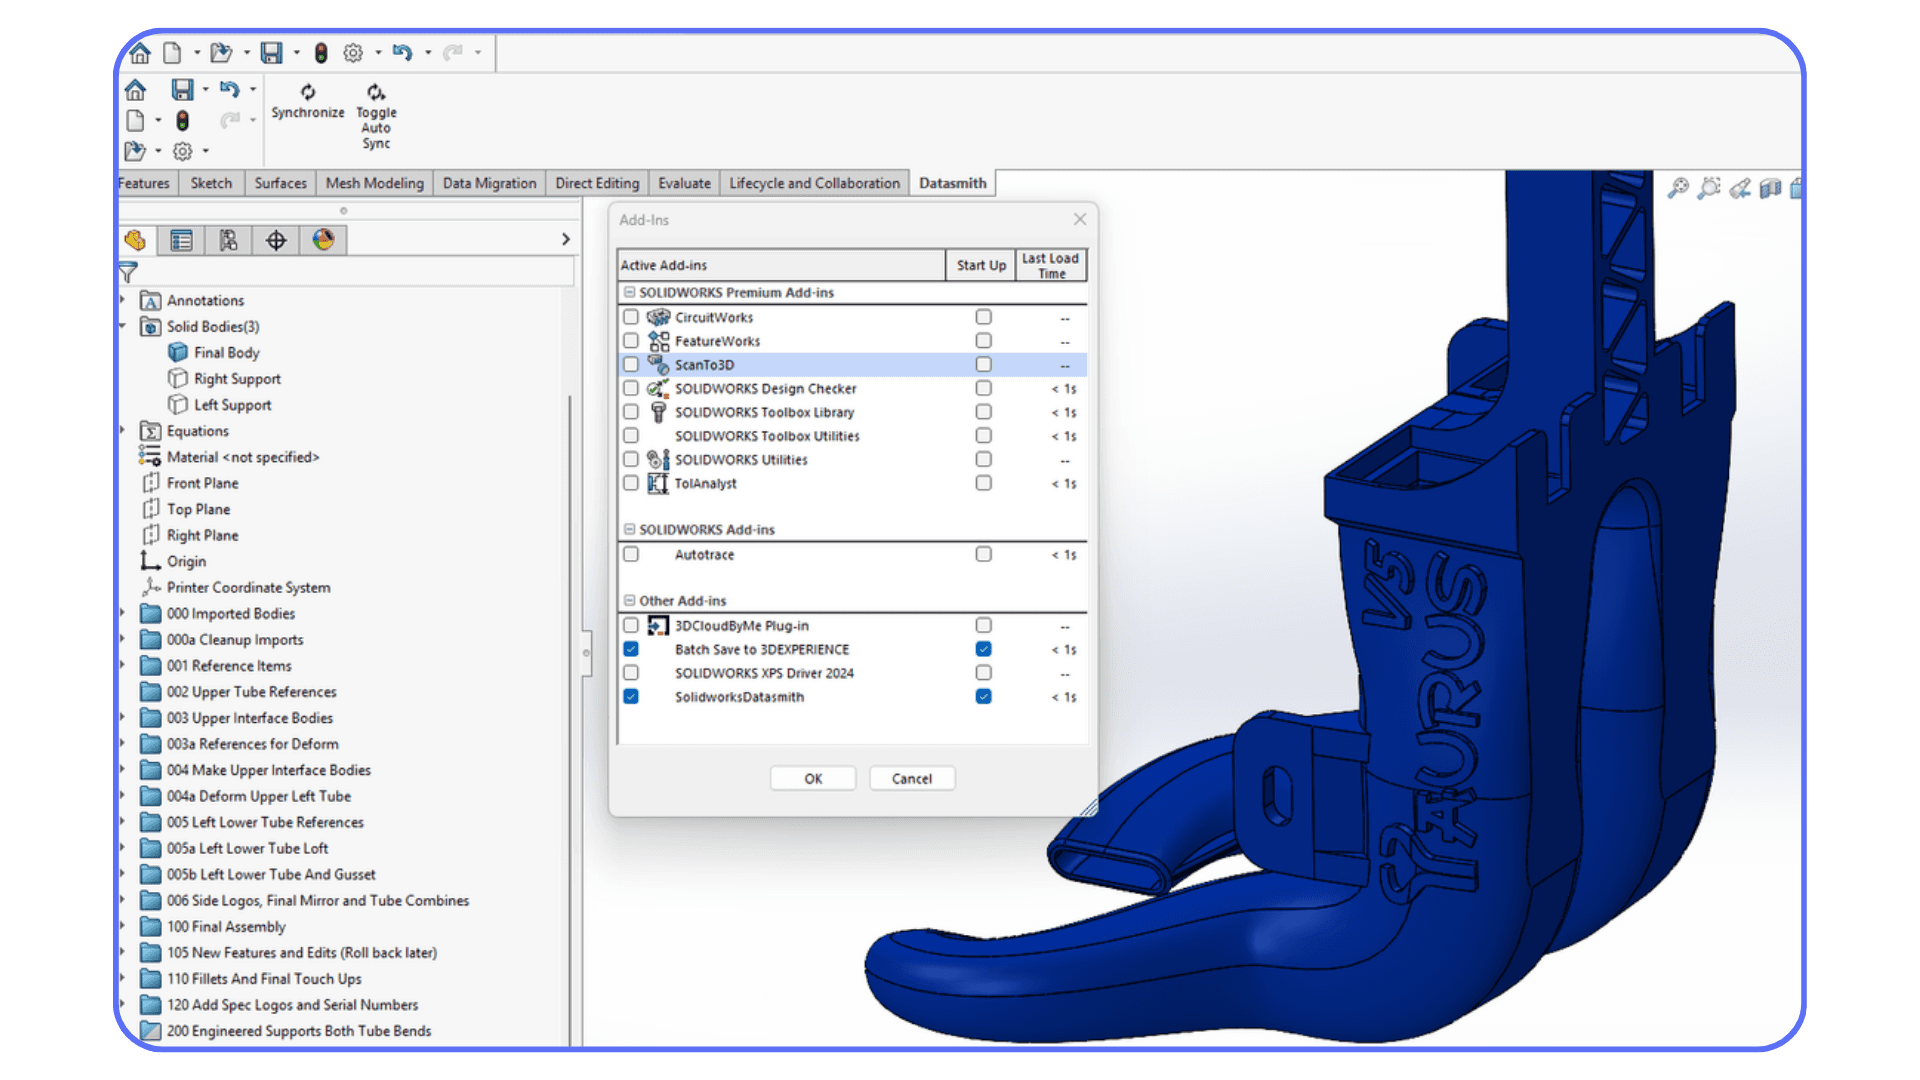
Use the Datasmith Exporter (The Recommended Path)
If you installed the Datasmith Exporter plugin, this is the easiest and most reliable way to go. It keeps hierarchy clean, preserves your materials as IDs, and generally avoids 90% of the issues that come from generic formats.
Once the plugin is enabled in Tools → Add-ins, you’ll see the Datasmith or Twinmotion tab in your toolbar. That’s your export hub.
Choose Between Direct Link or File Export
You get two export options:
1. Export a .udatasmith file
This creates a portable file you import manually into Twinmotion. It’s predictable and great for final transfers or stable revisions.
2. Use Direct Link (Live Sync)
This syncs your SolidWorks model directly with Twinmotion. Change something in SolidWorks → update in Twinmotion instantly. It’s ideal for iterative design, testing materials quickly, or showing progress live.
Both methods work well. File export is slightly more “controlled,” while Direct Link is perfect for fast iteration.
Set the Correct Export Options
Before exporting, take a moment to check a few settings:
Keep hierarchy if your model has moving parts or grouped structures you want to maintain.
Include appearances so your placeholder colors transfer correctly.
Export only visible parts unless you specifically need hidden components.
Preserve instances if you have repeated bolts or hardware, it helps performance later.
A few seconds spent here saves a lot of frustration inside Twinmotion.
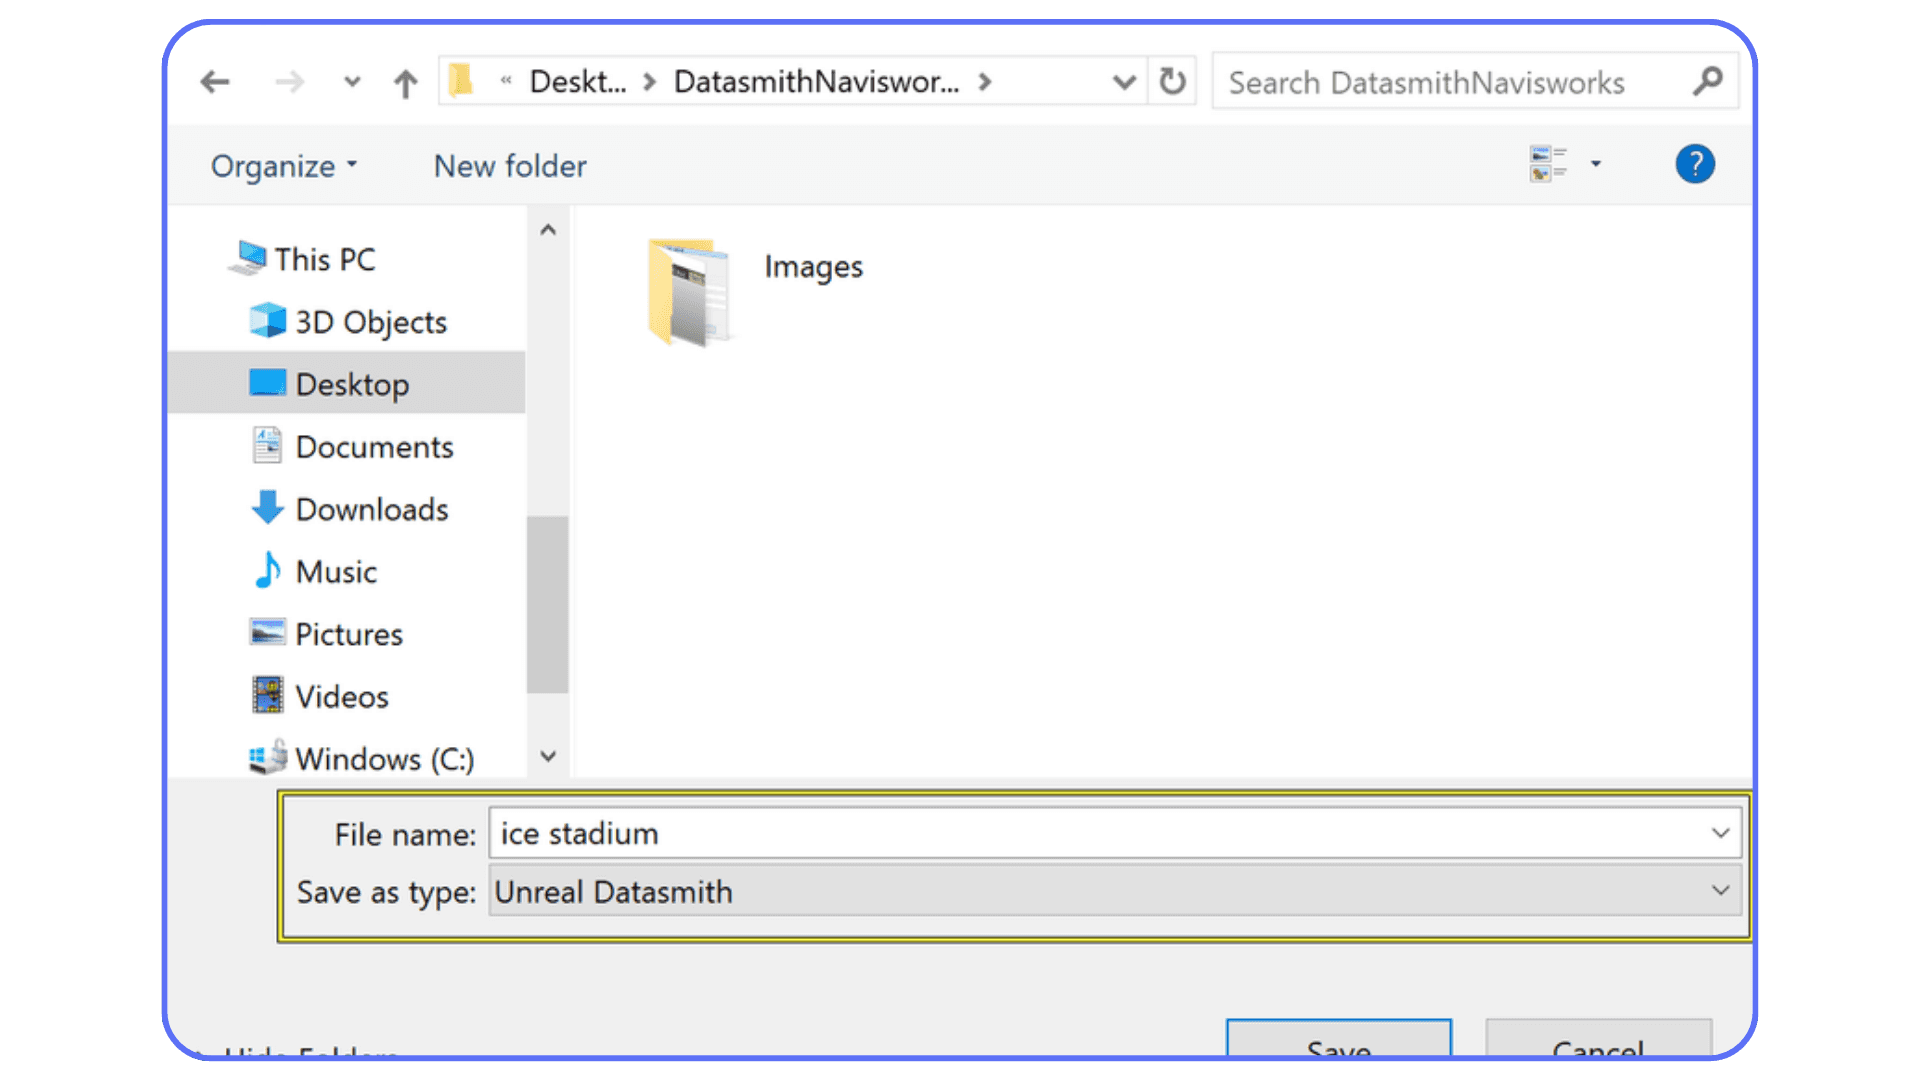
Export the Model
Click Export Datasmith (or Sync, if using Direct Link), choose a location, and let SolidWorks generate the necessary files. You’ll get a .udatasmith file and a folder full of supporting geometry. Keep them together, Twinmotion reads the whole package.
If You Can’t Use the Plugin (Less Ideal Alternatives)
Sometimes IT restrictions or older versions make the plugin unavailable. In that case, you do have other options, but each comes with caveats:
STEP → FBX: Good geometry but weaker hierarchy. Requires conversion in a third application.
FBX (if available): Quick but prone to flattened materials and odd scale issues.
OBJ: Fine for very simple parts but loses hierarchy and doesn’t preserve materials well.
STL: The nuclear option, destroys hierarchy, creates huge triangle meshes, and should be avoided at all costs.
If hierarchy or material control matters, the plugin is always the better path.
Typical Export Issues and How to Avoid Them
SolidWorks exports can go sideways in predictable ways:
A single melted mesh usually means you exported as STL or collapsed hierarchy.
Wrong scale usually points to mismatched SolidWorks and export units.
Washed-out or missing material colors happen when SolidWorks appearances weren’t properly assigned.
Performance issues are often caused by exporting every tiny piece, including screws and threads.
These problems are almost always preventable by preparing the model cleanly and using the Datasmith exporter.
The same logic applies to other pipelines too, this SketchUp to Twinmotion workflow guide shows how much cleaner things feel when your hierarchy and materials come in organized.
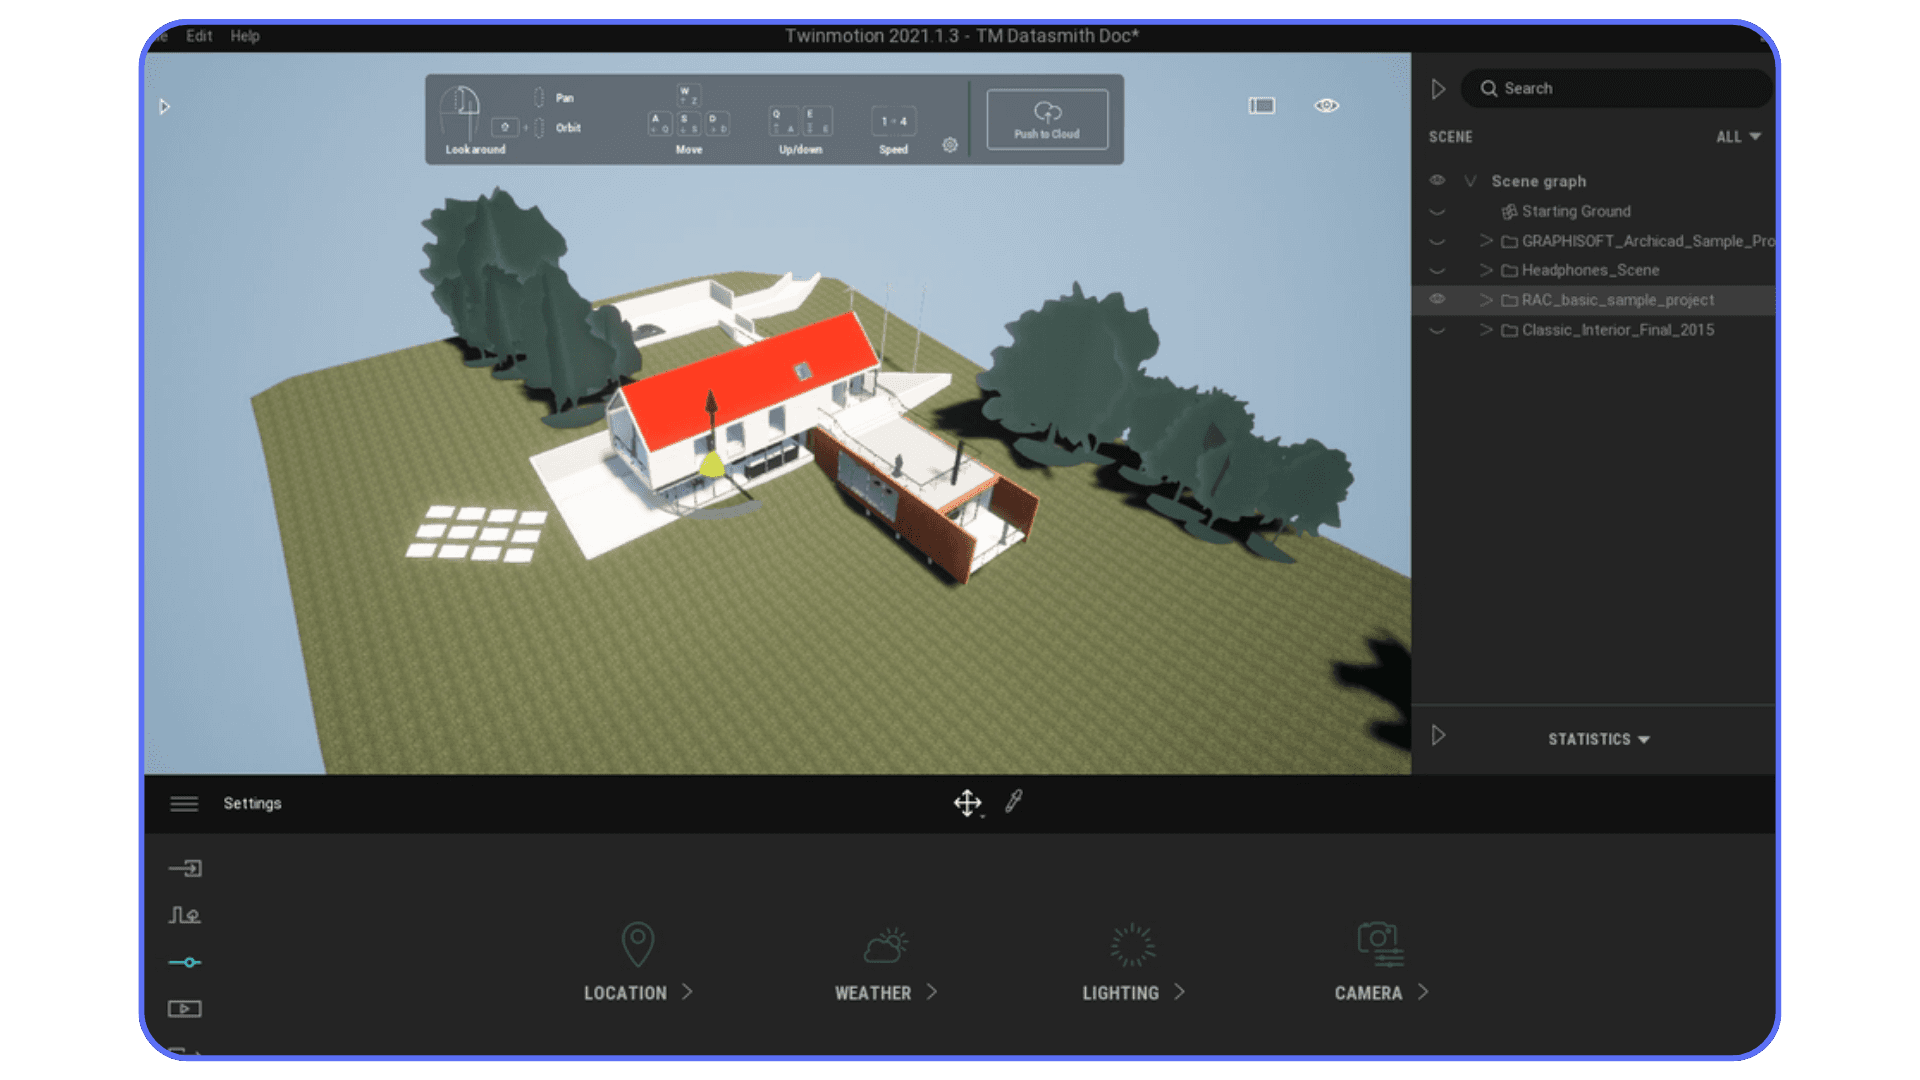
Importing Your Model Into Twinmotion & Initial Checks
Once your export is ready, Twinmotion becomes your playground. But the first few minutes after import are crucial, this is where you confirm that the structure, scale, materials, and orientation all made the trip correctly. A smooth import means the polishing stage becomes a creative process instead of damage control.
Bring the Datasmith File Into Twinmotion
Open Twinmotion, start a new project (or open an existing one), and choose Import. Select your .udatasmith file, and Twinmotion will automatically pull in the geometry, hierarchy, and appearance data. If you’re using Direct Link, click Sync instead and your model will appear instantly.
Both workflows lead to the same result; the only difference is how fast updates arrive when you revise your SolidWorks model.
Choose the Right Import Settings
Twinmotion gives you a few important choices during import:
Keep hierarchy:
Always enable this for assemblies. It keeps your subassemblies intact and lets you edit or animate specific parts later.
Combine instances:
If your assembly uses repeated bolts or patterned components, turn this on. It reduces memory usage and keeps your scene running smoothly.
Material behavior:
If this is your first import, allow Twinmotion to use the incoming SolidWorks appearance data. Once you start replacing materials in Twinmotion, you may want to disable automatic material updates on future reimports to avoid overwriting your work.
These settings only take a few seconds to pick, but they affect everything that comes next.
Check the Scale and Orientation
Place a human-scale object next to your imported model. This quick test confirms whether your scale carried over properly. If your product looks like a giant sculpture, or a matchbox, adjust the units in your export and reimport.
Orientation is just as important. SolidWorks and Twinmotion don’t always agree on which way is “up,” so it’s not uncommon for a model to arrive rotated. Fix the root object orientation before doing any detailed work so you don’t have to fix everything twice.
Inspect Materials and Shading
Twinmotion doesn’t recreate SolidWorks materials, and that’s fine, you’ll be replacing everything anyway. What you’re checking here is whether:
Placeholder colors transferred correctly
Parts grouped by materials came in as expected
Any objects look oddly dark, shiny, or transparent
Strange shading often comes from flipped normals or unsupported appearances, which you can repair inside Twinmotion with a few clicks.
Evaluate Performance Early
Before adding lights, reflections, assets, or environment effects, move around the scene and get a sense of performance. If the model stutters on an empty project, the issue is usually polygon density or an overly detailed SolidWorks export, things like fine threads, internal parts, or 500 bolts rendered individually.
Catching this early lets you go back and simplify the model before investing time into polishing a slow scene.
Save a Clean Baseline Version
Once you confirm scale, orientation, hierarchy, and materials are correct, save your project. This becomes your baseline scene, the one you can revert to if something goes wrong later or if you want to test different lighting setups.
Scene Optimization & Visual Polish
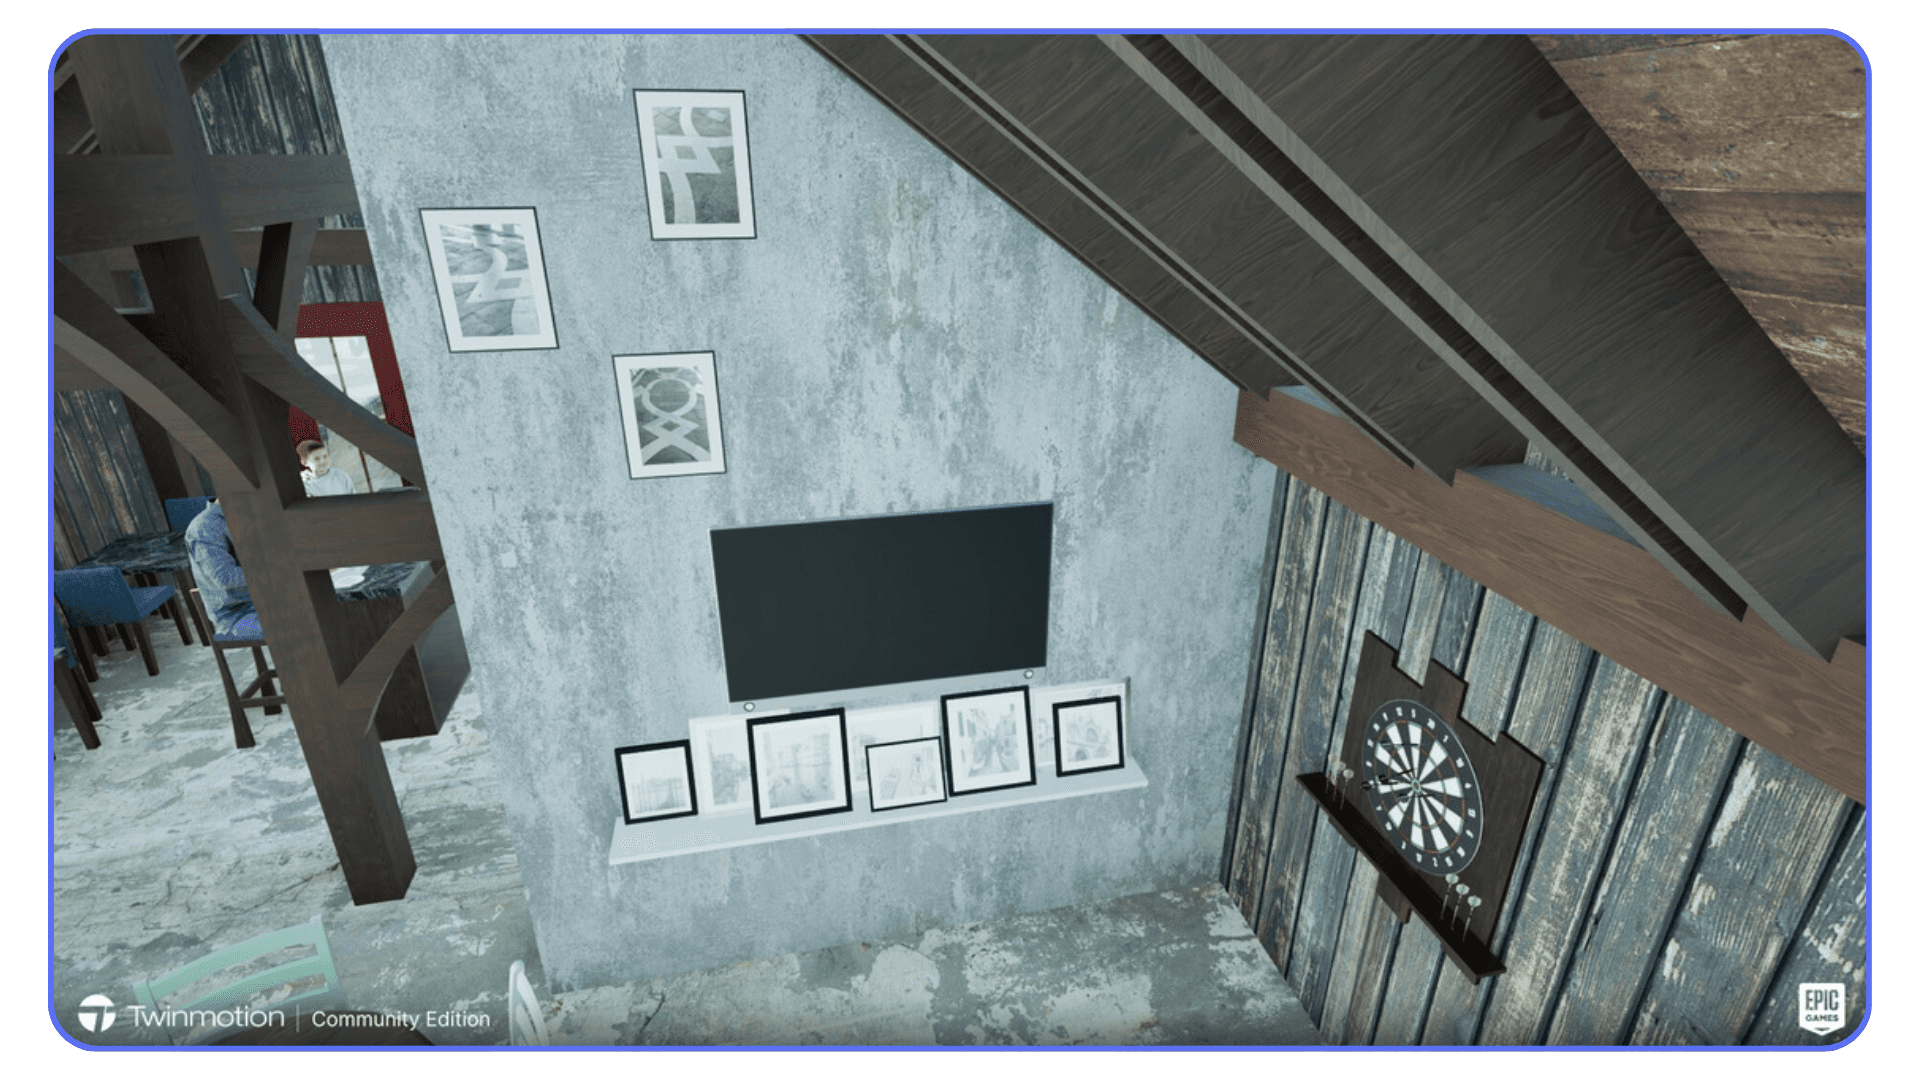
Once your model is in Twinmotion and everything looks structurally correct, this is where the fun begins. Twinmotion shines when you start adding life to your model, lighting, materials, environment, but doing it intelligently keeps performance smooth and results impressive.
Tidy Up the Geometry Inside Twinmotion
Even if you cleaned the SolidWorks file, some models still arrive heavier than necessary. Look for:
Parts you can merge because they’ll share the same material
Tiny hidden faces or pieces you won’t see in the final render
Repeated assets that Twinmotion might instanced-merge for better performance
A quick cleanup here keeps your scene manageable, especially as lighting and textures get more complex.
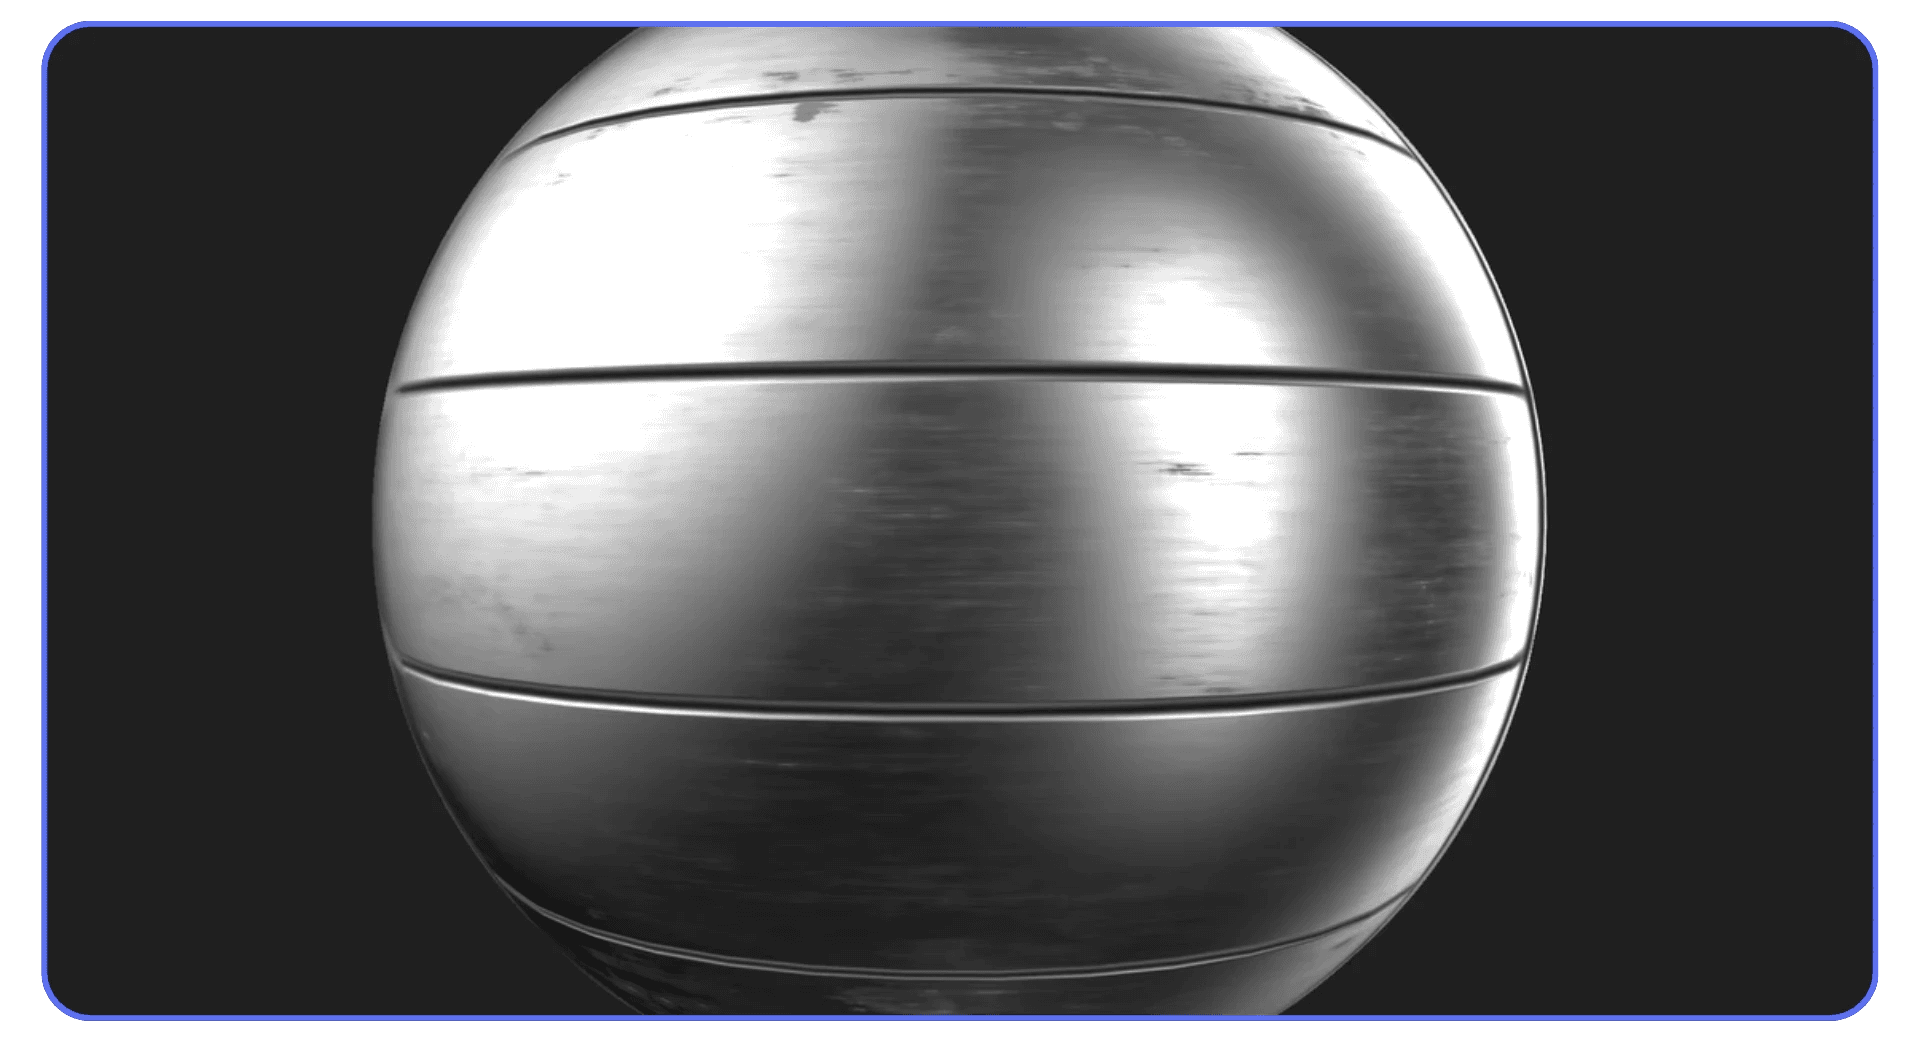
Upgrade All Placeholder Materials
Your SolidWorks appearances did their job, they came through as IDs. Now it’s time to replace them with true Twinmotion materials.
Best approach:
Replace metals with PBR metal materials
Assign plastics from Twinmotion’s non-metal library
Swap placeholder glass for real glass presets
Adjust reflectiveness, roughness, and bump maps to add realism
Even two or three well-chosen materials can dramatically improve the look of a mechanical assembly.
Refine Your Lighting
Good lighting makes CAD assemblies feel “real,” even without complex texturing.
Start with:
The primary light direction (sun angle)
Basic shadows and ambient occlusion
Soft reflections to emphasize form
An environment sky or an HDRI for more natural contrast
One trick many SolidWorks users love: tilt the sun slightly so edges catch a bit of highlight. It immediately gives the assembly more dimension.
Build a Simple but Convincing Environment
Your assembly doesn’t need a full architectural scene. A clean environment helps scale and realism:
Add a ground plane or studio floor
Use a neutral HDRI for lighting
Place a few minimal assets for context if needed
A simple staged environment often looks more professional than a crowded one.

Check Performance as You Polish
As you add lights, reflections, and effects, occasionally rotate around the scene or move the camera to see if things are still smooth. Twinmotion can handle a lot, but real-time rendering always depends on balance.
If your FPS drops:
Reduce unnecessary reflection probes
Lower the complexity of materials (especially glass or chrome)
Remove background assets that don’t add meaningful value
Simplify geometry in high-density areas
Optimizing here keeps the scene beautiful without sacrificing speed.
Once everything is set up, you can squeeze more quality out of your scene by following these tips on the best render settings in Twinmotion for high-quality visuals.
A Real-World Example: What This Workflow Looks Like in Practice
To give you a sense of how everything comes together, here’s a real project that pushed me into making SolidWorks → Twinmotion part of my standard workflow.
A while back, I had a mechanical assembly with around 450 parts, nothing insane for engineering work, but definitely heavy for real-time visualization. The model had a mix of sheet metal, machined components, rubber seals, a motor housing, and a handful of assemblies nested inside each other. Exactly the kind of file that looks impressive in SolidWorks but turns into a performance nightmare if you’re not careful.
I started by cleaning up the internals, hiding bolts that were buried inside housings, suppressing a whole section of internal geometry that nobody would ever see, and reducing thread details everywhere I could. That alone cut the exported file size by almost half.
When I brought it into Twinmotion using the Datasmith exporter, the hierarchy came through perfectly. Every subassembly and part name was right where I expected it to be, which made the next step, replacing placeholder materials, way faster. Metals became brushed aluminum or painted steel, rubber parts got soft matte finishes, and the transparent components actually looked transparent instead of flat grey.
Lighting made the biggest difference. A slight tilt in the sun angle brought out all the edges and curves in the assembly, and a neutral HDRI added just enough realism without turning it into a dramatic cinematic shot. The whole thing suddenly looked physical, like something I could reach out and grab off the table.

Performance was surprisingly good at first, but once I added reflections and a few environment elements, I could feel the scene starting to get heavier. That’s when I turned off a few unnecessary lights, merged some instanced parts, and simplified a few materials. After that, the scene felt smooth again.
The best part? Every time the design changed, I’d remove a bracket, adjust a housing, update a pattern, I’d push the update through Direct Link, and Twinmotion would update almost instantly. I didn’t have to redo materials, camera angles, or lighting setups. That alone saved hours.
This is the moment where the workflow really proves itself: once you get a clean import and a solid base scene, all your future iterations become fast, predictable, and honestly, a lot more fun.
When Your Hardware Hits Its Limit
At some point in the process, almost everyone hits the same wall: the scene looks great, the materials are coming together, lighting feels right, and then the performance starts to dip. Twinmotion is powerful, but real-time rendering gets heavy fast, especially when you’re working with mechanical assemblies that weren’t exactly designed with GPU budgets in mind.
This is where Vagon Cloud Computer becomes a useful option.
Instead of relying on your laptop or an aging desktop to push a detailed Twinmotion scene, Vagon lets you spin up a high-performance cloud machine with a strong GPU whenever you need it. You open your Twinmotion project just like you would locally, but suddenly you’re working with hardware designed for this kind of load.
It’s convenient for a few specific situations:
Large assemblies that strain your system: If your SolidWorks export includes hundreds of parts, reflections, or high-quality lighting, cloud GPU power keeps everything smooth.
Rendering high-quality images or videos: Twinmotion’s higher-quality modes can get heavy quickly, cloud hardware handles them comfortably.
Working from a lightweight laptop: If you’re traveling, using a Mac, or don’t want to carry a workstation everywhere, Vagon makes your setup portable.
Sharing the experience with others: You can run Twinmotion from the cloud and show the live viewport to clients, teammates, or collaborators without needing to send them the full project.
You still follow the exact same SolidWorks → Twinmotion workflow. The difference is simply where the performance comes from. When you’re polishing scenes, testing materials, previewing animations, or exporting high-quality visuals, having more GPU power feels less like a luxury and more like the workflow you were supposed to have all along.
Common Mistakes & How to Avoid Them
SolidWorks → Twinmotion is a smooth workflow when set up correctly, but a few recurring mistakes can make the process much harder than it needs to be. Most of them are easy to avoid once you know what to look out for.
Exporting Every Tiny Detail
SolidWorks models often contain screws, washers, threads, small fillets, internal ribs, and all kinds of geometry you’ll never see in the final visualization. Sending all of this to Twinmotion makes the scene unnecessarily heavy.
Fix: Hide or suppress small internal parts, simplify high-density objects, and avoid exporting features that won’t be visible.
Ignoring Hierarchy Before Export
If your SolidWorks assembly structure is chaotic, Twinmotion will show that chaos back to you. Messy names, random groupings, and nested parts make material assignment and editing painful.
Fix: Clean up the FeatureManager tree. Name parts clearly, group assemblies logically, and remove unused components.
Using the Wrong Export Format
Formats like STL or OBJ lose hierarchy and materials. STEP → FBX conversions help a bit, but they still require extra work and often break material groupings.
Fix: Use the Datasmith Exporter whenever possible. It preserves the most information and gives Twinmotion what it needs.
Scale Mismatch on Import
Even though both programs use real-world units, mismatched export settings can cause your model to arrive at the wrong size.
Fix: Double-check unit settings in SolidWorks and in the export dialogue. After import, compare the model to a human-scale asset in Twinmotion.
Not Checking Orientation
SolidWorks and Twinmotion don’t always share the same up-axis. A model that arrives tilted or rotated becomes harder to work with once you start placing assets or lights.
Fix: Correct orientation immediately after import, before adding anything to the scene.
Relying on SolidWorks Materials
SolidWorks appearances are useful for grouping parts, but they won’t look good in Twinmotion. Many people waste time trying to fix imported appearances instead of replacing them.
Fix: Use basic colors or placeholders in SolidWorks, then replace them with real Twinmotion materials after import.
Overloading the Scene With Lighting and Reflections Too Early
Adding high-quality lights, reflection probes, and environment effects before testing performance can slow down the entire project.
Fix: Verify performance while the scene is still simple. Add complexity gradually and test as you go.
Skipping the Baseline Save
Many users start polishing their scene immediately after import and forget to save an untouched version. When reimports or updates overwrite materials or cause issues, recovery becomes complicated.
Fix: Save a clean baseline right after a correct import. Use versioning as you refine the scene.
And if you’re still getting familiar with the software, these beginner tips to master Twinmotion are a great way to avoid small mistakes that slow people down early on.
Final Thoughts
Once you see a SolidWorks model come to life in Twinmotion, it’s hard to go back to static screenshots or plain CAD renderings. The workflow becomes surprisingly natural: prepare the model, export cleanly, bring it into a real-time environment, and start exploring lighting, materials, and atmosphere in a way that’s impossible inside SolidWorks alone.
The best part is how repeatable it becomes. After the first clean import, updates are fast. Revisions stop feeling like chores, and the visualization stage turns into something closer to a creative session than a technical task. Whether you’re building product previews, pitching concepts, checking form in context, or just wanting to see your work outside a grey viewport, Twinmotion adds a layer of clarity that engineers and designers often don’t realize they’re missing.
This guide gives you the path that avoids all the usual traps, lost hierarchy, wrong scale, broken shading, heavy geometry, and lets you focus on the part that actually matters: making your design look real.
FAQs
1. Can I export directly from SolidWorks to Twinmotion without any plugins?
Yes, but it’s not ideal. You can export using formats like FBX, OBJ, or STEP, but you’ll lose hierarchy, material grouping, or instance data. The Datasmith Exporter is the only method that brings everything across cleanly.
2. Why does my SolidWorks model look shiny or plastic-like in Twinmotion?
Because SolidWorks appearances don’t translate as real materials. They come in as placeholders. Replace them with Twinmotion’s materials and tweak roughness, reflectivity, and metallic values to get realistic results.
3. My model is tiny (or huge) when imported. What happened?
Scale mismatch. SolidWorks and Twinmotion use the same unit logic, but export settings can still override them. Check the units in your SolidWorks document and in the Datasmith export window, then reimport.
4. Why is my assembly coming in as one big fused piece?
You probably exported as STL, OBJ, or a format that collapses hierarchy. Also check whether “Collapse hierarchy” was turned on during import. Using Datasmith with “Keep hierarchy” fixes this.
5. Is Direct Link better than exporting a .udatasmith file?
Neither is “better”, they’re just different. Direct Link is great for fast iteration because updates are instant. File export is more controlled and reliable for final deliveries or sharing with teammates.
6. Why are some parts dark or black after import?
This usually happens when normals are flipped, or when SolidWorks appearances don’t translate correctly. In Twinmotion, try toggling double-sided materials or reassigning the surface material entirely.
7. Twinmotion feels slow after import. What should I do?
Large assemblies can overload real-time engines. Try merging instanced parts, removing tiny details from the SolidWorks file, replacing heavy materials, or lowering scene complexity until it feels smoother.
8. Can I animate parts of the assembly in Twinmotion?
Yes, as long as the hierarchy is preserved. If your rotating or sliding components are grouped properly in SolidWorks, Twinmotion will let you animate them with keyframes or simple movement tools.
9. Do I need to keep the Datasmith folder next to the .udatasmith file?
Absolutely. Twinmotion reads both the file and the folder. If you separate them, Twinmotion may not load materials, meshes, or references correctly.
10. Is this workflow only for product design?
Not at all. Mechanical assemblies, prototypes, vehicles, enclosures, architectural components, and even conceptual models transfer well, as long as you clean the geometry and keep the structure organized.
Did you know you can take a full mechanical CAD assembly and turn it into a real-time visualization in just a few minutes? Most people don’t believe it until they actually see it. Honestly, I didn’t either.
A few months ago, I was deep in a SolidWorks project packed with tiny fillets, bolts, hidden components, basically a small mechanical jungle. I needed proper lighting, reflections, and a scene that felt real, not another flat CAD viewport. So I tried sending the model into Twinmotion, half expecting something to break.
But when it opened, everything suddenly made sense. The parts had depth. The materials reacted to light. The whole assembly looked like a physical object instead of a technical sketch. It was one of those moments where you wonder why you hadn’t been doing this the whole time.
That’s why this guide exists. Anyone who has ever tried moving a SolidWorks model into a real-time environment knows how messy it can get, wrong orientation, missing materials, exploded hierarchies, and file sizes that make your system groan. This guide is the practical roadmap that avoids all of that. You’ll see exactly how to prep, export, import, and polish your SolidWorks model in Twinmotion without wasting hours on problems that shouldn’t exist in the first place.
If you want to push your scene a bit further, especially for final images or client visuals, this guide on the best render settings on Twinmotion breaks down which sliders actually matter and which ones only slow you down.
Setup and Prerequisites
Before exporting anything, you need a few pieces in place. Most issues people face later, broken materials, weird scale, missing parts, start right here, during the setup. A clean beginning saves a lot of frustration down the line.
Make Sure You’re Using the Right Tools
Twinmotion has an official Datasmith Exporter plugin specifically for SolidWorks. It’s the smoothest path between the two programs because it preserves hierarchy, materials, part names, and overall structure far better than generic formats like STEP or FBX.
If you’re using SolidWorks 2020 or newer, you’re in good shape, the plugin supports all modern versions. Older versions can still export, but they make you work harder than necessary.
Install the Datasmith Exporter Plugin
Once installed, you’ll get a new tab in SolidWorks that lets you:
Export a .udatasmith file
Or use Direct Link to sync your model with Twinmotion in real time
Most users stick to file export, but Direct Link is incredibly useful if you’re iterating on a design and want instant updates in Twinmotion without repeated exporting.
Check Your Hardware Reality
Twinmotion is fast, but it still relies heavily on your GPU. Even a moderately complex SolidWorks assembly can be heavy in a real-time environment, so expect:
Mid-range GPUs to run fine with medium settings
Older or low-power GPUs to struggle
Laptop GPUs to occasionally fall behind on large assemblies
You don’t need workstation hardware to follow this workflow, but understanding your limitations helps set the right expectations once you begin working inside Twinmotion.
And if you ever feel like Twinmotion isn’t using your hardware properly, this walkthrough on how to use GPU on Twinmotion shows exactly how to get smoother performance without touching your model.
Start with a Clean, Organized SolidWorks File
A chaotic SolidWorks model becomes a chaotic Twinmotion import. Before exporting, make sure:
Your assembly tree is organized
Unused parts are hidden or suppressed
Tiny internal details you don’t need are removed
Materials or appearance colors are assigned logically
Twinmotion can handle a lot, but it’s still real-time rendering. The cleaner your model, the smoother things will go.
Preparing Your SolidWorks Model for Export
This is the part most people rush through, and it’s exactly why their Twinmotion imports look messy or perform poorly. SolidWorks models are built for engineering precision, not real-time rendering, so a little preparation here saves a lot of cleanup later.
Clean Up the Geometry
Ask yourself a simple question: “Will anyone actually see this detail?”
If the answer is no, simplify it.
Things worth removing or suppressing:
Microscopic fillets that won’t be visible
Internal components hidden inside housings
Excessively detailed fasteners
Decorative features that don’t show up in the final view
Threads, engravings, fine text, vents, internal ribs
Real-time engines don’t need engineering-level accuracy. They need visual clarity.
Organize Your Assembly Structure
Twinmotion will show your hierarchy exactly as it is. If your SolidWorks FeatureManager is a tangled forest of unnamed parts, expect that same chaos in Twinmotion.
Make sure:
Subassemblies are grouped logically
Part names are readable
Hidden parts are actually hidden
Suppressed components are removed from the export
A clean structure makes it much easier to replace materials, animate components, or isolate parts once you’re inside Twinmotion.
Assign Basic Appearance Materials in SolidWorks
Twinmotion won’t recreate SolidWorks materials perfectly, but it will use them as material IDs. That means you can speed up your Twinmotion workflow by assigning simple placeholder colors or materials in SolidWorks.
For example:
All metal parts → one color
All plastic parts → another color
Glass → its own appearance
Rubber or soft components → their own category
These placeholders help Twinmotion understand what belongs together, so you can quickly swap them for high-quality materials later.
Check Units and Scale
Even though both programs use real-world units, scale mismatch still happens. Before exporting:
Confirm your SolidWorks document units
Make sure the model is at 1:1 scale
Verify the export settings use the same units
Few things are more annoying than an import that shows up the size of a toy car or a building.
Simplify Using Defeature
SolidWorks includes a tool called Defeature that removes internal features and simplifies complex assemblies into lighter, render-friendly versions. It’s incredibly useful for large enclosures, machine bodies, or assemblies with hundreds of repetitive internals.
Use it when the original model is too heavy or when you know only the outer surfaces will be visible in Twinmotion.
If you’re comparing engines or trying to decide long-term, this Lumion vs Twinmotion breakdown does a great job of showing where each tool shines and where they fall short.
Exporting from SolidWorks to Twinmotion
This is where everything you prepared finally leaves SolidWorks and enters a format Twinmotion understands. The export process isn’t hard, but your choices here determine whether your model arrives smooth and workable… or as a single fused blob you can’t edit at all.
Use the Datasmith Exporter (The Recommended Path)
If you installed the Datasmith Exporter plugin, this is the easiest and most reliable way to go. It keeps hierarchy clean, preserves your materials as IDs, and generally avoids 90% of the issues that come from generic formats.
Once the plugin is enabled in Tools → Add-ins, you’ll see the Datasmith or Twinmotion tab in your toolbar. That’s your export hub.
Choose Between Direct Link or File Export
You get two export options:
1. Export a .udatasmith file
This creates a portable file you import manually into Twinmotion. It’s predictable and great for final transfers or stable revisions.
2. Use Direct Link (Live Sync)
This syncs your SolidWorks model directly with Twinmotion. Change something in SolidWorks → update in Twinmotion instantly. It’s ideal for iterative design, testing materials quickly, or showing progress live.
Both methods work well. File export is slightly more “controlled,” while Direct Link is perfect for fast iteration.
Set the Correct Export Options
Before exporting, take a moment to check a few settings:
Keep hierarchy if your model has moving parts or grouped structures you want to maintain.
Include appearances so your placeholder colors transfer correctly.
Export only visible parts unless you specifically need hidden components.
Preserve instances if you have repeated bolts or hardware, it helps performance later.
A few seconds spent here saves a lot of frustration inside Twinmotion.
Export the Model
Click Export Datasmith (or Sync, if using Direct Link), choose a location, and let SolidWorks generate the necessary files. You’ll get a .udatasmith file and a folder full of supporting geometry. Keep them together, Twinmotion reads the whole package.
If You Can’t Use the Plugin (Less Ideal Alternatives)
Sometimes IT restrictions or older versions make the plugin unavailable. In that case, you do have other options, but each comes with caveats:
STEP → FBX: Good geometry but weaker hierarchy. Requires conversion in a third application.
FBX (if available): Quick but prone to flattened materials and odd scale issues.
OBJ: Fine for very simple parts but loses hierarchy and doesn’t preserve materials well.
STL: The nuclear option, destroys hierarchy, creates huge triangle meshes, and should be avoided at all costs.
If hierarchy or material control matters, the plugin is always the better path.
Typical Export Issues and How to Avoid Them
SolidWorks exports can go sideways in predictable ways:
A single melted mesh usually means you exported as STL or collapsed hierarchy.
Wrong scale usually points to mismatched SolidWorks and export units.
Washed-out or missing material colors happen when SolidWorks appearances weren’t properly assigned.
Performance issues are often caused by exporting every tiny piece, including screws and threads.
These problems are almost always preventable by preparing the model cleanly and using the Datasmith exporter.
The same logic applies to other pipelines too, this SketchUp to Twinmotion workflow guide shows how much cleaner things feel when your hierarchy and materials come in organized.
Importing Your Model Into Twinmotion & Initial Checks
Once your export is ready, Twinmotion becomes your playground. But the first few minutes after import are crucial, this is where you confirm that the structure, scale, materials, and orientation all made the trip correctly. A smooth import means the polishing stage becomes a creative process instead of damage control.
Bring the Datasmith File Into Twinmotion
Open Twinmotion, start a new project (or open an existing one), and choose Import. Select your .udatasmith file, and Twinmotion will automatically pull in the geometry, hierarchy, and appearance data. If you’re using Direct Link, click Sync instead and your model will appear instantly.
Both workflows lead to the same result; the only difference is how fast updates arrive when you revise your SolidWorks model.
Choose the Right Import Settings
Twinmotion gives you a few important choices during import:
Keep hierarchy:
Always enable this for assemblies. It keeps your subassemblies intact and lets you edit or animate specific parts later.
Combine instances:
If your assembly uses repeated bolts or patterned components, turn this on. It reduces memory usage and keeps your scene running smoothly.
Material behavior:
If this is your first import, allow Twinmotion to use the incoming SolidWorks appearance data. Once you start replacing materials in Twinmotion, you may want to disable automatic material updates on future reimports to avoid overwriting your work.
These settings only take a few seconds to pick, but they affect everything that comes next.
Check the Scale and Orientation
Place a human-scale object next to your imported model. This quick test confirms whether your scale carried over properly. If your product looks like a giant sculpture, or a matchbox, adjust the units in your export and reimport.
Orientation is just as important. SolidWorks and Twinmotion don’t always agree on which way is “up,” so it’s not uncommon for a model to arrive rotated. Fix the root object orientation before doing any detailed work so you don’t have to fix everything twice.
Inspect Materials and Shading
Twinmotion doesn’t recreate SolidWorks materials, and that’s fine, you’ll be replacing everything anyway. What you’re checking here is whether:
Placeholder colors transferred correctly
Parts grouped by materials came in as expected
Any objects look oddly dark, shiny, or transparent
Strange shading often comes from flipped normals or unsupported appearances, which you can repair inside Twinmotion with a few clicks.
Evaluate Performance Early
Before adding lights, reflections, assets, or environment effects, move around the scene and get a sense of performance. If the model stutters on an empty project, the issue is usually polygon density or an overly detailed SolidWorks export, things like fine threads, internal parts, or 500 bolts rendered individually.
Catching this early lets you go back and simplify the model before investing time into polishing a slow scene.
Save a Clean Baseline Version
Once you confirm scale, orientation, hierarchy, and materials are correct, save your project. This becomes your baseline scene, the one you can revert to if something goes wrong later or if you want to test different lighting setups.
Scene Optimization & Visual Polish
Once your model is in Twinmotion and everything looks structurally correct, this is where the fun begins. Twinmotion shines when you start adding life to your model, lighting, materials, environment, but doing it intelligently keeps performance smooth and results impressive.
Tidy Up the Geometry Inside Twinmotion
Even if you cleaned the SolidWorks file, some models still arrive heavier than necessary. Look for:
Parts you can merge because they’ll share the same material
Tiny hidden faces or pieces you won’t see in the final render
Repeated assets that Twinmotion might instanced-merge for better performance
A quick cleanup here keeps your scene manageable, especially as lighting and textures get more complex.
Upgrade All Placeholder Materials
Your SolidWorks appearances did their job, they came through as IDs. Now it’s time to replace them with true Twinmotion materials.
Best approach:
Replace metals with PBR metal materials
Assign plastics from Twinmotion’s non-metal library
Swap placeholder glass for real glass presets
Adjust reflectiveness, roughness, and bump maps to add realism
Even two or three well-chosen materials can dramatically improve the look of a mechanical assembly.
Refine Your Lighting
Good lighting makes CAD assemblies feel “real,” even without complex texturing.
Start with:
The primary light direction (sun angle)
Basic shadows and ambient occlusion
Soft reflections to emphasize form
An environment sky or an HDRI for more natural contrast
One trick many SolidWorks users love: tilt the sun slightly so edges catch a bit of highlight. It immediately gives the assembly more dimension.
Build a Simple but Convincing Environment
Your assembly doesn’t need a full architectural scene. A clean environment helps scale and realism:
Add a ground plane or studio floor
Use a neutral HDRI for lighting
Place a few minimal assets for context if needed
A simple staged environment often looks more professional than a crowded one.
Check Performance as You Polish
As you add lights, reflections, and effects, occasionally rotate around the scene or move the camera to see if things are still smooth. Twinmotion can handle a lot, but real-time rendering always depends on balance.
If your FPS drops:
Reduce unnecessary reflection probes
Lower the complexity of materials (especially glass or chrome)
Remove background assets that don’t add meaningful value
Simplify geometry in high-density areas
Optimizing here keeps the scene beautiful without sacrificing speed.
Once everything is set up, you can squeeze more quality out of your scene by following these tips on the best render settings in Twinmotion for high-quality visuals.
A Real-World Example: What This Workflow Looks Like in Practice
To give you a sense of how everything comes together, here’s a real project that pushed me into making SolidWorks → Twinmotion part of my standard workflow.
A while back, I had a mechanical assembly with around 450 parts, nothing insane for engineering work, but definitely heavy for real-time visualization. The model had a mix of sheet metal, machined components, rubber seals, a motor housing, and a handful of assemblies nested inside each other. Exactly the kind of file that looks impressive in SolidWorks but turns into a performance nightmare if you’re not careful.
I started by cleaning up the internals, hiding bolts that were buried inside housings, suppressing a whole section of internal geometry that nobody would ever see, and reducing thread details everywhere I could. That alone cut the exported file size by almost half.
When I brought it into Twinmotion using the Datasmith exporter, the hierarchy came through perfectly. Every subassembly and part name was right where I expected it to be, which made the next step, replacing placeholder materials, way faster. Metals became brushed aluminum or painted steel, rubber parts got soft matte finishes, and the transparent components actually looked transparent instead of flat grey.
Lighting made the biggest difference. A slight tilt in the sun angle brought out all the edges and curves in the assembly, and a neutral HDRI added just enough realism without turning it into a dramatic cinematic shot. The whole thing suddenly looked physical, like something I could reach out and grab off the table.
Performance was surprisingly good at first, but once I added reflections and a few environment elements, I could feel the scene starting to get heavier. That’s when I turned off a few unnecessary lights, merged some instanced parts, and simplified a few materials. After that, the scene felt smooth again.
The best part? Every time the design changed, I’d remove a bracket, adjust a housing, update a pattern, I’d push the update through Direct Link, and Twinmotion would update almost instantly. I didn’t have to redo materials, camera angles, or lighting setups. That alone saved hours.
This is the moment where the workflow really proves itself: once you get a clean import and a solid base scene, all your future iterations become fast, predictable, and honestly, a lot more fun.
When Your Hardware Hits Its Limit
At some point in the process, almost everyone hits the same wall: the scene looks great, the materials are coming together, lighting feels right, and then the performance starts to dip. Twinmotion is powerful, but real-time rendering gets heavy fast, especially when you’re working with mechanical assemblies that weren’t exactly designed with GPU budgets in mind.
This is where Vagon Cloud Computer becomes a useful option.
Instead of relying on your laptop or an aging desktop to push a detailed Twinmotion scene, Vagon lets you spin up a high-performance cloud machine with a strong GPU whenever you need it. You open your Twinmotion project just like you would locally, but suddenly you’re working with hardware designed for this kind of load.
It’s convenient for a few specific situations:
Large assemblies that strain your system: If your SolidWorks export includes hundreds of parts, reflections, or high-quality lighting, cloud GPU power keeps everything smooth.
Rendering high-quality images or videos: Twinmotion’s higher-quality modes can get heavy quickly, cloud hardware handles them comfortably.
Working from a lightweight laptop: If you’re traveling, using a Mac, or don’t want to carry a workstation everywhere, Vagon makes your setup portable.
Sharing the experience with others: You can run Twinmotion from the cloud and show the live viewport to clients, teammates, or collaborators without needing to send them the full project.
You still follow the exact same SolidWorks → Twinmotion workflow. The difference is simply where the performance comes from. When you’re polishing scenes, testing materials, previewing animations, or exporting high-quality visuals, having more GPU power feels less like a luxury and more like the workflow you were supposed to have all along.
Common Mistakes & How to Avoid Them
SolidWorks → Twinmotion is a smooth workflow when set up correctly, but a few recurring mistakes can make the process much harder than it needs to be. Most of them are easy to avoid once you know what to look out for.
Exporting Every Tiny Detail
SolidWorks models often contain screws, washers, threads, small fillets, internal ribs, and all kinds of geometry you’ll never see in the final visualization. Sending all of this to Twinmotion makes the scene unnecessarily heavy.
Fix: Hide or suppress small internal parts, simplify high-density objects, and avoid exporting features that won’t be visible.
Ignoring Hierarchy Before Export
If your SolidWorks assembly structure is chaotic, Twinmotion will show that chaos back to you. Messy names, random groupings, and nested parts make material assignment and editing painful.
Fix: Clean up the FeatureManager tree. Name parts clearly, group assemblies logically, and remove unused components.
Using the Wrong Export Format
Formats like STL or OBJ lose hierarchy and materials. STEP → FBX conversions help a bit, but they still require extra work and often break material groupings.
Fix: Use the Datasmith Exporter whenever possible. It preserves the most information and gives Twinmotion what it needs.
Scale Mismatch on Import
Even though both programs use real-world units, mismatched export settings can cause your model to arrive at the wrong size.
Fix: Double-check unit settings in SolidWorks and in the export dialogue. After import, compare the model to a human-scale asset in Twinmotion.
Not Checking Orientation
SolidWorks and Twinmotion don’t always share the same up-axis. A model that arrives tilted or rotated becomes harder to work with once you start placing assets or lights.
Fix: Correct orientation immediately after import, before adding anything to the scene.
Relying on SolidWorks Materials
SolidWorks appearances are useful for grouping parts, but they won’t look good in Twinmotion. Many people waste time trying to fix imported appearances instead of replacing them.
Fix: Use basic colors or placeholders in SolidWorks, then replace them with real Twinmotion materials after import.
Overloading the Scene With Lighting and Reflections Too Early
Adding high-quality lights, reflection probes, and environment effects before testing performance can slow down the entire project.
Fix: Verify performance while the scene is still simple. Add complexity gradually and test as you go.
Skipping the Baseline Save
Many users start polishing their scene immediately after import and forget to save an untouched version. When reimports or updates overwrite materials or cause issues, recovery becomes complicated.
Fix: Save a clean baseline right after a correct import. Use versioning as you refine the scene.
And if you’re still getting familiar with the software, these beginner tips to master Twinmotion are a great way to avoid small mistakes that slow people down early on.
Final Thoughts
Once you see a SolidWorks model come to life in Twinmotion, it’s hard to go back to static screenshots or plain CAD renderings. The workflow becomes surprisingly natural: prepare the model, export cleanly, bring it into a real-time environment, and start exploring lighting, materials, and atmosphere in a way that’s impossible inside SolidWorks alone.
The best part is how repeatable it becomes. After the first clean import, updates are fast. Revisions stop feeling like chores, and the visualization stage turns into something closer to a creative session than a technical task. Whether you’re building product previews, pitching concepts, checking form in context, or just wanting to see your work outside a grey viewport, Twinmotion adds a layer of clarity that engineers and designers often don’t realize they’re missing.
This guide gives you the path that avoids all the usual traps, lost hierarchy, wrong scale, broken shading, heavy geometry, and lets you focus on the part that actually matters: making your design look real.
FAQs
1. Can I export directly from SolidWorks to Twinmotion without any plugins?
Yes, but it’s not ideal. You can export using formats like FBX, OBJ, or STEP, but you’ll lose hierarchy, material grouping, or instance data. The Datasmith Exporter is the only method that brings everything across cleanly.
2. Why does my SolidWorks model look shiny or plastic-like in Twinmotion?
Because SolidWorks appearances don’t translate as real materials. They come in as placeholders. Replace them with Twinmotion’s materials and tweak roughness, reflectivity, and metallic values to get realistic results.
3. My model is tiny (or huge) when imported. What happened?
Scale mismatch. SolidWorks and Twinmotion use the same unit logic, but export settings can still override them. Check the units in your SolidWorks document and in the Datasmith export window, then reimport.
4. Why is my assembly coming in as one big fused piece?
You probably exported as STL, OBJ, or a format that collapses hierarchy. Also check whether “Collapse hierarchy” was turned on during import. Using Datasmith with “Keep hierarchy” fixes this.
5. Is Direct Link better than exporting a .udatasmith file?
Neither is “better”, they’re just different. Direct Link is great for fast iteration because updates are instant. File export is more controlled and reliable for final deliveries or sharing with teammates.
6. Why are some parts dark or black after import?
This usually happens when normals are flipped, or when SolidWorks appearances don’t translate correctly. In Twinmotion, try toggling double-sided materials or reassigning the surface material entirely.
7. Twinmotion feels slow after import. What should I do?
Large assemblies can overload real-time engines. Try merging instanced parts, removing tiny details from the SolidWorks file, replacing heavy materials, or lowering scene complexity until it feels smoother.
8. Can I animate parts of the assembly in Twinmotion?
Yes, as long as the hierarchy is preserved. If your rotating or sliding components are grouped properly in SolidWorks, Twinmotion will let you animate them with keyframes or simple movement tools.
9. Do I need to keep the Datasmith folder next to the .udatasmith file?
Absolutely. Twinmotion reads both the file and the folder. If you separate them, Twinmotion may not load materials, meshes, or references correctly.
10. Is this workflow only for product design?
Not at all. Mechanical assemblies, prototypes, vehicles, enclosures, architectural components, and even conceptual models transfer well, as long as you clean the geometry and keep the structure organized.
Get Beyond Your Computer Performance
Run applications on your cloud computer with the latest generation hardware. No more crashes or lags.

Trial includes 1 hour usage + 7 days of storage.
Summarize with AI

Ready to focus on your creativity?
Vagon gives you the ability to create & render projects, collaborate, and stream applications with the power of the best hardware.

Vagon Blog


Run heavy applications on any device with
your personal computer on the cloud.
San Francisco, California
Solutions
Vagon Teams
Vagon Streams
Use Cases
Resources
Vagon Blog
How to Run Ollama in the Cloud on a GPU Ubuntu Desktop (2026 Guide)
How to Run Ubuntu on an iPad (That Actually Works in 2026)
How to Get an Ubuntu Desktop in the Cloud (GPU Optional): The Complete 2026 Guide
What Slows Down After Effects Projects?
The First 30 Minutes in Blender 3D: A Practical Workflow Guide
What’s New in Godot 4.7? Key Features, Upgrades, and Workflow Improvements
What Slows Down Blender 3D Projects?
What Slows Down Adobe Photoshop Projects?
The First 30 Minutes in Adobe Photoshop: A Practical Workflow Guide
Vagon Blog
Run heavy applications on any device with
your personal computer on the cloud.
San Francisco, California
Solutions
Vagon Teams
Vagon Streams
Use Cases
Resources
Vagon Blog