Instant Connection for Pixel Streaming
— New Feature Automated Setup

How To Run Final Cut Pro On iPad
How To Run Final Cut Pro On iPad
VideoProduction
How To Run Final Cut Pro On iPad
Table of Contents
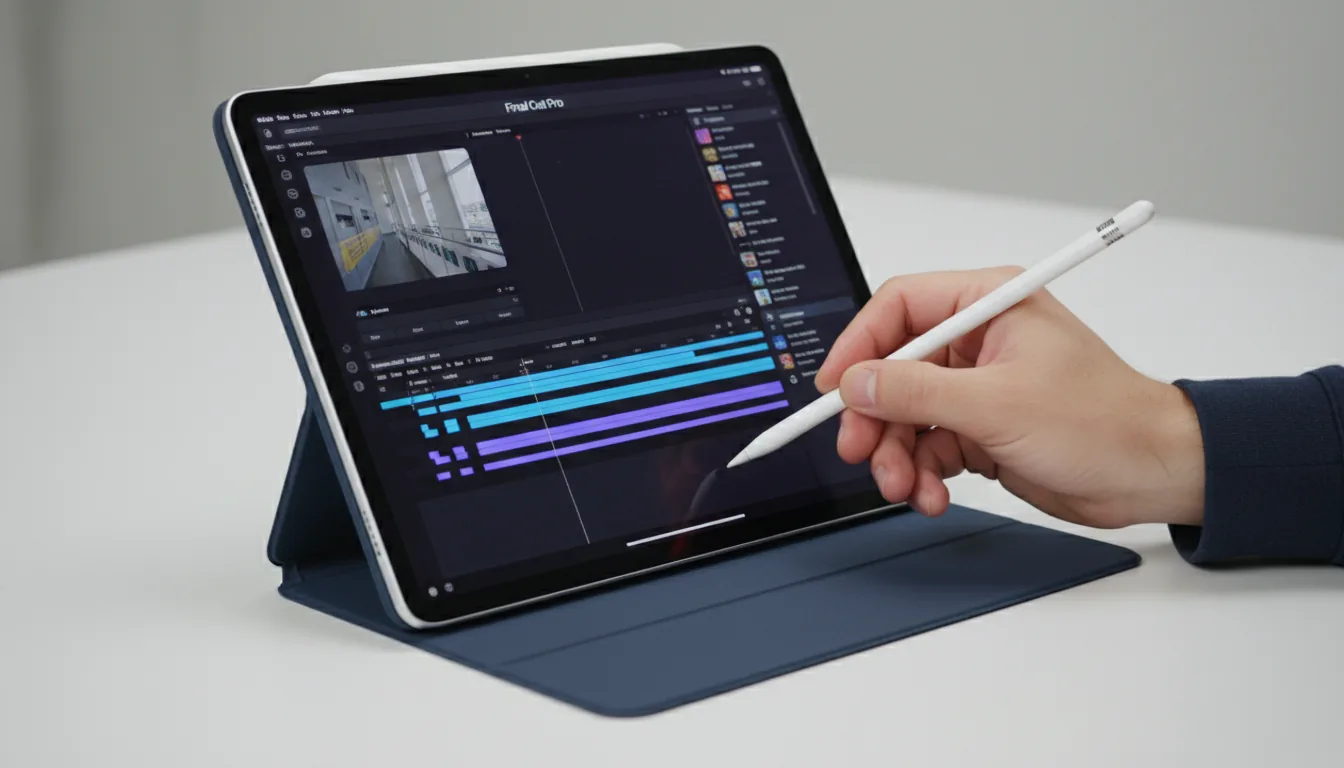
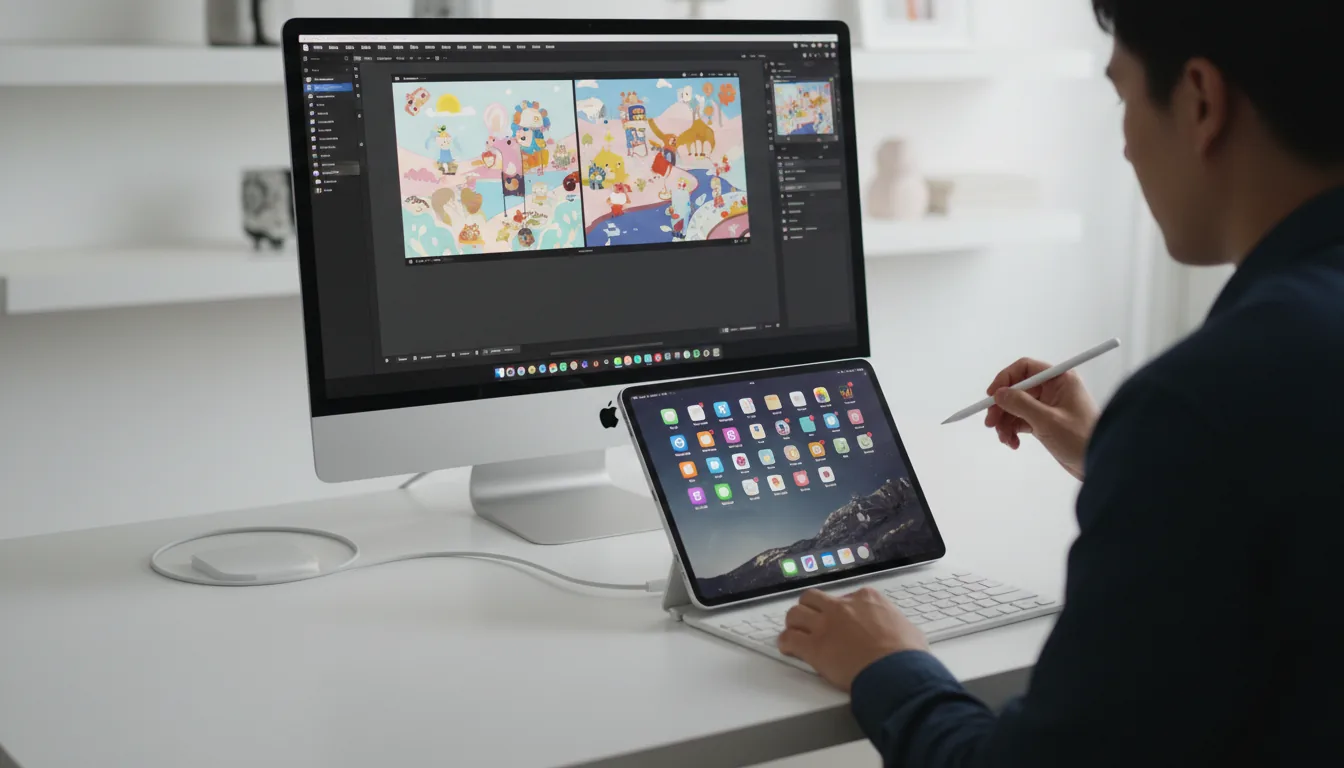
I still remember the first time I opened Final Cut Pro on my iPad. I was sitting in a café, halfway through a travel vlog project, my MacBook sitting at home charging. Out of curiosity, I downloaded Final Cut Pro for iPad, half expecting it to crash or throw a “not supported” message. But it didn’t. Within minutes, I was trimming clips with my fingers, color-grading with the Apple Pencil, and actually enjoying it.
It felt weirdly… fun. Like editing had turned into something tactile again. But also, I kept asking myself, is this for real?
That moment kind of sums up the iPad version perfectly. It’s not a full replacement for the desktop Final Cut Pro, but it’s surprisingly capable. You can cut, color, layer effects, and even do multicam editing on a tablet that fits in your backpack. And yes, there are some real limitations you’ll hit if you’re used to desktop power.
But that’s what this guide is for. I’ll walk you through how to actually use Final Cut Pro on iPad, what works beautifully, what still feels like a beta experiment, and where you might need a little help (especially if you’re aiming for pro-level projects).
Next up: let’s talk about why Final Cut Pro on iPad isn’t just “Final Cut Mini,” but a whole new way of editing.

What’s Different — Why Final Cut Pro on iPad Isn’t Just “Mac on a Tablet”
When Apple announced Final Cut Pro for iPad, I’ll admit, I was skeptical. I mean, this is a tool that’s been a desktop heavyweight for years. Editors rely on it for 8K timelines, LUT-heavy color grading, multi-angle syncing, and terabytes of footage. And now… it’s supposed to fit on a tablet?
Turns out, Apple didn’t just cram the macOS version into iPadOS. They rebuilt it.
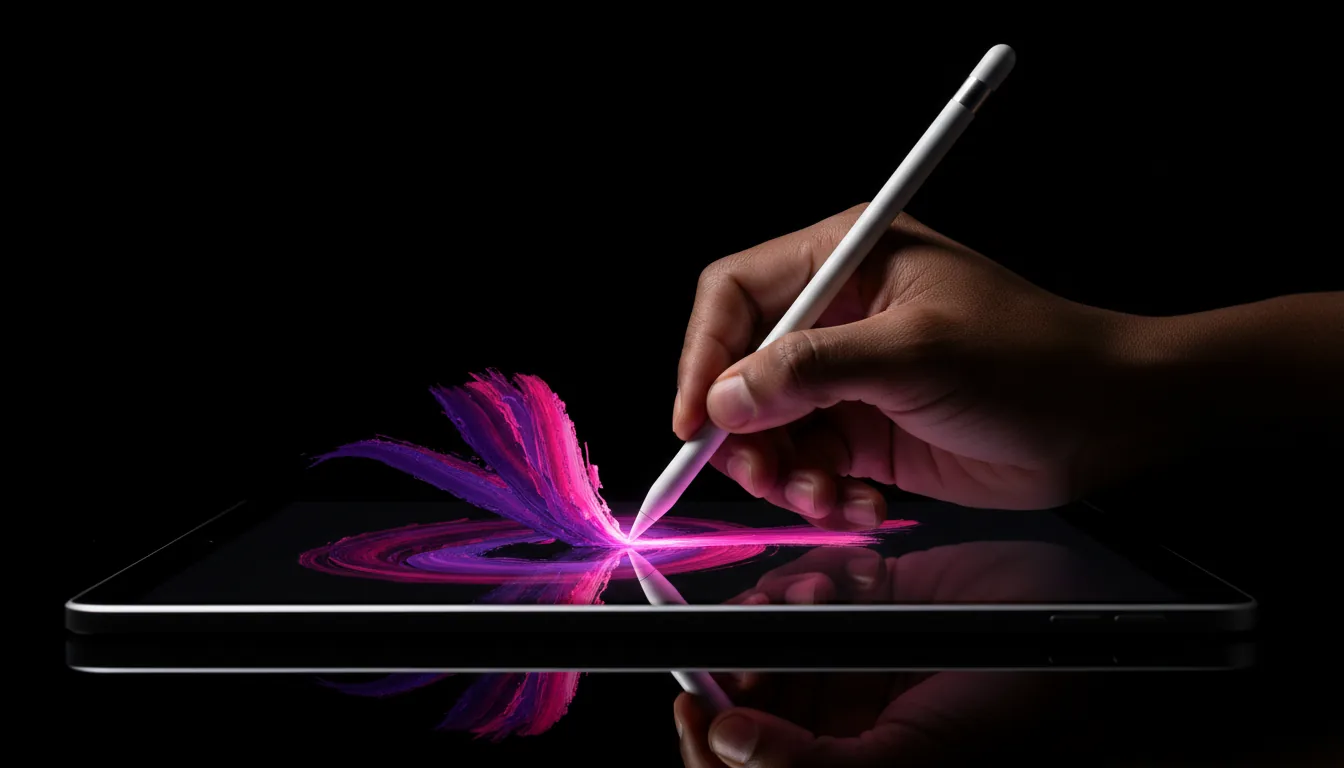
Here’s the interesting part: the touch-first interface actually makes editing feel natural. You can scrub through clips with your finger, use the new jog wheel for precision edits, and tap directly on your footage instead of hunting for handles with a mouse. It feels more like sculpting your timeline than operating it. And when you throw in an Apple Pencil, you get hover previews, frame-accurate trimming, and even on-screen annotations while you edit. It’s weirdly satisfying.
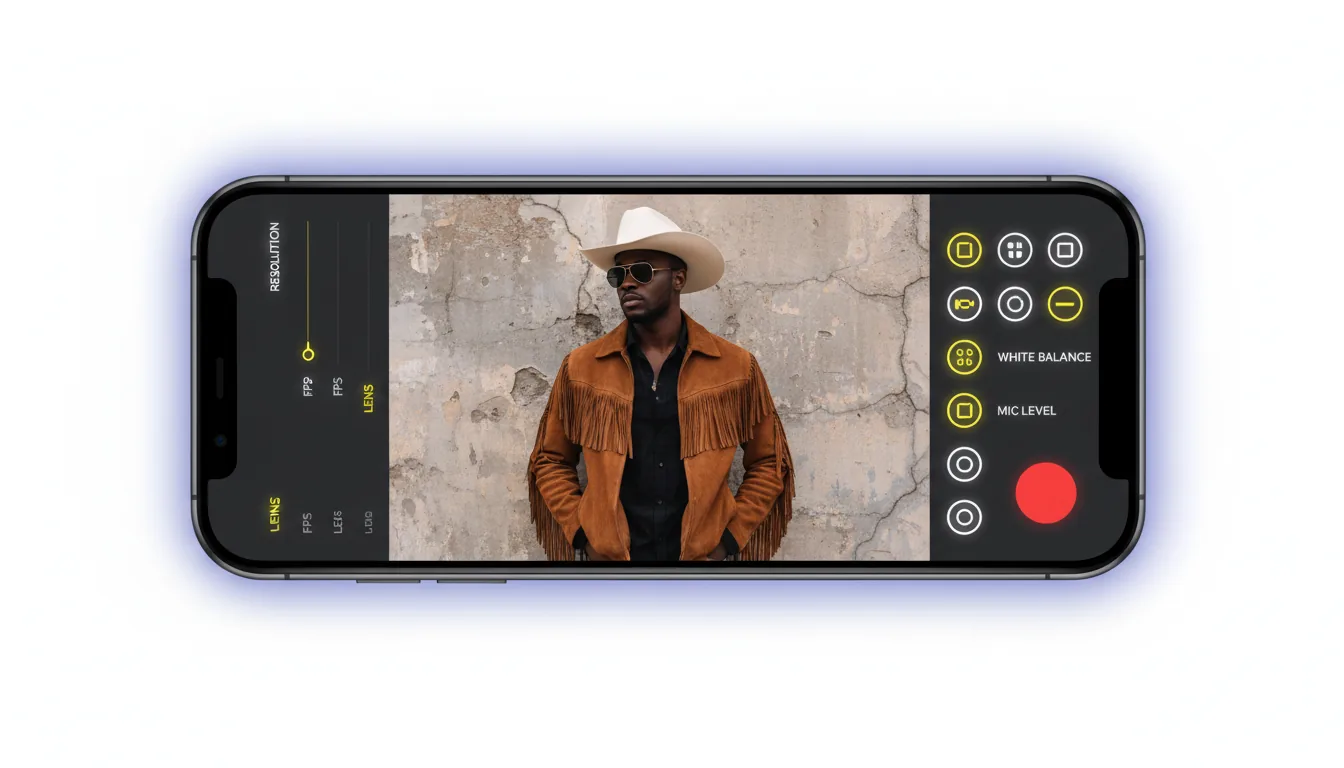
Then there’s the Final Cut Camera app, which lets you record live footage from your iPhone (or multiple iPhones) straight into your iPad timeline. That’s something the Mac version doesn’t even do natively. You can literally run a multicam shoot from your backpack.
But here’s the part that gets people talking, the subscription model. Instead of the traditional one-time purchase, Final Cut Pro on iPad costs $4.99 per month or $49 per year. Some people hate it, others shrug and say it’s fair for a mobile app that updates often. I’m somewhere in between. It makes sense for the App Store ecosystem, but it also signals that Apple sees this as an ongoing service, not a one-off product.
Compatibility-wise, you’ll need at least an M1 iPad or newer, running iPadOS 17.5 or later. If you’re on an older iPad, don’t bother, it won’t even show up in the App Store. You’ll also want plenty of internal storage or fast external SSDs, because video projects chew through space like crazy.
Still, this isn’t just a “lite” version of Final Cut. It’s a reimagined one. Some tools are missing (we’ll get to that later), but the workflow feels fluid and surprisingly pro.
Up next: let’s go hands-on, how to actually get started, install it, and set up your first project.
Getting Started — Setup, Installation & First Project
Let’s be real: the first hurdle with Final Cut Pro on iPad isn’t editing. It’s getting the setup right. Apple makes it easy, but there are a few things worth knowing before you hit “Install.”
Step 1: Check if Your iPad Can Handle It
Final Cut Pro for iPad only runs on M1, M2, or M4 chip iPads, so if you’re using an older A12X or A14 model, you’re out of luck.
Here’s the current compatibility list (as of late 2025):
iPad Pro 11” (M1, M2, or M4)
iPad Pro 12.9” (M1, M2, or M4)
iPad Air (M1 or M2)
You’ll also need iPadOS 17.5 or newer. And trust me, keep at least 50–100GB of free space. Even short projects eat storage faster than you expect.
Step 2: Install and Subscribe
Head to the App Store, search for Final Cut Pro, and tap download.
The first launch will prompt a 7-day free trial, then it switches to $4.99/month or $49/year.
There’s no perpetual license like on Mac, and yes, some longtime users grumble about that. But the tradeoff is you’re getting more frequent feature updates.

Step 3: Create a New Project
Once you open the app, you’ll see a clean, minimal home screen, no clutter, no library management like macOS. Just tap “New Project.”
Then:
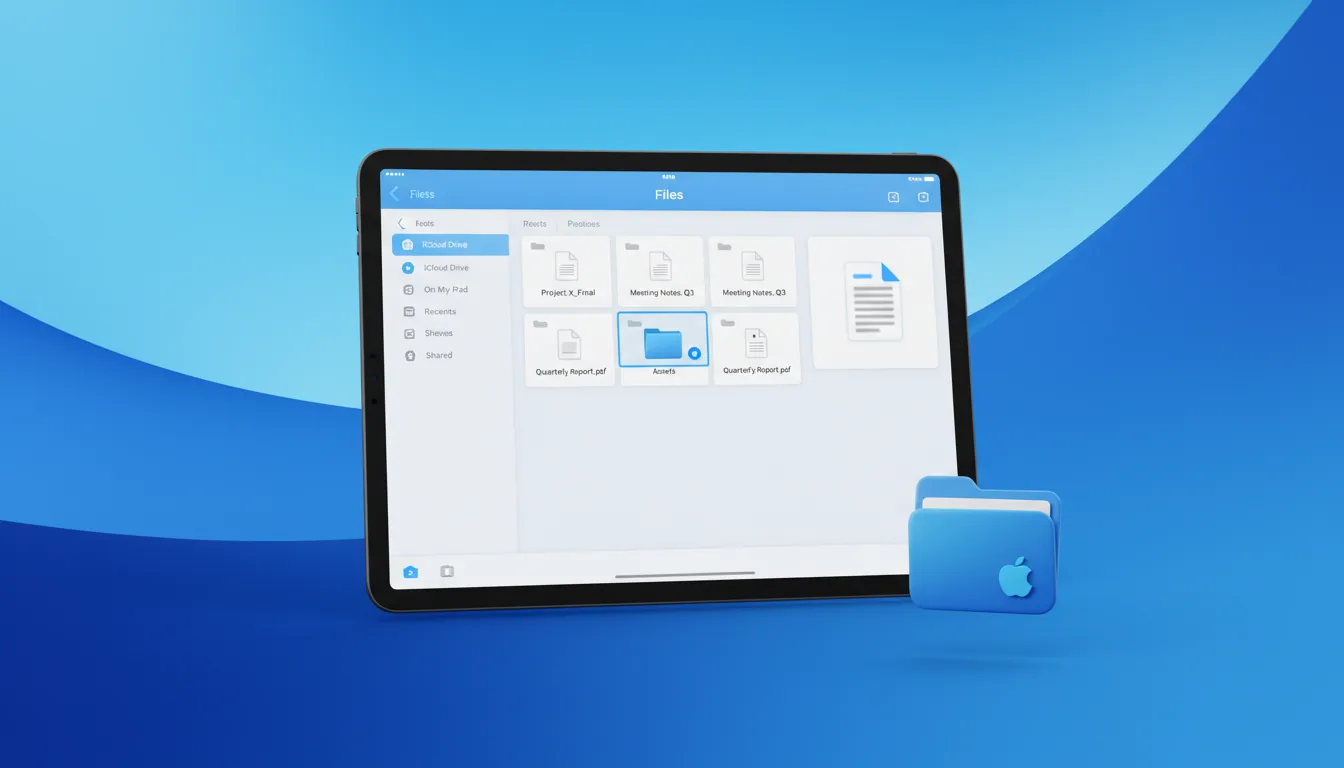
Import media from Photos, Files, or an external SSD (USB-C drives work great).
Choose aspect ratio & frame rate (you can still change it later, but best to set it now).
Name your project, hit Create, and boom, you’re in the timeline.
Step 4: Learn the Interface Quickly
Here’s what you’ll see:
Timeline (bottom): drag clips here to arrange, trim, and edit.
Browser (left): all your imported media, sorted by date or folder.
Viewer (top): your playback window.
Inspector (right): where you adjust properties like color, stabilization, and audio levels.
And that circular jog wheel in the corner? That’s your new best friend.
You can scrub through clips frame-by-frame, trim edges precisely, and even nudge transitions, all with your thumb. It’s faster than you’d think once you get the muscle memory.
Step 5: Import From iPhone or External Sources
If you shoot with your iPhone, open the Final Cut Camera app. It syncs directly with your iPad via Wi-Fi, letting you record and preview in real-time. Perfect for quick interviews, B-roll, or vlog setups.
You can also import directly from an SSD or SD card reader, though large file transfers can take a while. I’ve noticed projects above 20GB start to slow things down, especially if your iPad’s internal storage is near full.
Editing on iPad feels shockingly natural once you’ve done these steps, but it’s not identical to the desktop version. Some tools are redesigned, some are missing, and others are better.
Let’s get into the real heart of it next: how the actual editing workflow on iPad works, from cutting and color to multicam and effects.
Core Editing Workflow on iPad
Once you’ve got your first project open, this is where things start to feel fun. Apple clearly spent time rethinking what editing means on a touchscreen, and it shows. Editing on an iPad feels less like managing a machine and more like touching your story.
Trimming and Rearranging Clips
Forget about dragging sliders with a mouse. You can literally trim clips with your finger, just grab the edge and slide. The magnetic timeline still works like it does on Mac, snapping clips together automatically, which makes rough cutting super fast.
If you’re a precision nerd (like me), the jog wheel is magic. You can fine-tune edits frame-by-frame, tap to nudge a few frames forward or backward, and even adjust transitions with surgical precision. I honestly prefer it to using arrow keys.
Apple Pencil: Not a Gimmick
I used to think the Apple Pencil was more for illustrators than editors, until Final Cut Pro proved me wrong.
You can:
Hover over the timeline to preview frames before cutting.
Draw directly on the video for annotations or masks.
Tap and hold to bring up contextual editing menus faster than long-pressing with your finger.
For quick edits on the go, it’s addictive. You’ll find yourself reaching for the Pencil instinctively.
Audio Editing on the Go
Apple simplified the audio tools for iPad without dumbing them down. You can still:
Adjust volume levels and fades directly on the clip.
Add keyframes by tapping the waveform.
Record voiceovers right inside the app (yes, your iPad mic actually does a decent job for quick narration).
What’s missing? Advanced EQ or multi-channel mixing. But for vloggers or short-form editors, it’s more than enough.
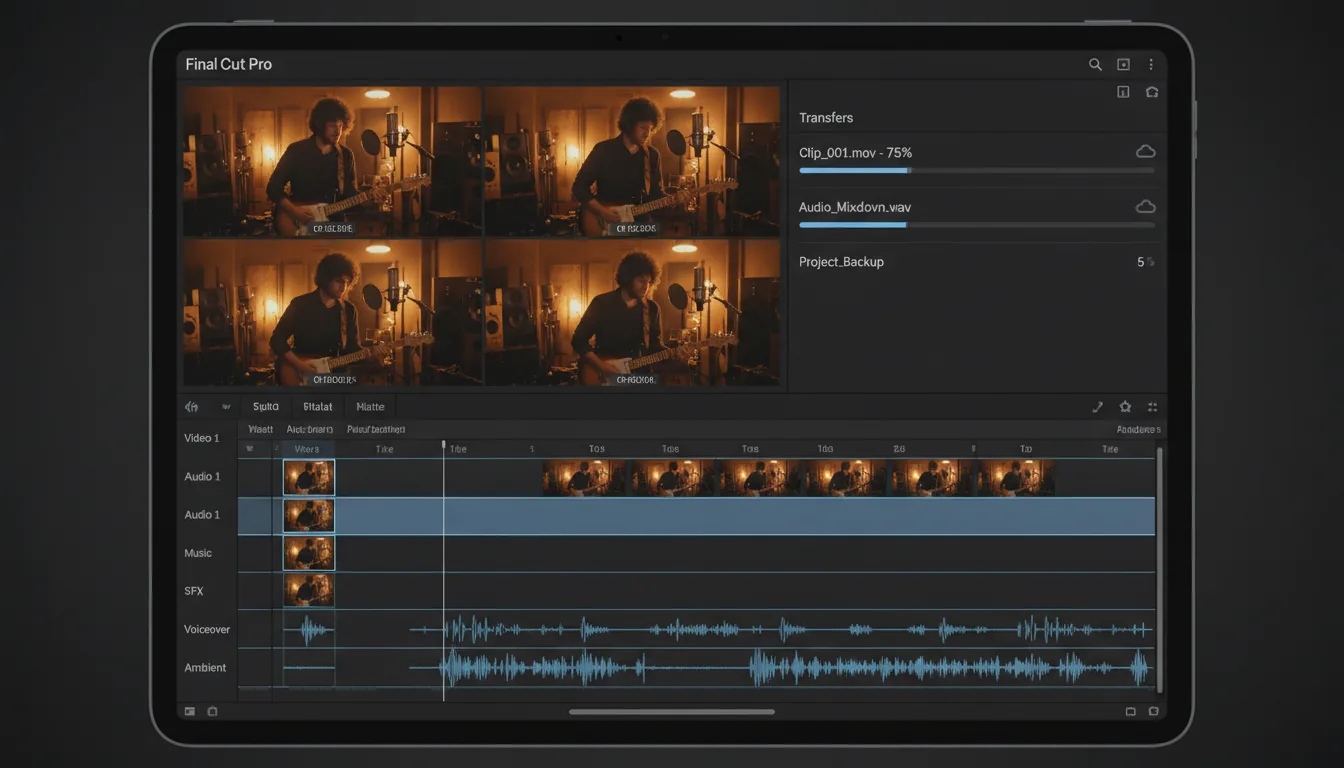
Multicam Editing & Final Cut Camera
Here’s the coolest part: multicam editing actually works.
With the Final Cut Camera app, you can connect up to four iPhones and record simultaneously. Each feed syncs automatically in the timeline.
You can switch angles live or later in post, just like desktop multicam. It’s smooth, as long as your Wi-Fi is strong and your storage isn’t full.
This combo (Final Cut Pro + Final Cut Camera) turns an iPad into a mobile studio setup. You can film, sync, and edit everything in one device.
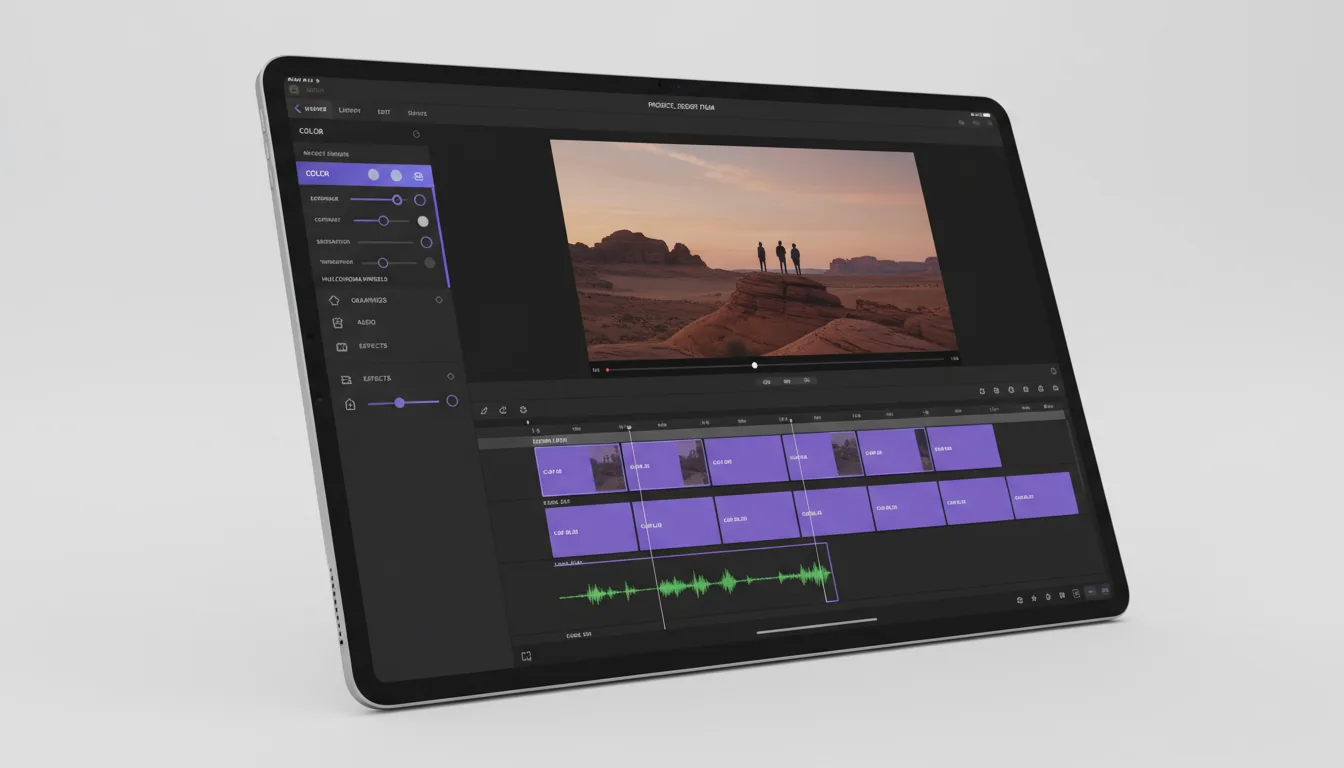
Color, Effects, and Titles
You still get color balance, exposure, and LUTs, though not the full Color Inspector from the Mac version. It’s perfect for quick grading, swipe a slider, see instant results.
Effects and transitions are redesigned for touch: swipe to apply, hold to preview. And text overlays? Drag, drop, resize, done.
The limitation is plugin support, you can’t install custom effects or motion templates yet. That’s a huge deal if you rely on them for client work. But for quick content or travel editing, the built-in options are solid.
And if you're looking for a faster start, there are plenty of Final Cut templates out there that can save hours of setup time on intros, lower thirds, and more.
Want smoother scene changes? Even though plugin support is limited, there’s still a great collection of Final Cut Pro transitions you can use right out of the box.
Exporting and Sharing
When you’re done, exporting is straightforward, choose resolution, codec, and destination. You can export straight to Files, Photos, or external storage.
One feature I love: you can send your project to Mac via AirDrop or iCloud, where it opens in full Final Cut Pro with all edits intact. That’s when the iPad starts feeling like a legit pre-edit station instead of a toy.
Final Cut Pro on iPad nails the essentials. It’s fast, tactile, and surprisingly powerful, until you hit the ceiling. And that ceiling usually comes in the form of performance, storage, or plugin limitations.
Next up, we’ll get honest about those, the limitations and pitfalls you’ll probably run into once you go beyond casual projects.
Limitations & Things to Be Wary Of
Okay, here’s where the shine starts to fade a bit. Final Cut Pro on iPad is brilliant for what it is, but it’s not a miracle machine. You’ll run into walls, especially if you’re used to the Mac version or you’re doing complex post-production work.
#1. File Management: Still Kind of a Mess
The iPad version depends heavily on Files app integration, and it’s easy to lose track of where your media actually lives. If you import from external drives, Final Cut usually copies files into its local library, which means you’re duplicating huge video folders and filling up your iPad fast.
Even worse, not all drives play nicely. Some SSDs will randomly disconnect during imports, and you can’t choose to “leave files in place” like you can on desktop. If you’re dealing with large 4K projects, this becomes a real headache.
#2. Limited Plugin & Effects Support
If you rely on third-party LUTs, motion templates, or audio plugins, brace yourself: none of that works here. There’s no Motion or FxFactory integration, and you can’t install custom effects. You’re limited to Apple’s built-in set which, while polished, is definitely not studio-level.
It’s great for vloggers or travel content creators, but if you’re building client intros, branded animations, or complex titles, you’ll feel boxed in fast.
If you're curious what you're missing compared to desktop, this Final Cut Pro plugins guide breaks down some of the most popular tools that currently aren't available on iPad.
#3. Performance Bottlenecks
Even with the M2 iPad Pro, the app can choke under heavy timelines.
A few examples:
Stacked adjustment layers cause playback stutter.
Complex color correction adds noticeable render lag.
Background rendering occasionally halts until you restart the app.
It’s stable, but not invincible. Apple Silicon handles a lot, but 4K ProRes multicam or HDR timelines still make it sweat.
#4. No Shared Libraries or External Collaboration
Unlike the Mac version, there’s no Library sharing, XML export, or shared drives. That means team collaboration or round-tripping between editors is clunky at best. You can export a project to Mac, sure, but not vice versa.
So if you start on iPad and your teammate edits on Mac, great. The other way around? Not happening.
#5. Export Control Is Simplified (Maybe Too Simplified)
You can export in H.264, HEVC, or ProRes, that’s about it. Want custom bitrates, mastering files, or compression settings? Nope. You’ll need a Mac for that.
Also, don’t expect to connect external displays and get a proper dual-monitor editing setup. External preview via HDMI or Stage Manager is limited.
#6. Real-World Friction Points
I’ve run into a few consistent annoyances over time:
Projects over 30GB tend to slow down even if you have headroom.
Some external audio devices cause sync drift.
The app sometimes refuses to relink missing media if the file path changes slightly.
It’s small stuff, but adds up.
Now, here’s the thing: all these limitations don’t mean Final Cut on iPad is bad. It just means it’s mobile-first.
And if you’re someone who wants to edit casually or on the go, it’s an incredible piece of software.
But if you’re pushing professional workloads, multiple camera angles, long-form content, big effects stacks, there’s a point where the iPad simply can’t keep up.
That’s where the smart move is to pair it with something more powerful, not replace it.
And while crashes are rare, if you're running into stability issues, here are a few ways to stop Final Cut Pro from crashing and keep your edits safe.
Up next, we’ll talk about exactly that: how to extend your iPad editing workflow using a cloud computer, especially when you need desktop-grade rendering or plugin support without owning a workstation.
If you notice timeline stutters or sluggish playback during a big project, you’re not alone—there are a few simple tricks to help you fix lag and speed up Final Cut Pro before you consider switching devices.
When & Why You Might Want a Cloud Computer to Complement Your iPad Workflow
At some point, every iPad editor hits that moment, when the export bar crawls, the project stutters, or you realize you can’t install your favorite LUT pack. That’s usually when people start saying: “Okay… maybe I need more power.”
But here’s the thing, you don’t have to ditch your iPad workflow. You just need to extend it.
When the iPad Hits Its Limits
You’ll start noticing bottlenecks in a few key areas:
Render-heavy projects: 4K multicam edits or color correction with multiple adjustment layers.
Plugin work: if you use specialized transitions, sound design tools, or titling effects.
Storage space: large ProRes or RAW files fill your internal storage fast, and juggling SSDs gets messy.
Exporting final masters: you’ll want desktop-level control over formats, compression, and delivery specs.
That’s exactly where a cloud computer steps in, especially something purpose-built for creative work, like Vagon Cloud Computer.
How Vagon Cloud Computer Fits In
I think of it as a “desk in the cloud.” You log in from your iPad browser, and suddenly you’re running a full macOS or Windows-style environment, powerful enough for heavy software, from Final Cut Pro to DaVinci Resolve, Premiere Pro, or After Effects.
It’s not just remote access. It’s real performance:
High-end GPUs & CPUs (far beyond what even the M4 chip can do).
Instant file sync from iPad using Vagon Files or cloud drives.
No installation stress: everything is ready to launch in seconds.
So you can edit your rough cut on iPad, then upload the project to your Vagon Cloud Computer to:
Render the final master in full 4K or 8K.
Add heavier effects or advanced plugins.
Export in professional codecs or custom delivery settings.
When it’s done, download the rendered file back to your iPad, ready to share or post.
Why It Makes Sense
The beauty of this setup is flexibility. You’re not committing to a $3000 workstation that sits idle when you’re on the road. You’re paying for desktop power only when you need it, a few hours, a few days, or for one big project.
And if you’re working with clients or teammates, it means your project environment stays consistent no matter where you open it from. Your iPad becomes your editing surface; the heavy lifting happens elsewhere.
The Takeaway
Final Cut Pro on iPad is great for starting, for cutting, organizing, rough grading, and experimenting. But when it’s time to finish strong, render fast, use desktop-only plugins, or export broadcast-quality masters, that’s when something like Vagon Cloud Computer becomes the natural next step.
It’s not about replacing your iPad. It’s about backing it up with desktop power when it matters most.
Next, let’s wrap it up with a few pro tips to get the best performance out of Final Cut Pro on iPad, and how to know when to hand things off to your cloud setup.

Tips to Maximize Your iPad Editing Workflow
After using Final Cut Pro on iPad for a while, I’ve realized the difference between a smooth edit and a frustrating one usually comes down to workflow habits, not hardware. So here are a few practical ways to make the most of your iPad setup before you even think about handing things off to the cloud.
#1. Keep Your Projects Lean
Final Cut Pro on iPad doesn’t like clutter.
Use shorter clips. Don’t dump an entire 128GB SD card in one project, break things into smaller chunks.
Delete unused media. Trim your imports to the exact section you’ll use.
Stick to one project at a time. Having too many timelines open slows the app dramatically.
Think of it like editing in “bites” — quick sessions that stay light and manageable.
#2. Use Optimized or Proxy Media
Even though Apple hides it under the hood, Final Cut Pro can create optimized or proxy versions of your clips. These are lighter, lower-resolution files that play back smoothly, even on large projects.
If your timeline feels sluggish or stutters during playback, create proxies for your heaviest clips. You can switch them off before exporting to retain full quality.
#3. Pair Your iPad with Accessories
The magic combo for mobile editing:
Apple Pencil (2nd gen) for precision trimming and hover preview.
Magic Keyboard or Bluetooth keyboard for shortcuts — “Command + Z” feels weirdly empowering on iPad.
External SSD (USB-C 3.2 or faster) for media libraries.
A single accessory can save you hours over time.
And once you connect a keyboard, unlocking Final Cut’s keyboard shortcuts can seriously boost your editing speed—even on a touchscreen device.
#4. Mind Your Storage
This one’s huge: always keep at least 20–30GB of free internal storage.
When your iPad gets full, Final Cut slows down or even crashes during export.
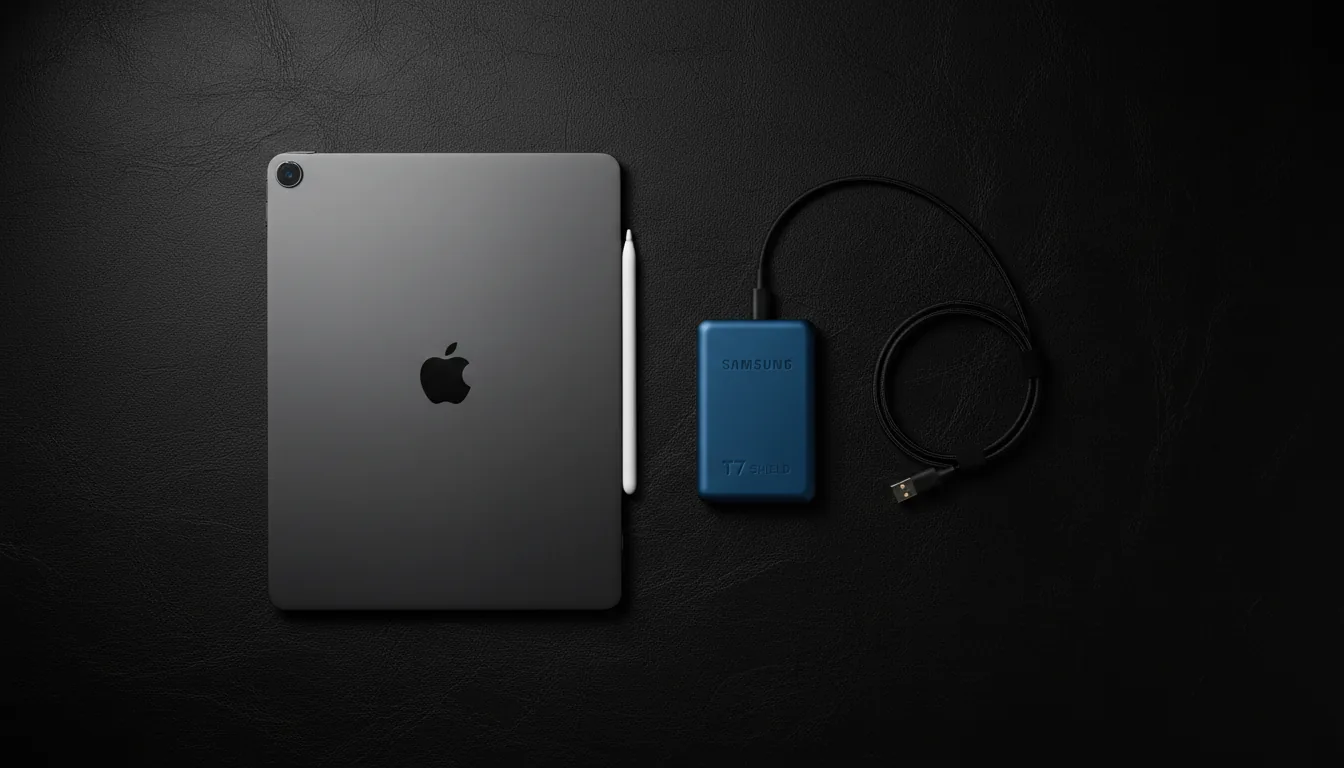
I use an external Samsung T7 SSD, it’s fast, portable, and reliable for 4K media.
If your footage lives in iCloud, make sure to download it locally before editing, cloud-based playback can stutter badly, especially on slow connections.
#5. Leverage iPad–iPhone Sync
One of the best things Apple added recently is Final Cut Camera integration. You can use your iPhone as a live camera feed, record directly into the iPad’s timeline, or sync footage automatically via AirDrop.
No SD cards. No adapters. Just record, drop, edit.
#6. Export Smartly
When exporting from iPad:
Stick to H.264 or HEVC for YouTube, Instagram, and TikTok.
If you plan to color grade or finish on desktop, choose ProRes 422 HQ.
Always test a short render before exporting your full project, it saves you from wasting time if the export fails halfway.
And if you’re exporting large files or full-resolution masters, that’s a great time to switch over to Vagon Cloud Computer. It can handle multi-gigabyte renders without eating your iPad’s battery or thermal limits.

#7. Backup Everything
Final Cut Pro for iPad doesn’t auto-backup your libraries like the Mac version. So after every major session:
Export a project file copy to iCloud Drive.
Save your media to an external SSD or Vagon Files.
Keep a versioned backup of your main timeline in case something corrupts.
Trust me, the day you accidentally delete your only project copy, you’ll wish you had.
Editing on iPad can feel incredibly freeing, especially when you get your rhythm right. But like any creative workflow, it rewards structure. Keep things clean, offload when necessary, and know when to switch gears.
Next, let’s tie it all together with some final thoughts, what I’ve learned after months of using Final Cut Pro on iPad, and where I think the future of mobile editing is heading.
And if you're ready to level up beyond the basics, these Final Cut Pro tips will help you unlock even more creative tricks—whether you're editing on iPad or desktop.
Final Thoughts
After a few months of real editing on the iPad, I’ve landed on this: Final Cut Pro on iPad is both incredible and incomplete.
It’s incredible because it changes what “mobile editing” means. You’re no longer stuck with half-baked apps or stripped-down timelines, this is a real editor, capable of producing polished videos. You can shoot on your iPhone, AirDrop to your iPad, edit, color, and export, all within minutes. For travel creators, vloggers, or anyone who hates being tethered to a desk, it’s a dream.
But it’s incomplete because you still feel the ceiling.
When you start layering effects, syncing multiple cameras, or trying to install your go-to LUT packs, the cracks show. It’s not that the iPad isn’t powerful enough; it’s that the environment is still sandboxed. You’re working in Apple’s curated garden, and while it’s beautiful, the walls are real.
That’s why I think of the iPad as my portable editor, not my full studio. It’s where I start ideas, assemble rough cuts, and even finish lighter projects. But when I want the big guns, full plugin libraries, ultra-fast rendering, or total control over export specs, I spin up my Vagon Cloud Computer.
It’s the perfect combo:
iPad = creativity and portability.
Vagon Cloud Computer = muscle and scalability.
Together, they cover everything. You sketch your story on the iPad, finish it in the cloud, and share it anywhere.
If you’ve been wondering whether Final Cut Pro on iPad is “real editing,” my answer is yes, but with an asterisk. It’s real editing when you understand its boundaries and know how to extend them.
Start small. Cut a short vlog. Try color grading with your Apple Pencil. See how far you can go before your iPad says, “Nope.” When that happens, that’s when you’ll truly appreciate having a cloud workstation that picks up right where your tablet leaves off.
FAQs
1. Which iPads support Final Cut Pro?
Final Cut Pro for iPad only works on M1, M2, and M4 chip models. That includes the iPad Pro 11” (M1, M2, or M4), iPad Pro 12.9” (M1, M2, or M4), and iPad Air (M1 or M2). If you’re using an older A-series iPad, the app won’t install.
2. Is the iPad version as powerful as the Mac version?
Not quite. It’s fast and intuitive for light to mid-level projects, but you’ll miss features like plugin support, advanced color correction, shared libraries, and custom export options. It can absolutely handle pro-level content, just within tighter limits.
3. Do I need an Apple Pencil to use Final Cut Pro on iPad?
No, you can edit entirely with touch. But the Apple Pencil makes a big difference. You can hover to preview frames, trim clips precisely, and even draw masks or annotations. Once you’ve used it, editing without it feels clunky.
4. Can I use external drives for editing?
Yes. Final Cut Pro supports USB-C SSDs for both importing and exporting, but it tends to copy your files locally instead of referencing them. That means your iPad’s internal storage can fill up fast. Using a fast SSD and keeping backups off-device is essential for larger projects.
5. How does Final Cut Camera work with iPad?
Final Cut Camera is Apple’s companion app that connects your iPhone to your iPad over Wi-Fi. It lets you record live video straight into Final Cut Pro for iPad, which is perfect for multicam setups or quick shoots. You can sync and switch angles in real time or edit them later.
6. Can I start editing on iPad and finish on Mac?
Yes. You can export your project from iPad and open it directly in Final Cut Pro on Mac, with all your edits intact. The only caveat is that macOS-exclusive plugins or effects won’t transfer. However, the reverse, starting on Mac and continuing on iPad, still isn’t supported.
7. What if my project is too heavy for iPad performance?
That’s when a cloud computer like Vagon comes in. You can upload your project files or footage to Vagon Files, log into your cloud computer through Safari, and continue editing on a powerful desktop environment right from your iPad. It’s perfect for high-res renders, complex effects, or plugin-heavy timelines.
8. Is Final Cut Pro on iPad good for YouTube or TikTok creators?
Absolutely. The app supports vertical aspect ratios, LUTs, and fast social exports. You can shoot, edit, color, and publish all on one device. For most creators who value speed and simplicity, it’s more than enough.
9. How much does Final Cut Pro for iPad cost?
It costs $4.99 per month or $49 per year after a 7-day free trial. There’s no one-time purchase option like the desktop version.
10. Can I use Final Cut Pro on iPad offline?
Yes. Once you’ve downloaded the app and imported your media, everything runs locally. You only need an internet connection for updates, syncing to iCloud, or connecting to your Vagon Cloud Computer for remote rendering.
I still remember the first time I opened Final Cut Pro on my iPad. I was sitting in a café, halfway through a travel vlog project, my MacBook sitting at home charging. Out of curiosity, I downloaded Final Cut Pro for iPad, half expecting it to crash or throw a “not supported” message. But it didn’t. Within minutes, I was trimming clips with my fingers, color-grading with the Apple Pencil, and actually enjoying it.
It felt weirdly… fun. Like editing had turned into something tactile again. But also, I kept asking myself, is this for real?
That moment kind of sums up the iPad version perfectly. It’s not a full replacement for the desktop Final Cut Pro, but it’s surprisingly capable. You can cut, color, layer effects, and even do multicam editing on a tablet that fits in your backpack. And yes, there are some real limitations you’ll hit if you’re used to desktop power.
But that’s what this guide is for. I’ll walk you through how to actually use Final Cut Pro on iPad, what works beautifully, what still feels like a beta experiment, and where you might need a little help (especially if you’re aiming for pro-level projects).
Next up: let’s talk about why Final Cut Pro on iPad isn’t just “Final Cut Mini,” but a whole new way of editing.
What’s Different — Why Final Cut Pro on iPad Isn’t Just “Mac on a Tablet”
When Apple announced Final Cut Pro for iPad, I’ll admit, I was skeptical. I mean, this is a tool that’s been a desktop heavyweight for years. Editors rely on it for 8K timelines, LUT-heavy color grading, multi-angle syncing, and terabytes of footage. And now… it’s supposed to fit on a tablet?
Turns out, Apple didn’t just cram the macOS version into iPadOS. They rebuilt it.
Here’s the interesting part: the touch-first interface actually makes editing feel natural. You can scrub through clips with your finger, use the new jog wheel for precision edits, and tap directly on your footage instead of hunting for handles with a mouse. It feels more like sculpting your timeline than operating it. And when you throw in an Apple Pencil, you get hover previews, frame-accurate trimming, and even on-screen annotations while you edit. It’s weirdly satisfying.
Then there’s the Final Cut Camera app, which lets you record live footage from your iPhone (or multiple iPhones) straight into your iPad timeline. That’s something the Mac version doesn’t even do natively. You can literally run a multicam shoot from your backpack.
But here’s the part that gets people talking, the subscription model. Instead of the traditional one-time purchase, Final Cut Pro on iPad costs $4.99 per month or $49 per year. Some people hate it, others shrug and say it’s fair for a mobile app that updates often. I’m somewhere in between. It makes sense for the App Store ecosystem, but it also signals that Apple sees this as an ongoing service, not a one-off product.
Compatibility-wise, you’ll need at least an M1 iPad or newer, running iPadOS 17.5 or later. If you’re on an older iPad, don’t bother, it won’t even show up in the App Store. You’ll also want plenty of internal storage or fast external SSDs, because video projects chew through space like crazy.
Still, this isn’t just a “lite” version of Final Cut. It’s a reimagined one. Some tools are missing (we’ll get to that later), but the workflow feels fluid and surprisingly pro.
Up next: let’s go hands-on, how to actually get started, install it, and set up your first project.
Getting Started — Setup, Installation & First Project
Let’s be real: the first hurdle with Final Cut Pro on iPad isn’t editing. It’s getting the setup right. Apple makes it easy, but there are a few things worth knowing before you hit “Install.”
Step 1: Check if Your iPad Can Handle It
Final Cut Pro for iPad only runs on M1, M2, or M4 chip iPads, so if you’re using an older A12X or A14 model, you’re out of luck.
Here’s the current compatibility list (as of late 2025):
iPad Pro 11” (M1, M2, or M4)
iPad Pro 12.9” (M1, M2, or M4)
iPad Air (M1 or M2)
You’ll also need iPadOS 17.5 or newer. And trust me, keep at least 50–100GB of free space. Even short projects eat storage faster than you expect.
Step 2: Install and Subscribe
Head to the App Store, search for Final Cut Pro, and tap download.
The first launch will prompt a 7-day free trial, then it switches to $4.99/month or $49/year.
There’s no perpetual license like on Mac, and yes, some longtime users grumble about that. But the tradeoff is you’re getting more frequent feature updates.
Step 3: Create a New Project
Once you open the app, you’ll see a clean, minimal home screen, no clutter, no library management like macOS. Just tap “New Project.”
Then:
Import media from Photos, Files, or an external SSD (USB-C drives work great).
Choose aspect ratio & frame rate (you can still change it later, but best to set it now).
Name your project, hit Create, and boom, you’re in the timeline.
Step 4: Learn the Interface Quickly
Here’s what you’ll see:
Timeline (bottom): drag clips here to arrange, trim, and edit.
Browser (left): all your imported media, sorted by date or folder.
Viewer (top): your playback window.
Inspector (right): where you adjust properties like color, stabilization, and audio levels.
And that circular jog wheel in the corner? That’s your new best friend.
You can scrub through clips frame-by-frame, trim edges precisely, and even nudge transitions, all with your thumb. It’s faster than you’d think once you get the muscle memory.
Step 5: Import From iPhone or External Sources
If you shoot with your iPhone, open the Final Cut Camera app. It syncs directly with your iPad via Wi-Fi, letting you record and preview in real-time. Perfect for quick interviews, B-roll, or vlog setups.
You can also import directly from an SSD or SD card reader, though large file transfers can take a while. I’ve noticed projects above 20GB start to slow things down, especially if your iPad’s internal storage is near full.
Editing on iPad feels shockingly natural once you’ve done these steps, but it’s not identical to the desktop version. Some tools are redesigned, some are missing, and others are better.
Let’s get into the real heart of it next: how the actual editing workflow on iPad works, from cutting and color to multicam and effects.
Core Editing Workflow on iPad
Once you’ve got your first project open, this is where things start to feel fun. Apple clearly spent time rethinking what editing means on a touchscreen, and it shows. Editing on an iPad feels less like managing a machine and more like touching your story.
Trimming and Rearranging Clips
Forget about dragging sliders with a mouse. You can literally trim clips with your finger, just grab the edge and slide. The magnetic timeline still works like it does on Mac, snapping clips together automatically, which makes rough cutting super fast.
If you’re a precision nerd (like me), the jog wheel is magic. You can fine-tune edits frame-by-frame, tap to nudge a few frames forward or backward, and even adjust transitions with surgical precision. I honestly prefer it to using arrow keys.
Apple Pencil: Not a Gimmick
I used to think the Apple Pencil was more for illustrators than editors, until Final Cut Pro proved me wrong.
You can:
Hover over the timeline to preview frames before cutting.
Draw directly on the video for annotations or masks.
Tap and hold to bring up contextual editing menus faster than long-pressing with your finger.
For quick edits on the go, it’s addictive. You’ll find yourself reaching for the Pencil instinctively.
Audio Editing on the Go
Apple simplified the audio tools for iPad without dumbing them down. You can still:
Adjust volume levels and fades directly on the clip.
Add keyframes by tapping the waveform.
Record voiceovers right inside the app (yes, your iPad mic actually does a decent job for quick narration).
What’s missing? Advanced EQ or multi-channel mixing. But for vloggers or short-form editors, it’s more than enough.
Multicam Editing & Final Cut Camera
Here’s the coolest part: multicam editing actually works.
With the Final Cut Camera app, you can connect up to four iPhones and record simultaneously. Each feed syncs automatically in the timeline.
You can switch angles live or later in post, just like desktop multicam. It’s smooth, as long as your Wi-Fi is strong and your storage isn’t full.
This combo (Final Cut Pro + Final Cut Camera) turns an iPad into a mobile studio setup. You can film, sync, and edit everything in one device.
Color, Effects, and Titles
You still get color balance, exposure, and LUTs, though not the full Color Inspector from the Mac version. It’s perfect for quick grading, swipe a slider, see instant results.
Effects and transitions are redesigned for touch: swipe to apply, hold to preview. And text overlays? Drag, drop, resize, done.
The limitation is plugin support, you can’t install custom effects or motion templates yet. That’s a huge deal if you rely on them for client work. But for quick content or travel editing, the built-in options are solid.
And if you're looking for a faster start, there are plenty of Final Cut templates out there that can save hours of setup time on intros, lower thirds, and more.
Want smoother scene changes? Even though plugin support is limited, there’s still a great collection of Final Cut Pro transitions you can use right out of the box.
Exporting and Sharing
When you’re done, exporting is straightforward, choose resolution, codec, and destination. You can export straight to Files, Photos, or external storage.
One feature I love: you can send your project to Mac via AirDrop or iCloud, where it opens in full Final Cut Pro with all edits intact. That’s when the iPad starts feeling like a legit pre-edit station instead of a toy.
Final Cut Pro on iPad nails the essentials. It’s fast, tactile, and surprisingly powerful, until you hit the ceiling. And that ceiling usually comes in the form of performance, storage, or plugin limitations.
Next up, we’ll get honest about those, the limitations and pitfalls you’ll probably run into once you go beyond casual projects.
Limitations & Things to Be Wary Of
Okay, here’s where the shine starts to fade a bit. Final Cut Pro on iPad is brilliant for what it is, but it’s not a miracle machine. You’ll run into walls, especially if you’re used to the Mac version or you’re doing complex post-production work.
#1. File Management: Still Kind of a Mess
The iPad version depends heavily on Files app integration, and it’s easy to lose track of where your media actually lives. If you import from external drives, Final Cut usually copies files into its local library, which means you’re duplicating huge video folders and filling up your iPad fast.
Even worse, not all drives play nicely. Some SSDs will randomly disconnect during imports, and you can’t choose to “leave files in place” like you can on desktop. If you’re dealing with large 4K projects, this becomes a real headache.
#2. Limited Plugin & Effects Support
If you rely on third-party LUTs, motion templates, or audio plugins, brace yourself: none of that works here. There’s no Motion or FxFactory integration, and you can’t install custom effects. You’re limited to Apple’s built-in set which, while polished, is definitely not studio-level.
It’s great for vloggers or travel content creators, but if you’re building client intros, branded animations, or complex titles, you’ll feel boxed in fast.
If you're curious what you're missing compared to desktop, this Final Cut Pro plugins guide breaks down some of the most popular tools that currently aren't available on iPad.
#3. Performance Bottlenecks
Even with the M2 iPad Pro, the app can choke under heavy timelines.
A few examples:
Stacked adjustment layers cause playback stutter.
Complex color correction adds noticeable render lag.
Background rendering occasionally halts until you restart the app.
It’s stable, but not invincible. Apple Silicon handles a lot, but 4K ProRes multicam or HDR timelines still make it sweat.
#4. No Shared Libraries or External Collaboration
Unlike the Mac version, there’s no Library sharing, XML export, or shared drives. That means team collaboration or round-tripping between editors is clunky at best. You can export a project to Mac, sure, but not vice versa.
So if you start on iPad and your teammate edits on Mac, great. The other way around? Not happening.
#5. Export Control Is Simplified (Maybe Too Simplified)
You can export in H.264, HEVC, or ProRes, that’s about it. Want custom bitrates, mastering files, or compression settings? Nope. You’ll need a Mac for that.
Also, don’t expect to connect external displays and get a proper dual-monitor editing setup. External preview via HDMI or Stage Manager is limited.
#6. Real-World Friction Points
I’ve run into a few consistent annoyances over time:
Projects over 30GB tend to slow down even if you have headroom.
Some external audio devices cause sync drift.
The app sometimes refuses to relink missing media if the file path changes slightly.
It’s small stuff, but adds up.
Now, here’s the thing: all these limitations don’t mean Final Cut on iPad is bad. It just means it’s mobile-first.
And if you’re someone who wants to edit casually or on the go, it’s an incredible piece of software.
But if you’re pushing professional workloads, multiple camera angles, long-form content, big effects stacks, there’s a point where the iPad simply can’t keep up.
That’s where the smart move is to pair it with something more powerful, not replace it.
And while crashes are rare, if you're running into stability issues, here are a few ways to stop Final Cut Pro from crashing and keep your edits safe.
Up next, we’ll talk about exactly that: how to extend your iPad editing workflow using a cloud computer, especially when you need desktop-grade rendering or plugin support without owning a workstation.
If you notice timeline stutters or sluggish playback during a big project, you’re not alone—there are a few simple tricks to help you fix lag and speed up Final Cut Pro before you consider switching devices.
When & Why You Might Want a Cloud Computer to Complement Your iPad Workflow
At some point, every iPad editor hits that moment, when the export bar crawls, the project stutters, or you realize you can’t install your favorite LUT pack. That’s usually when people start saying: “Okay… maybe I need more power.”
But here’s the thing, you don’t have to ditch your iPad workflow. You just need to extend it.
When the iPad Hits Its Limits
You’ll start noticing bottlenecks in a few key areas:
Render-heavy projects: 4K multicam edits or color correction with multiple adjustment layers.
Plugin work: if you use specialized transitions, sound design tools, or titling effects.
Storage space: large ProRes or RAW files fill your internal storage fast, and juggling SSDs gets messy.
Exporting final masters: you’ll want desktop-level control over formats, compression, and delivery specs.
That’s exactly where a cloud computer steps in, especially something purpose-built for creative work, like Vagon Cloud Computer.
How Vagon Cloud Computer Fits In
I think of it as a “desk in the cloud.” You log in from your iPad browser, and suddenly you’re running a full macOS or Windows-style environment, powerful enough for heavy software, from Final Cut Pro to DaVinci Resolve, Premiere Pro, or After Effects.
It’s not just remote access. It’s real performance:
High-end GPUs & CPUs (far beyond what even the M4 chip can do).
Instant file sync from iPad using Vagon Files or cloud drives.
No installation stress: everything is ready to launch in seconds.
So you can edit your rough cut on iPad, then upload the project to your Vagon Cloud Computer to:
Render the final master in full 4K or 8K.
Add heavier effects or advanced plugins.
Export in professional codecs or custom delivery settings.
When it’s done, download the rendered file back to your iPad, ready to share or post.
Why It Makes Sense
The beauty of this setup is flexibility. You’re not committing to a $3000 workstation that sits idle when you’re on the road. You’re paying for desktop power only when you need it, a few hours, a few days, or for one big project.
And if you’re working with clients or teammates, it means your project environment stays consistent no matter where you open it from. Your iPad becomes your editing surface; the heavy lifting happens elsewhere.
The Takeaway
Final Cut Pro on iPad is great for starting, for cutting, organizing, rough grading, and experimenting. But when it’s time to finish strong, render fast, use desktop-only plugins, or export broadcast-quality masters, that’s when something like Vagon Cloud Computer becomes the natural next step.
It’s not about replacing your iPad. It’s about backing it up with desktop power when it matters most.
Next, let’s wrap it up with a few pro tips to get the best performance out of Final Cut Pro on iPad, and how to know when to hand things off to your cloud setup.
Tips to Maximize Your iPad Editing Workflow
After using Final Cut Pro on iPad for a while, I’ve realized the difference between a smooth edit and a frustrating one usually comes down to workflow habits, not hardware. So here are a few practical ways to make the most of your iPad setup before you even think about handing things off to the cloud.
#1. Keep Your Projects Lean
Final Cut Pro on iPad doesn’t like clutter.
Use shorter clips. Don’t dump an entire 128GB SD card in one project, break things into smaller chunks.
Delete unused media. Trim your imports to the exact section you’ll use.
Stick to one project at a time. Having too many timelines open slows the app dramatically.
Think of it like editing in “bites” — quick sessions that stay light and manageable.
#2. Use Optimized or Proxy Media
Even though Apple hides it under the hood, Final Cut Pro can create optimized or proxy versions of your clips. These are lighter, lower-resolution files that play back smoothly, even on large projects.
If your timeline feels sluggish or stutters during playback, create proxies for your heaviest clips. You can switch them off before exporting to retain full quality.
#3. Pair Your iPad with Accessories
The magic combo for mobile editing:
Apple Pencil (2nd gen) for precision trimming and hover preview.
Magic Keyboard or Bluetooth keyboard for shortcuts — “Command + Z” feels weirdly empowering on iPad.
External SSD (USB-C 3.2 or faster) for media libraries.
A single accessory can save you hours over time.
And once you connect a keyboard, unlocking Final Cut’s keyboard shortcuts can seriously boost your editing speed—even on a touchscreen device.
#4. Mind Your Storage
This one’s huge: always keep at least 20–30GB of free internal storage.
When your iPad gets full, Final Cut slows down or even crashes during export.
I use an external Samsung T7 SSD, it’s fast, portable, and reliable for 4K media.
If your footage lives in iCloud, make sure to download it locally before editing, cloud-based playback can stutter badly, especially on slow connections.
#5. Leverage iPad–iPhone Sync
One of the best things Apple added recently is Final Cut Camera integration. You can use your iPhone as a live camera feed, record directly into the iPad’s timeline, or sync footage automatically via AirDrop.
No SD cards. No adapters. Just record, drop, edit.
#6. Export Smartly
When exporting from iPad:
Stick to H.264 or HEVC for YouTube, Instagram, and TikTok.
If you plan to color grade or finish on desktop, choose ProRes 422 HQ.
Always test a short render before exporting your full project, it saves you from wasting time if the export fails halfway.
And if you’re exporting large files or full-resolution masters, that’s a great time to switch over to Vagon Cloud Computer. It can handle multi-gigabyte renders without eating your iPad’s battery or thermal limits.
#7. Backup Everything
Final Cut Pro for iPad doesn’t auto-backup your libraries like the Mac version. So after every major session:
Export a project file copy to iCloud Drive.
Save your media to an external SSD or Vagon Files.
Keep a versioned backup of your main timeline in case something corrupts.
Trust me, the day you accidentally delete your only project copy, you’ll wish you had.
Editing on iPad can feel incredibly freeing, especially when you get your rhythm right. But like any creative workflow, it rewards structure. Keep things clean, offload when necessary, and know when to switch gears.
Next, let’s tie it all together with some final thoughts, what I’ve learned after months of using Final Cut Pro on iPad, and where I think the future of mobile editing is heading.
And if you're ready to level up beyond the basics, these Final Cut Pro tips will help you unlock even more creative tricks—whether you're editing on iPad or desktop.
Final Thoughts
After a few months of real editing on the iPad, I’ve landed on this: Final Cut Pro on iPad is both incredible and incomplete.
It’s incredible because it changes what “mobile editing” means. You’re no longer stuck with half-baked apps or stripped-down timelines, this is a real editor, capable of producing polished videos. You can shoot on your iPhone, AirDrop to your iPad, edit, color, and export, all within minutes. For travel creators, vloggers, or anyone who hates being tethered to a desk, it’s a dream.
But it’s incomplete because you still feel the ceiling.
When you start layering effects, syncing multiple cameras, or trying to install your go-to LUT packs, the cracks show. It’s not that the iPad isn’t powerful enough; it’s that the environment is still sandboxed. You’re working in Apple’s curated garden, and while it’s beautiful, the walls are real.
That’s why I think of the iPad as my portable editor, not my full studio. It’s where I start ideas, assemble rough cuts, and even finish lighter projects. But when I want the big guns, full plugin libraries, ultra-fast rendering, or total control over export specs, I spin up my Vagon Cloud Computer.
It’s the perfect combo:
iPad = creativity and portability.
Vagon Cloud Computer = muscle and scalability.
Together, they cover everything. You sketch your story on the iPad, finish it in the cloud, and share it anywhere.
If you’ve been wondering whether Final Cut Pro on iPad is “real editing,” my answer is yes, but with an asterisk. It’s real editing when you understand its boundaries and know how to extend them.
Start small. Cut a short vlog. Try color grading with your Apple Pencil. See how far you can go before your iPad says, “Nope.” When that happens, that’s when you’ll truly appreciate having a cloud workstation that picks up right where your tablet leaves off.
FAQs
1. Which iPads support Final Cut Pro?
Final Cut Pro for iPad only works on M1, M2, and M4 chip models. That includes the iPad Pro 11” (M1, M2, or M4), iPad Pro 12.9” (M1, M2, or M4), and iPad Air (M1 or M2). If you’re using an older A-series iPad, the app won’t install.
2. Is the iPad version as powerful as the Mac version?
Not quite. It’s fast and intuitive for light to mid-level projects, but you’ll miss features like plugin support, advanced color correction, shared libraries, and custom export options. It can absolutely handle pro-level content, just within tighter limits.
3. Do I need an Apple Pencil to use Final Cut Pro on iPad?
No, you can edit entirely with touch. But the Apple Pencil makes a big difference. You can hover to preview frames, trim clips precisely, and even draw masks or annotations. Once you’ve used it, editing without it feels clunky.
4. Can I use external drives for editing?
Yes. Final Cut Pro supports USB-C SSDs for both importing and exporting, but it tends to copy your files locally instead of referencing them. That means your iPad’s internal storage can fill up fast. Using a fast SSD and keeping backups off-device is essential for larger projects.
5. How does Final Cut Camera work with iPad?
Final Cut Camera is Apple’s companion app that connects your iPhone to your iPad over Wi-Fi. It lets you record live video straight into Final Cut Pro for iPad, which is perfect for multicam setups or quick shoots. You can sync and switch angles in real time or edit them later.
6. Can I start editing on iPad and finish on Mac?
Yes. You can export your project from iPad and open it directly in Final Cut Pro on Mac, with all your edits intact. The only caveat is that macOS-exclusive plugins or effects won’t transfer. However, the reverse, starting on Mac and continuing on iPad, still isn’t supported.
7. What if my project is too heavy for iPad performance?
That’s when a cloud computer like Vagon comes in. You can upload your project files or footage to Vagon Files, log into your cloud computer through Safari, and continue editing on a powerful desktop environment right from your iPad. It’s perfect for high-res renders, complex effects, or plugin-heavy timelines.
8. Is Final Cut Pro on iPad good for YouTube or TikTok creators?
Absolutely. The app supports vertical aspect ratios, LUTs, and fast social exports. You can shoot, edit, color, and publish all on one device. For most creators who value speed and simplicity, it’s more than enough.
9. How much does Final Cut Pro for iPad cost?
It costs $4.99 per month or $49 per year after a 7-day free trial. There’s no one-time purchase option like the desktop version.
10. Can I use Final Cut Pro on iPad offline?
Yes. Once you’ve downloaded the app and imported your media, everything runs locally. You only need an internet connection for updates, syncing to iCloud, or connecting to your Vagon Cloud Computer for remote rendering.
Get Beyond Your Computer Performance
Run applications on your cloud computer with the latest generation hardware. No more crashes or lags.

Trial includes 1 hour usage + 7 days of storage.
Summarize with AI

Ready to focus on your creativity?
Vagon gives you the ability to create & render projects, collaborate, and stream applications with the power of the best hardware.

Vagon Blog


Run heavy applications on any device with
your personal computer on the cloud.
San Francisco, California
Solutions
Vagon Teams
Vagon Streams
Use Cases
Resources
Vagon Blog
How to Run Audacity on a Cloud Ubuntu Desktop (2026 Guide)
How to Run Darktable on a Cloud Ubuntu Desktop for RAW Photo Editing (2026 Guide)
How to Run Kdenlive on a Cloud Ubuntu Desktop (2026 Guide)
How to Run DaVinci Resolve on Linux in the Cloud (2026 Guide)
How to Run Inkscape on a Cloud Ubuntu Desktop (2026 Guide)
How to Run Krita on a Cloud Ubuntu Desktop for Digital Painting (2026 Guide)
How to Run GIMP on a Cloud Ubuntu Desktop (2026 Guide)
How to Run Jupyter on a Cloud GPU Linux Desktop (2026 Guide)
Vagon vs GitHub Codespaces: Cloud Dev Environments Compared (2026)
Vagon Blog
Run heavy applications on any device with
your personal computer on the cloud.
San Francisco, California
Solutions
Vagon Teams
Vagon Streams
Use Cases
Resources
Vagon Blog